This blog post was originally published on 10 September, 2022.
In the previous blog post, you learned how to provision APEX on OCI using the graphic user interface via Oracle Cloud Console. But is it possible to provision APEX on OCI via scripts? – Yes, it is!
In this blog, which is part of the APEX on Autonomous Database blog series, you will learn how to provision APEX instance on OCI using REST APIs, Command Line Interface (CLI) utility and Software Development Kits (SDKs).
Oracle Cloud Infrastructure provides public REST APIs and Software Development Kits (SDKs) to help create and manage OCI resources. Let us see how you can use these to automate provisioning APEX on OCI.
General Prerequisites
Before sending a request to OCI, there are certain prerequisites to follow to be able to authenticate the request. Below are the high-level steps:
- Create an OCI IAM User (if the user doesn’t exist already) with the required privileges to create and Manage OCI resources. See Adding Users.
- An API signing Key for the user created in Step 1- An RSA key pair in PEM format used for signing API requests. See How to Generate an API Signing Key.
The private key file obtained from this step will be used to sign the request.
If you have used OCI Console to generate the keys, the downloaded Private Key file should be safely stored in the local system. - Get API Key fingerprint. This is obtained after you complete Step 2. See How to Get the Key’s Fingerprint.
- Get Tenancy OCID and User OCID. See Where to Get the Tenancy’s OCID and User’s OCID.
Using REST APIs
The Oracle Cloud Infrastructure APIs are typical REST APIs that use HTTPS requests and responses. You can read more about it in the OCI documentation and here are the API References and Endpoints
Let’s start building the REST request!
The API of our interest to create an Autonomous Database is CreateAutonomousDatabase.
The POST request endpoint looks like this:
POST /20160918/autonomousDatabases
I will be using the cURL utility to make the REST call in a shell script.
-
Create a request.json file that contains the request body.
{
"compartmentId" : "ocid.compartment.oc1..aaaaaaaacwex5sqkhi7ledb5s234n6brmhrjvhhsxduw35l2rzahhsa7pyaa",
"displayName" : "APEXonOCI",
"dbName" : "APEXonOCI",
"dbWorkload" : "APEX",
"adminPassword" : "secretPassword@123%^&",
"licenseModel" : "LICENSE_INCLUDED",
"cpuCoreCount" : 1,
"dataStorageSizeInTBs" : 1
}
This request creates an Autonomous Database with the Oracle APEX Application Development workload type having name as APEXonOCI with 1 OCPU and 1 TB storage in the specified compartment.
Details about the available attributes can be found in the documentation. -
Define Tenancy & User OCIDs, API Signing key fingerprint, Private Key file path, host and request body JSON file path as variables to make it easy to use them in the scripts wherever required.
These values can be found in the configuration file that gets created after creating an API signing key (See General Prerequisites section above)# OCID of the tenancy to which API request are sent tenancy_ocid = "ENTER TENANCY OCID" # OCID of the user making the rest call user_ocid = "ENTER USER OCID" # path to the private PEM format key for this user # Enter the path you saved the private file in Step 2 of prerequisites Ex: "/Users/special_user/.oci/API_USER-08-21-14-09.pem" private_key_file_path="ENTER PRIVATE KEY FILE PATH" # fingerprint of the private key for this user fingerprint="ENTER FINGERPRINT" # tenancy endpoint to which the request needs to be sent Ex: "database.ap-hyderabad-1.oraclecloud.com" host="ENTER HOST" # the json file containing request JSON body="./request.json"
- All Oracle Cloud Infrastructure API requests must be signed for authentication purposes. More about Request Signatures can be found in the documentation.
For the POST request that will be sent, the below headers need to be included in the signing string. Each of these header values are computed and stored in variables as illustrated in the below steps:- (request-target)
request_target="(request-target): post /20160918/autonomousDatabases"
- host
host_header="host: $host"
- date or x-date
date=`date -u "+%a, %d %h %Y %H:%M:%S GMT"`date_header="date: $date"
- x-content-sha256
content_sha256="$(openssl dgst -binary -sha256 < $body | openssl enc -e -base64)";
content_sha256_header="x-content-sha256: $content_sha256"
- content-type
content_type="application/json"
content_type_header="content-type: $content_type";
- content-length
content_length="$(wc -c < $body | xargs)";
content_length_header="content-length: $content_length"
- (request-target)
- With the required headers and the corresponding values calculated, the request can be signed.
- Create the signing string with the headers concatenated. The “headers” variable in the below script maintains the order of the headers in the signing string and this will be passed in the Authorization header along with the signature.
headers="(request-target) date host x-content-sha256 content-type content-length"
signing_string="$request_target\n$date_header\n$host_header\n$content_sha256_header\n$content_type_header\n$content_length_header"
The signing string looks like this:
(request-target): post /20160918/autonomousDatabases
date: Tue, 23 Aug 2022 05:19:21 GMT
host: database.ap-mumbai-1.oraclecloud.com
x-content-sha256: tP8069l+uenqwnLTk3PaqIbu4PyuJlDl0HEV4Tkk6X8=
content-type: application/json
content-length: 345
- Signing the request.
The signing algorithm must be RSA-SHA256 and the signature should be in base64 encoding.signature=`printf '%b' "$signing_string" | openssl dgst -sha256 -sign $private_key_file_path | openssl enc -e -base64 | tr -d '\n'`
The signature looks like this:
UJCFb7Ve0rvE56tY54HmQ4yW4TcNuxRe+nB5tSOzu7qawweaB9PlQimBzskuo++A0naRMC8yFGxYWP2P6jmRH5DaB/u/c+0eXMrV+a3UJC8O6o7EaH0QS2zmwjSURp4mboikm8XpIeJCLkUgcepbPjQxxYmjzzcvtPTTb5wHb8iKsv8Lztq22SKUbVWdQ9Lt1FyKqnCIItH5f5rfTfKrGG1B3NMuQVgZRf4JmKbjEhyMq+hdmlKQVPuZi5ZOtJ4/Uo6J7bffvStqPsJlPwdhXi2DLKPZxMl81bC308aBsQKHrlUZB3Wq1X3tjYMFmhhBY17uNb4ZzDYUF15HJWHlRw==
- Create the signing string with the headers concatenated. The “headers” variable in the below script maintains the order of the headers in the signing string and this will be passed in the Authorization header along with the signature.
- With the signature ready, the final cURL call can be constructed
curl -X POST --data-binary "@request.json" https://$host/20160918/autonomousDatabases \
     -H "date: $date" -H "x-content-sha256: $content_sha256" \
     -H "content-type: $content_type" \
     -H "content-type: $content_type" \
     -H "content-length: $content_length" \
     -H "Authorization: Signature version=\"1\",keyId=\"$tenancy_ocid/$user_ocid/$fingerprint\",algorithm=\"rsa-sha256\",headers=\"$headers\",signature=\"$signature\""
Summing up all the above steps, the final Shell script (named as createADB.sh) looks like this:
# Configuration Values
# OCID of the tenancy to which API request are sent
tenancy_ocid="<ENTER YOUR TENANCY OCID>"

# OCID of the user making the rest call
user_ocid="<ENTER USER TENANCY OCID>"

# path to the private PEM format key for this user
# Enter the path you saved the private file in Step 2 of prerequisites Ex: "/Users/special_user/.oci/API_USER-08-21-14-09.pem"
private_key_file_path="<ENTER LOCATION OF PRIVATE KEY FILE>"

# fingerprint of the private key for this user
fingerprint="<ENTER FINGERPRINT OF THE API SIGNING KEY>"

# tenancy endpoint to which the request needs to be sent
# Ex: "database.ap-hyderabad-1.oraclecloud.com"
host="<ENTER THE API ENDPOINT CORRESPONDING TO YOUR REGION>"

# the json file containing request JSON
body="./request.json"

# Required Headers for the signing string
request_target="(request-target): post /20160918/autonomousDatabases"

host_header="host: $host"

date=`date -u "+%a, %d %h %Y %H:%M:%S GMT"`
date_header="date: $date"

content_sha256="$(openssl dgst -binary -sha256 < $body | openssl enc -e -base64)";
content_sha256_header="x-content-sha256: $content_sha256"

content_type="application/json"
content_type_header="content-type: $content_type";

content_length="$(wc -c < $body | xargs)";
content_length_header="content-length: $content_length"

# Create the signing string
headers="(request-target) date host x-content-sha256 content-type content-length"
signing_string="$request_target\n$date_header\n$host_header\n$content_sha256_header\n$content_type_header\n$content_length_header"

# Sign the signing string with the Private Key
signature=`printf '%b' "$signing_string" | openssl dgst -sha256 -sign $private_key_file_path | openssl enc -e -base64 | tr -d '\n'`

# The final curl request
curl -X POST --data-binary "@request.json" https://$host/20160918/autonomousDatabases \
    -H "date: $date" \
    -H "x-content-sha256: $content_sha256" \
    -H "content-type: $content_type" \
    -H "content-length: $content_length" \
    -H "Authorization: Signature version=\"1\",keyId=\"$tenancy_ocid/$user_ocid/$fingerprint\",algorithm=\"rsa-sha256\",headers=\"$headers\",signature=\"$signature\""
On successful execution of this script, the response is a JSON Object containing the details of the newly created Autonomous Database…
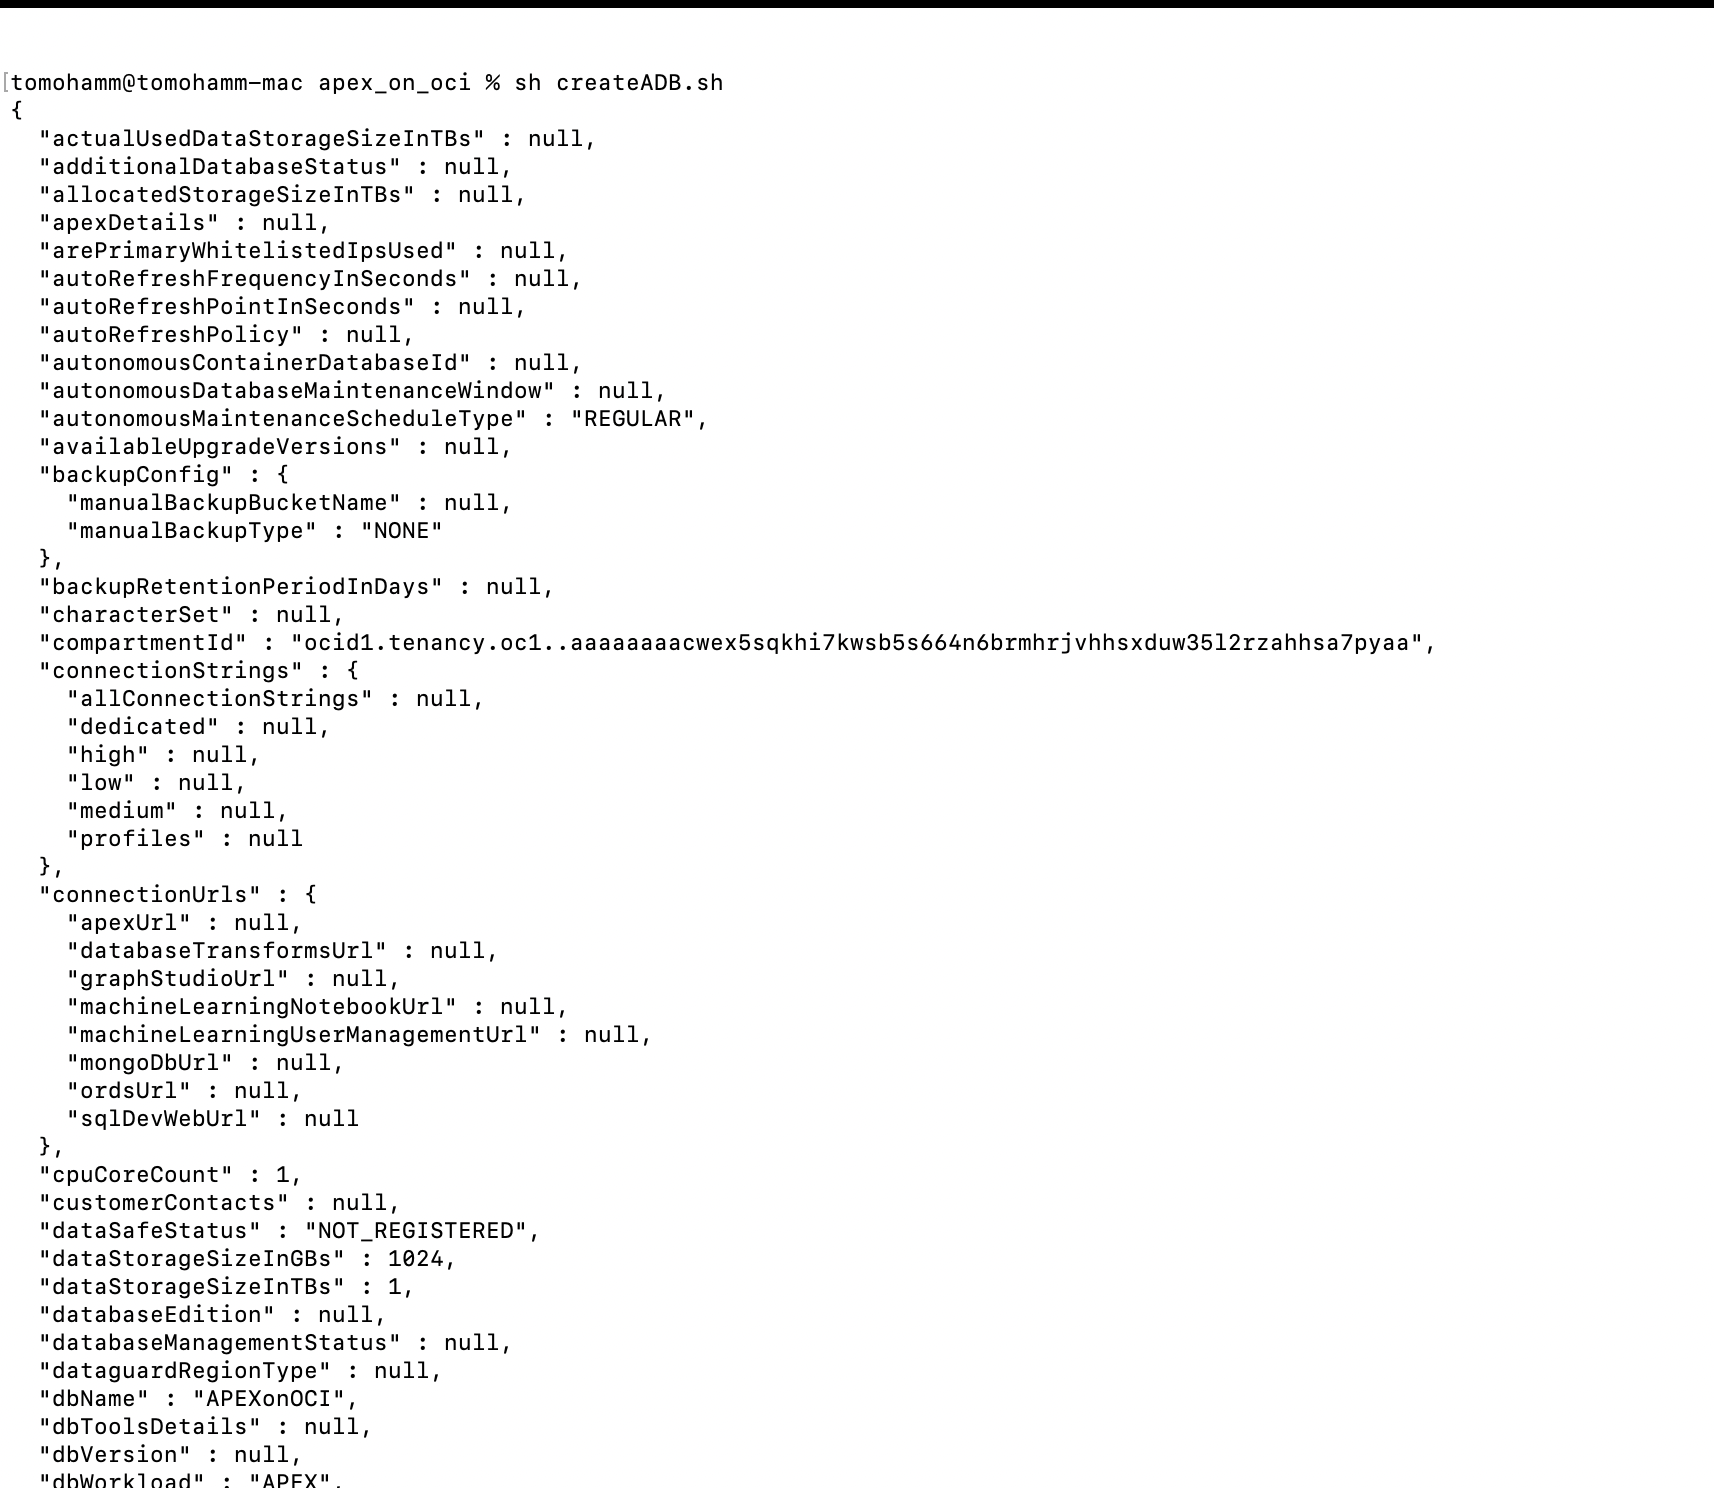 … and creation of a new Autonomous Database with APEX specific workload is triggered on OCI . The same can be verified on the OCI Console.

Using Oracle Cloud Infrastructure Command Line Interface (OCI CLI)
The OCI Command Line Interface is a small footprint tool that you can use to complete Oracle Cloud Infrastructure tasks. The CLI provides the same core functionality as the Console, plus some additional commands. Some of these, such as the ability to run scripts extend the Console’s functionality.
OCI CLI is a tool built on OCI SDK for Python. Python code, under the covers, calls the OCI APIs discussed in the previous section.
Prerequisites
In addition to the general prerequisites described above, you also need:
- OCI CLI installed. See OCI CLI Quickstart
- Python3.6 or later running on MAC, Windows, or supported Linux and UNIX-like operating systems:
- Config file ( ~/.oci/config ) correctly configured as per SDK and CLI Configuration file
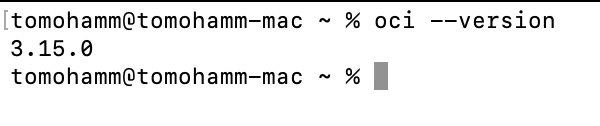
Check the OCI CLI version using the below command
oci --version
With OCI CLI installed, you can use oci db autonomous-database create to create an Autonomous Database with the Oracle APEX Application Development workload type (Same as the one created in REST APIs section)
oci db autonomous-database create \
--compartment-id "ocid.compartment.oc1..aaaaaaaacwex5sqkhi7ledb5s234n6brmhrjvhhsxduw35l2rzahhsa7pyaa" \
--cpu-core-count 1 \
--data-storage-size-in-tbs 1 \
--db-name "APEXonOCI" \
--display-name "APEXonOCI" \
--db-workload "APEX" \
--license-model "LICENSE_INCLUDED" \
--admin-password "secretPassword@123%^&"
More details about the available attributes can be found in the documentation
Using Oracle Cloud Infrastructure SDKs
Alongside REST APIs and OCI CLI, using OCI SDKs is another way you can automate and script the creation of Autonomous Database with APEX workload type (or ATP, ADW, JSON)
SDKs are available for various languages. Detailed documentation can be found at the following links:
Example using SDK for Python:
The below python script (named as createADB.py) creates APEXonOCI Database (same configuration created in above section)
Details about the API reference used in the below example can be found in documentation
import oci

# Load the default configuration
config = oci.config.from_file()

# Set the compartment_id. You can use any compartment in your tenancy which
# has privileges for creating an Autonomous Database
compartment_id = config["tenancy"]

def create_adb(db_client):
    # Create the model and populate the values
    # See: https://docs.cloud.oracle.com/iaas/Content/Database/Tasks/adbcreating.htm
    adb_request = oci.database.models.CreateAutonomousDatabaseDetails()

    adb_request.compartment_id = compartment_id
    adb_request.cpu_core_count = 1
    adb_request.data_storage_size_in_tbs = 1
    adb_request.db_name = "APEXonOCI"
    adb_request.display_name = "APEXonOCI"
    adb_request.db_workload = "APEX"
    adb_request.license_model = adb_request.LICENSE_MODEL_LICENSE_INCLUDED
    # For demonstration, we just passed the password here but for Production code you should have a better
    # way to pass the password like env variable or commandline
    adb_request.admin_password = "Welcome1!SDK"
    adb_request.is_auto_scaling_enabled = False

    adb_response = db_client.create_autonomous_database(
        create_autonomous_database_details=adb_request,
        retry_strategy=oci.retry.DEFAULT_RETRY_STRATEGY)

    print("Created Automated Database {}".format(adb_response.data.id))

    return adb_response.data.id

if __name__ == "__main__":
    # Initialize the client
    db_client = oci.database.DatabaseClient(config)
    # Create adb
    adb_id = create_adb(db_client)
On executing the above script…
… an Autonomous Database named APEXonOCI is created with workload type as APEX – Different approach same result!
Note: The OCI CLI and the SDKs come pre-installed on the OCI Cloud Shell. You can use SDK Quick Starts with Cloud Shell documentation to get started.
Check out the demonstration of the above steps in this video:
Next Steps
With the provisioning of Autonomous Database using scripts sorted out, you can also download the wallet and use it to connect to the newly created Database. See generate-wallet documentation
And take a step further by creating and automating the provision of APEX workspaces. See the blog post How to Script Workspace Provisioning on Oracle Autonomous Database
Conclusion
Within a few minutes, you can provision an Autonomous Database with an APEX instance. I hope this blog post provided you with insights into different ways you can provision an APEX instance on Autonomous Database on Oracle Cloud. Developers and DevOps Architects now have greater flexibility to script and automate creation and maintenance of APEX and Autonomous Database on OCI with APIs, CLI, SDKs with the scripting language of their choice.
Related Blogs
Getting started with APEX on Oracle Cloud – QuickStart
How to Provision APEX in Oracle Cloud Interactively Using a Web Browser