This blog was originally published on January 03, 2020!
This first in a series of blog posts on List of Values examines the different ways you can allow end users to select data from a list of allowed values. Starting with a text column that allows free-form data entry, you will learn different ways to limit what your end users can enter.
For the purpose of this blog we are going to start with the Creating an App from a Spreadsheet tutorial. After completing Module 1 and 2 you should have created the PROJECT_TASKS table and created an APEX application based on this table. As is common when first developing an application, this table is based on a spreadsheet, where none of the columns are normalized. In the original spreadsheet, columns are generally free format. Data must be manually checked and corrected if only certain values should be entered into a specific column. In Microsoft Excel, for example, you can add data validations to limit data entry, but rarely are features used.
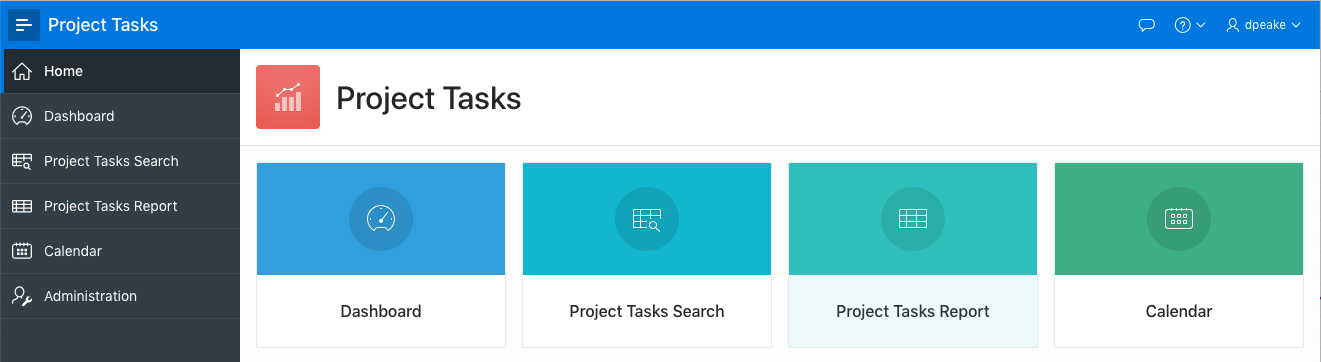
First, let’s review the APEX app you just generated. From the Application Home Page, click Run Application, and log into the app.
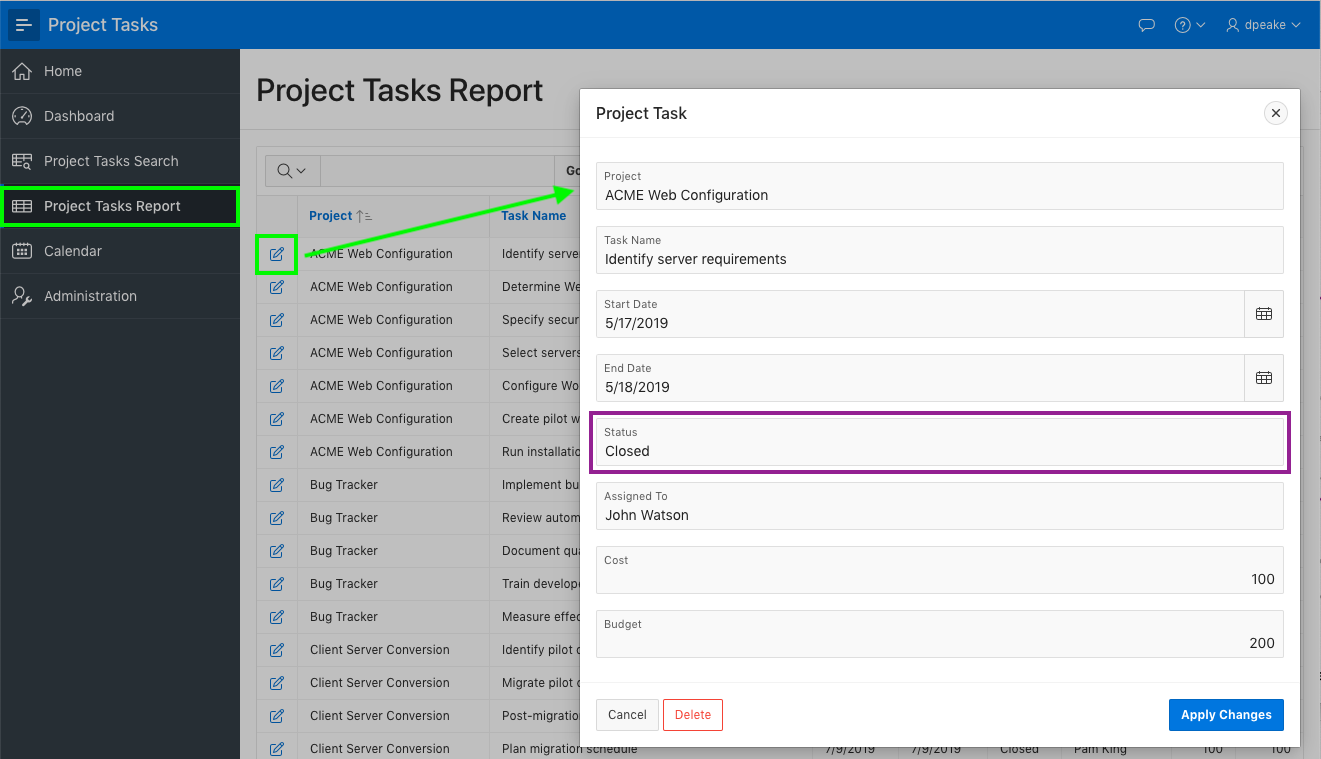
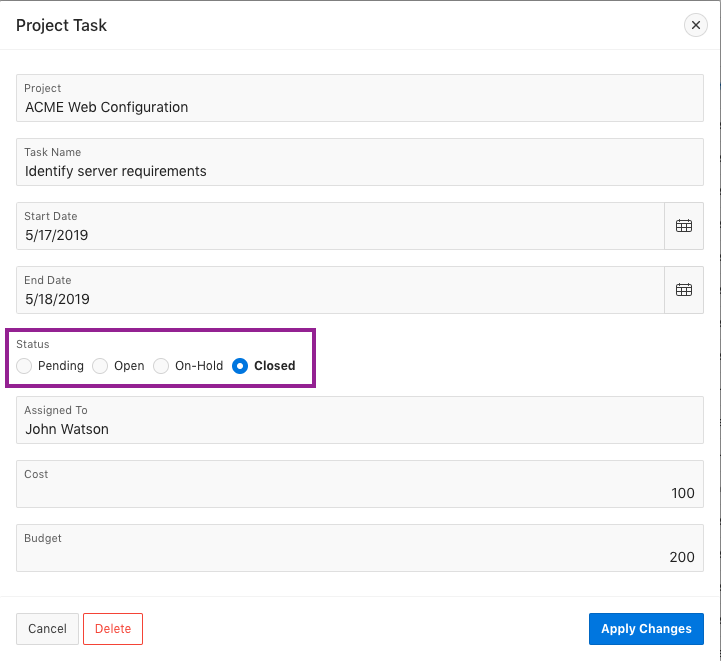
Navigate to Project Tasks Report and then click the edit icon and review the form page. In particular, notice that the Status field is a standard text item that allows any input.
Decision time! At this point you need to make a decision whether end users are allowed to enter any status, whether the current values are the only allowed statuses, or whether you want to restrict data entry but want to be able to add additional statuses in the future. A column such as Assigned To may be free format, as many different people work on tasks, and you don’t want to maintain a list of employees. However, a column such as Status should generally be limited to ensure everyone uses a small set of values. For this blog, we are going to restrict Status input to the current values in the table.
Now you have more choices on how to implement the list:
- A static list or as a simple SQL which retrieves the unique values from the table.
- Allow data selection using a Select List, Pop-up LOV, or Radio Group.
{Note: if multiple values are allowed you could also use a Checklist or a Shuttle} - Define the List of Values directly on a page, or as a Shared Component that can be used on any page.
For simplicity we are going to create a static list for a Radio Group directly on the page.
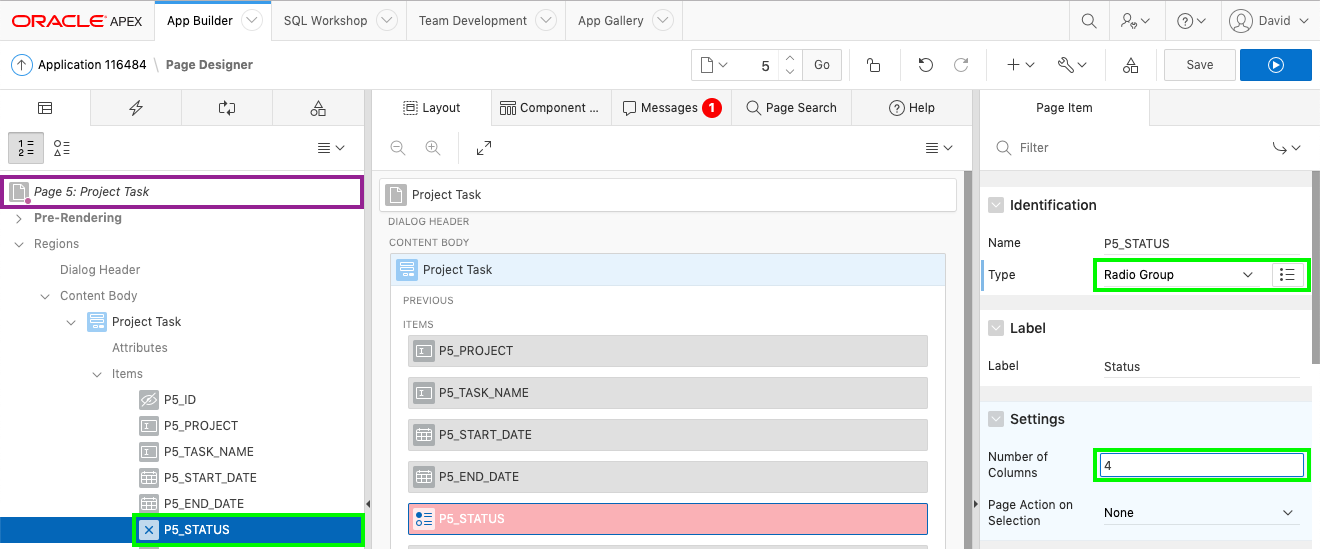
Navigate back to the APEX App Builder and go to Page 5. Within Page Designer, in the Rendering tree (left pane), under the Project Task region, select P5_STATUS. In the Property Editor (right pane), enter the following:
| Group |
Attribute |
Value |
| Identification |
Type |
Radio Group |
| Settings |
Number of Columns |
4 |
| List of Values |
Type |
Static Values |
|
|
Display Extra Values |
Uncheck |
|
|
Display Null Value |
Uncheck |

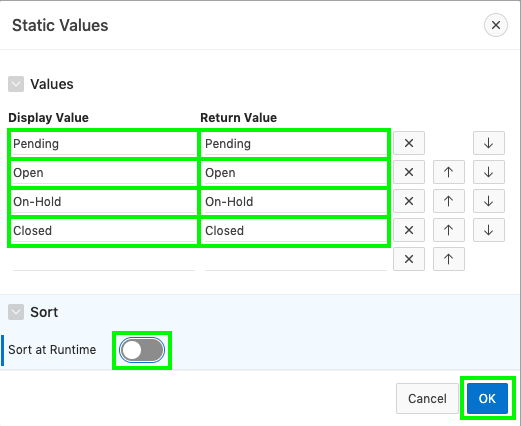
To set the values, under List of Values > Static Values, click Display1, Display2 and enter the following:
| Display Value |
Return Value |
| Pending |
Pending |
| Open |
Open |
| On-Hold |
On-Hold |
| Closed |
Closed |
Under Sort, uncheck Sort at Runtime, and click OK.
In Page Designer, in the toolbar click Save.
Navigate back to the Runtime environment, refresh the browser and click on the edit icon for a record.
Using a Select List
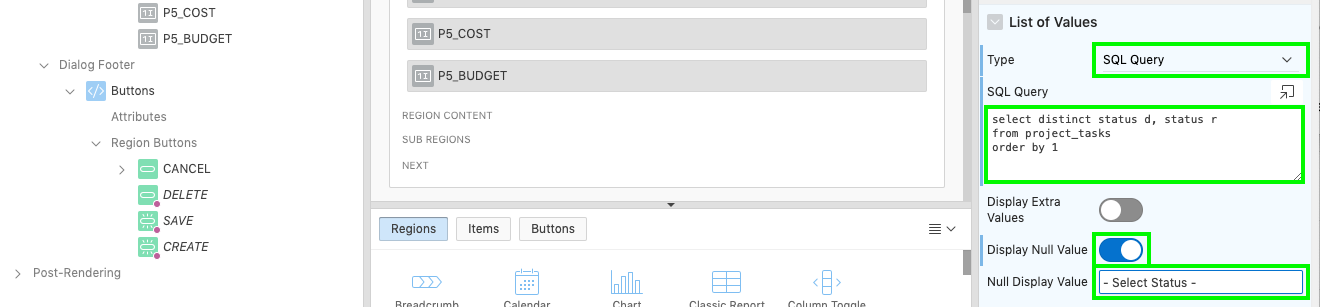
If instead of 4 or 5 values you have a larger selection than Select List is generally a better choice. To modify the Status item to use a Select List and a SQL statement simply go back to the APEX App Builder, and within Page Designer, for Page 5: Project Tasks, in the Property Editor (right pane) enter the following:
| Group |
Attribute |
Value |
| Identification |
Type |
Select List |
| List of Values |
Type |
Static Values |
|
|
Display Null Value |
Check |
|
|
Null Display Value |
Type “- Select Status” |
In SQL Query enter the following SQL:
select distinct status d, status r
 from project_tasks
 order by 1
{Note: This SQL statement selects the display (d) value and the return (r) value from the table you created. Modify the table name if you did not call your table PROJECT_TASKS. It also uses distinct to ensure only one of each status is returned.}
In Page Designer, in the toolbar click Save.
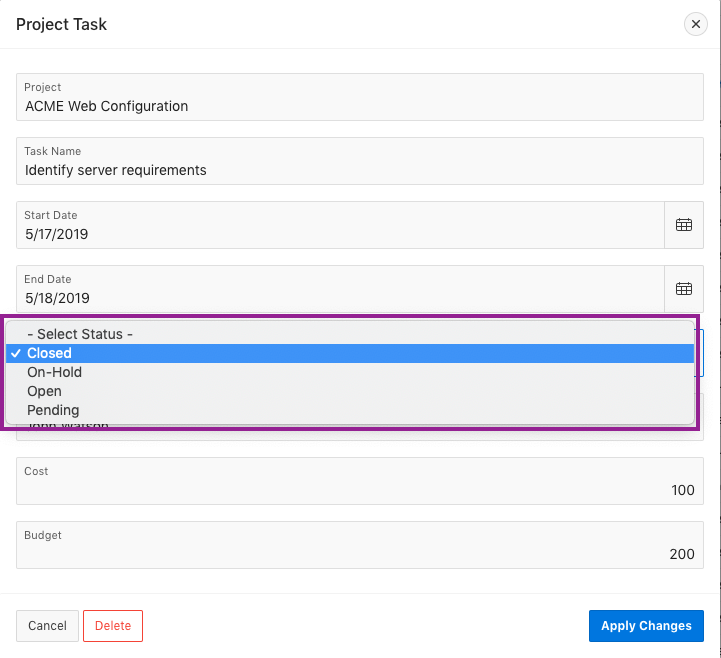
Navigate back to the Runtime environment, refresh the browser and click on the edit icon for a record.
Try it out for yourself to see just how easy it is to improve data quality, by limiting the values end users can enter!