Prerequisite
This blog assumes that you are already familiar with Oracle APEX Workflow concepts and terminology.
If you are new to Oracle APEX Workflow, the following blogs provide a good foundation before proceeding with this blog:
- Simplify Business Process Management using APEX Workflow
- Multi-Level Expense Approval Using APEX Workflow
- APEX Workflow Lifecycle
As applications evolve from serving a single organization to supporting multiple customers, one of the first architectural challenges that surfaces is tenant isolation.
Consider a SaaS application where multiple organizations use the same Oracle APEX application to manage their workflows and tasks. Every customer expects complete separation of their business processes, workflow instances, approvals, and tasks data, even though the application itself runs from a single deployment. As your customer base grows, so does the complexity of serving them efficiently, securely.
This is where multi-tenancy becomes essential. This is where multi-tenancy comes in – a software architecture where multiple user groups (tenants) share a single instance of your application, while helping their data and configurations remain completely isolated.
In Oracle APEX, multi-tenancy is commonly implemented using a Tenant ID. The Tenant ID acts as a logical boundary that ensures users only see workflows, tasks, and application data belonging to their organization.
In this blog, we will walk through how tenant isolation works in Oracle APEX Workflow using a simple requisition approval application. We will also see how Workflow instances and Tasks automatically remain scoped to the appropriate tenant when the Tenant ID is properly configured.
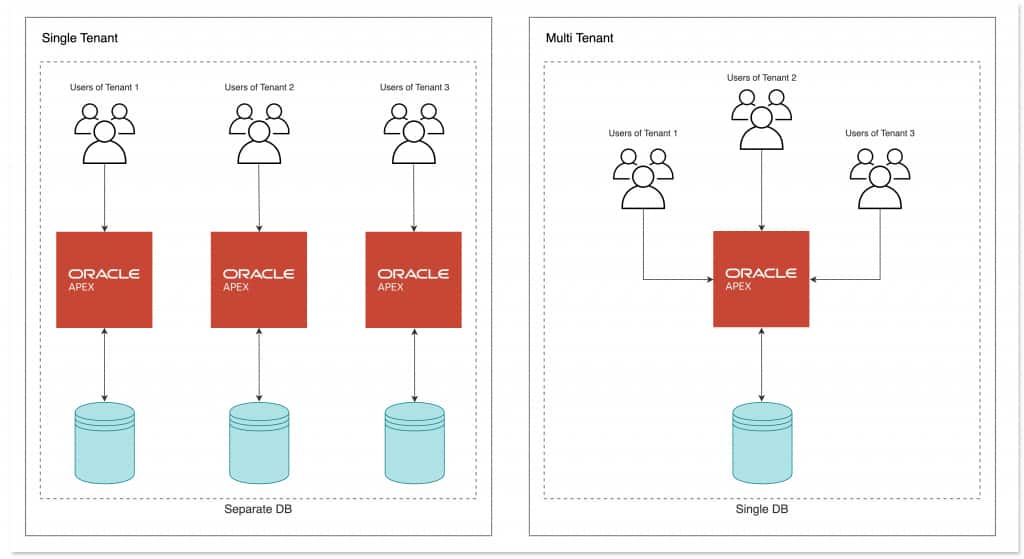
Single-Tenant vs Multi-Tenant Applications
In a traditional single-tenant application, every deployment typically serves a single organization. This helps achieve data isolation is naturally achieved because each customer has a separate environment.
In a multi-tenant architecture, however, multiple tenants share the same application instance and infrastructure while still helping maintain complete separation of data and runtime context. Oracle APEX provides built-in support for this model through session-level tenant context management.
Setting the Tenant ID
In most applications, the Tenant ID is established during authentication to ensure proper data segregation across users. It is helpful to briefly review how this is commonly implemented.
A common implementation pattern is to define a Post-Authentication Procedure within the current Authentication Scheme. This procedure identifies the tenant associated with the logged-in user and stores it in the session using APEX_SESSION.SET_TENANT_ID.
Below is a simple example:
Post Authentication
procedure post_authentication
is
    l_tenant_id varchar2(32);
begin
    -- Retrieve the Tenant ID for the logged-in user.
    select tenant_id
      into l_tenant_id
      from users
     where username = :APP_USER;

    -- Set the Tenant ID for the current session.
    apex_session.set_tenant_id (
        p_tenant_id => l_tenant_id );

exception
    when others then
        apex_debug.info(
            p_message => 'Tenant %s already set.',
            p0        => l_tenant_id );
end post_authentication;

Once authentication completes, Oracle APEX automatically invokes the Post-Authentication Procedure defined in the Authentication Scheme.
From that point onward, the session operates entirely within the context of the assigned tenant.
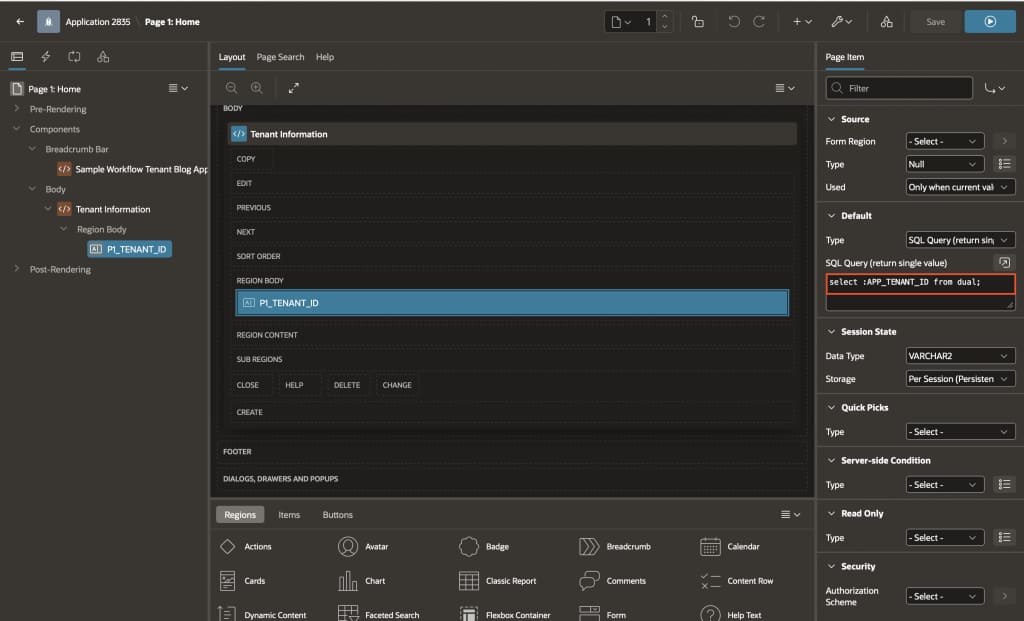
The current tenant can then be accessed anywhere in the application using:
Tenant Details
SELECT :APP_TENANT_ID FROM DUAL;Note: Users are typically mapped to a specific tenant, and all application access is scoped accordingly.
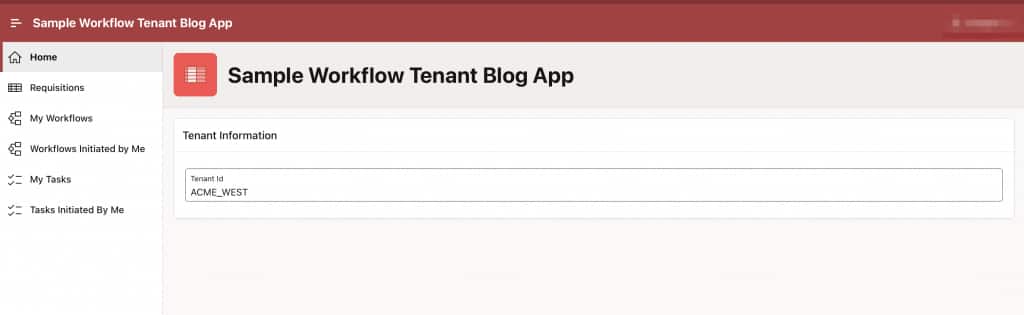
Example Scenario
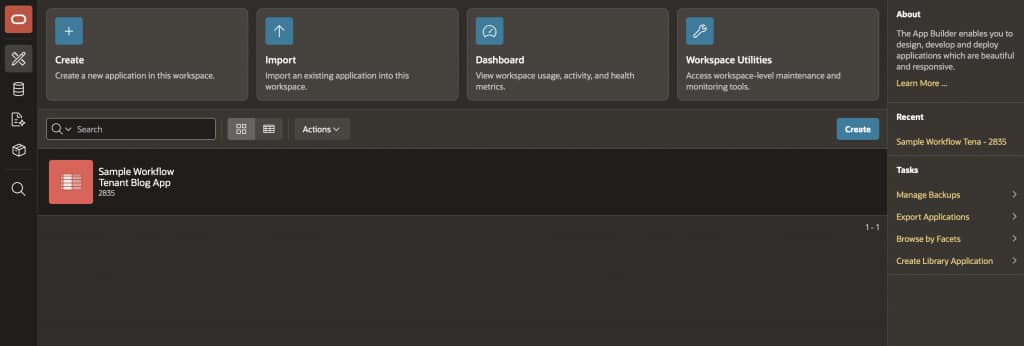
To demonstrate how tenant isolation works in practice, let’s use a simple requisition approval application.
The application is deployed once within a single workspace, but supports multiple tenants.
Each user belongs to a specific tenant:
| Tenant ID | Username | Participant Type |
|---|---|---|
| ACME_EAST | BO | Initiator |
| PAT | Potential Owner | |
| JANE | Business Administrator | |
| ACME_WEST | JOHN | Initiator |
| STEVE | Potential Owner | |
| RALMUELL | Business Administrator |
The application allows users to create and submit requisitions, which are then routed through an approval workflow.
Note: If you want to test the sample application, make sure the users are created through Workspace Administration → Manage Users and Groups.
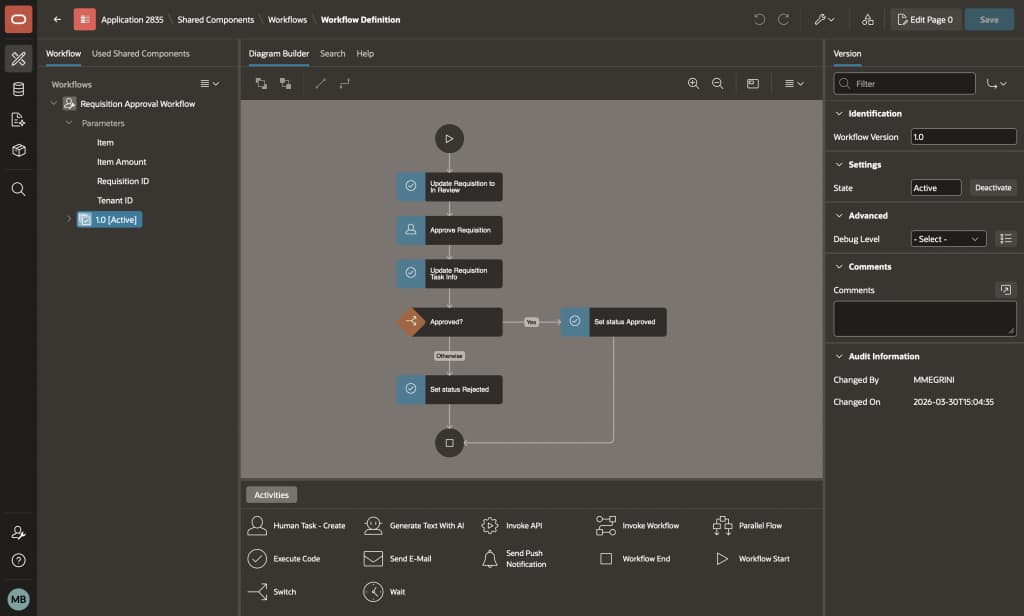
Workflow Definition
The requisition workflow follows a straightforward approval process:
- A requisition is submitted
- An approval task is created
- The requisition status is updated based on the approval outcome
The workflow accepts the following input parameters:
- Tenant ID
- Requisition ID
- Item
- Item Amount
Although the workflow definition itself is shared across tenants, every workflow instance executes within the context of the Tenant ID associated with the user session.
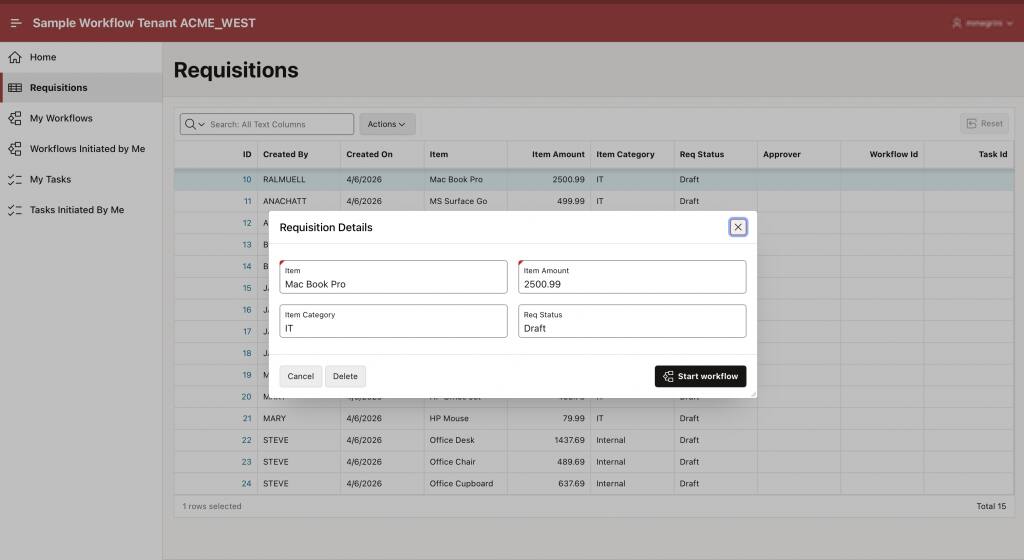
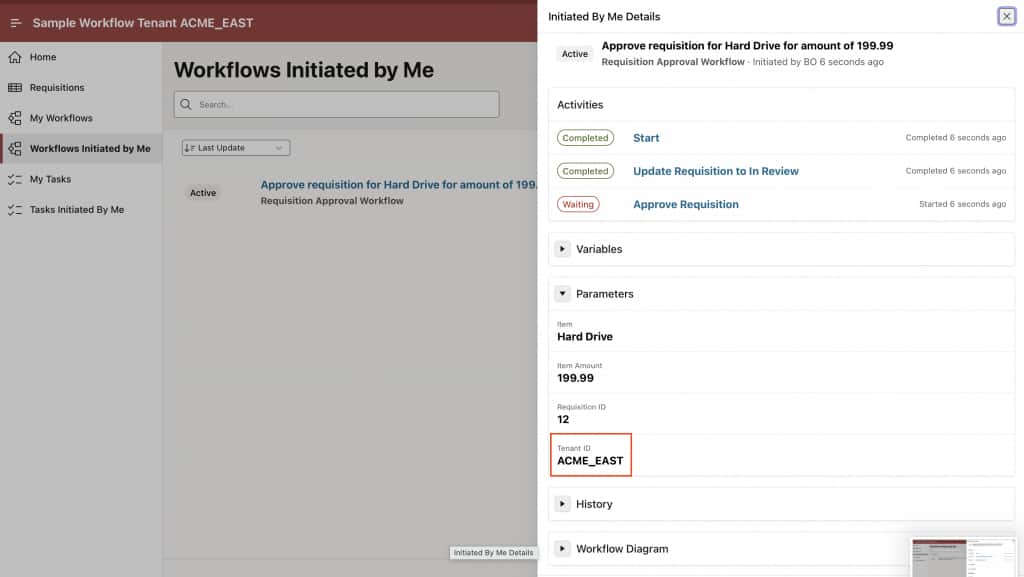
Running the Application
When a user submits a requisition, the application automatically captures the Tenant ID from the current session and associates it with the Workflow instance.
To illustrate this clearly, let’s perform the same operation from two different tenants.
A user from ACME_WEST submits a requisition, while another user from ACME_EAST performs the exact same action using the same application.
Even though both users interact with the same pages and trigger the same workflow definition, this helps the resulting data remains completely isolated.
Each requisition is stored with its associated Tenant ID.
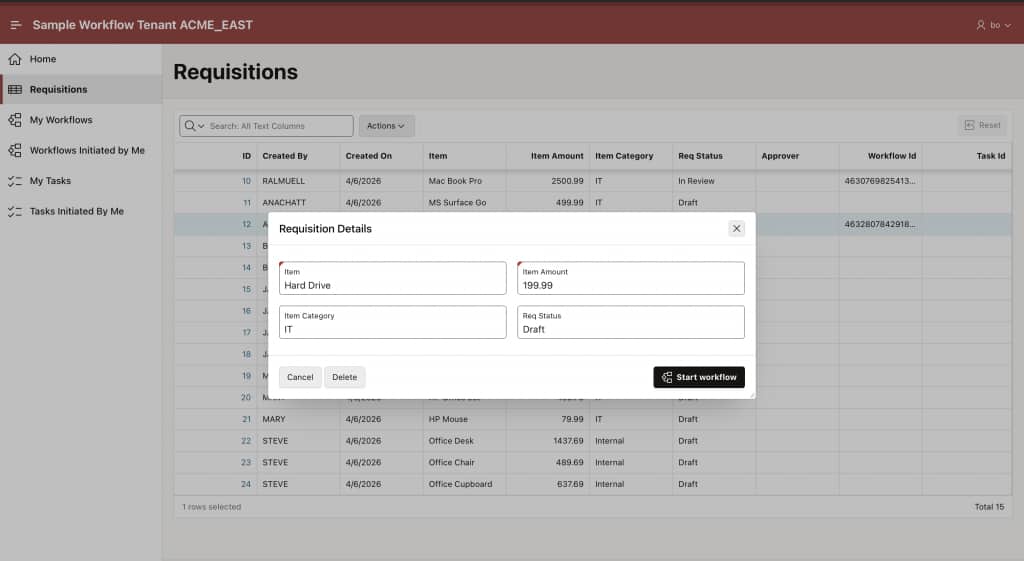
Workflow Instance Isolation
Once the requisitions are submitted, separate Workflow instances are created for each tenant.
Although the workflows are structurally identical, users only see instances belonging to their own tenant.
For example:
- Users in
ACME_WESTcan only view workflow instances created withinACME_WEST - Users in
ACME_EASTcan only view workflow instances created withinACME_EAST
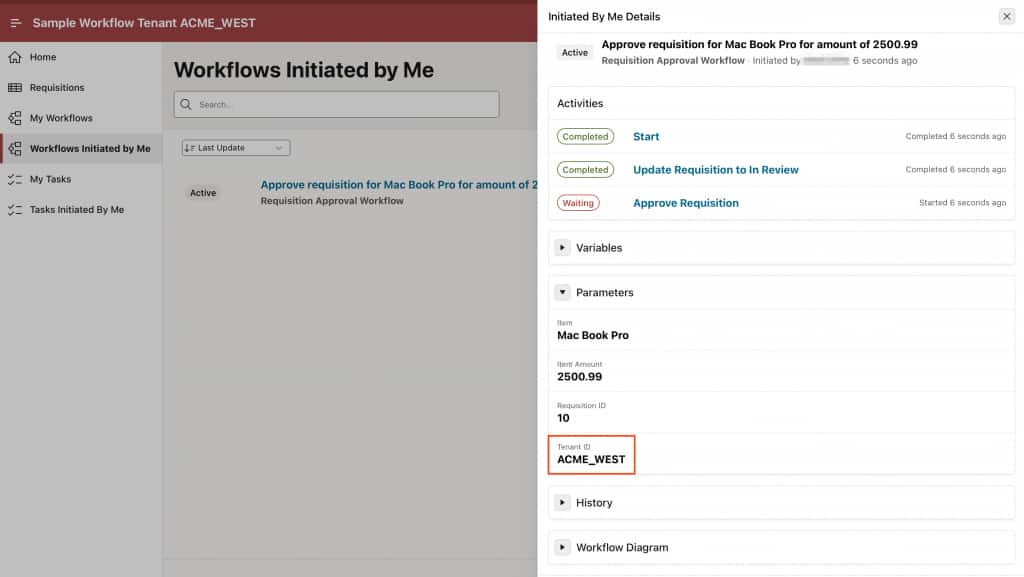
This isolation happens automatically through the tenant context established during authentication.
No additional filtering logic is required at the application level.
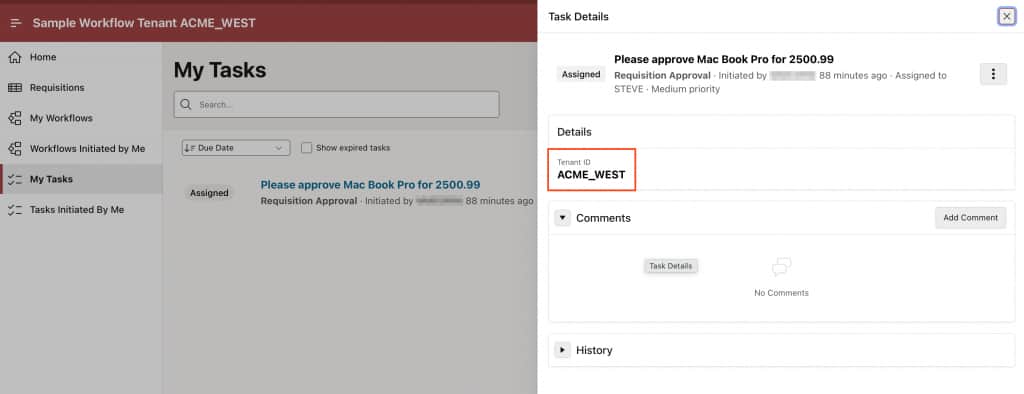
Unified Task List Isolation
The same tenant scoping behavior applies to Tasks generated by the workflow.
Tasks created from requisitions remain visible only within their originating tenant.
Even though all tasks exist within the same underlying system, users can only:
- View tasks belonging to their tenant
- Act on tasks scoped to their tenant
- Manage workflow execution within their own tenant boundary
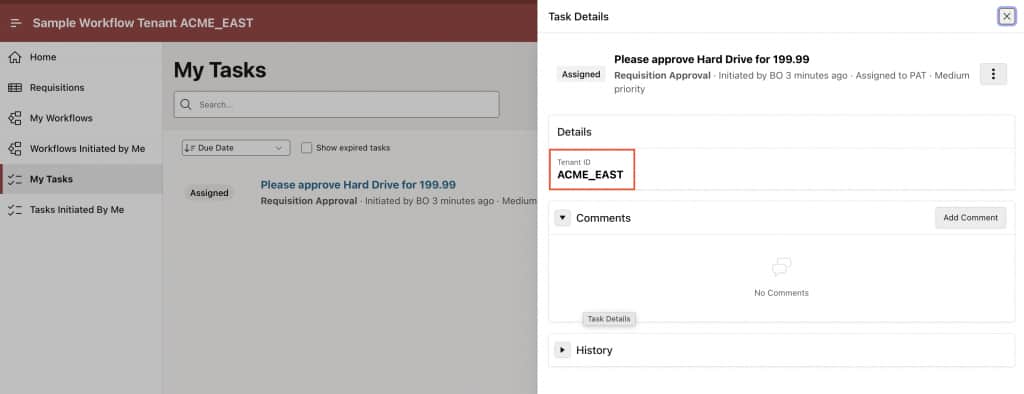
This helps ensures secure separation of workflow activity across organizations sharing the same application instance.
Note: In this demo application, the Tenant ID is intentionally displayed in the Workflow Console and Unified Task List to illustrate how tenant isolation works. In production applications, Tenant IDs are typically hidden from end users.
Conclusion
Oracle APEX makes it straightforward to build multi-tenant workflow applications using Tenant IDs.
By establishing the tenant context during authentication, Workflow instances and Tasks automatically execute within the appropriate tenant boundary, helping ensure proper data isolation across organizations.
This approach enables SaaS-style application architectures where multiple tenants can securely share the same Oracle APEX application instance while helping maintain complete separation of workflows, tasks, and business data.
As a result, organizations can scale efficiently without introducing additional deployment or infrastructure complexity.