Rich Text Editor: HTML or Markdown
Oracle APEX’s Rich Text Editor page item lets users edit a document with the most common kinds of formatting. This includes bold, italics, monospace, links, bulleted and numbered lists, quoted text, code blocks, and images.
TIP: To see any image in this article in a larger size, right click on it and open it in a new tab.
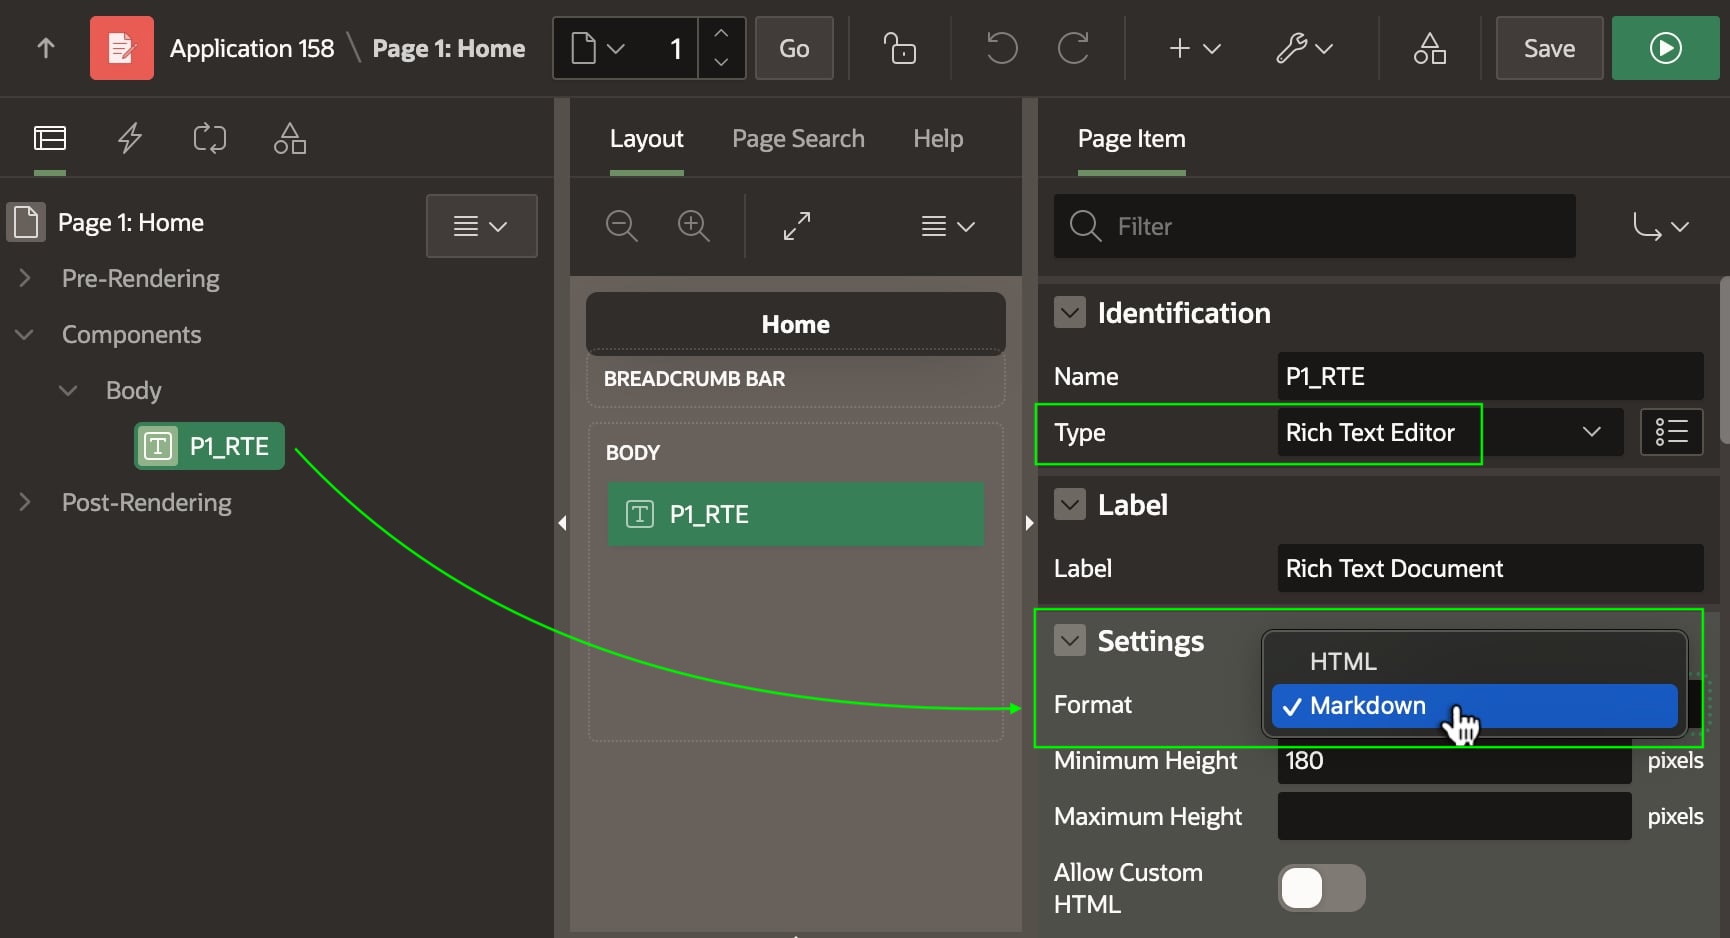
You configure each Rich Text Editor page item to store the document as HTML or the Markdown format.
Documents Reference Images by URL
Both HTML and Markdown include images by reference, using a URL. For example, HTML uses the src attribute of an <img> tag to provide the image reference, with alternate text for accessibility in the alt attribute.
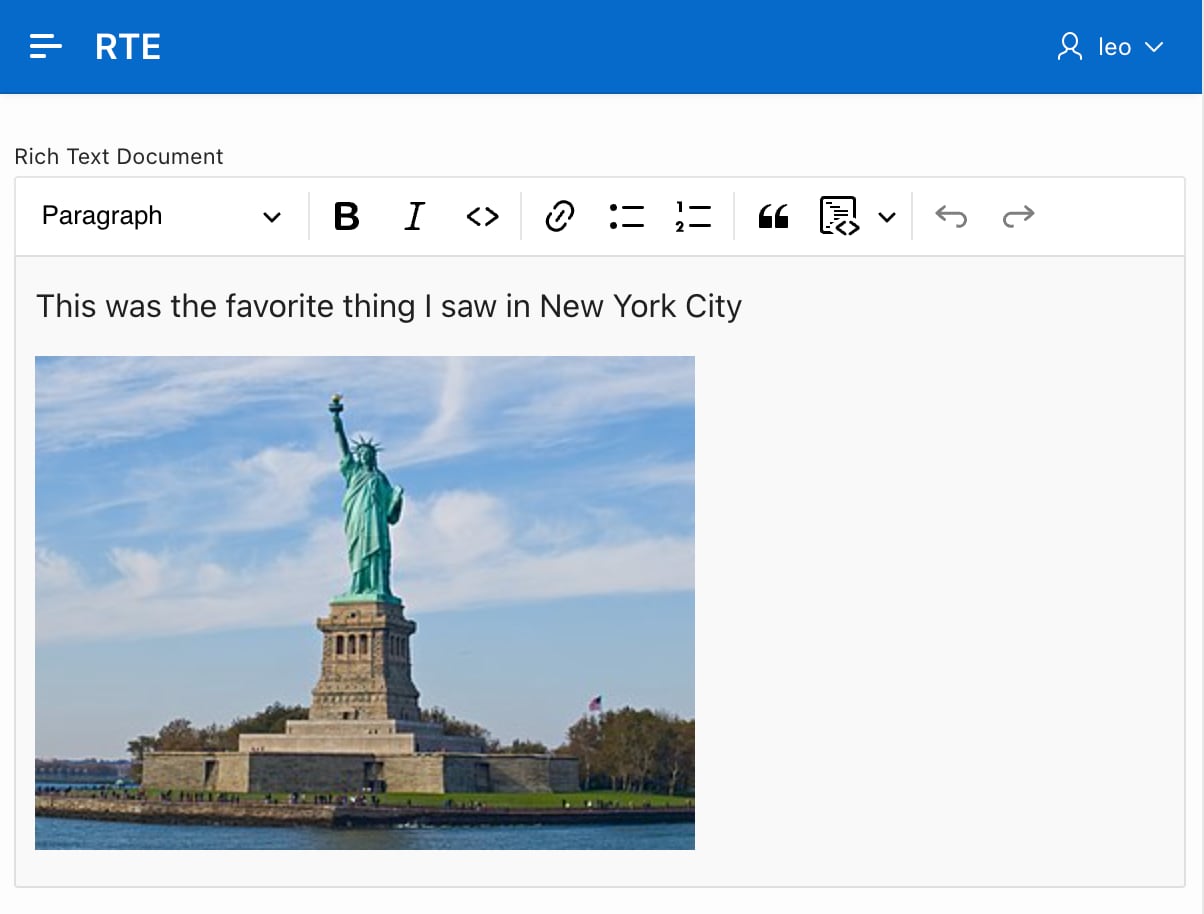
<p>This was the favorite thing I saw in New York City</p>
<img alt="The Statue of Liberty"
     src="https://example.com/media/statue_of_liberty.jpg">
Markdown uses a more compact syntax, with image URL in parenthesis following the alternative text in square brackets.
This was the favorite thing I saw in New York City
Adding New Images to Rich Text: “Some Assembly Required”
If a Rich Text Editor page item document contains references to existing images, they appear as expected, but letting users add new images requires additional work. Since they are referenced by URL, any image a user adds to a document must be:
- uploaded and stored on the server, and
- referenceable by URL.
The Oracle APEX Rich Text Editor page item is extensible, so you can add these capabilities with the approach that best fits your app.
Image Support for Rich Text Editor Sample
The Image Support for Rich Text Editor sample in the Gallery offers a concrete approach to let users embed images in the documents they edit. It includes reusable code to simplify adding this feature into your own apps. The JavaScript library and PL/SQL package it contains implement the image uploading, storage, and referencing mentioned above to unlock this interesting functionality your end users may appreciate. This article explains how the sample works and how to repurpose its helper code in your own apps.
Installing and Running the Sample
Use the Gallery tab of the Oracle APEX Builder to find the Image Support for Rich Text Editor sample and install it.
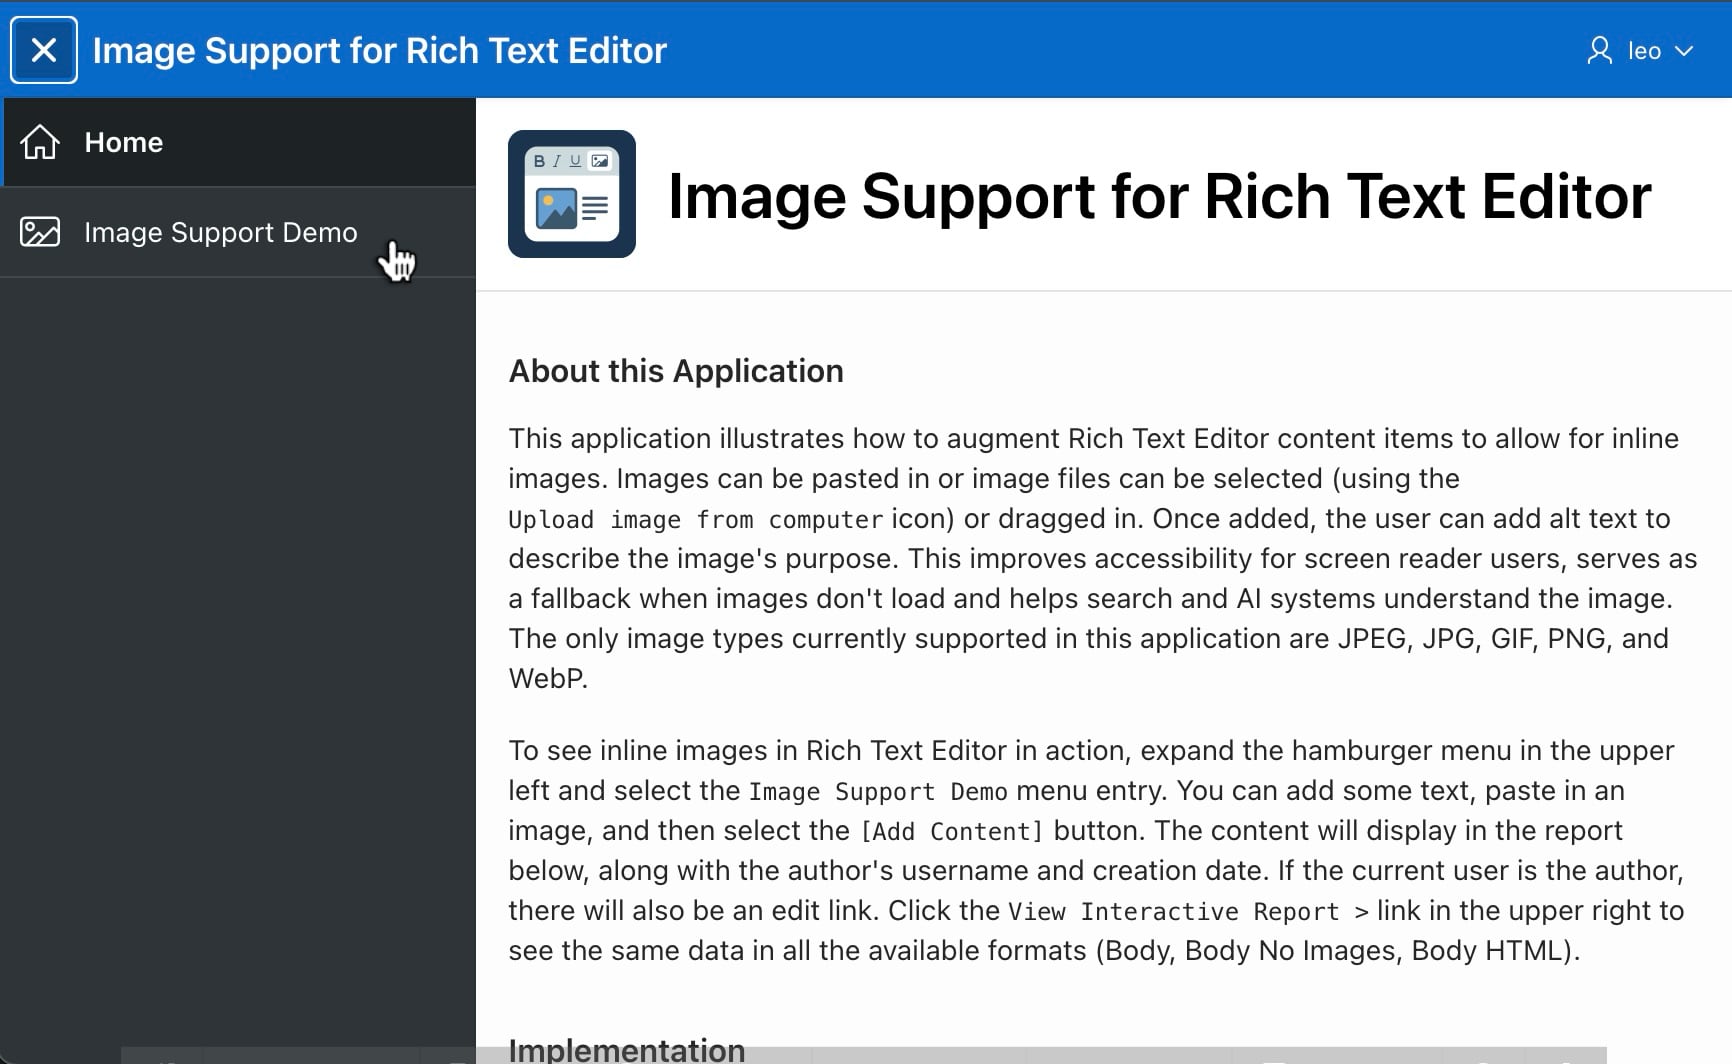
Run the app to view the overview page. It highlights key implementation details this article explains in more depth. Visit the Image Support Demo page and login to try out the functionality interactively. The application uses APEX Accounts authentication, so you can login using any account in your workspace.
Adding a Document with Images
The sample’s Image Support Demo page has a Rich Text Editor item to add a comment. For example, as shown below, you can enter text and images. Add an image by dragging it into the editor and dropping it where you want it to go. Alternatively, position the cursor and then either:
- Click on the (Image Upload) toolbar icon and select a file, or
- Paste an image from the clipboard.
When you’re done, click (Add Content) to save the comment.
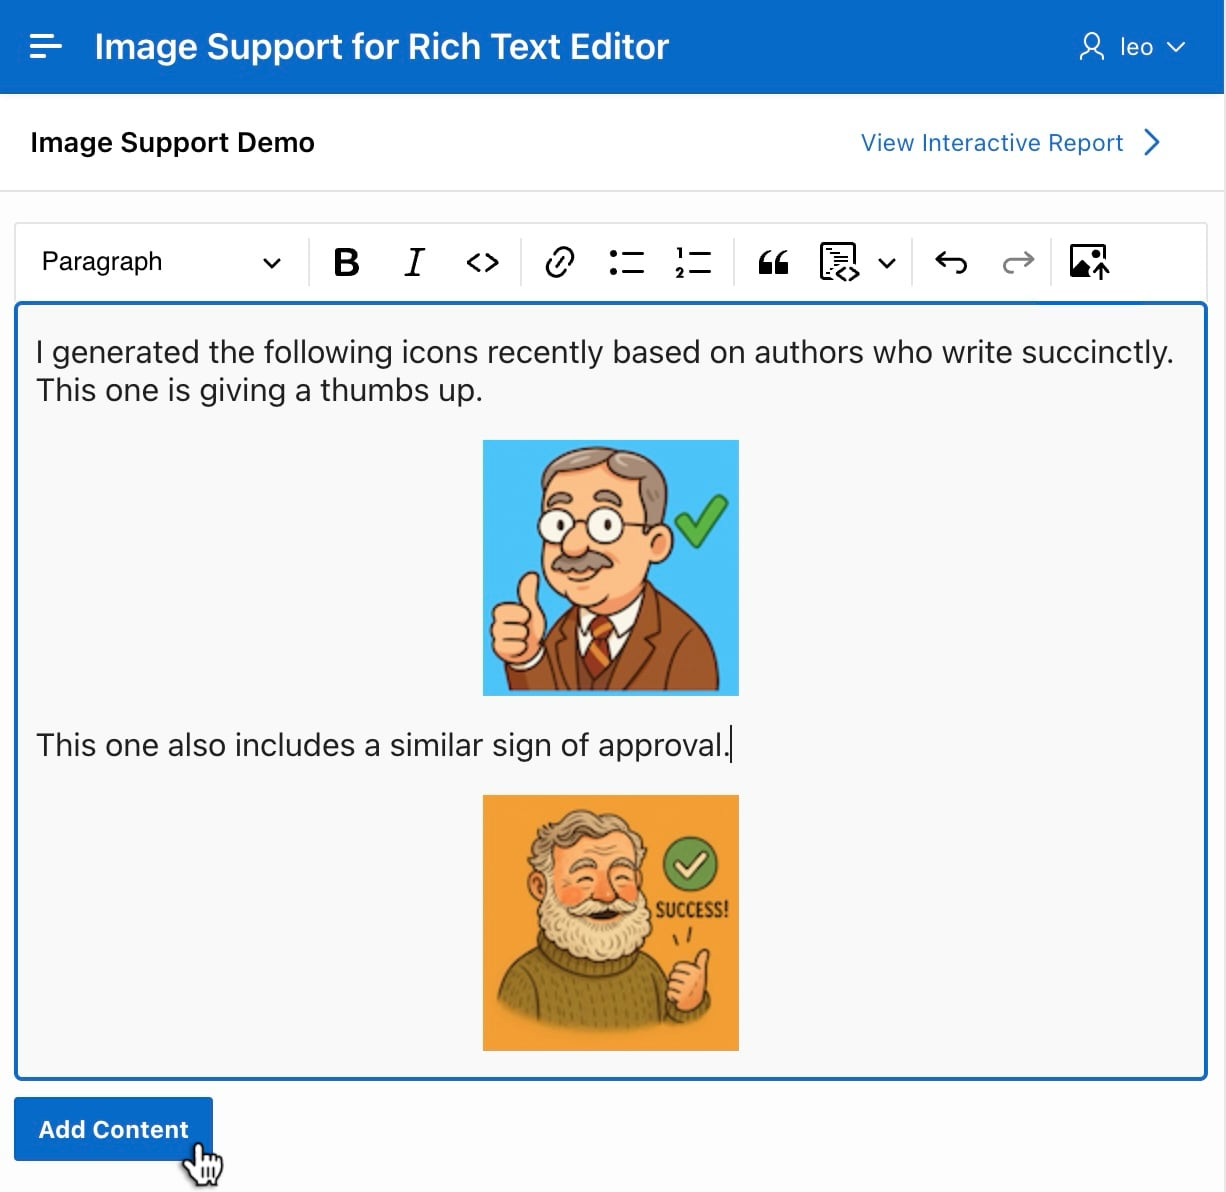
The document you add displays as a comment in a Classic Report region below using the Comments template.
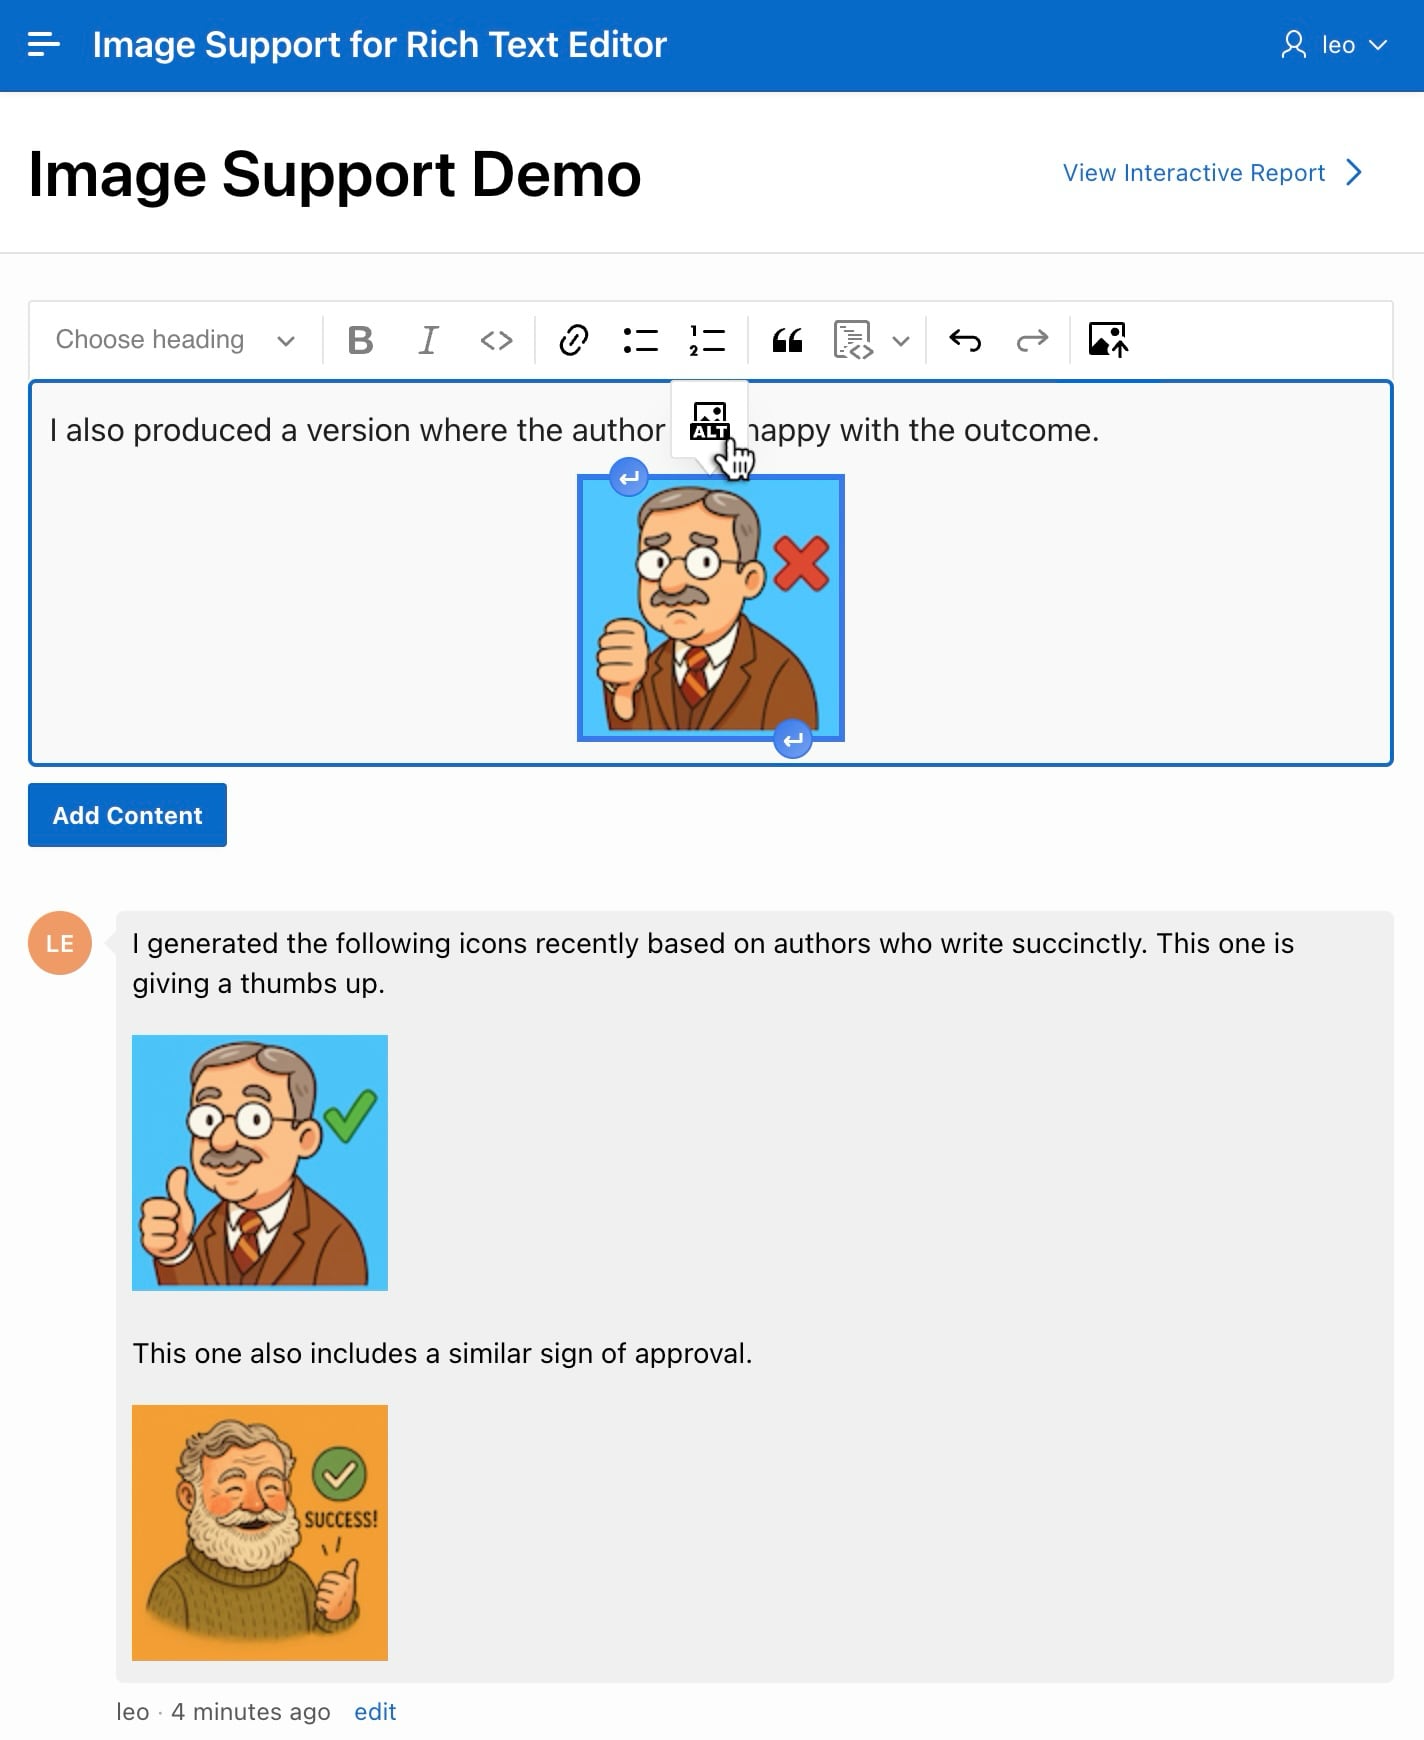
Adding Optional Alternative Text for Accessibility
After adding an image, whenever it’s selected a small floating ALT icon appears above it. Click the icon to enter or edit the image’s alternative text.
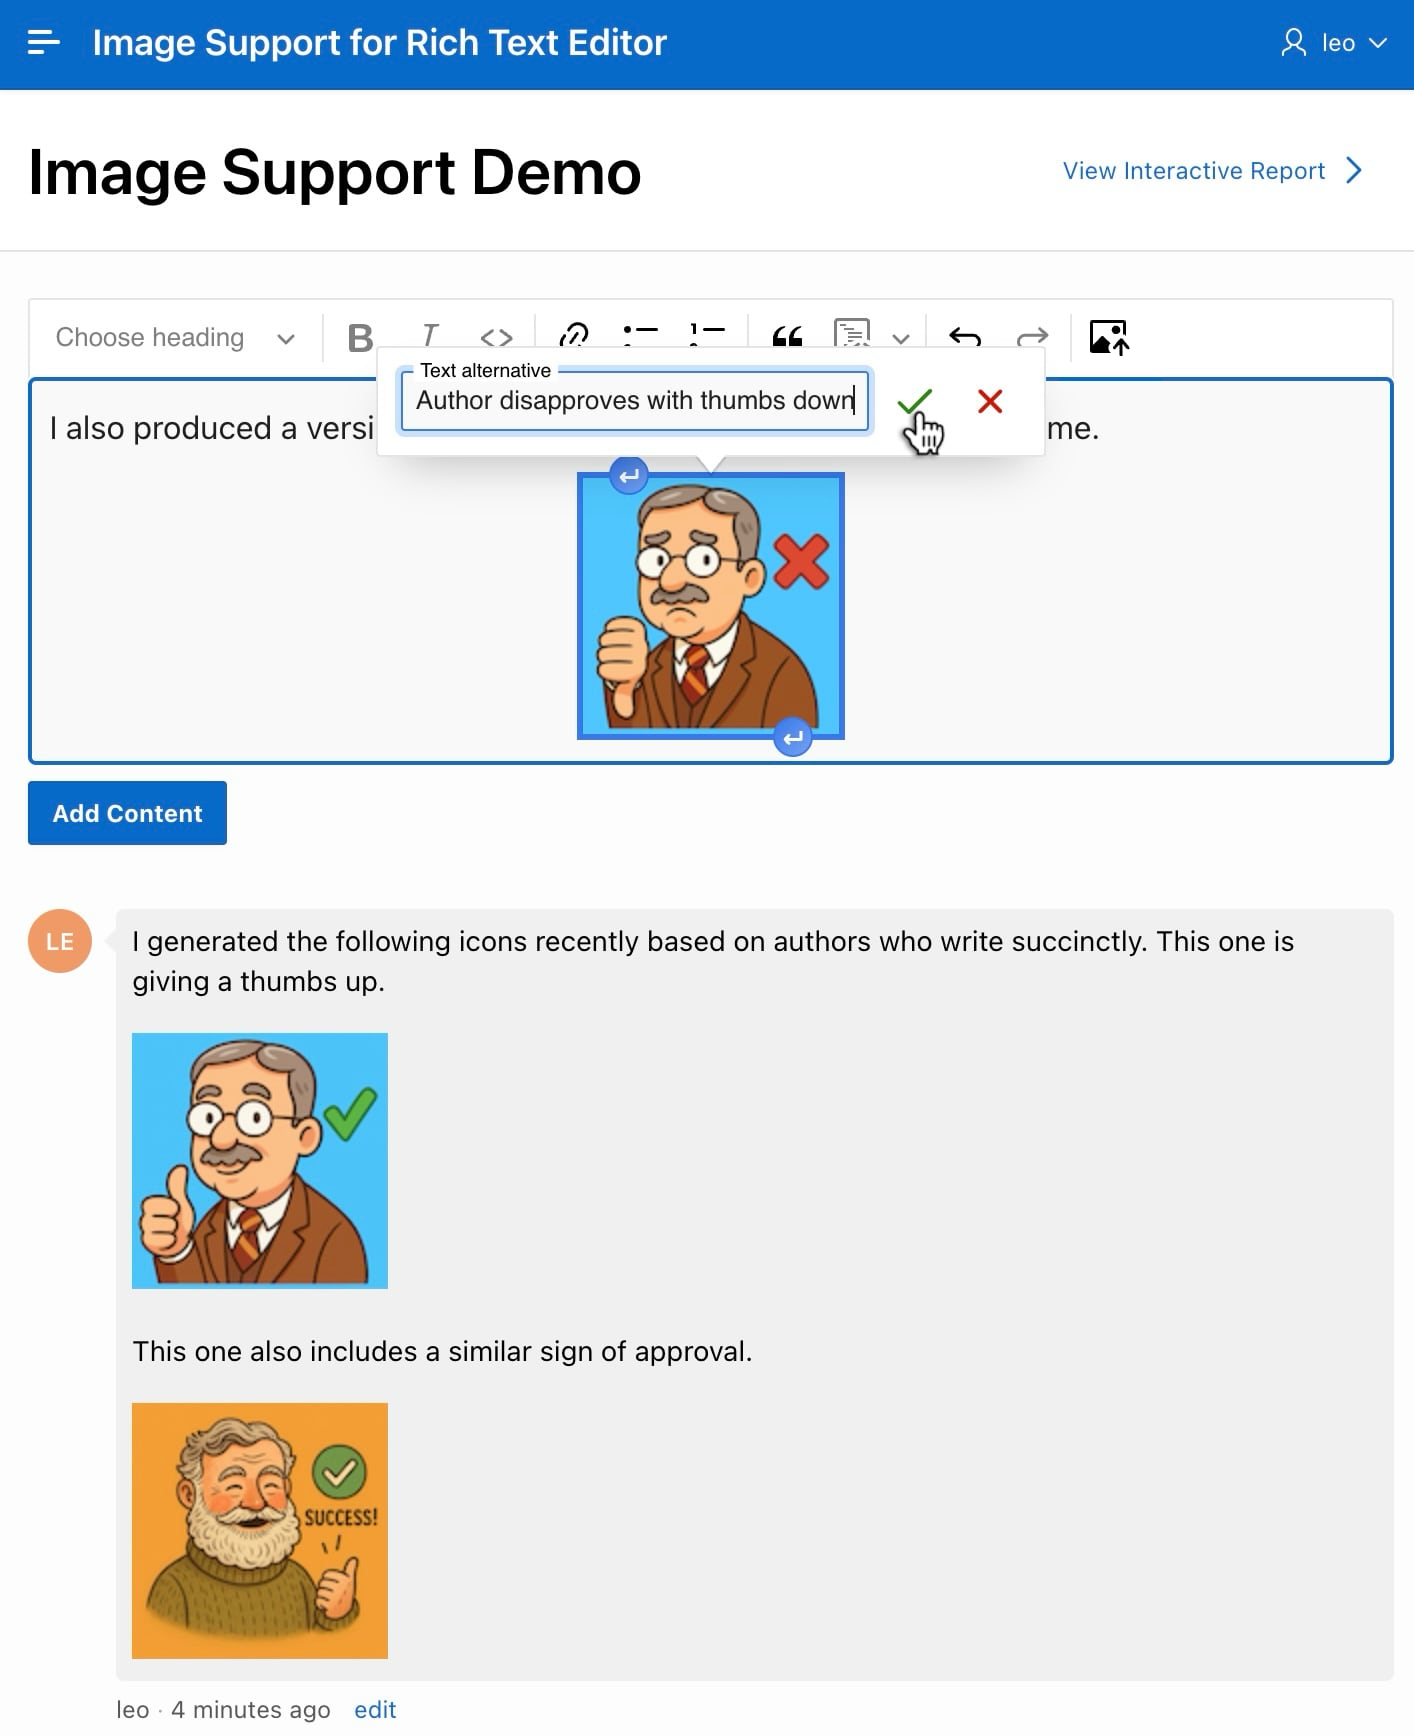
After entering or adjusting the alternative text, click the check mark to confirm your entry.
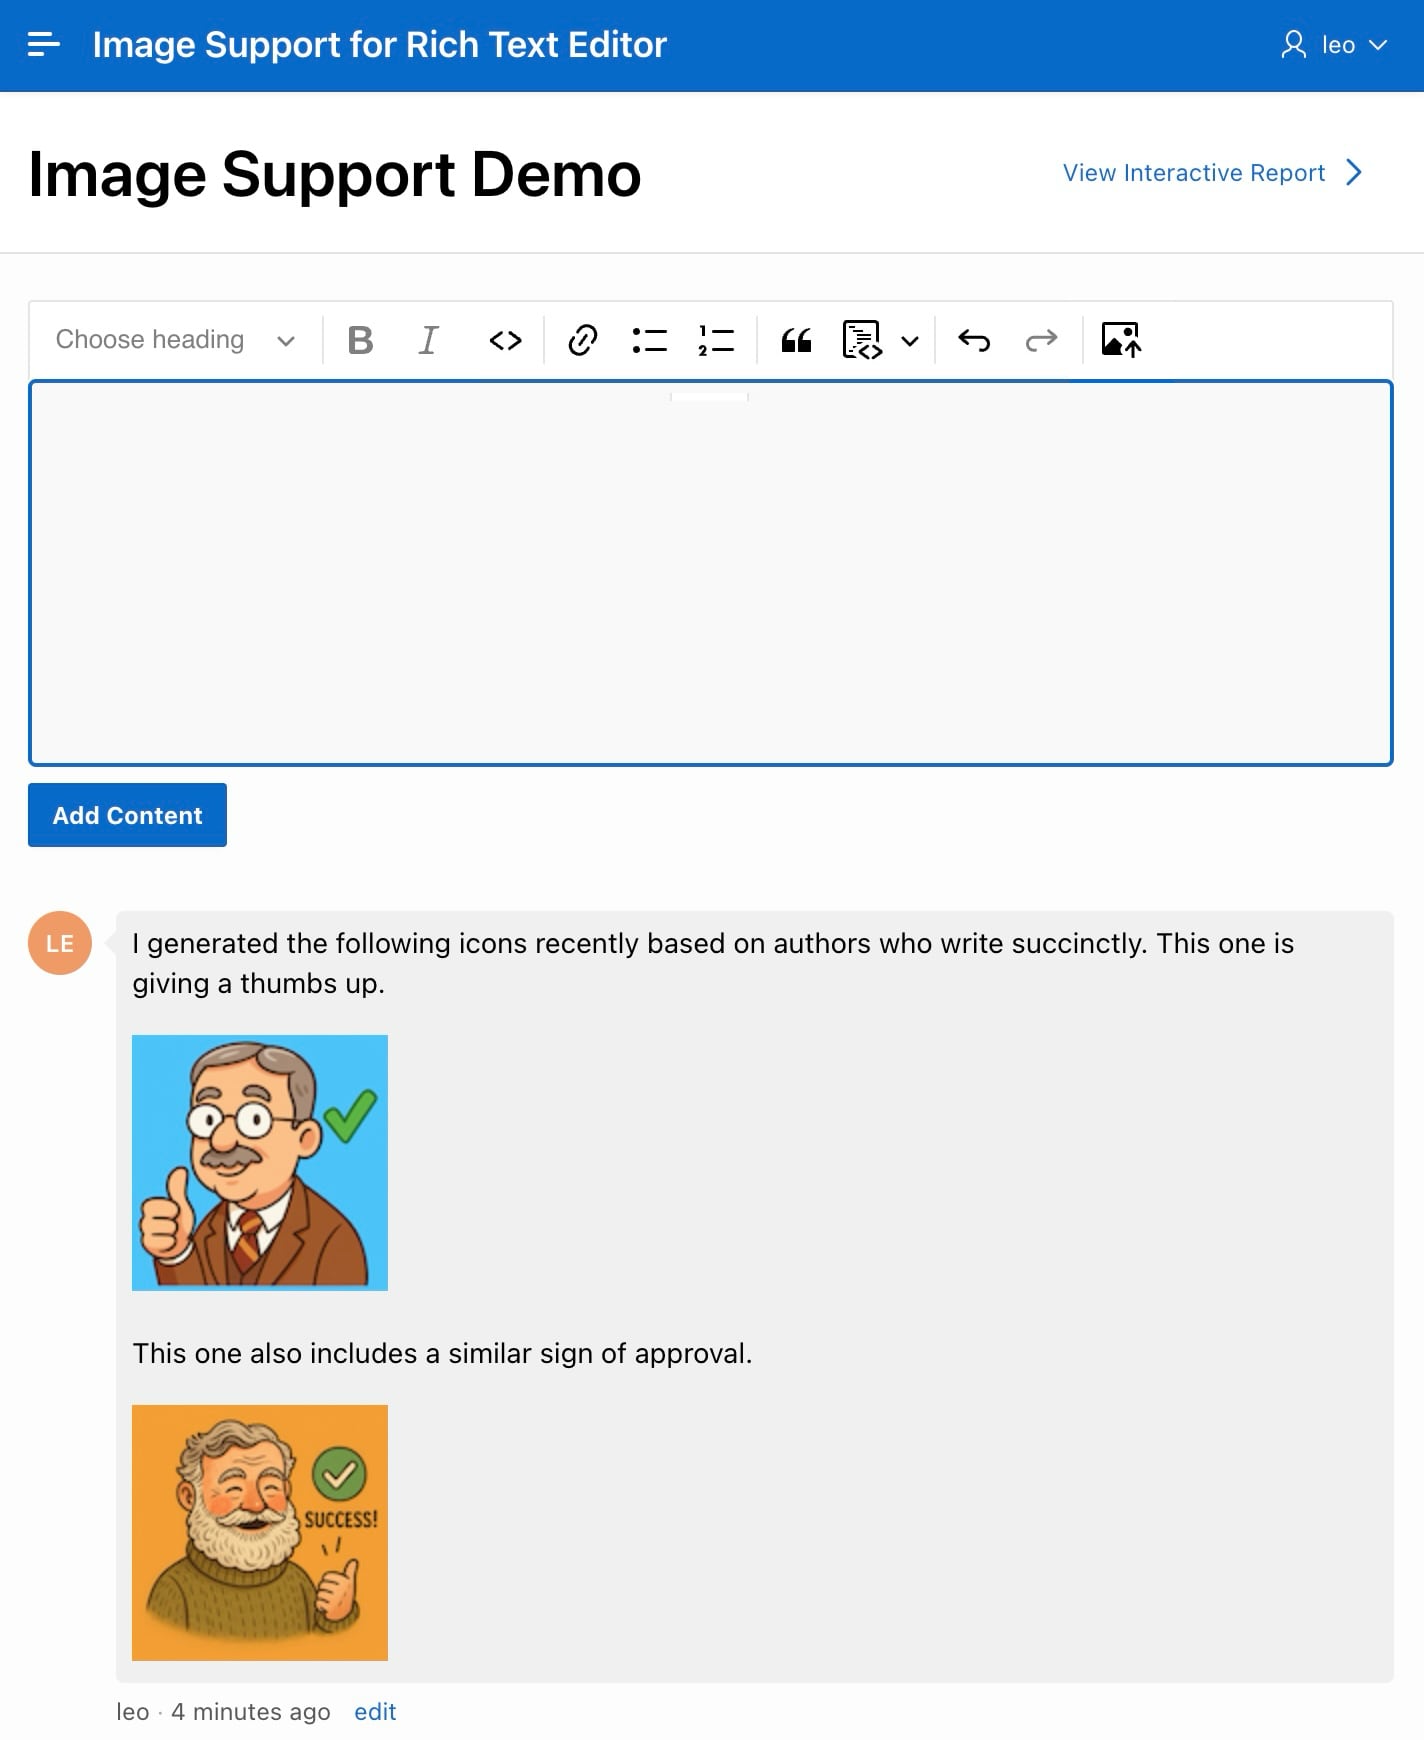
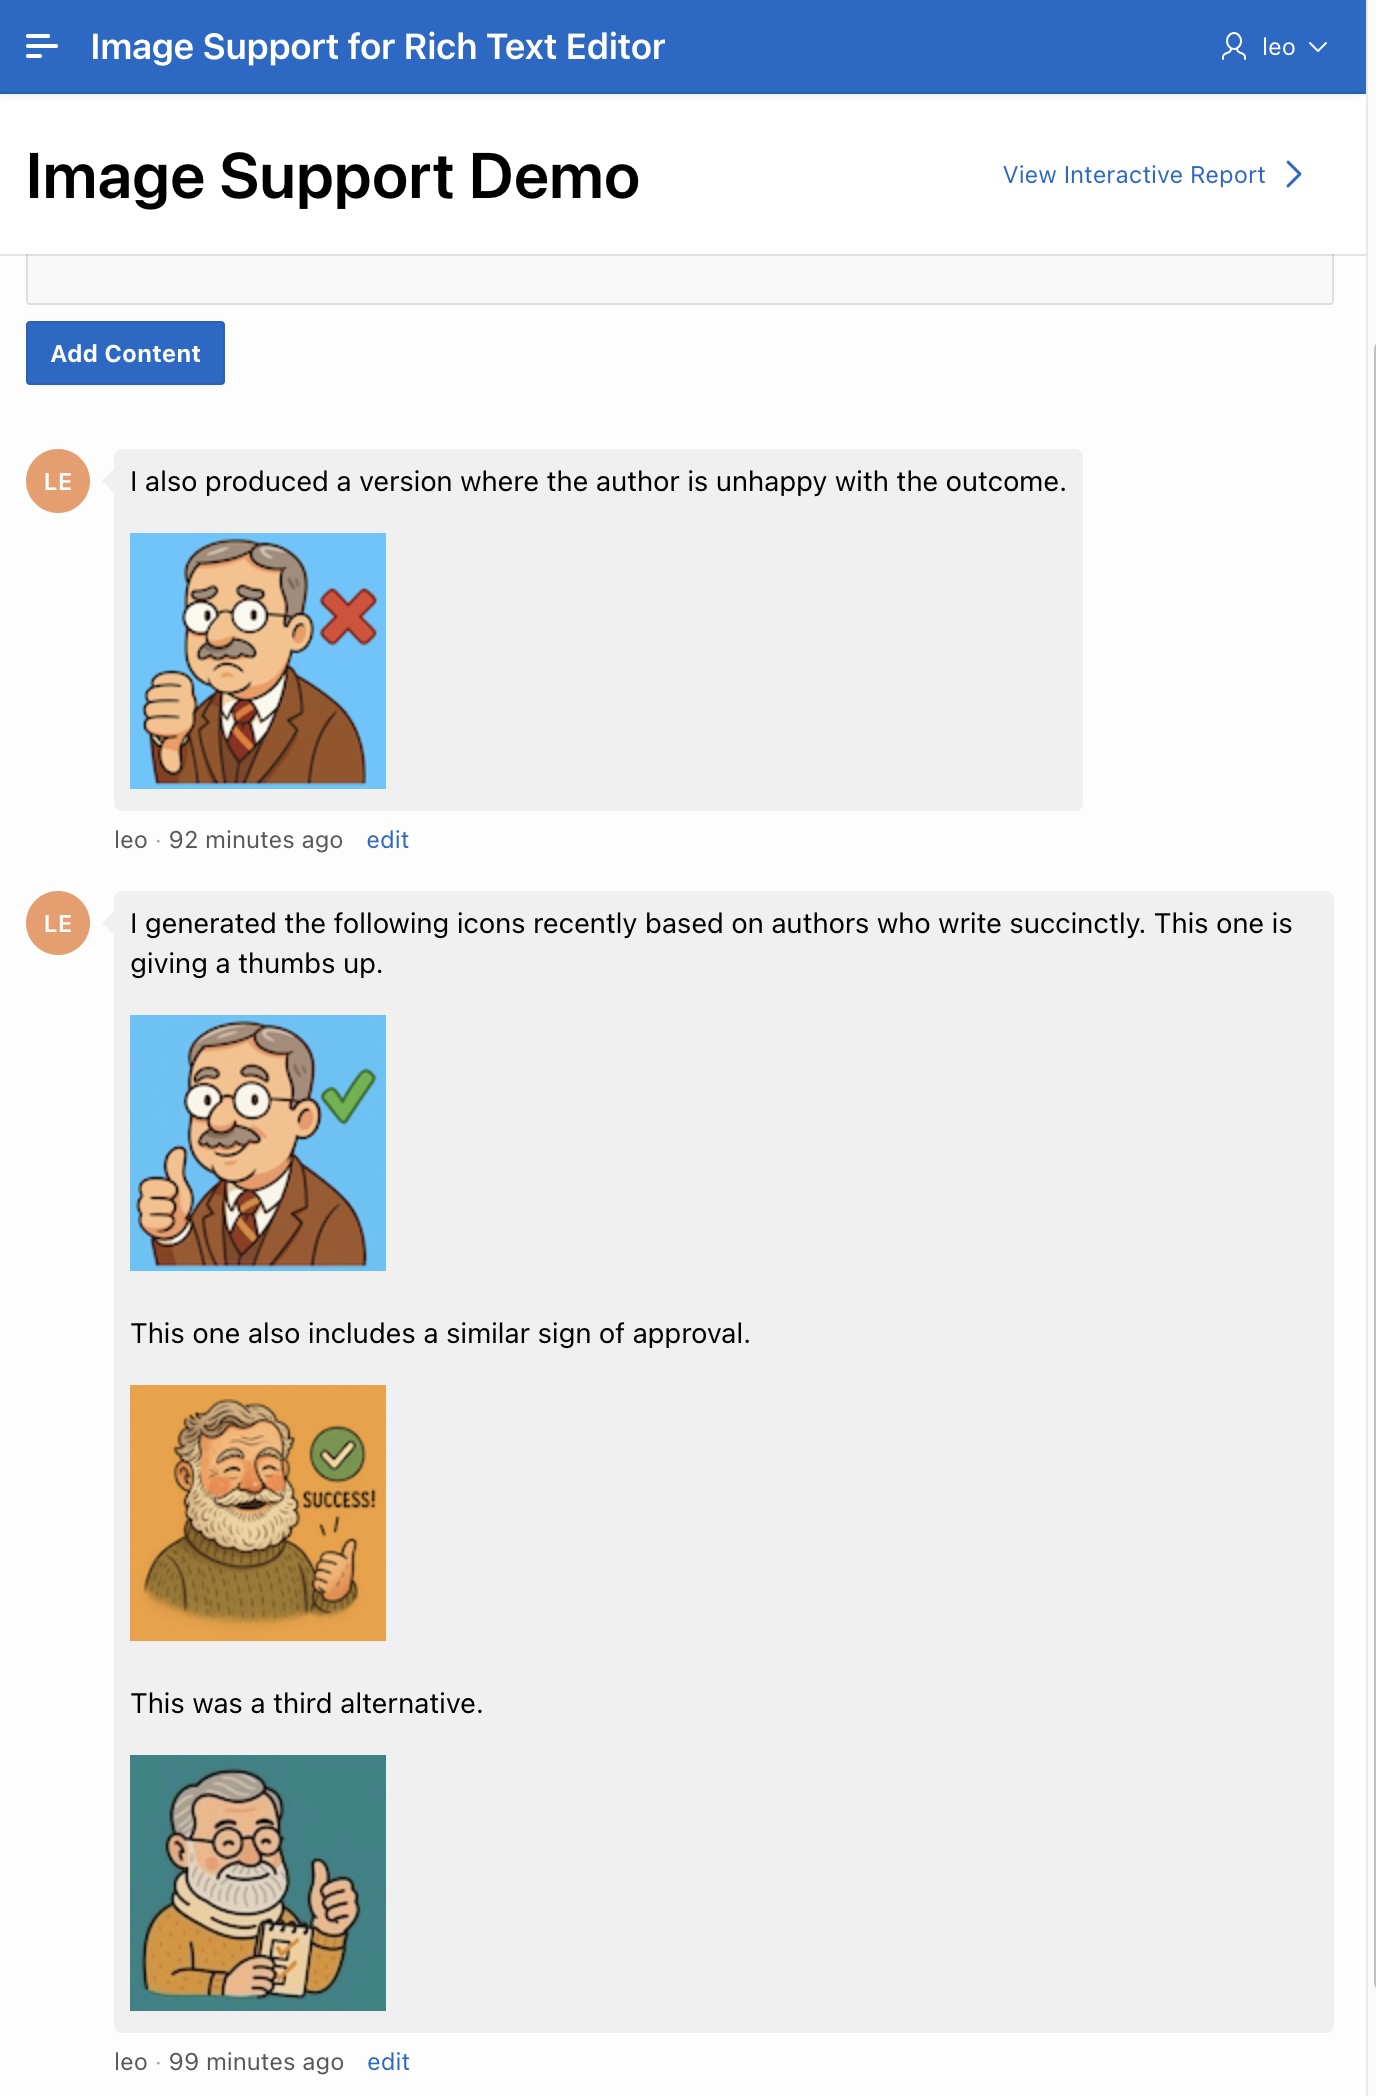
After clicking (Add Content) again, the page inserts a second comment row. They display in reverse chronological order by creation date. Notice that any comments the current user created show an edit link.
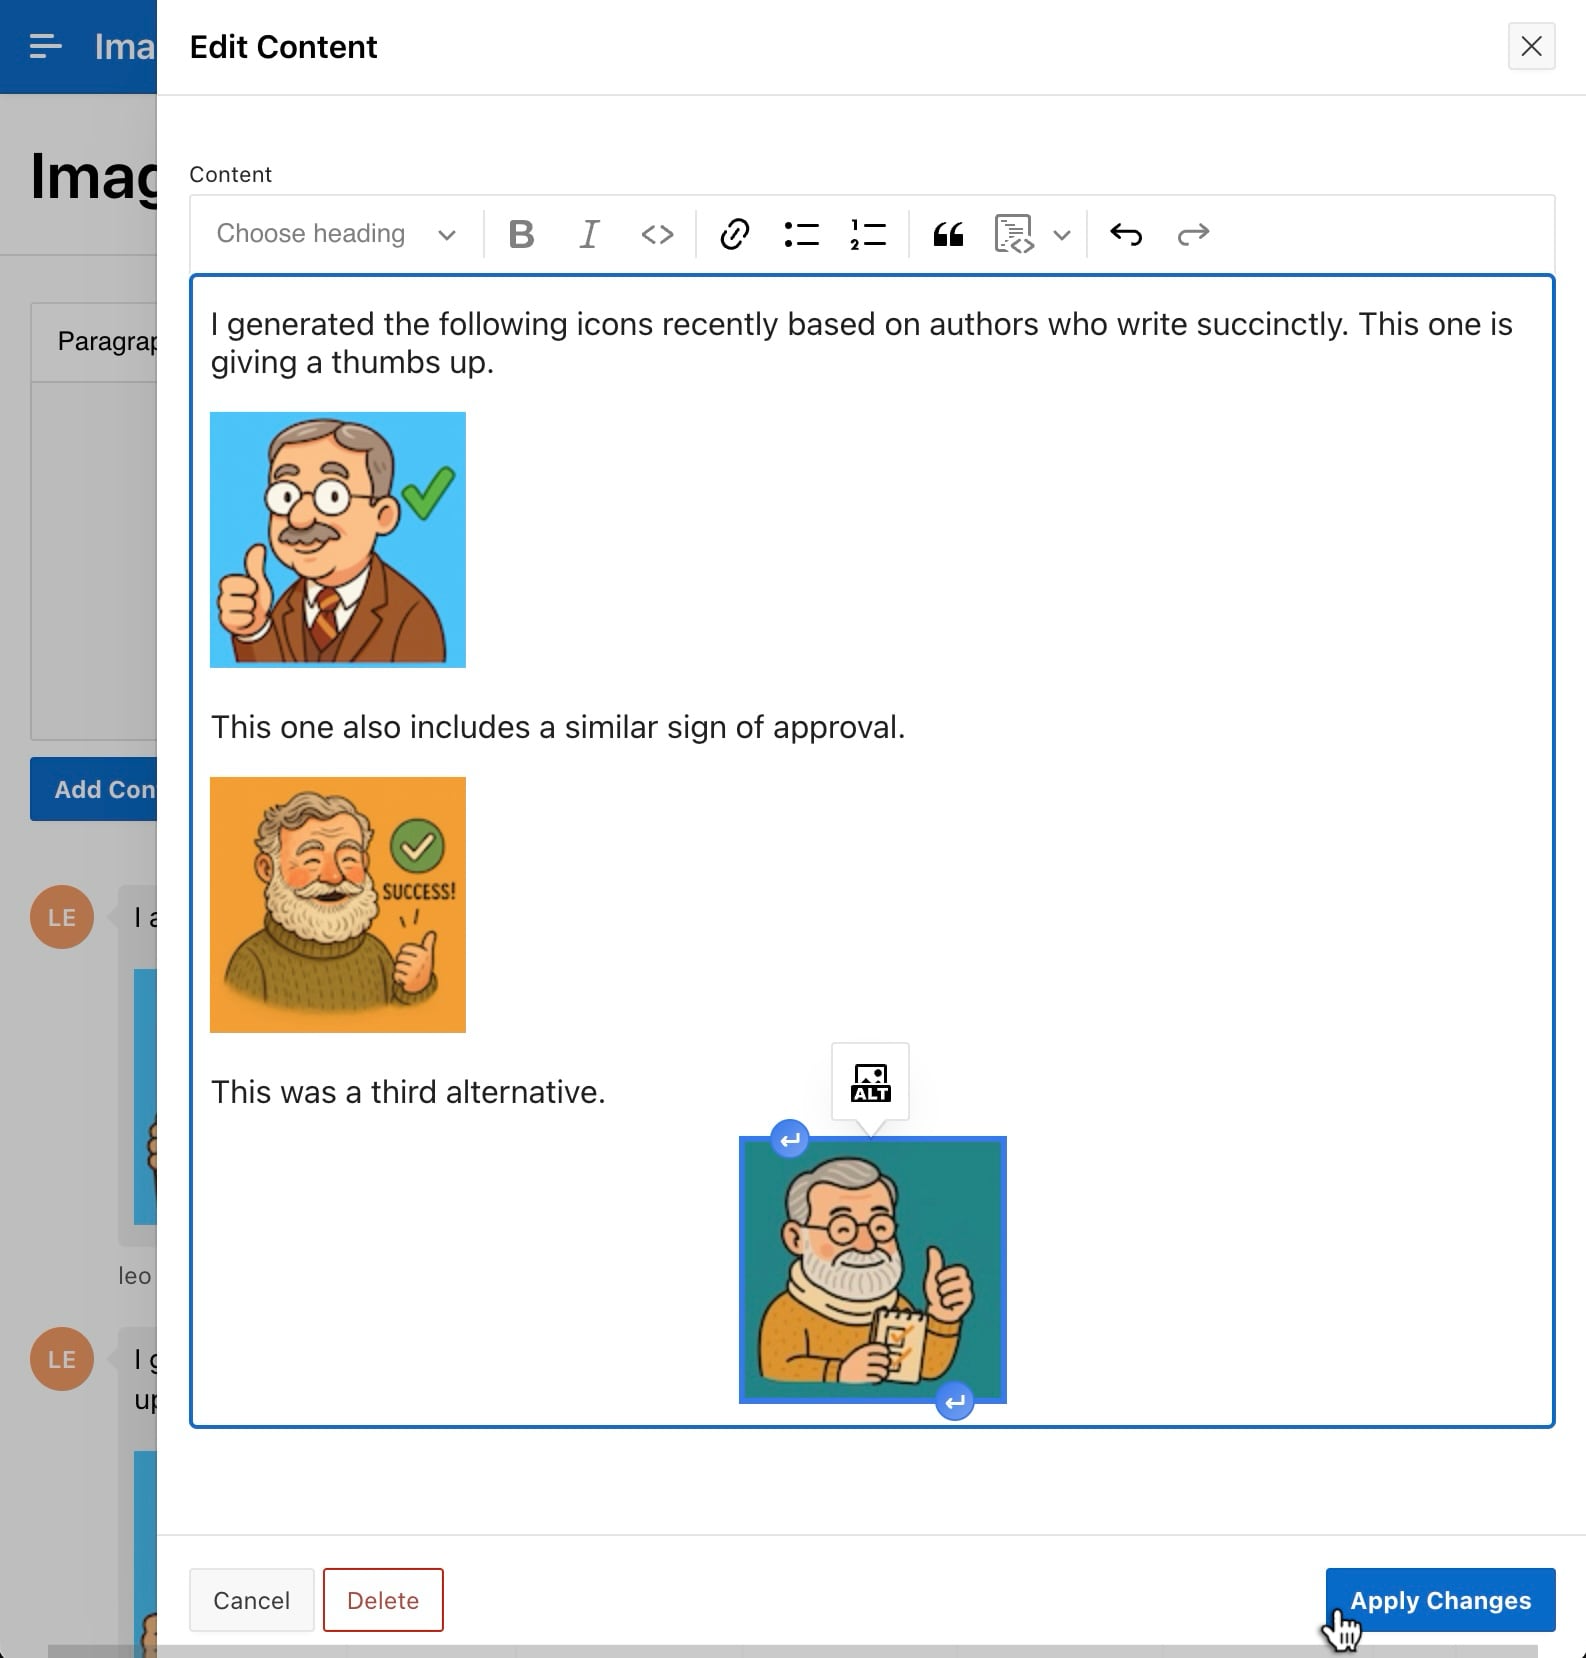
Editing an Existing Comment
To edit a comment you created, click its respective edit link to open a modal drawer. As shown below, you can edit the text and images before clicking (Apply Changes) to save your updates.
When the dialog closes, the calling page refreshes to show the updated comments.
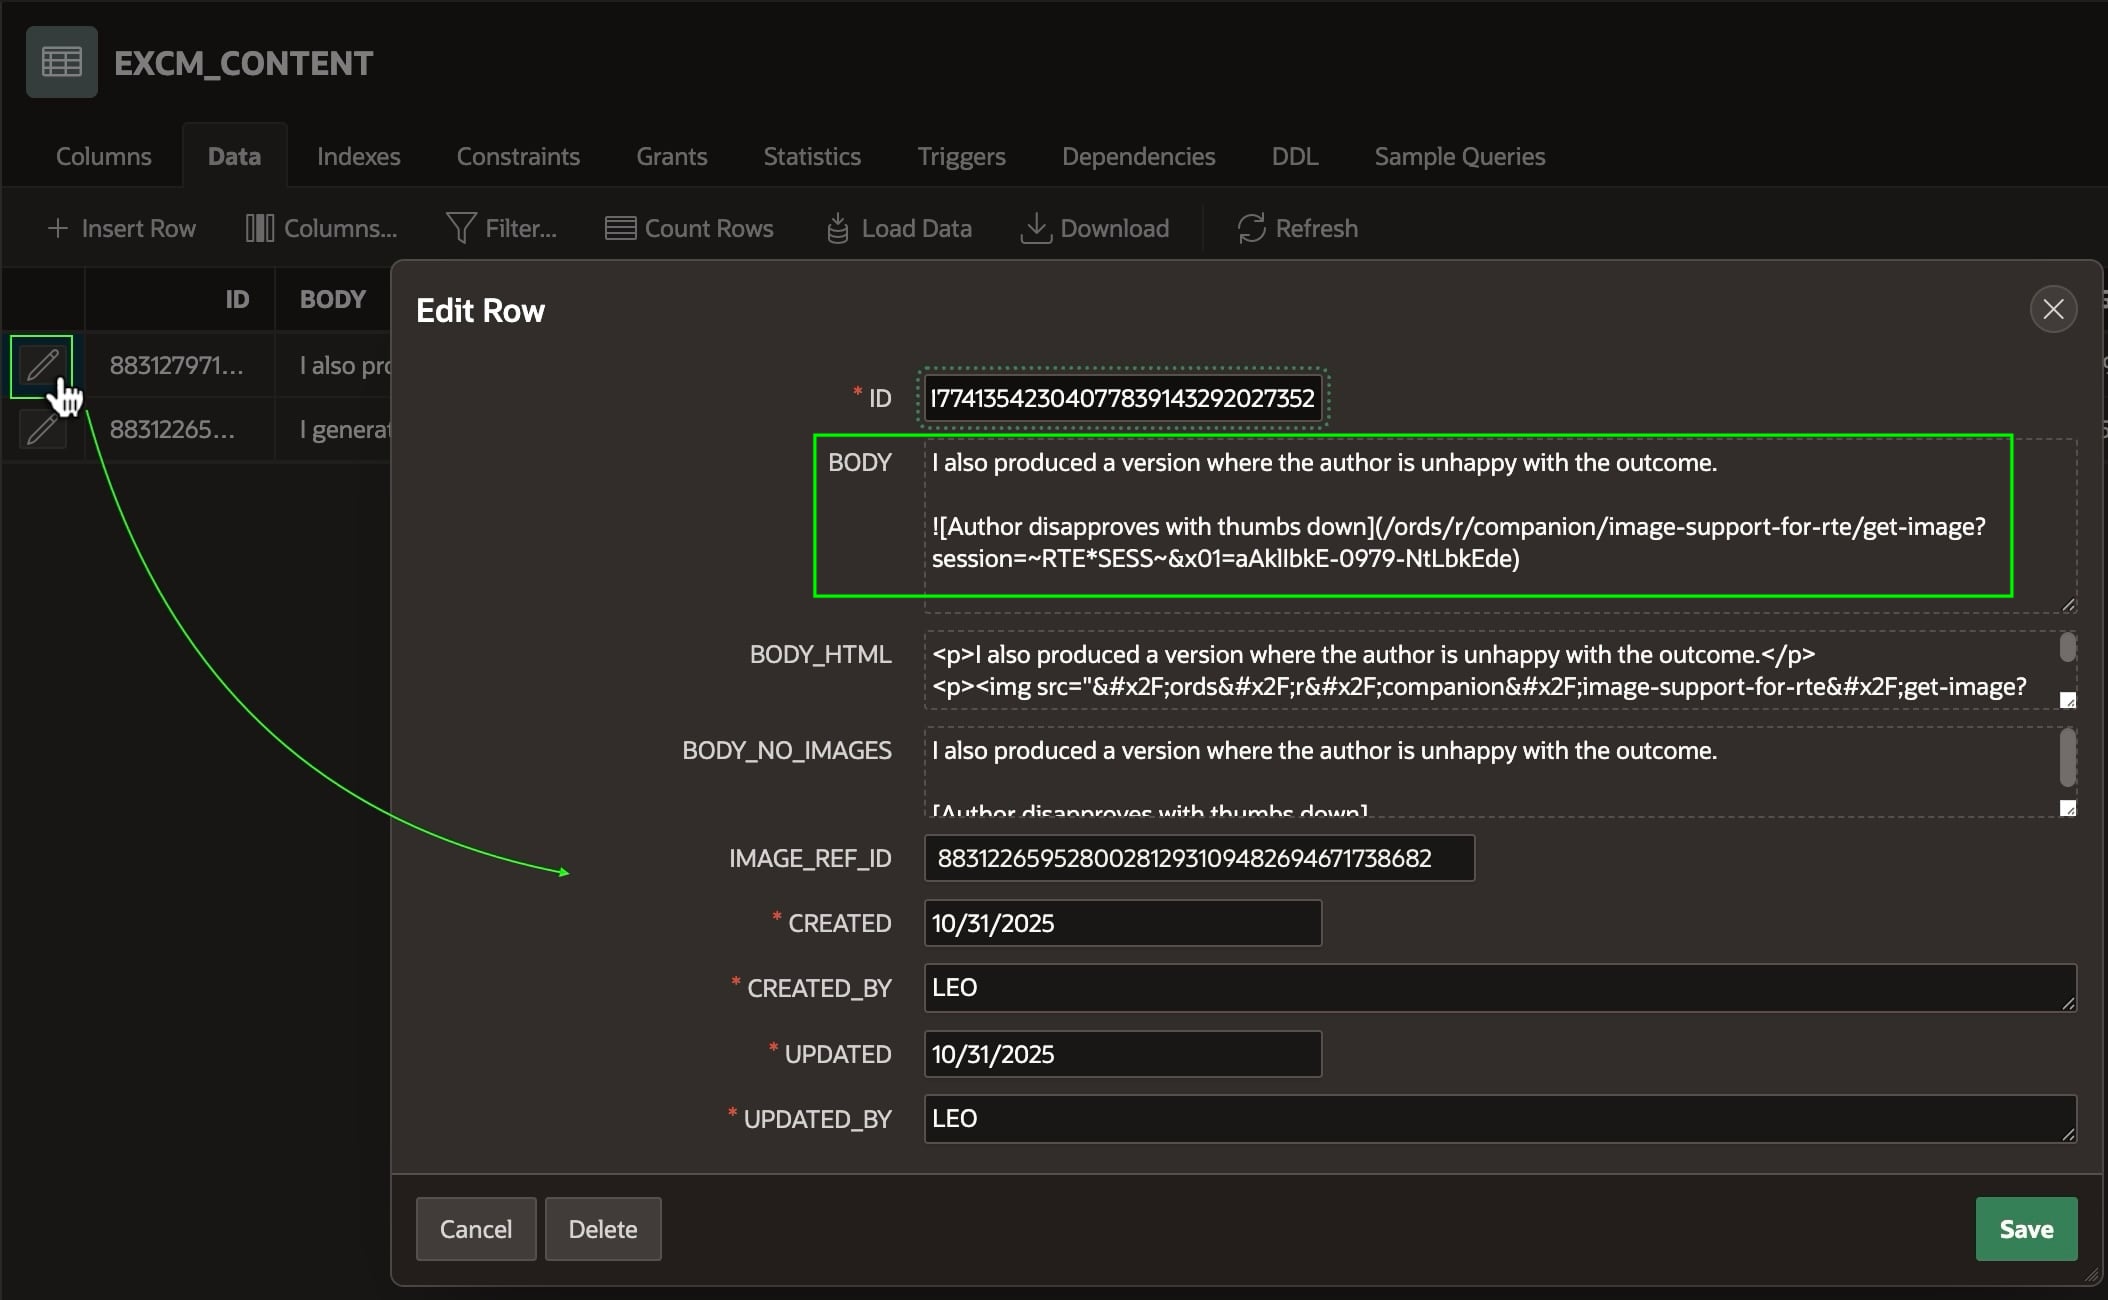
Studying the Saved Rows
Exploring the contents of the EXCM_CONTENT table in the Object Browser after performing the steps above, we see that user LEO inserted two comment rows. Clicking the pencil icon as shown below to browse the details of the most recently added comment, we see its BODY column contains the Markdown syntax for the rich text document containing a single image with alternative text.
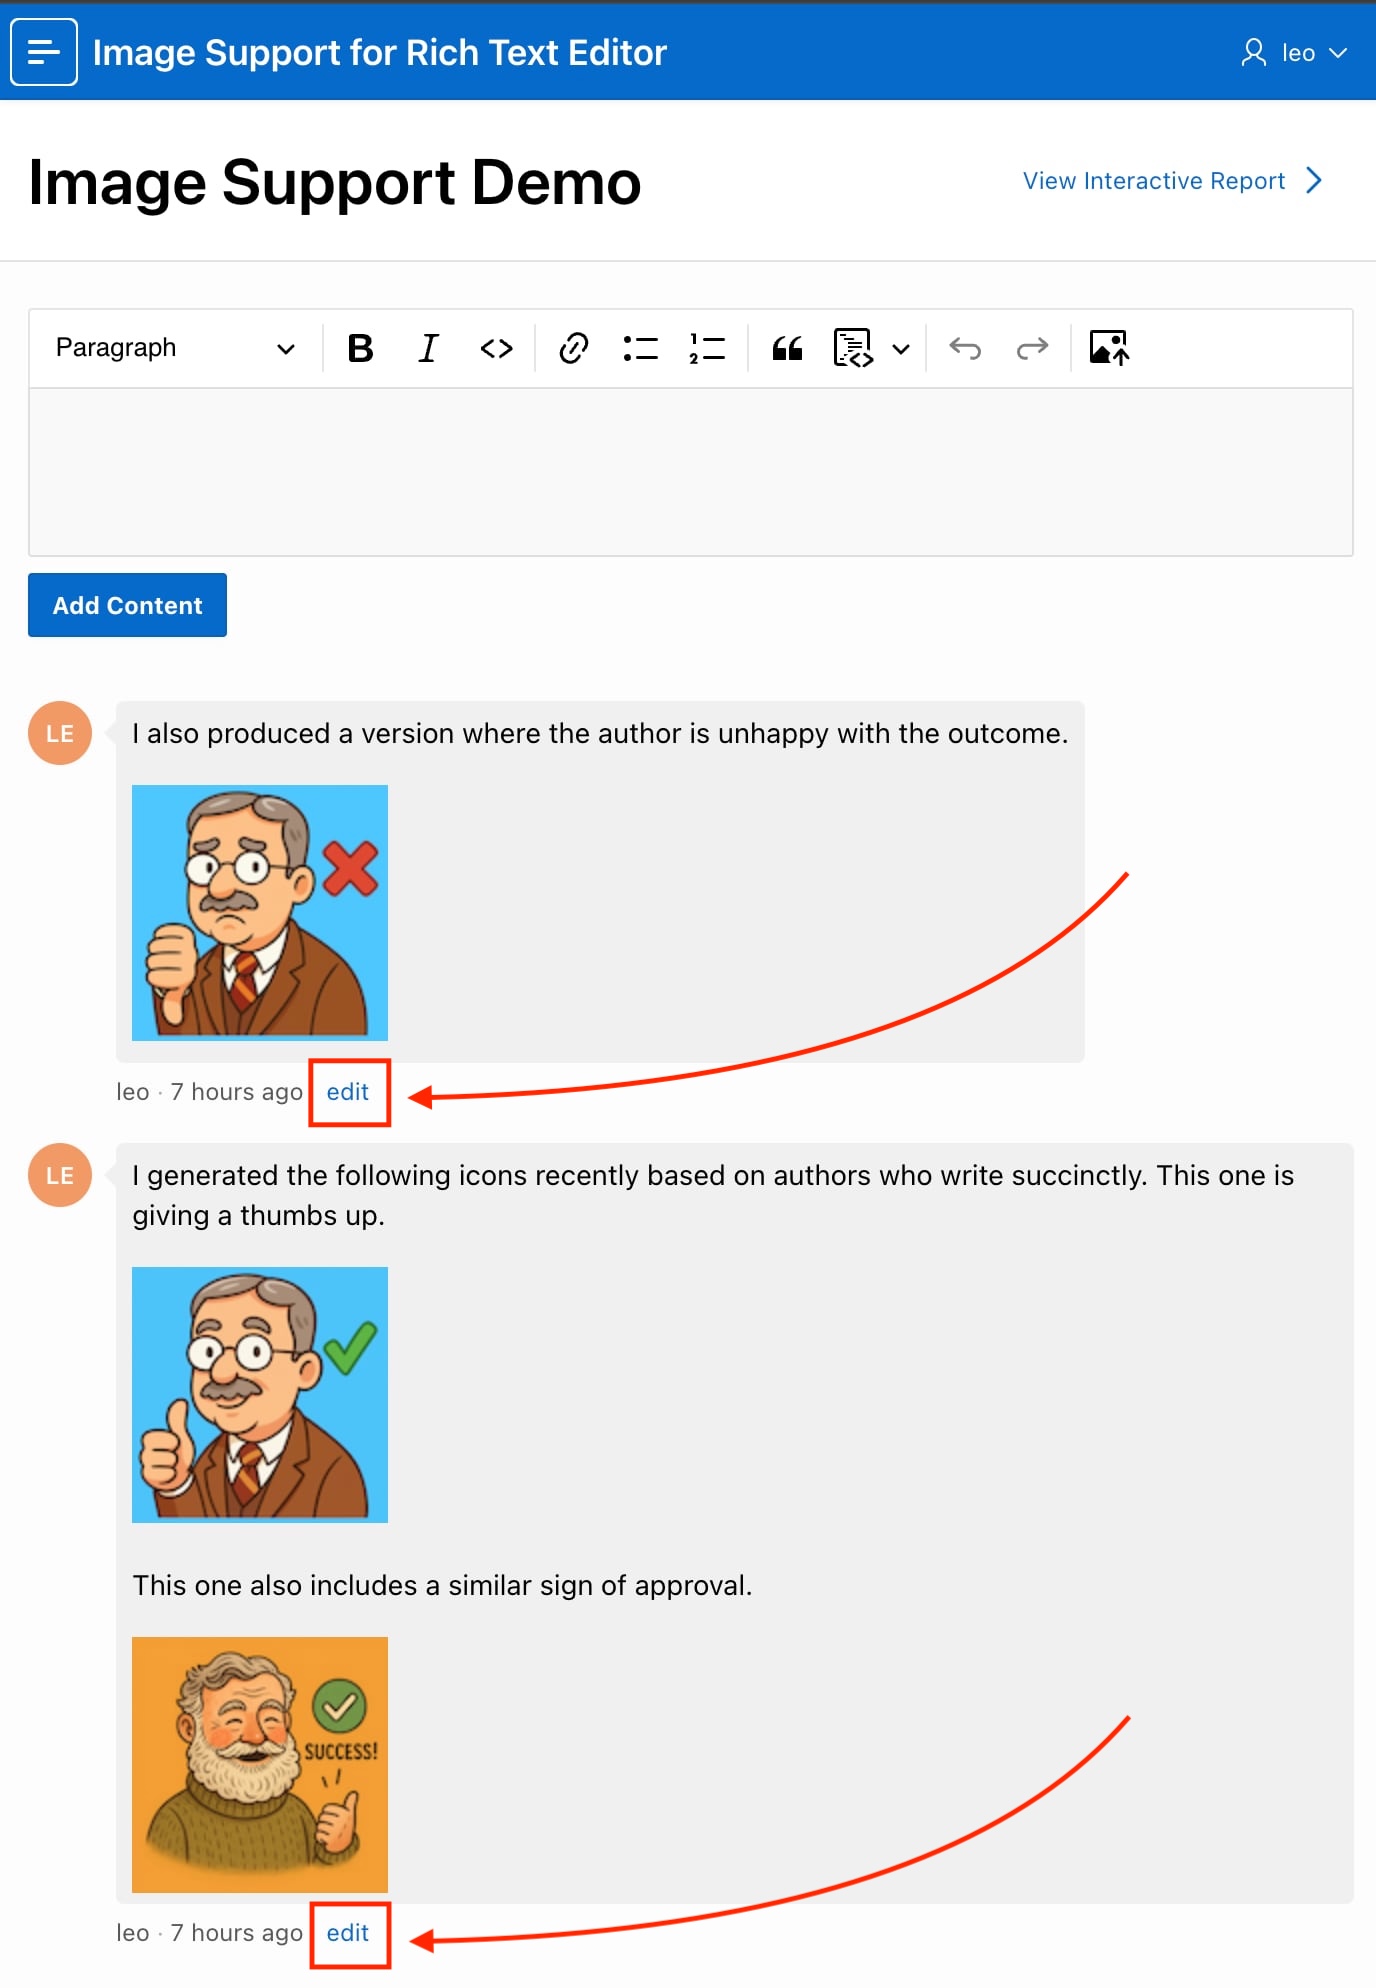
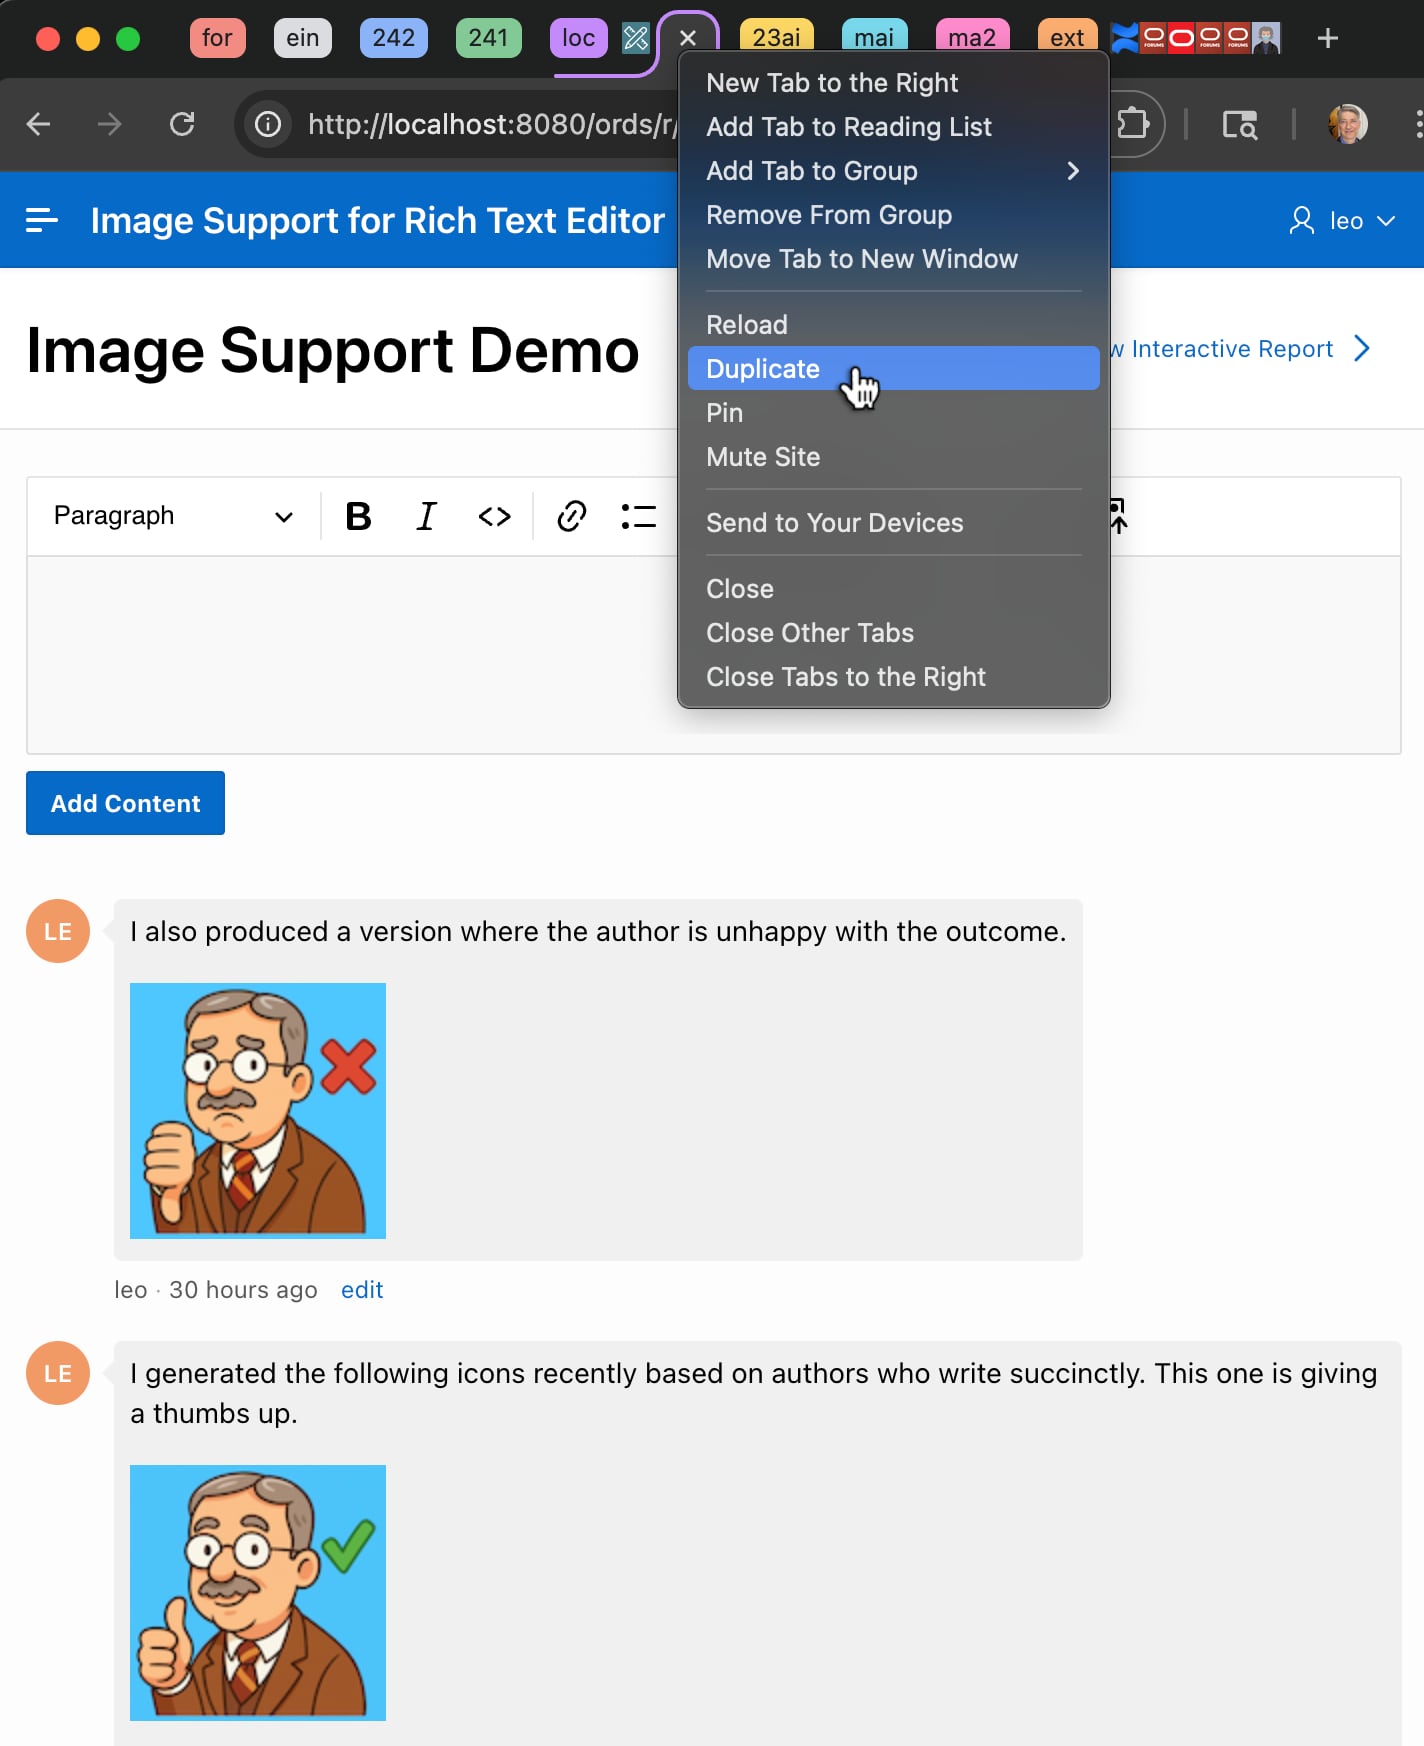
I also produced a version where the author is unhappy with the outcome.
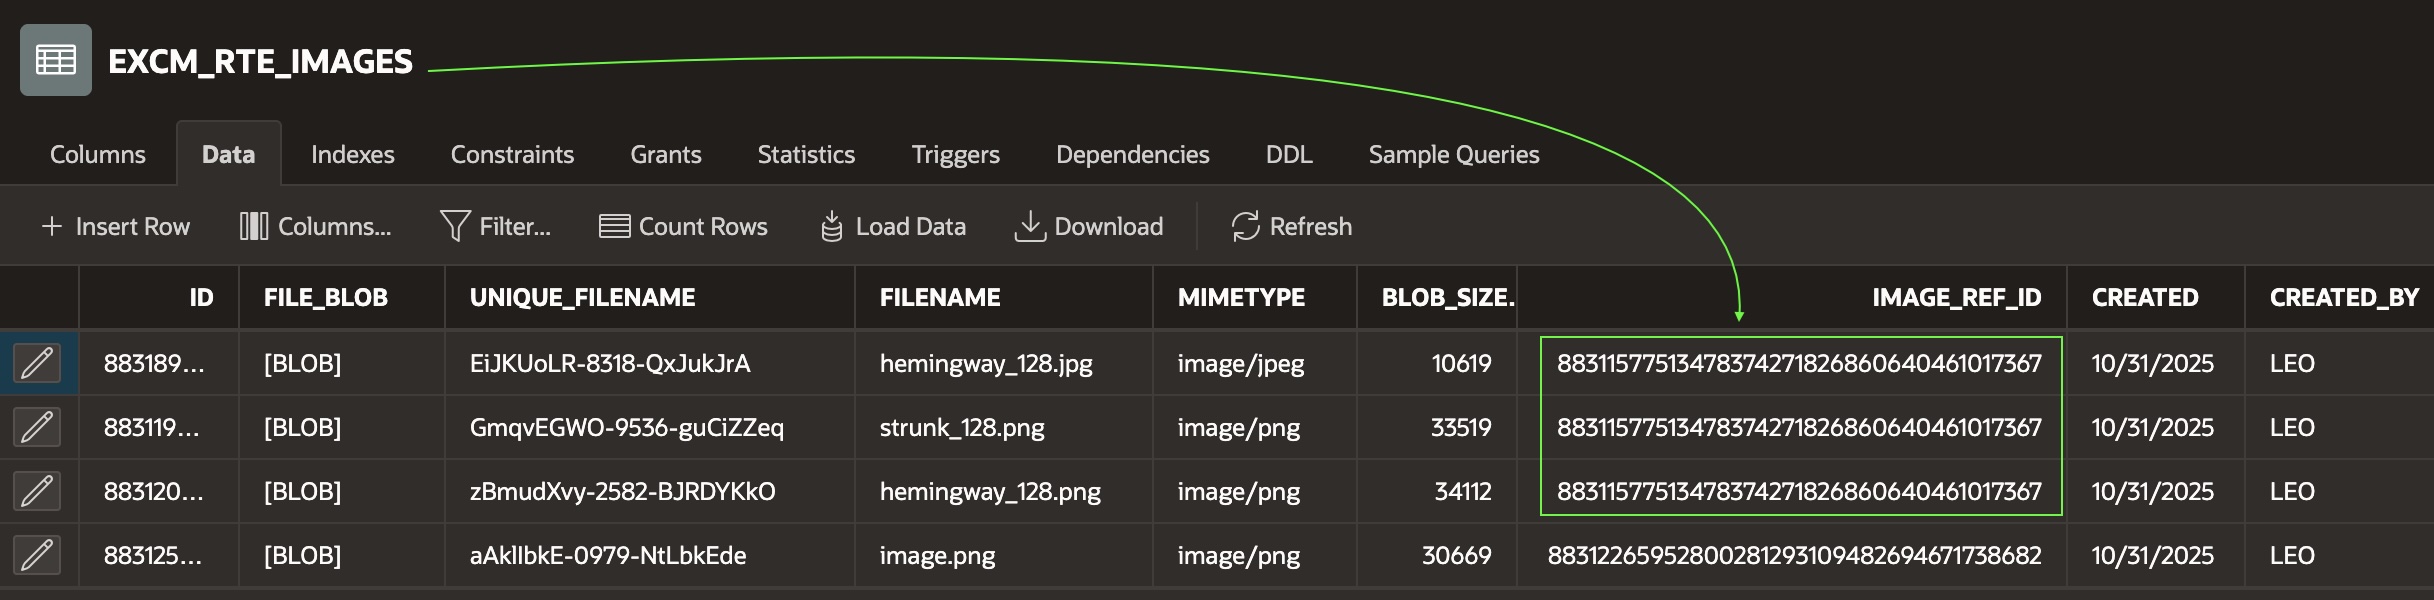
Studying the contents of the EXCM_RTE_IMAGES table in the Object Browser, we see that a total of four user-added images were uploaded and stored in the table. As shown by the highlighted rectangle, three of them share one IMAGE_REF_ID value, while the fourth one has a distinct value for IMAGE_REF_ID.
The application logic handling the image upload and storage assigns a unique, randomly-generated filename to each new image. Notice that the final image row with UNIQUE_FILENAME value aAklIbkE‑0979‑NtLbkEde has the IMAGE_REF_ID value of 883122⋯738682. This matches the value of the IMAGE_REF_ID shown in the previous figure for the most recently saved comment.
The IMAGE_REF_ID of each comment is a unique identifier for an image-referencing document, and every image it contains uses this IMAGE_REF_ID value as a foreign key to reference the document it belongs to. As we’ll see later, this relationship based on IMAGE_REF_ID lets helper code automatically detect and cleanup “orphaned” images. These are ones users added, but which no document in the system references anymore.
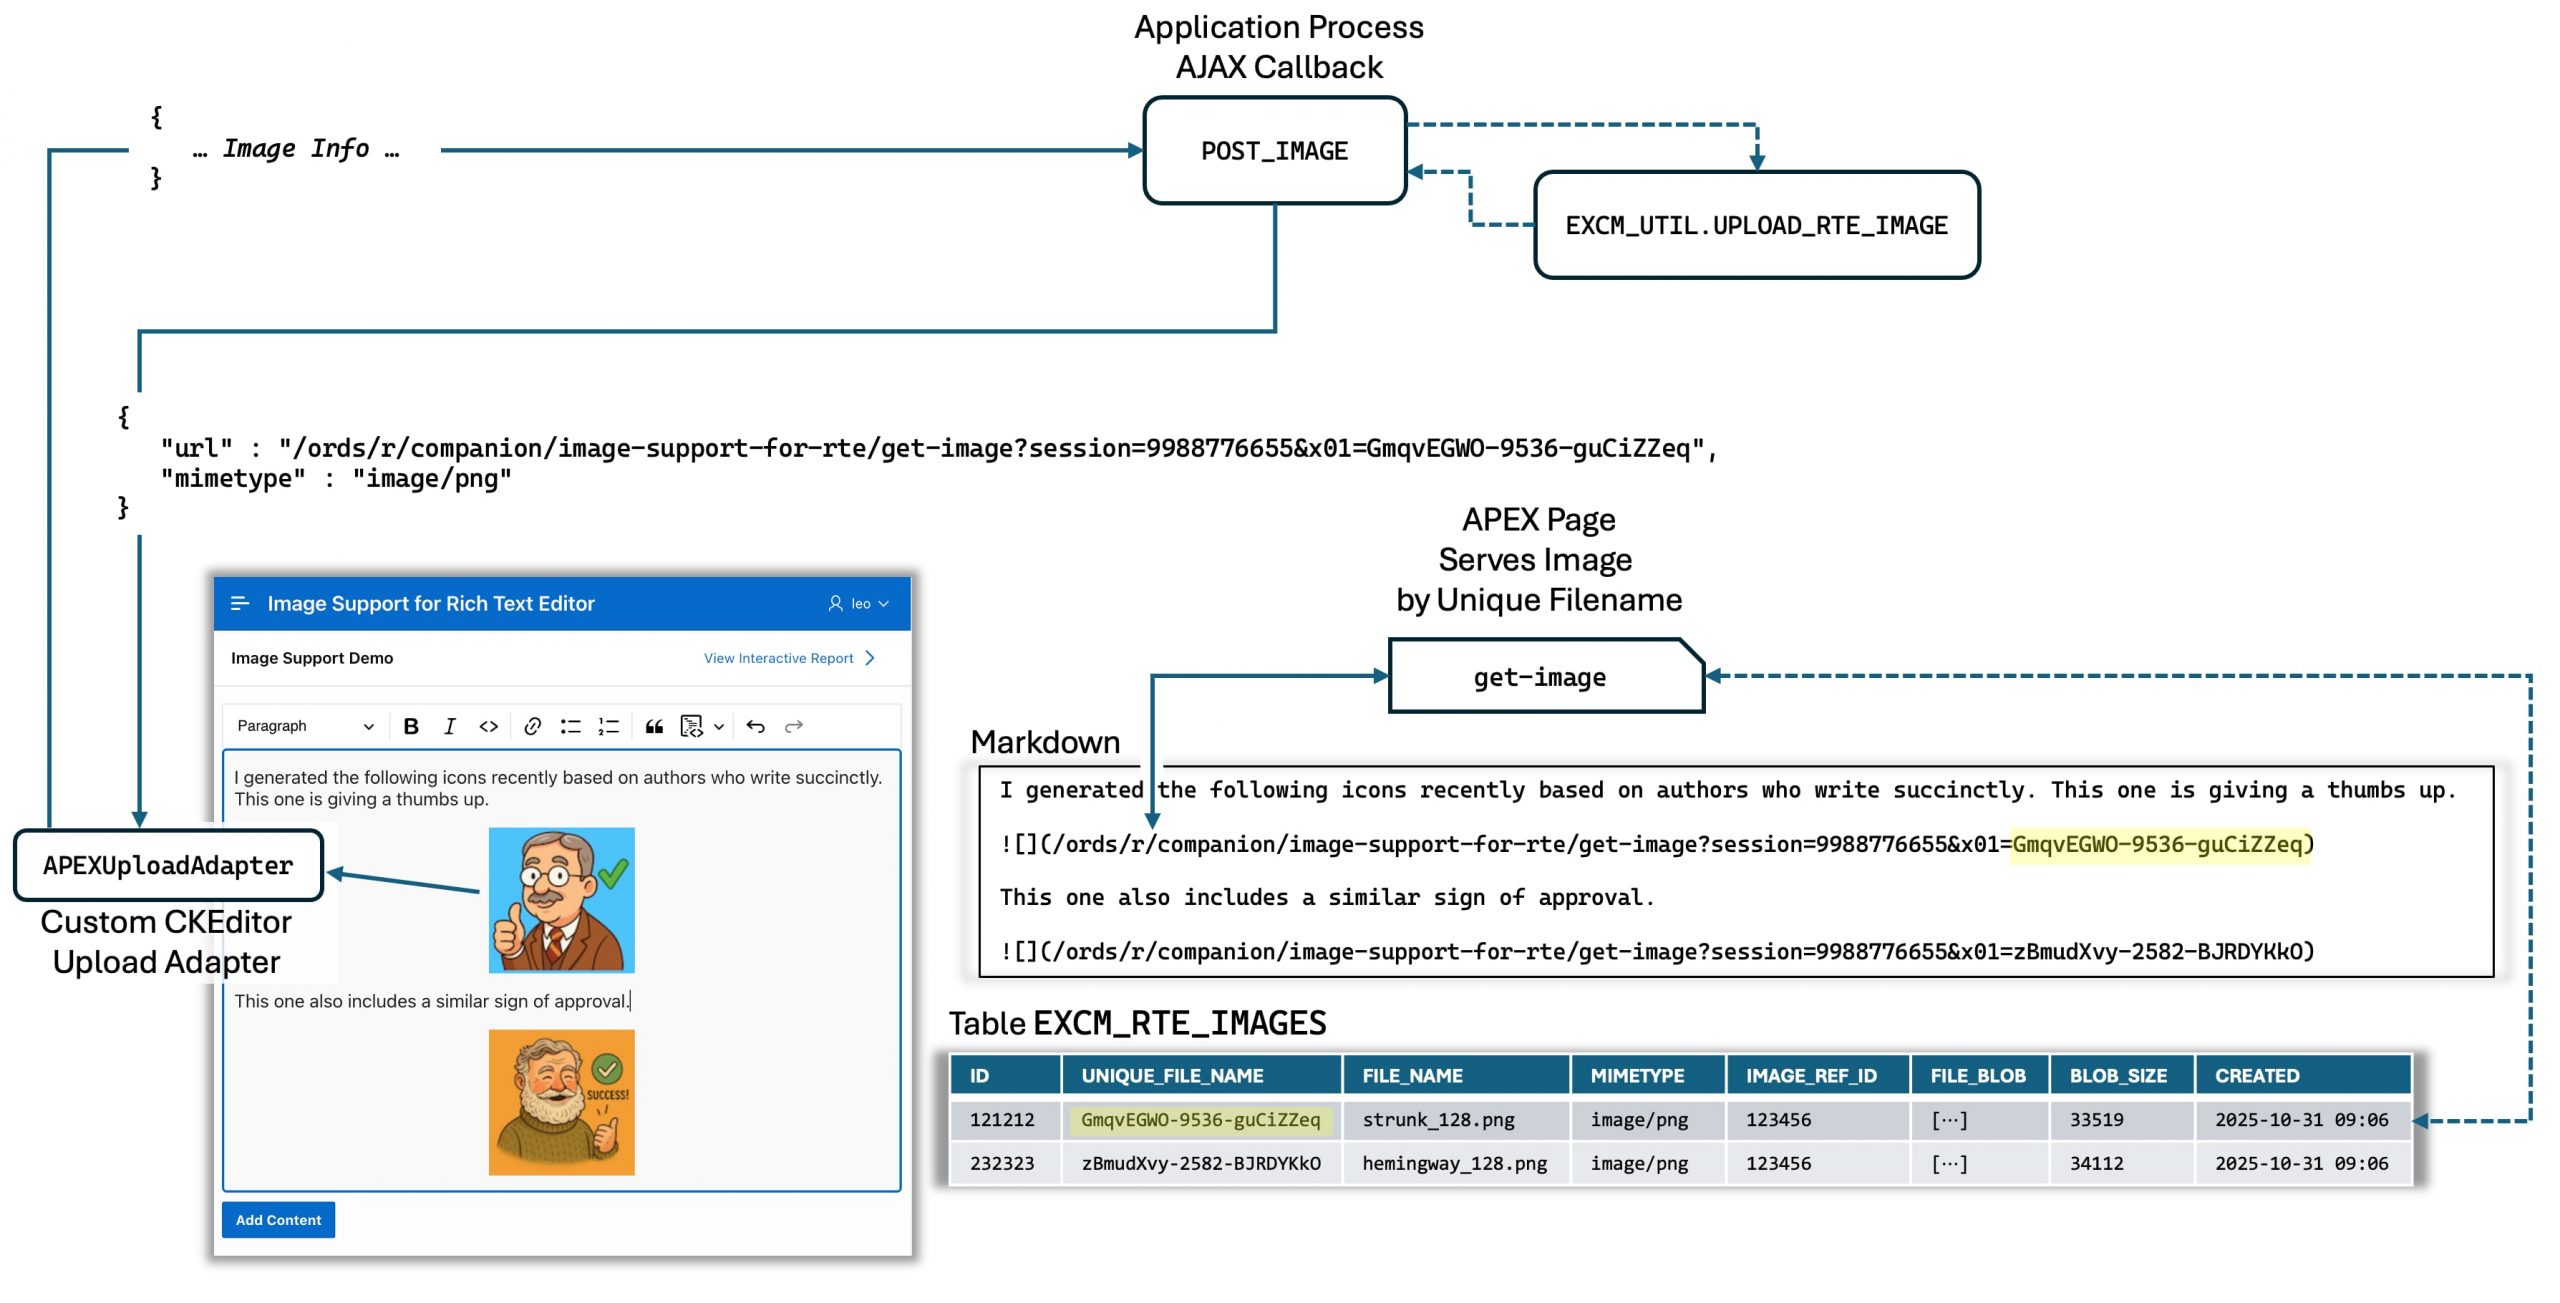
Referencing an Image by Unique Filename
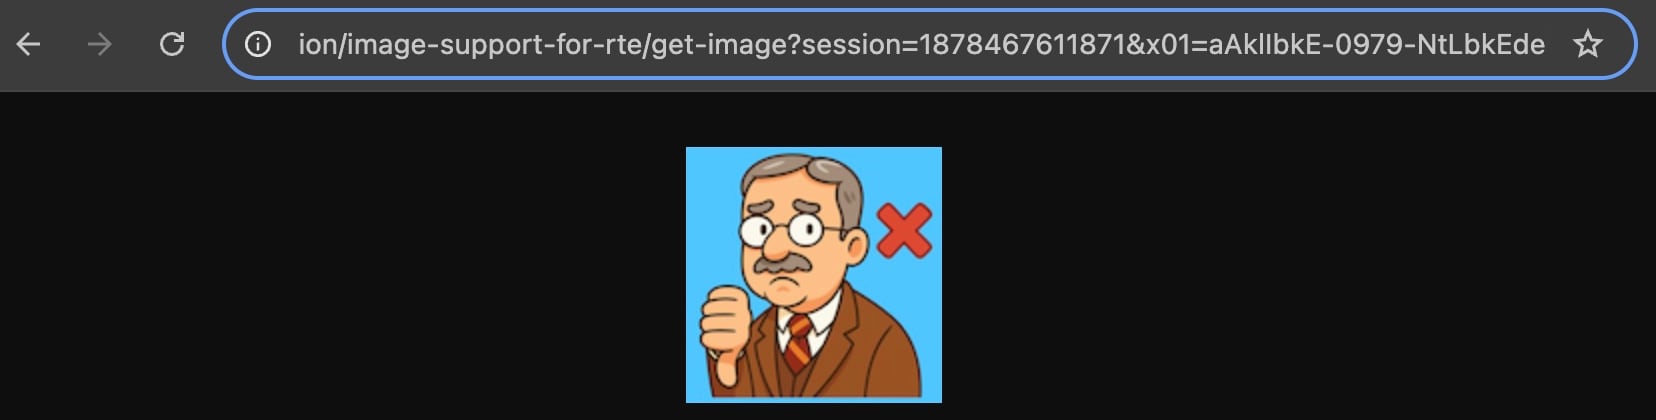
By selecting a UNIQUE_FILENAME value like aAklIbkE‑0979‑NtLbkEde, you can see how the sample uses it in a get-image page URL to reference an uploaded image in a document. Start by duplicating the sample application’s browser tab.
In the new tab, change the /demo? part of the URL to /get-image? instead, and after the session= query string parameter, add on the additional parameter &x01=aAklIbkE-0979-NtLbkEde to produce a new URL that ends like the one below (all in a single line!). Of course, your session ID value will differ so just use the session value that’s in the duplicated tab’s URL already:
⋯/ords/r/companion/image-support-for-rte/get-image?session=1878467611871&x01=aAklIbkE-0979-NtLbkEdeWhen you press [Enter] to retrieve the page with this URL, as shown below, you see the image identified by the unique filename you used as the value of the x01 parameter. We’ll see more about how the get page serves images shortly. But, this experiment helps you understand how a document in HTML or Markdown can reference an uploaded image by URL.‑image
get-image Page the Serves an Uploaded Image by Unique FilenameExperiencing Authenticated Image Access
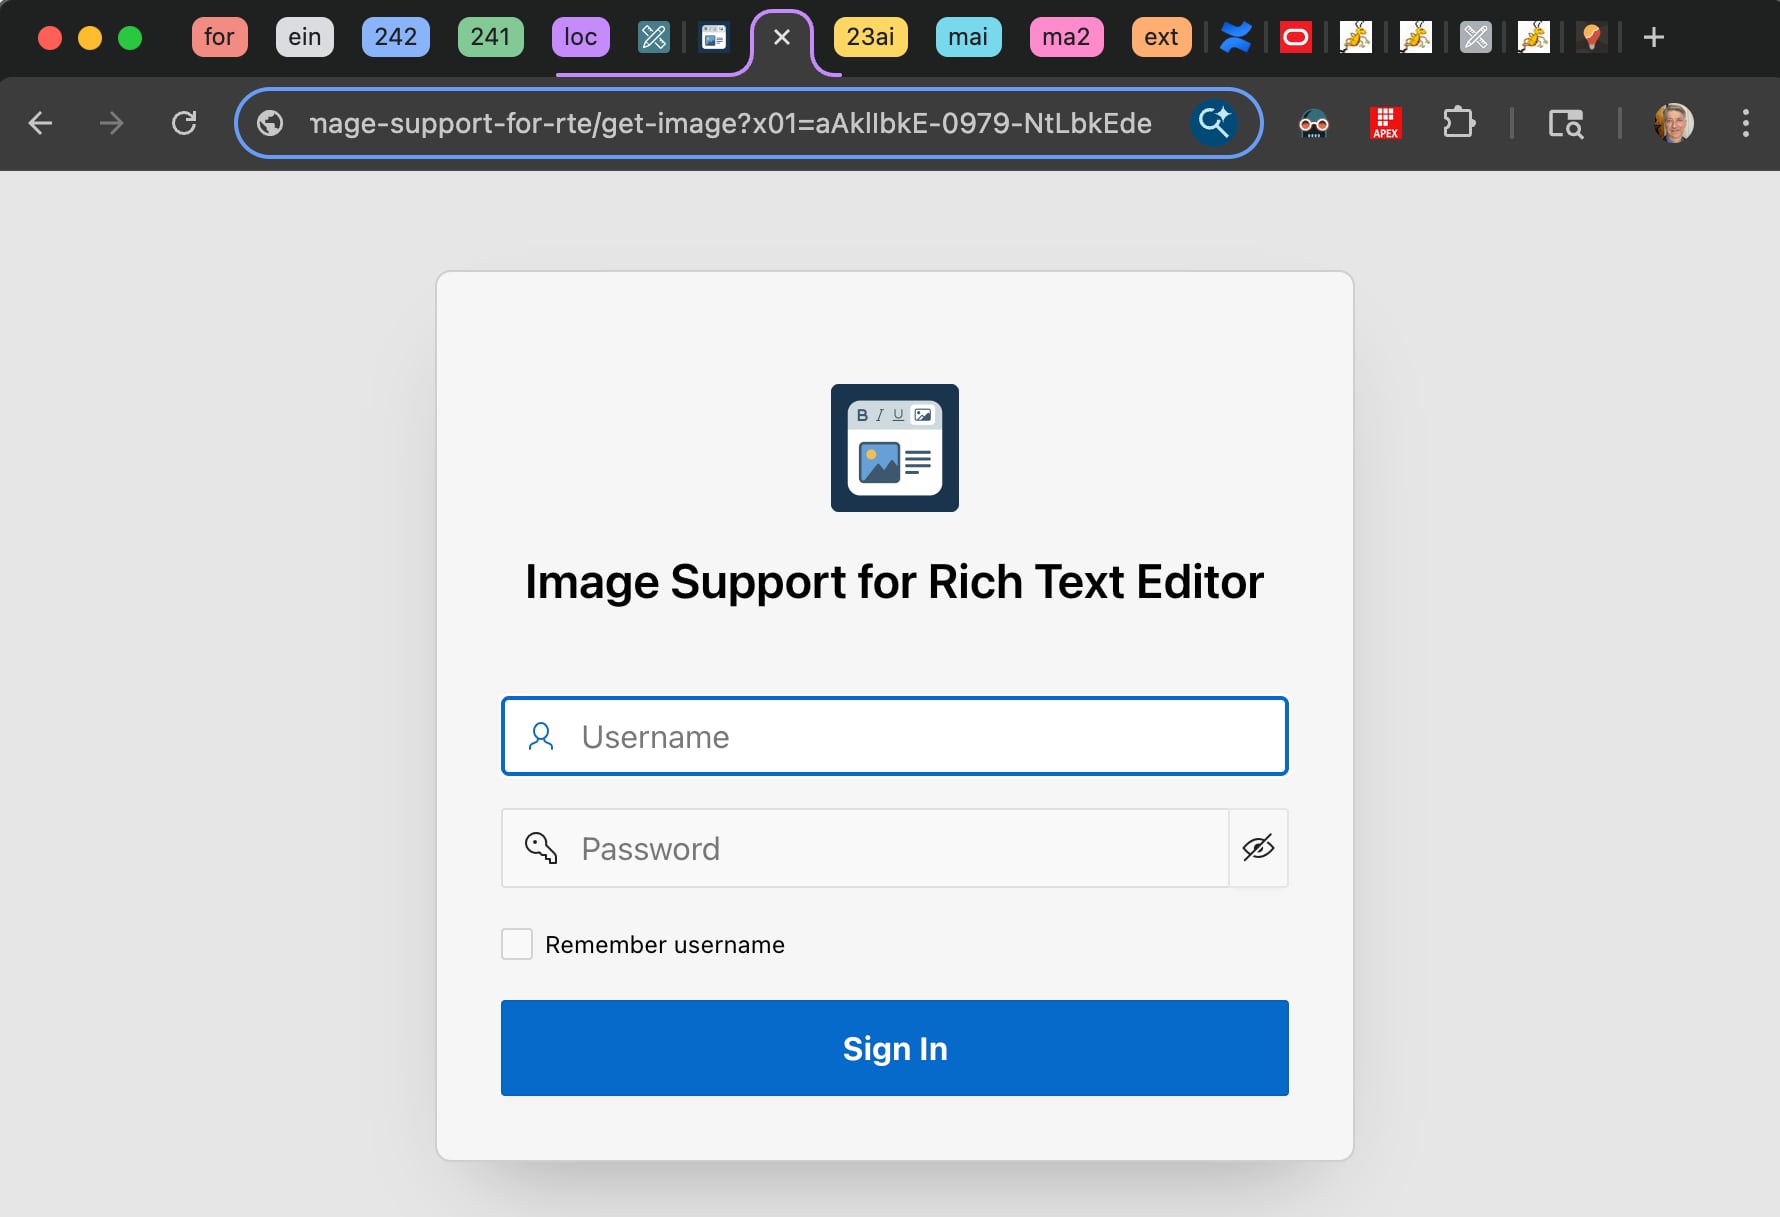
A clever corollary of using an APEX page to serve the image is authenticated access. In fact, if you repeat the experiment above but remove the session= parameter from the URL, then as shown below, the user sees the login page. An unauthenticated user can’t view the images.
Overview of Image Support Sample Application Logic
Oracle APEX’s Rich Text Editor page item inherits a rich set of customization options from the open source CKEditor 5 library. Among these, you can define an upload adapter to save added images using custom logic. The figure below shows a high-level overview of how the one in the sample application works.
The Rich Text Editor component engages a custom APEXUploadAdapter any time an image is added to the document. That adapter posts the base64-encoded image to a POST_IMAGE application process AJAX Callback in JSON format. This passes the image info to the UPLOAD_RTE_IMAGE function in the EXCM_UTIL package which:
- Creates a unique filename,
- Inserts the image into the
EXCM_RTE_IMAGEStable, and - Returns a JSON payload containing the new image URL.
The upload adapter then embeds the added image URL in the document. The Rich Text Editor immediately uses this image URL to retrieve the image to display to the user.
Associating IMAGE_REF_ID with Added Images
The page with the Rich Text Editor item contains a hidden page item like P2_IMAGE_REF_ID shown below. It stores the unique document id to associate with added images. When the page first renders, the hidden field uses the following simple expression to generate a unique id value:
to_number(sys_guid(), 'XXXXXXXXXXXXXXXXXXXXXXXXXXXXXXXX') The APEXUploadAdapter passes this value in the x01 parameter as a small JSON document with the key imageRefId, and then the UPLOAD_RTE_IMAGE procedure called by the POST_IMAGE application process AJAX callback inserts that value into the IMAGE_REF_ID foreign key column when it inserts the image into the EXCM_RTE_IMAGES table. It creates a JSON response payload that includes the new URL containing the image’s unique filename.
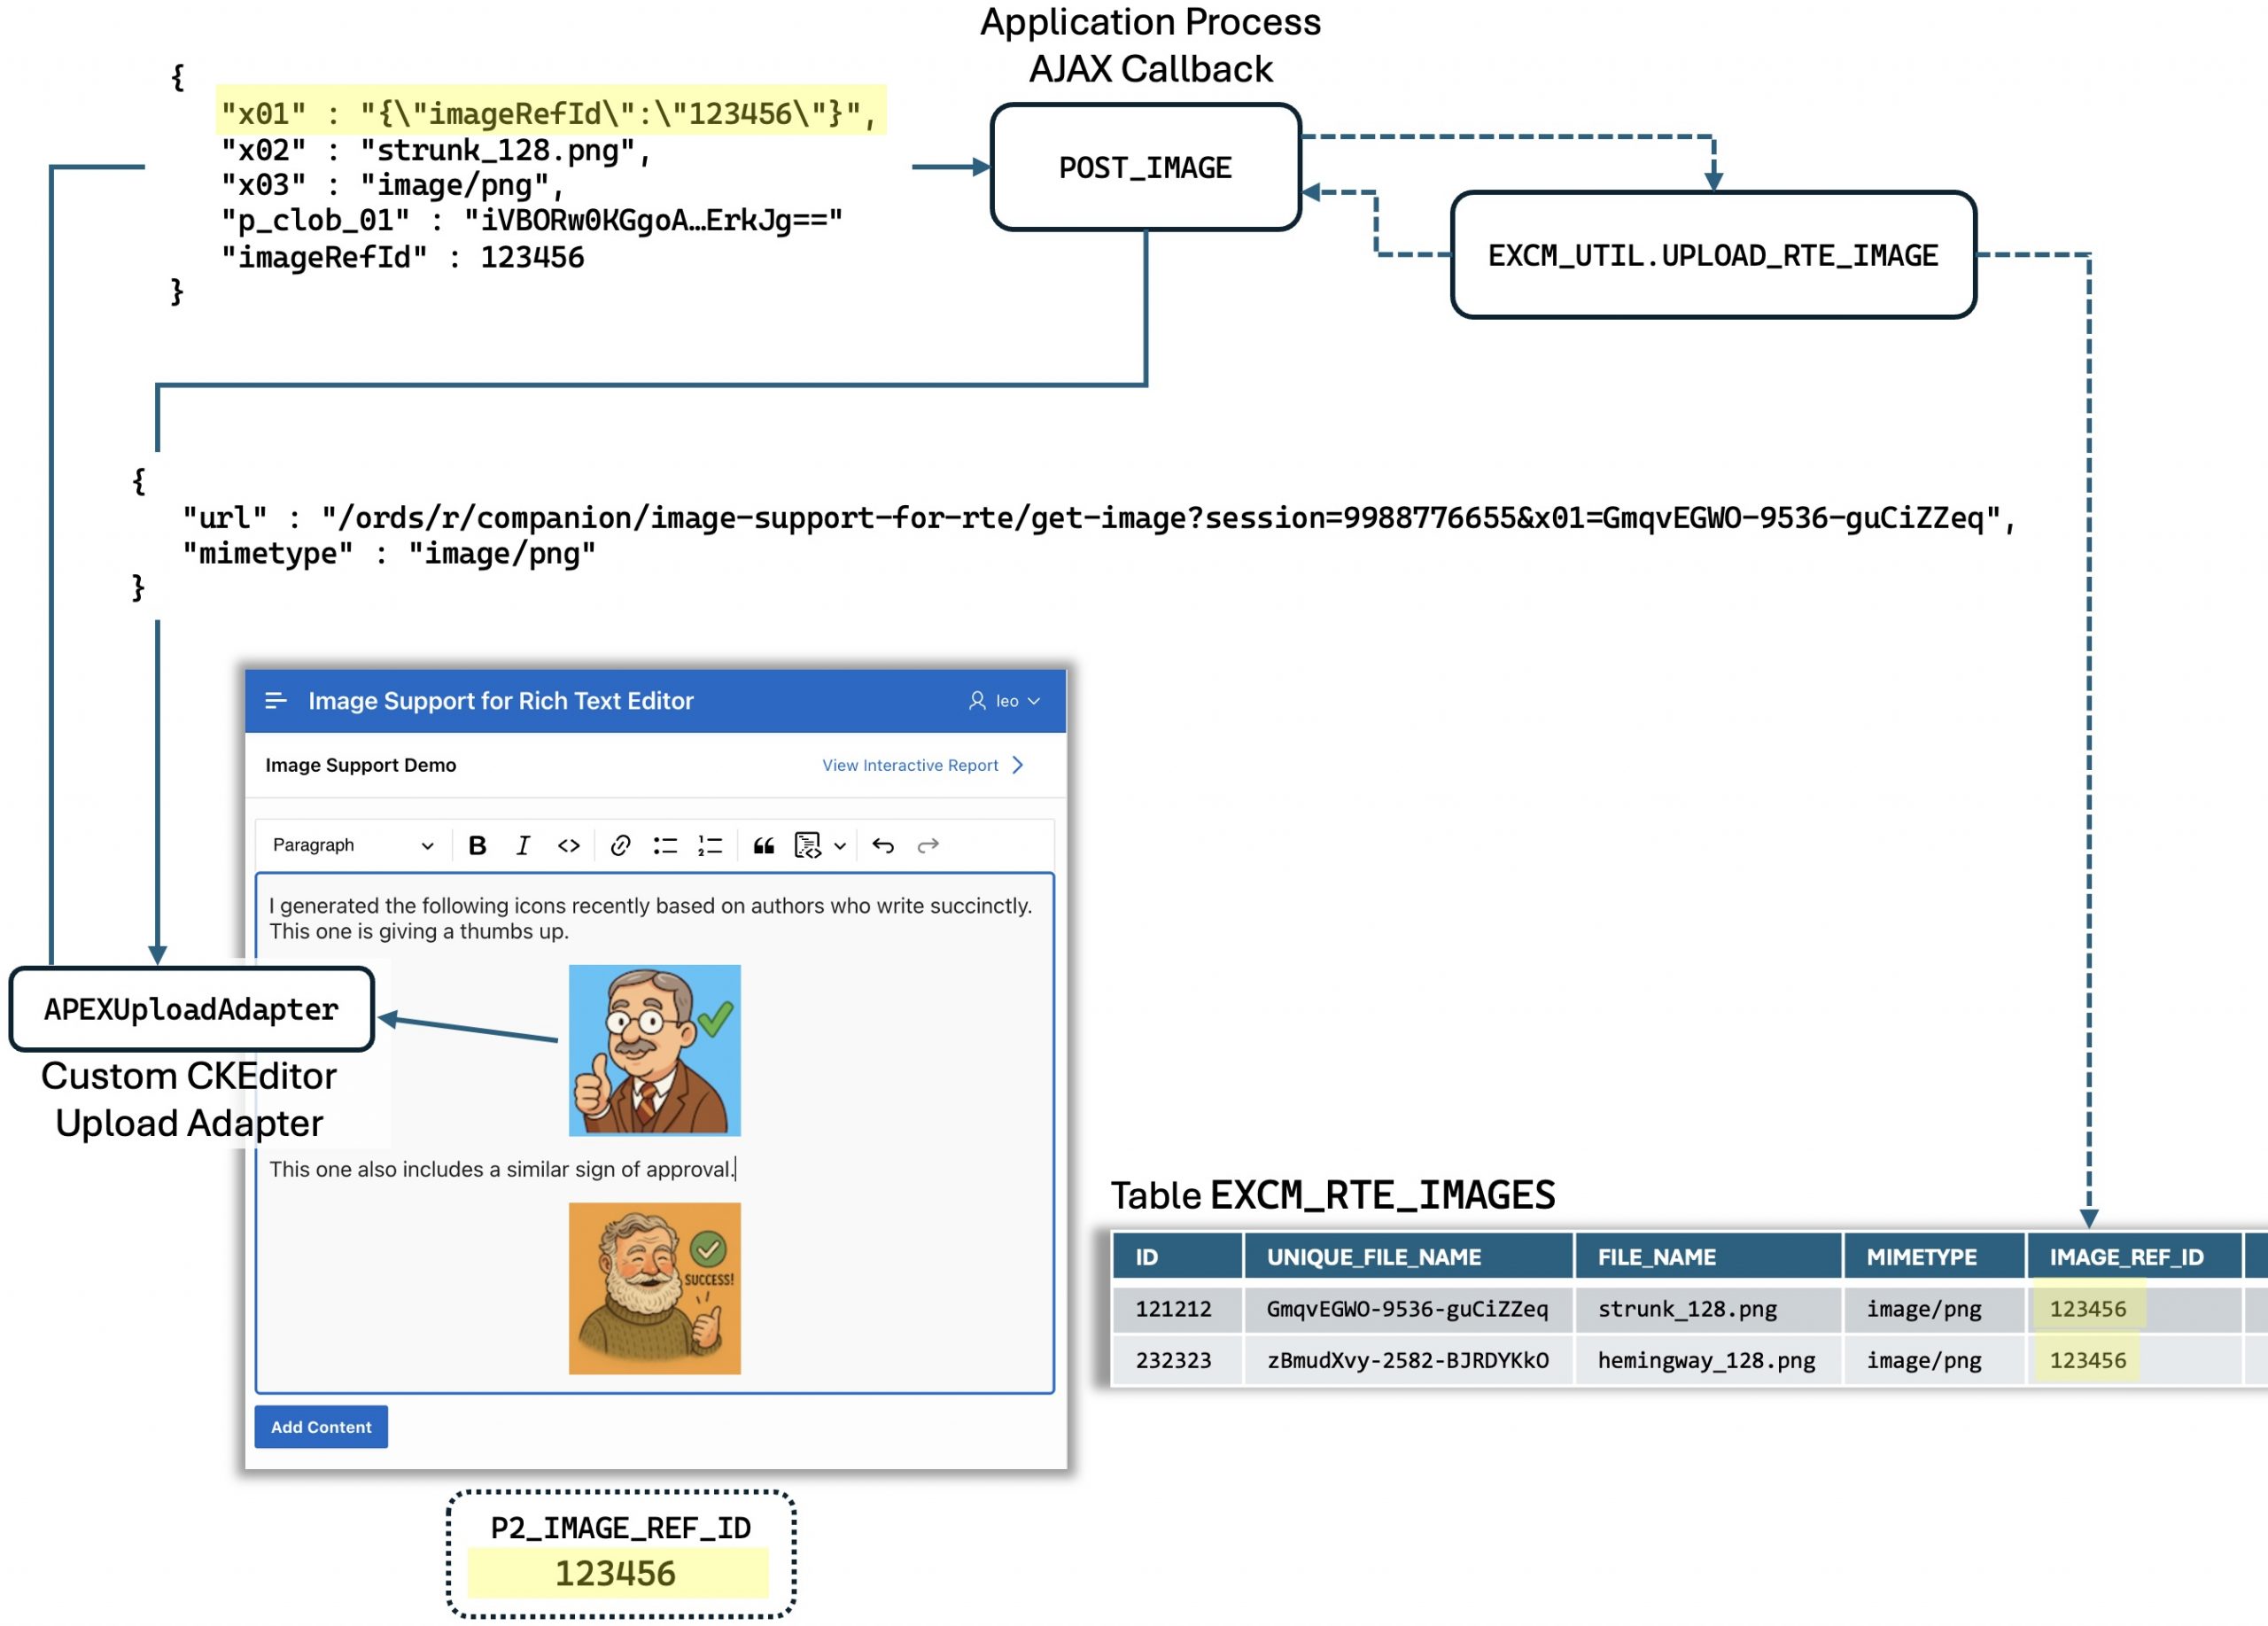
IMAGE_REF_ID Document Identifier with Added ImagesHandling Session Ids
The custom APEXUploadAdapter returns a relative image URL that contains the current user’s session ID. For example:
/ords/r/companion/image-support-for-rte/get-image?session=9988776655&x01=GmqvEGWO-9536-guCiZZeq
Later, when the page calls EXCM_UTIL.ADD_CONTENT to store the document, that calls the REPLACE_SESSION_ON_SAVE helper function to swap the actual session id with a placeholder string ~RTE*SESS~ instead in all the image URLs. For example, the URL above becomes:
/ords/r/companion/image-support-for-rte/get-image?session=~RTE*SESS~&x01=GmqvEGWO-9536-guCiZZeq
Whenever a page retrieves the rows containing the rich text document, it uses the EXCM_CONTENT_V view. It contains function calls to the REPLACE_SESSION_ON_DISPLAY function in the EXCM_UTIL package. This substitutes the session ID placeholder string with the current user’s session id. This ensures the current authenticated user can fetch the images successfully.
create or replace view excm_content_v as
 select id,
        excm_util.replace_session_on_display(
            body,
            sys_context('APEX$SESSION', 'APP_SESSION')) body,
        excm_util.replace_session_on_display(
            body_html,
            sys_context('APEX$SESSION', 'APP_SESSION')) body_html,
        body_no_images,
        image_ref_id,
        created,
        created_by,
        updated,
        updated_by
 from excm_content;
Managing Image Reference IDs and Removing “Orphans”
The EXCM_UTIL package contains helper code to manage image reference IDs, store the document containing image references, and to remove “orphan” images. These are images the user removes from the document before saving.
The ADD_CONTENT procedure performs the following tasks:
- Replaces session ID in image URLs,
- Replaces images with
[image]to produce a “No Images” version of the document, - Inserts the row into
EXCM_CONTENT - Removes any orphaned images
The UPDATE_CONTENT procedure takes care of:
- Replaces session ID in image URLs,
- Replaces images with
[image]to produce a “No Images” version of the document, - Updates the document in the
EXCM_CONTENTrow, retrieving its existingIMAGE_REF_ID - Updates the
IMAGE_REF_IDof any newly-added images during editing to use the existing document’sIMAGE_REF_IDinstead, and - Removes any orphaned images
The DELETE_CONTENT procedure:
- Deletes any images referenced by the document about to be deleted, then
- Deletes the row in
EXCM_CONTENTcontaining the document.
The REMOVE_ORPHAN_IMAGES helper function in the package deletes any images that are no longer referenced by the document being saved. This ensures that removed images don’t continue to occupy storage in the images table.
Producing the HTML Version of the Markdown
A BEFORE INSERT OR UPDATE trigger on the EXCM_CONTENT table fires FOR EACH ROW to maintain the audit columns, and produce the HTML version of the Markdown content in the BODY column. The trigger includes the following single line that performs this eager HTML rendering. It calls the TO_HTML function in the APEX_MARKDOWN package.
-- In EXCM_CONTENT_BIU before insert or update trigger
:
-- DONE IN TRIGGER TO PREVENT MANUAL UPDATE OF BODY_HTML
:new.body_html := apex_markdown.to_html(:new.body);
Bootstrapping the Custom Upload Adapter
The exContent.js Static Application File contains the custom APEXUploadAdapter JavaScript code for the Rich Text Editor page item based on CKEditor 5. The Image Support Demo page (2) in the sample includes this JavaScript library by mentioning its path as a JavaScript File URL:
#APP_FILES#exContent#MIN#.jsThe JavaScript initialization Function for the P2_CONTENT Rich Text Editor bootstraps the CKEditor custom upload adapter. Instead of configuring settings directly on the options object, this approach passes the options object along with a second argument containing custom options to the configEditor() function. That function lives in the exContent.markdown namespace, which the exContent.js library adds to the page when it loads.
The custom options object contains keys that define the name of the AJAX Callback application process to handle the image upload (e.g. POST_IMAGE) as well as a data object that contains additional info like the imageRefId to pass along with the upload. The invoked configEditor() function sets up the custom APEXUploadAdapter, adds the default imageUpload button to the editor toolbar, and returns the original options object.
function(options) {
  return exContent.markdown.configEditor(options, {
      apexUpload: {
          // App process name to handle POST request when image added
          uploadApplicationProcess: 'POST_IMAGE',
          // Pass in any data that you want in the POST process
          // Available as JSON in apex_application.g_x01
          data: {
              imageRefId: apex.item('P2_IMAGE_REF_ID').getValue()
          }
      }
  });
}
The modal drawer Edit Content page (3) in the sample contains a similar setup.
Steps to Add Rich Text Image Support to an Application
Follow the steps below to prepare your application to support adding images in Rich Text Editor page items.
App-Level: Step 1
Add the EXCM_UTIL package to your workspace’s parsing schema
App-Level: Step 2
Add an application setting named GET_IMAGE_PREFIX
App-Level: Step 3
Add the exContent.js file to your app’s Static Application Files
App-Level: Step 4
Add an application process application process named POST_IMAGE on the “AJAX Callback” process point with the PL/SQL block:
excm_util.upload_rte_image (
    p_file_base64  => apex_application.g_clob_01,
    p_filename     => apex_application.g_x02,
    p_mimetype     => apex_application.g_x03,
    p_image_ref_id => json_value(apex_application.g_x01, '$.imageRefId') );
App-Level: Step 5
Add an application process named Set GET_IMAGE_PREFIX on the “On New Instance” process point to set image prefix setting with the PL/SQL block:
apex_app_setting.set_value(
    p_name  => 'GET_IMAGE_PREFIX',
    p_value => substr(APEX_UTIL.HOST_URL('SCRIPT'),
                      length(APEX_UTIL.HOST_URL())+1));
App-Level: Step 6
Create page 9000 with alias get-image to serve the images with the following PL/SQL block in a Pre‑Rendering Before Header page process named Download Image:
declare
    l_file_blob  excm_rte_images.file_blob%type;
    l_mimetype   excm_rte_images.mimetype%type;
begin
    select file_blob, mimetype
      into l_file_blob, l_mimetype
      from excm_rte_images
     where unique_filename = apex_application.g_x01;
    apex_http.download (
        p_blob         => l_file_blob,
        p_content_type => l_mimetype,
        p_is_inline    => true );
end;
Steps to Add Rich Text Image Support to a Page
On a specific page where you want to include image support in a Rich Text Editor page item named Px_SOME_ITEM, follow the steps below.
Page-Level: Step 1
Add JavaScript File URL to your page:
#APP_FILES#exContent#MIN#.jsPage-Level: Step 2
Add a Px_IMAGE_REF_ID page item with the following default value expression:
to_number(sys_guid(), 'XXXXXXXXXXXXXXXXXXXXXXXXXXXXXXXX')Page-Level: Step 3
Add the following JavaScript Initialization Function on the Px_SOME_ITEM Rich Text Editor page item (adjusting the name of Px_IMAGE_REF_ID approprirately):
function(options) {
    return exContent.markdown.configEditor(options, {
        apexUpload: {
            // App process name to handle POST request when image added
            uploadApplicationProcess: 'POST_IMAGE',
            // Pass in any data that you want in the POST process
            // Available as JSON in apex_application.g_x01
            data: {
                imageRefId: apex.item('P2_IMAGE_REF_ID').getValue()
            }
        }
    });
}
Page-Level: Step 4
Add the following in an Execute Server-side Code dynamic action step (or in a page process if you submit the page to save the content instead) in a page that’s creating the document. Of course, adjust the Px to the correct page number and adjust the name of the Rich Text Editor page item appropriately.
excm_util.add_content (
    p_content      => :Px_YOUR_RTE_ITEM,
    p_image_ref_id => :Px_IMAGE_REF_ID );

:Px_YOUR_RTE_ITEM := null;

:Px_IMAGE_REF_ID := to_number(sys_guid(), 'XXXXXXXXXXXXXXXXXXXXXXXXXXXXXXXX');
Page-Level: Step 5
If your page is updating the row containing the Rich Text Editor, add a call to the following after any other columns are updated to update the Rich Text Editor document. Of course, adjust the Px to the correct page number and adjust the name of the Rich Text Editor page item appropriately.
excm_util.update_content (
    p_content_id   => :Px_ID,
    p_content      => :Px_YOUR_RTE_ITEM,
    p_image_ref_id => :Px_NEW_IMAGE_REF_ID );
Page-Level: Step 6
If your page is deleting the row containing the Rich Text Editor, add a call to the following to delete the content row. Of course, adjust the Px to the correct page number appropriately.
excm_util.delete_content (
    p_content_id => :Px_ID );
Summary of Image Support in Rich Text Editor Sample
In summary, the Image Support in Rich Text Editor sample app shows how to handle image uploads in Oracle APEX Rich Text Editor components without relying on external file systems or ORDS endpoints. A custom CKEditor upload adapter works with APEX’s built-in features to store images as BLOBs in the database and serve them through a dedicated APEX page. The design supports both new content and edits, using a clean lifecycle that keeps only referenced images.
The architecture relies on a pseudo-foreign-key system that uses randomly generated image reference IDs to group and manage image lifecycles. When a page opens for new content, the hidden item Px_IMAGE_REF_ID gets a unique value from Oracle’s SYS_GUID() function. This ID tags all images uploaded in that editing session. As users drag images into the Rich Text Editor, a custom JavaScript upload adapter converts each to Base64 and sends it to the APEX process POST_IMAG. That process calls EXCM_UTIL.UPLOAD_RTE_IMAGE which decodes the Base64 data, stores it as a BLOB in EXCM_RTE_IMAGES tagged with the current IMAGE_REF_ID, and returns a URL for a dedicated image-serving page. CKEditor then displays the image inline, letting users see it immediately while they continue composing.
The system’s sophistication lies in how it manages both content creation and editing while preserving referential integrity without foreign keys. When users save new content, EXCM_UTIL.ADD_CONTENT creates a record in EXCM_CONTENT using the same image reference ID that tagged uploaded images, linking them for retention. During edits, the system assigns a temporary image reference ID – new uploads use it, while existing images keep their original ID. On save, EXCM_UTIL.UPDATE_CONTENT scans the final content, promotes only images that remain by updating their IDs to the original one, and discards the rest. It then generates a new reference ID for the next session and runs cleanup routines that remove orphaned images – those not linked to any content and older than 24 hours. Images are served through a lightweight APEX page that streams BLOBs by unique filename with the correct MIME type, forming a self-contained content system with tight lifecycle control that avoids database bloat while supporting rich editing workflows.