Running the Doctor Appointments Made Easy! Application
Setting Automatic Timezone for the Application
To demonstrate the behavior of the application , we will use automatic timezone setup. This will ensure that the appointment dates and times are honored with respect to the End User’s timezone. To do this, Go to the Application Home Page -> Shared Components-> Globalization and turn on the Automatic Time Zone.
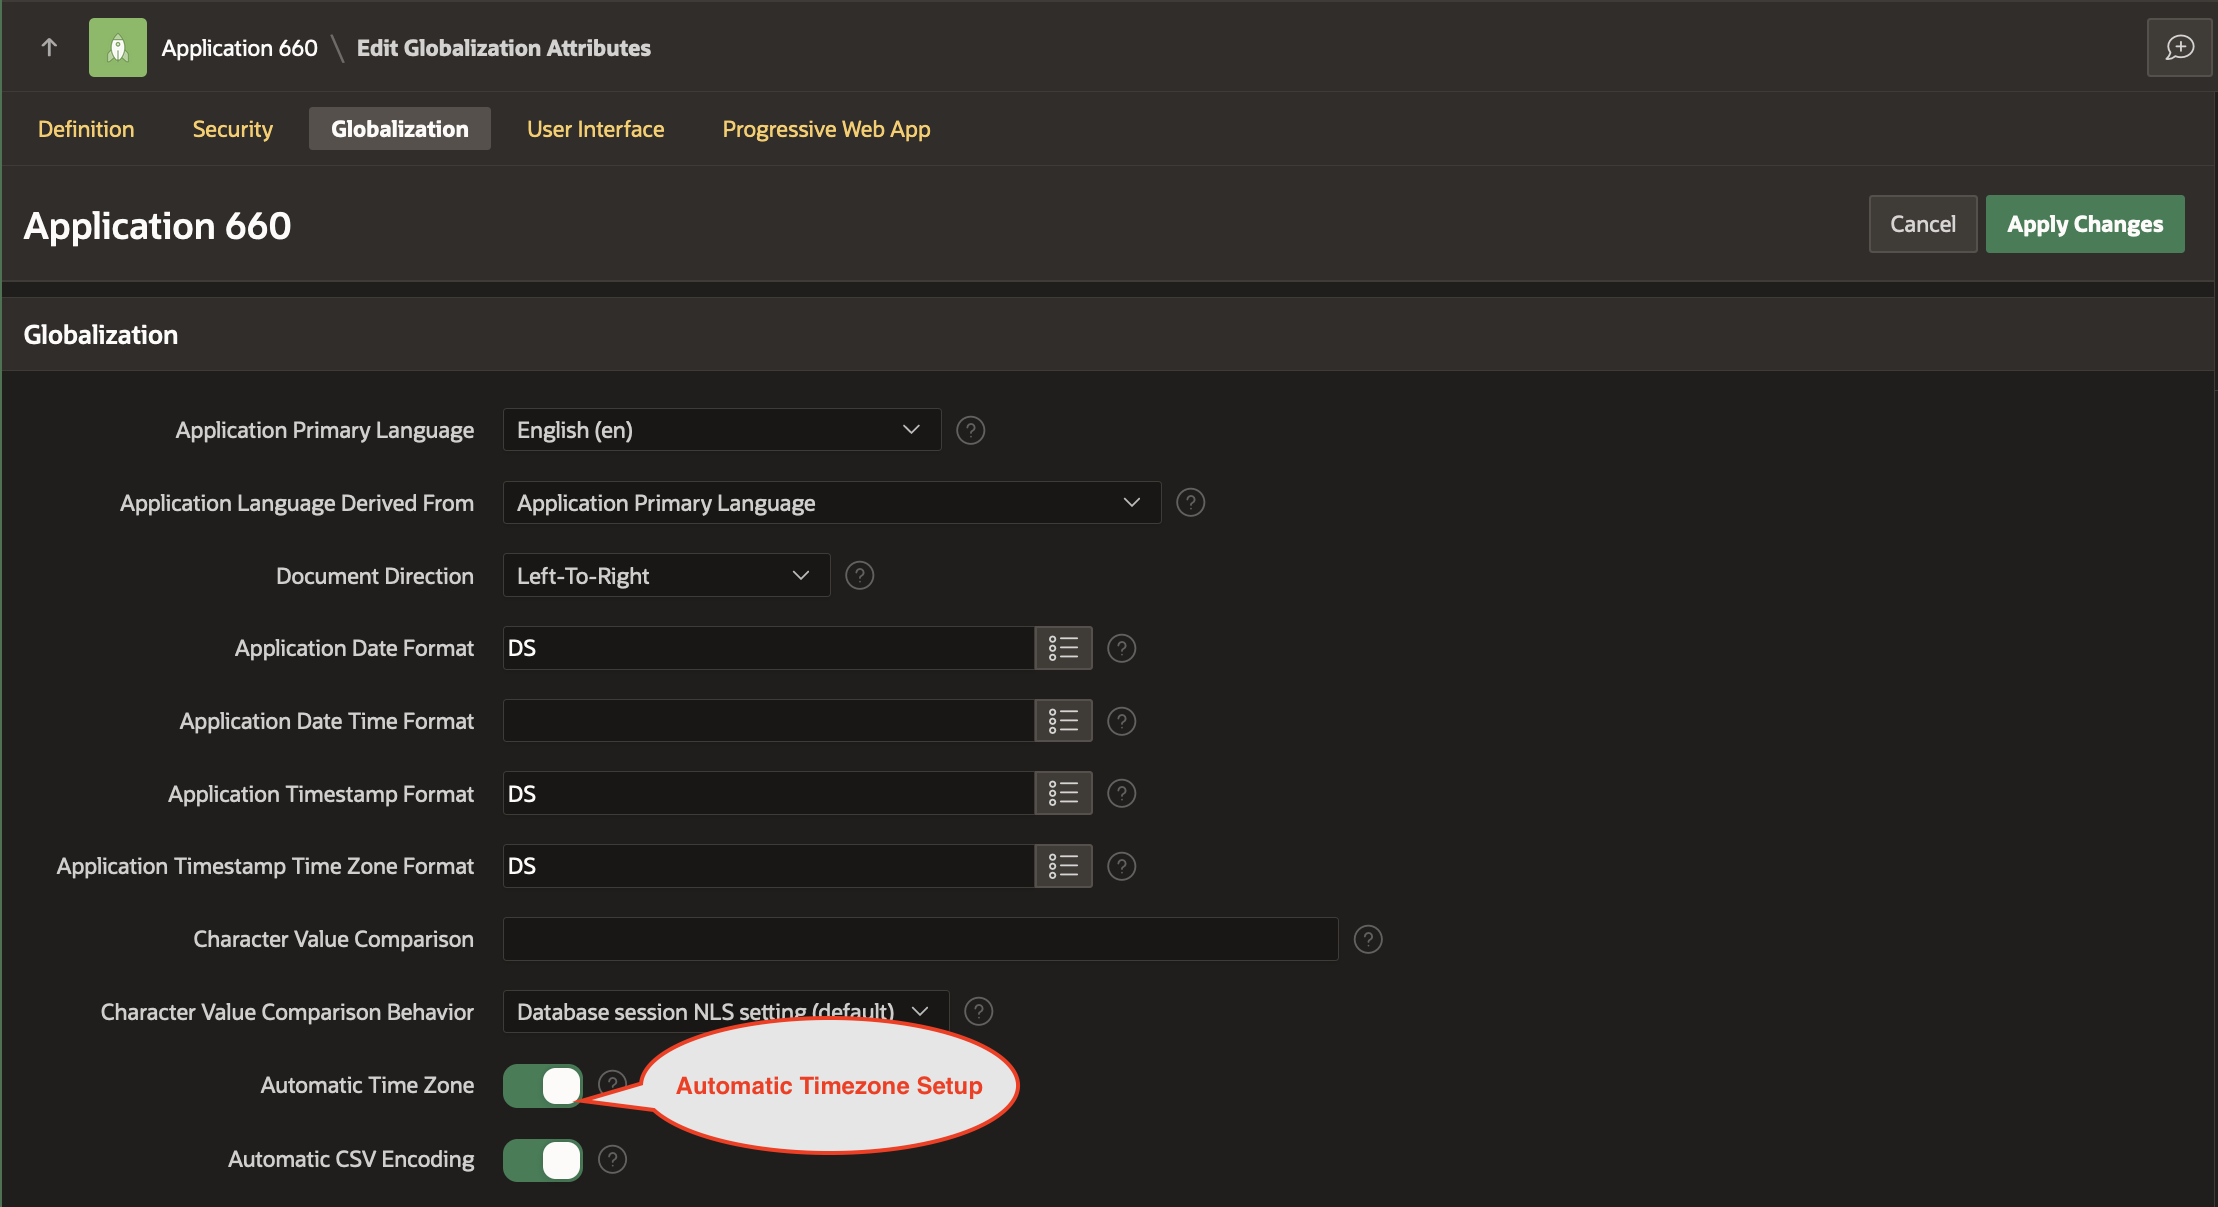
Save the changes by clicking on Apply Changes.
Setting the APP_EMAIL substitution string
We would like the email sender to be no-reply@abchospitals.com.
Go to Application Home Page and click on Edit Application Definition.
Under Substitutions , add the following Entry
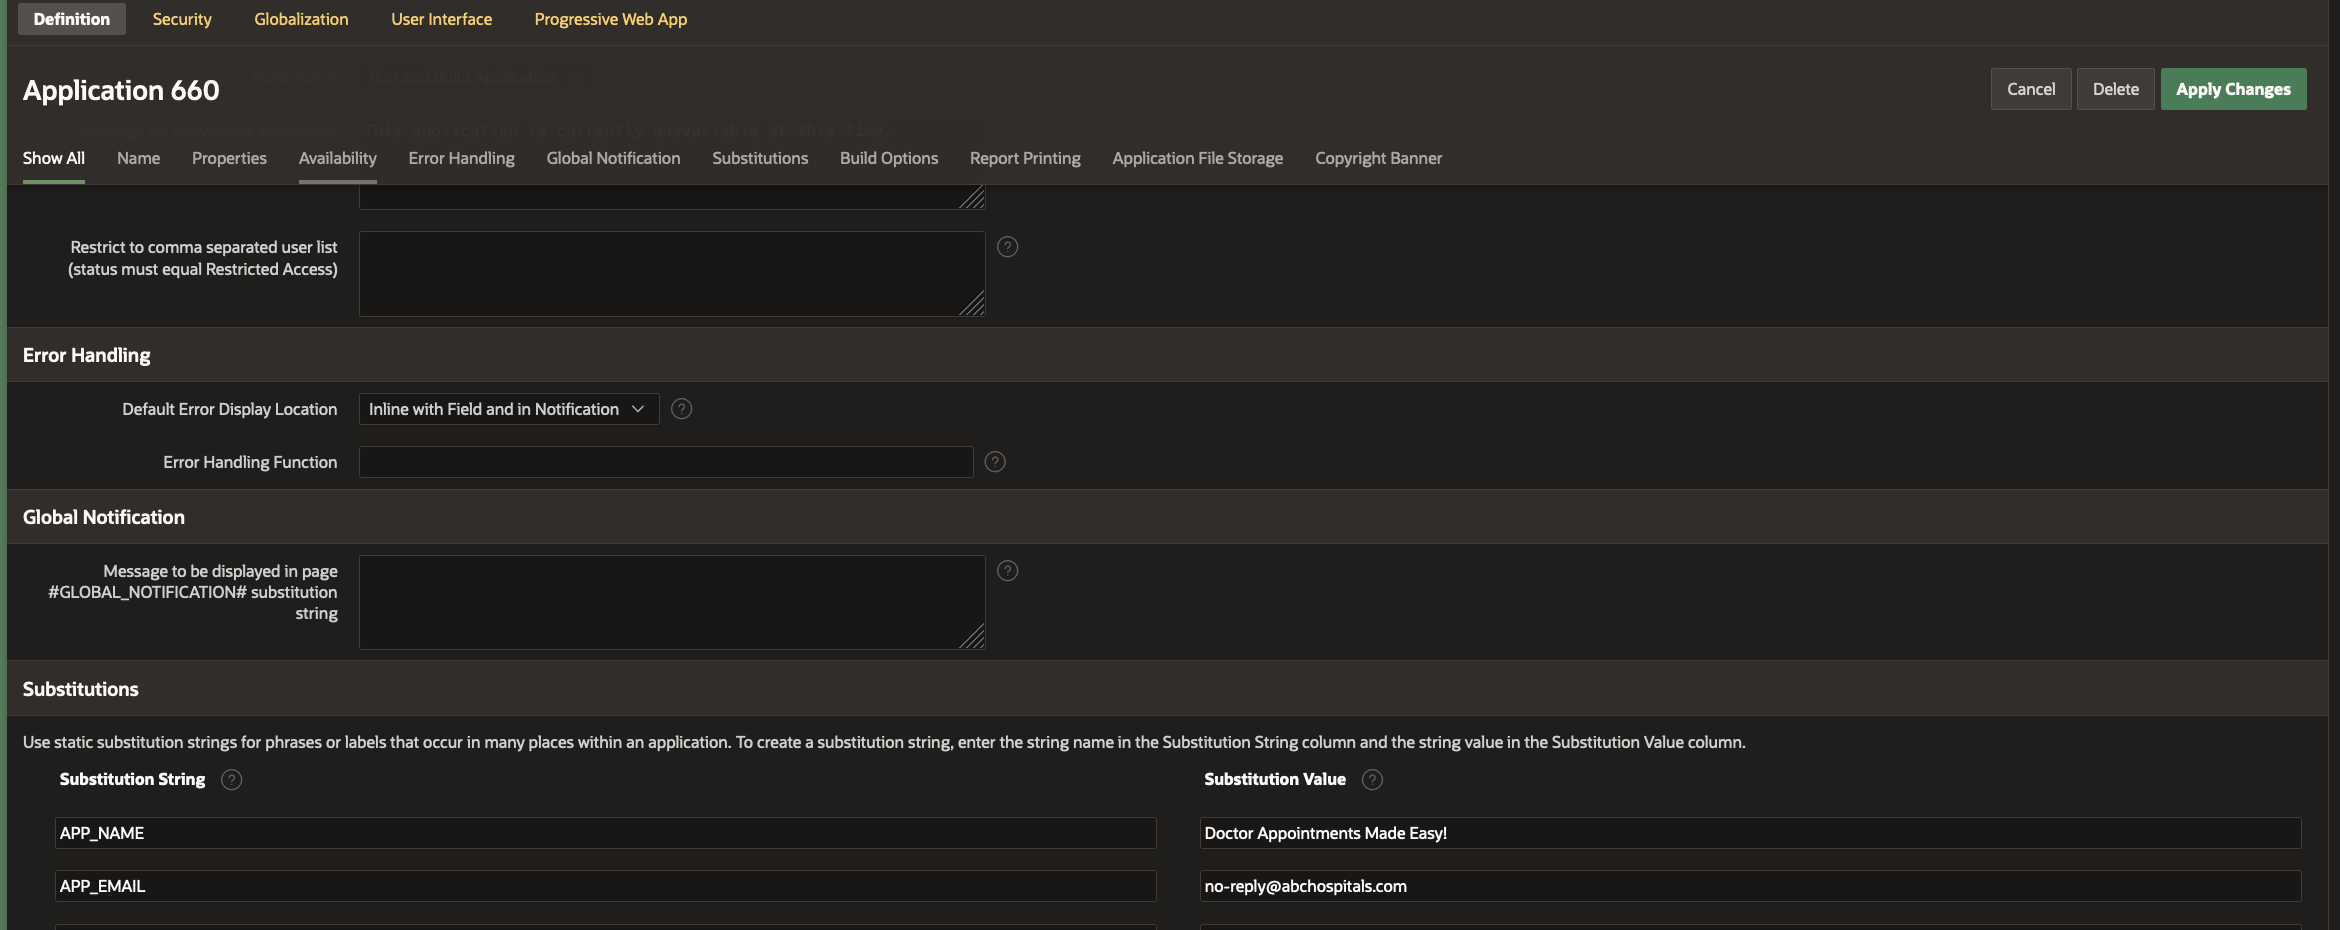
Save the changes by clicking on Apply Changes.
From Application Home Page, click on Run Application.
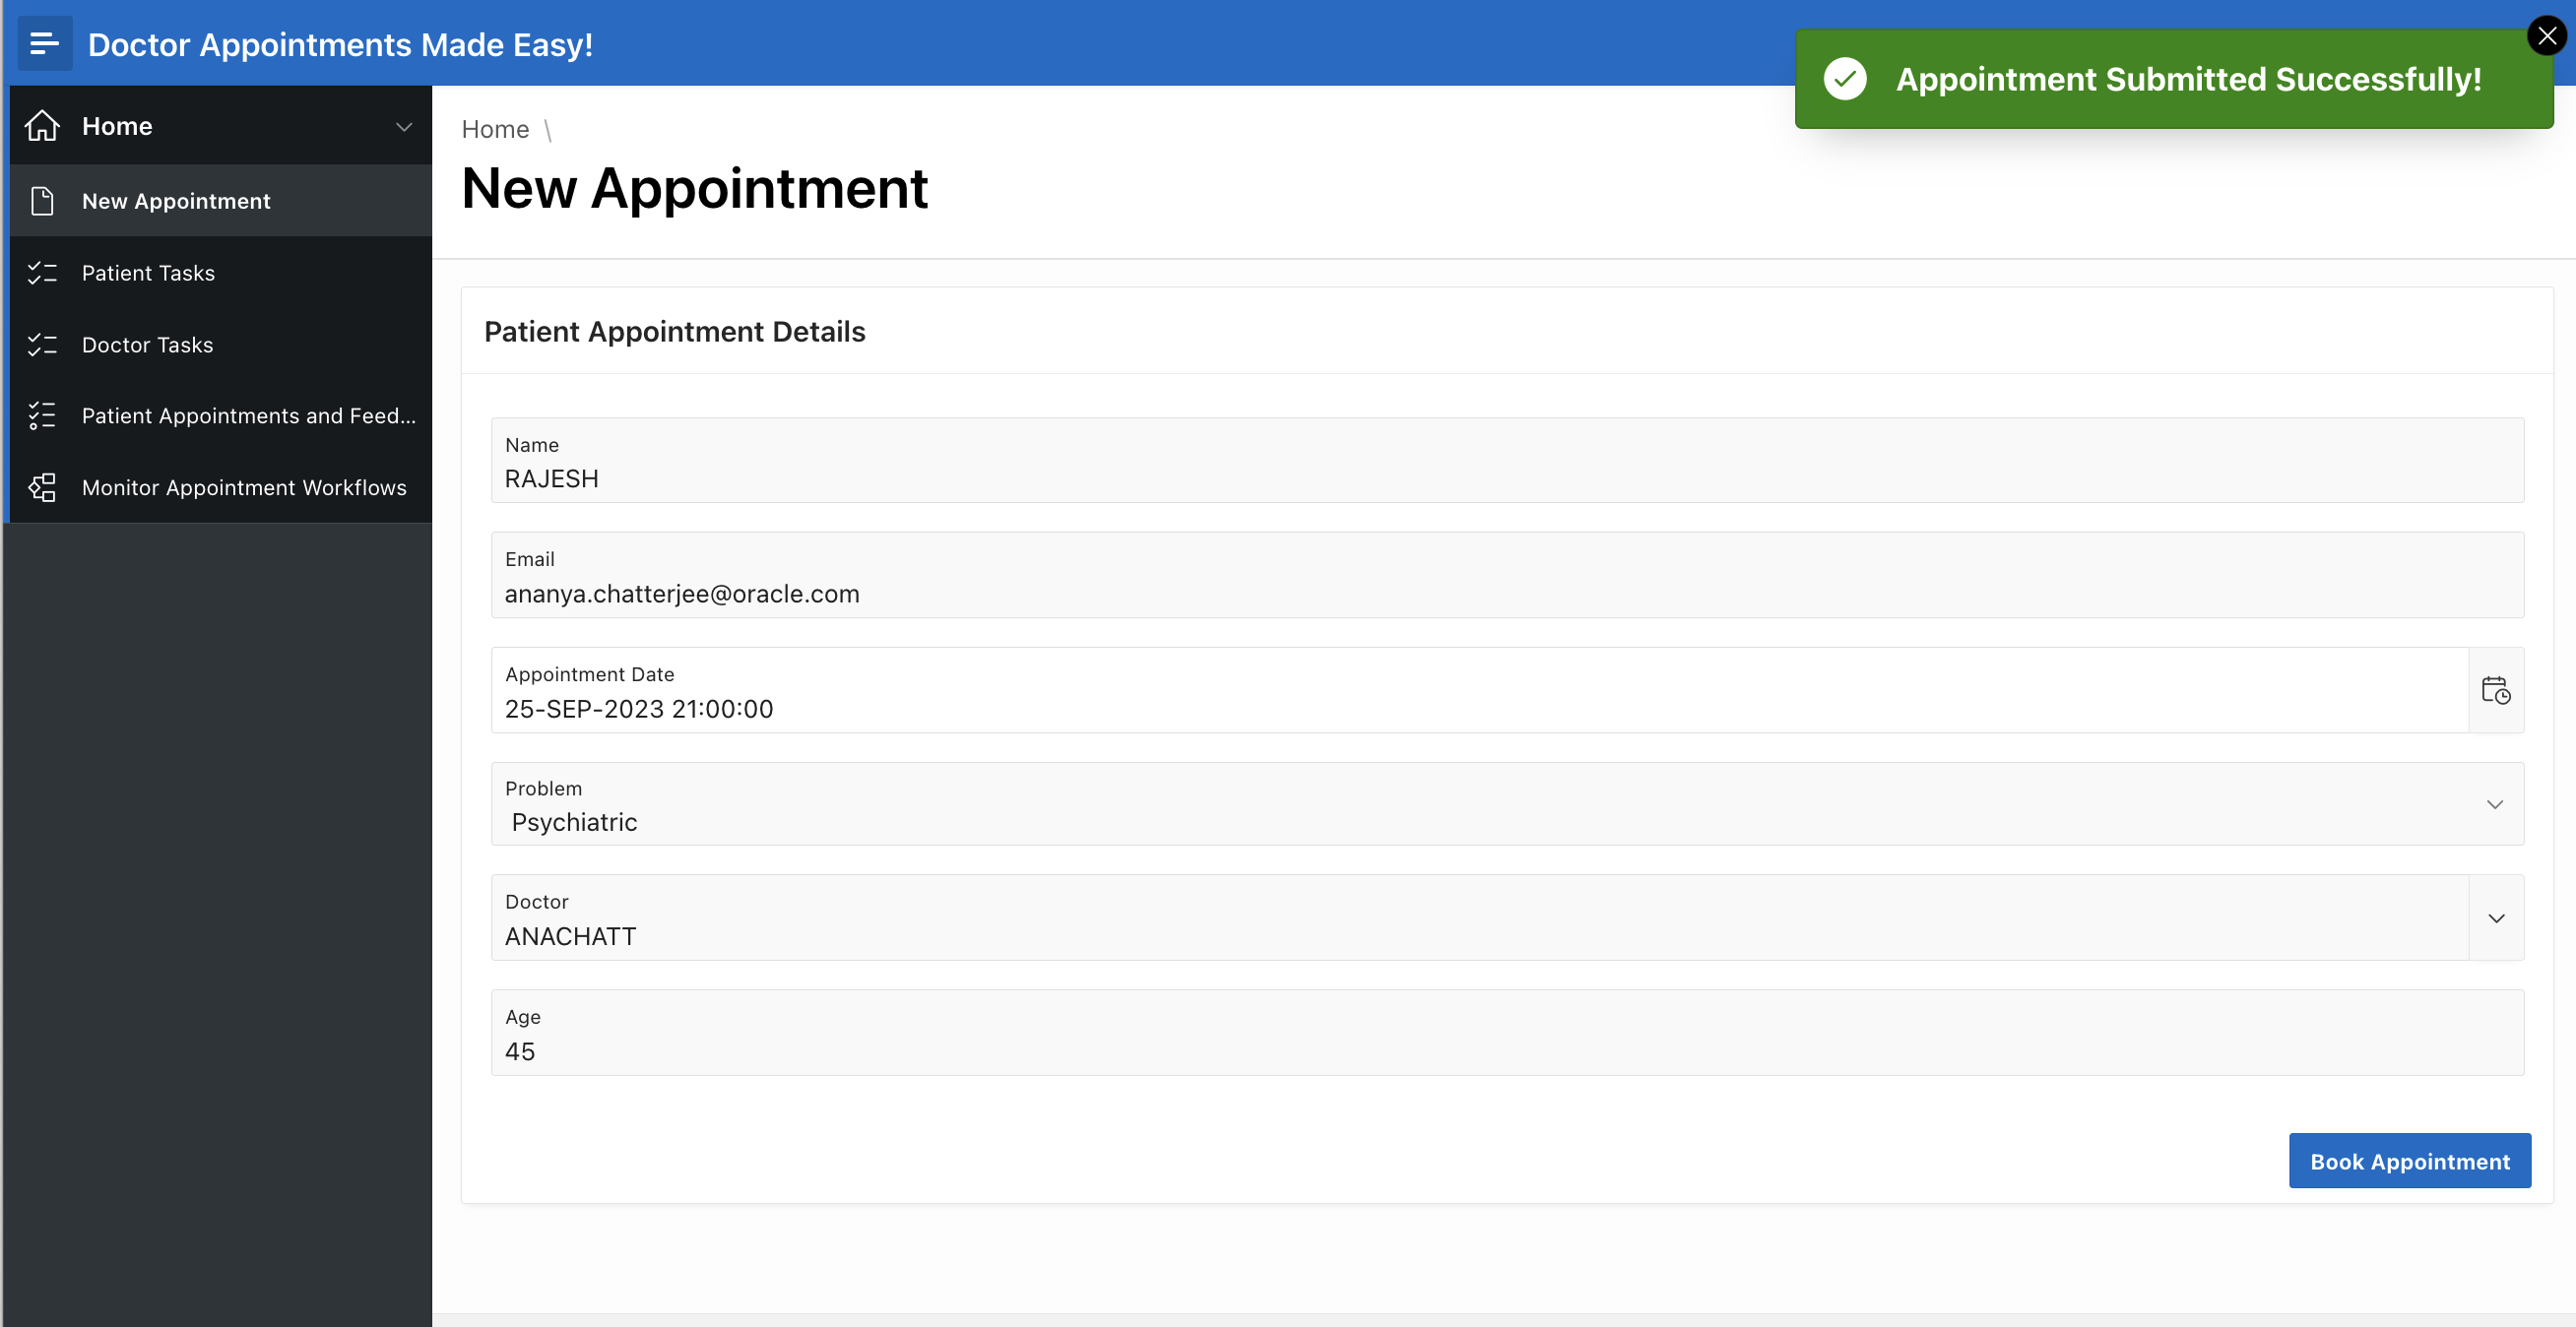
Log In as STEVE (Hospital Staff). Clck on New Appointment to Book a New Appointment for Rajesh. Select the Problem from the drop down as Psychiatric.

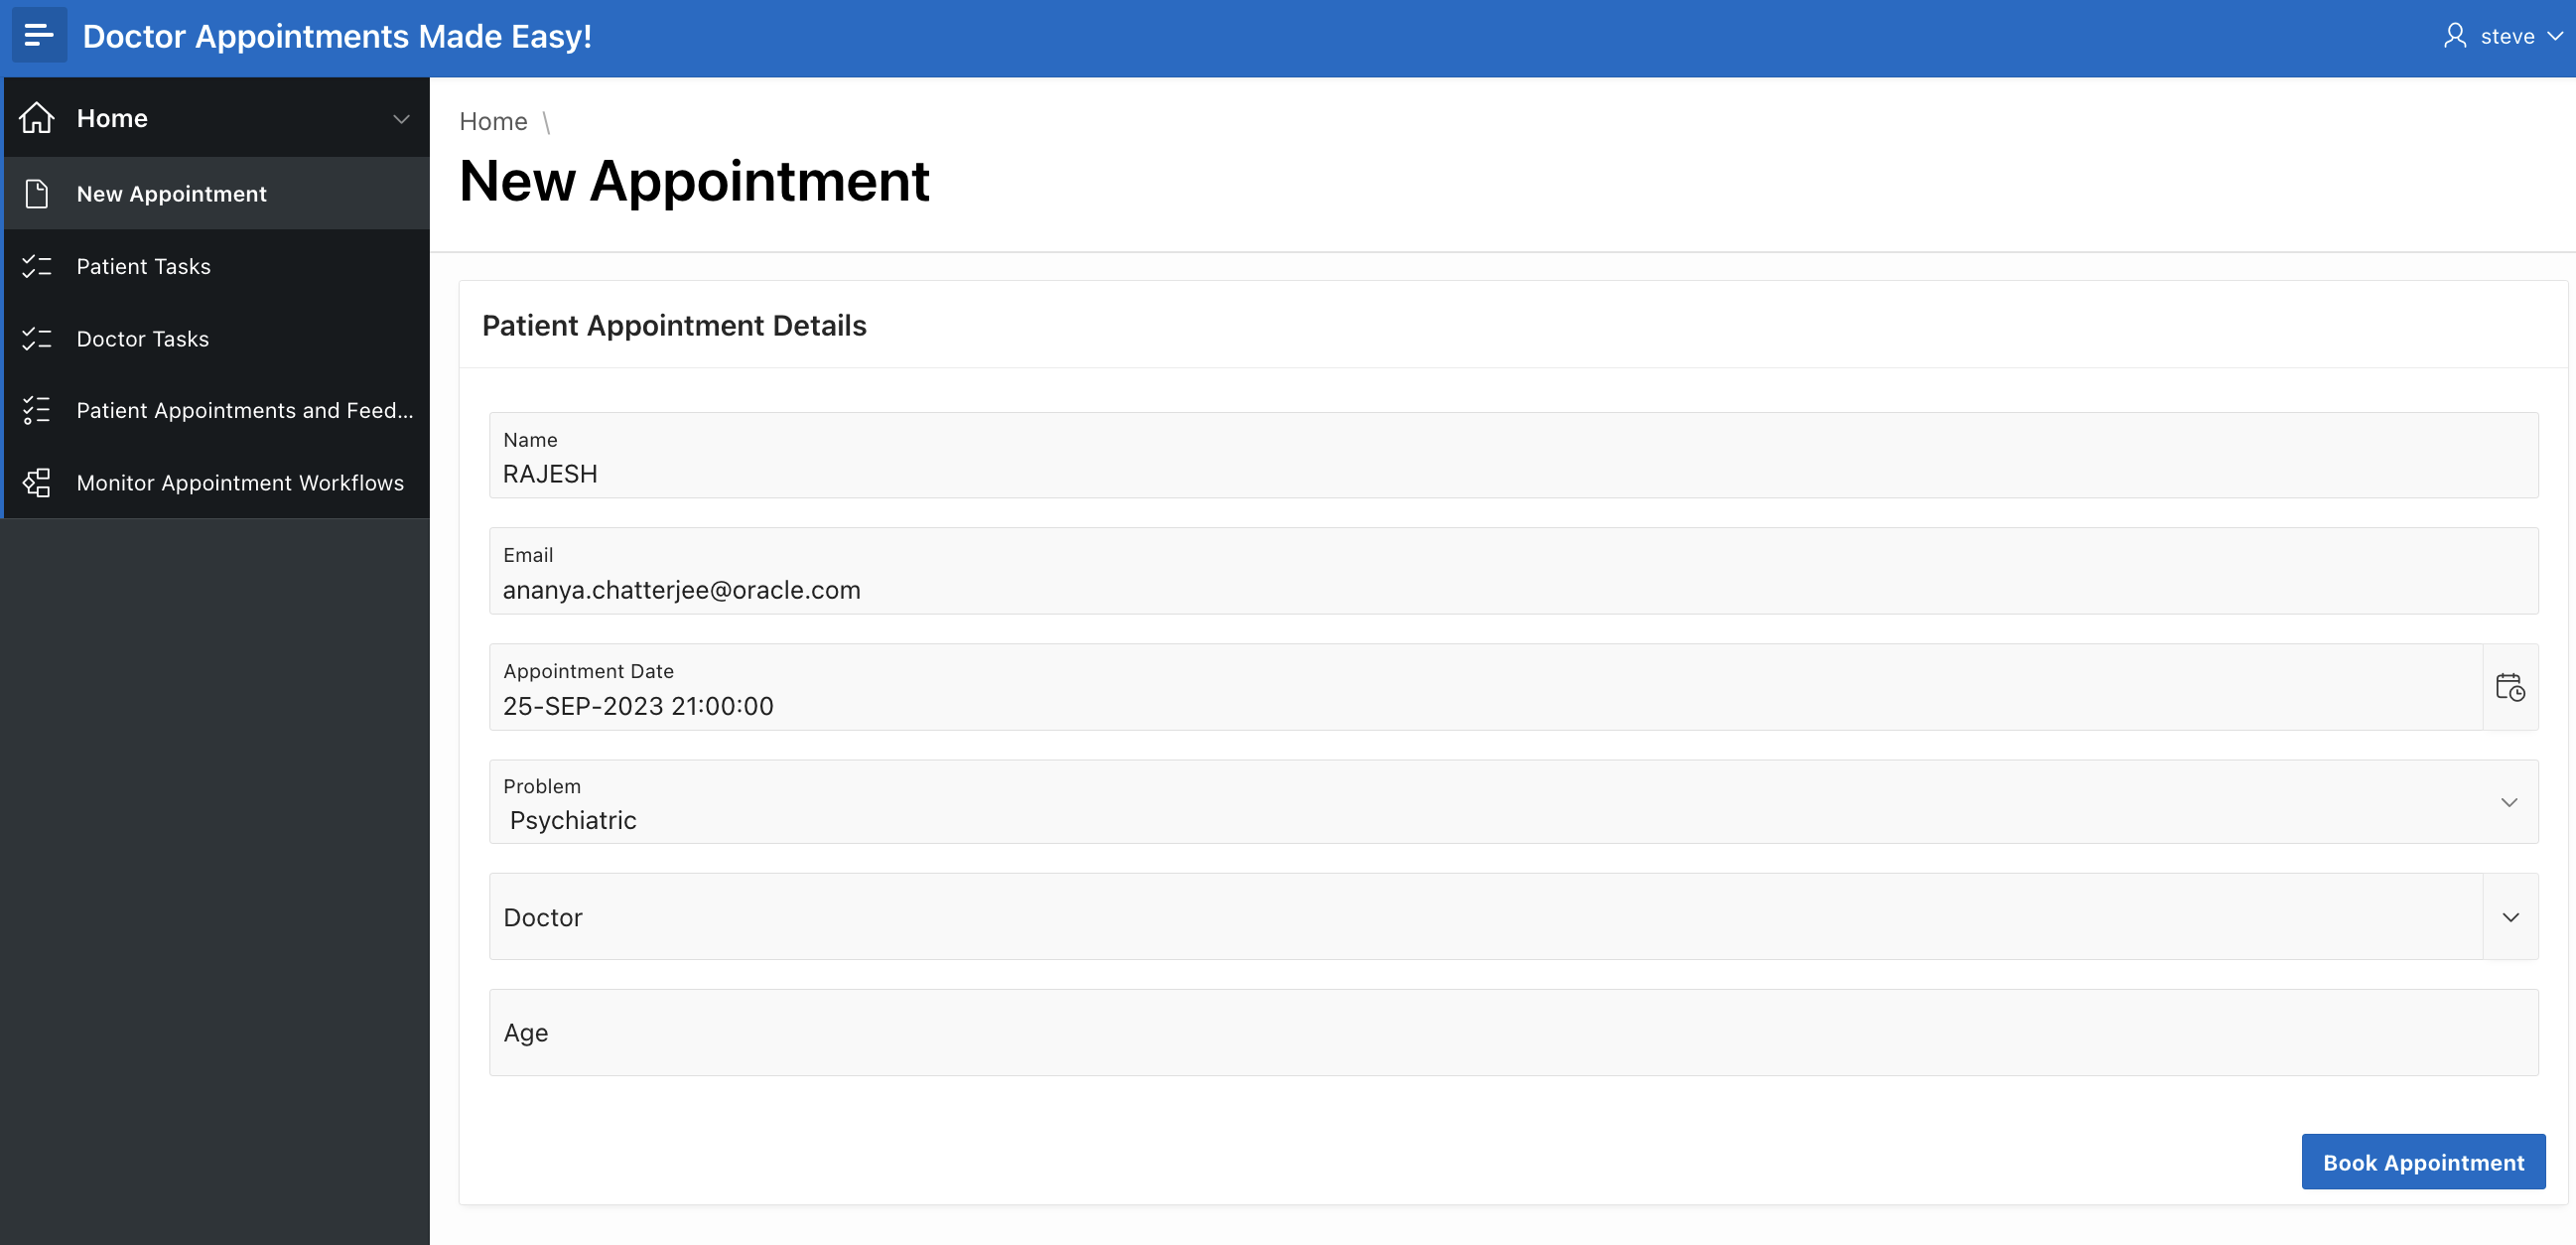
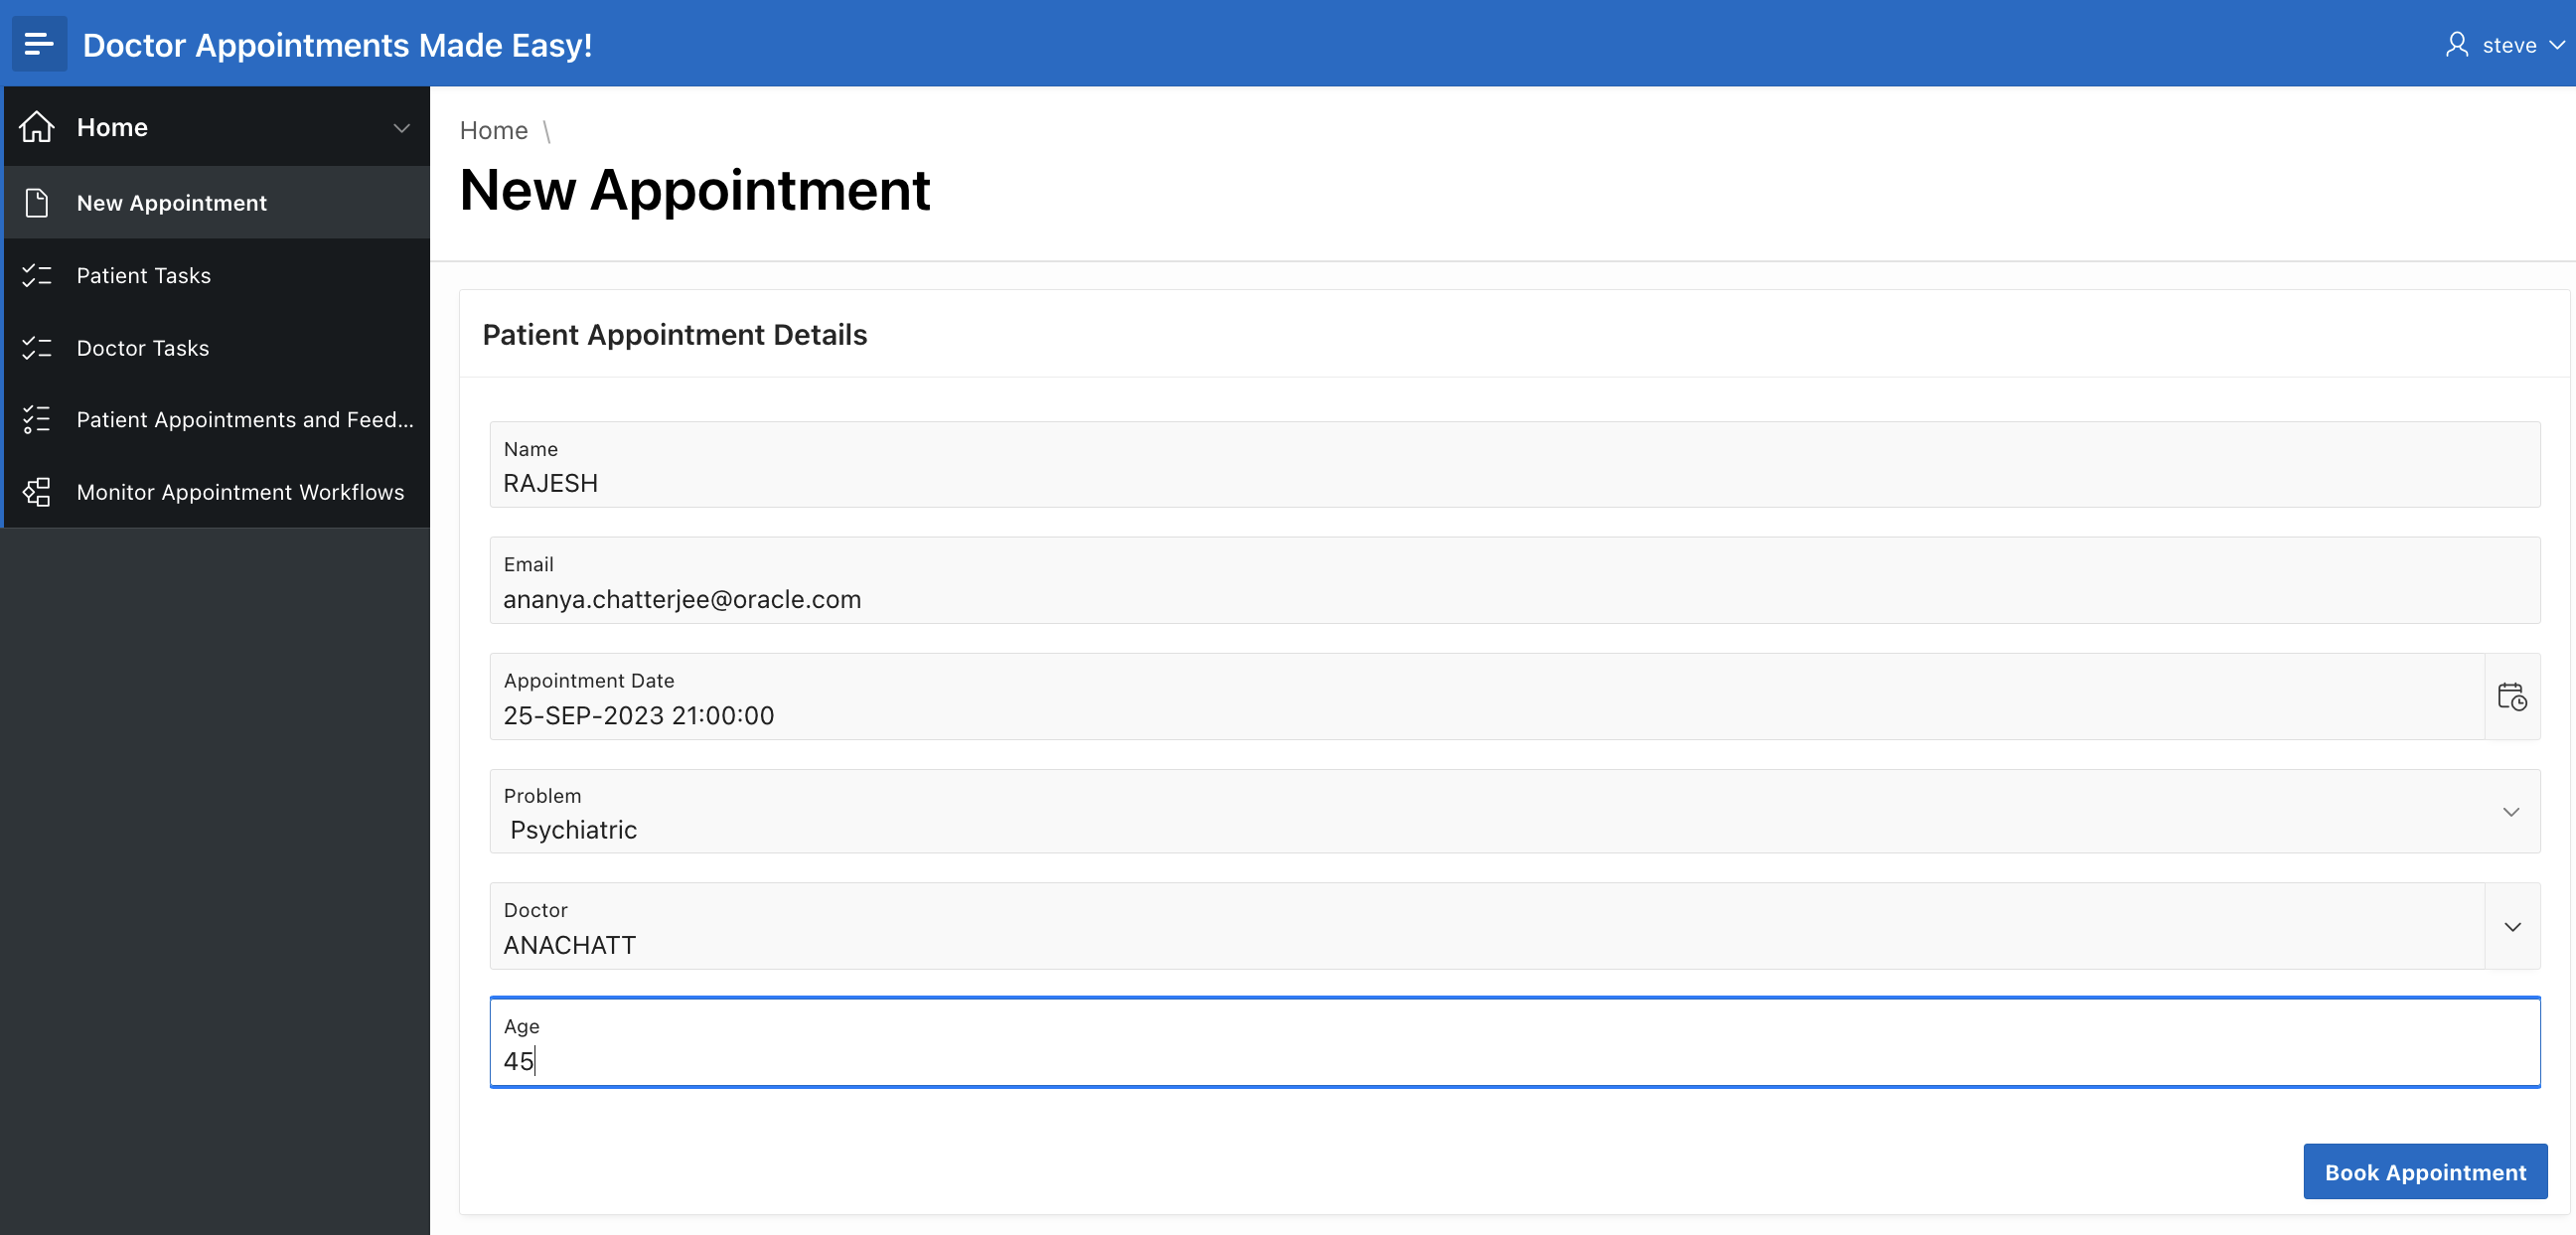
Click on the drop down to select the available doctor. You should see ANACHATT.
Fill in the Age and then click on Book Appointment.
You should see a success message.
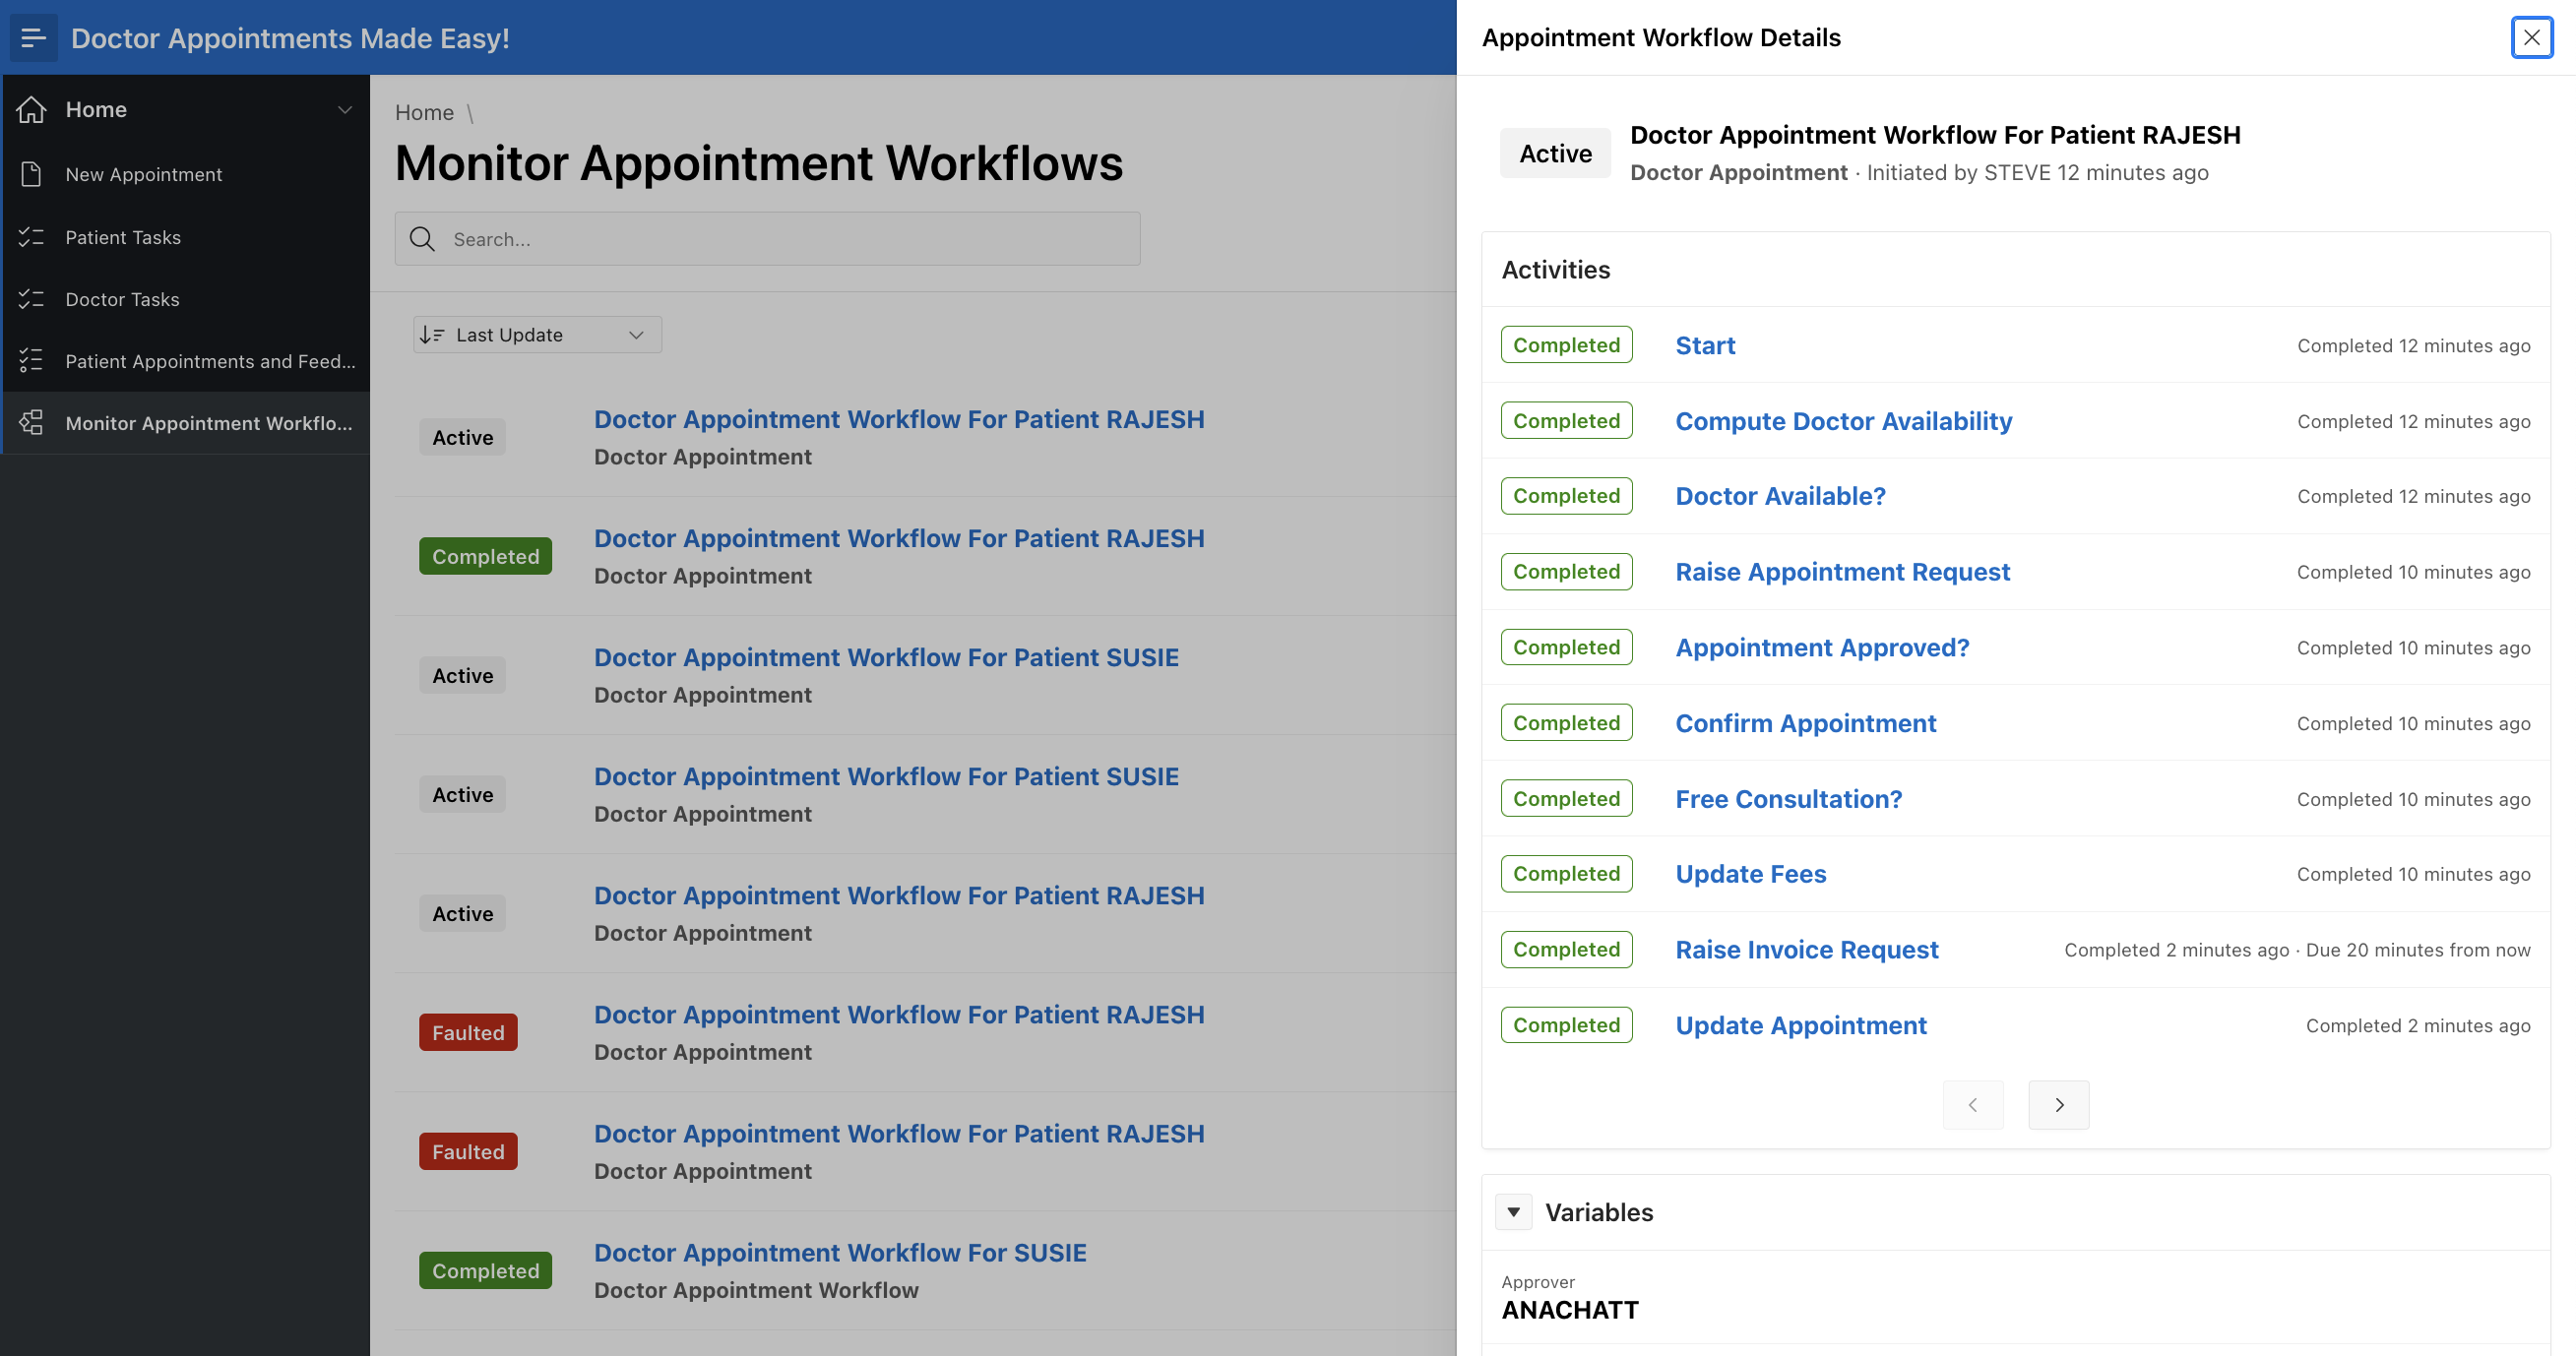
Click on Montor Appointment Workflows
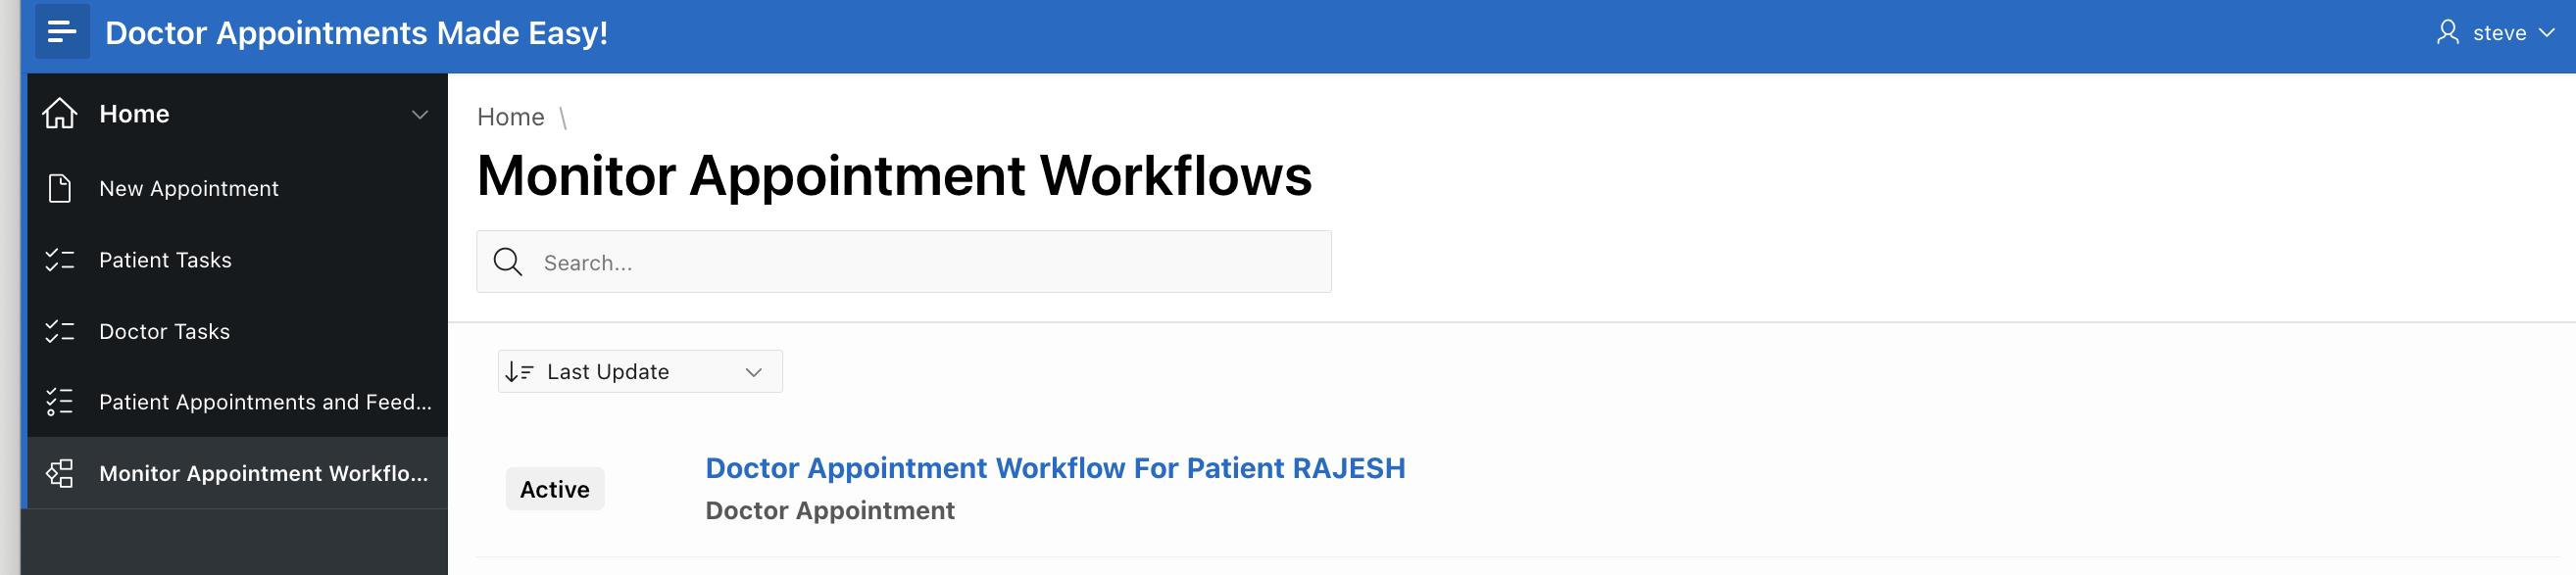
Click on the Entry you see above. This will open the Workflow Details Popup.
Observe that the Workflow is now waiting at Activity Raise Appointment Request . Also observe the Workflow Parameters.

Log In as ANACHATT -> The Doctor who needs to Approve the Appointment Request. Click on Doctor Tasks
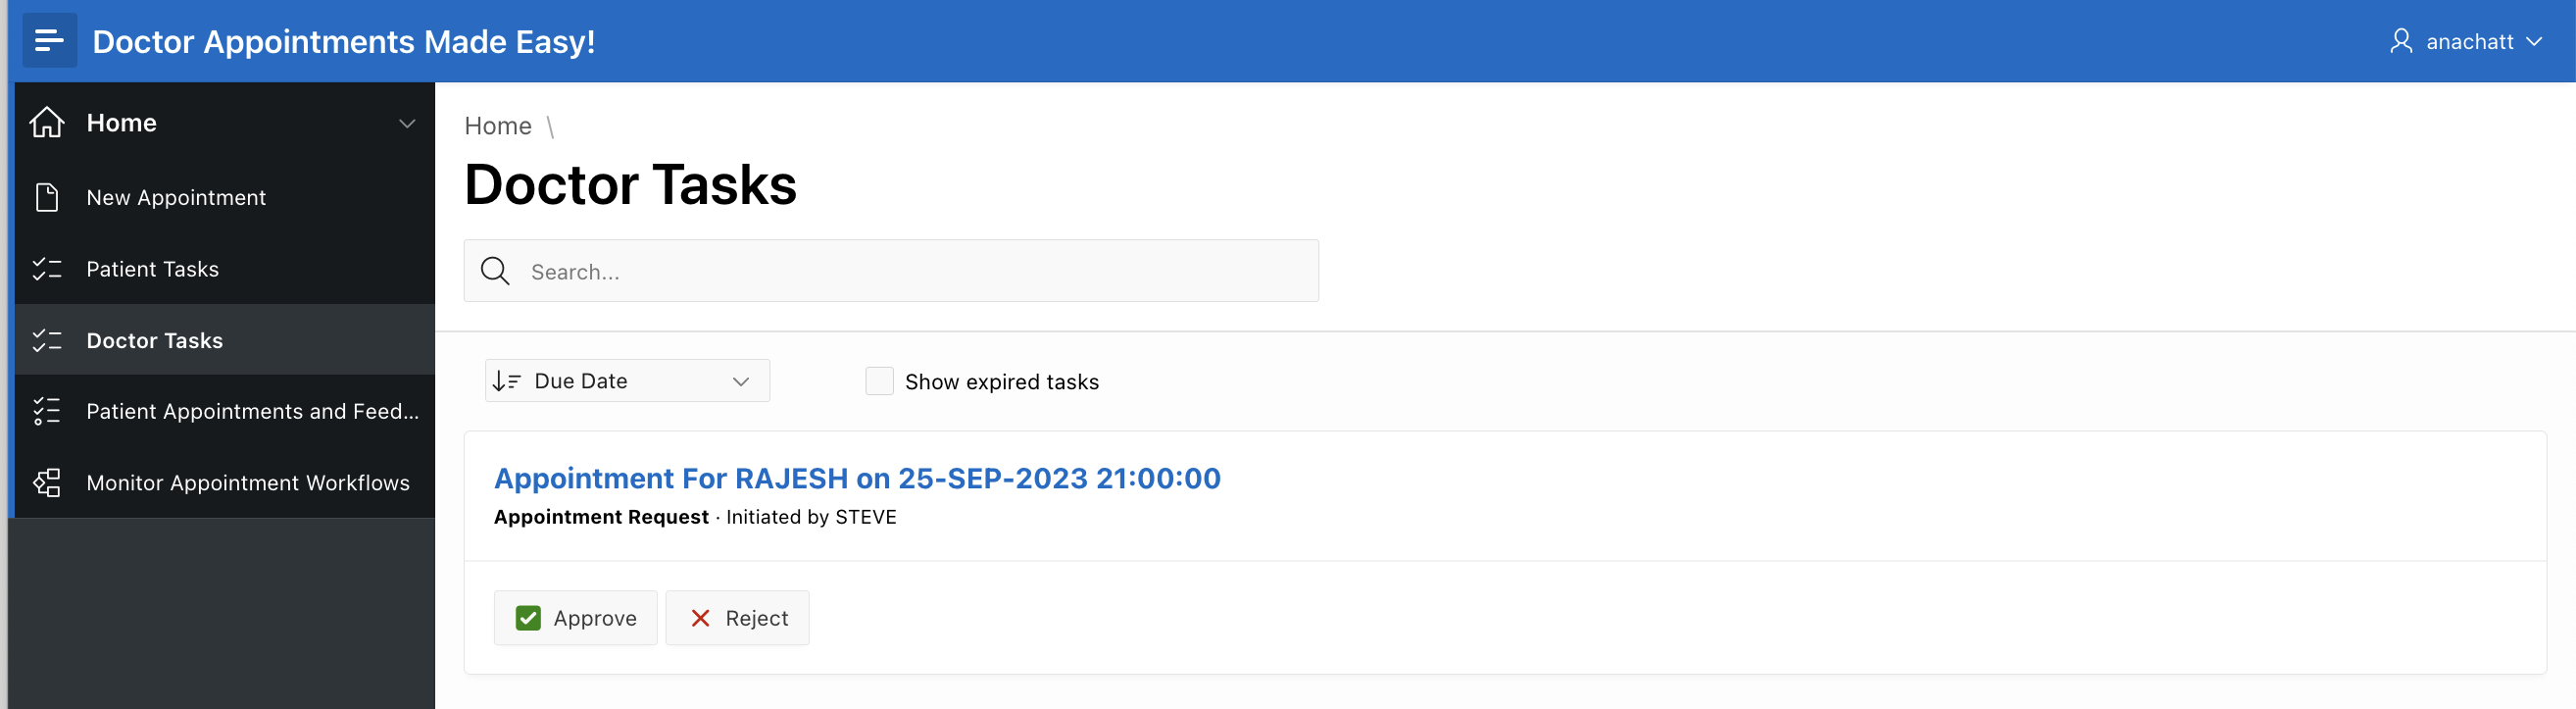
Click on Approve to approve this request.
Log back in as STEVE (Hospital Staff) and click on Monitor Appointment Workflows to monitor the progress of the workflow.
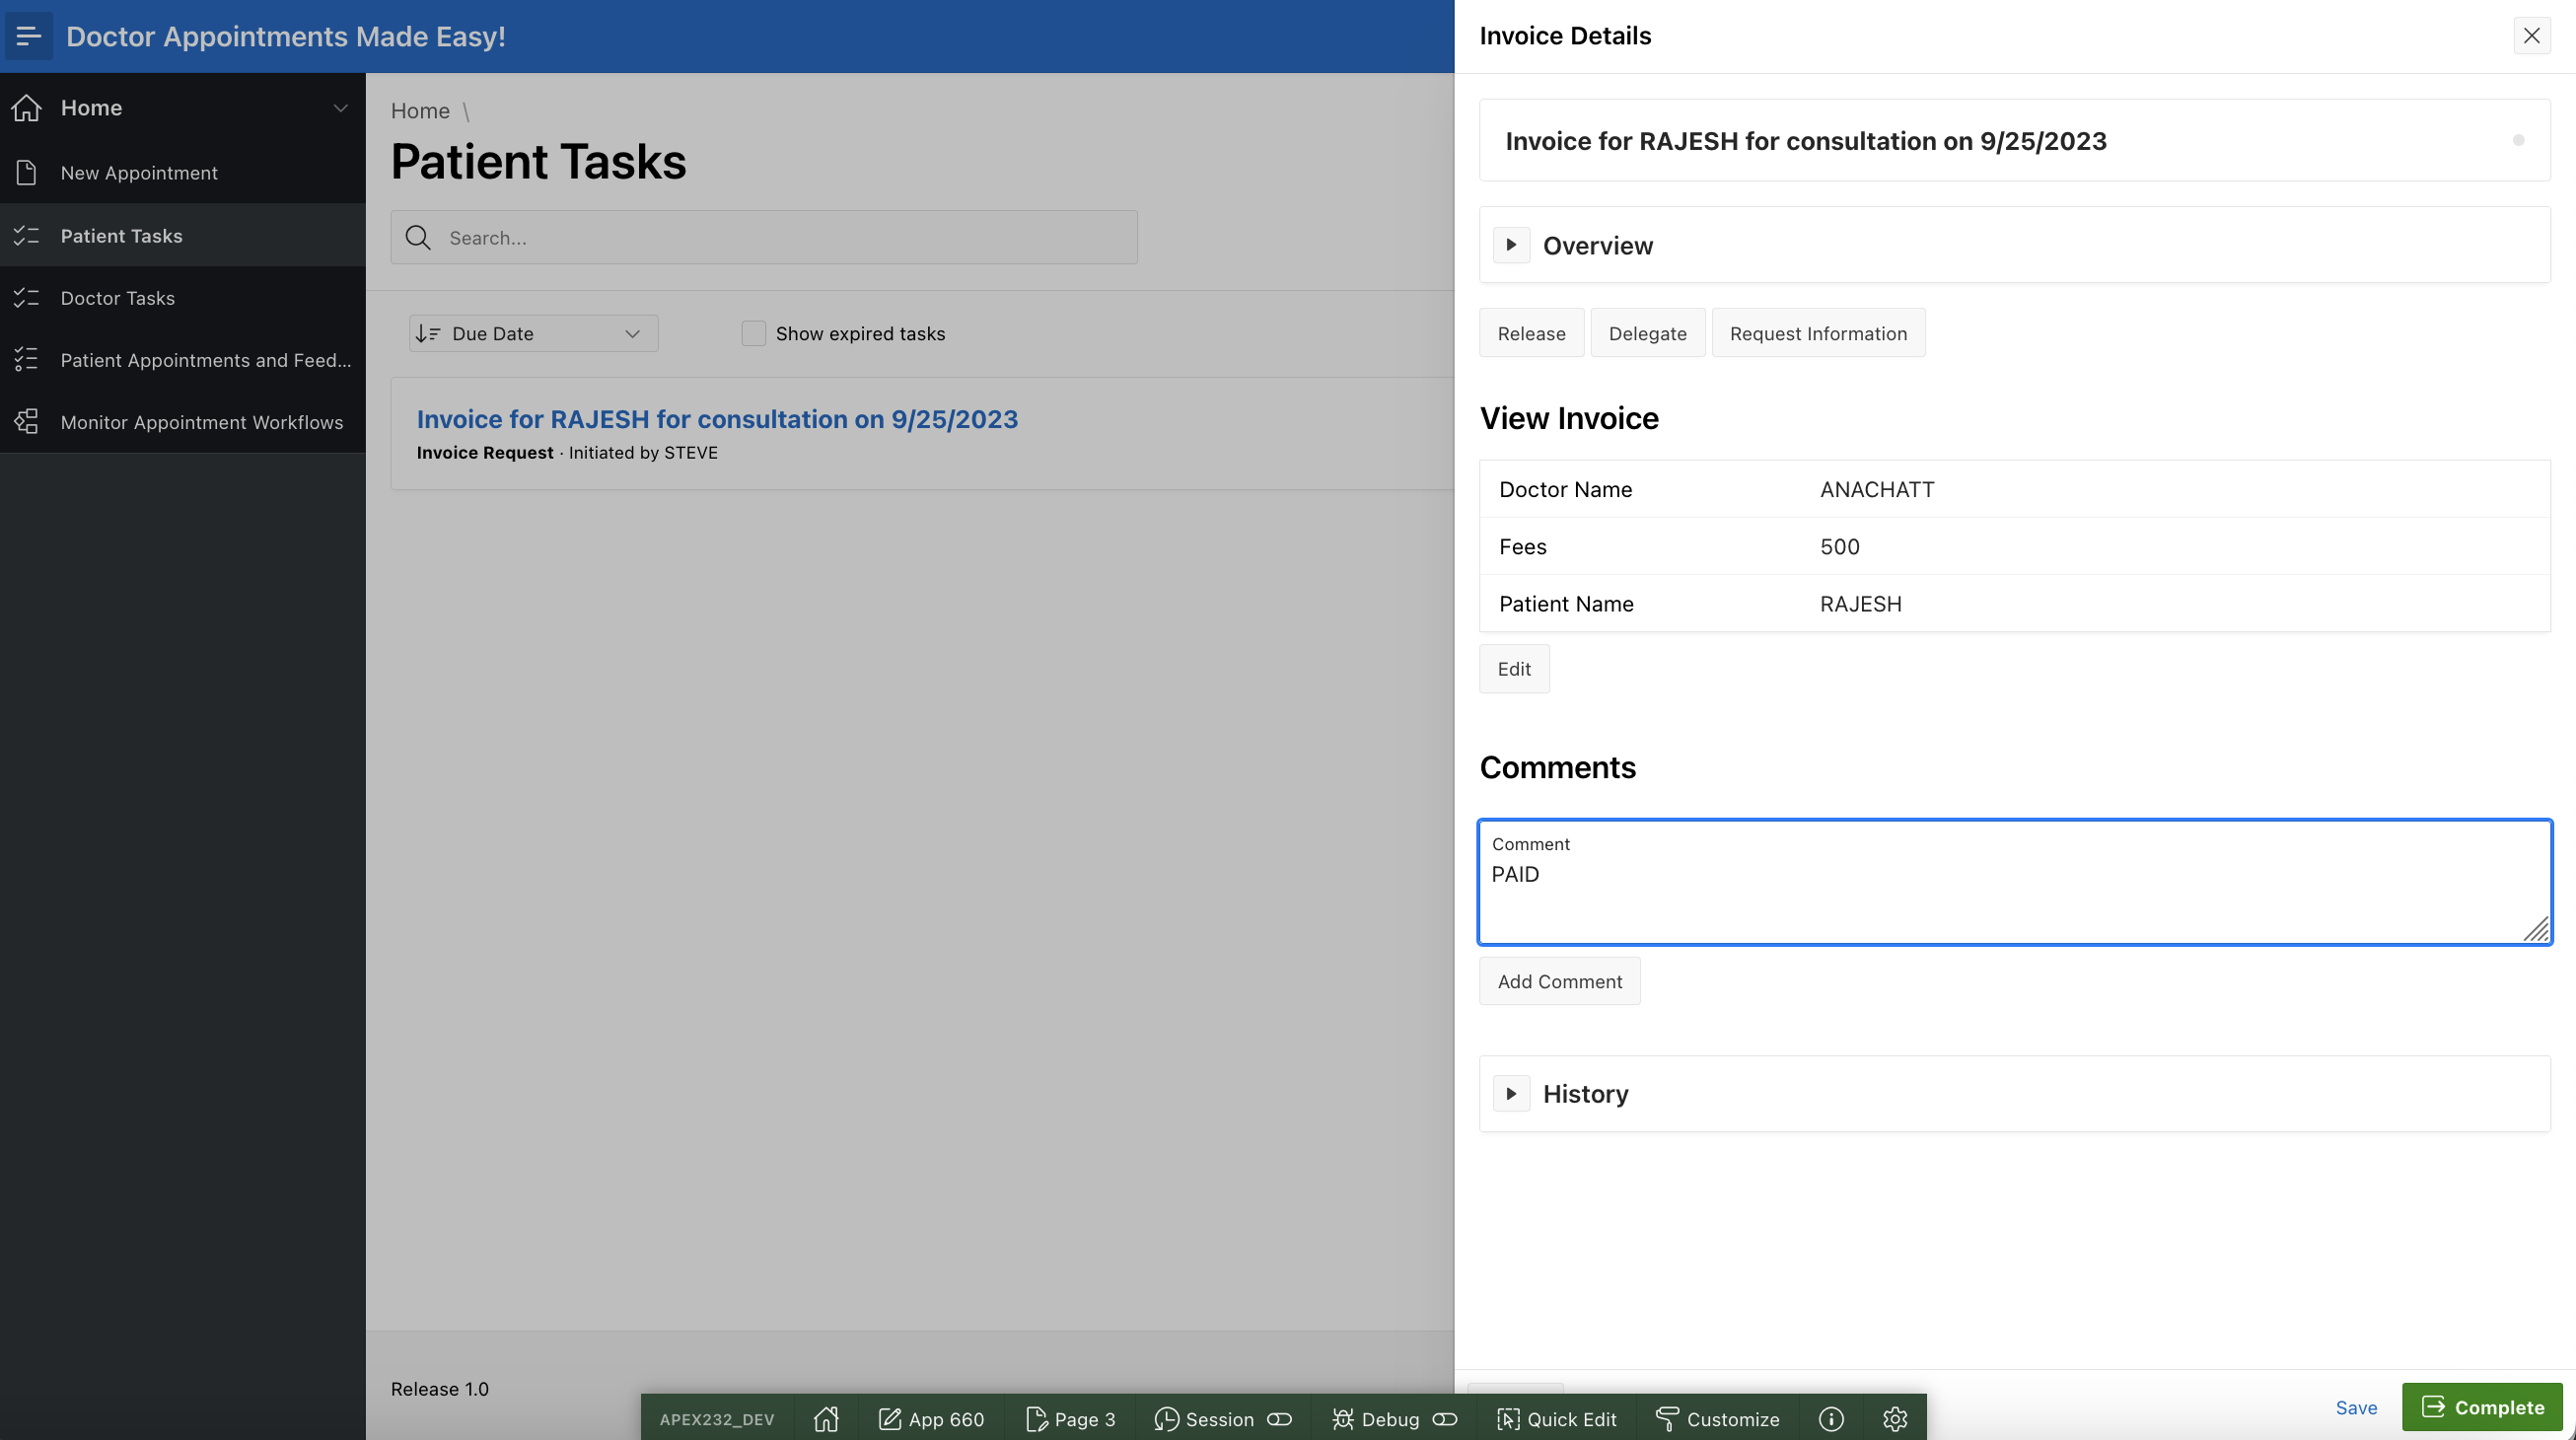
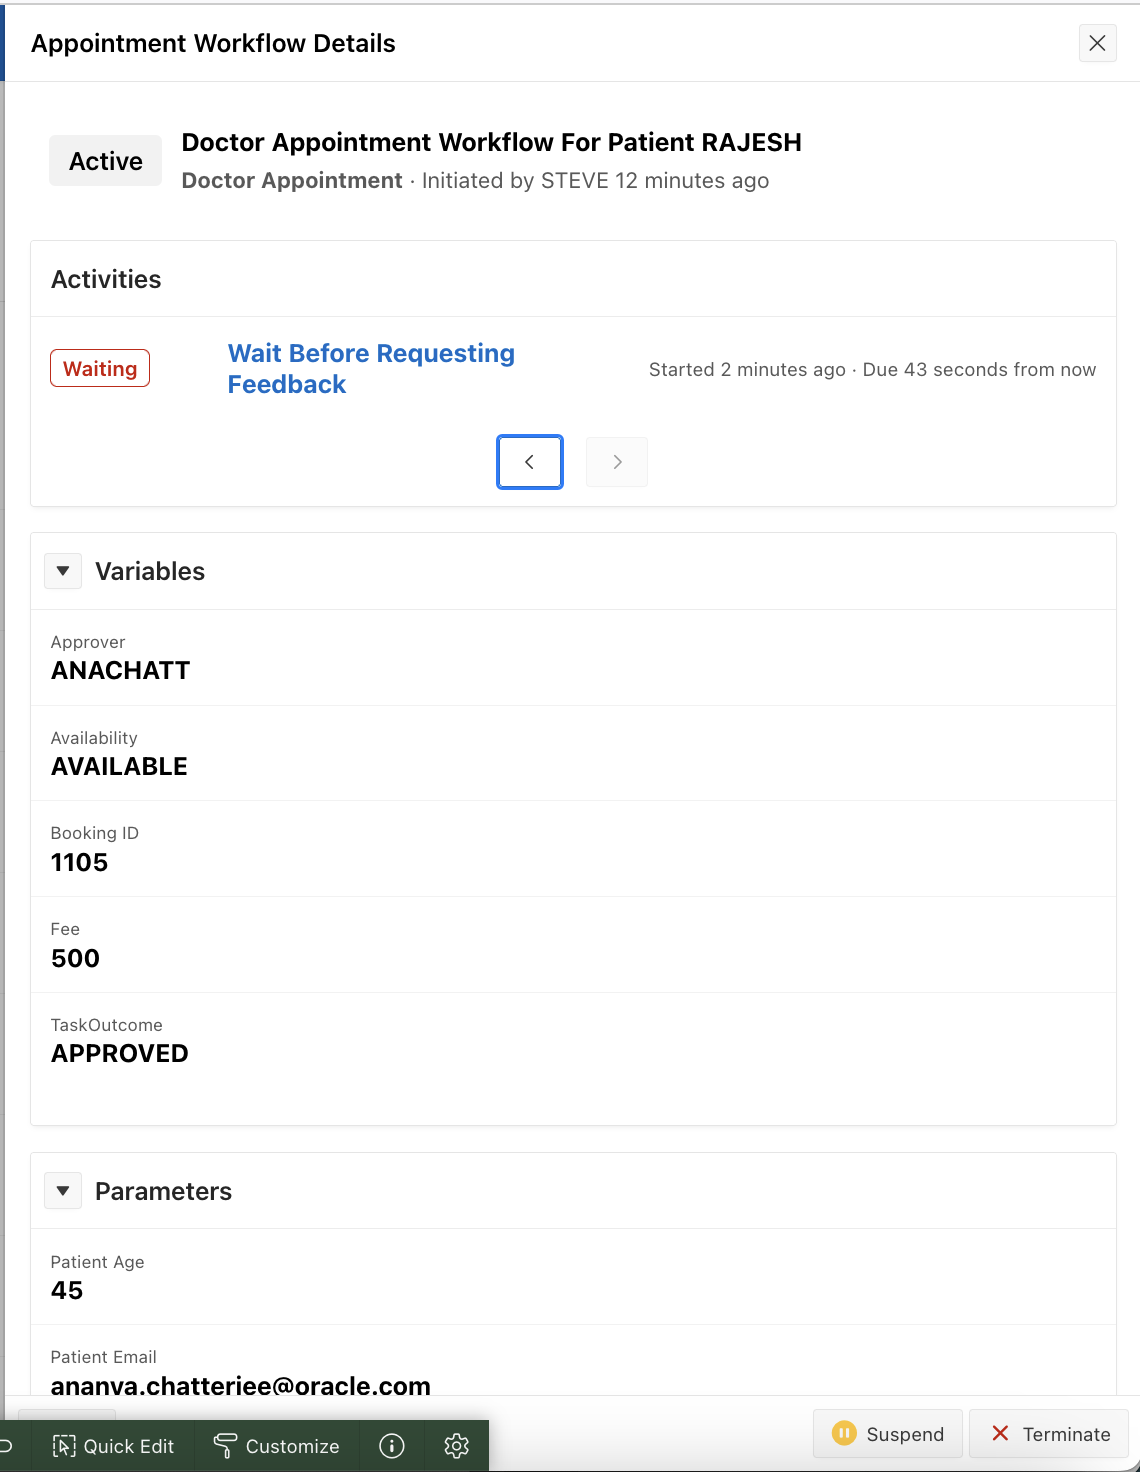
Observe that the Workflow has progressed further and is now waiting at the Raise Invoice Request activity. This activity is waiting for the patient RAJESH to confirm and pay the invoice. Also observe that the Workflow Variables: Approver , Fee , and TaskOutcome are correctly set.

Log back in as RAJESH and click on the entry in Patient Tasks to complete this request.
Log out and log back in as STEVE to once again monitor the state of the workflow.
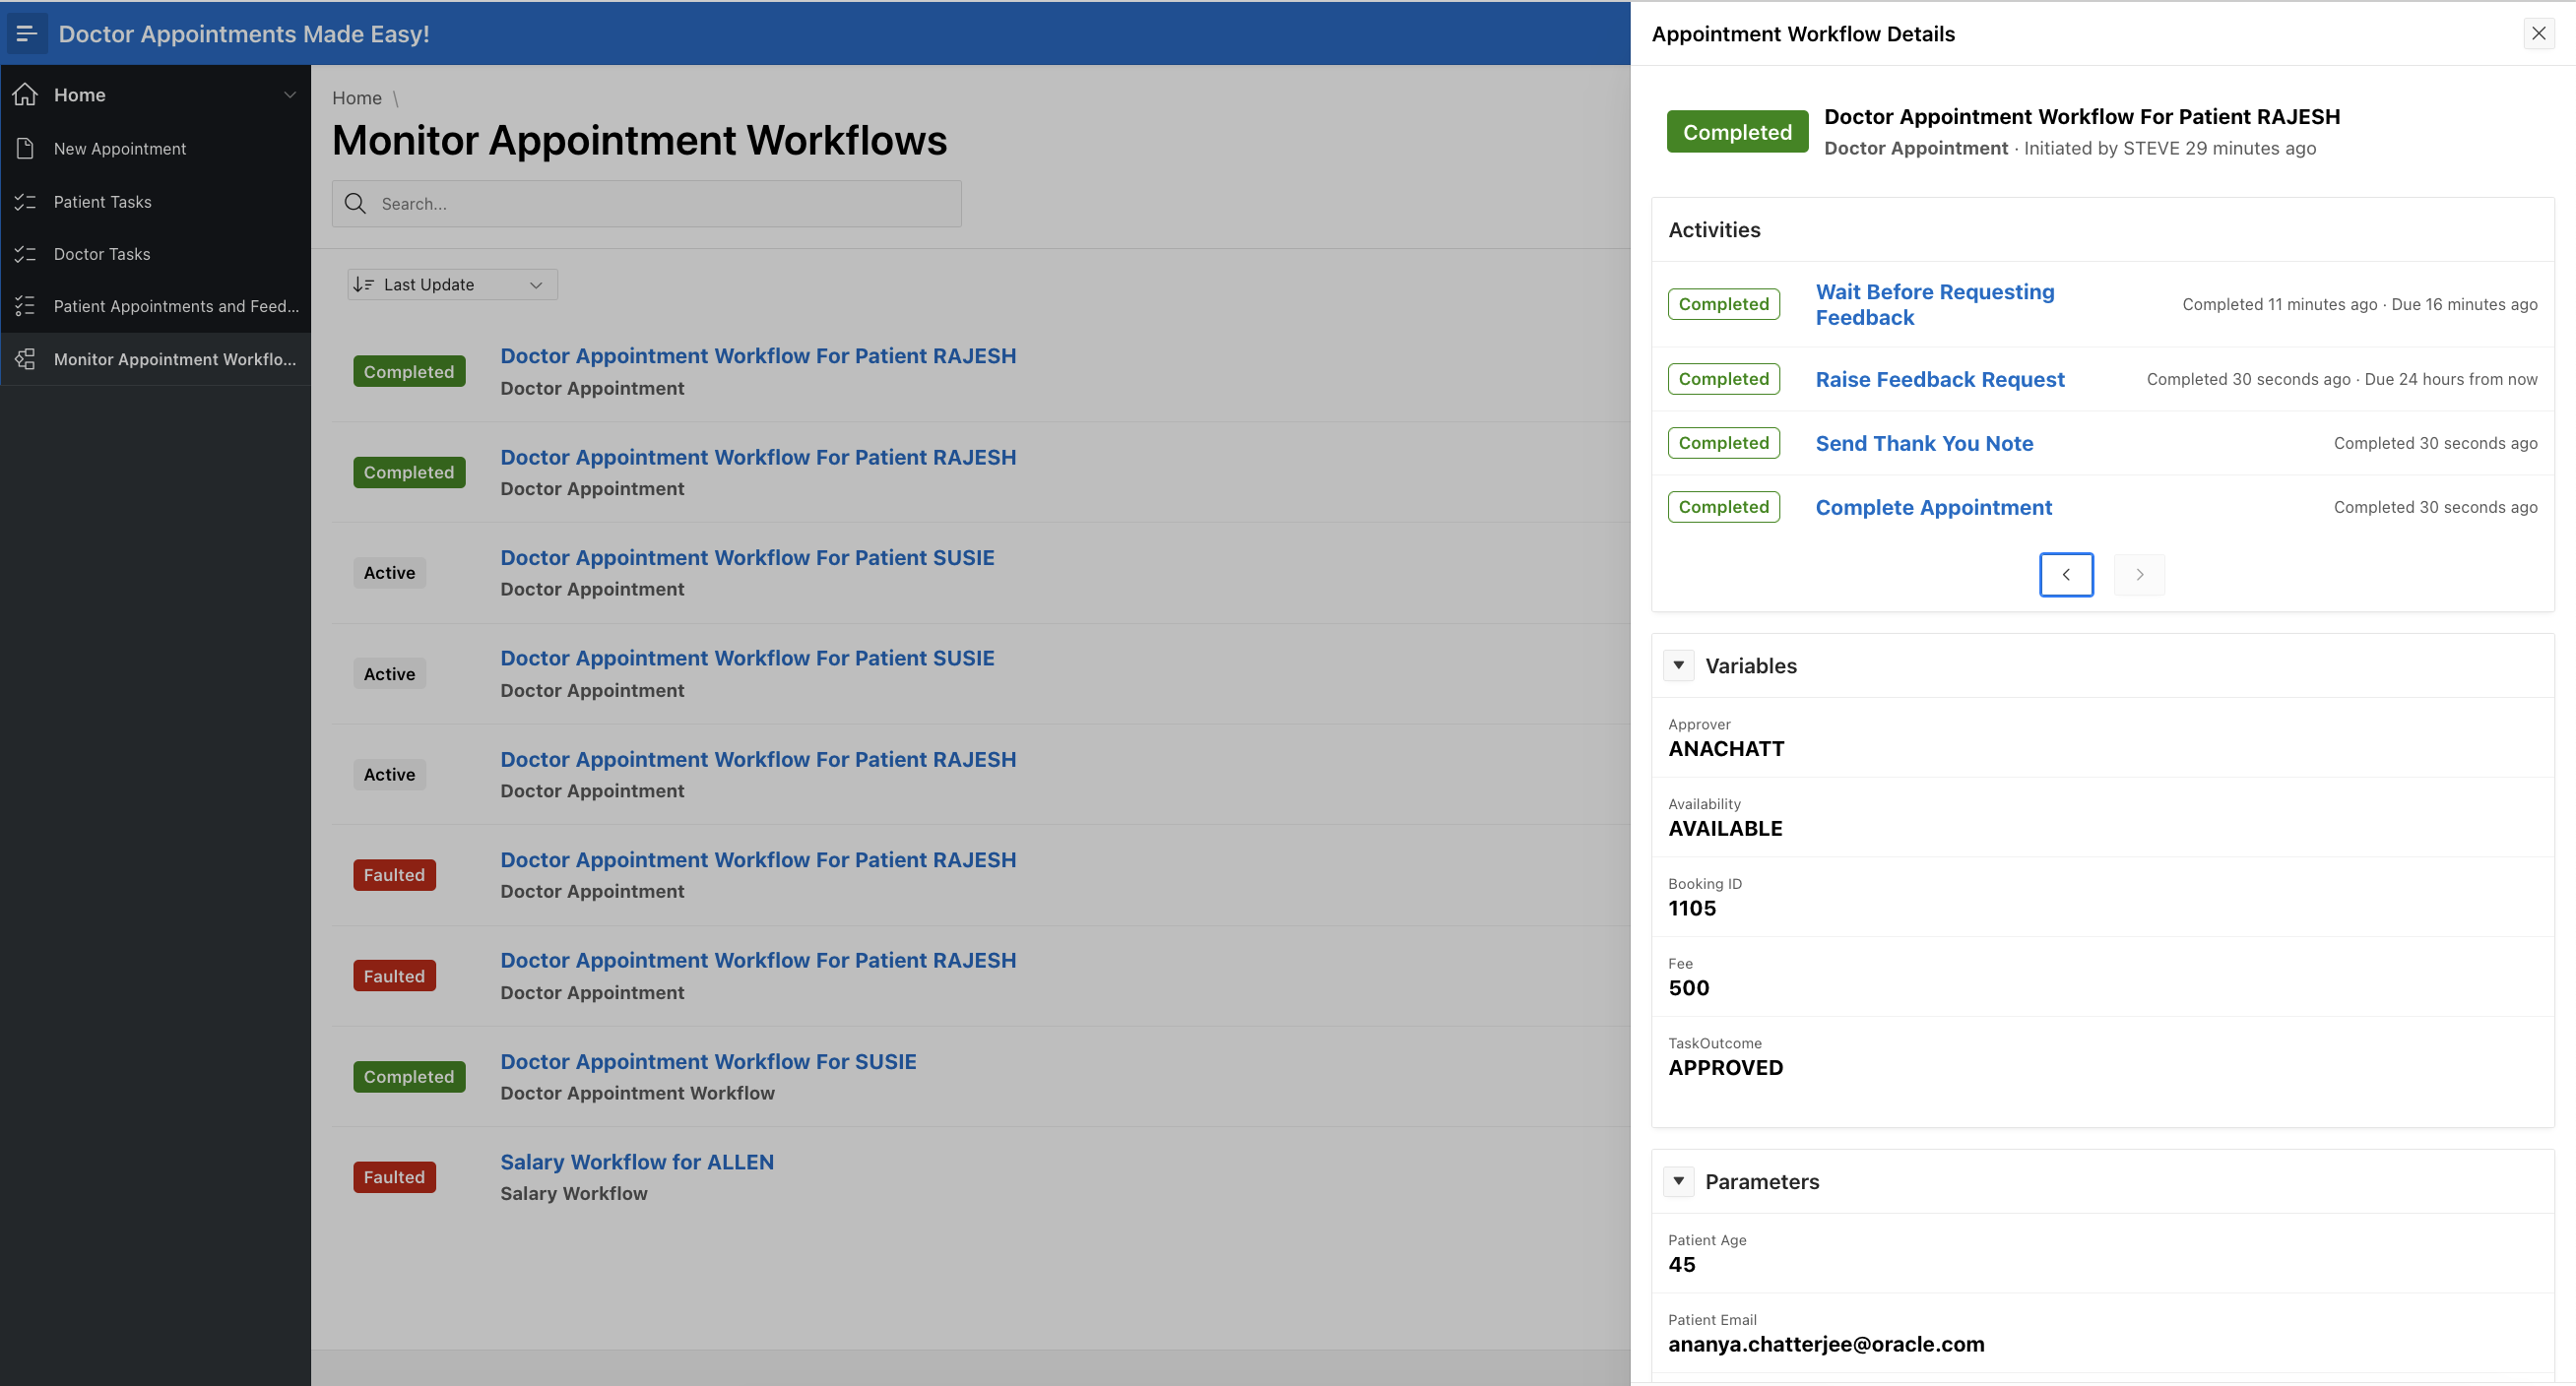
Observe that the workflow has now completed the Raise Invoice Request and Update Appointment Activities.
Click on the next page button below the Activities.
On the next page, observe that the Workflow is now waiting for the Wait Before Requesting Feedback activity to complete. Recall that the Wait activity has a timeout setting which elapeses once the Appointment Time is reached.
At this point we wait for the appointment time to elapse, and check back again once that happens. This is what is observed.

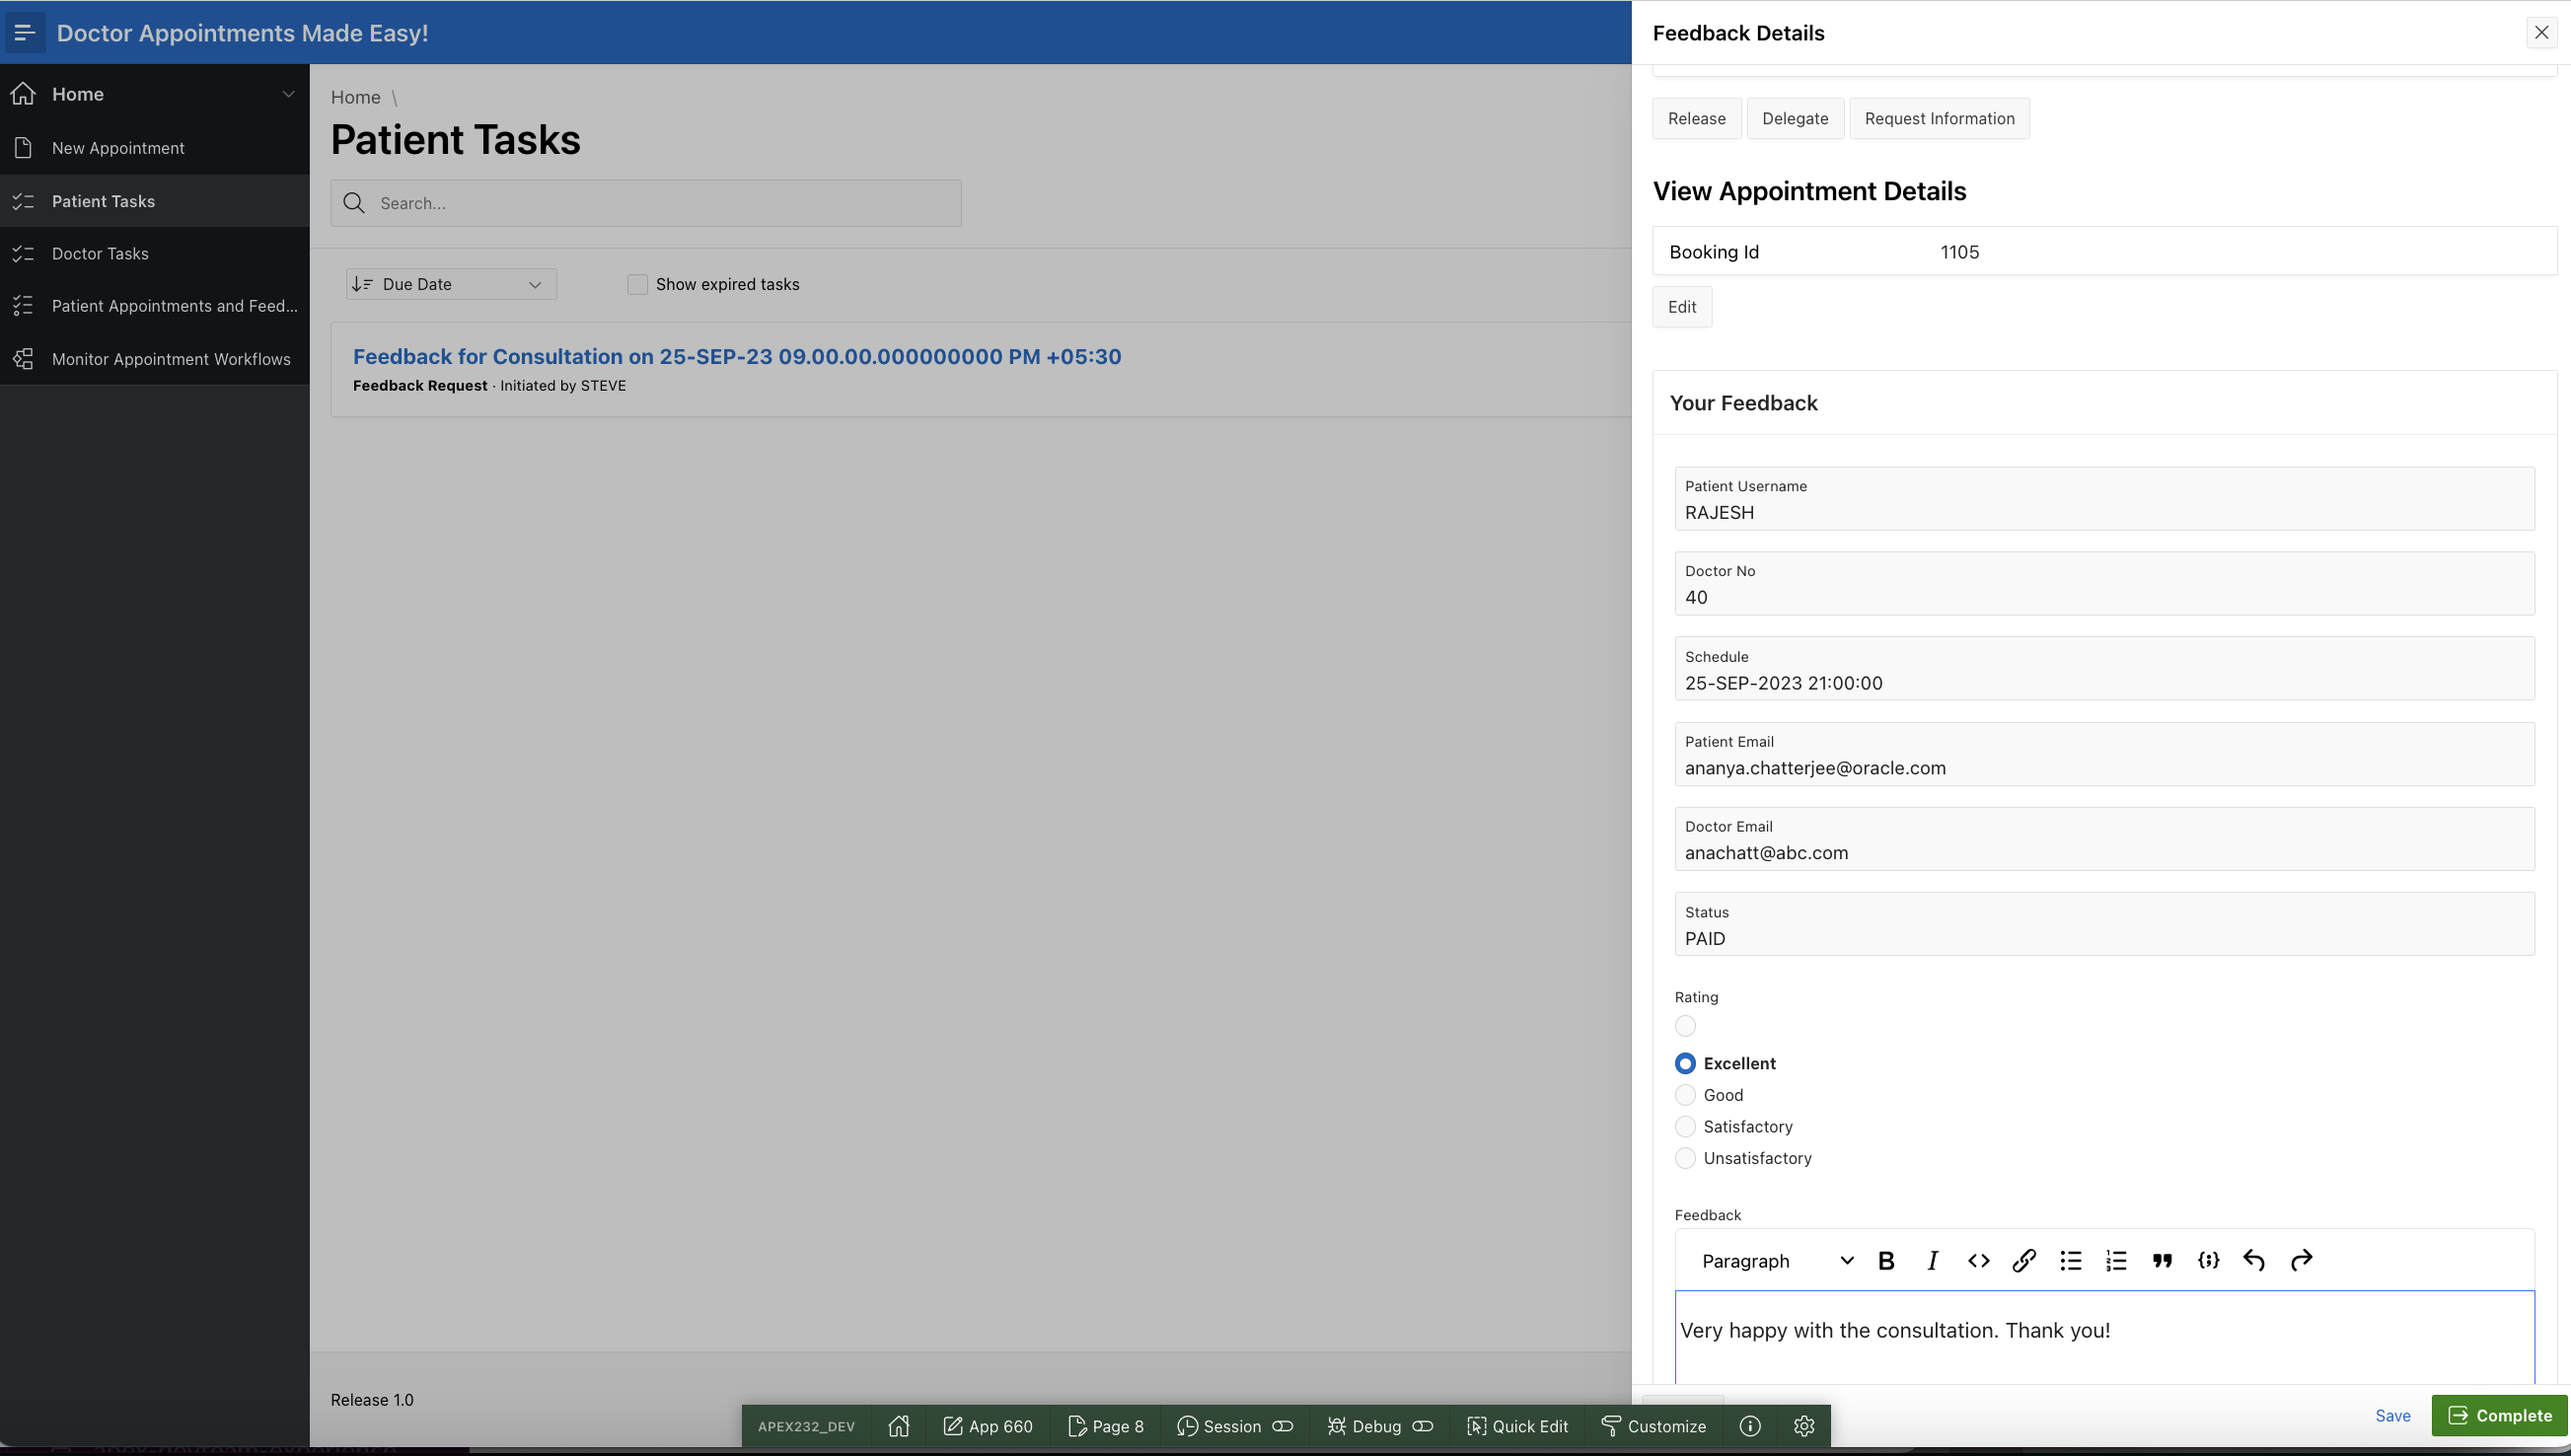
Now that the Feedback Request has been raised, log out and log back in as RAJESH , the patient.
Click on Patient Tasks. You will find a Feedback Request Task waiting for your action.
Click on it and fill in the Feedback Form as shown below
Click on the Complete button.
Log out and log back in as STEVE to monitor the workflow. Observe that the Workflow is now Completed.
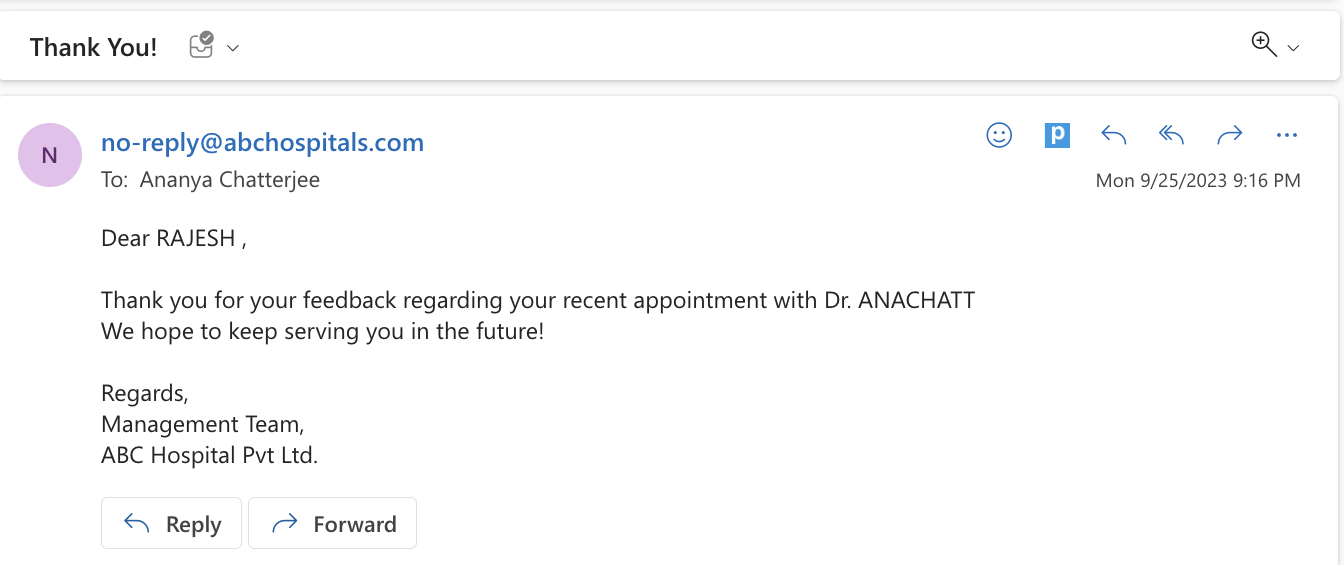
Check the inbox of the mail id used for the patient.
You will find a Thank You Email.
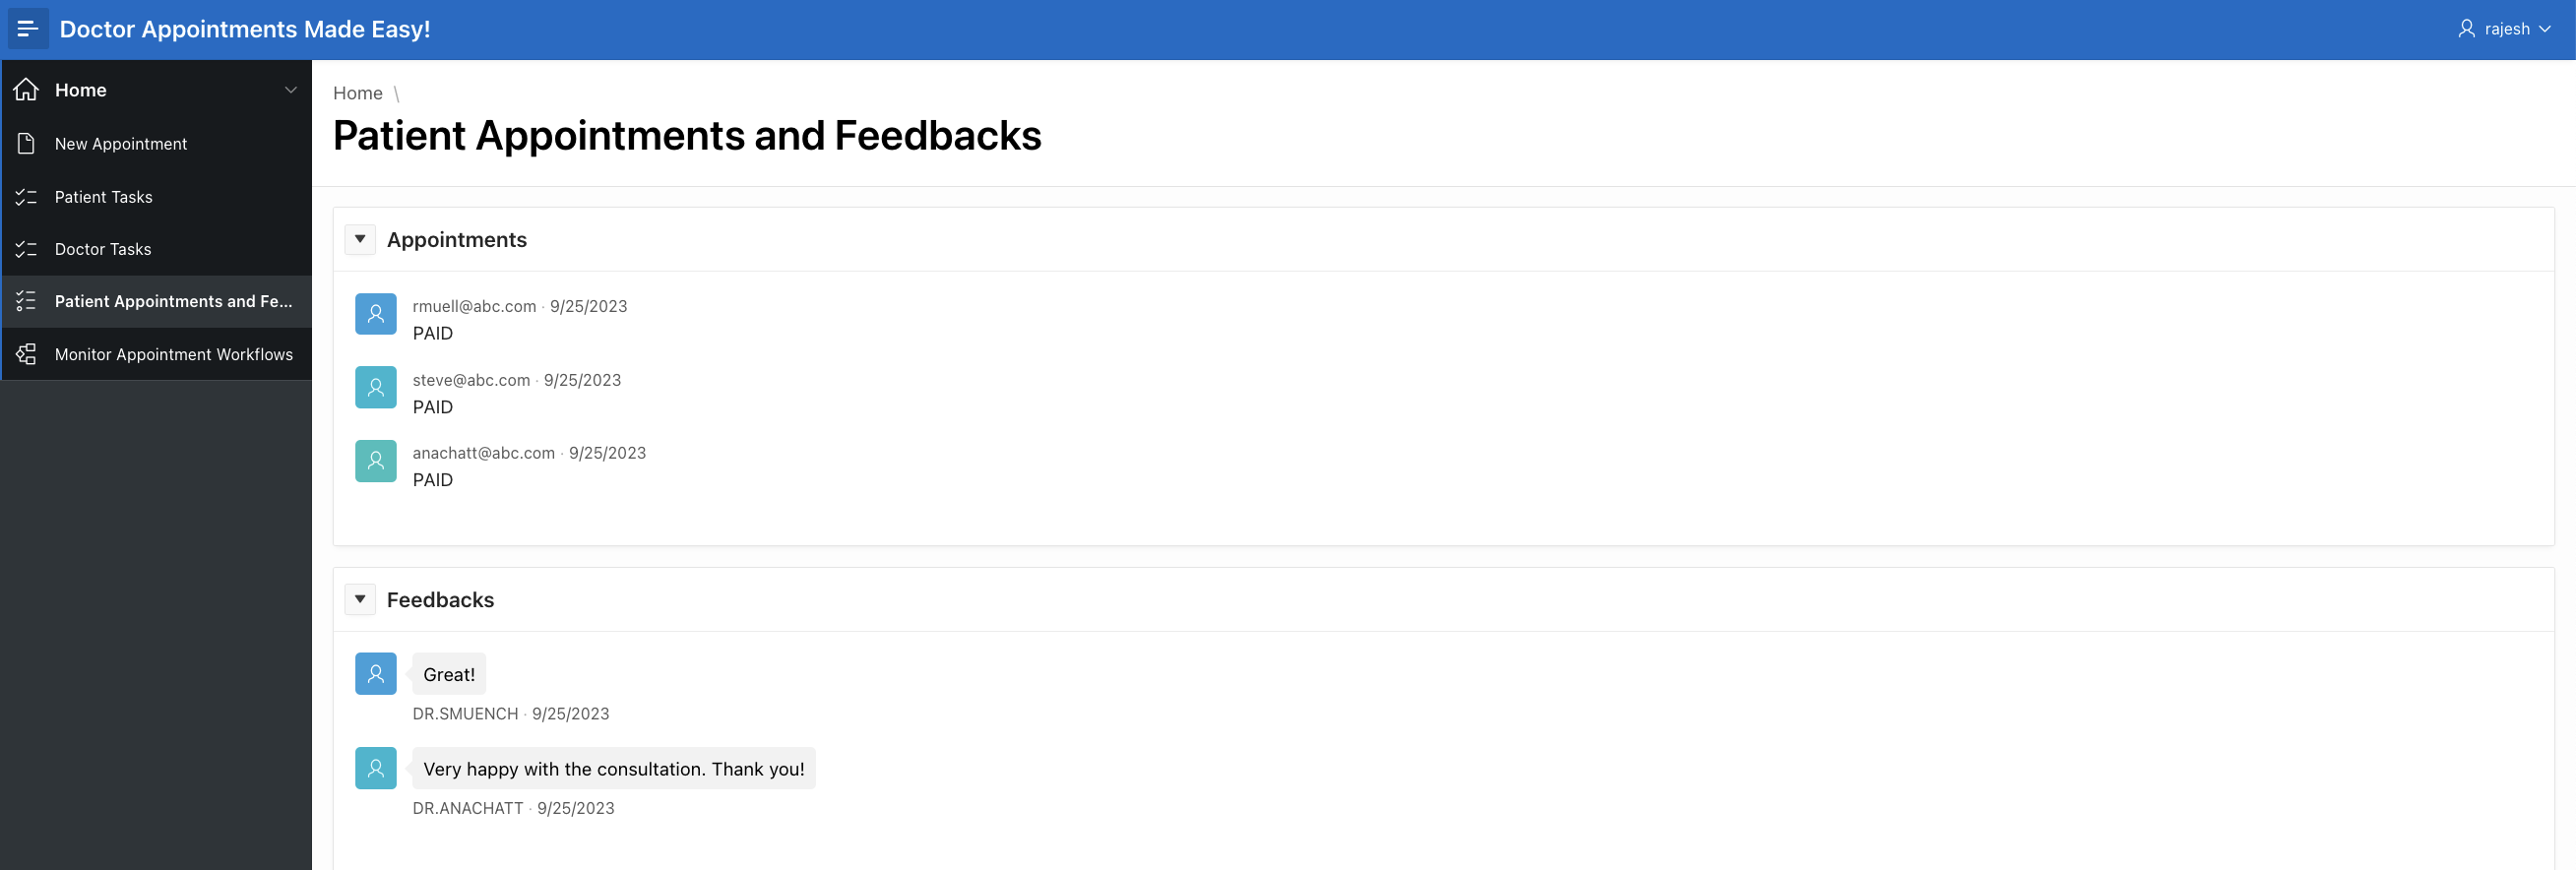
Log back in as RAJESH and click on Patient Appointments And Feedbacks . You will find the Feedback entered successfully in the system.
Other Scenarios to try…
You may try the following usecases and observe the difference in the workflows.
1. As a Hospital Staff, try to book 2 appointments for the same time, on behalf of 2 different patients for the same Doctor. Observe that the workflow terminates for the second patient and the patient receives a No Appointment Email.
2. As a Doctor, Reject an Appointment Request. Observe that the workflow terminates for the patient and the patient receives a No Appointment Email.
3. As a Hospital Staff, try to book an appointment for the same patient for the same doctor with an appointment date which is within 7 days of the last appointment. Observe that the calculated consultation fees is 0.
4. As a patient, after receiving an Invoice Request, do not act on the task. Observe that after 1 day, the workflow has terminated and the patient receives a No Appointment Email.
5. As a patient, after receiving a Feedback Request, do not act on the task. Observe that after 12 hours, the workflow has completed and no Thank You Note is received by the patient.
What did you learn?
In this blog-series you learnt how to
a. Automate your business process and logic using APEX Workflow
b. Define workflow activities, variables, parameters,additional data, and connections to suit your business logic.
c. Start a new workflow through a Page Process
d. Monitor the progress of workflows you have initiated
What’s next?
If you’ve enjoyed the contents of this blog, you’d surely be excited about the next blogs on Workflow, where you will learn more about
a. Workflow Lifecycle management and versioning – How to activate/ deactivate workflows
b. Defining Workflow Participants. Authorization checks based on report contexts in Workflow Console.
c. Performing workflow operations in the Workflow Details page – Suspend, Resume, Retry, Update Variables, Terminate.
d. Unblocking Wait activities in a running Workflow.
e. Error Handling and Debugging in a Workflow