Creating the New Appointments Page
Now that the Workflow is created, let us create the Page which will be used by the Hospital Staff to Submit a New Appointment.
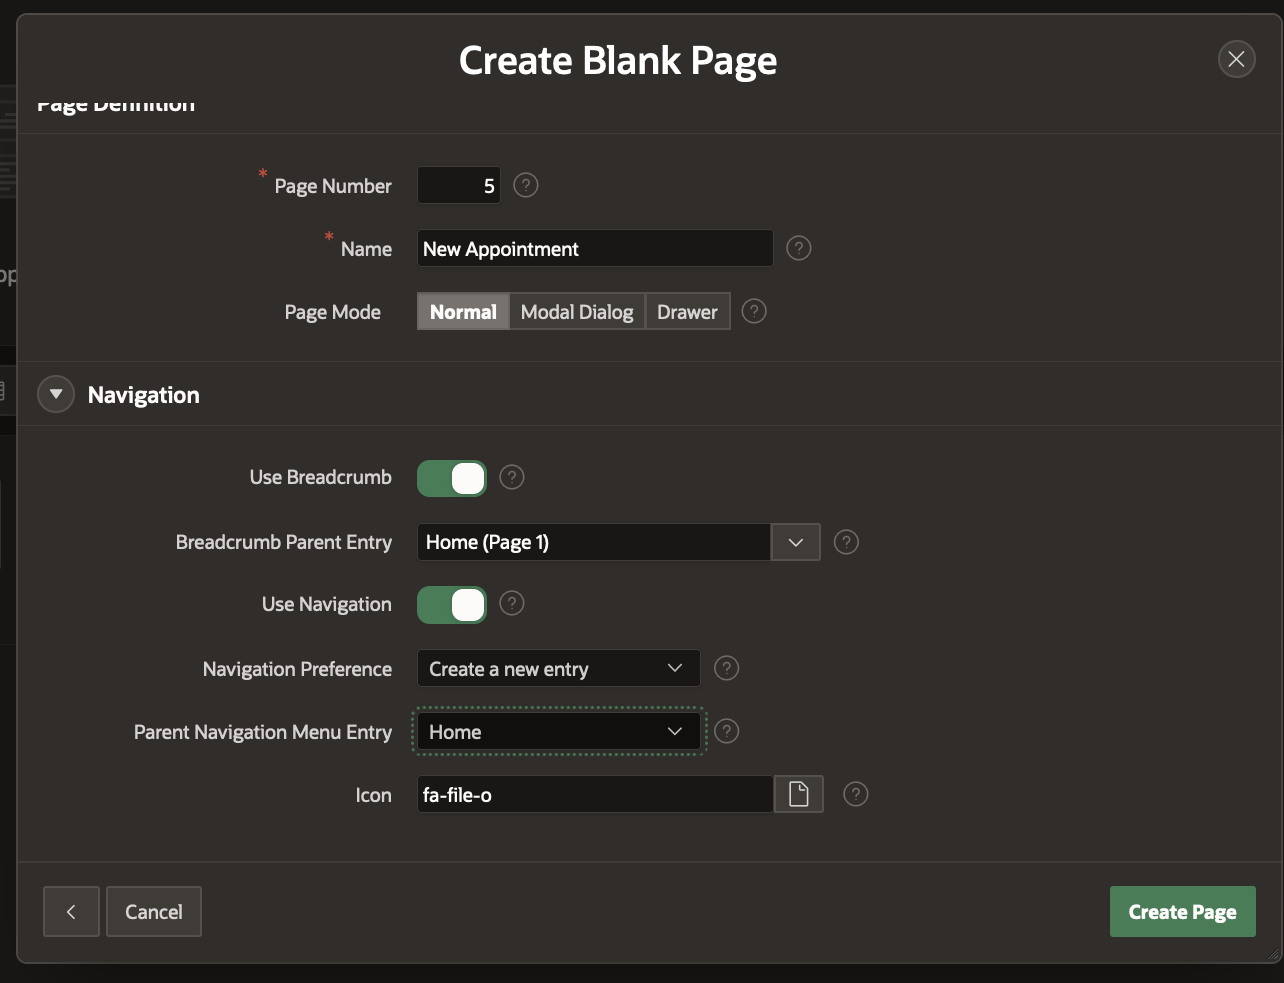
Click on Create Page in your Doctor Appointments Made Easy! application.
Name this page “New Appointment” and add it as a breadcrumb under the Home page
In the Page Designer, create a new Static Content and name it Patient Appointment Details. Add 6 page items – P5_NAME, P5_EMAIL, P5_DESC, P5_APPT_DATE, P5_DOC and P5_AGE
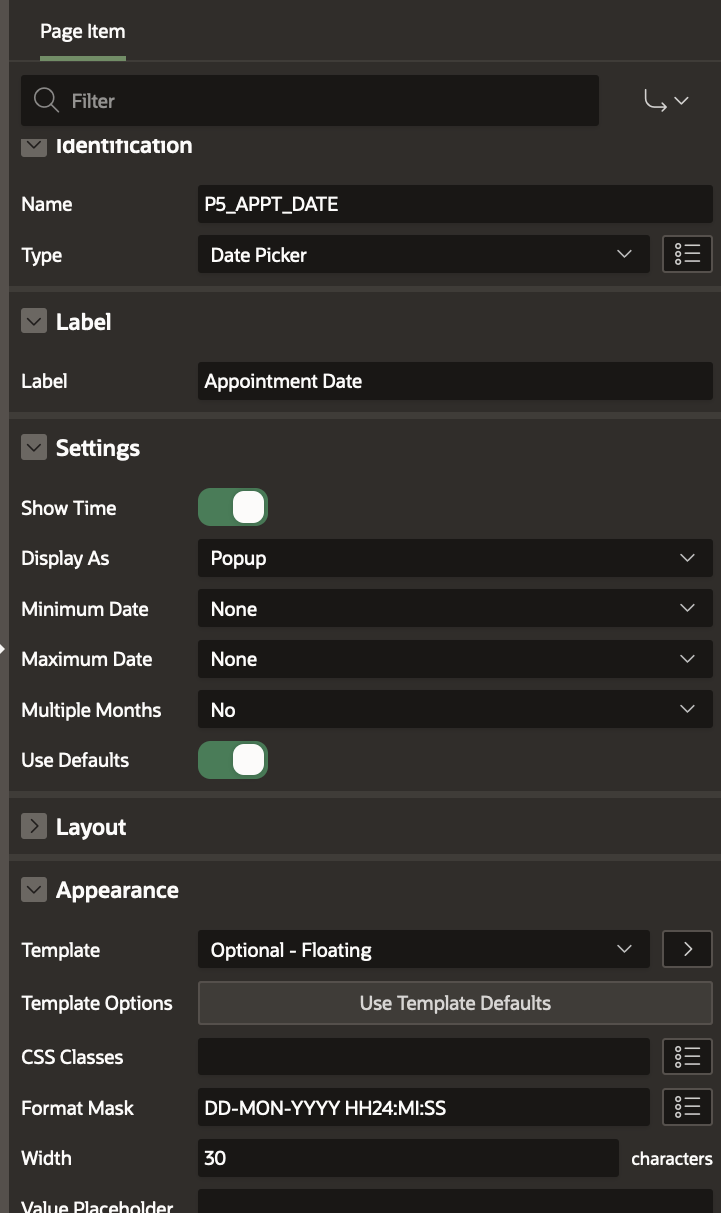
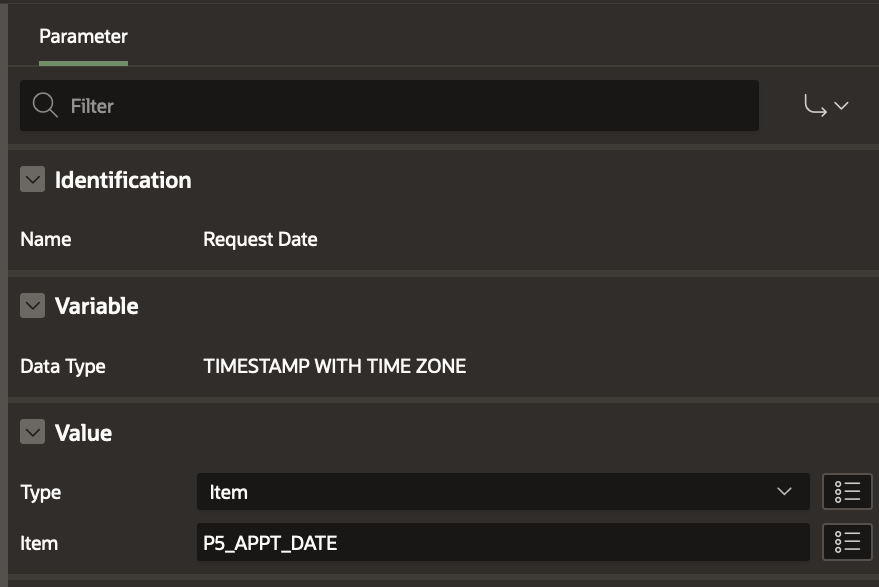
Set the type for P5_APPT_DATE as DatePicker. Fill in the properties as shown below
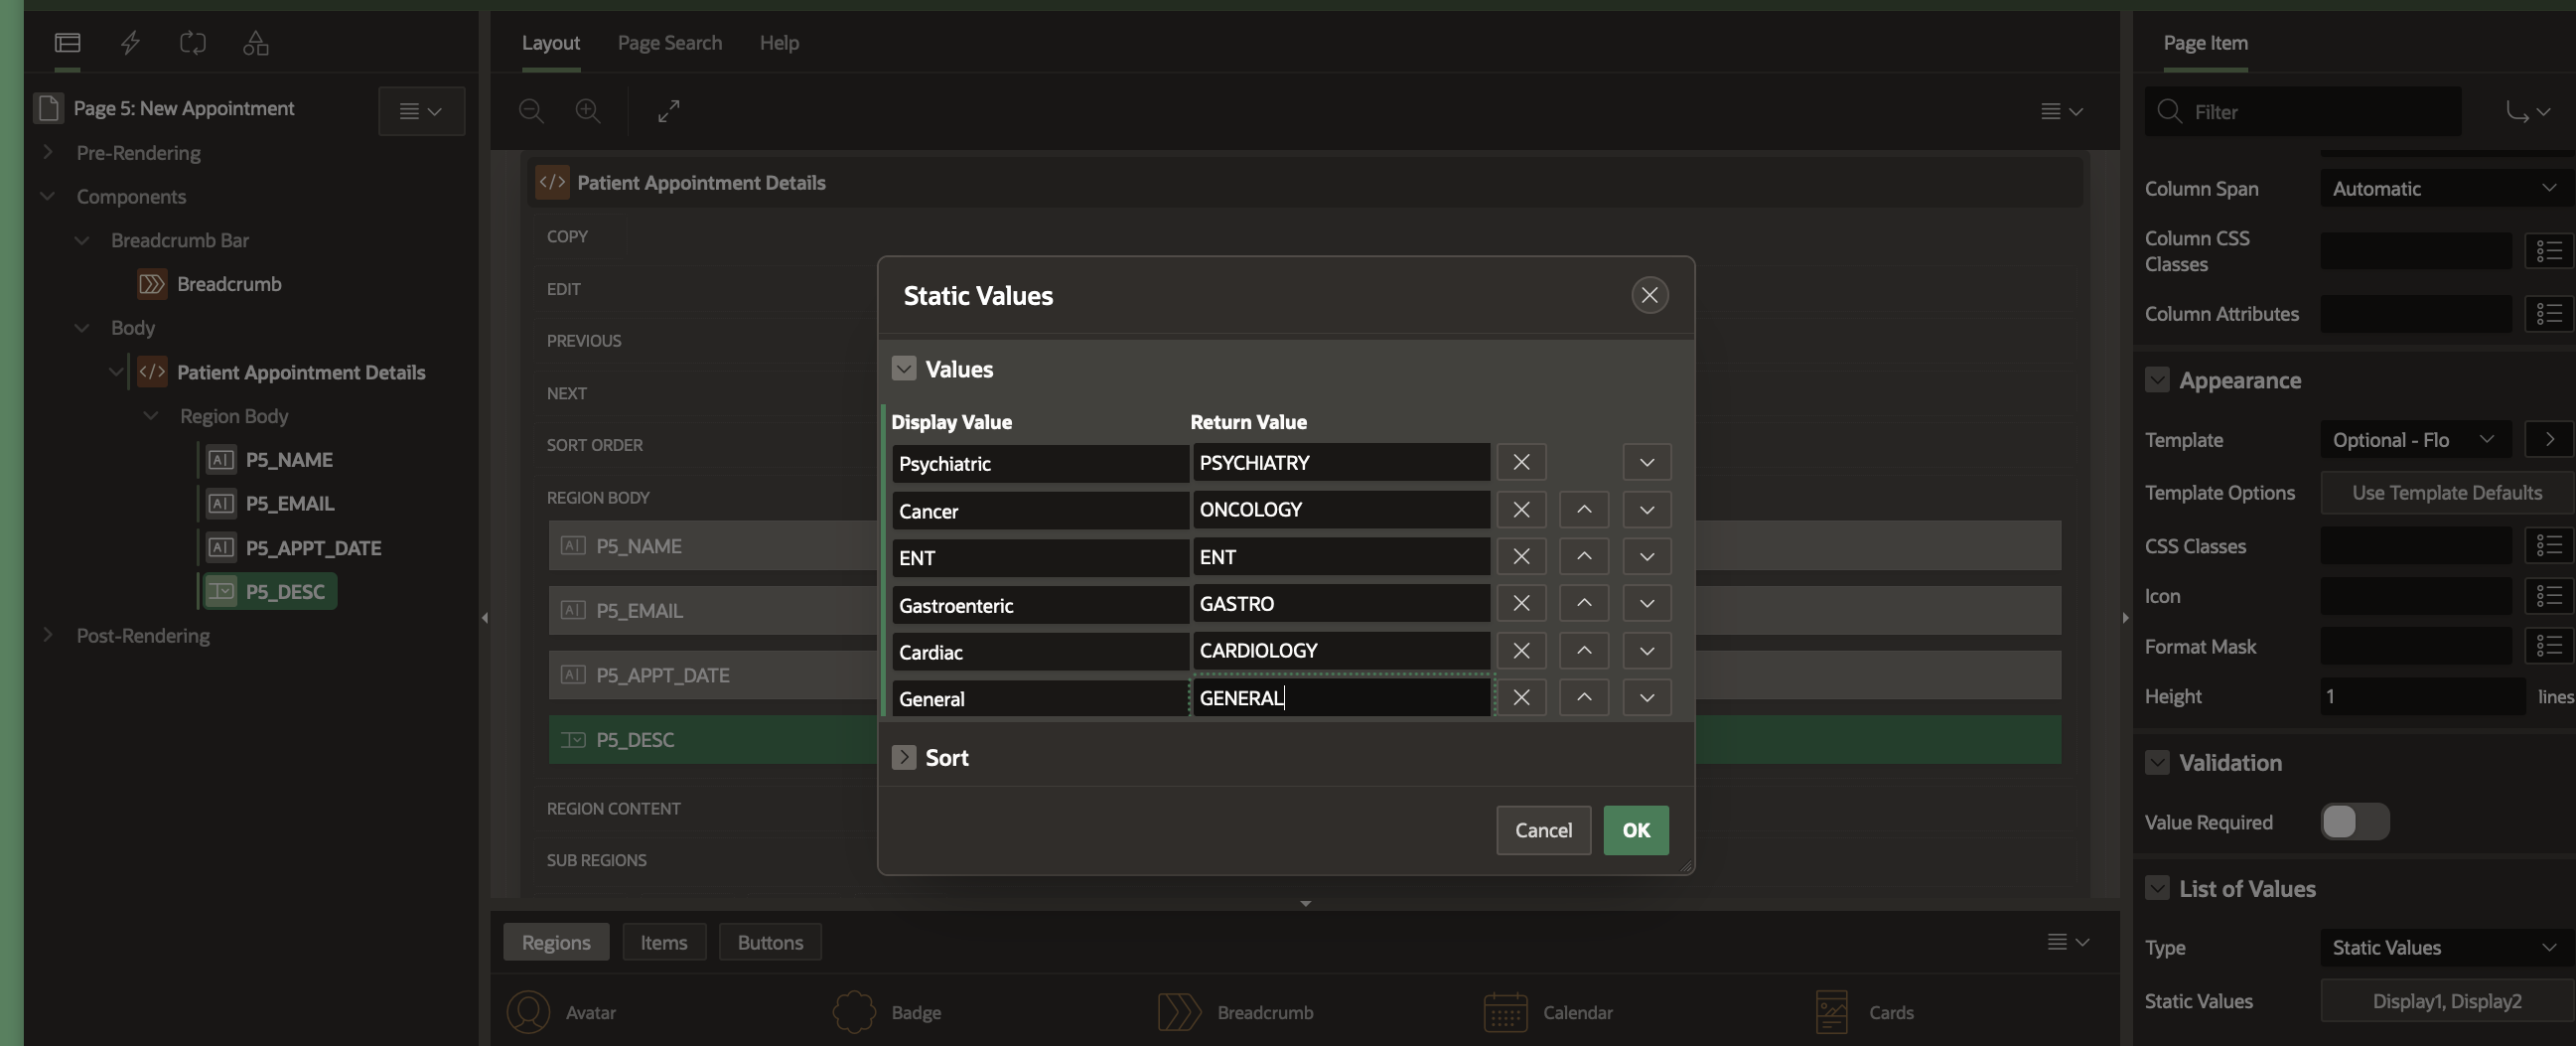
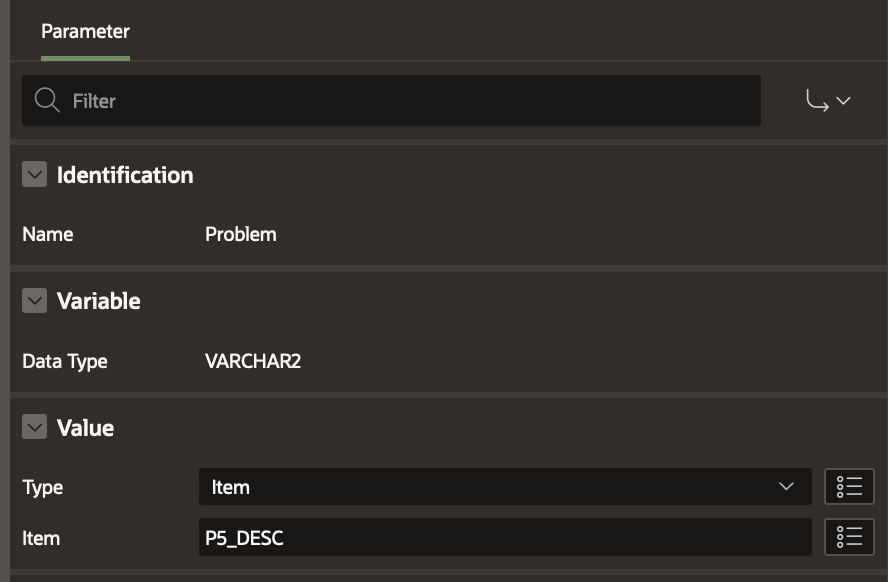
Set the type for P5_DESC to Select List, set the label as Problem and define a list of static values as following:
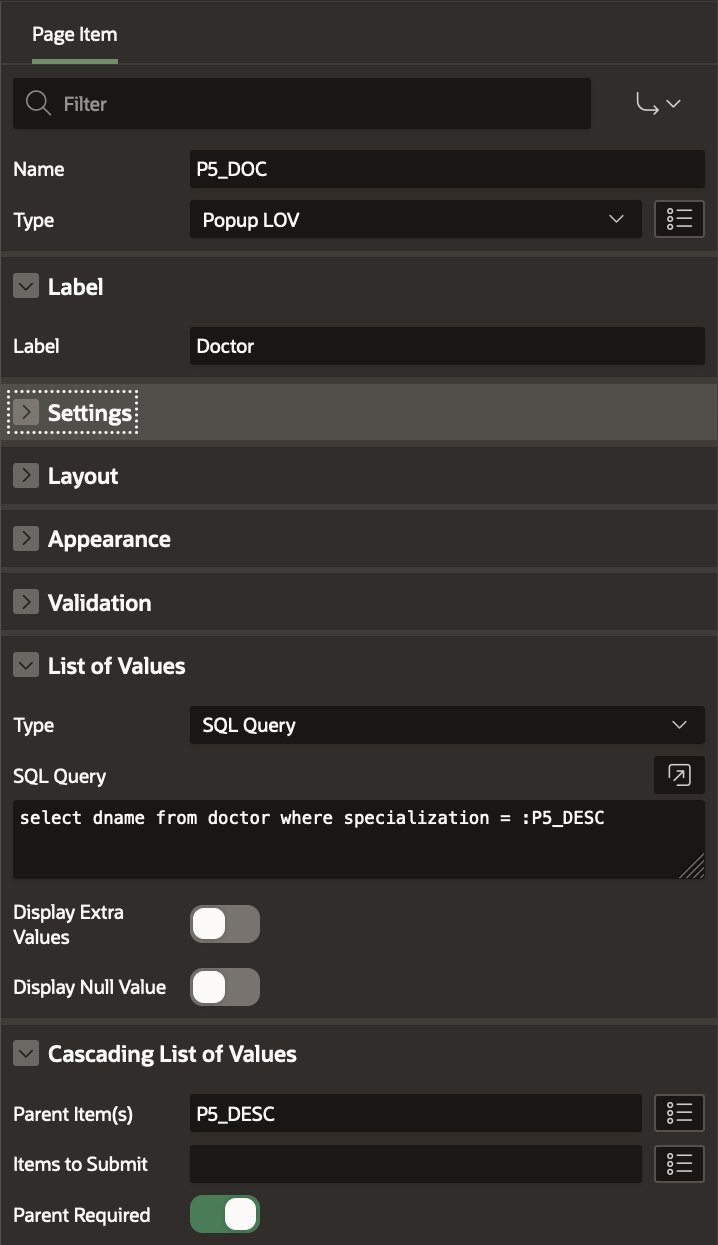
For the P5_DOC Page Item, specify the type as POP LOV and specify the List Of Values using the following SQL Query:
select dname from doctor where specialization = :P5_DESC
Specify Cascading List Of Values -> Parent Items as P5_DESC.
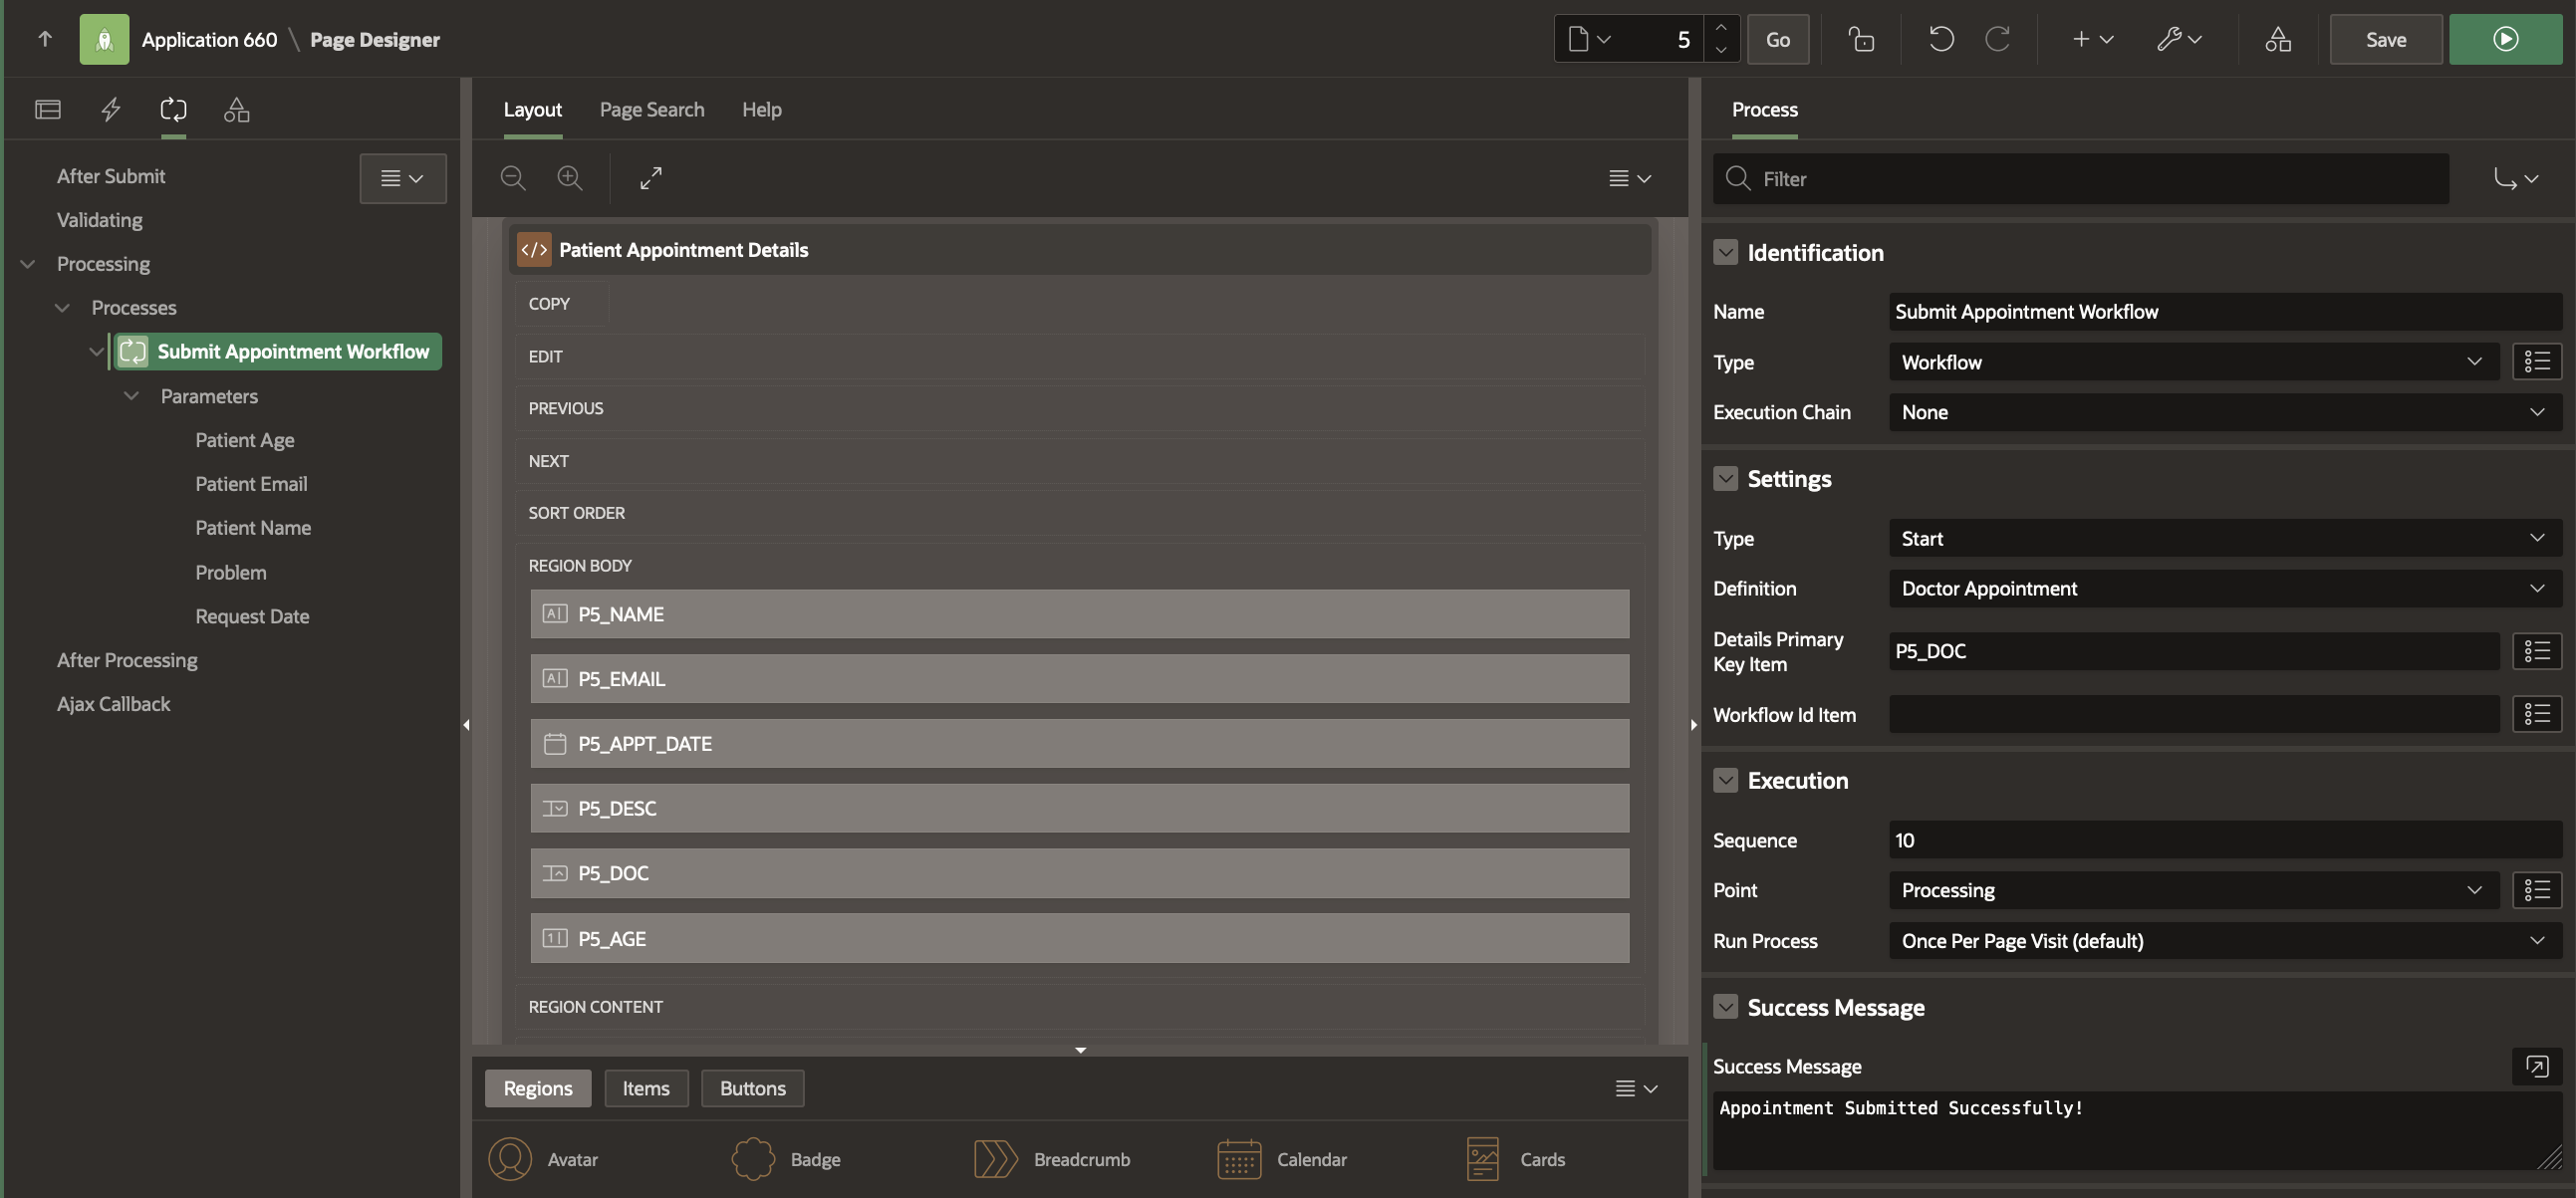
Navigate to the Processing Tab and Create a new Page Process of type Workflow. Name the process “Doctor Appointment Workflow”“.
Under the Settings, Click the Type and set it as Start. Set the Workflow Definition as Doctor Apppointment.
Set the Details Primary Key Item as P5_DOC. This is how the additional data defined for your workflow gets tied to the DOCTOR table records.
Set the Success Message as “Appointment Submitted Successfully!”
Set Parameters for the Workflow Page Process
Under Submit Apppontment Workflow in the Processing section:
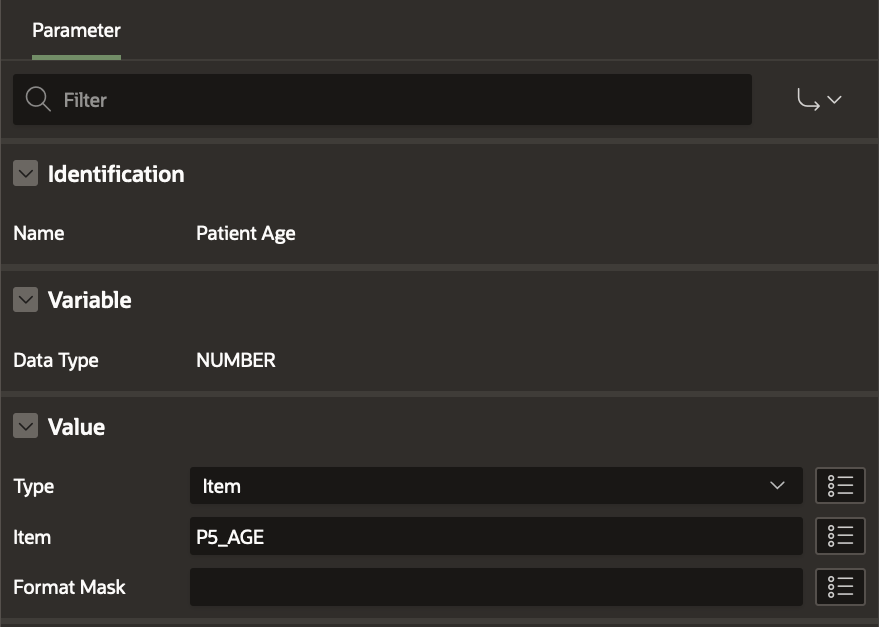
Click on Patient Age and set it to Item P5_AGE
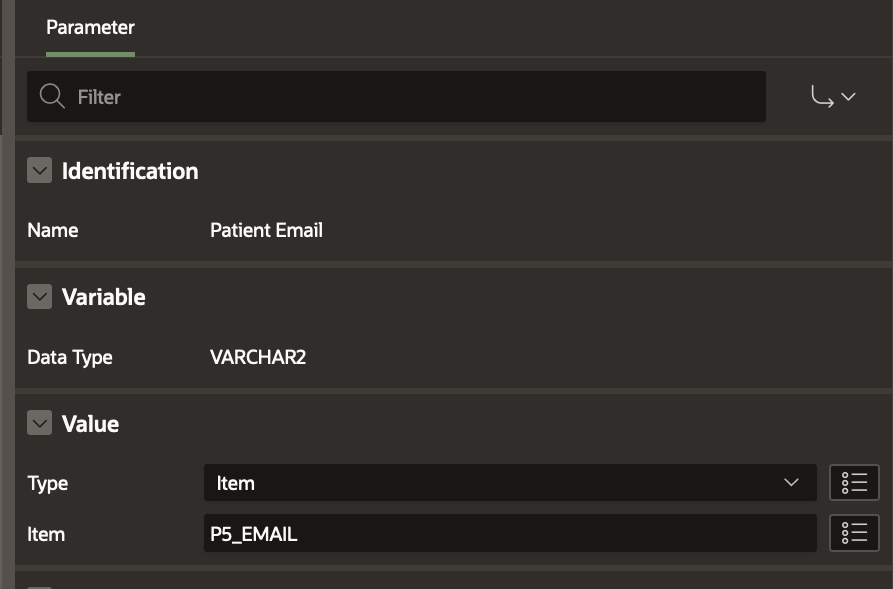
Click on Patient Email and set it to Item P5_EMAIL
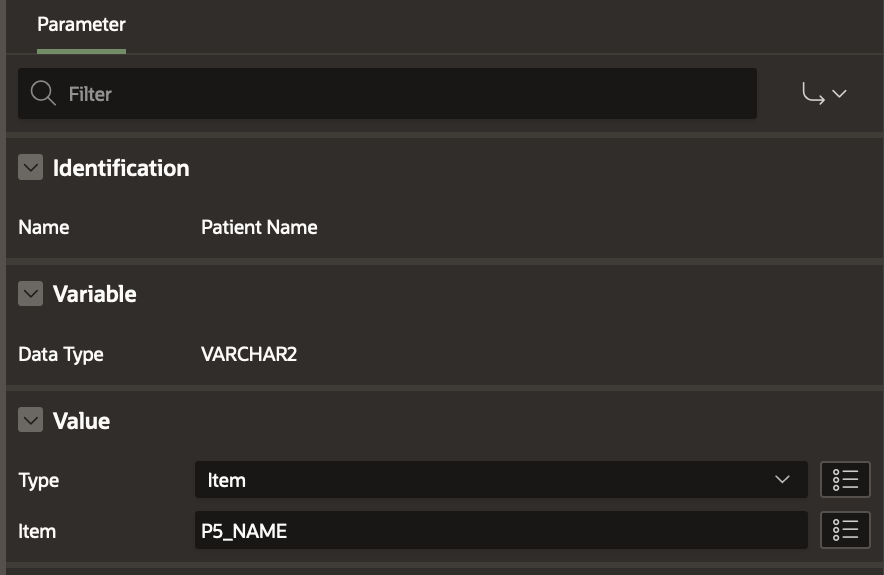
Click on Patient Name and set it to Item P5_NAME
Click On Problem and set it to Item P5_DESC
Click on Request Date and set it to Item P5_APPT_DATE
Click Save and navigate back to the Rendering Section. Create a new Button and name it BOOK_APT (Book Appointment) as shown below.
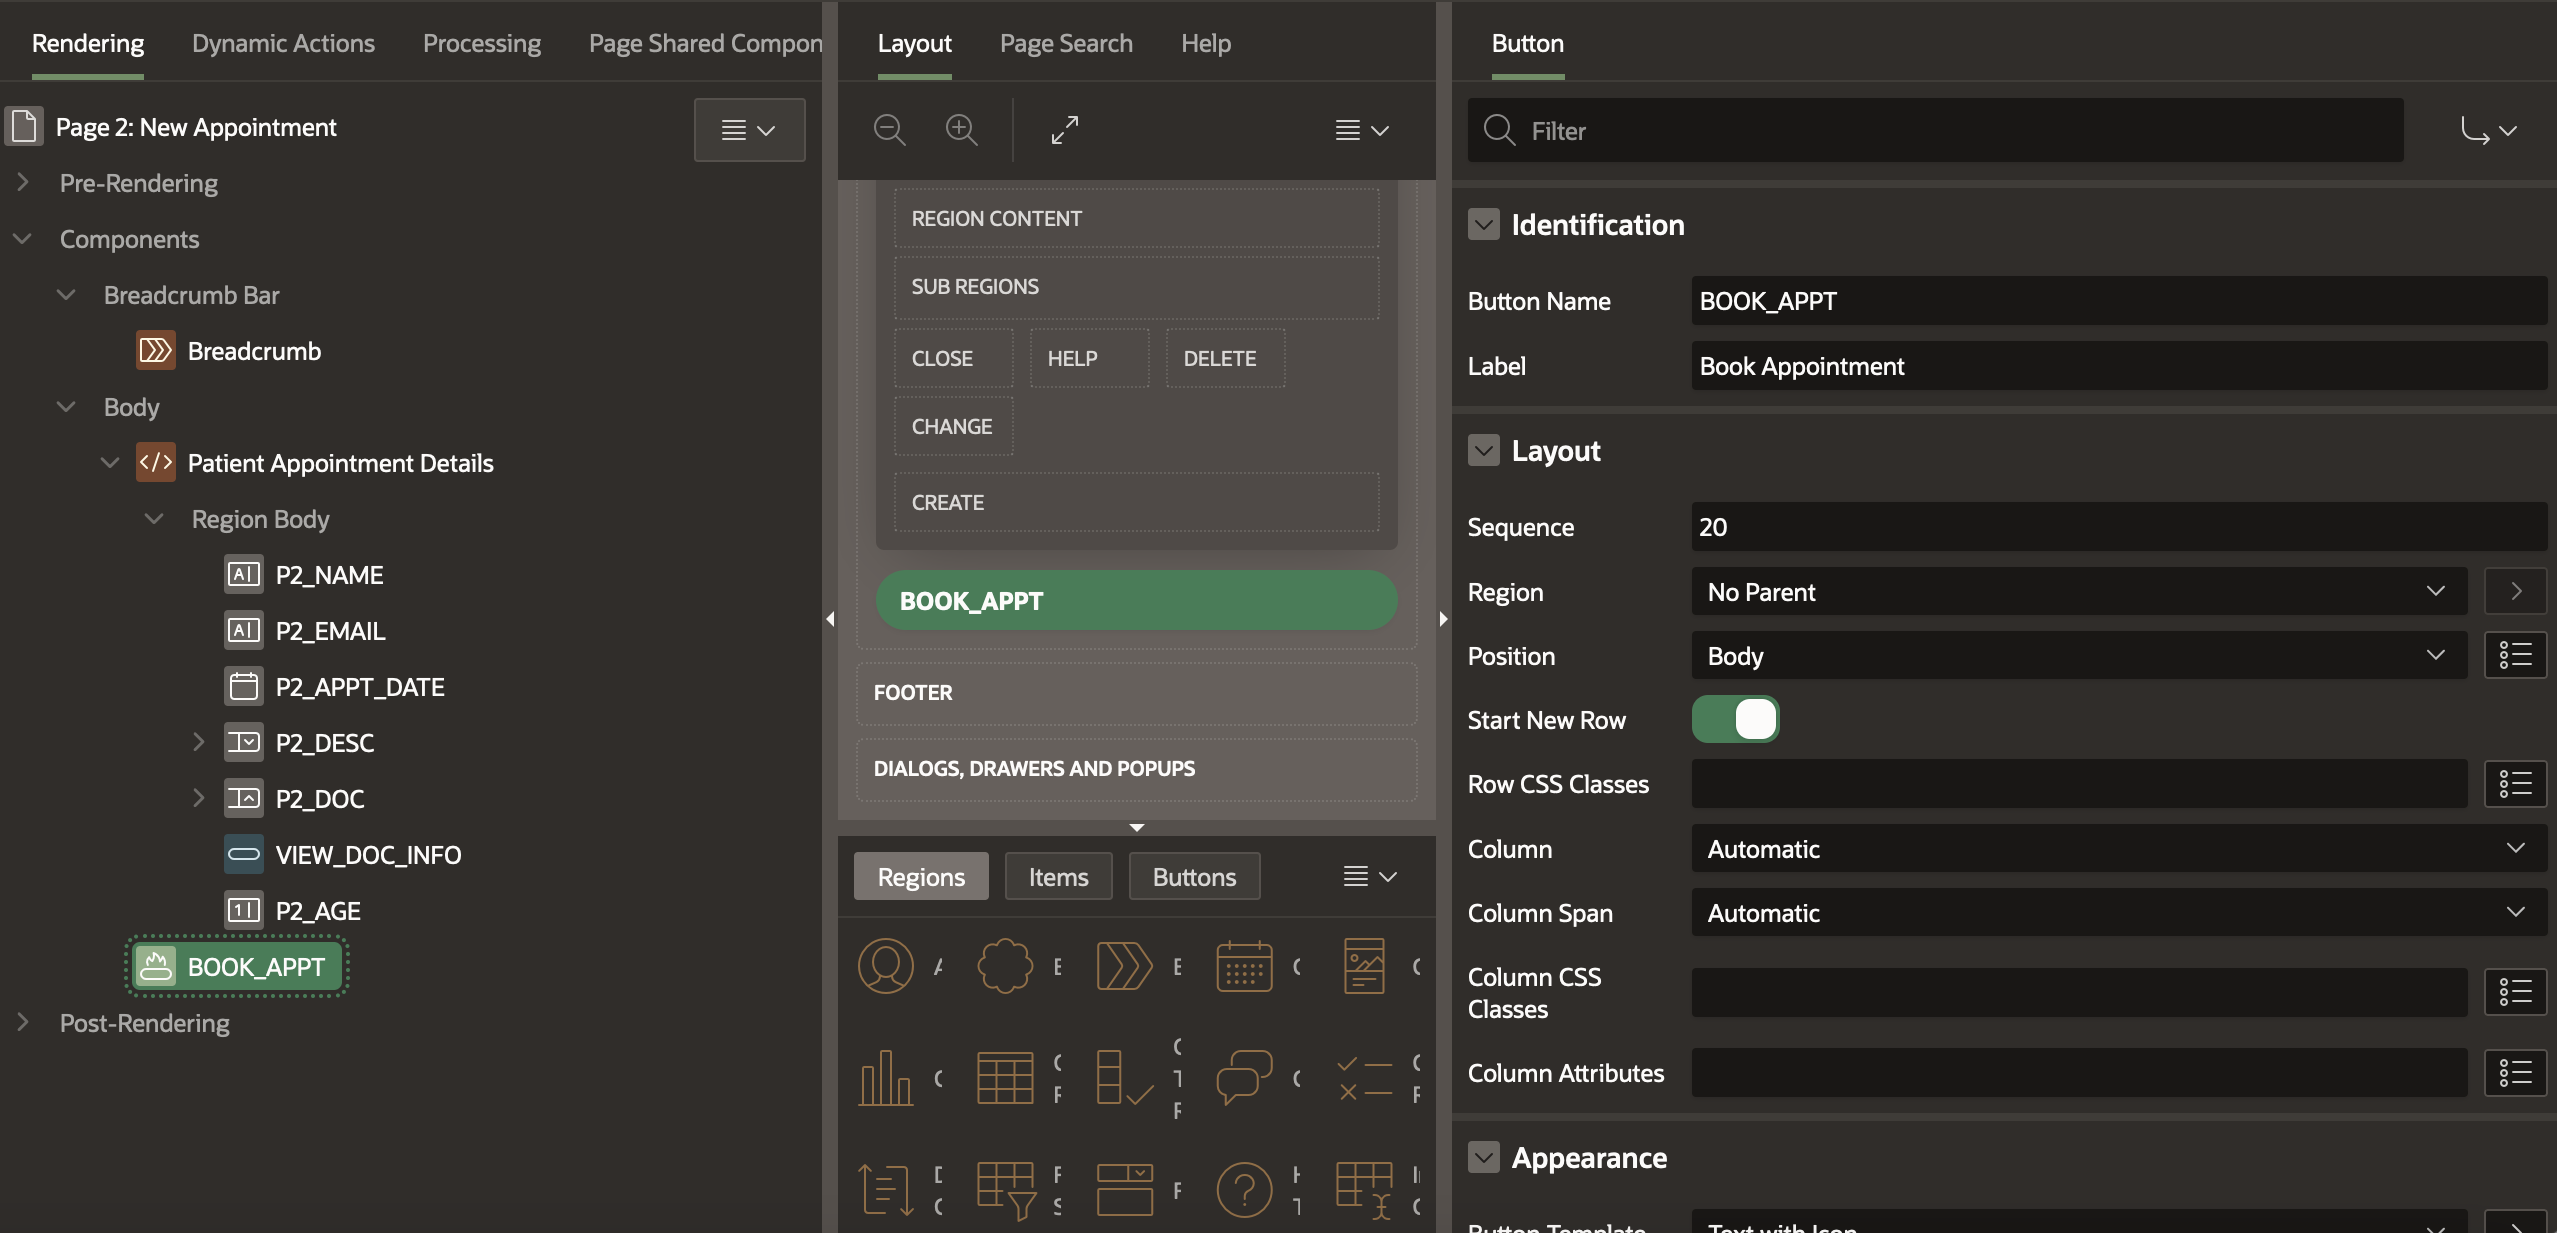
Save the changes.
Creating the Patient Tasks Page
Our application has 2 entry points for Patients. First, to confirm an invoice request. Second, to provide feedback. For this we need to create a Unified Task List for Patients to act on.
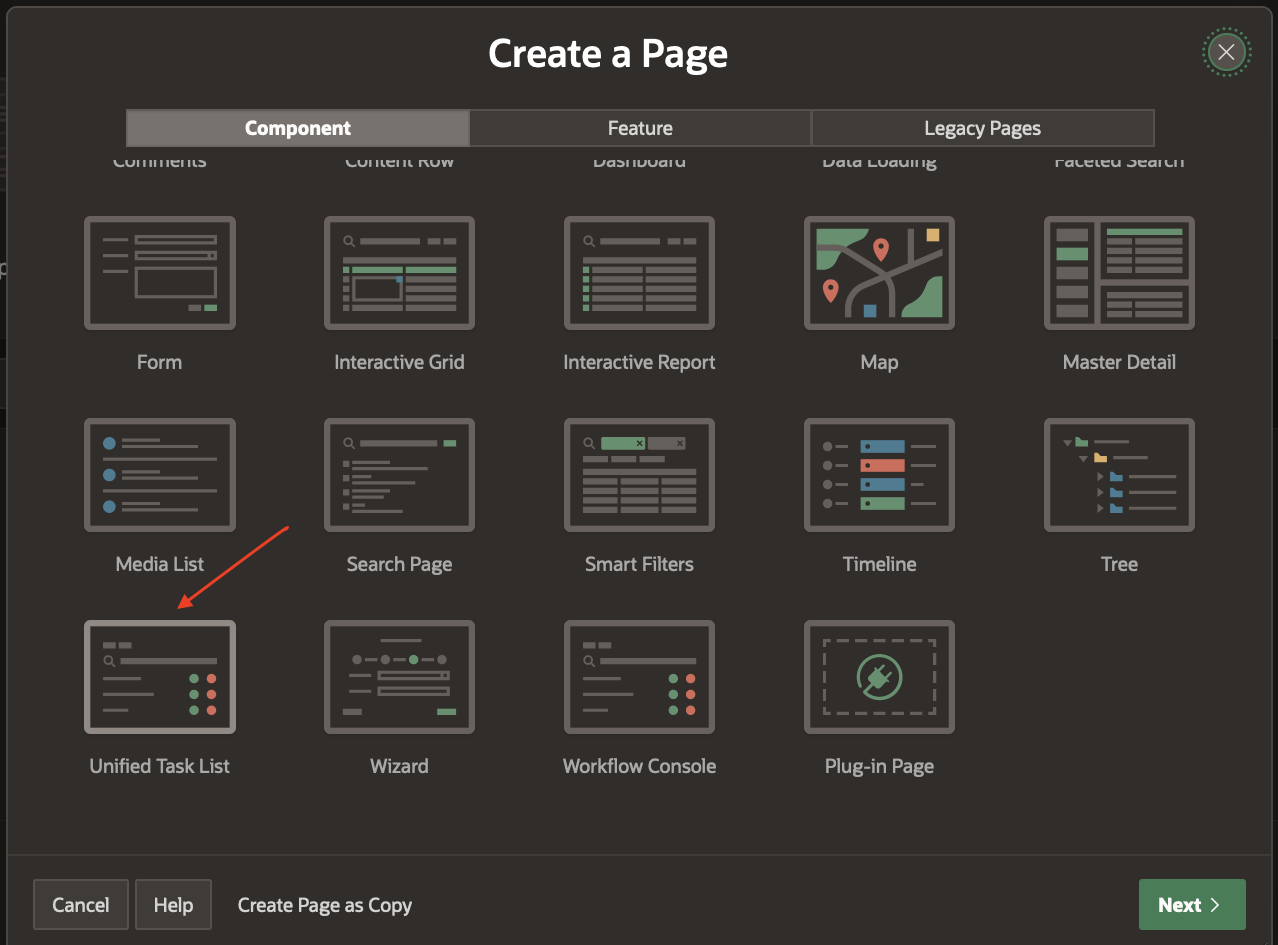
Go to the Application Home and click on Create Page. In the Create Page Wizard, select Unified Task List.
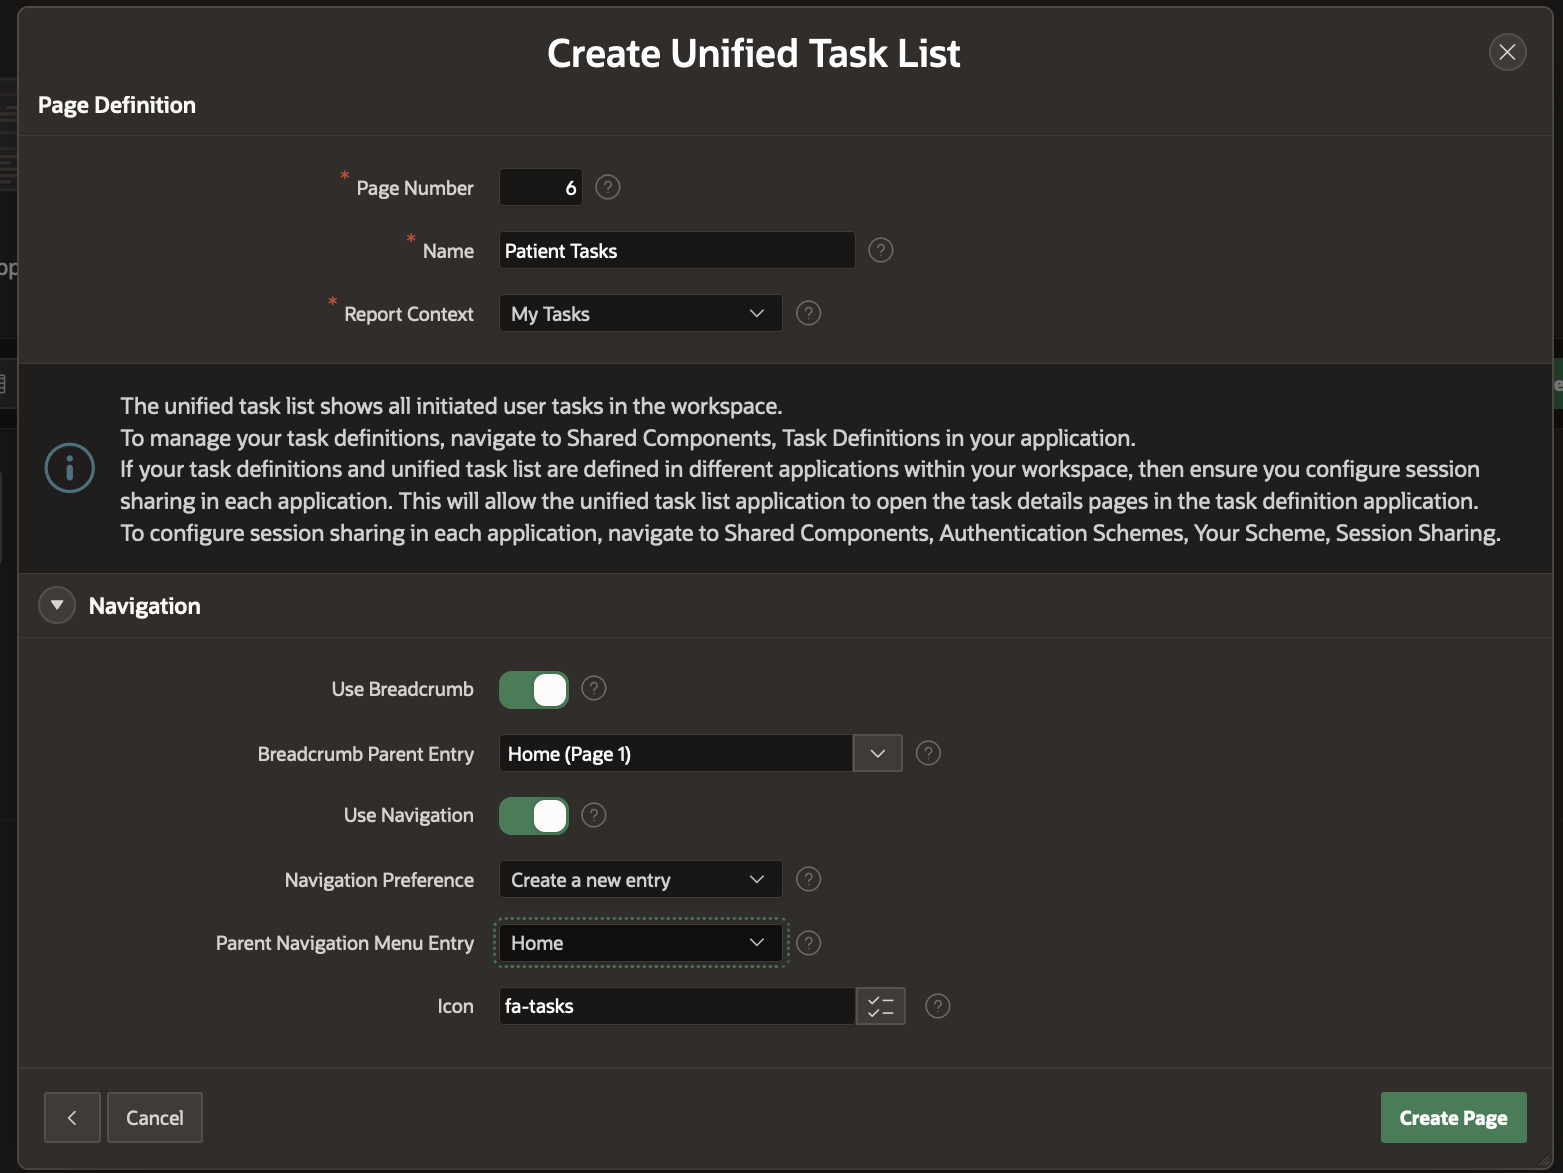
In the Create Unified Task List Wizard, enter Name as Patient Tasks. Leave the Report Context as My Tasks. Enter the Breadcrumb and Navigation Menu entries as shown below. Click on Create Page . This will create the Patient Tasks Unified task list page where Patients can log in to Confirm their appointment invoices and provide requested feedbacks.
Creating the Doctor Tasks Page
Our application has 1 entry point for Doctors. Doctors need to log in to approve or reject appointment requests. For this we will create a Doctor Tasks page. This will also be a Unified Task List page for Doctors to act on the tasks assigned to them.
Go to the Application Home and click on Create Page. In the Create Page Wizard, select Unified Task List.
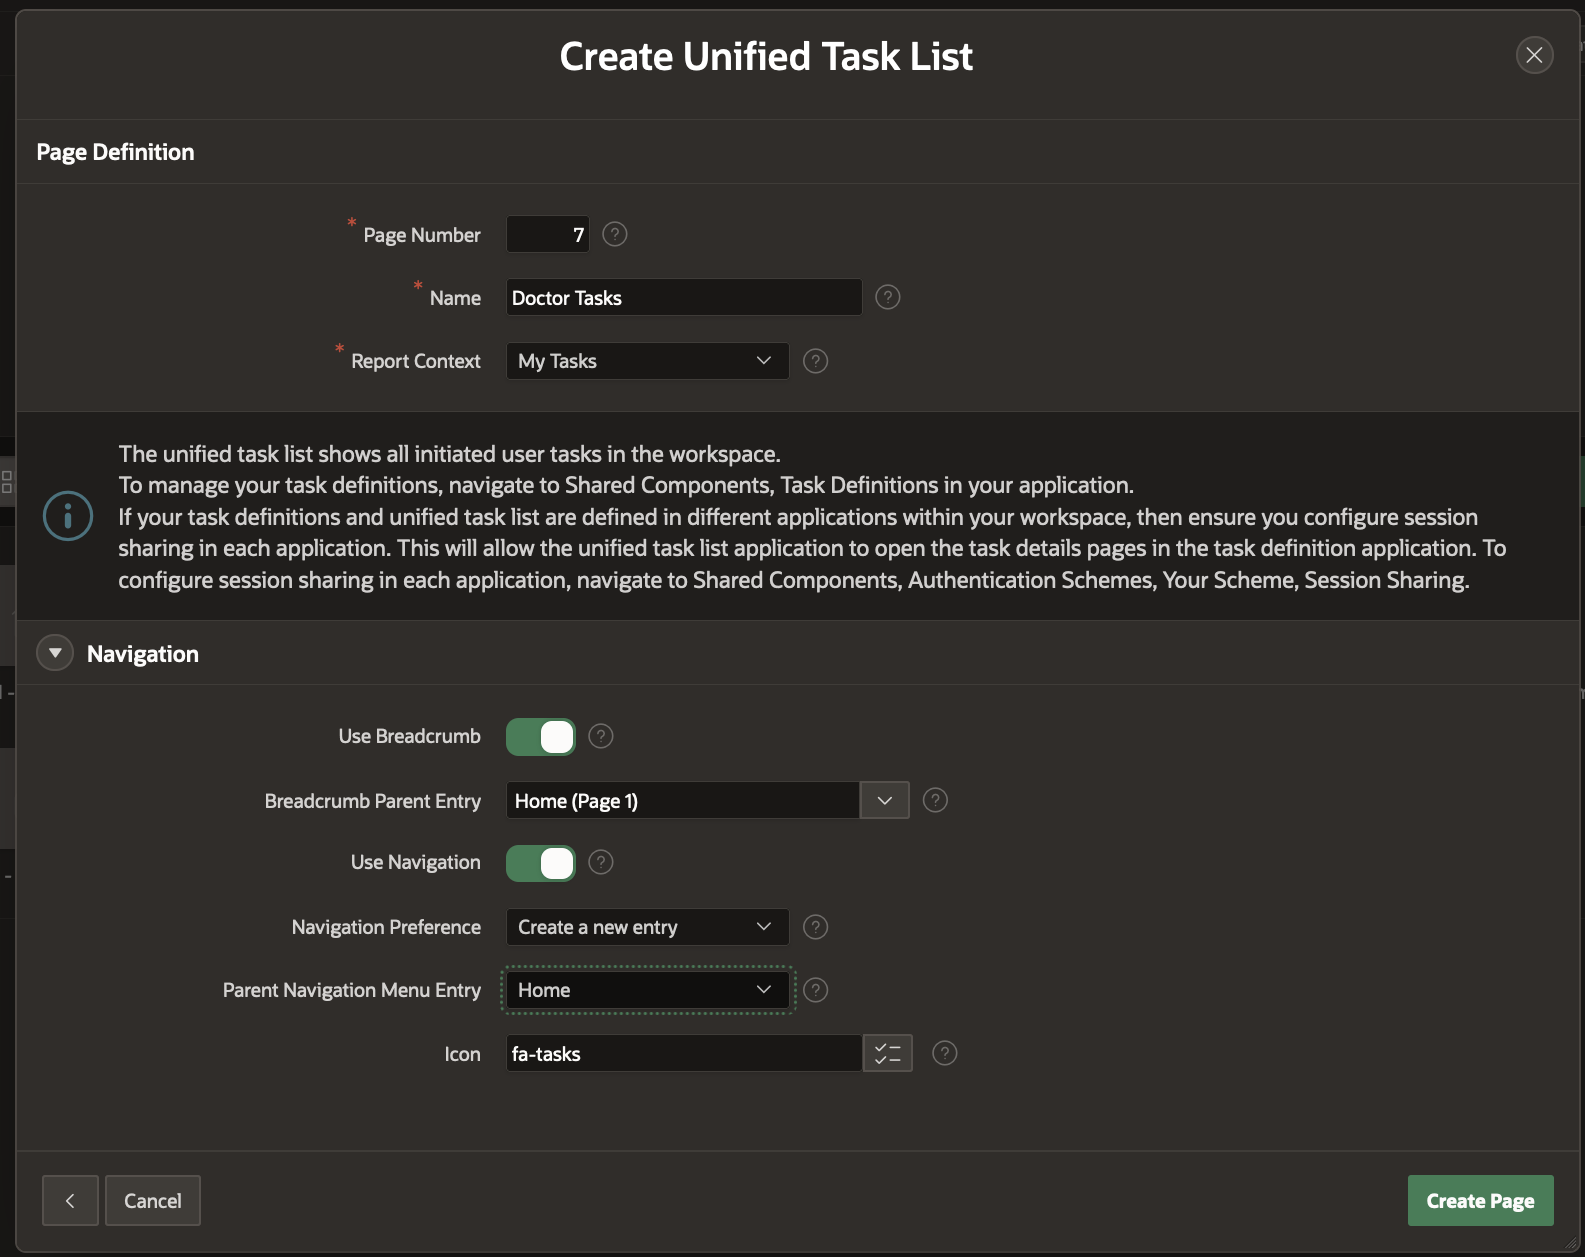
In the Create Unified Task List Wizard, enter Name as Doctor Tasks. Leave the Report Context as My Tasks. Enter the Breadcrumb and Navigation Menu entries as shown below. Click on Create Page . This will create the Doctor Tasks Unified task list page where Doctors can log in to Approve or Reject the appointment requests.
Modifying the 3 Task Details Pages
Our Application has 3 Task Definitions – Appointment Request, Invoice Request and Feedback Request. For each of them we had generated a Task Details page. In this section we will rename the Pages so that they appear more meaningful in the Application.
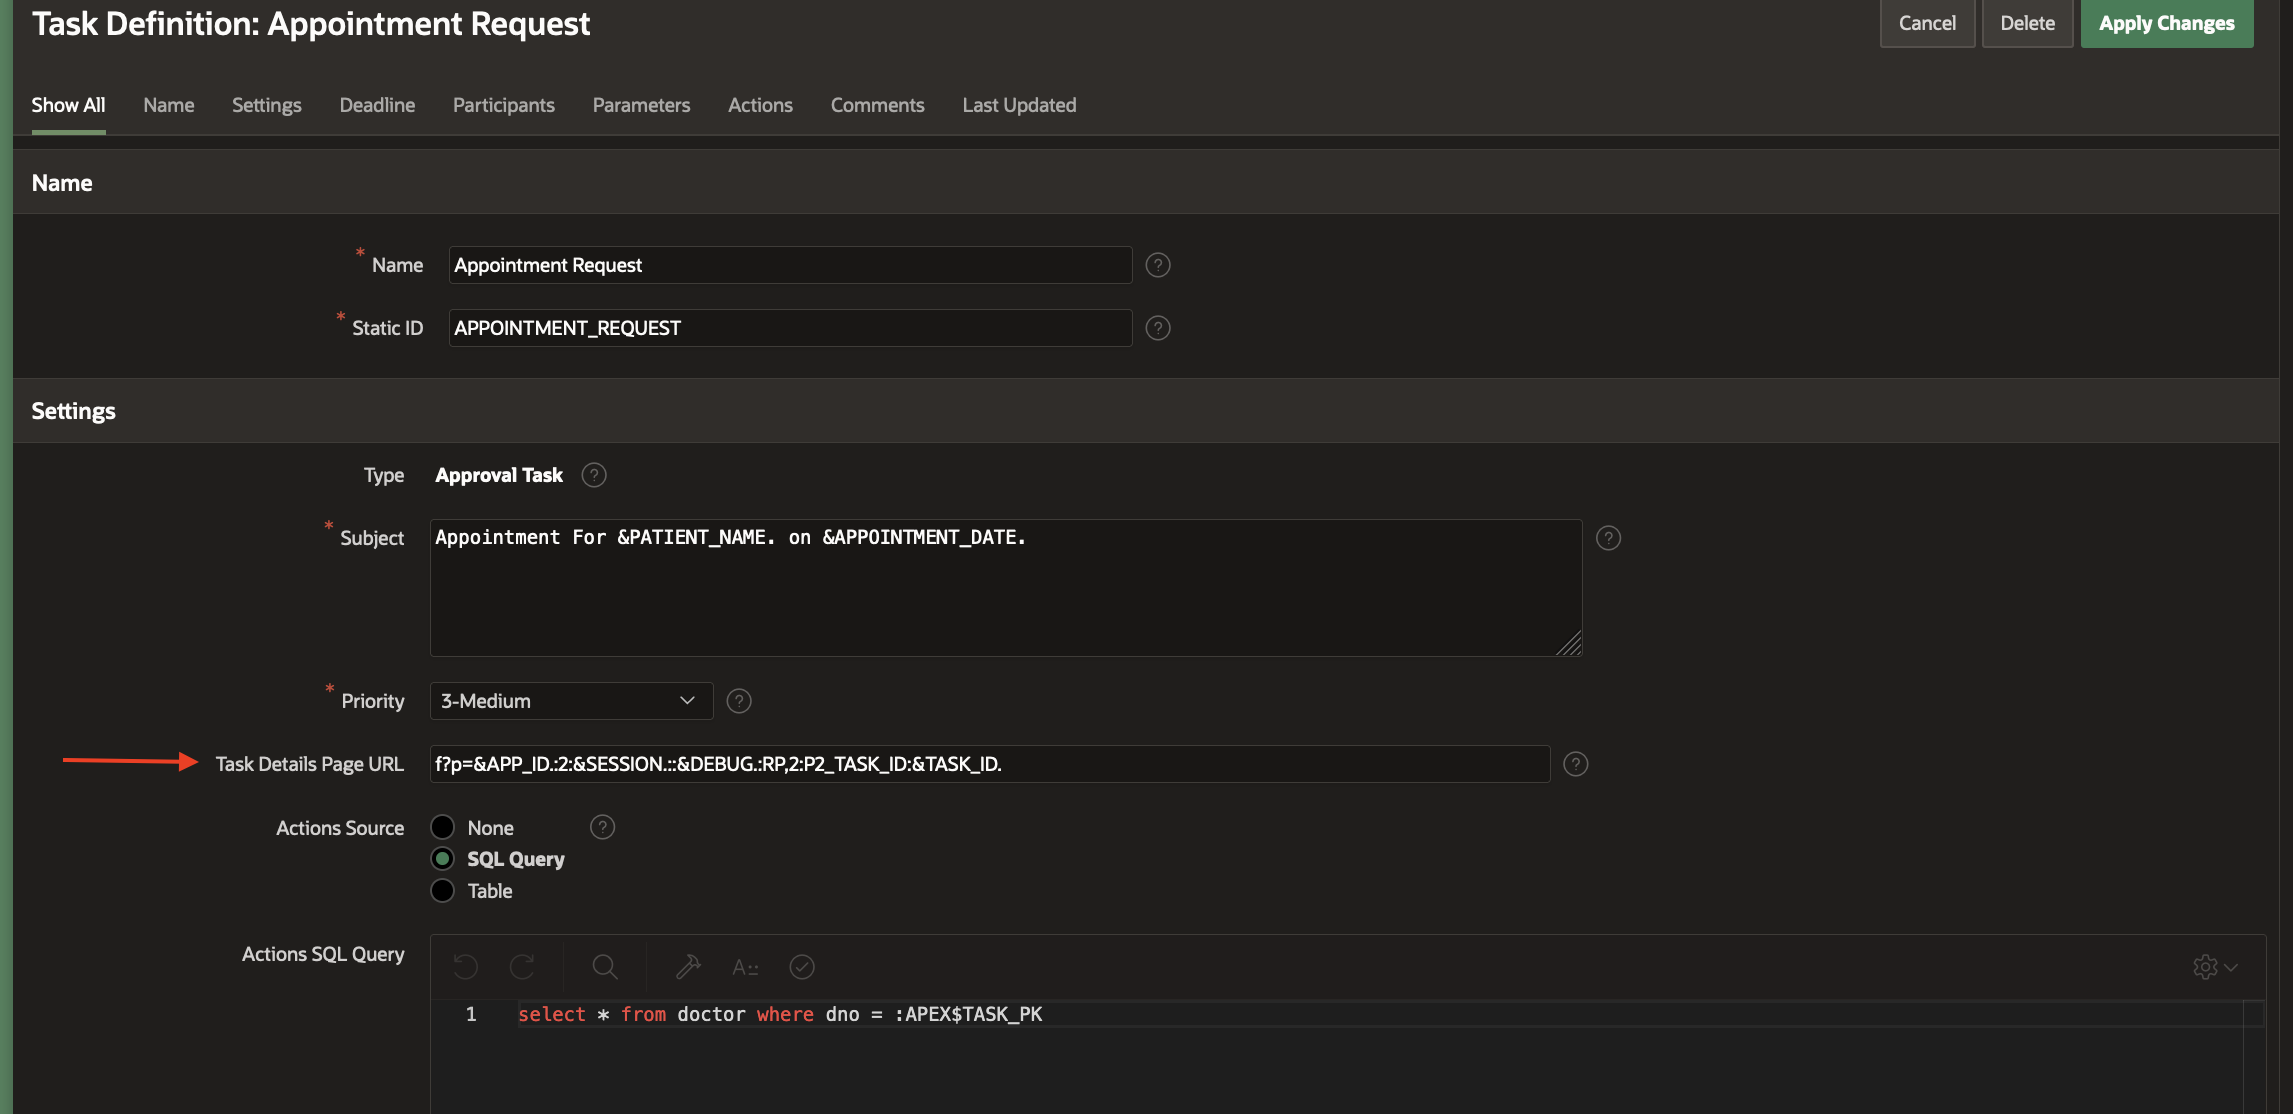
Go to Shared Components-> Task Definitions-> Click on Appointment Request. In the Task Definition Editor, note the page number in the Task Details URL (f?p=&APP_ID.:2:&SESSION.::&DEBUG.:RP,2:P2_TASK_ID:&TASK_ID.) . This points to Page 2.
Open this page from the Application Home.
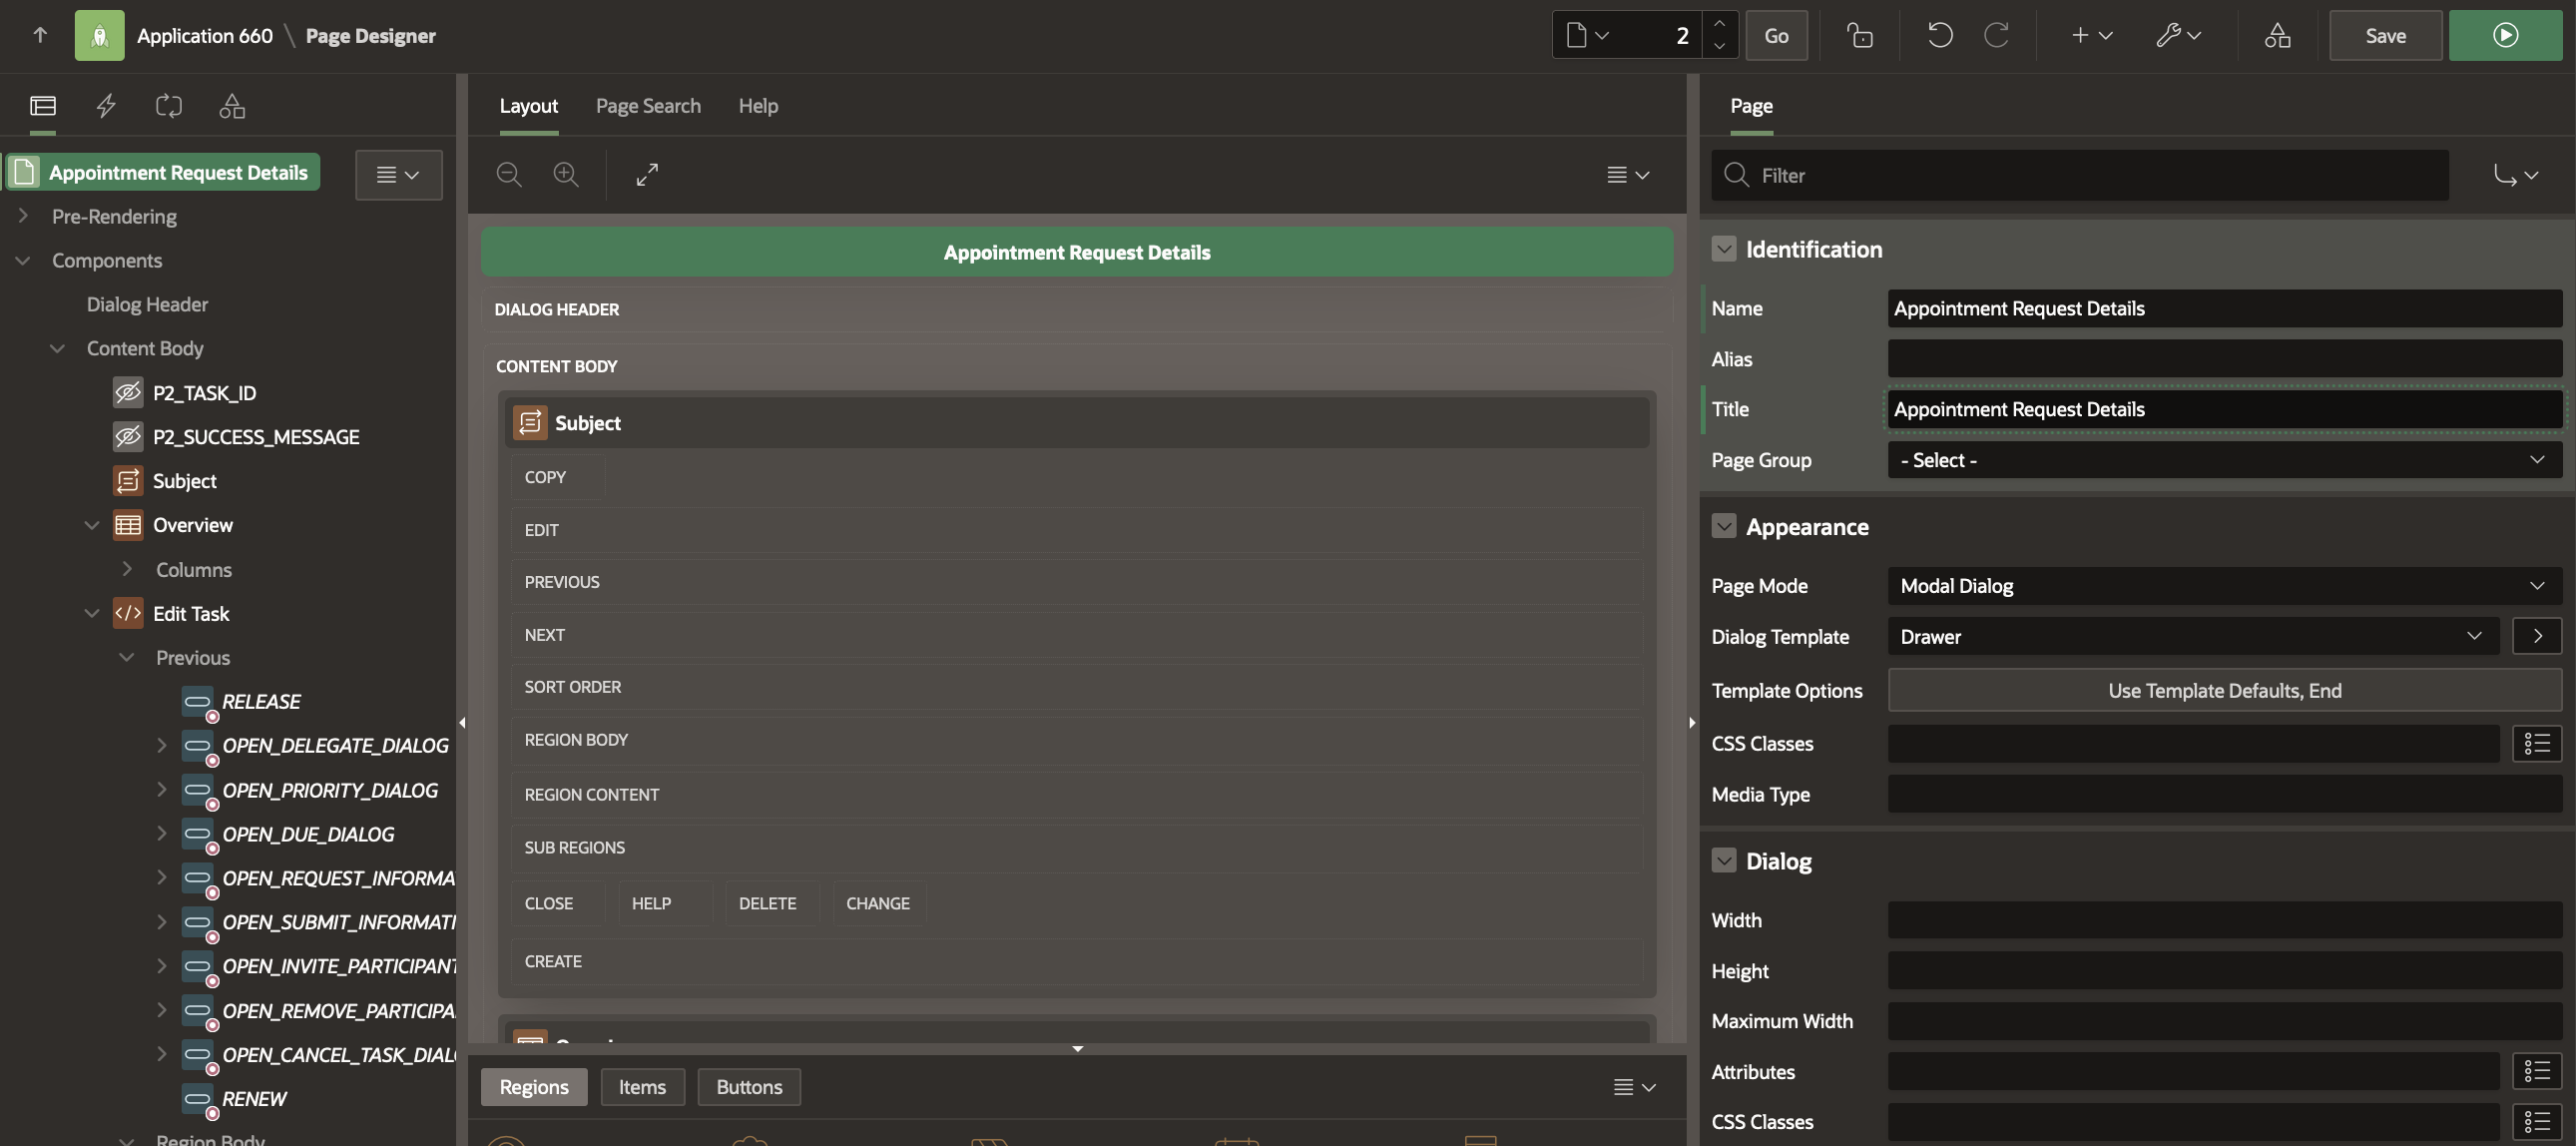
Change the Page Name and Title to Appointment Request Details .
Save your changes.
Open the Invoice Request Task Definition from Shared Components and similarly check the page number for the Task Details. This points to Page 3. Open this page from Application Home.
Change the Page Name and Title to Invoice Details .
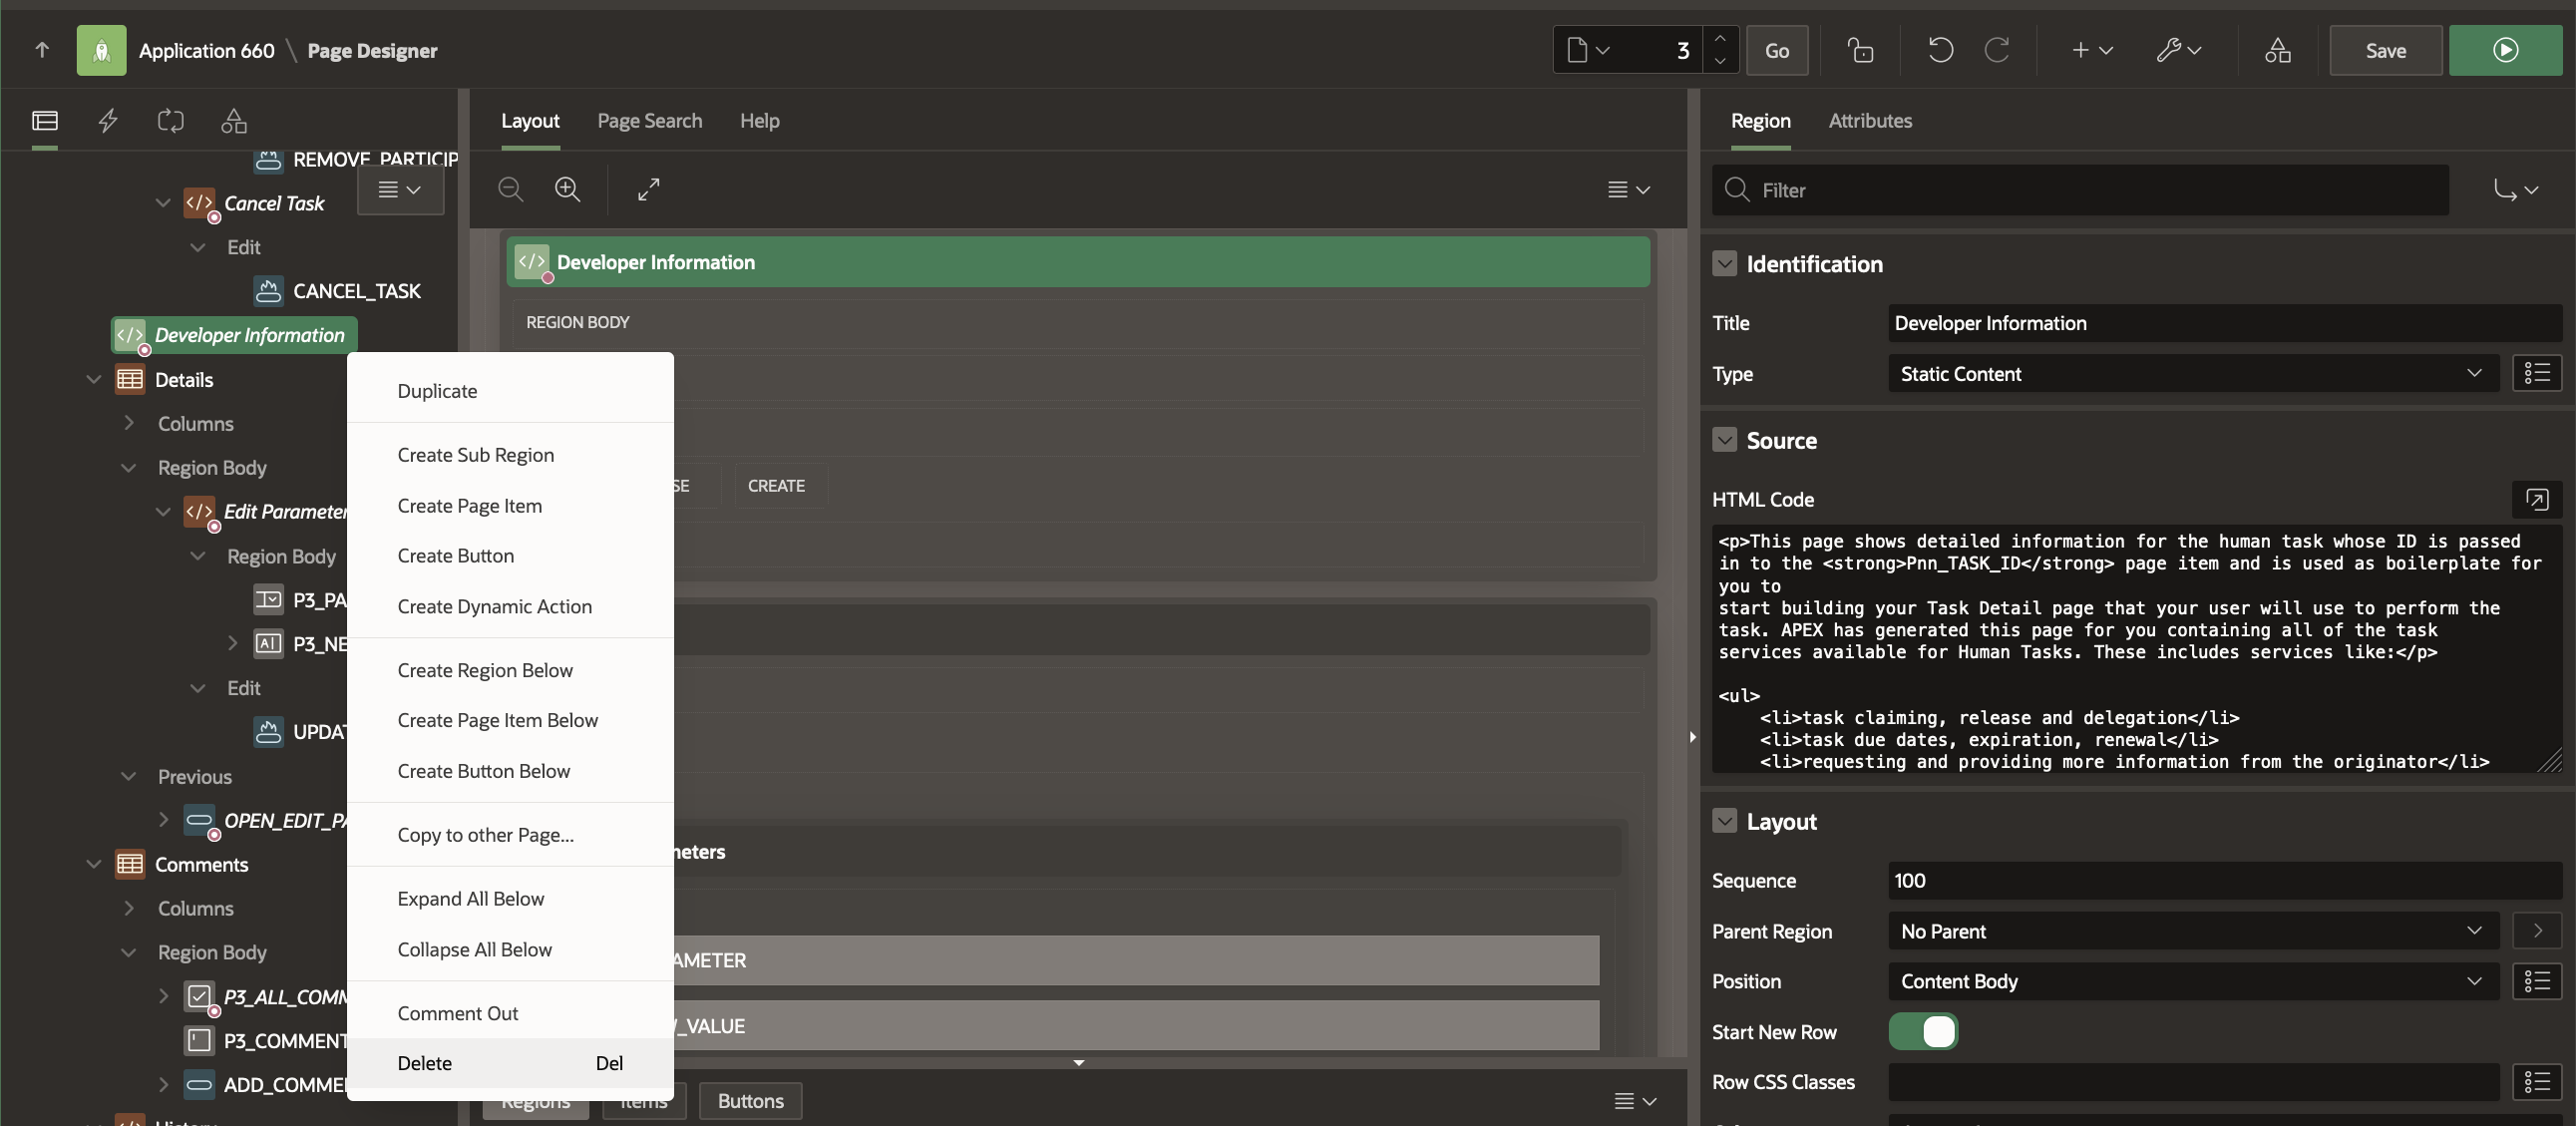
Notice there is a Developer Information region in the Details Page. Remove this region by right-clicking on the region and selecting Delete.
Modify the Title of Details Classic Report region to View Invoice.

Note: Developer Information region is autogenerated for Action Tasks (non-approval). This can be removed/customized depending on the application usecase.
Save your Changes.
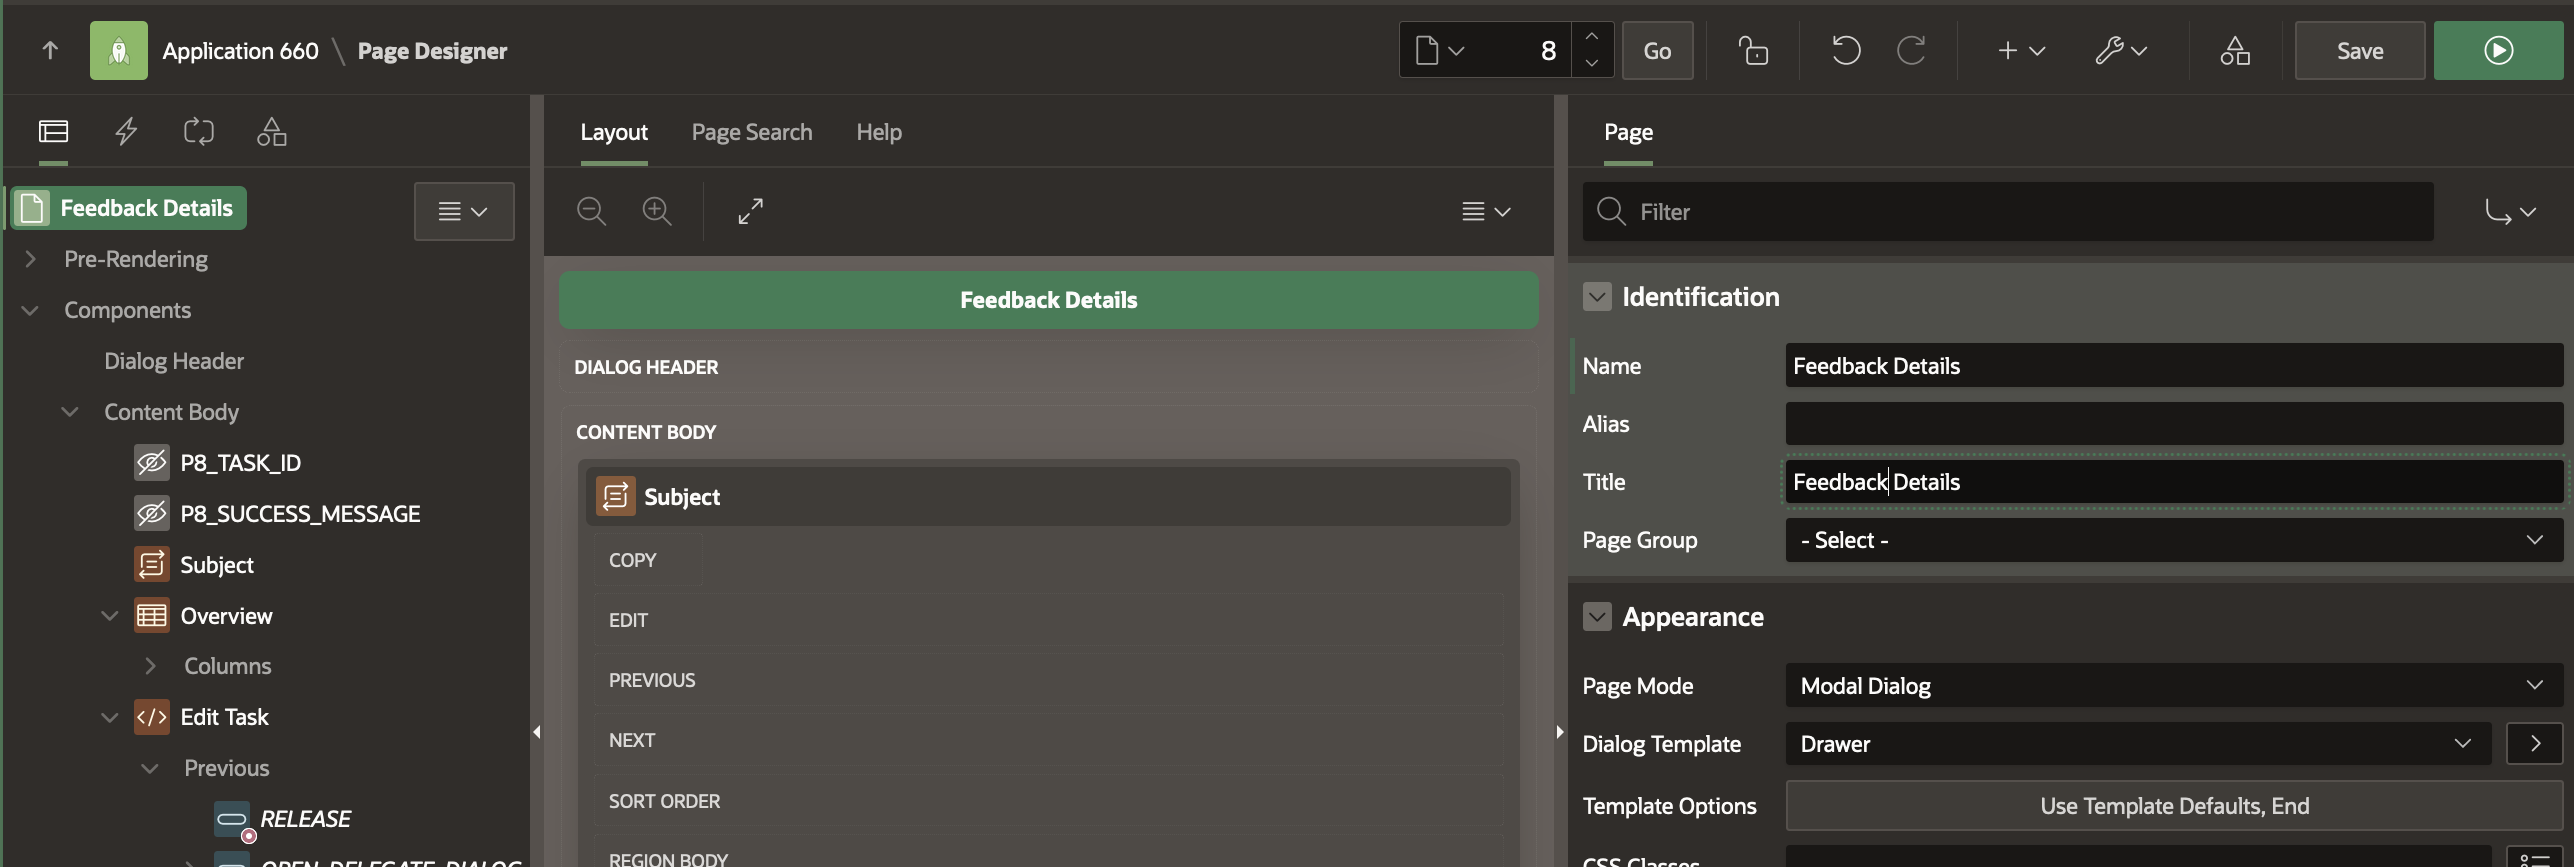
Open the Feedback Request Task Definition from Shared Components and similarly check the page number for the Task Details. This points to Page 8. Open this page from Application Home.
Change the Page Name and Title to Feedback Details .
Notice there is a Developer Information region in the Details Page. Remove this region by right-clicking on the region and selecting Delete.
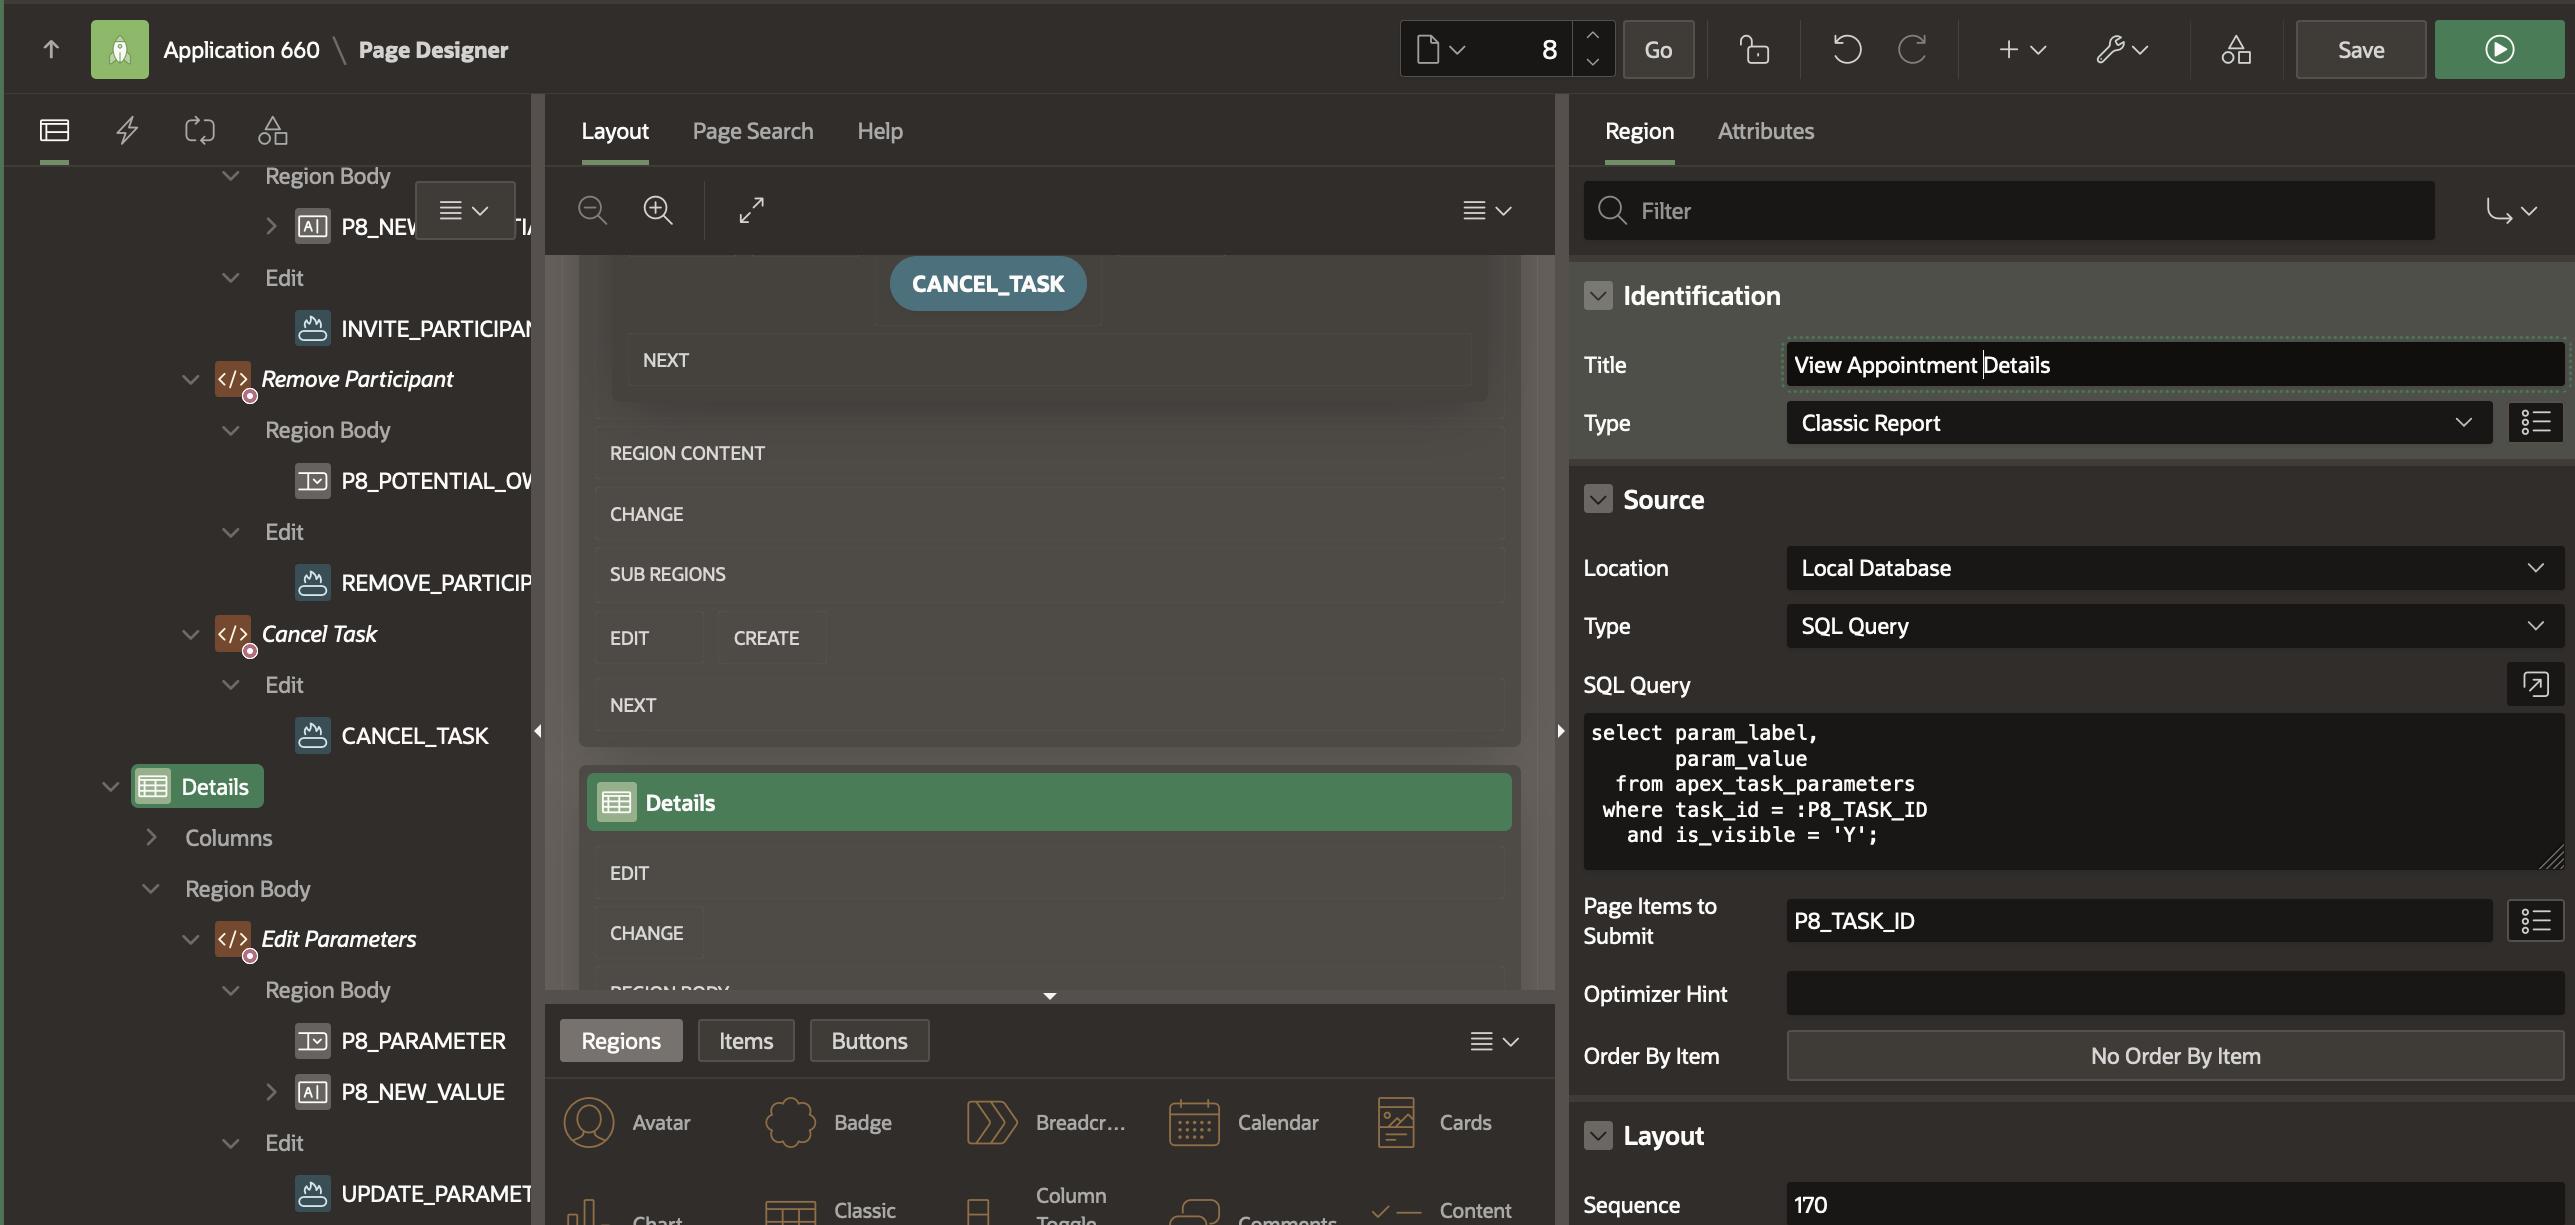
Modify the Title of Details Classic Report region to View Appointment Details.
In the Details Page, we want the patient to be able to fill up a Feedback form and submit it. On submission it will create an entry in the PATIENT_FEEDBACK table for the particular doctor. We will customize the Feedback Details Page as follows.
Below View Appointment Details region, create a new Region of type Form and name it Your Feedback.
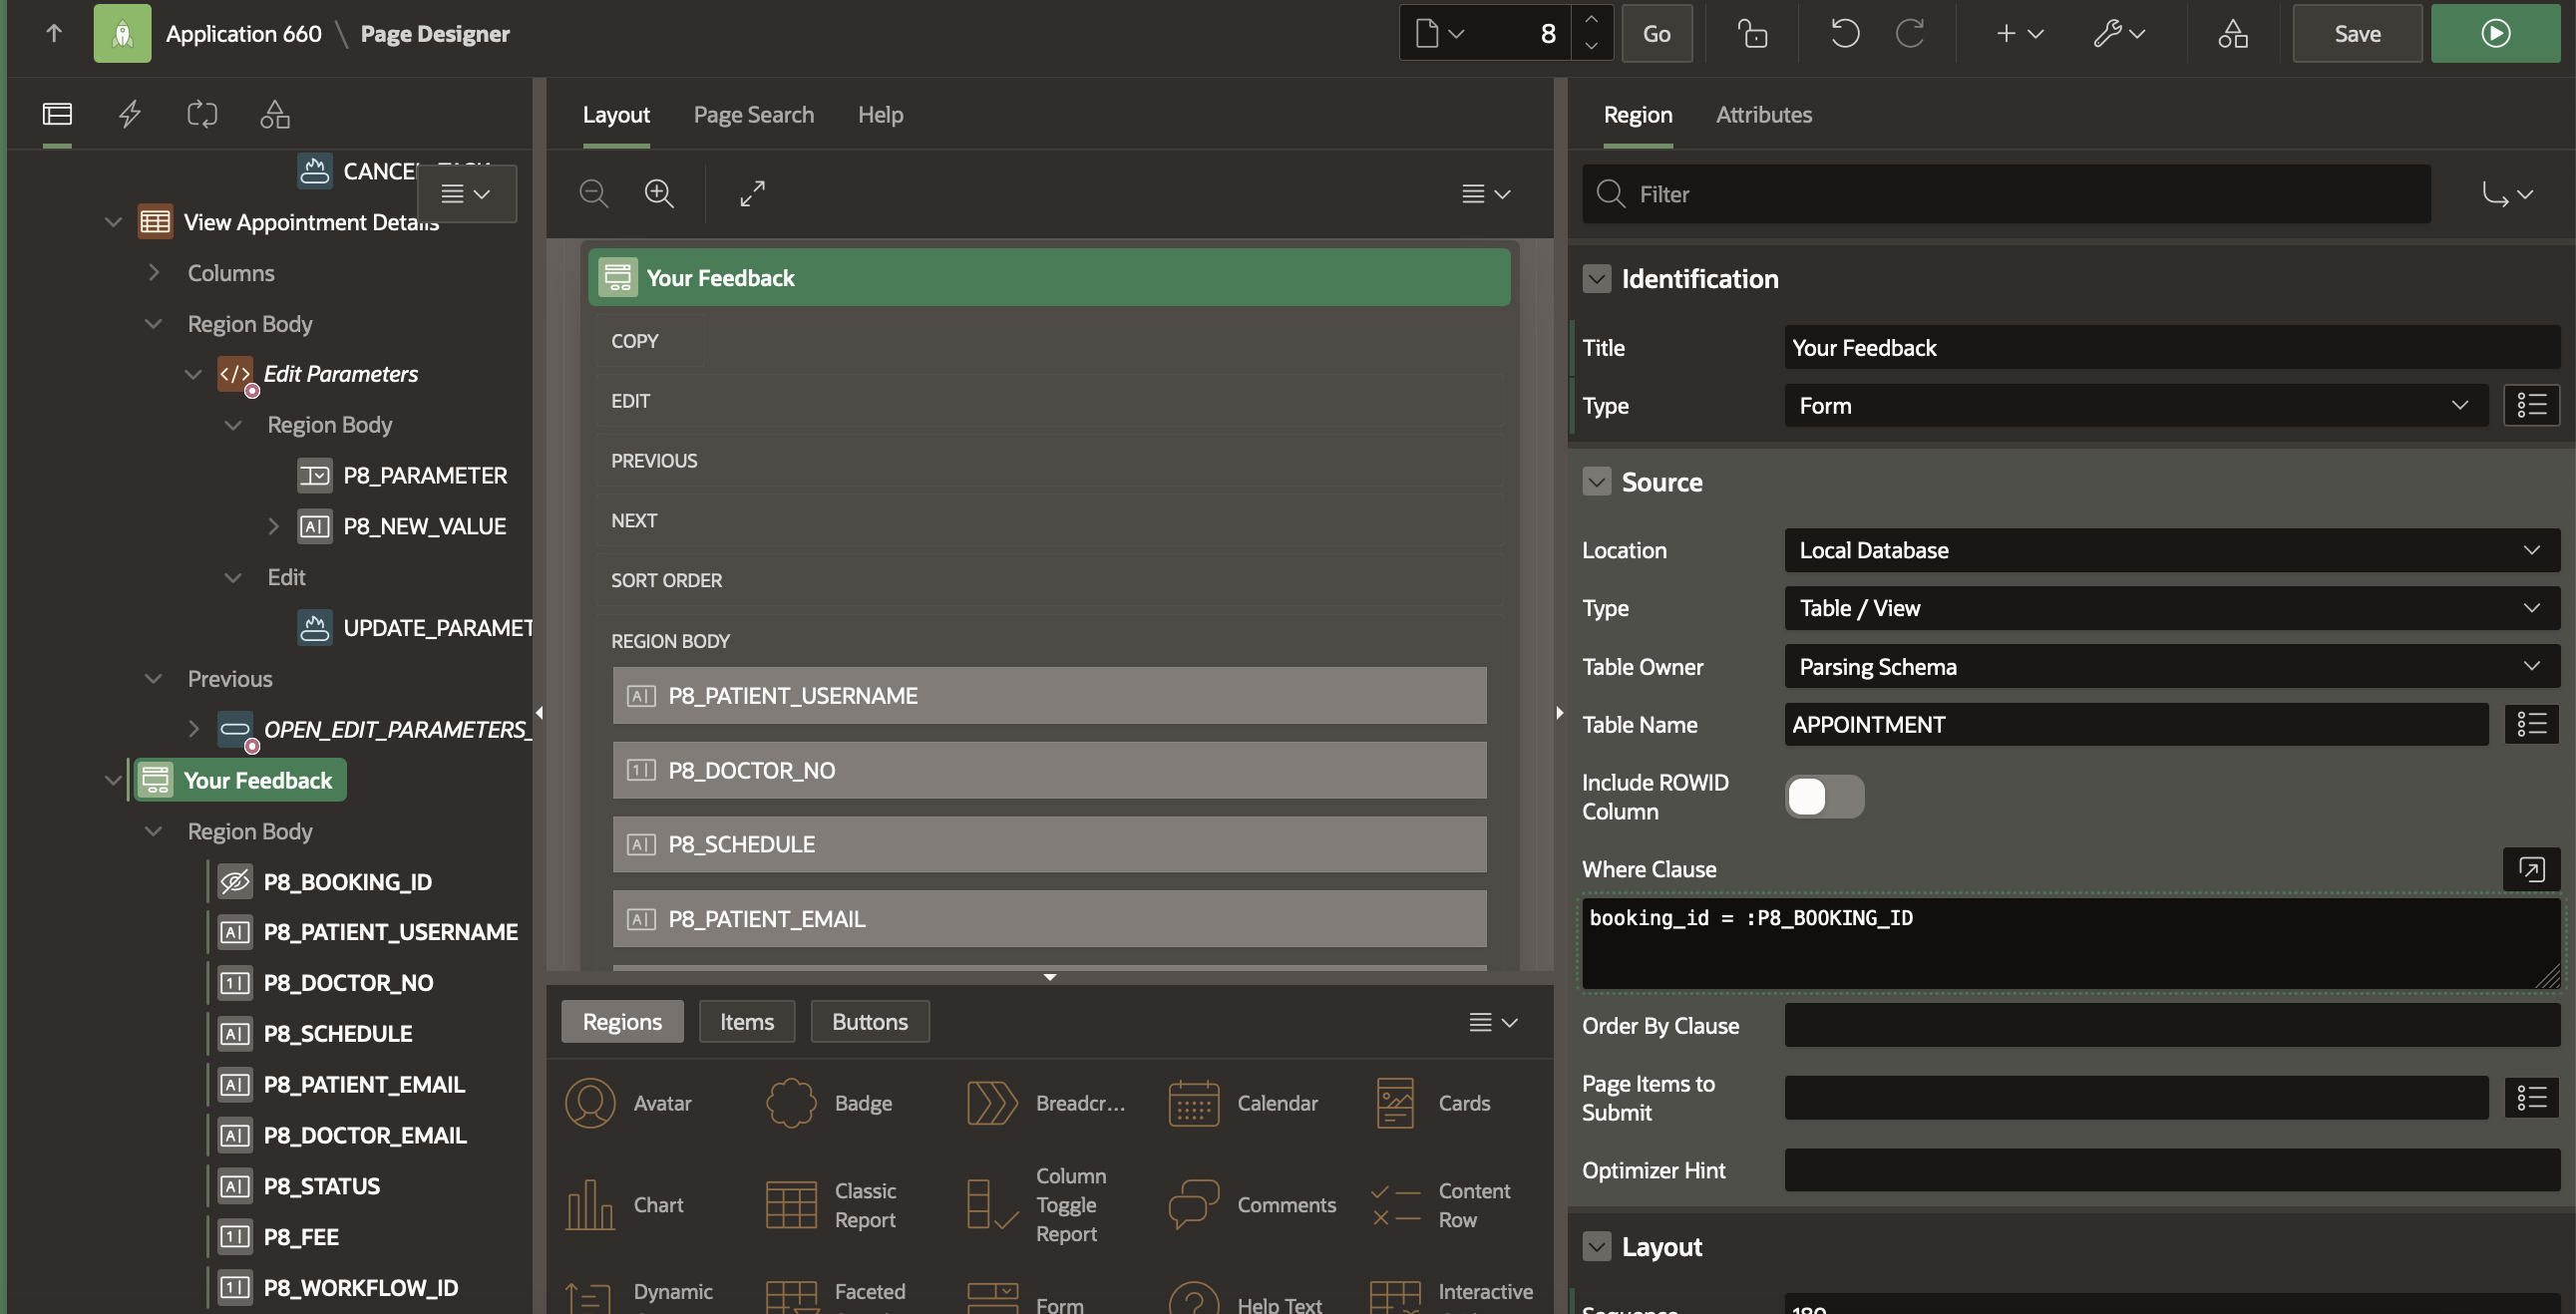
In the Source section of the Property Editor, set the Table Name as APPOINTMENT and the Where clause as
booking_id = :P8_BOOKING_ID
Mark the Page Items P8_FEE and P8_WORKFLOW_ID as Hidden . Change the Format Mask for P8_SCHEDULE to DD-MON-YYYY HH24:MI:SS
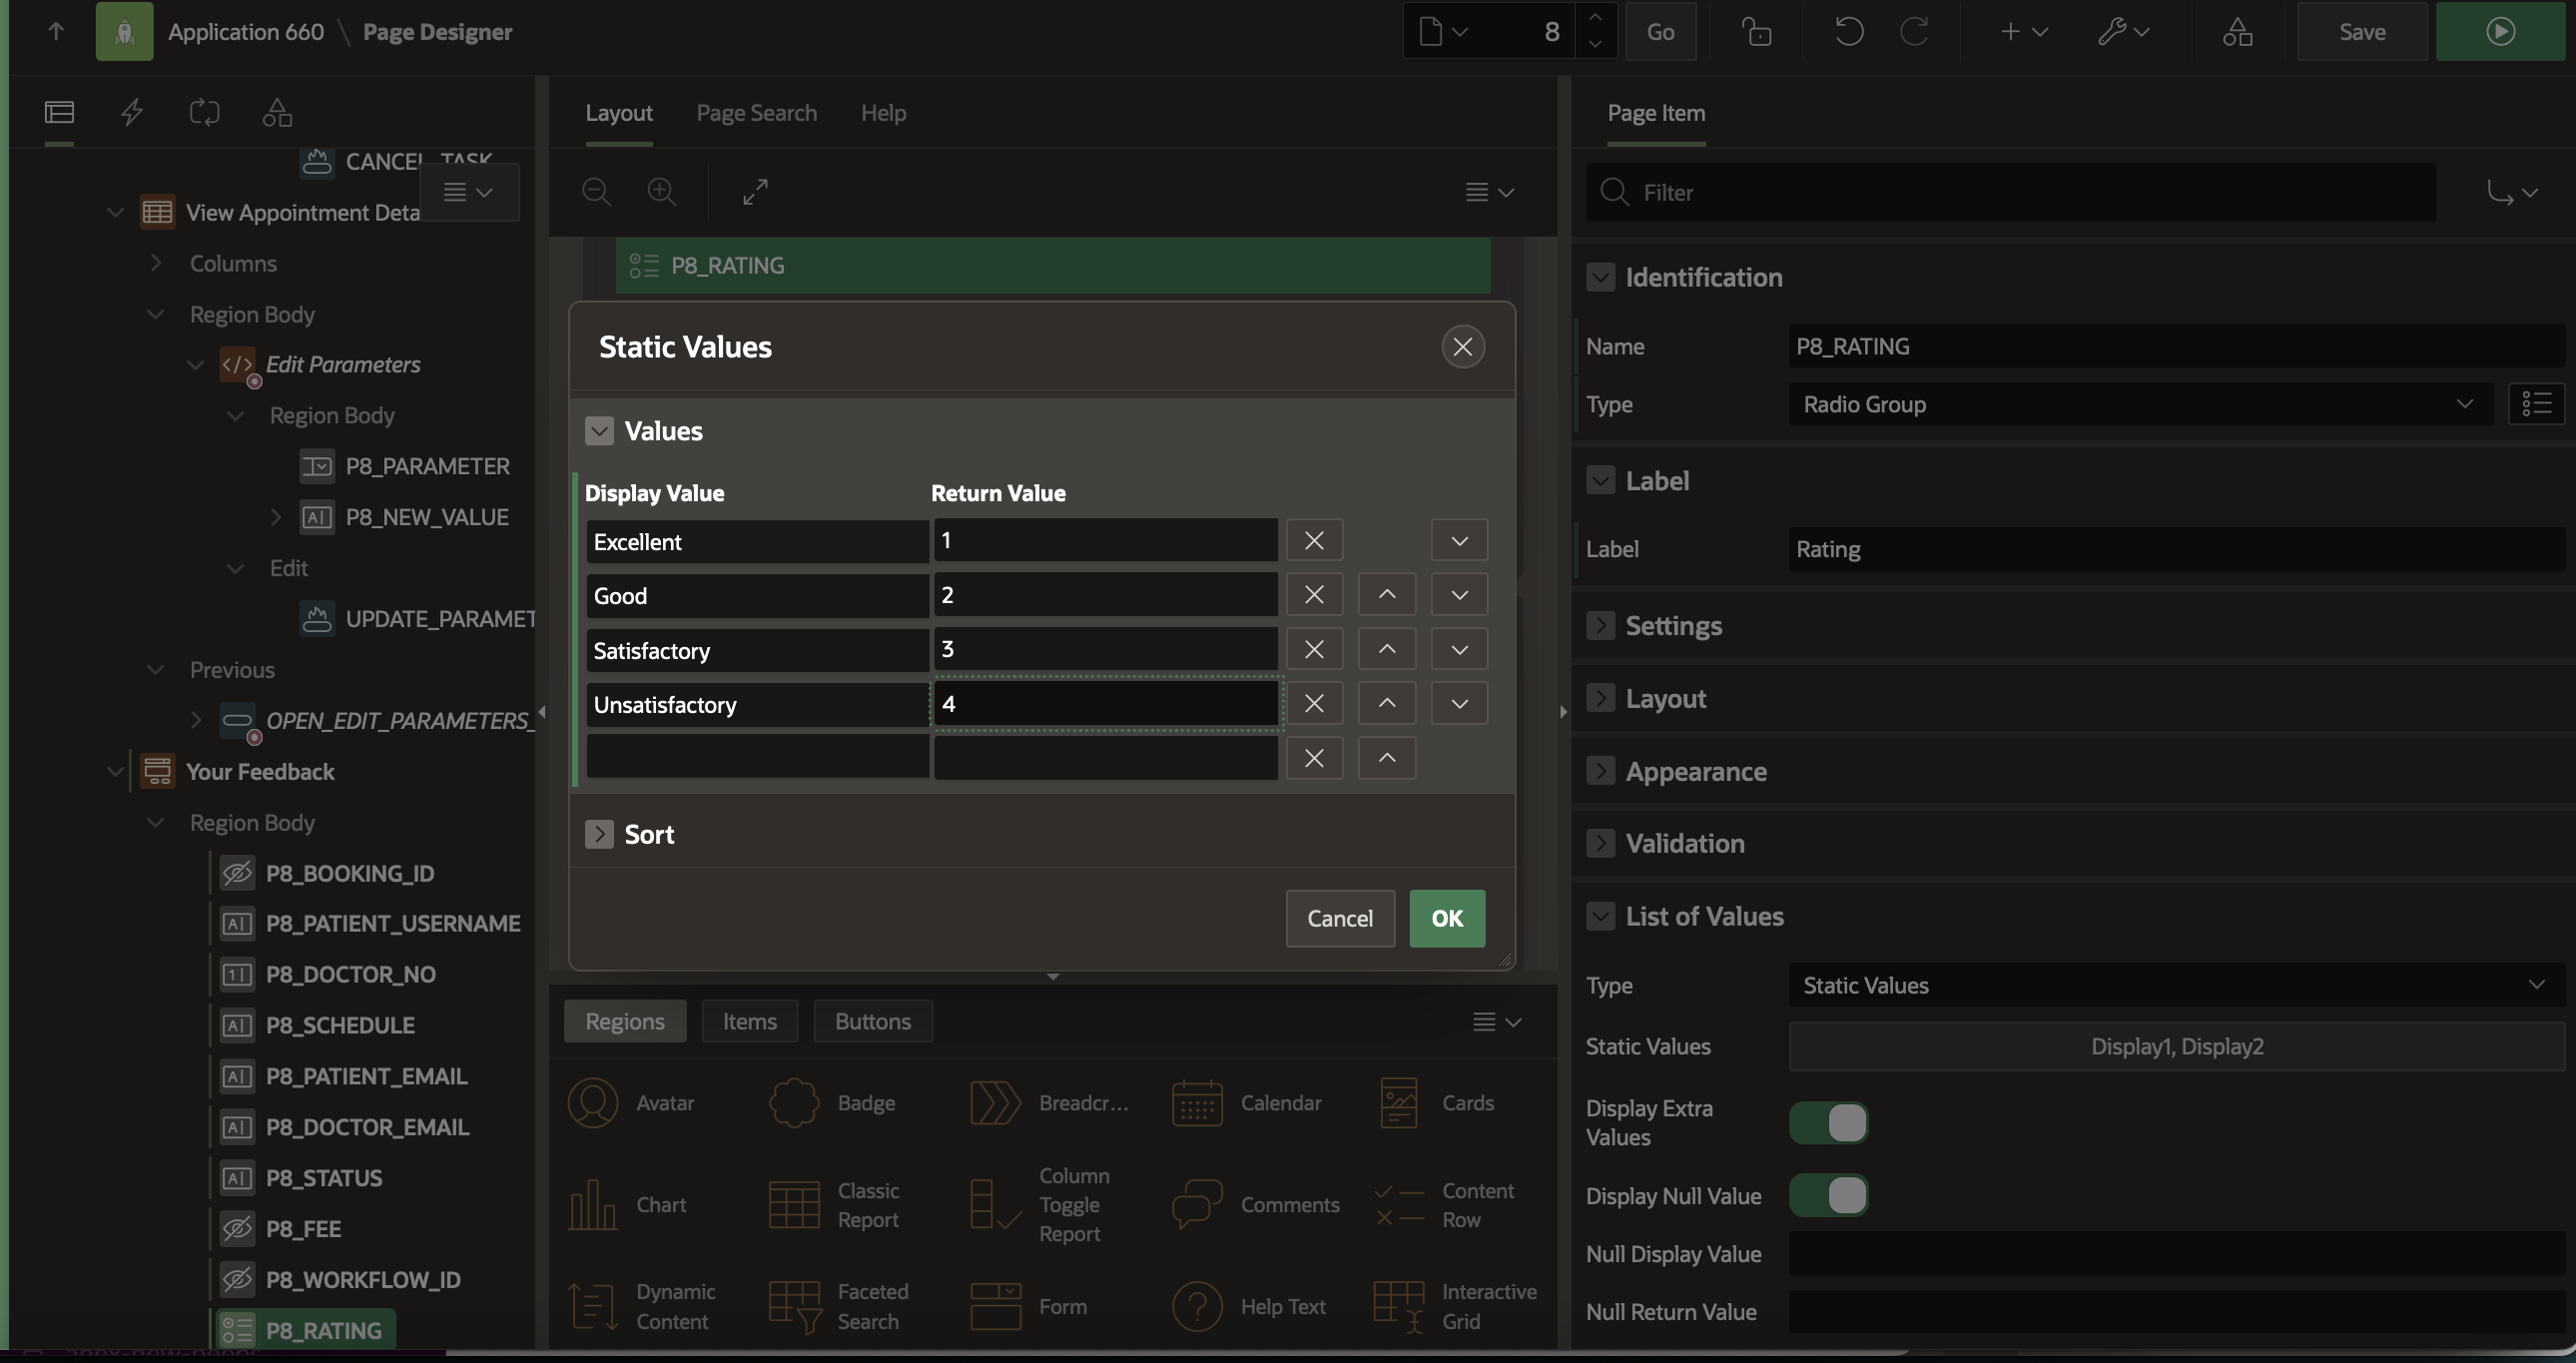
Create 2 new Page Items: P8_RATING and P8_FEEDBACK.
For P8_RATING, set the type as Radio Group.
Select List of Values as Static Values and provide the following entries
For P8_FEEDBACK, set the type as Rich Text Editor.
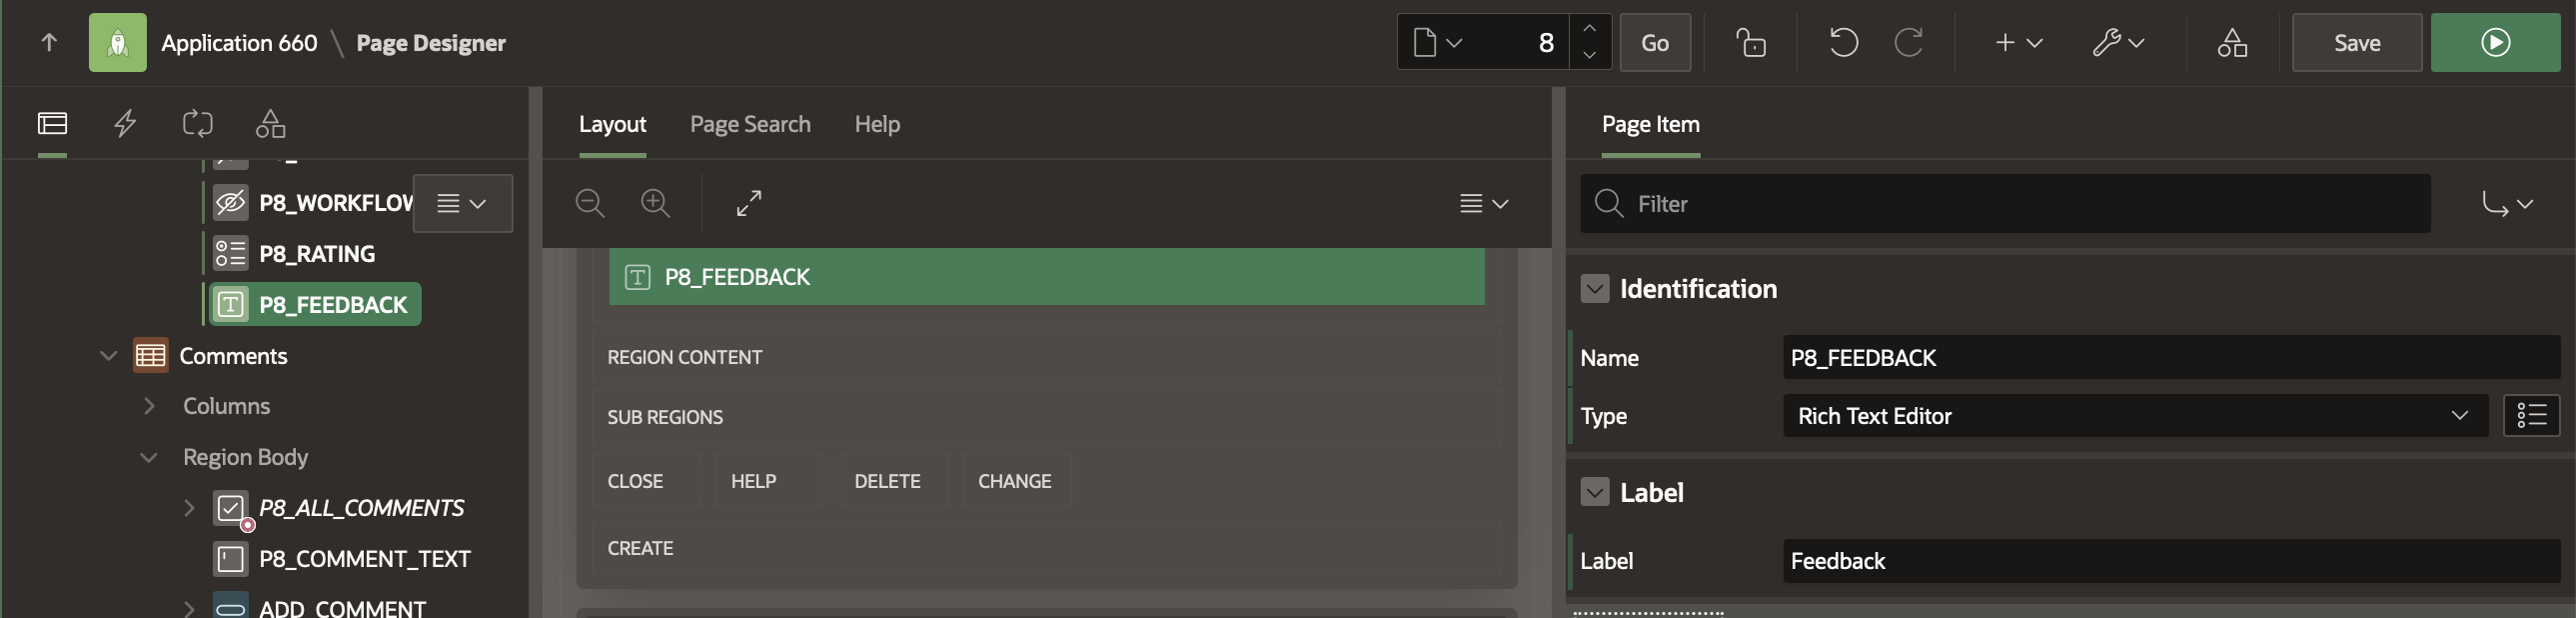
Click on Save to save your changes.
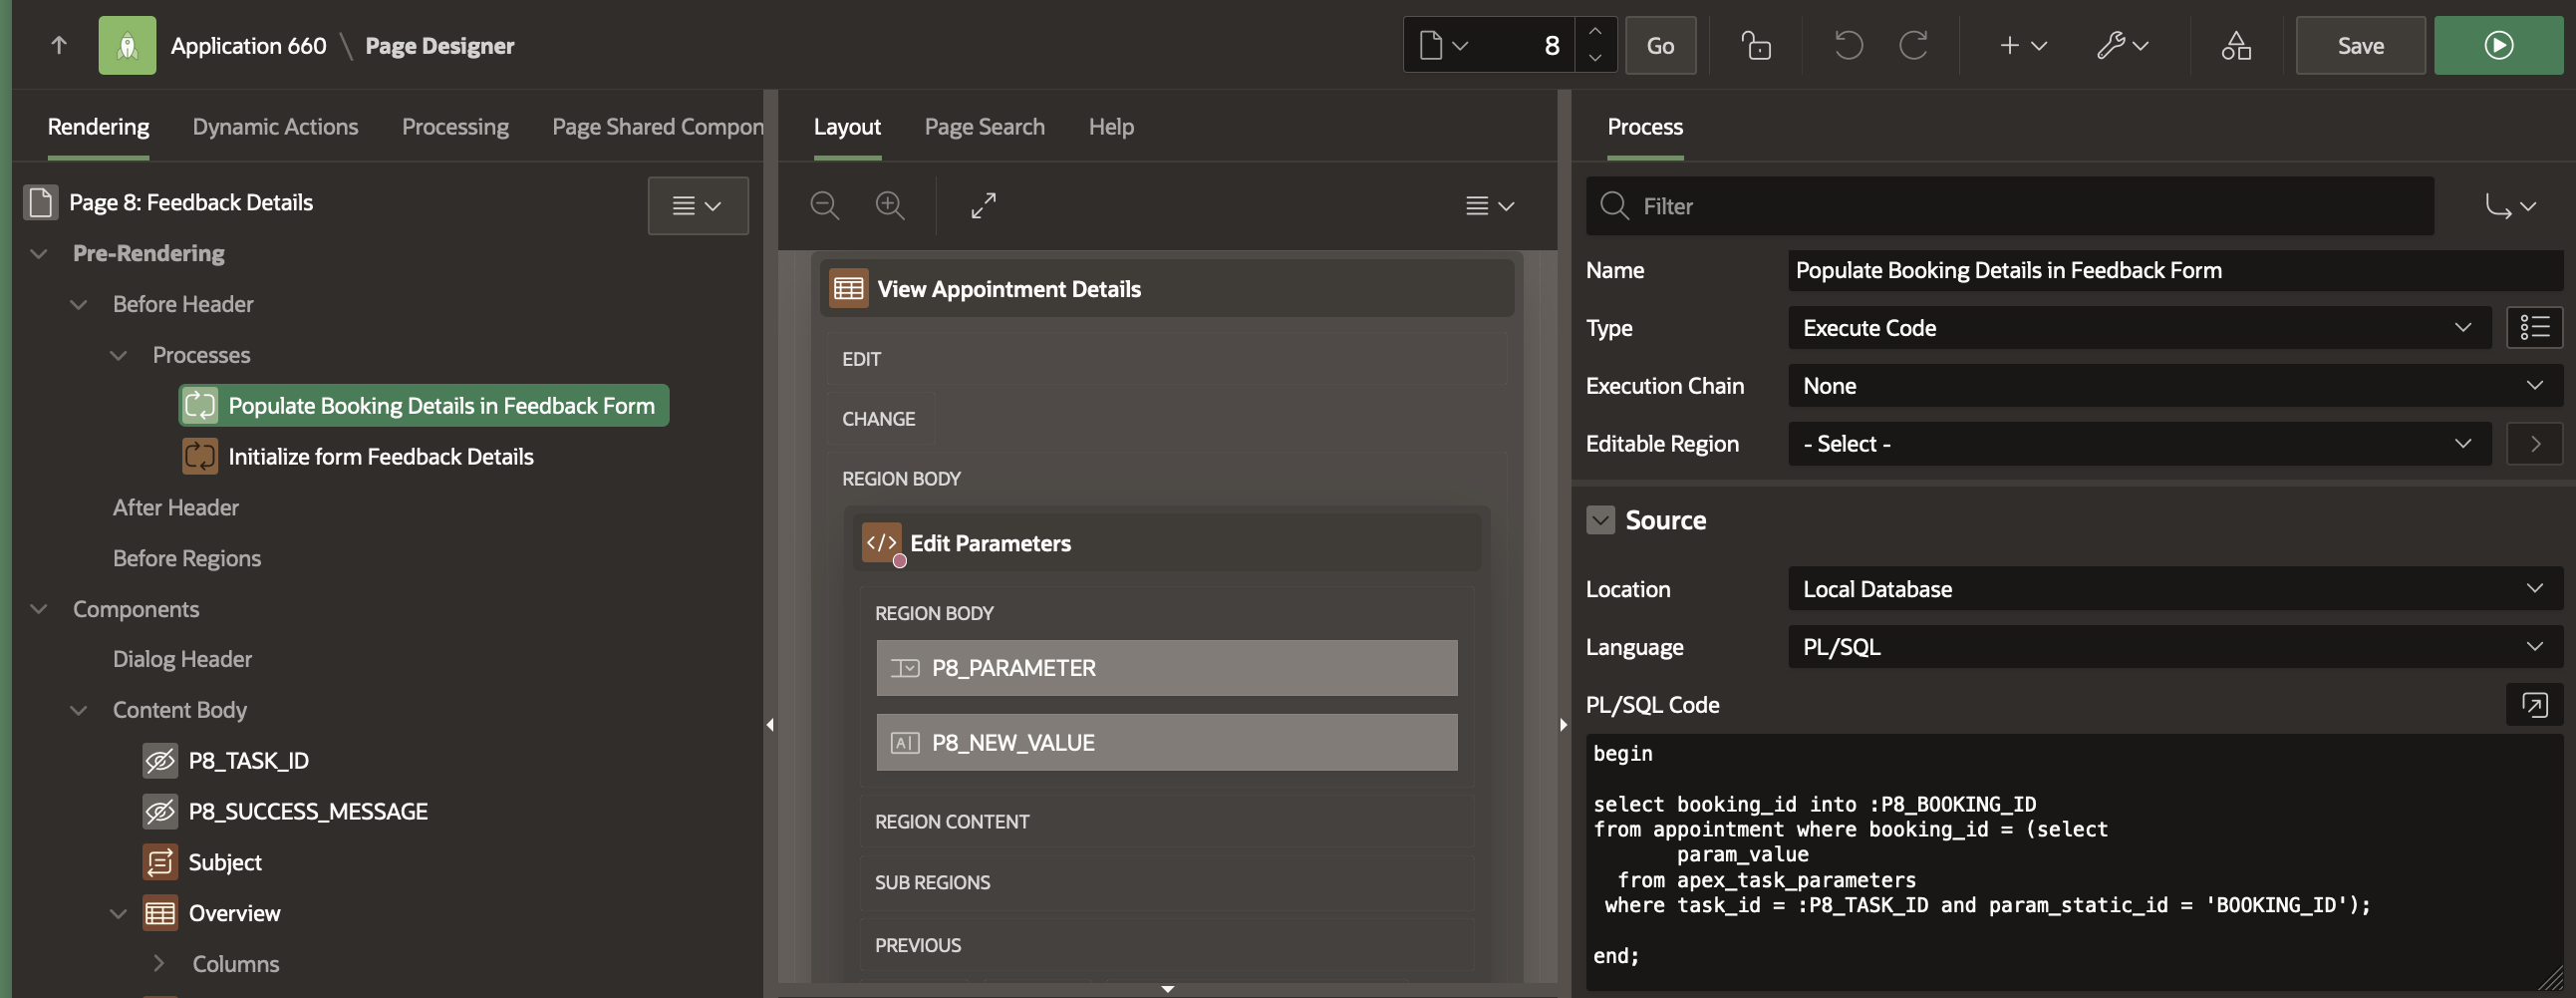
In the Pre-Rendering section add a new Process above the Initialize Form Feedback Details Process and name it Populate Booking Details in Feedback Form.
Select the Process Type as Execute Code and enter the following code in the PL/SQL Code section
begin

select booking_id into :P8_BOOKING_ID
from appointment where booking_id = (select
       param_value
  from apex_task_parameters
 where task_id = :P8_TASK_ID and param_static_id = 'BOOKING_ID');

end;
Go to the Processing Tab and add a new Process after the Claim process. Set the type as Execute Code and in the PL/SQL Code section enter the following
begin
    insert into patient_feedback (
        patient_name,
        doctor_no,
        appointment,
        feedback,
        rating,
        created_at,
        updated_at)
    values
        (:P8_PATIENT_USERNAME,
        :P8_DOCTOR_NO,
        to_timestamp_tz(:P8_SCHEDULE,'DD-MON-YYYY HH24:MI:SS'),
        :P8_FEEDBACK,
        :P8_RATING,
        systimestamp,
        systimestamp);
end;

In Server Side Condition , set When Button Pressed as COMPLETE.
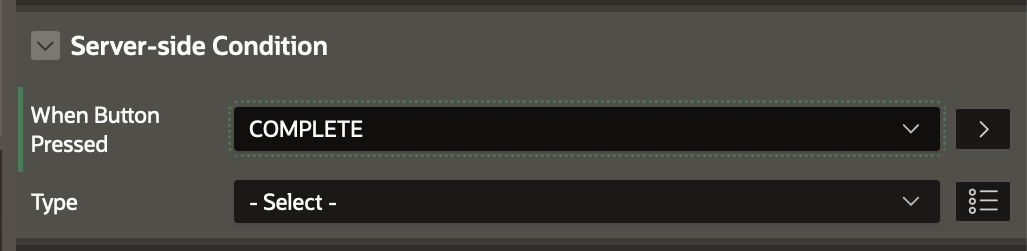
Save the changes.
Creating the Patient Appointments And Feedbacks Page
Let us now created a View Only page where a patient can log in to view their appointments and also the feedbacks they have left so far.
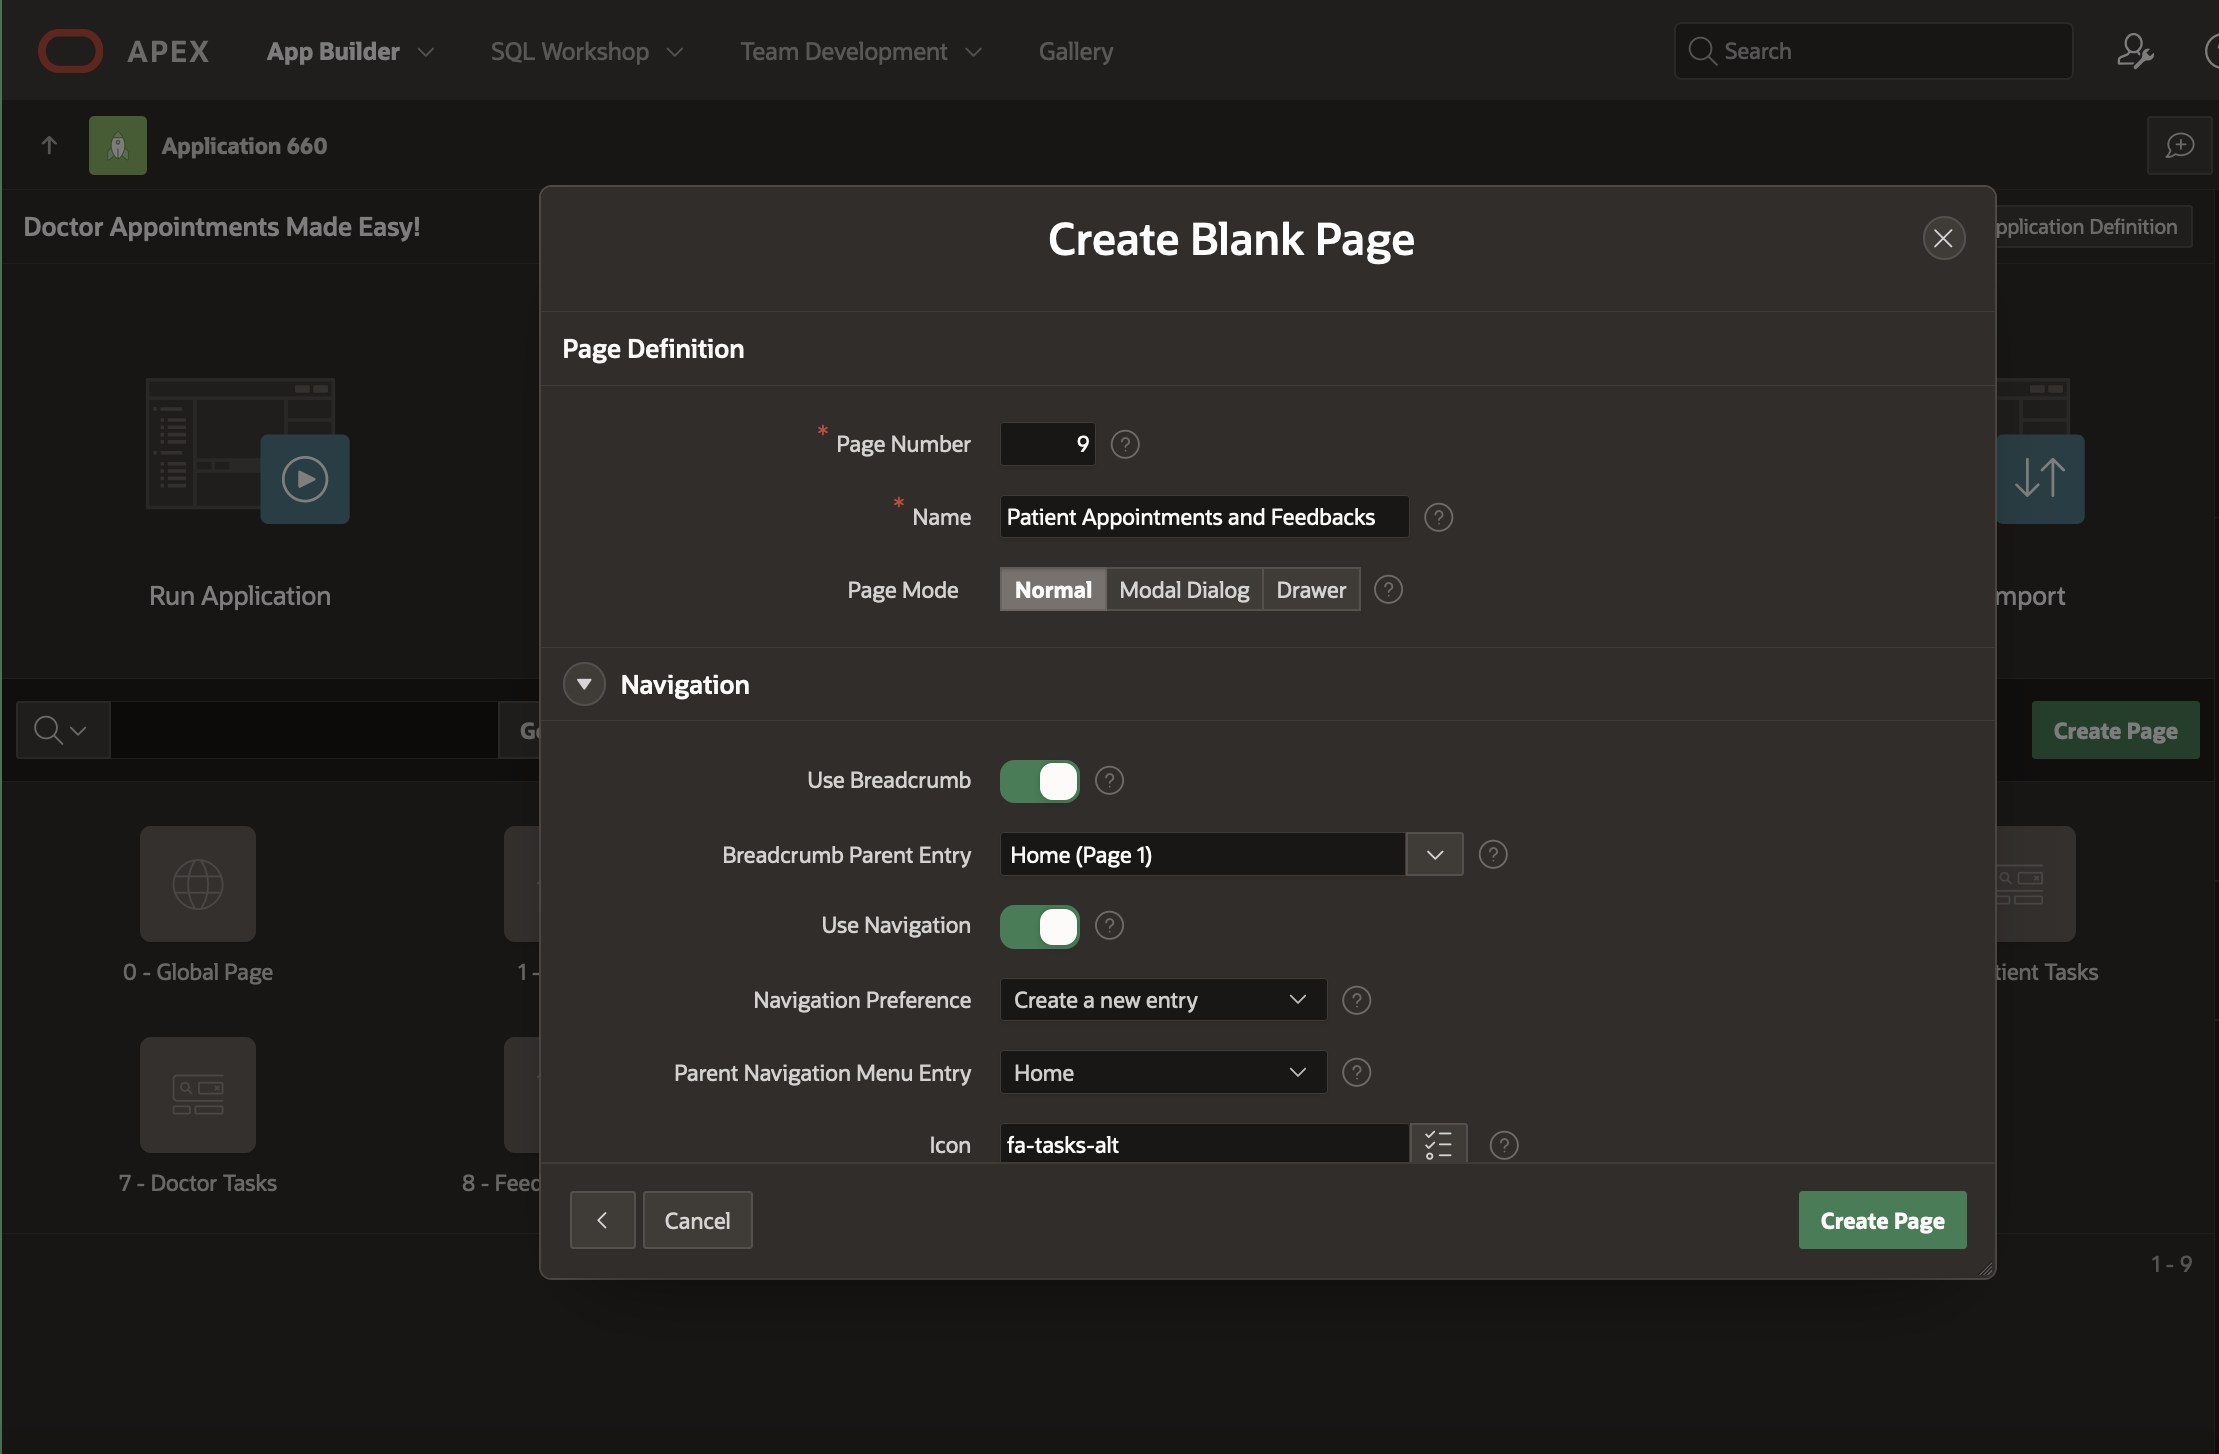
Go to App Builder and Click on Create Page. Choose Blank Page in the Create Page Wizard and click Next.
In the Next section, enter the name of the page as Patient Appointments And Feedbacks.
Enter the Breadcrumb and Naviation Menu entries as shown in the screen below.
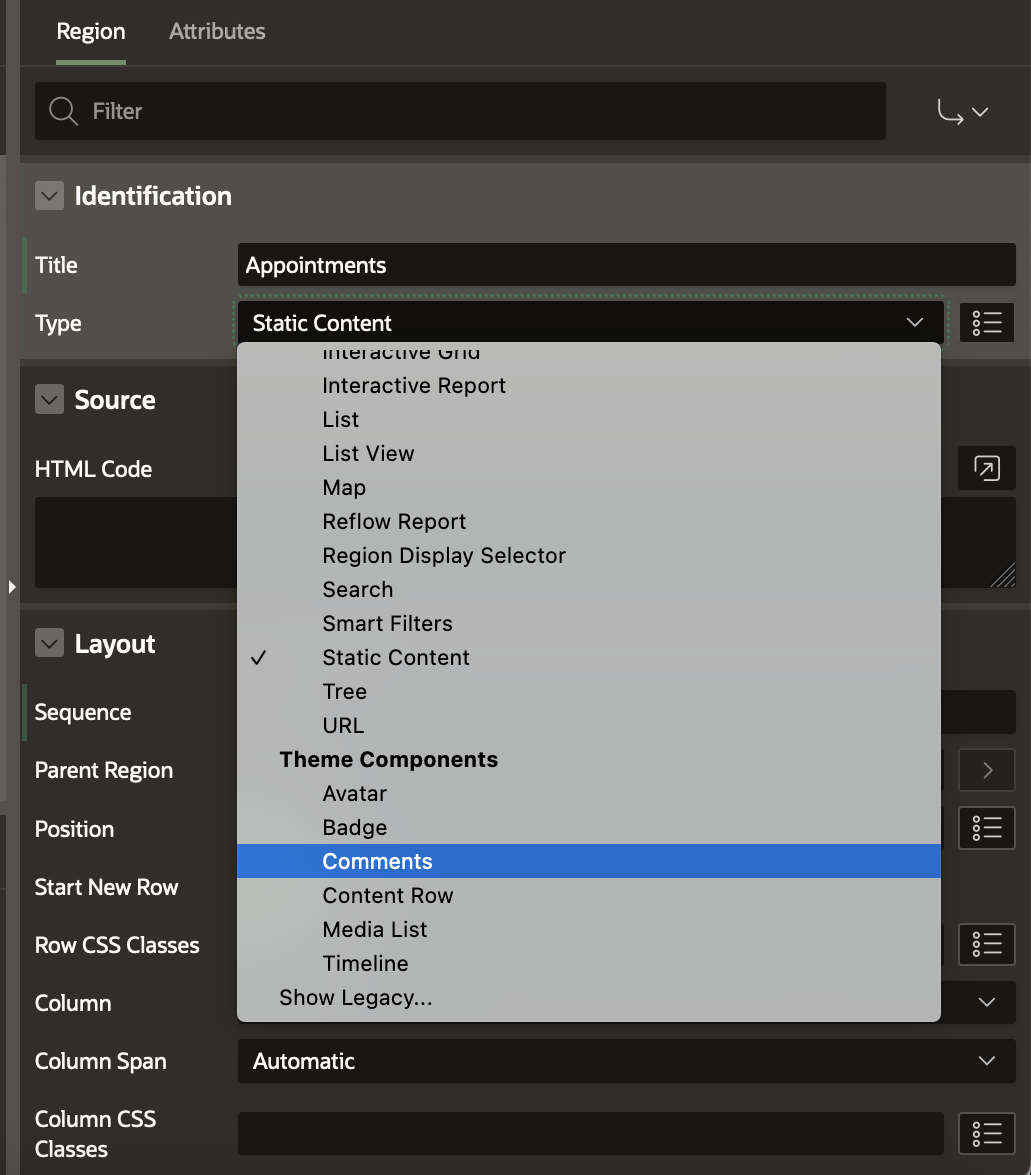
In Page Designer, right click on Body and click Create Region. In the new Region, go to Property Editor and change the name to Appointments. Change the Type to Comments (under Theme Components).
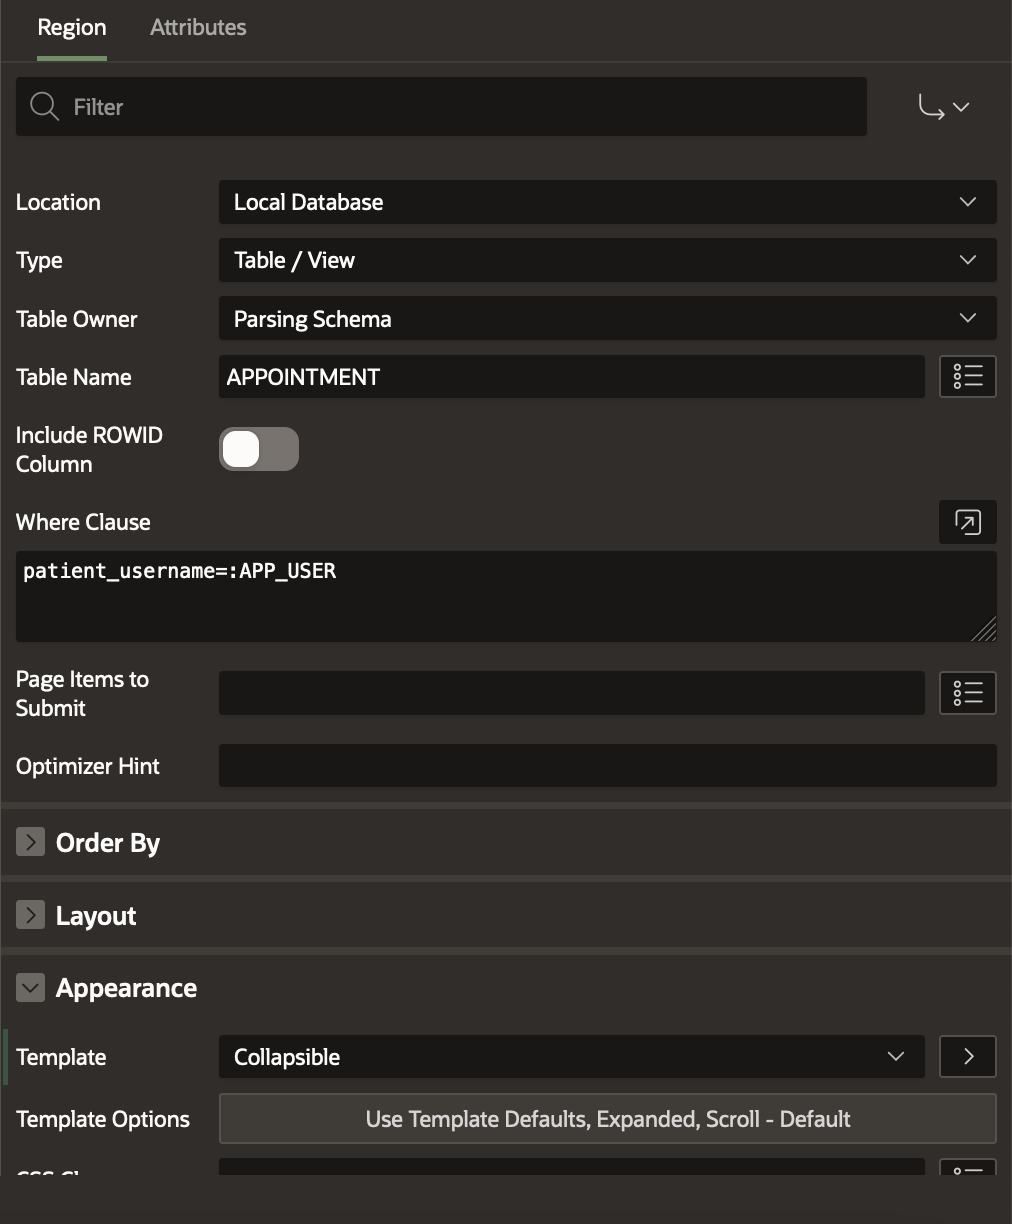
In the Source Section set Table Name as APPOINTMENT. In the Where Clause, enter :
patient_username=:APP_USER
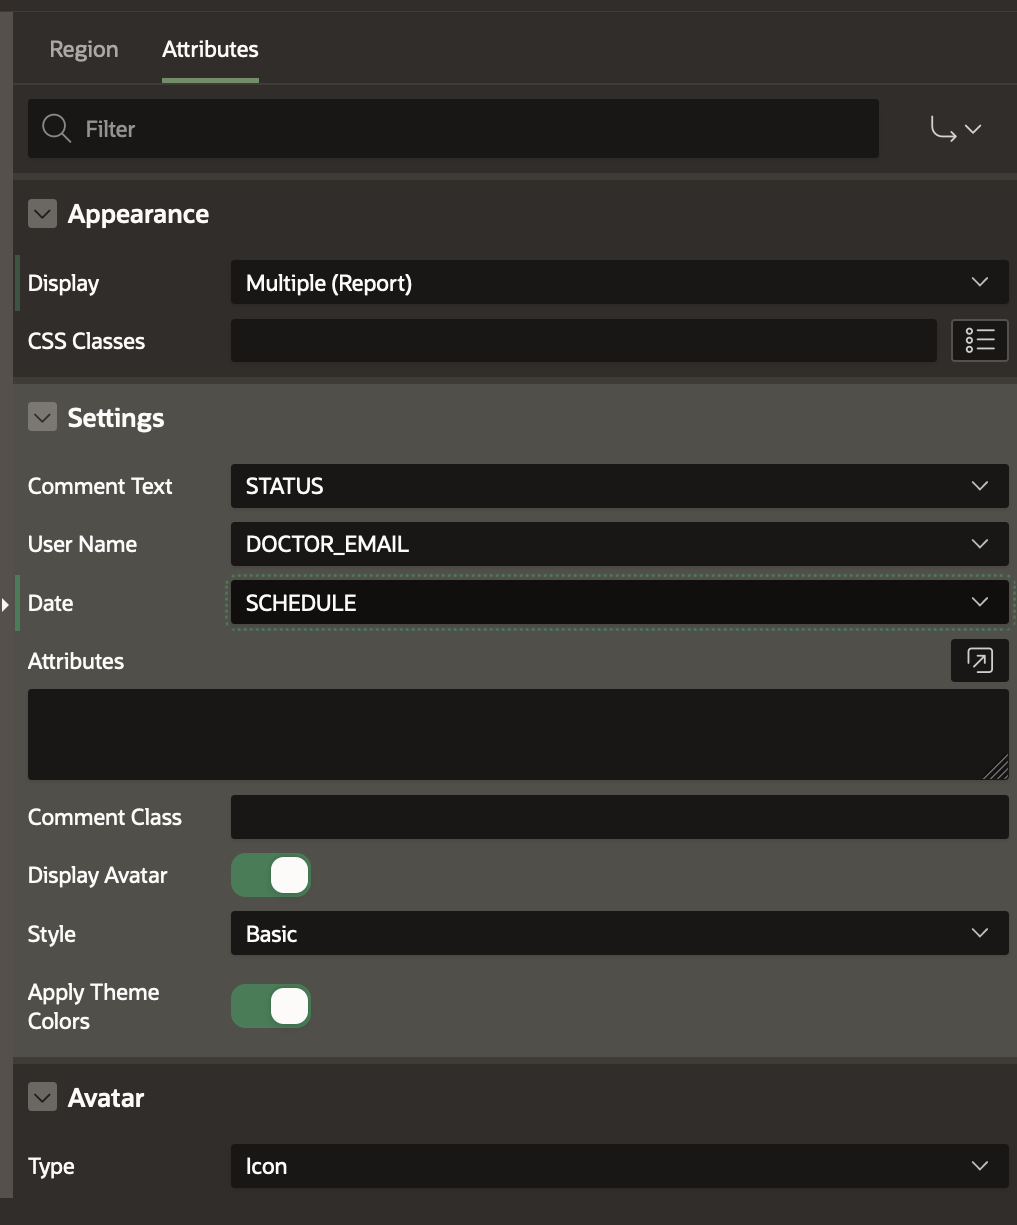
Go to the Attributes Tab and Enter the Username, Date and Comment Text as shown below.
Create a Region Below Appointments Region, and name it Feedbacks. Change the Type to Comments (under Theme Components).
In the Source Section set Type as SQL Querty and in the SQL Query editor, enter :
select ID,
       PATIENT_NAME,
       'DR.' || DNAME as DNAME,
       APPOINTMENT,
       FEEDBACK,
       RATING,
       CREATED_AT,
       UPDATED_AT
  from PATIENT_FEEDBACK, DOCTOR
 where PATIENT_NAME=:APP_USER
  and DOCTOR_NO = DNO
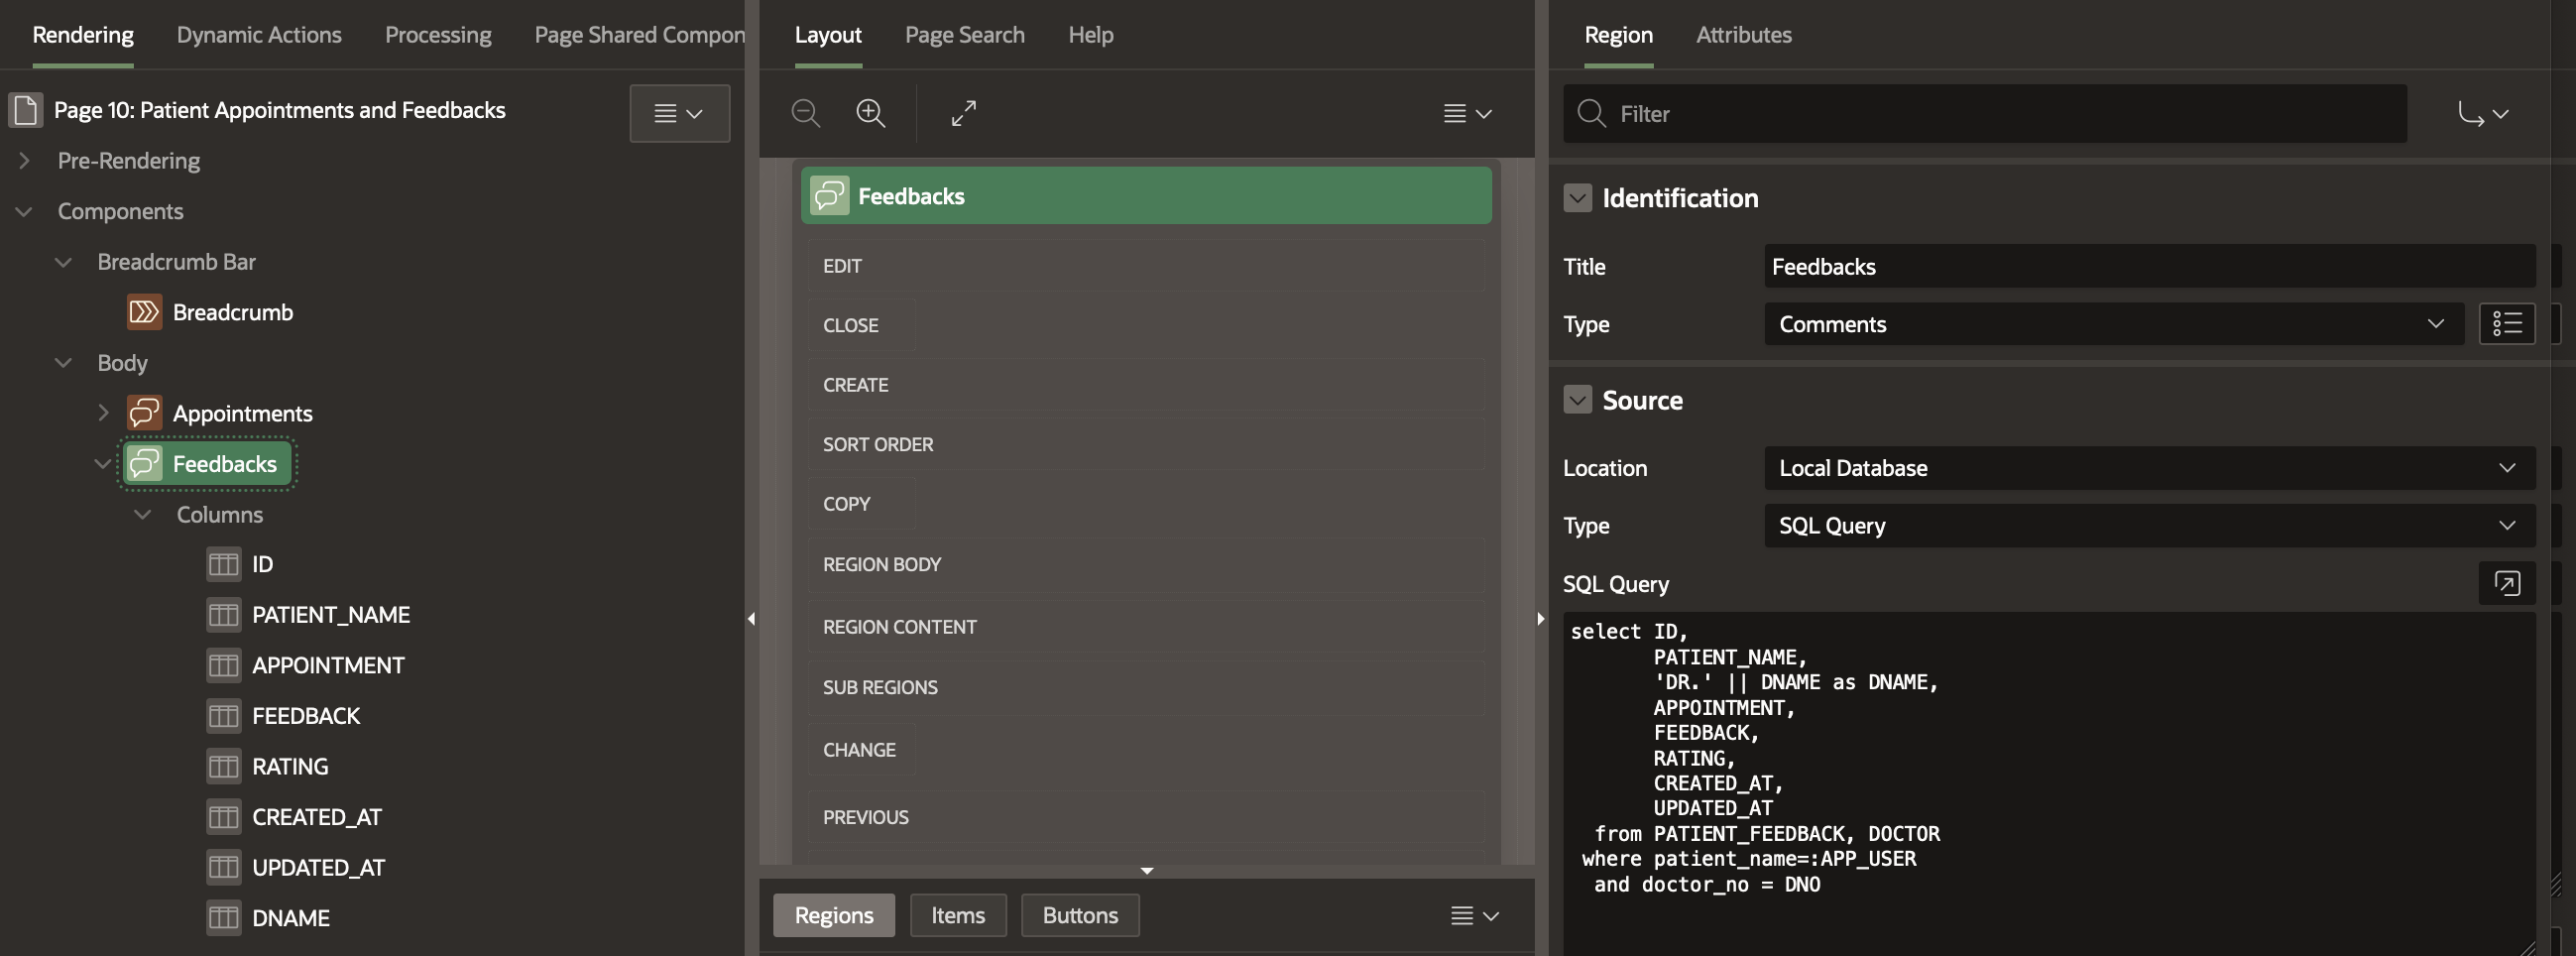
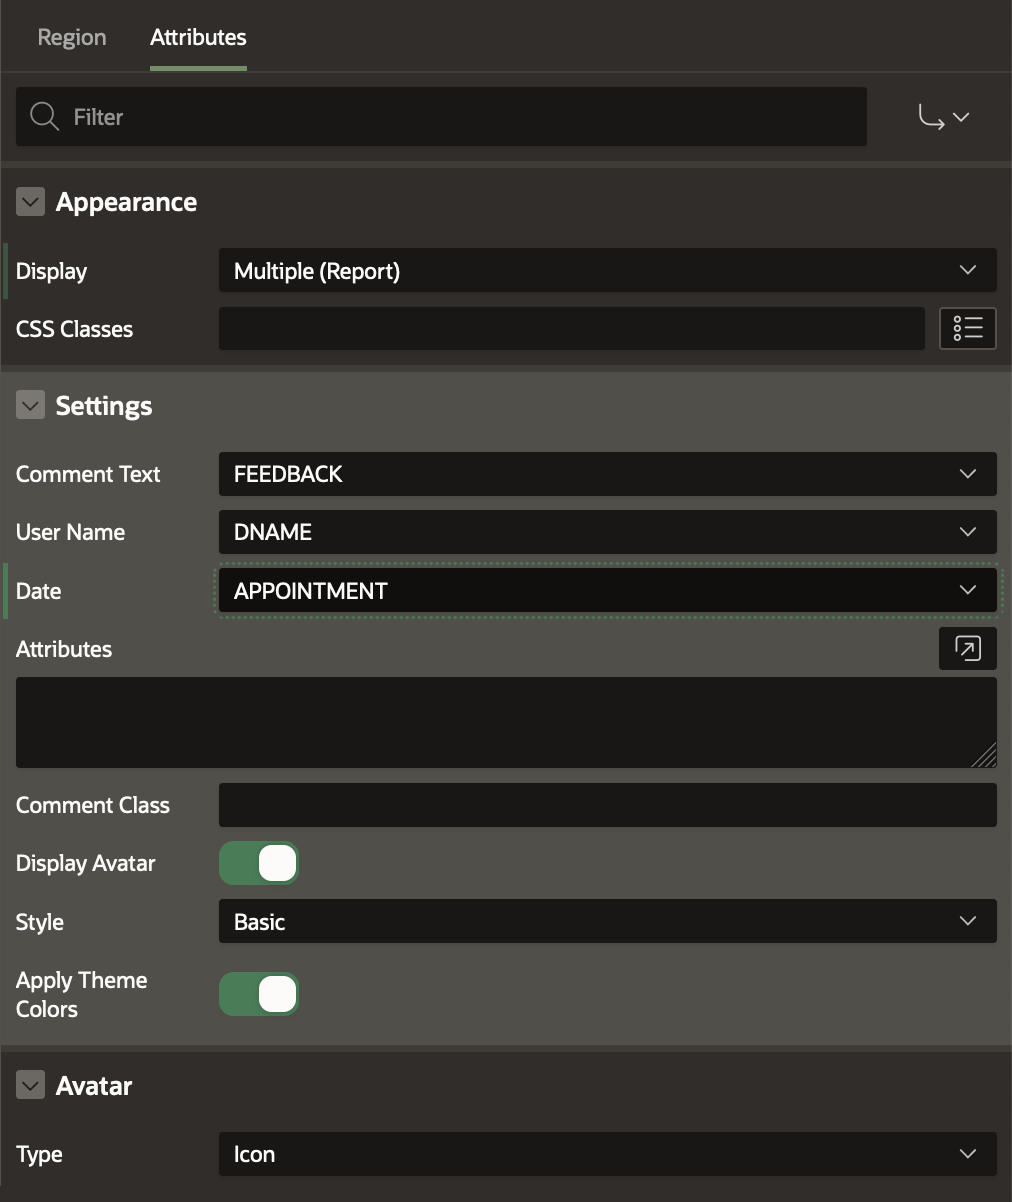
Go to the Attributes Tab and Enter the Username, Date and Comment Text as shown below.
Save the changes.
Creating the View Appointment Workflows Page
Finally, we need the page that the Hospital Management Staff will use the monitor the appointment workflow.
We use the Workflow Console and Details pages with Initiated By Me report context which allows a logged in user to view all Workflows Initiated by him or her.
To create the Workflow Console and Details pages:
- On the Application home page, select Create Page.
- Under Components, select Workflow Console.
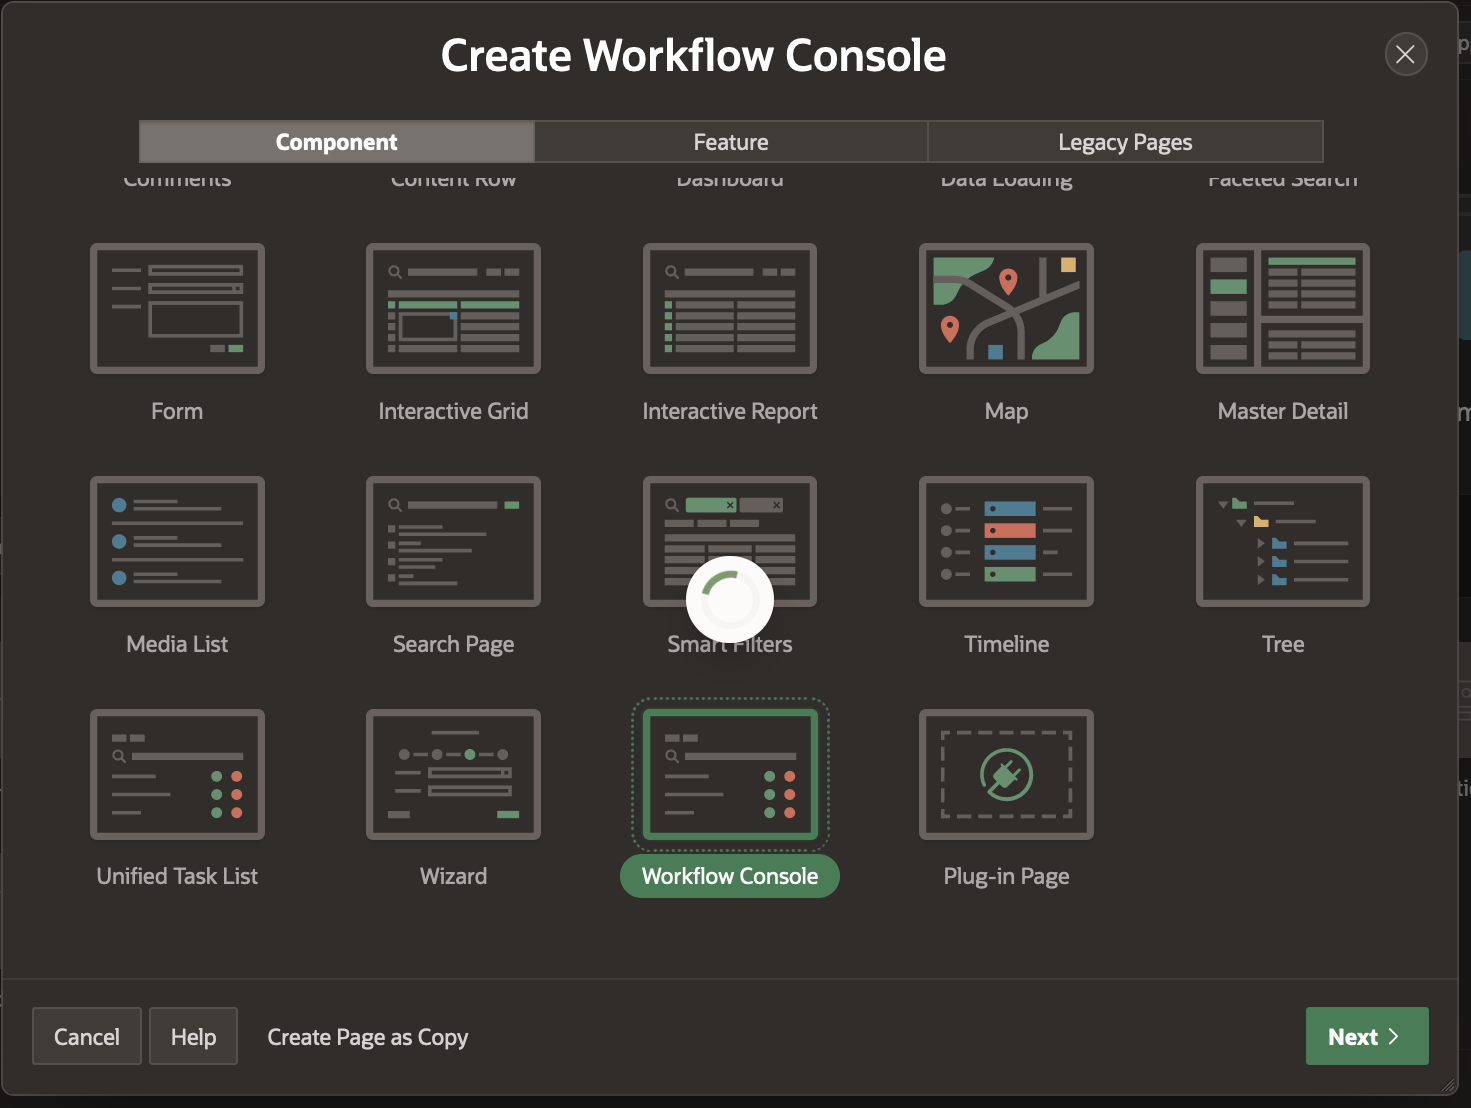
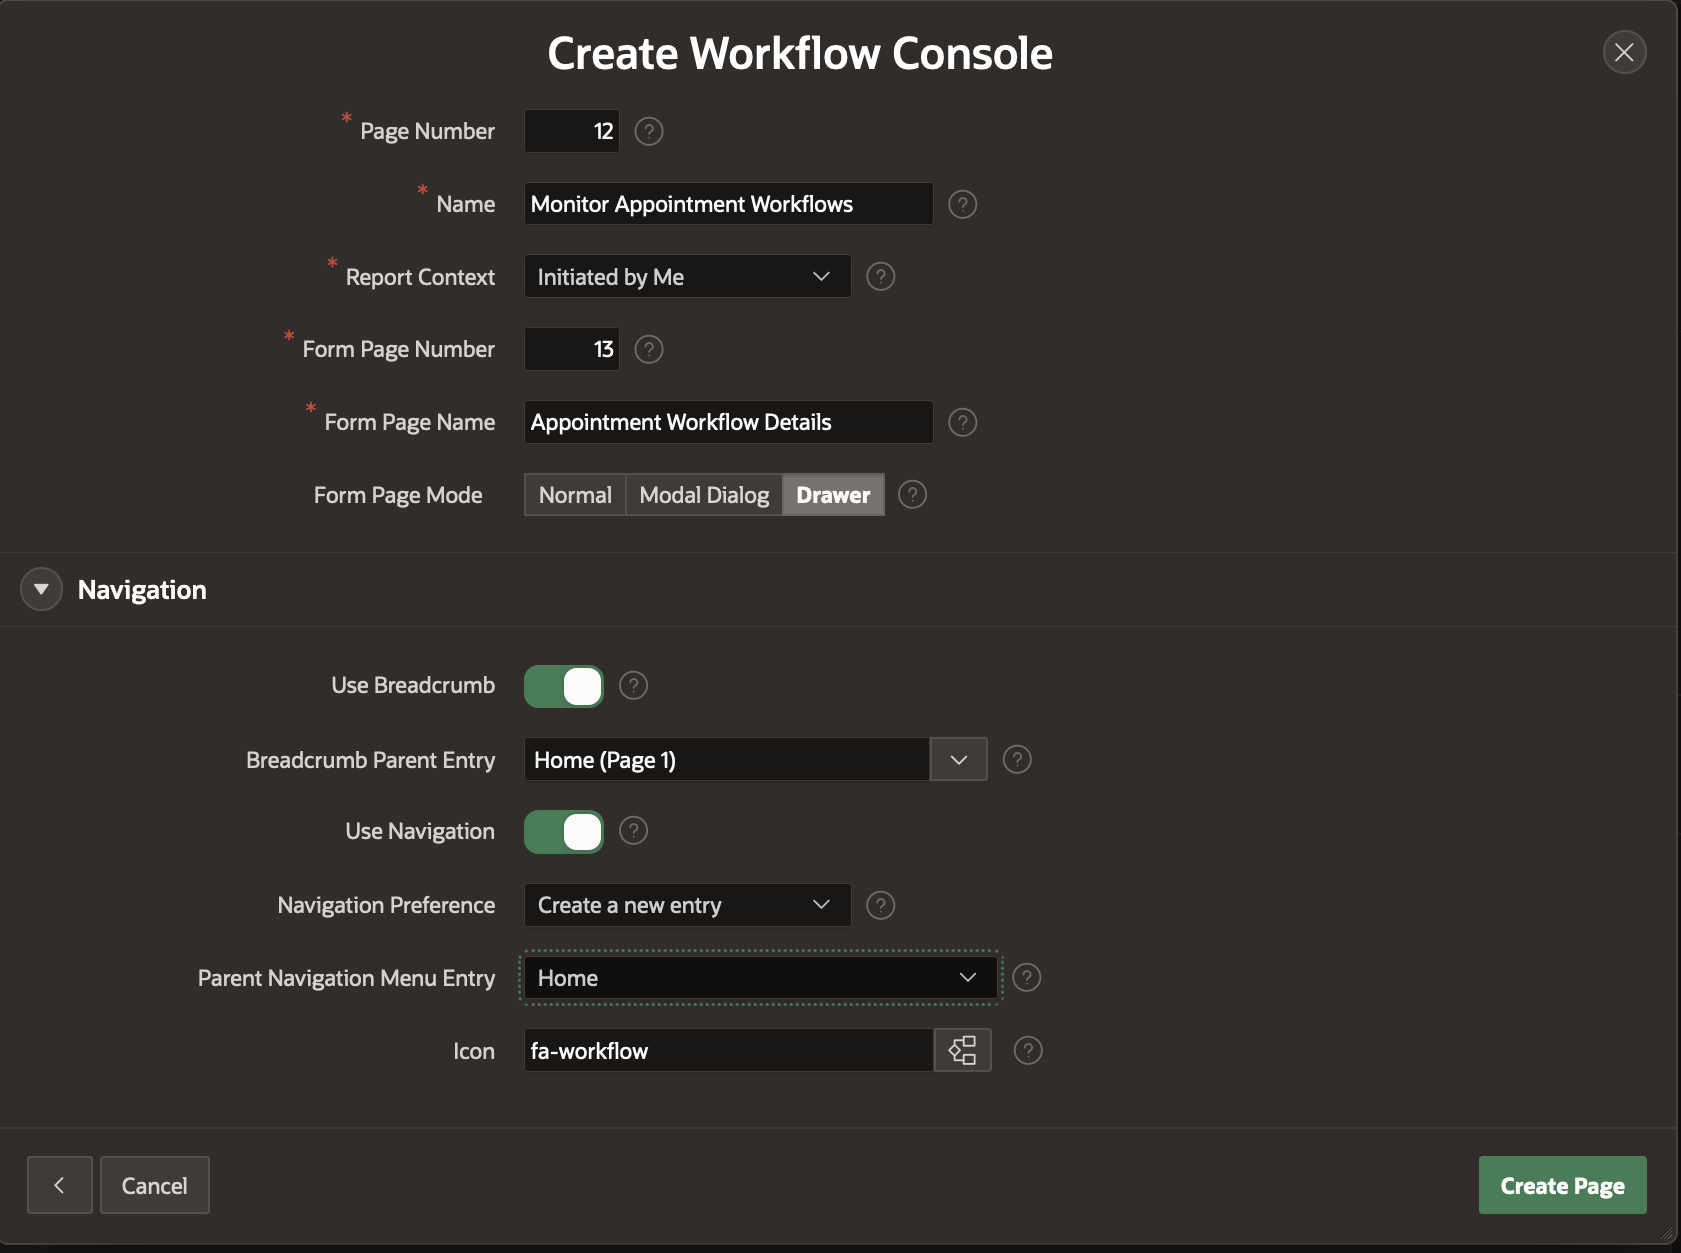
- Select the Report Context as Initiated By Me.
- For the Form Page, enter Monitor Appointment Workflows
- For the Workflow Details page, set the name as Appointment Workflow Details
Our Application is now Complete and Ready to Run!
In the Next Section we will Run the Application and demonstrate the Workflow.