This blog was originally published on Feb 12, 2019.
The latest APEX Early Adopter Release 19.1 introduces a lot of new functionality for forms. First, there is REST Service and REST Enabled SQL support for forms, as outlined in the Statement Of Direction. This will be covered in a separate blog posting in more detail.
Today we have a look at some other, general changes to form pages in APEX 19.1. The most straightforward way to do this is to log into the Application Express 19.1 Early Adopter Instance, create a new application and create a form. In the Create Page wizard, click Form and the Next button.

The most easy way to experiment with a form is the Report with Form option. That will allow us to play with creating new rows as well as changing or deleting existing rows.

The next wizard step also looks similar to previous APEX releases. Provide names for the report and forms pages, adjust the page numbers (if required), decide whether the form should be a modal dialog or a normal page and so on. When finished, click the Next button and decide whether you want to have a navigation menu entry for the new pages. Click Next again – you will be directed to the Data Source wizard step.

This step really looks different in the new APEX release: APEX continues its way to support multiple data sources, which has started with APEX 18.1: Now, not only report, charts or calendars can be created on external data sources, forms support this as well. As stated in the beginning, the Web Source Module option will be covered in a separate blog posting – today we’ll focus on Local Database.
Instead of creating a form on a table, we’ll pick the SQL Query option. Forms can now also operate on the same query types as report, charts or calendars. Thus we can not only create a form on a table, but also on a SQL query and … on a PL/SQL function returning a SQL Query (in the latter case, the column list of the SQL query generated by the PL/SQL code must be stable and not change at runtime).
Use the following SQL Query to create the report and form pages:
select e.empno, e.ename, e.job, e.hiredate, e.sal, e.comm, e.deptno,
       (select dname from dept where deptno = e.deptno ) as dname
  from emp e
 where deptno = 10
This SQL query has two interesting aspects:
-
In the WHERE clause, we have a restriction to DEPTNO = 10. So it should not be possible to use the form to edit rows with DEPTNO = 20
-
The DNAME column columns from a subquery. This column is, of course, not updatable.
In the next wizard step, pick a primary key column and then click the Create button in order to create your report with form pages.

As in earlier versions, APEX actually assumes that the primary key column is auto-generated (default value, sequence with trigger or identity column). Thus APEX will create the page item for the primary key columns as hidden items. If your primary key column is not auto-generated, you need to manually change the form page to make the primary key page item a visible form field.
When done, you will be redirected to page designer for the report page. Run that page to show the report. It shows only a subset of the EMP table – so far, so good.
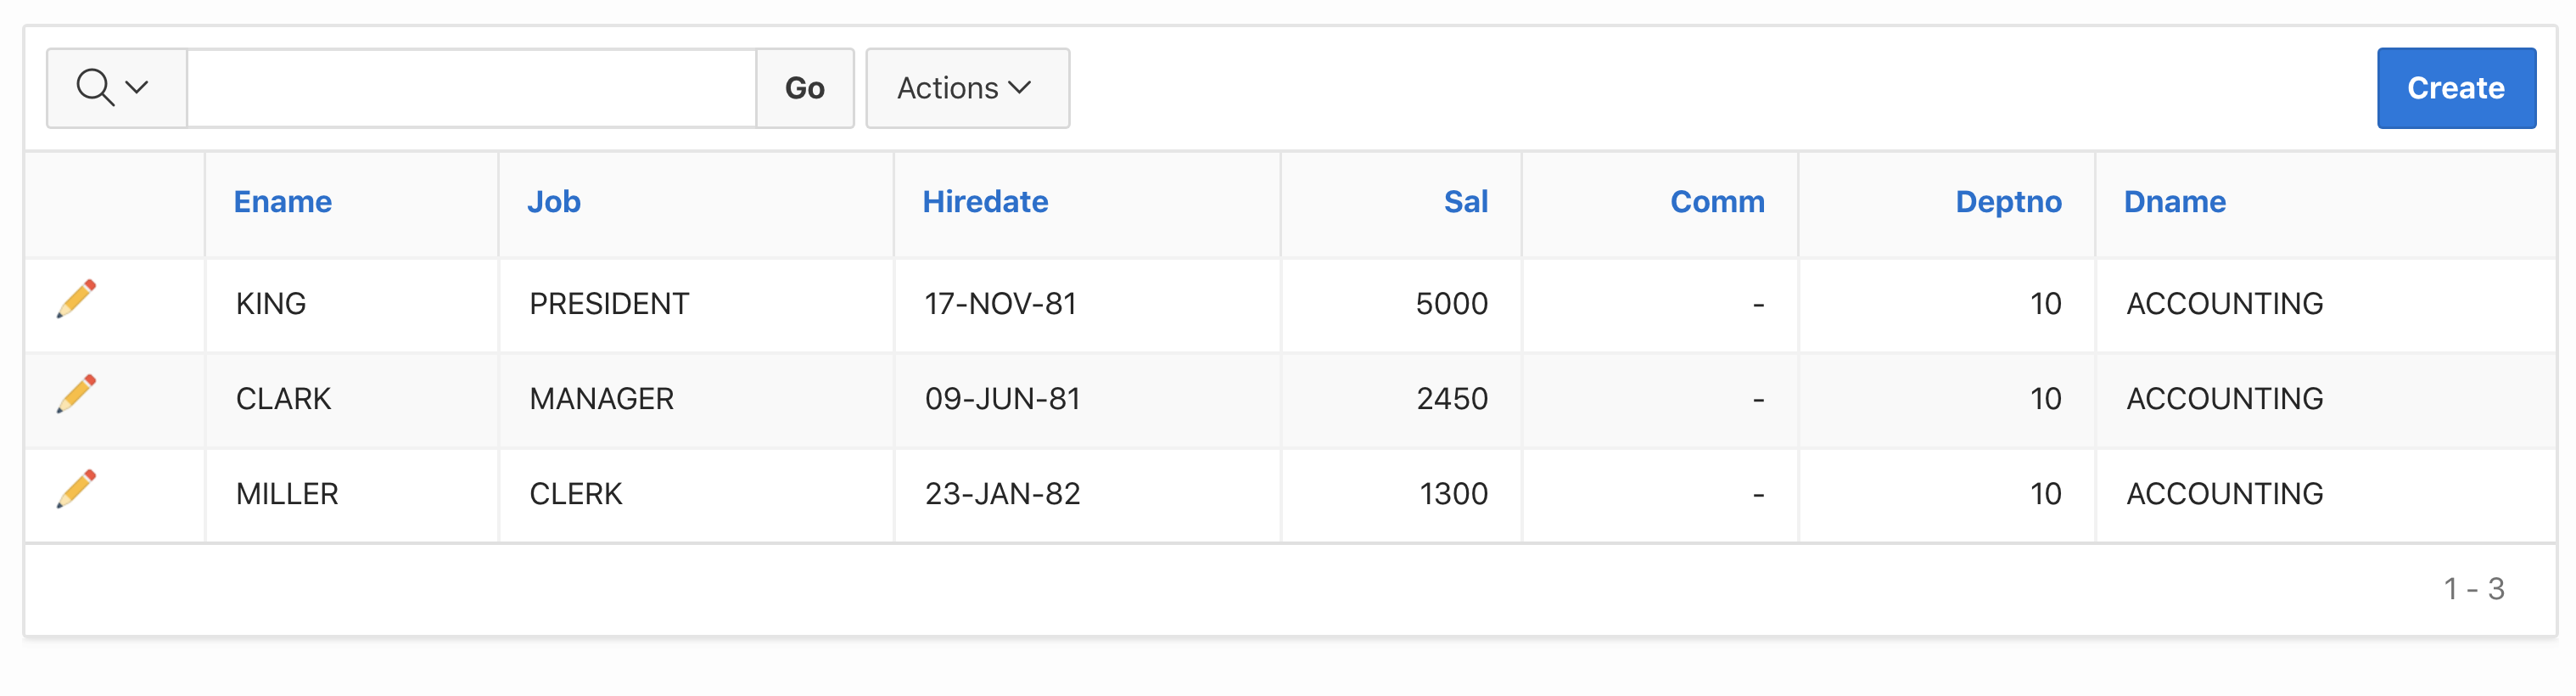
Click the pencil icon to edit one of the rows. A modal page with the form should open. However, once you try to change the row, you will see an error message.
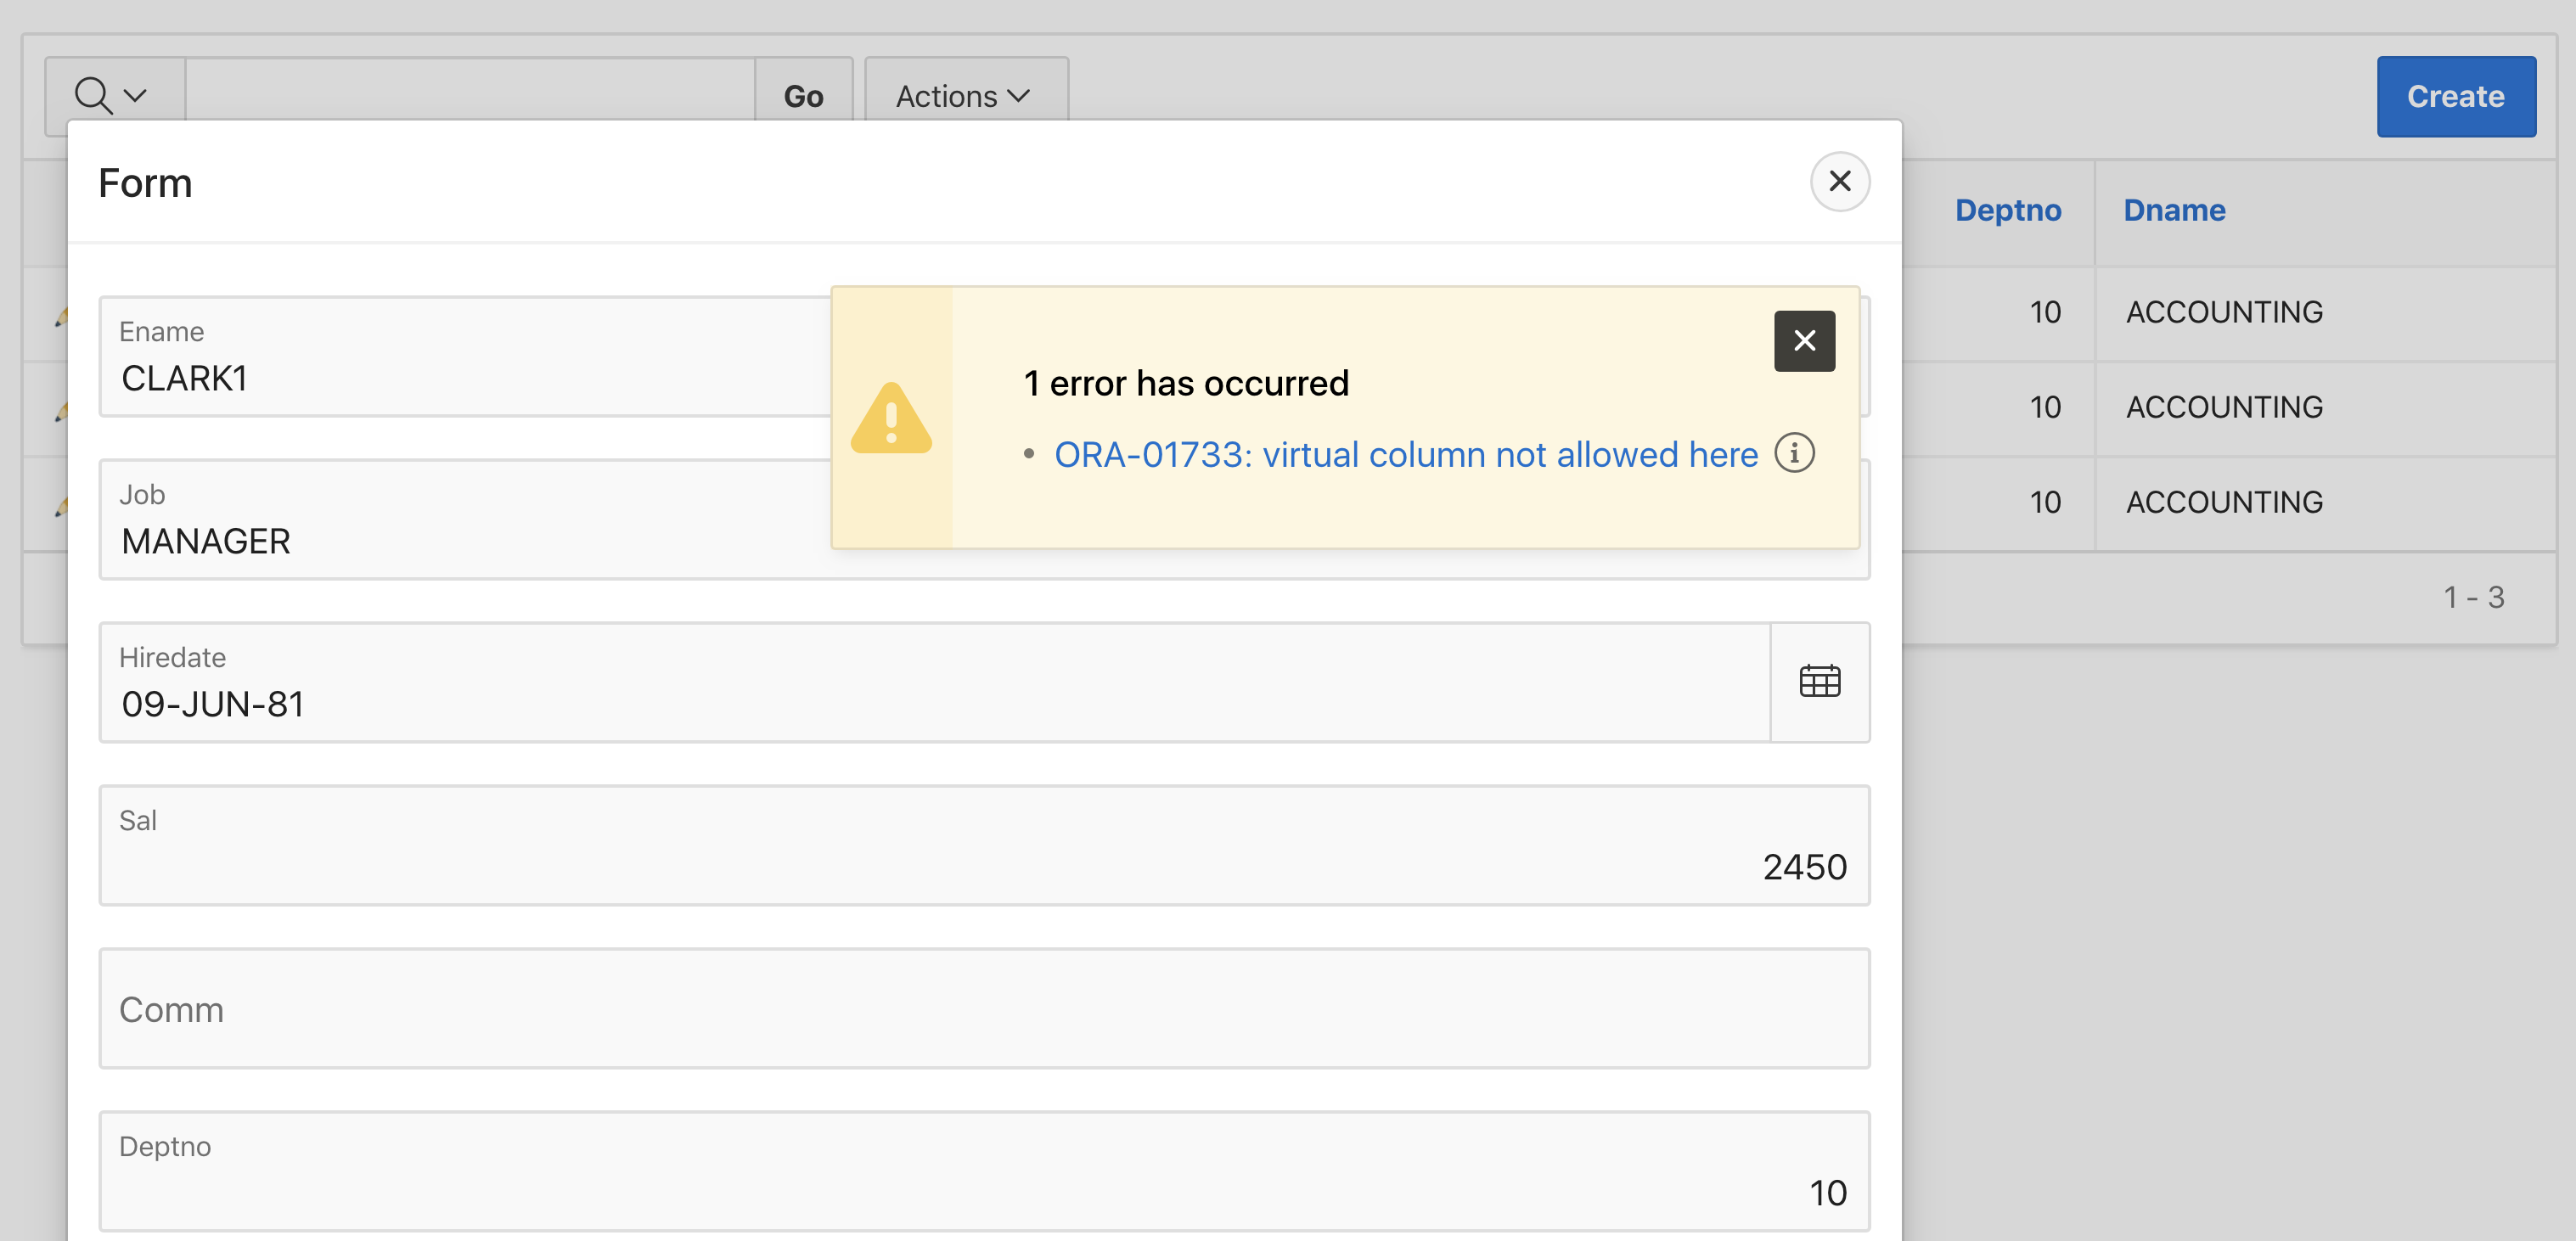
The error message is natural and had to come: the reason is that the form also tried to update the DNAME column of the SQL query. However, that column came from a subquery – and the Oracle Database is not able to perform such updates. And actually this column is only informational – since it is derived from the DEPTNO column. So let’s apply a tiny change to the form in order to get it working:
-
Open Page Designer for the form page
-
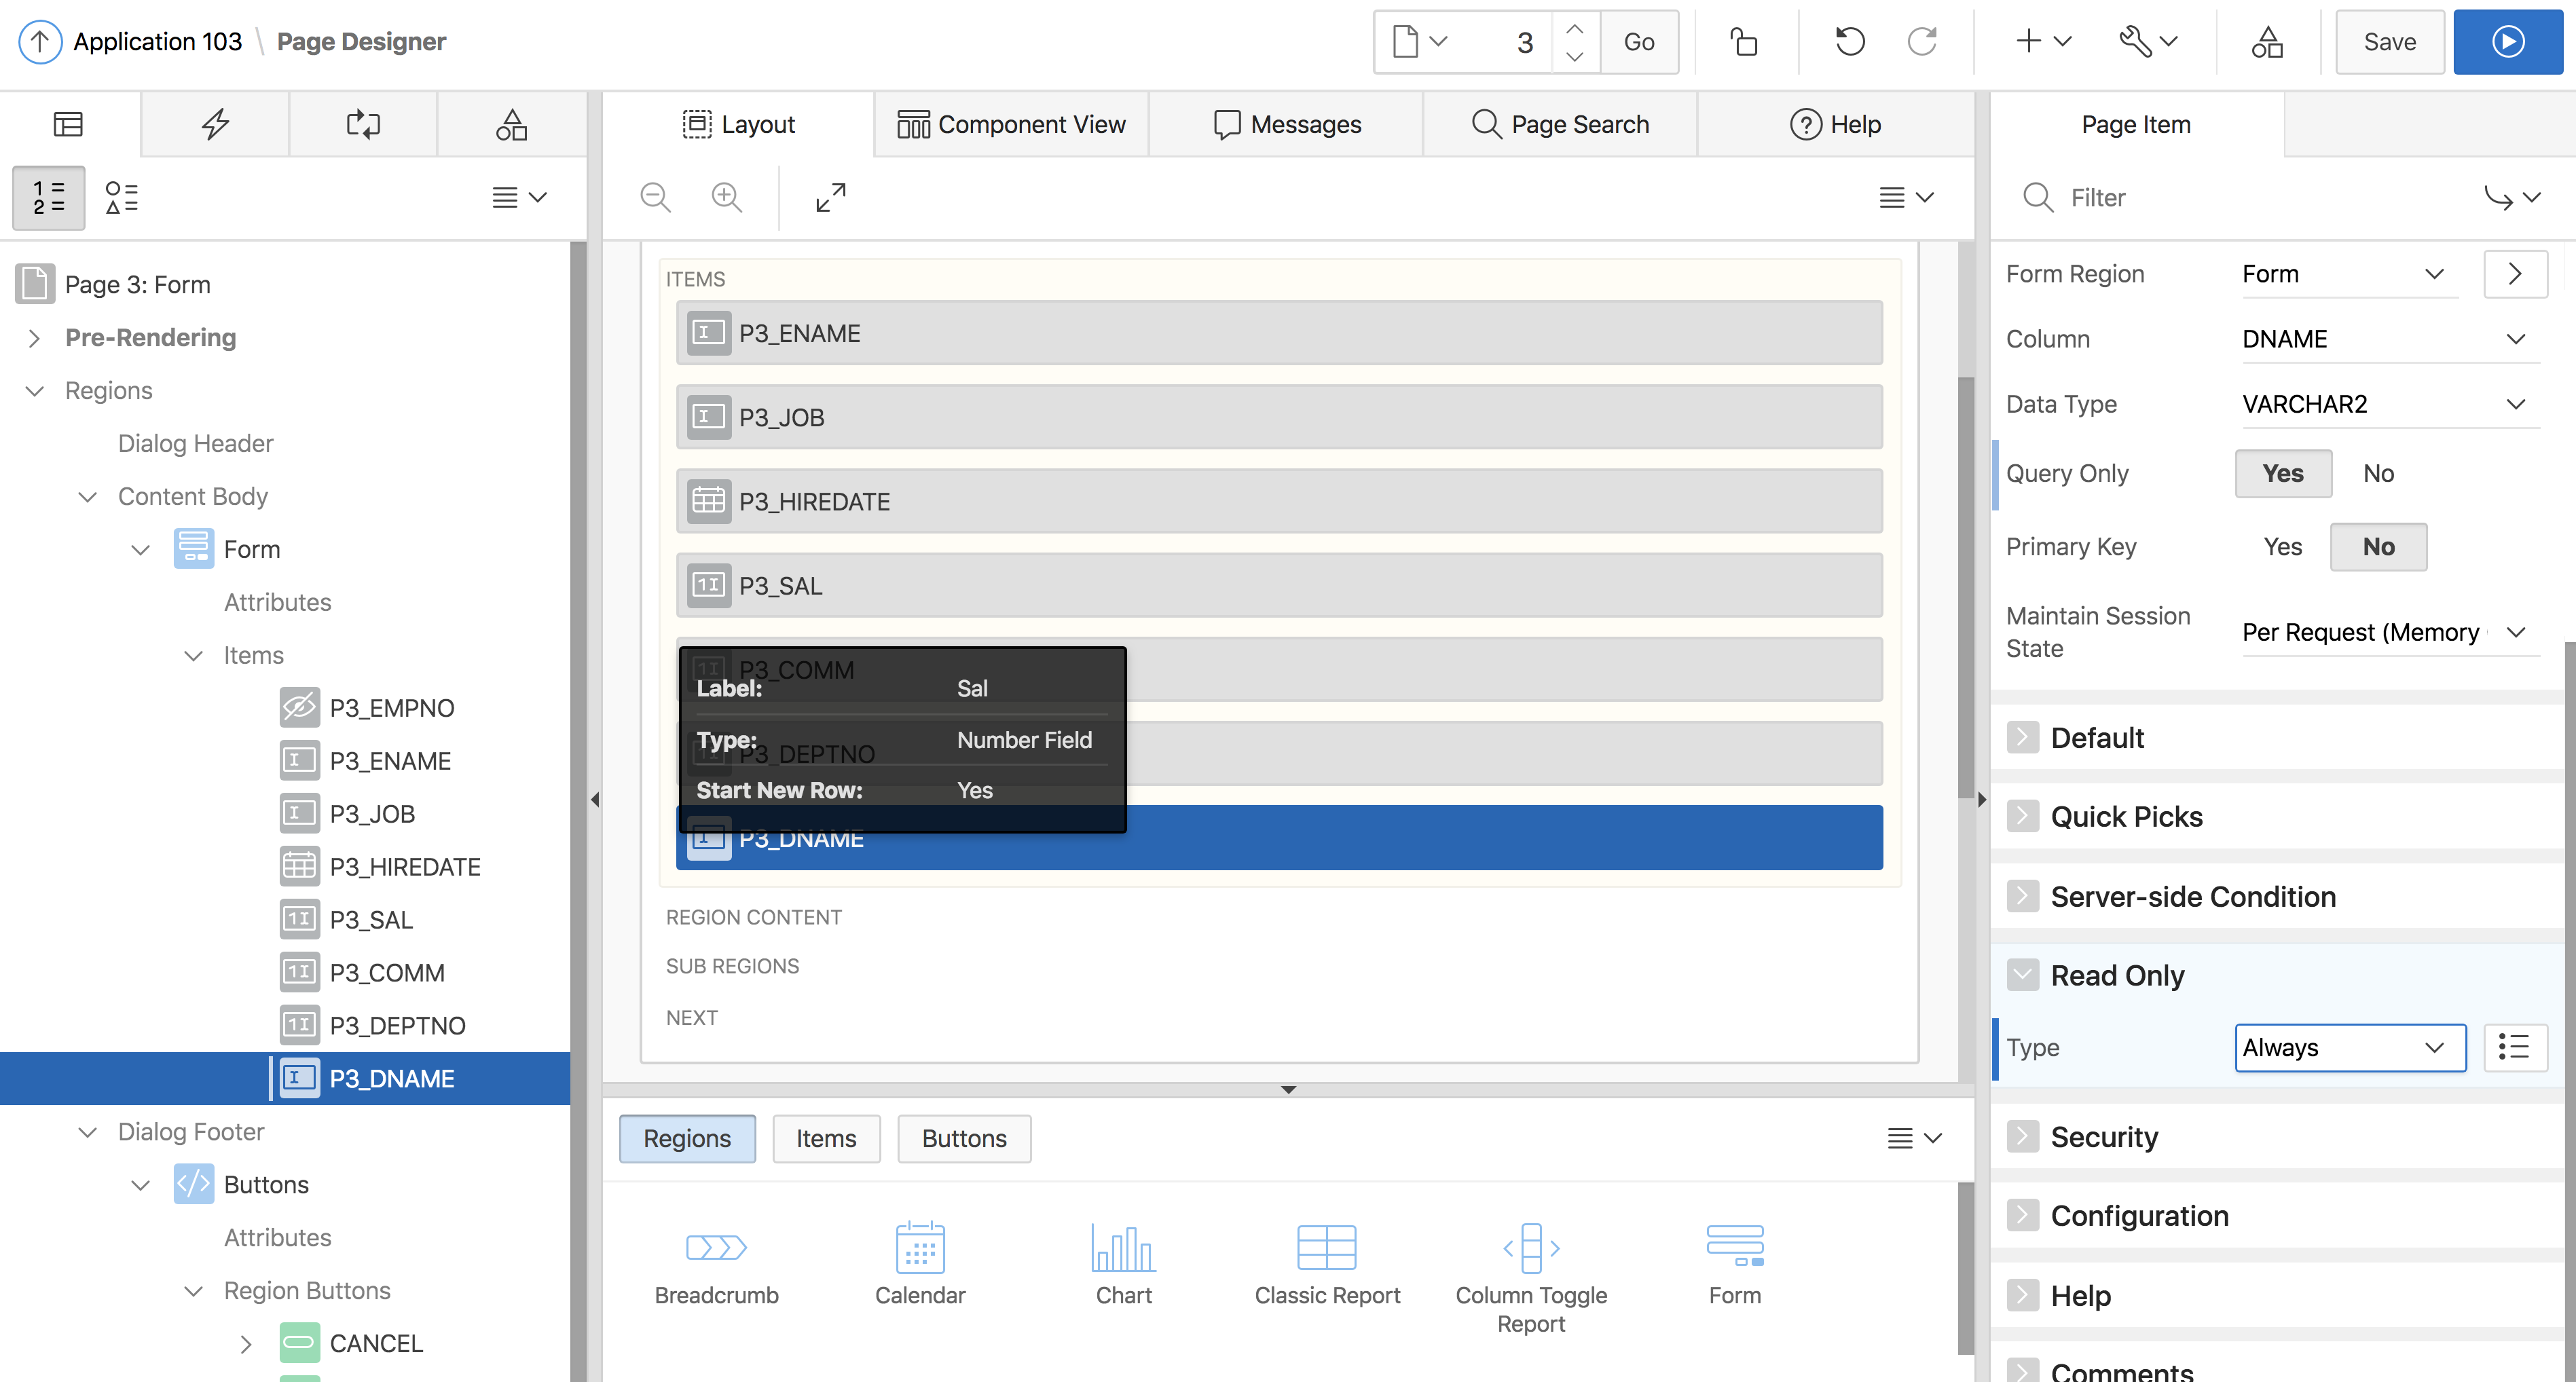
Look up the PX_DNAME item and change its Read Only attribute to Always and its Query Only attribute (within Source) to Yes.
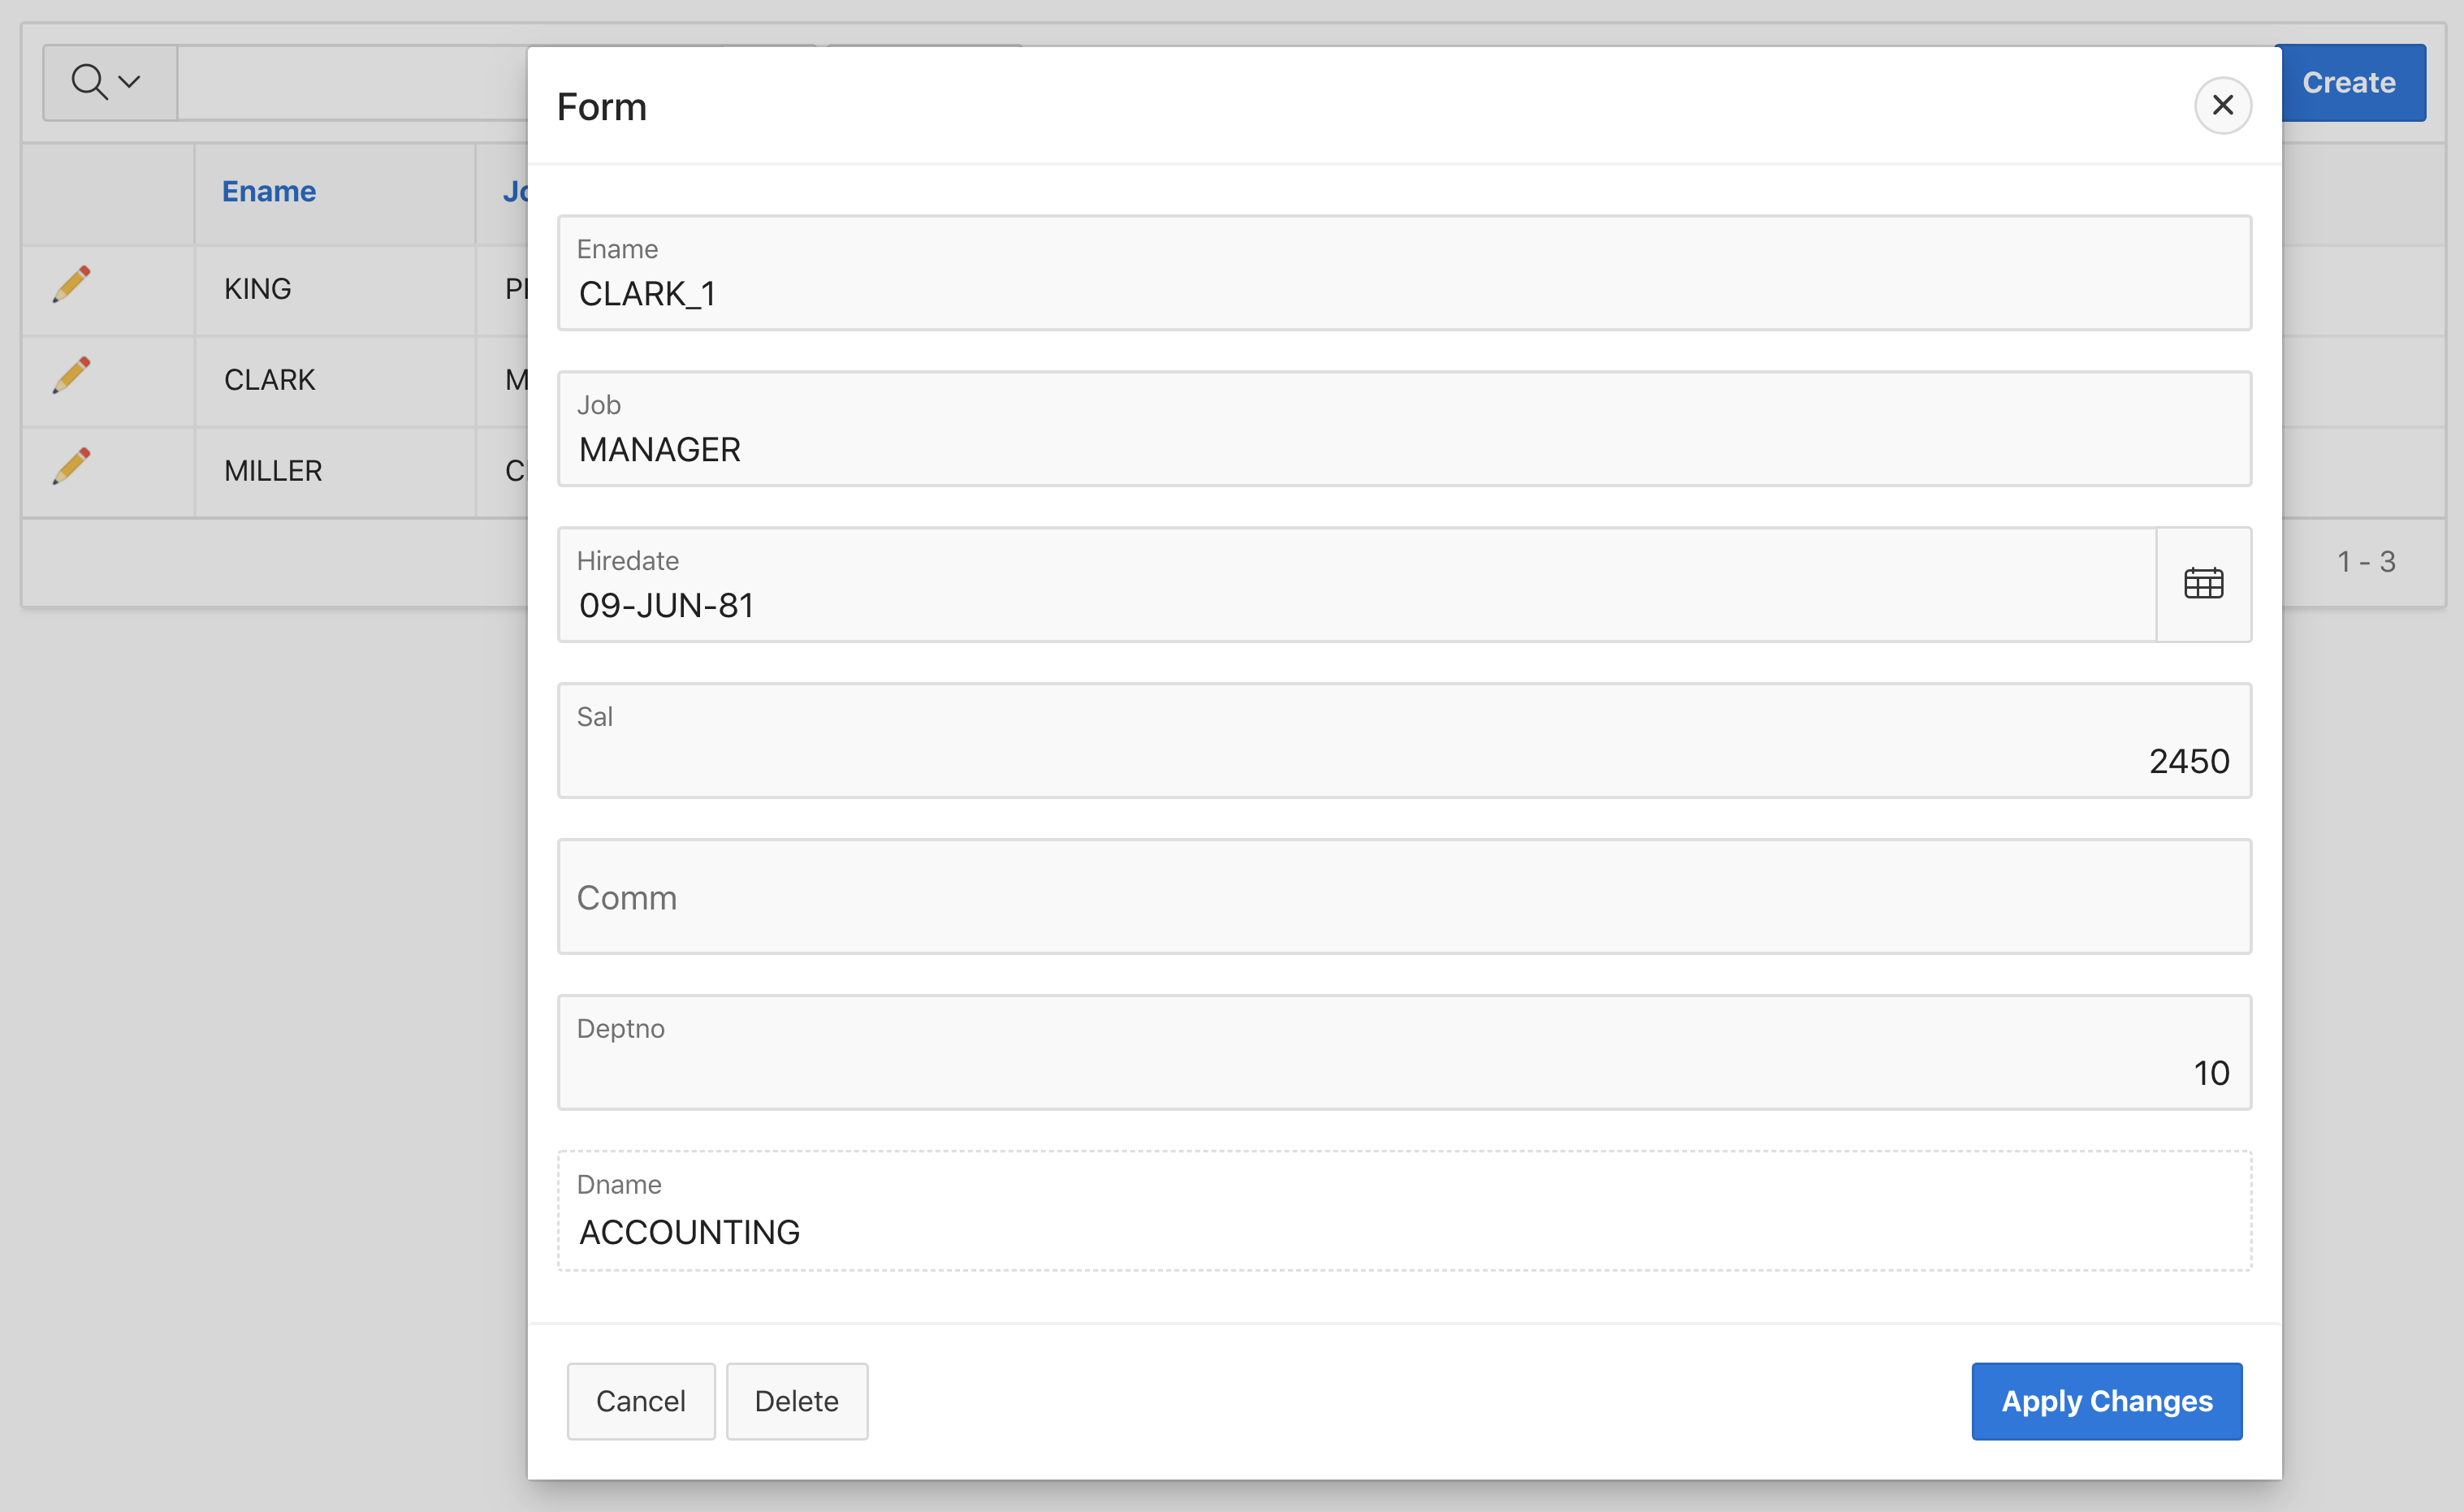
Save your changes and retry the operation. The form looks slightly different – and all form operations now work.
A very interesting case is changing the DEPTNO value to 20. Since the form SQL query restricts the data to rows with a DEPTNO value of 10, this should be an invalid operation. And consequently, you will see an error message.

Let’s now have a look at the form page itself. In earlier versions, a form consisted of the following:
-
One or more regions containing the page items
-
One Automated Row Fetch process in the Pre-Rendering section
-
One Automated Row Process process in the Processes section
The actual information on the table, the primary key columns and the optional WHERE clause to use, was stored in both the Row Fetch and the Row processing processes.
This changes with APEX 19.1: A new region type, the Form Region is introduced.
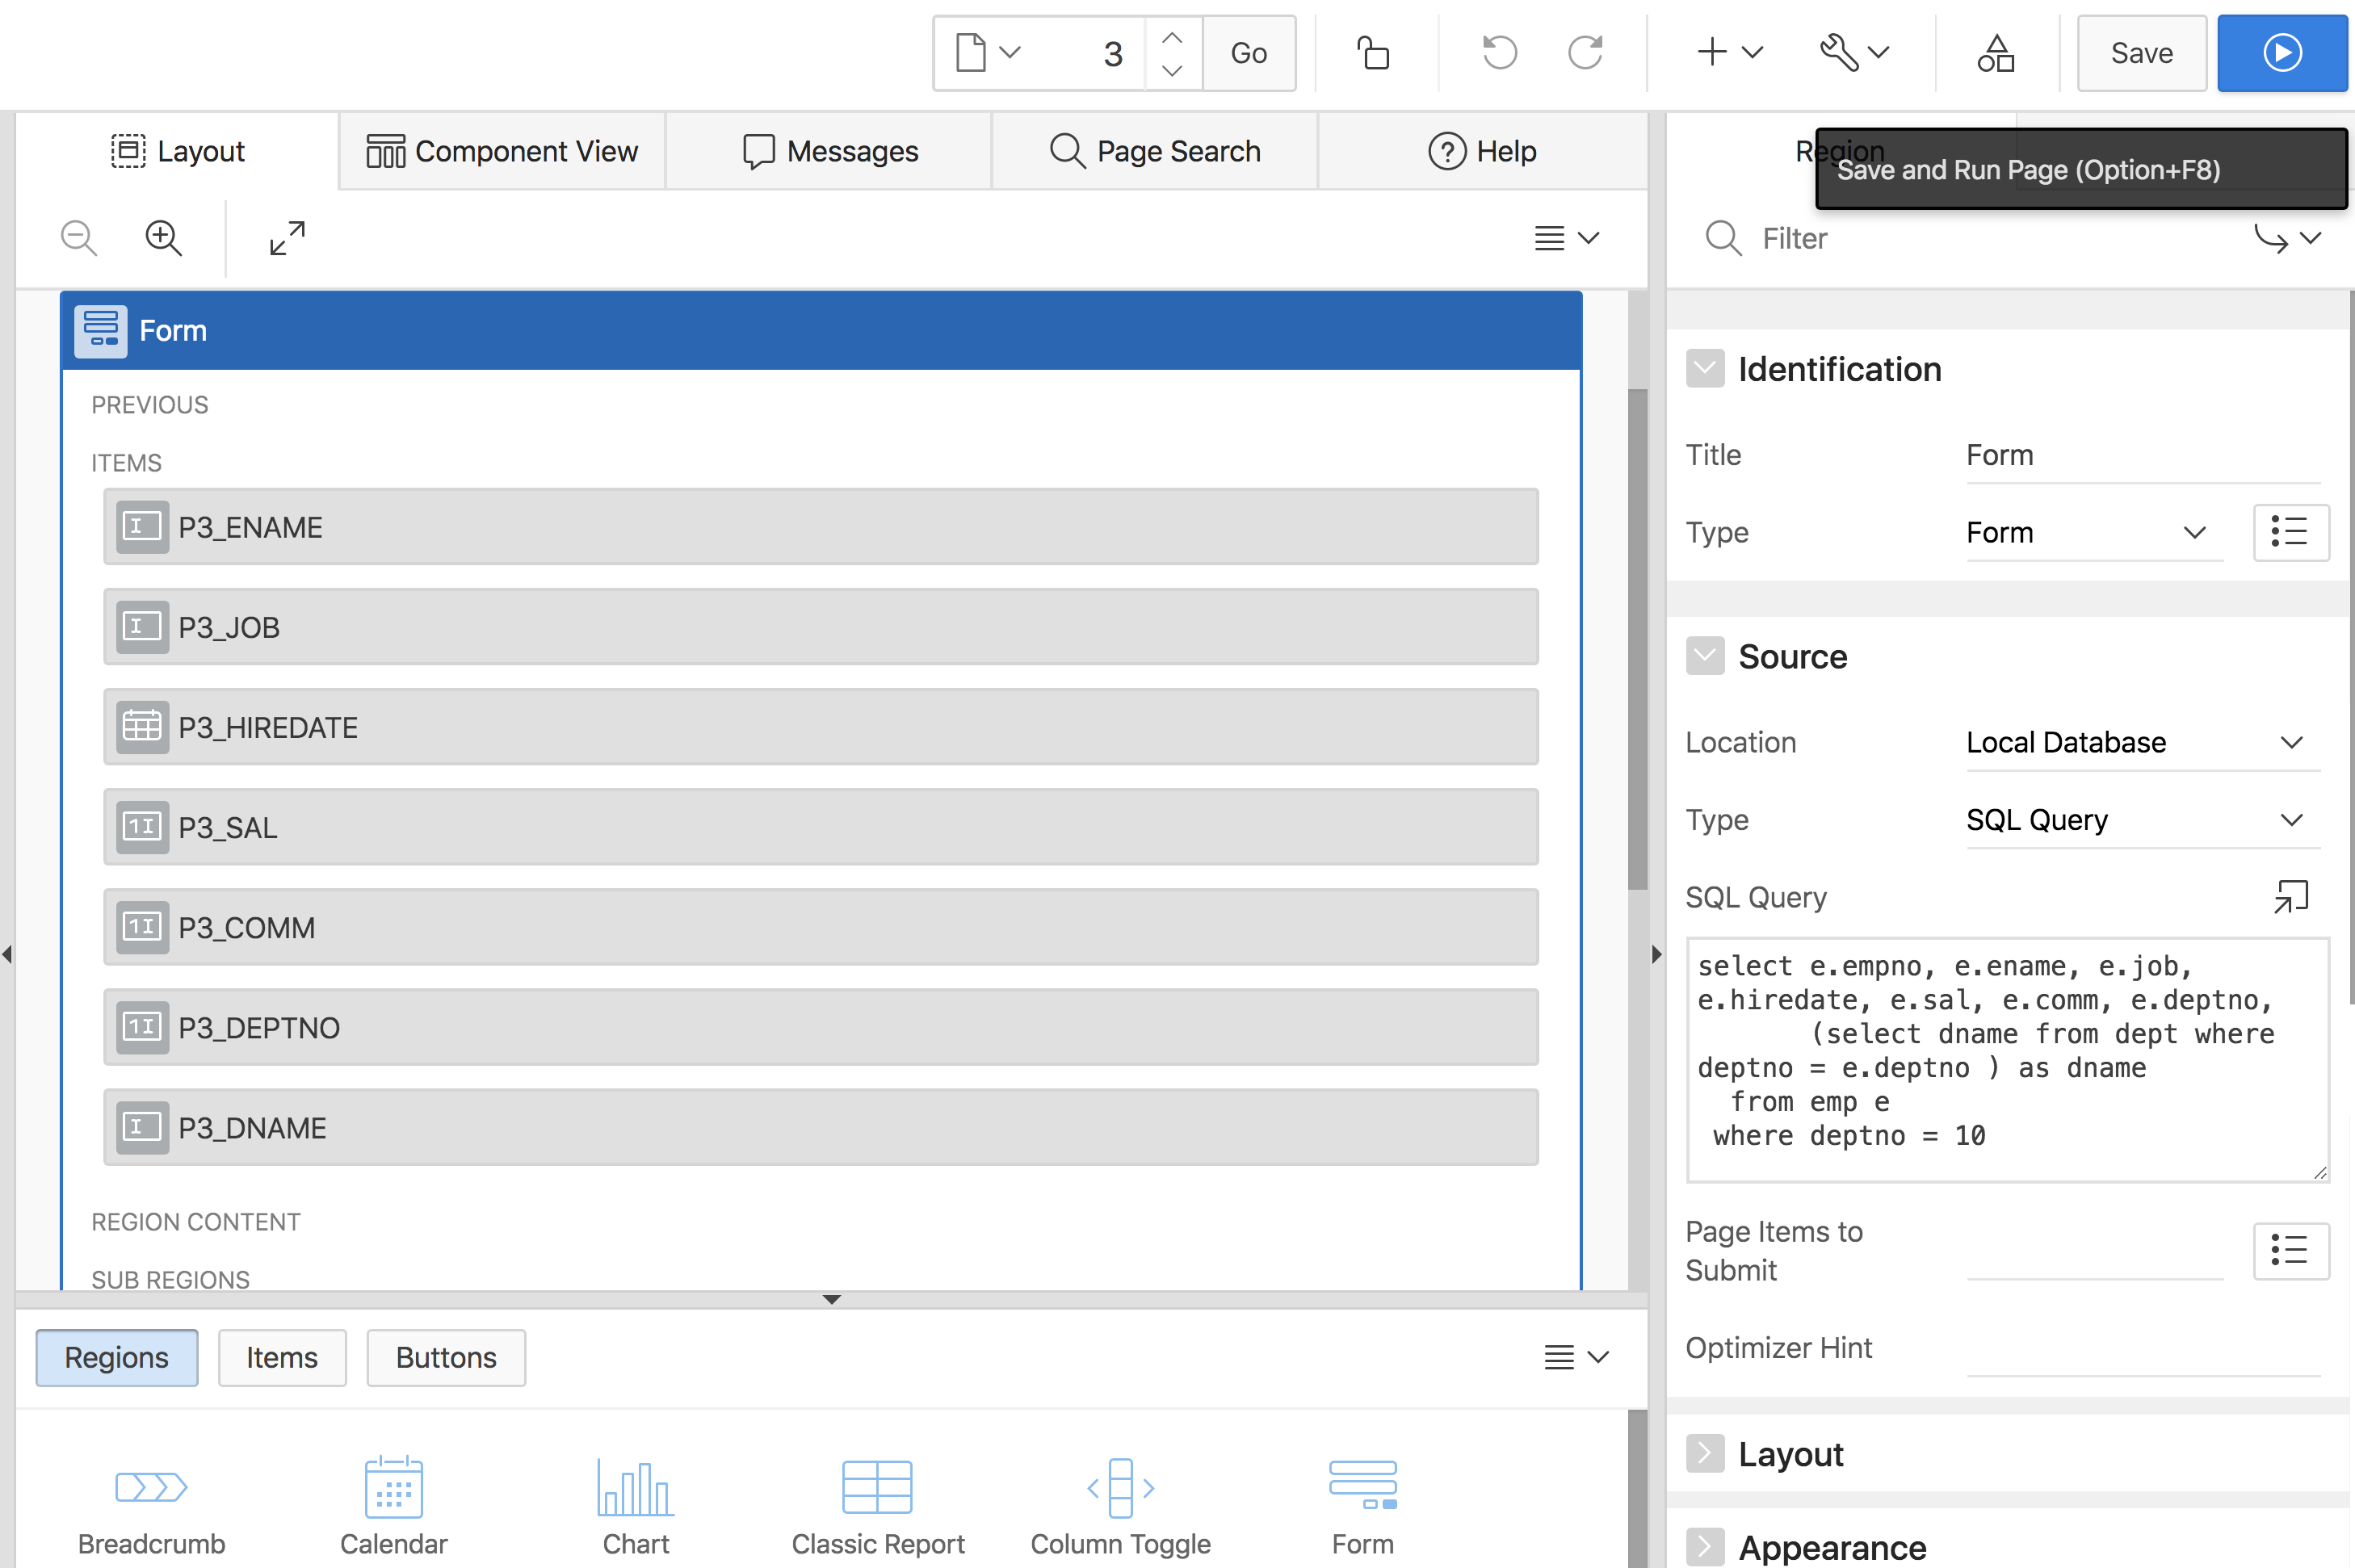
As all other region types, Forms now also store their data source information once at the region level. And the data source can be the local database, a REST Enabled SQL service or a Web Source Module. There are still two processes: Form – Initialization in the Pre-Rendering section and Form – Automatic Row Processing (DML) in the Processes section. Both processes reference the form region.
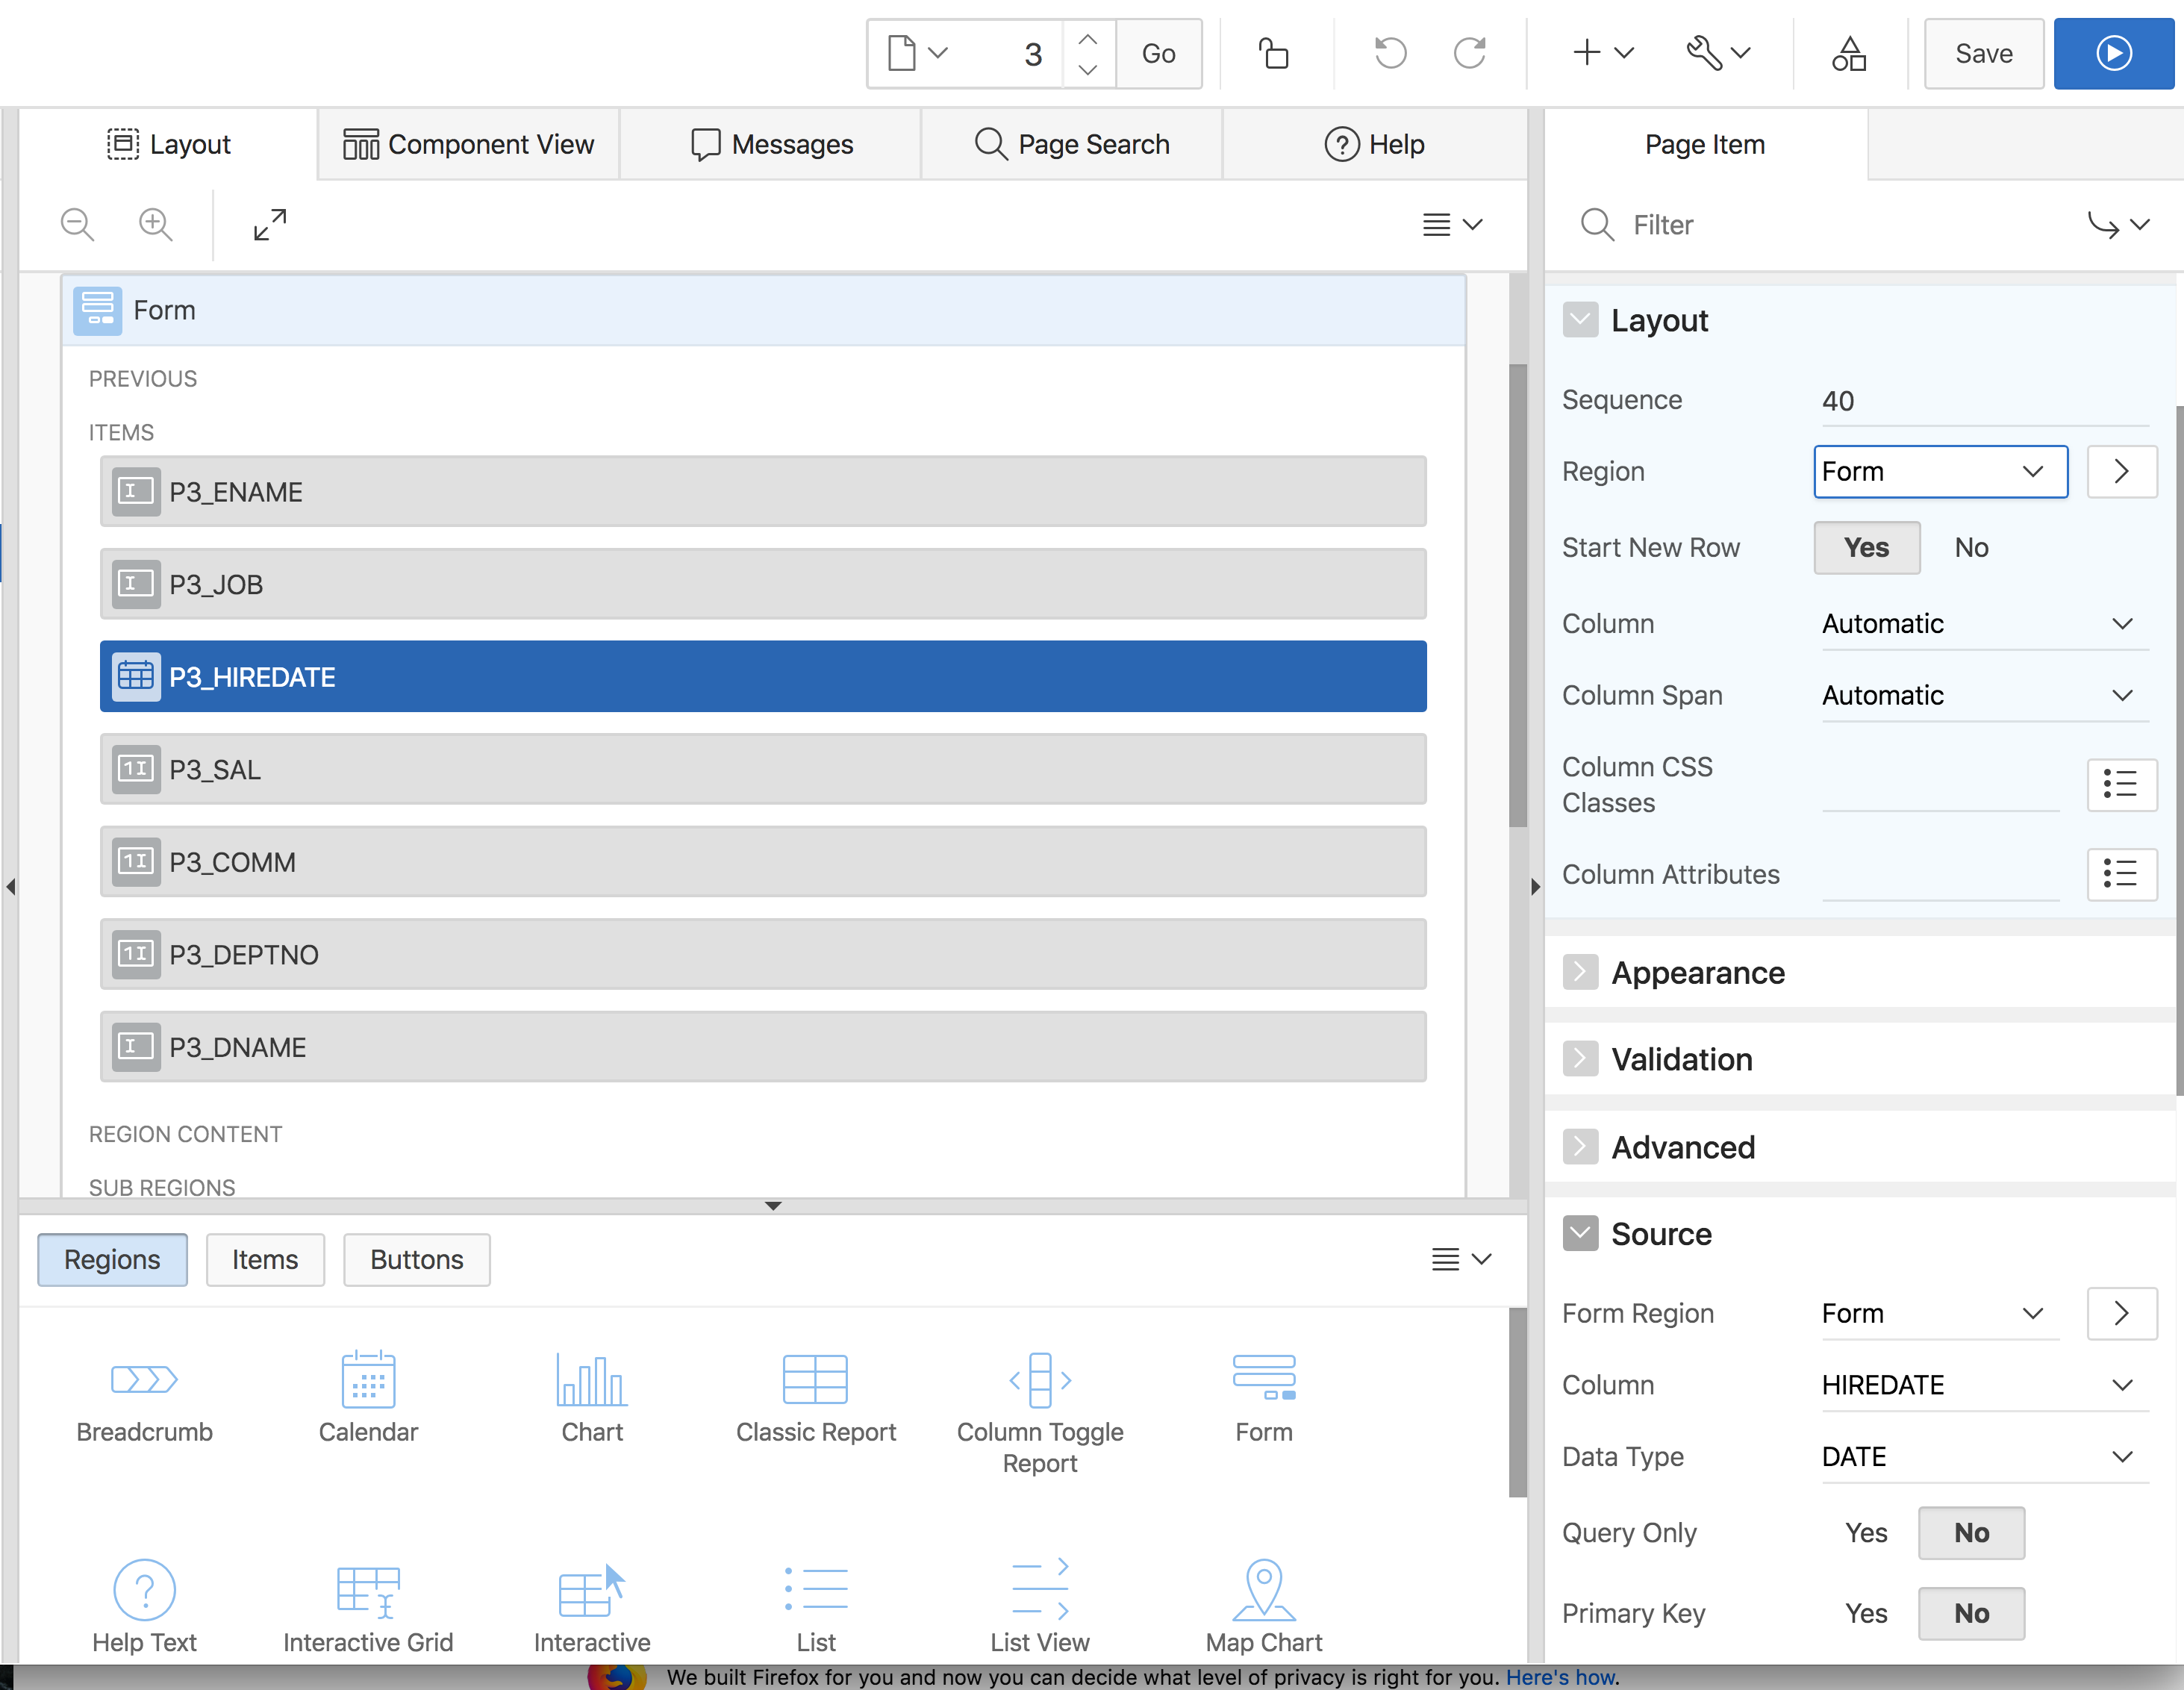
When a form region is on the page, a page item has two region references.
-
The Region attribute in the Layout section determines, where the item is displayed. This is unchanged in 19.1.
-
The Form Region attribute in the Source section determines where the data for this form region comes from. When this item is set, the form region and its processes control how the item is initialized on page load and processed on page submit. If this attribute can be empty, the item works as in previous APEX versions.
There are no restrictions regarding page, regions and item layout. Form region items can still be positioned on any other region. Let’s now have a closer look at the items’ Source section where the data source for a page item is configured.
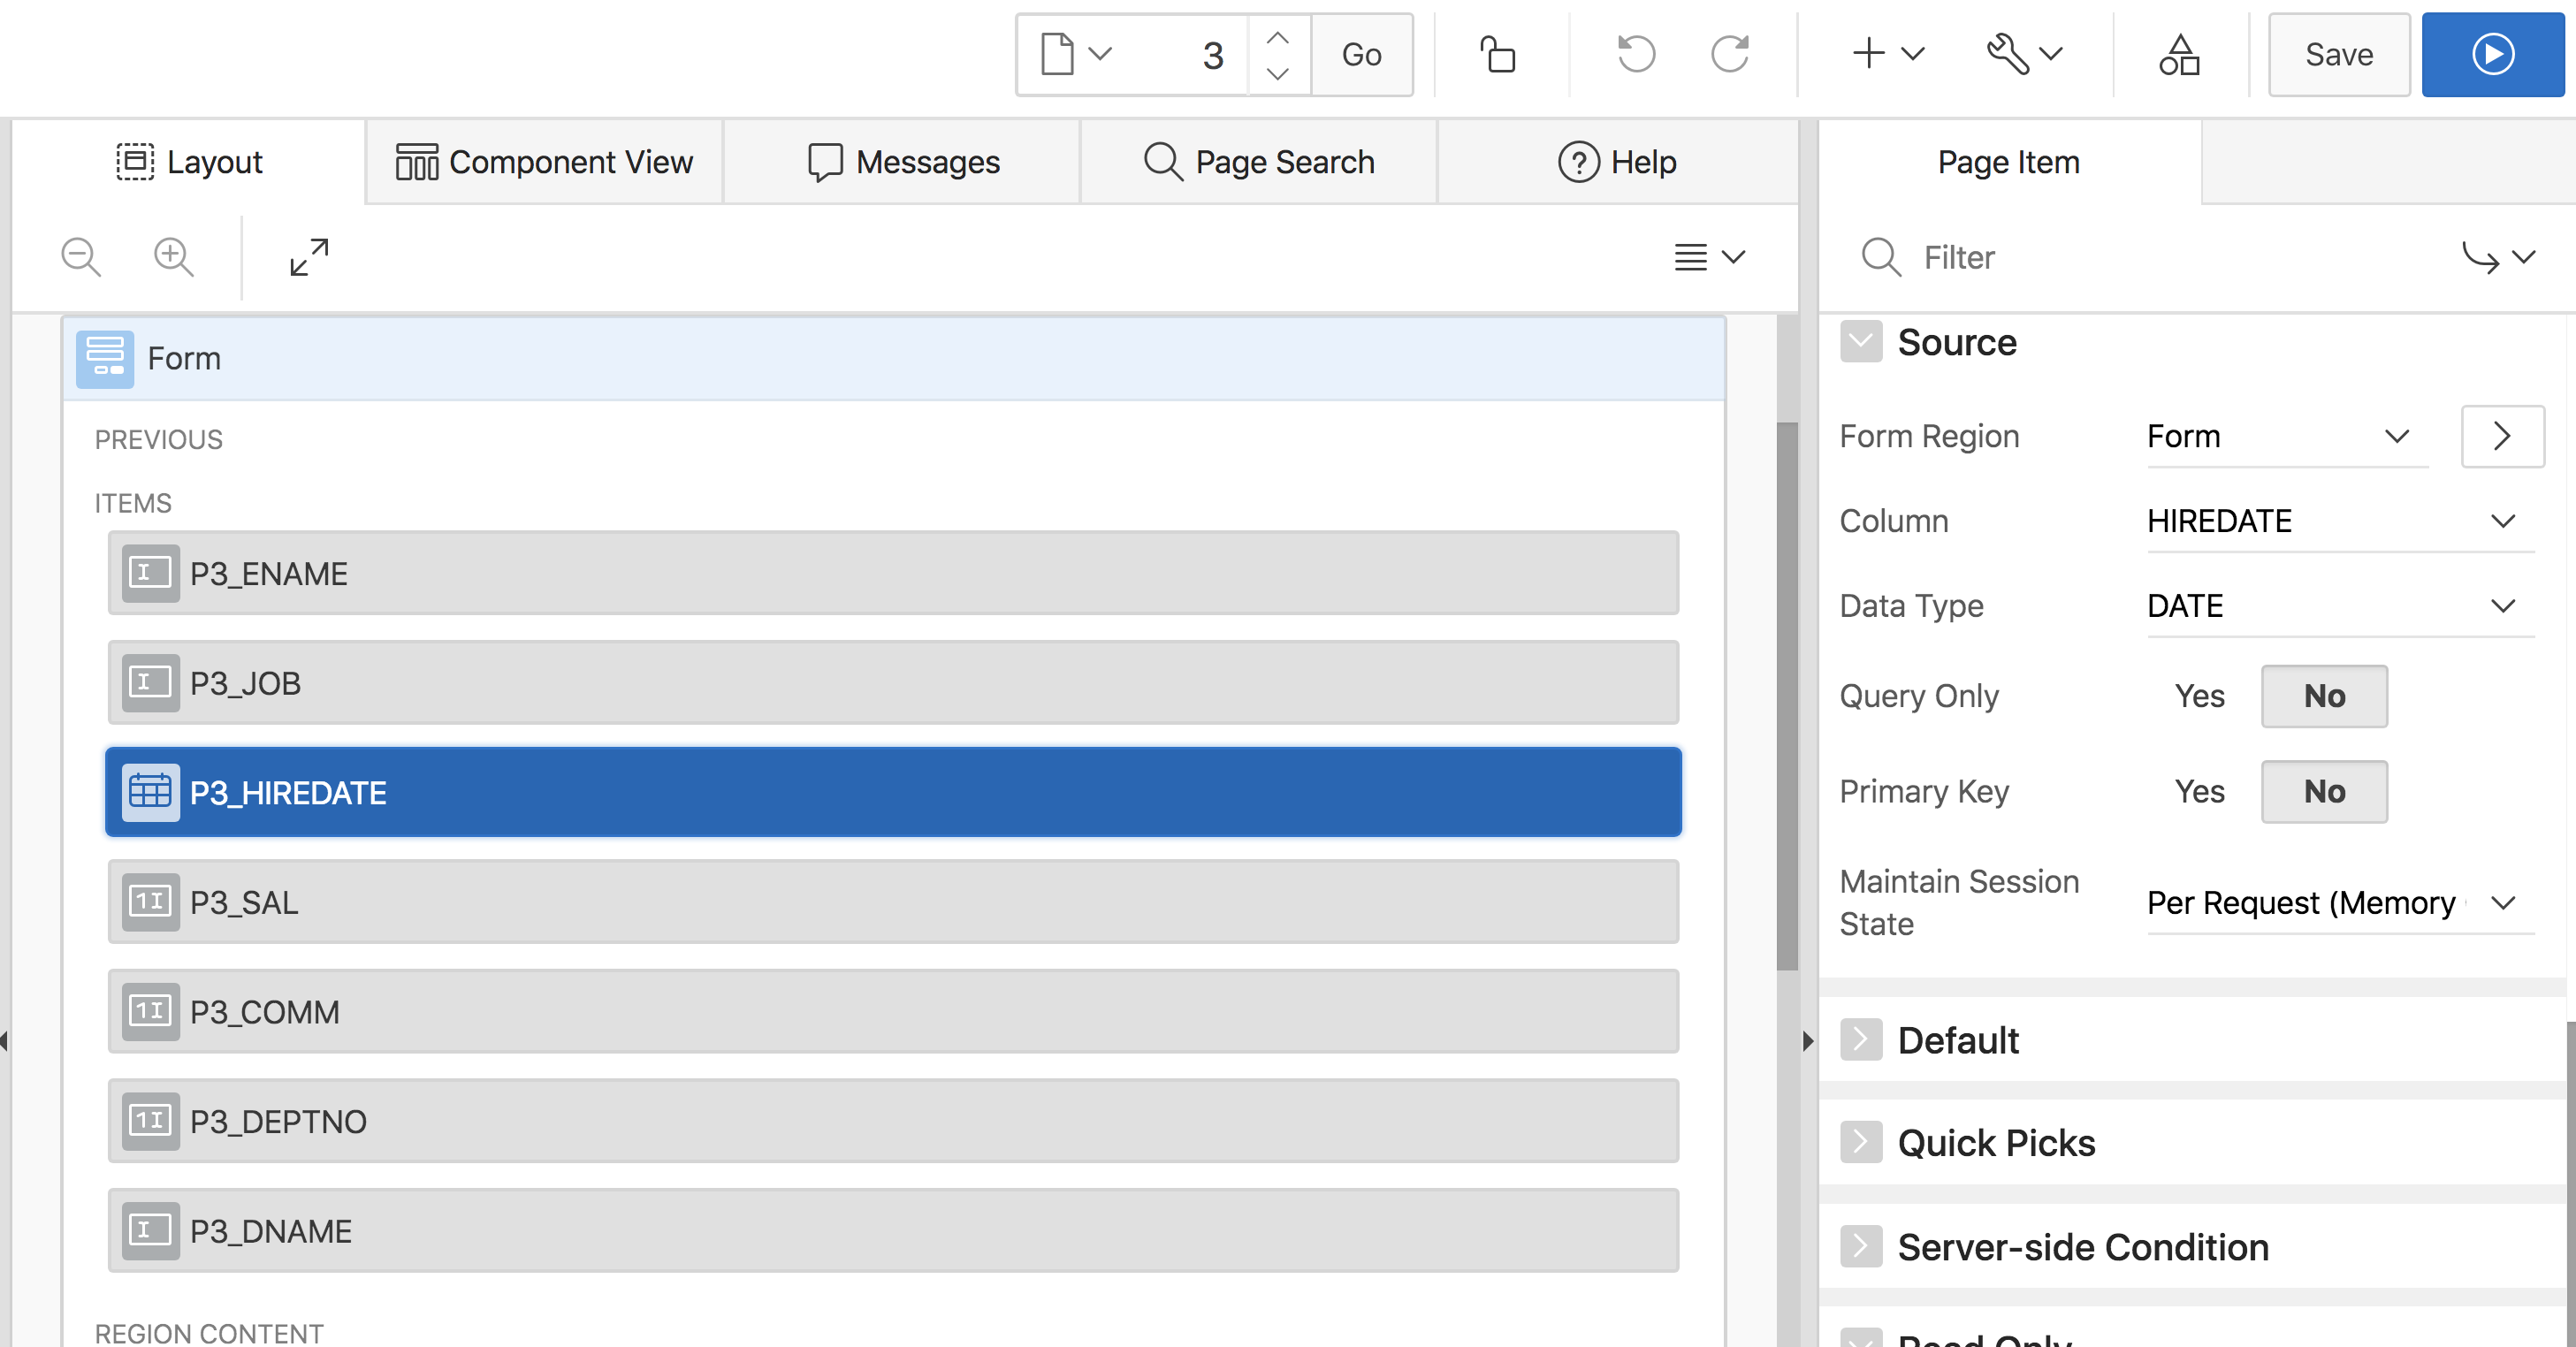
Once the form region is chosen, the Column select list will be populated from the result columns of the data source configured in the form region. Once a column is picked, the Data Type will adjust automatically. It’s not recommended to manually override the data type – always accept the APEX proposals. Only change the data type, if you know that the current selection is wrong (e.g. after a table change).
The most important switches are Query Only and Primary Key. A form region must have at least one primary key item; otherwise the page will not render. If Query Only is set to Yes, this item will only be fetched during initialization, but it will not participate in a DML operation. That is very useful for data source columns which are not updatable, like virtual columns or the subquery in our example.
Assigning an item to a form region has impact on its initialization behavior:
-
Items which are not assigned to a form region, will have their Default applied on page load, whenever the page item value is NULL. This behavior is consistent to earlier APEX versions. A default value can thus be also applied when a row was fetched from the data source by a custom PL/SQL process.
-
Once a page item is assigned to a form region, the Default value will only be applied when the primary key items are empty and thus no row is fetched from the data source. As soon as a row is fetched from the data source, the Default value will not be applied any more.
The old Used attribute which was either Always, replacing any existing value in session state or Only when current value in session state is null, was very confusing to APEX developers. Thus this attribute was removed for form region items and is not needed any more. The Always, replacing any existing value in session state option was actually only used by the old form pages, so for items not assigned to a form region, developers can always choose Only when current value in session state is null here.
Besides the data source, the form region offers additional settings in the Attributes section.

As for Interactive Grid, the developer can decide whether the form region is editable at all or not. When that attribute is set to No, the Automatic Row Processing (DML) process will be removed. This is useful for form page which are there to display data only. On editable forms, specific DML operations can be prohibited with the Allowed Operations checkbox. That information can also come from one of the data source columns (Allowed Row Operations Column). Finally the Lost Update Type can be chosen between a row checksum (Row Values) or one specific Row Version Column. This will control how APEX generally detects a lost update.
More interesting settings are configured in the Automatic Row Processing (DML) process.

The Target Type attribute determines whether APEX executes the DML processing on the table or SQL query from the Form Region source, an alternative table or whether it should execute custom PL/SQL code.
The Custom PL/SQL code option is particularly interesting here: Since the PL/SQL code is stored and executed as part the Automatic Row Processing (DML) process, developers can still use the Lost Update Detection feature. That was not possible in earlier APEX versions – as soon as developers wanted to use custom PL/SQL code, lost update detection was not available any more and had to be implemented manually. But the new form region allows to use custom logic to be executed as form DML – and still leverage built-in features like Lost Update Detection.
The new Automatic Row Processing (DML) process also provides more flexibility regarding lost update detection and whether rows should be locked or not. Both features can be turned on or off and are on by default.
It’s noteworthy that Lock Rows does not mean that rows are locked when the form page is loaded. APEX is still a web application and locking rows when the form is loaded into the browser would be a bad idea: How often are browsers just closed and such a lock would never be released. APEX never locks rows when the form page is loaded. But what does Lock Rows mean, then?
Lock Rows is all about that tiny time window between the (successful) lost update detection and the actual DML. So let’s have a closer look what exactly happens:
-
APEX performs lost-update detection. Either the row version column or a row checksum is fetched and compared with the value when the form page was loaded. If the checksums (or row versions) are identical, there is no lost update and APEX can proceed with its DML. If there is a difference, somebody changed the row in between – and APEX will raise an error message.
-
APEX performs the actual DML operation.
But in that tiny fraction of a second between 1. and 2., another browser could have successfully executed a DML operation. And even with Lost Update Detection enabled, we would have a lost update. To prevent that, the Lock Rows attribute is set to Yes. That will lead to …
-
APEX performs lost-update detection. The row is locked and either the row version column or a row checksum is fetched and compared with the value when the form page was loaded. If the checksums (or row versions) are identical, there is no lost update and APEX can proceed with its DML. If there is a difference, somebody changed the row in between – and APEX will raise an error message.
-
APEX performs the actual DML operation. The lock will be released after success.
Since the row was now locked between 1. and 2., we cannot have a lost update scenario any more.
For some data source types (Web Source Modules, complex SQL queries), it might be required to have no row locking or to use custom PL/SQL code to lock rows. Use the Lock Rows attribute to configure that.

Try the new form region and its various settings out. Since the data source is now available at the region level, APEX now also supports multiple form regions on a page. The new form region provides way more flexibility and power to the APEX developer.
Since its behavior is different to the old form pages and its processes, there is no(!) automatic migration of form pages. However, APEX offers an application upgrade tool to migrate old form pages (legacy forms) to the new form region. Navigate to your application, then to Utilities > Upgrade Application.
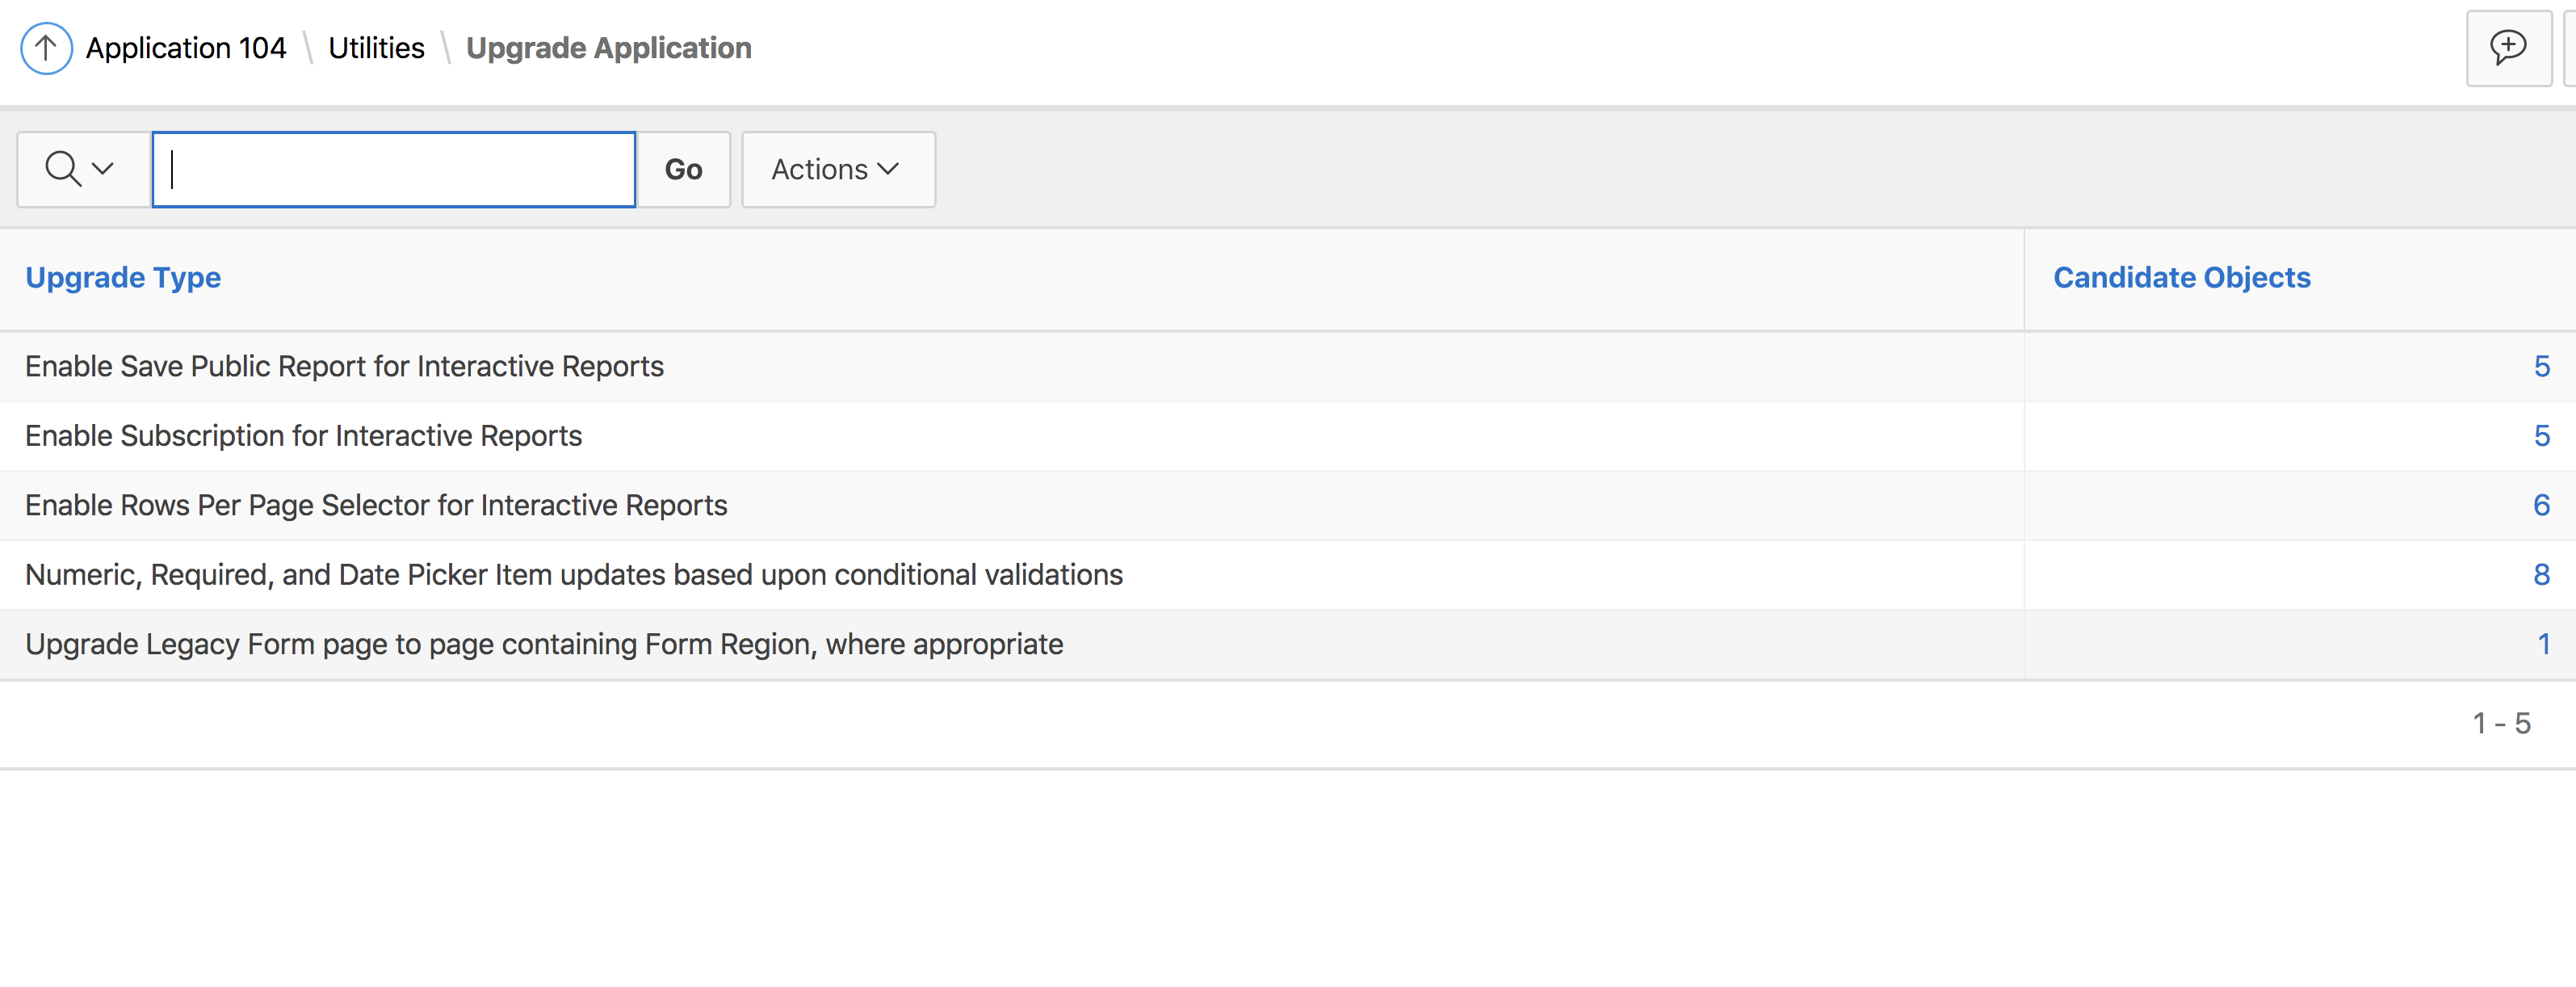
An application upgrade is offered for legacy form pages, when a minimum set of requirements is met. For instance, the table, primary key and WHERE clause settings must be identical for the Automated Fetch and Automated Row Processing page processes. However, it is recommended to perform that upgrade on a copy of your application and to test afterwards – form pages typically have a lot of custom functionality, additional PL/SQL code and other things – so do test thoroughly after such a migration.
The Application Express Early Adopter Instance allows to get a workspace on APEX 19.1 today – so get your workspace, log in and try the new Form region out today!