Oracle Analytics Cloud (OAC) offers a powerful feature to consume Oracle Cloud Infrastructure (OCI) Data Science Machine Learning models. This integrates OCI Data Science models within the Oracle Analytics experience, making a perfect environment to seamlessly invoke and apply machine learning models with a few clicks in an OAC data flow.
This article explains how to include a variety of results columns in the output of the data science model, which will be part of the output dataset in OAC data flows. The process includes these steps:
- Read and process the data
- Build and train the model
- Prepare the model
- Modify the model artifacts
- Save the model
Multiclass Classification Models
The use case of flight delays is perfect for multiclass classification. The objective is to predict the arrival delay group and list the prediction probability value for each arrival delay class for each flight record in a dataset. To do this, you must first create a notebook session in OCI Data Science. Then you build a model in Python using the Pipelines of the scikit library and then add columns to the output. Refer to the Create a Data Science Model for OAC article to create a notebook session and follow the basic steps to create a model.
You can use the Airlines Delay dataset, which has information such as flight date, carrier, flight number, and arrival delay group.
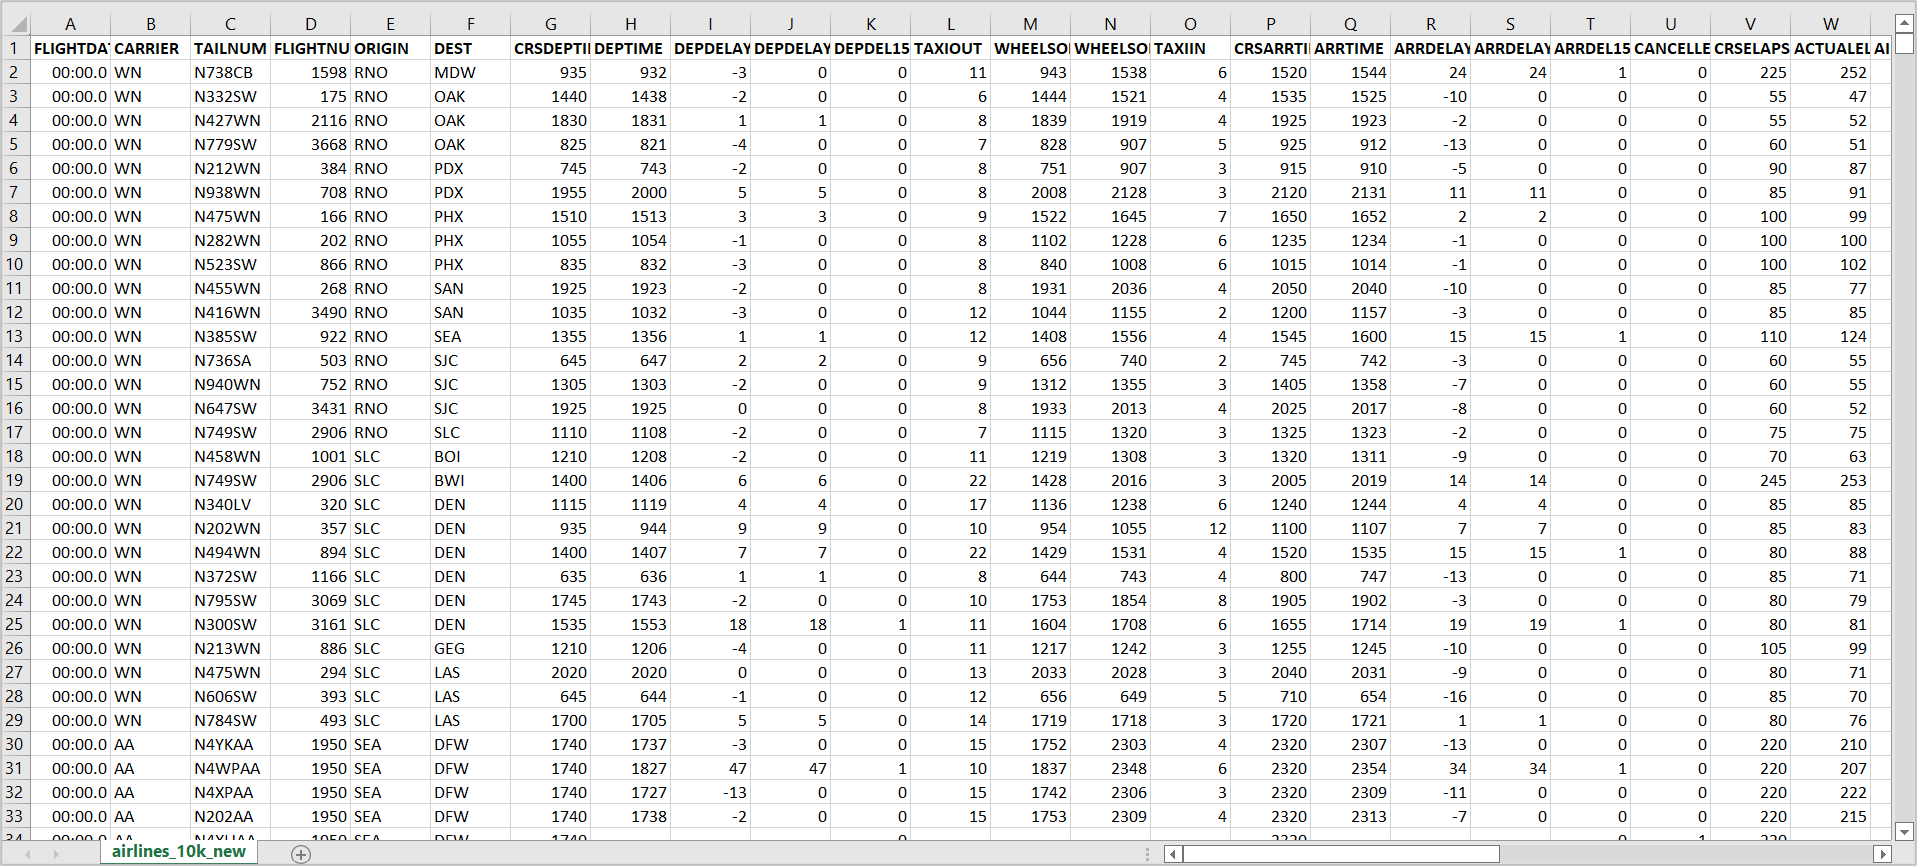
1. Read and process the data
Enter the following commands in the new notebook.
Read the dataset with these commands:
import pandas as pd
df =pd.read_csv('airlines_10k_new.csv')
df.head()
Then segregate and store the numeric and categorical columns separately, so that they can be transformed to the format as required by the Python model.
from sklearn.pipeline import make_pipeline
from sklearn.preprocessing import FunctionTransformer
from sklearn.compose import ColumnTransformer
from sklearn.linear_model import LogisticRegression
from sklearn.preprocessing import StandardScaler, OneHotEncoder
from sklearn.model_selection import train_test_split
from sklearn.pipeline import Pipeline

import ads
from ads.dataset.factory import DatasetFactory

ds = DatasetFactory.from_dataframe(df,target="ARR_DELAY_GRP_DESC")
train, test = ds.train_test_split(test_size=0.15)

import numpy as np

numeric_features = ds.select_dtypes(include=['int64', 'float64']).columns
categorical_features = ds.select_dtypes(include=['object']).columns
Now, create a transformer with these columns with SimpleImputer and encoders of the sklearn Python libraries.
from sklearn.pipeline import Pipeline
from sklearn.impute import SimpleImputer
from sklearn.preprocessing import StandardScaler, OneHotEncoder

numeric_transformer = Pipeline(steps=[
    ('imputer', SimpleImputer(strategy='median')),
    ('scaler', StandardScaler())])

categorical_transformer = Pipeline(steps=[
    ('imputer', SimpleImputer(strategy='constant', fill_value='missing')),
    ('onehot', OneHotEncoder(handle_unknown='ignore'))])
Create a preprocessor with ColumnTransformer
from sklearn.compose import ColumnTransformer
preprocessor = ColumnTransformer(
    transformers=[
        ('num', numeric_transformer, numeric_features),
        ('cat', categorical_transformer, categorical_features)])
2. Build and train the model
Create the pipeline for RandomForestClassifier:
from sklearn.ensemble import RandomForestClassifier

rf = Pipeline(steps=[('preprocessor', preprocessor),
    ('classifier', RandomForestClassifier())])
Train the model with the following command:
rf.fit(train.X, train.y)
Test the model with the following code:
y_pred = rf.predict(test.X)
y_pred
Check the following output:

3. Prepare the model
Prepare the model with the ADS library functions to generate the model artifacts such as the input and output schema files and the python code. These artifacts are required to save the model to the catalog.
import ads
import logging
import os
import tempfile
import warnings

from ads.catalog.model import ModelCatalog
from ads.common.model import ADSModel
from ads.common.model_export_util import prepare_generic_model
from ads.common.model_metadata import (MetadataCustomCategory,
   UseCaseType,
   Framework)

from ads.dataset.factory import DatasetFactory
from ads.feature_engineering.schema import Expression, Schema
from os import path

logging.basicConfig(format='%(levelname)s:%(message)s', level=logging.ERROR)
warnings.filterwarnings('ignore')

from ads.model.framework.sklearn_model import SklearnModel
from ads.common.model_metadata import UseCaseType

ads.set_auth('resource_principal')
path_to_ADS_model_artifact = tempfile.mkdtemp()
sklearn_model = SklearnModel(estimator=rf, artifact_dir=path_to_ADS_model_artifact)

model_artifact = sklearn_model.prepare(inference_conda_env="generalml_p38_cpu_v1", training_conda_env="generalml_p38_cpu_v1",
    X_sample=train.X, y_sample=train.y, )

print("Model Artifact Path: {}\n\nModel Artifact Files:".format(path_to_ADS_model_artifact))
Now the model artifacts are generated and stored under the /tmp directory displayed in the output. The artifacts directory has the following files:
runtime.yaml – Model deployment configuration parameters
model.joblib – Binary file of the model code
score.py – Inference script used for prediction by the scoring server when the schema is known
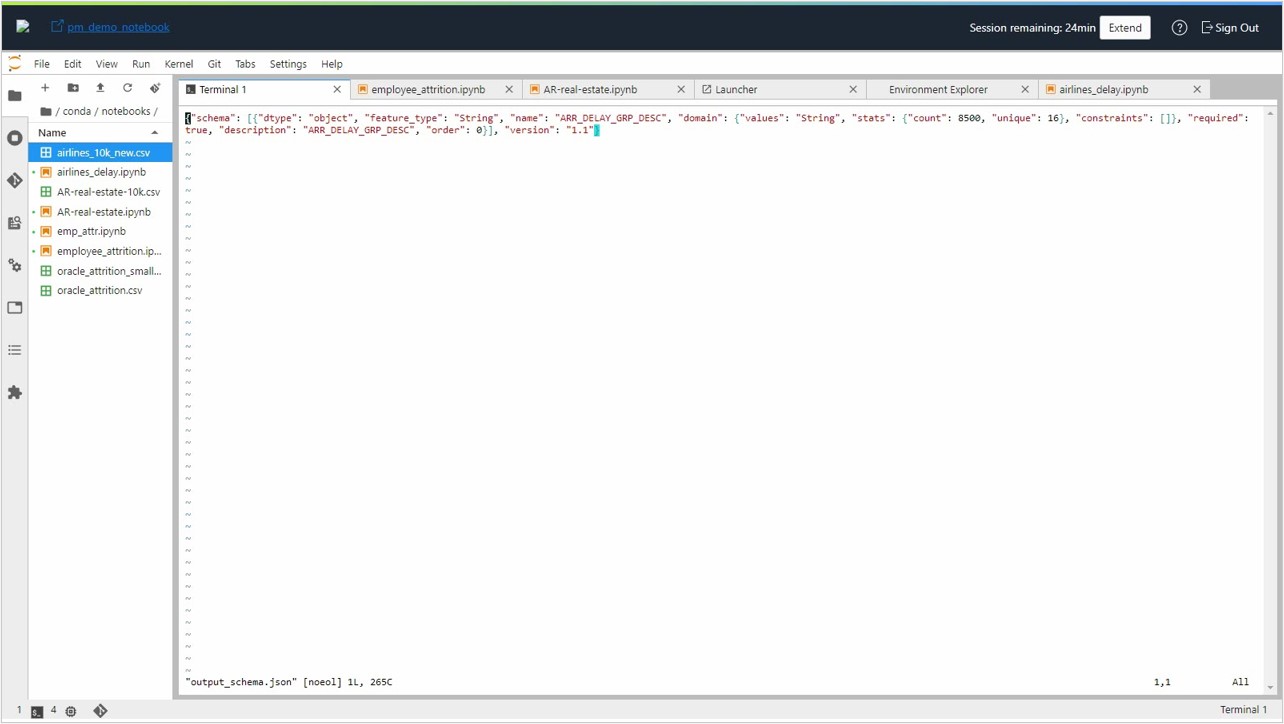
input_schema.json – Model’s input schema
output_schema.json – Model’s output schema
By default, only the prediction result is saved as model output in the output_schema.json file:
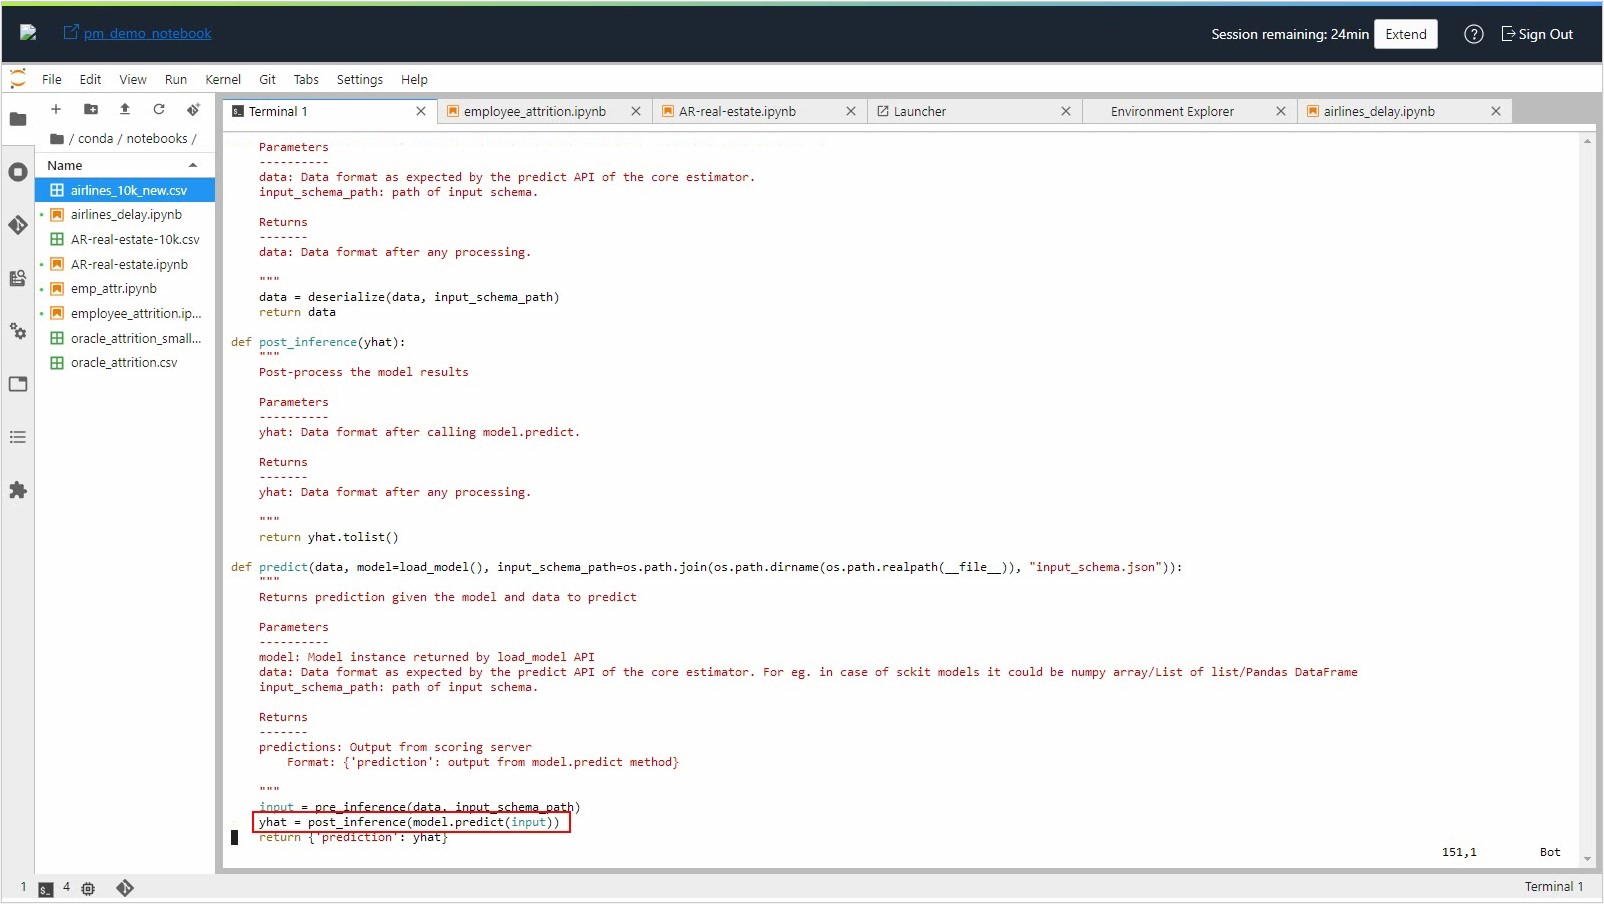
And the score.py script returns only the prediction output. Let’s now assume that we’re interested not only in the most probable class output, but also with the probabilities of alternate delay class prediction.
In this example, arrival delay group (column ARR_DELAY_GRP_DESC) is predicted and it’s returned as output.
Along with the prediction, the probabilities of other classes of arrival delay group must be added as part of the output. As a first step, identify all the possible classes in the arrival delay group using the following command:
rf.classes_
You see the following output.
array([' Delay below -15 minutes', ' Delay from -15 and -1 minutes',
       'Delay from 0 to  14 minutes', 'Delay from 015 to 029 minutes',
       'Delay from 030 to 044 minutes', 'Delay from 045 to 059 minutes',
       'Delay from 060 to 074 minutes', 'Delay from 075 to 089 minutes',
       'Delay from 090 to 104 minutes', 'Delay from 105 to 119 minutes',
       'Delay from 120 to 134 minutes', 'Delay from 135 to 149 minutes',
       'Delay from 150 to 164 minutes', 'Delay from 165 to 179 minutes',
       'Delay over 180 minutes', 'Unknown'], dtype=object)
4. Modify the model artifacts
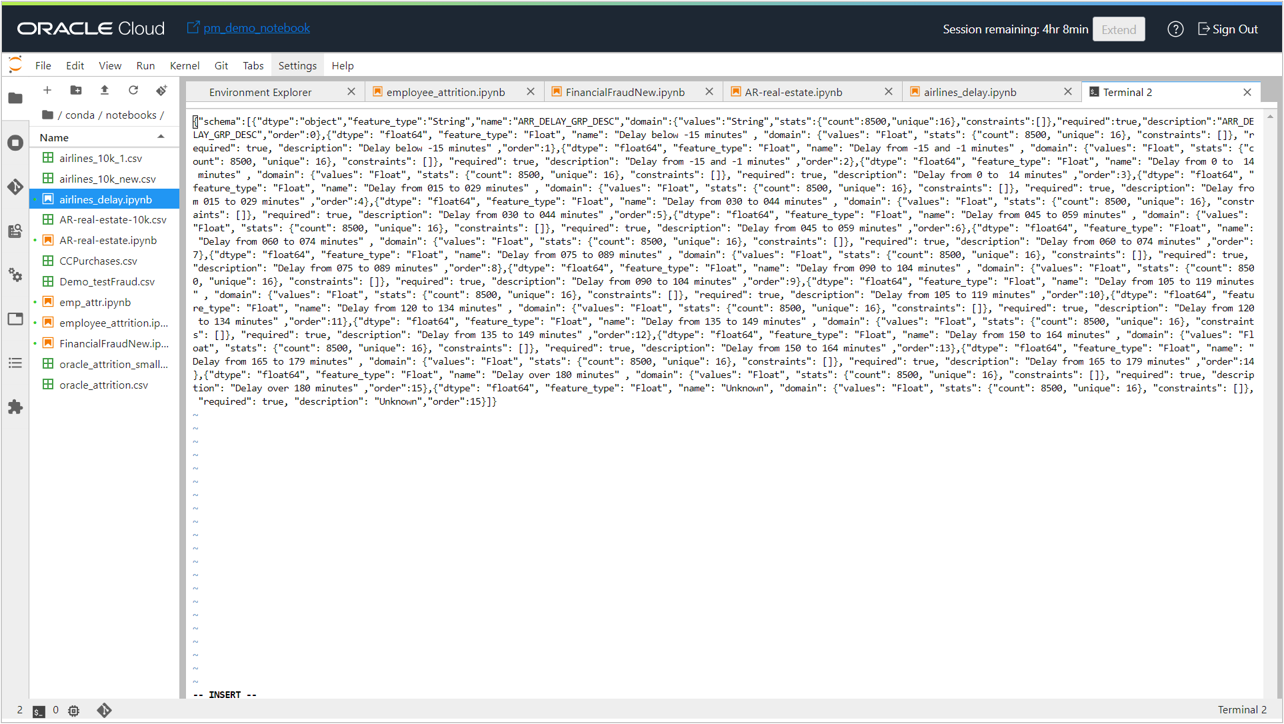
Now, add these classes as columns in the output_schema.json file in the following format, with appropriate values for dtype, feature_type, and name.
{"dtype": "float64", "feature_type": "Float", "name": "Delay below -15 minutes", "domain": {"values": "Float", "stats": {"count": 8500, "unique": 16}, "constraints": []}, "required": true, "description": "Delay below -15 minutes", "order": 1}
If you don’t have the actual values for count, unique, and similar, you can use the value generated for the prediction output. Add entries for all the possible classes in the output_schema.json file.
Make the necessary changes in the score.py file to return all the required classes as part of the output.
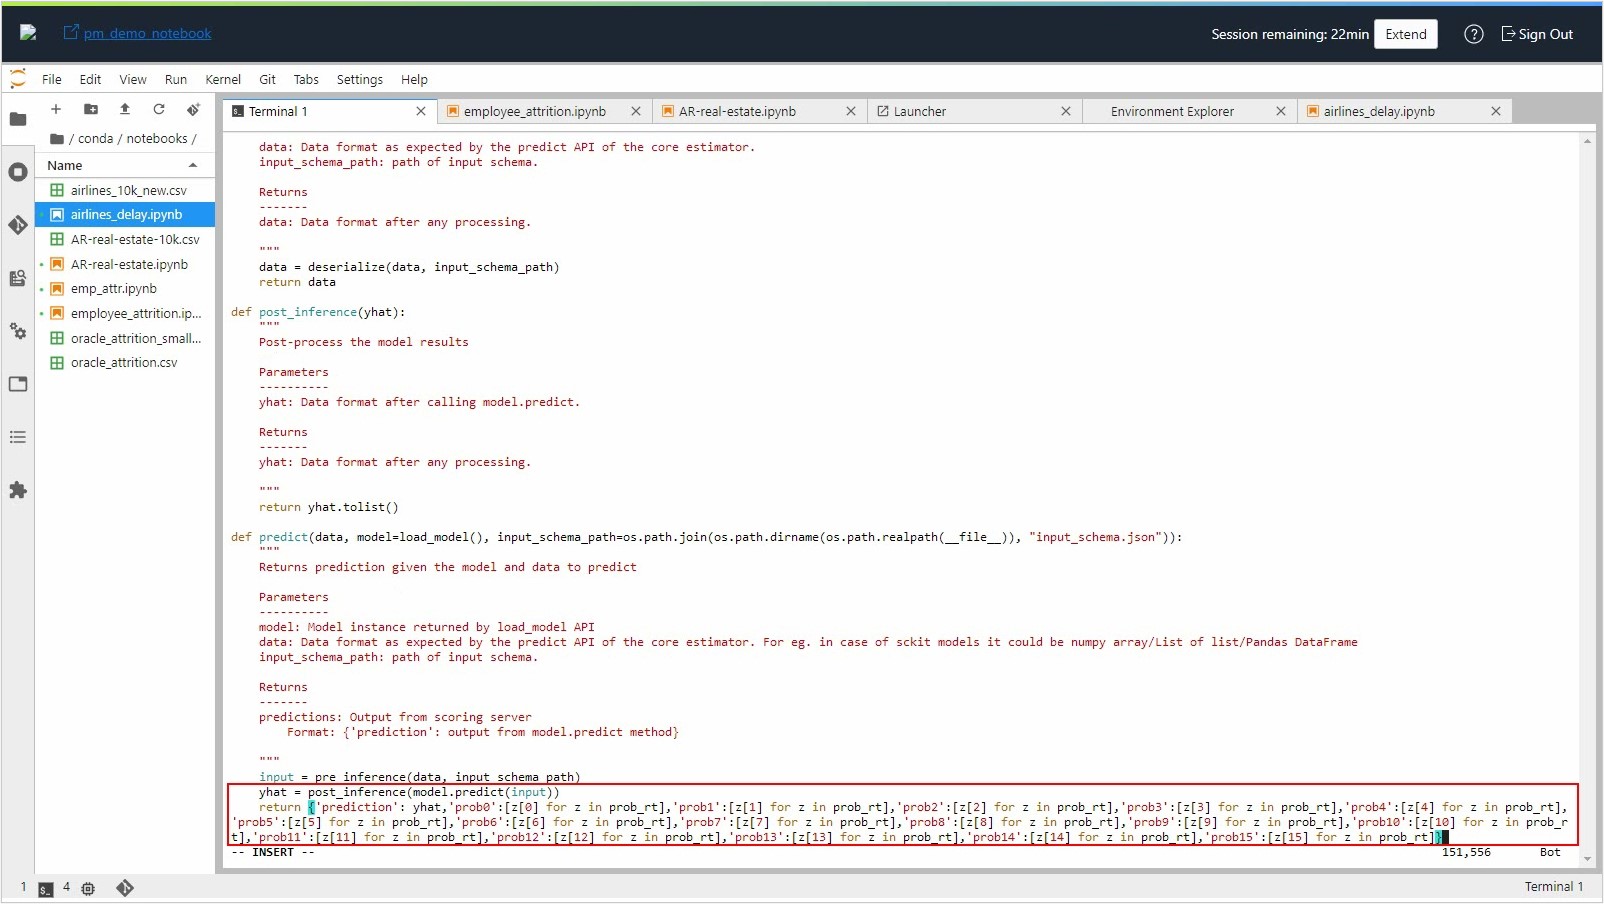
Enter the following command to update the model artifact object, so that it can be saved to the model catalog:
sklearn_model.schema_output = Schema.from_file(os.path.join(path_to_ADS_model_artifact, 'output_schema.json'))
5. Save the model
Save the model to the catalog:
for file in os.listdir(path_to_ADS_model_artifact):
    if path.isdir(path.join(path_to_ADS_model_artifact, file)):
        for file2 in os.listdir(path.join(path_to_ADS_model_artifact, file)):
            print(path.join(file,file2))
    else:
        print(file)
name = 'AirlinesDelay_RFMultiClass'
print(name)

mc_model = sklearn_model.save(project_id=os.environ['PROJECT_OCID'],
compartment_id=os.environ['NB_SESSION_COMPARTMENT_OCID'],
            training_id=os.environ['NB_SESSION_OCID'],
            display_name=name+"_1205_1",
            description=name,
            ignore_pending_changes=True,
            timeout=100,
            ignore_introspection=True,
            freeform_tags={"key" : "value"}
           )
mc_model
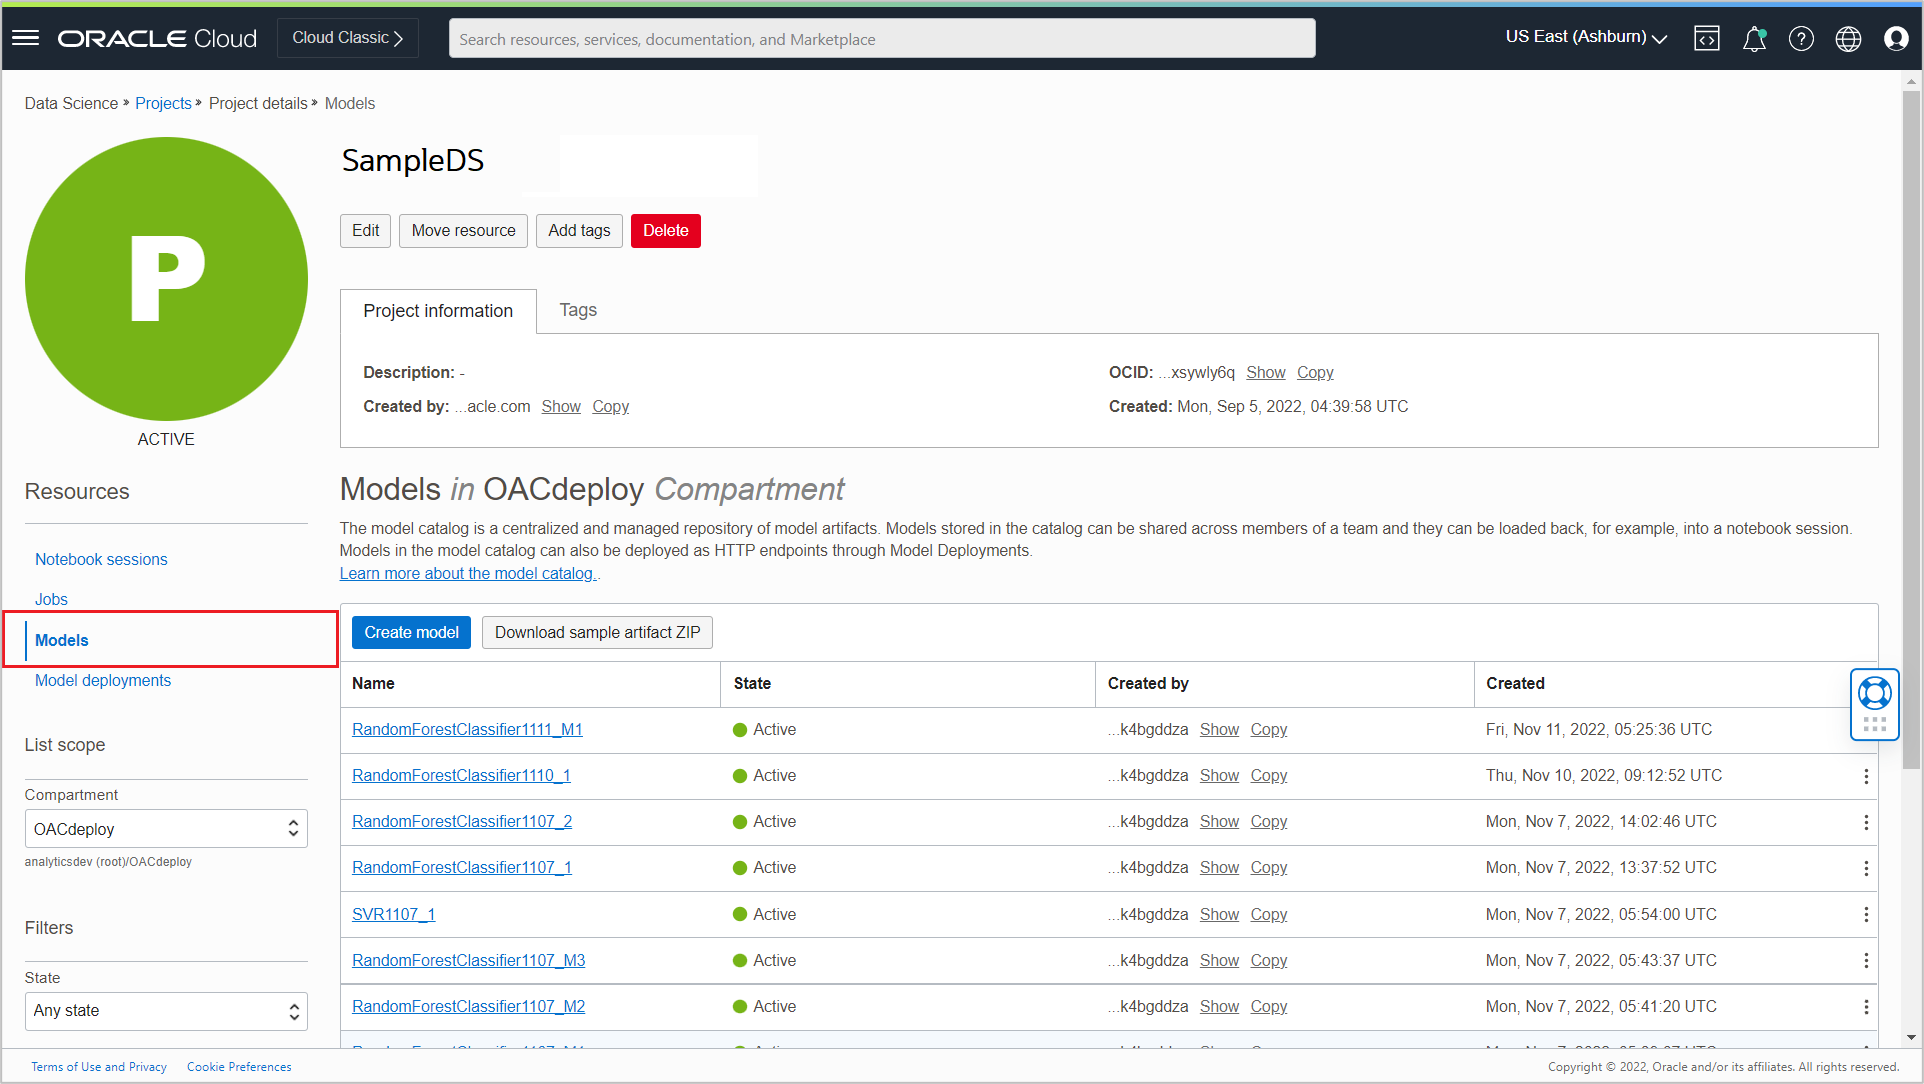
When the model is saved successfully to the Model Catalog, you see it listed in the Models section of the Project details page.
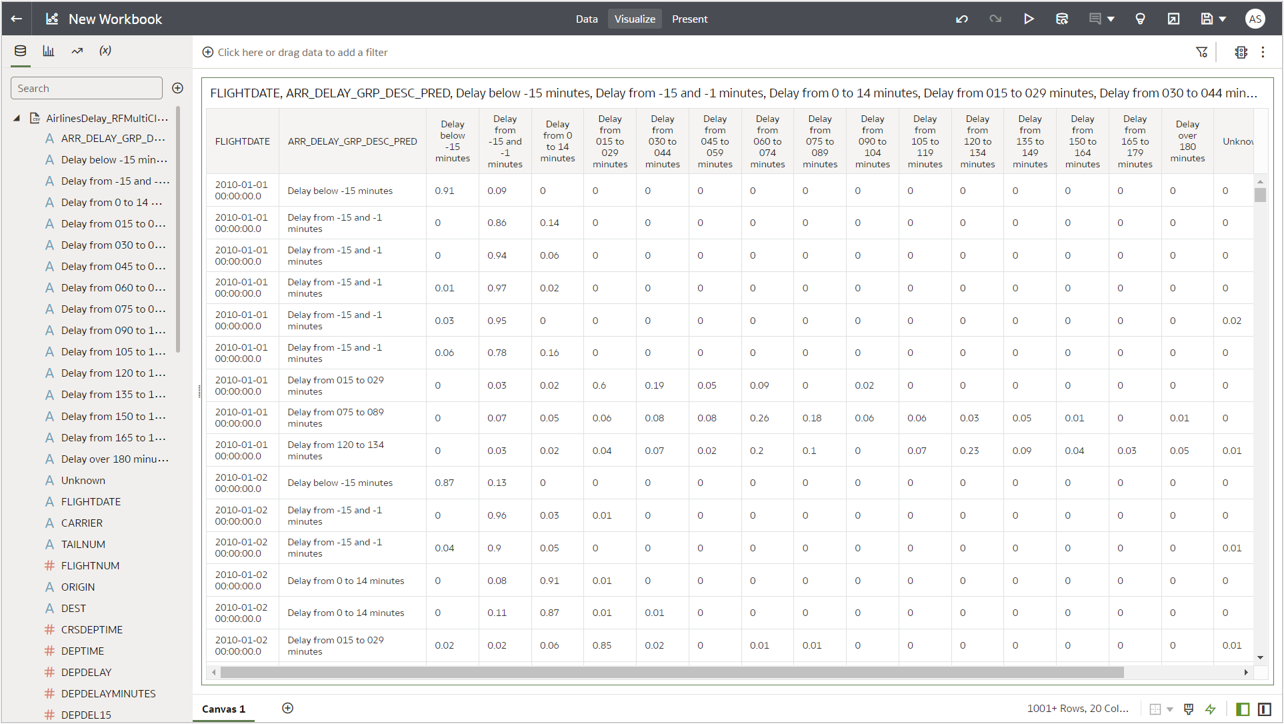
Now you have added multiple columns (prediction result and prediction probabilities) to the output of the multiclass classification model.
When you register this model in OAC and apply the model to the input dataset, you see the probability for each possible arrival delay group alongside the prediction in the output dataset.
Call to Action
In this artilce, you learned how to add multiple columns to the OCI Data Science model output by creating a multiclass classification model using an Airlines Delay dataset. As a next step, you can register this model in OAC and apply this model on your input dataset using OAC data flows. For more information, see these articles: Register a Data Science Model in OAC and Invoke a Data Science Model from OAC.