![]()
This article introduces Rclone and describes how to set up and configure Rclone to copy and sync files to Oracle Cloud Infrastructure Object Storage and Hadoop distributed file systems. After migrating your files to Oracle Cloud using Rclone, you can use Oracle Analytics Cloud to build enhanced data insights.
Rclone
Rclone is an open source command line tool for managing files on a range of storage systems. Refer to the Rclone documentation to find out which storage systems Rclone supports. Rclone can help you to back up files, mirror files between storage systems, migrate files between storage systems, and more.
This article covers three use cases:
- Copying files from a Local File System to Oracle Cloud Infrastructure Object Storage
- Copying files from a Hadoop Distributed File System to Oracle Cloud Infrastructure Object Storage
- Copying files from a Hadoop Distributed File System to another Hadoop Distributed File System
Oracle Cloud Infrastructure Object Storage
Oracle Cloud Infrastructure (OCI) Object Storage is a secure, scalable, and cost-effective cloud storage solution which allows you to store an unlimited amount of structured and unstructured data of any content type, including analytic data and rich content, such as images and videos.
OCI Object Storage offers high durability, multiple access tiers and seamless integration with Oracle Cloud services, such as Oracle Analytics Cloud. It also provides robust access control through OCI identity management (IAM) to ensure secure data management. OCI Object Storage is ideal for backup, archival, and big data analytics, and it’s a key component of modern cloud strategies.
Hadoop Distributed File System
Hadoop Distributed File System (HDFS) is a scalable and fault-tolerant storage solution designed for big data processing. It splits large datasets into blocks, distributing them across multiple nodes for parallel processing. HDFS ensures high reliability by replicating data across nodes, making it resilient to hardware failures. As the backbone of Hadoop ecosystems, it supports high-throughput data access, ideal for analytics and large-scale data storage.
High-Level Flow for Data Migration

Fig. 1: Rclone Data Transfer Flow
Install Rclone
Install Rclone on a suitable machine. Follow the Rclone documentation for your operating system.
If you use Linux, the following command might be sufficient. For more detail, refer to the Rclone documentation.
sudo yum install -y rclone
Configure Rclone for OCI Object Storage
- Log in to the machine where you installed Rclone.
- Run the command rclone config from a terminal.

Fig. 2: Rclone Config
- Enter n (New remote) and enter a name for the new remote (OCI Object Storage).
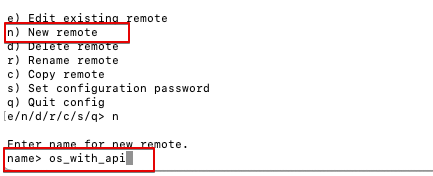
Fig. 3: New Remote
- Select the type of storage from the list. Enter the number associated with OCI Object Storage. For example, 38.
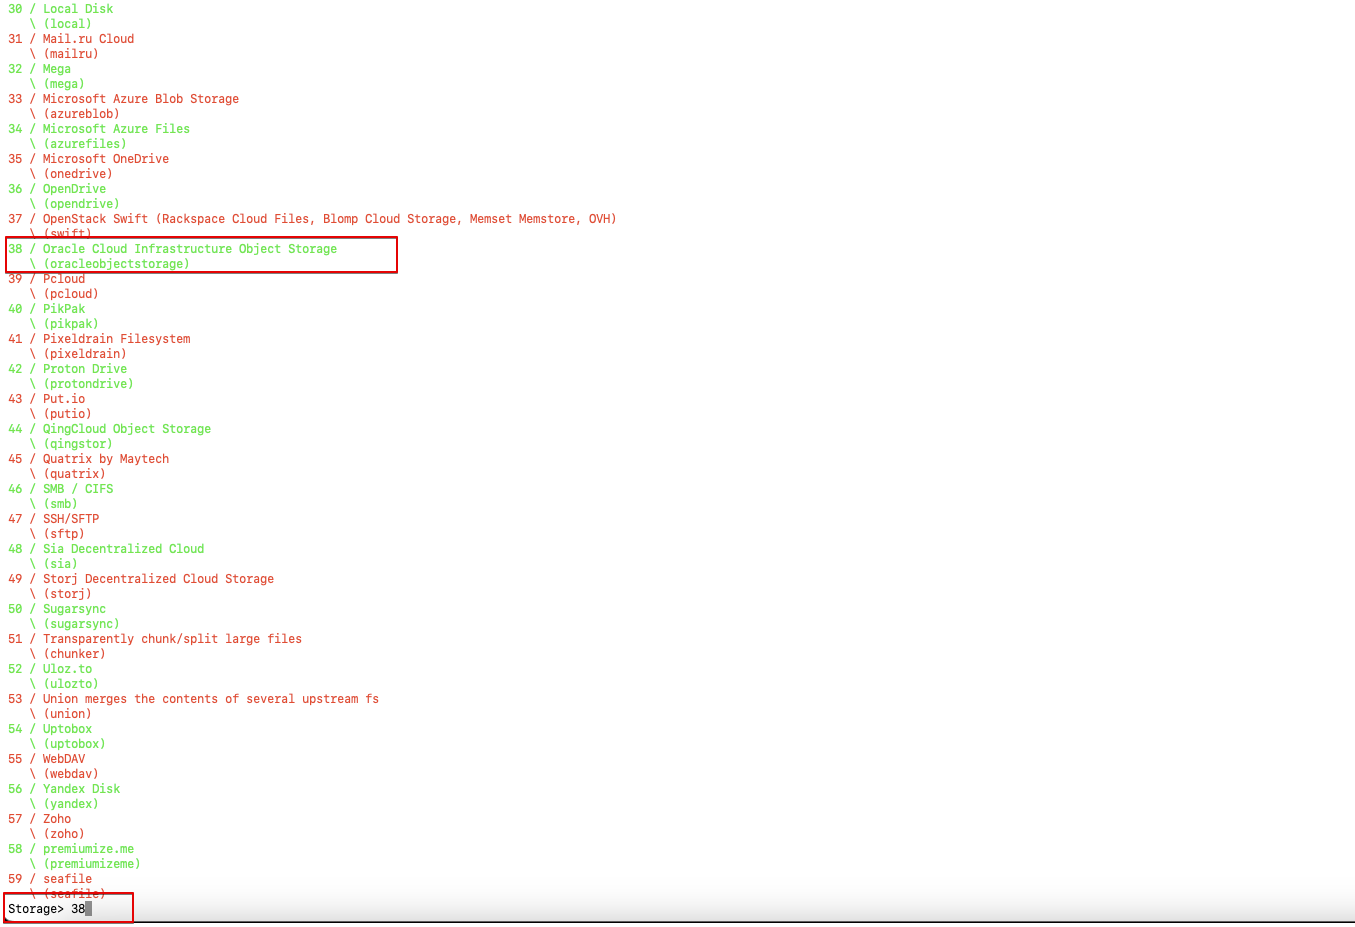
Fig. 4: Select OCI Object Storage
- Select your authentication provider (Auth Provider) from the list.
- Enter 2 if you use an OCI user and API key for authentication.
- Enter 3 to use an instance principal. If your instance is launched in OCI, this avoids copying sensitive information to your machine.
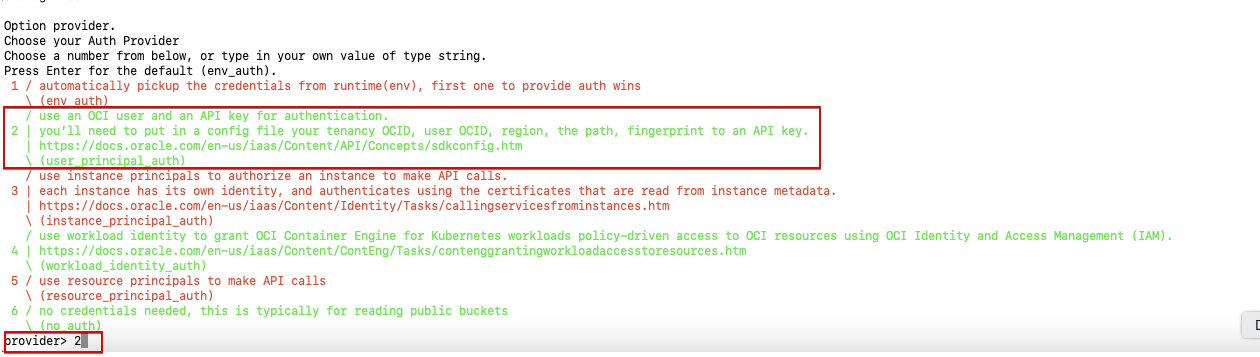
Fig. 5: Select Auth Provider
- Enter the OCI Object Storage namespace.
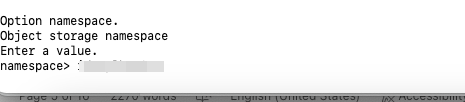
Fig. 6: Provide OCI Object Storage Namespace
- Enter the OCID of the OCI Object Storage compartment.

Fig. 7: Provide OCID of Compartment
- Enter the region where OCI Object Storage is deployed.
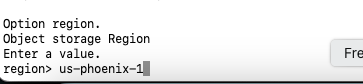
Fig. 8: Provide Region
- Enter the endpoint for the OCI Object Storage API. Leave blank to use the default endpoint for the region.
- If you use an OCI user and API key for authentication, provide the following additional information:
- Create an OCI configuration file as described in the OCI Documentation, and copy the file to your machine.
- Provide the path to the OCI configuration file. Leave blank to use the default path: ~/.oci/config
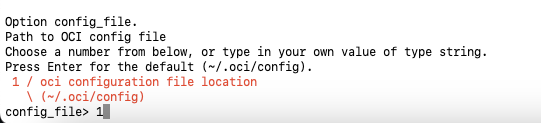
Fig. 9: Path of OCI Configuration File
- Enter the name of the profile in the configuration file. Leave blank to use the Default profile name.
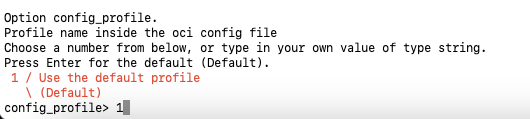
Fig. 10: Name of Profile
- Enter y (Yes) to edit advanced configuration. You only need to edit advanced configuration if you require a specific behavior or performance. For example, edit one or more of the properties shown here:
- storage_tier – Select from Standard, InfrequentAccess, and Archive storage tier.

Fig. 11: Storage Tier
- upload_cutoff

Fig. 12: Upload Cutoff
- chunk_size
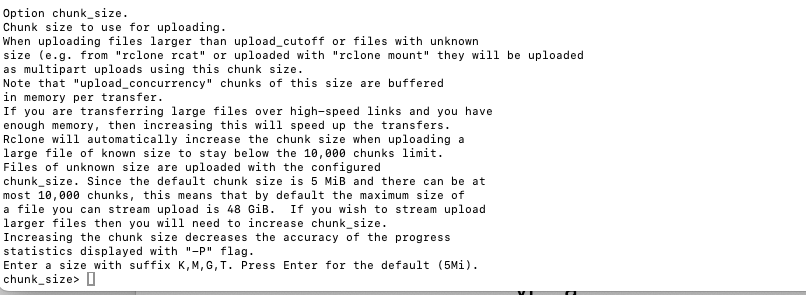
Fig. 13: Chunk Size
- max_upload_parts
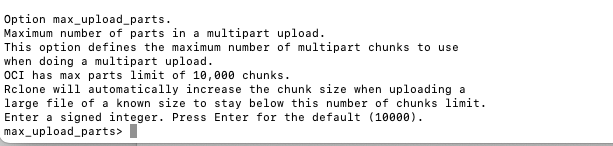
Fig. 14: Max Upload Parts
- upload_concurrency
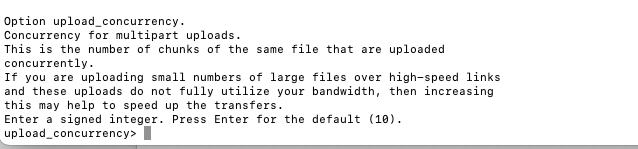
Fig. 15: Upload Concurrency
- copy_cutoff

Fig. 16: Copy Cutoff
- copy_timeout

Fig. 17: Copy Timeout
- disable_checksum

Fig. 18: Disable Checksum
- encoding

Fig. 19: Encoding
- leave_parts_on_error

Fig. 20: Leave Parts On Error
- attempt_resume_upload

Fig. 21: Attempt Resume Upload
- no_check_bucket
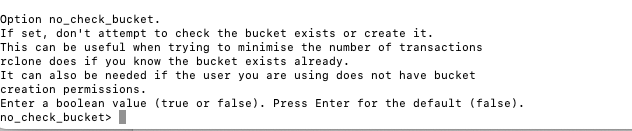
Fig. 22: No Check Bucket
- sse_customer_key_file

Fig. 23: SSE Customer Key File
- sse_customer_key

Fig. 24: SSE Customer Key
- sse_customer_key_sha256

Fig. 25: SSE Customer Key SHA256
- sse_kms_key_id

Fig. 26: SSE KMS Key Id
- sse_customer_algorithm

Fig. 27: SSE Customer Algorithm
- storage_tier – Select from Standard, InfrequentAccess, and Archive storage tier.
- Enter n (No) to exit the configuration.
- Verify that the configuration details displayed are correct and enter y (Yes this is OK) to save the configuration.
- Enter q (Quit) to exit the configuration.
- Validate your configuration by running the ls command on the target bucket in OCI Object Storage. For example, in the following ls command, os_with_api is the name of the remote and rclone_api is the name of the target bucket in OCI Object Storage.

Fig. 28: Validate OCI Object Storage Remote
Configure Rclone for HDFS
A non-Kerberos Hadoop cluster is used for this article. Hadoop cluster nodes must be reachable from machine, where Rclone is configured.
- Log in to the machine where you installed Rclone.
- Run the command rclone config from a terminal.
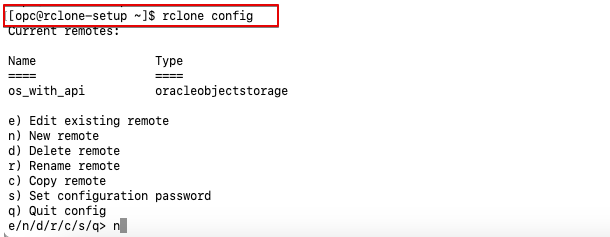
Fig. 29: Rclone Config
- Enter n (New remote) and enter a name for the new remote.
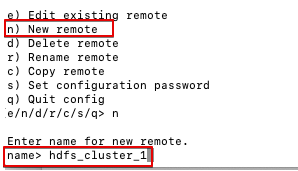
Fig. 30: New Remote
- Select the type of storage from the list. Enter the number associated with HDFS. For example, 22.

Fig. 31: Provide HDFS Storage
- Enter a comma separated list for namenode and port in namenode:port format.

Fig. 32: Provide Namenode and Port
- Enter the Hadoop username. Make sure the user has the required permissions on the HDFS folder you want to migrate.
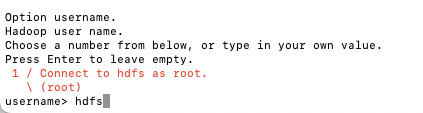
Fig. 33: Provide Hadoop Username
- Enter n (No) to complete the configuration.
Alternatively, enter y (Yes) if you need to override service_principal_name, data_transfer_protection or encoding properties though advanced configuration.
Note: For a Kerberos cluster, you must update the advanced configuration.
- Verify the configuration details and enter y (Yes this is OK), to save the configuration.
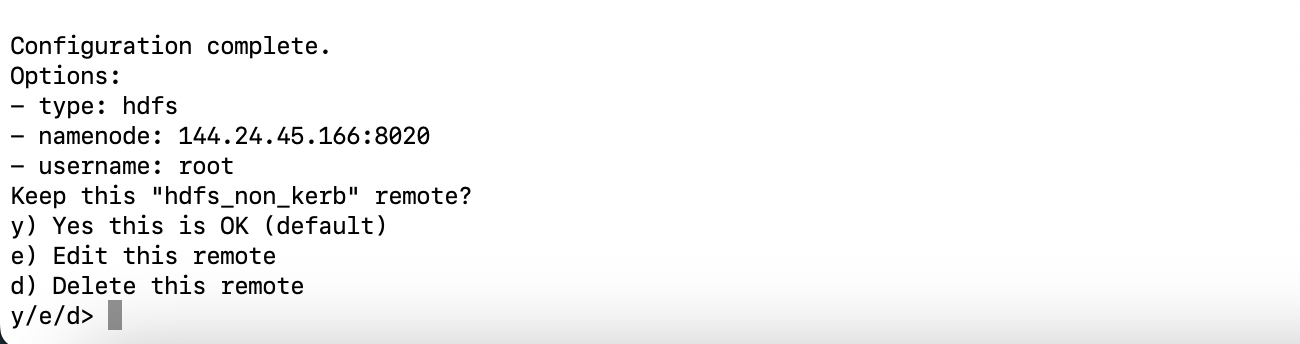
Fig. 34: Save Configuration
- Validate the configuration by running the ls command on a folder in the HDFS path. For example, in the following sample ls command, hdfs_cluster_1 is the remote name and /data/input is a path on the HDFS cluster.

Fig. 35: Validate HDFS Remote
Copy Files Using Rclone
- Copy files from your local file system to OCI Object Storage.
- Run the ls command on the source local directory that you want to copy to the destination OCI Object Storage.
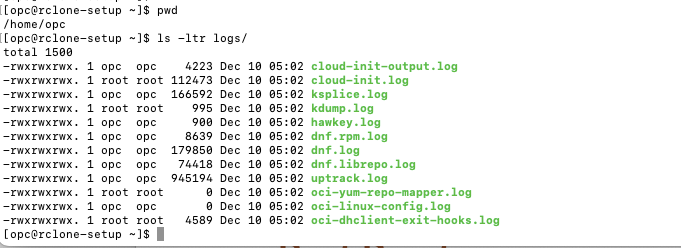
Fig. 36: List Source Local Directory
- Run the copy command with the dry-run flag and review the output.
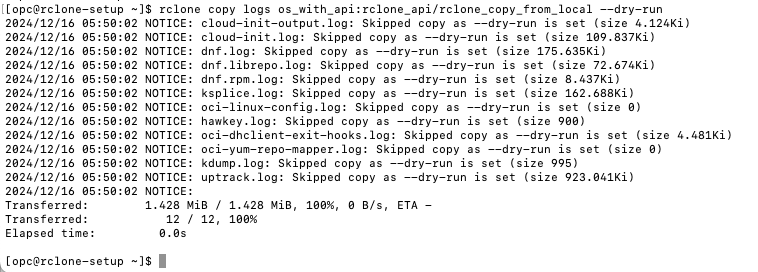
Fig. 37: Copy Command
- If the output of the dry run looks correct, execute the command without the flag to copy the files.
- Run the ls command on the source local directory that you want to copy to the destination OCI Object Storage.
- Copy files from your HDFS file system to OCI Object Storage.
- Run the ls command on the source HDFS directory that you want to copy to the destination OCI Object Storage.

Fig. 38: List Source HDFS Directory
- Run the copy command with the dry-run flag and review the output.

Fig. 39: Copy Command
- If the output of the dry run looks correct, execute the copy command without the flag to copy the files.
- Run the ls command on the source HDFS directory that you want to copy to the destination OCI Object Storage.
- Copy files from your HDFS file system to a HDFS file system on another Hadoop Cluster.
- Run the ls command on the source HDFS directory that you want to copy to the destination HDFS.

Fig. 40: List Source HDFS Directory
- Run the copy command with the dry-run flag and review the output.

Fig. 41: Copy Command
- If the output of the dry run looks correct, execute the copy command without the flag to copy the files.
- Run the ls command on the source HDFS directory that you want to copy to the destination HDFS.
Considerations
- Use the sync command if you want to sync the source to the destination. This might delete files from the destination.
- If you’re migrating production data, Oracle recommends that you test first using the dry-run option or run with the interactive flag.
- The dry-run option doesn’t list all permission related issues. This means you might not see errors during the dry run but still get errors during the actual run.
- If you’re migrating files for the first time and the destination folder is empty, the copy command might perform better than the sync command, due to the number of files.
- If you’re copying files to OCI Object Storage from a data center or company network, consider configuring Rclone in the same network to avoid network-related issues.
References
Oracle Solution Playbook: Learn More About Moving Data to Cloud-based Object Storage by Using Rclone
Rclone website: Rclone
Call to Action
Now you’ve learned how to set up and use Rclone, try it yourself. Migrate data from your data center machines or data center Hadoop cluster to OCI Object Storage (or OCI Big Data Service Hadoop cluster) using Rclone.
After migrating your data, connect Oracle Analytics Cloud to the destination OCI Object Storage (or Big Data Service Hadoop cluster), and start to build enhanced insights from the data. For details, see Connect to Dataflow SQL Endpoint from OAC and Connect to Big Data Service Spark and Hive from OAC.
If you have questions, post them in the Oracle Analytics Community and we’ll follow up with answers.
![]()