This article explains:
- Creating a guide in the Oracle Guided Learning (OGL) authoring environment
- Integrating and using OGL in Oracle Analytics Cloud (OAC) using the data visualization and workbook extensions
What’s Oracle Guided Learning (OGL)?
OGL is Oracle’s digital adoption platform that provides interactive, in-application walkthroughs to help users complete tasks easily. With OGL custom extensions in OAC, you can embed guides directly in dashboards so users onboard quickly, adopt features smoothly, and remain productive within their workflow.
To learn more about OGL’s full capabilities, explore the OGL website and documentation.
Creating a Guide in OGL
Before you use the extension in OAC, create a guide in OGL:
- Log in to the OGL authoring environment.
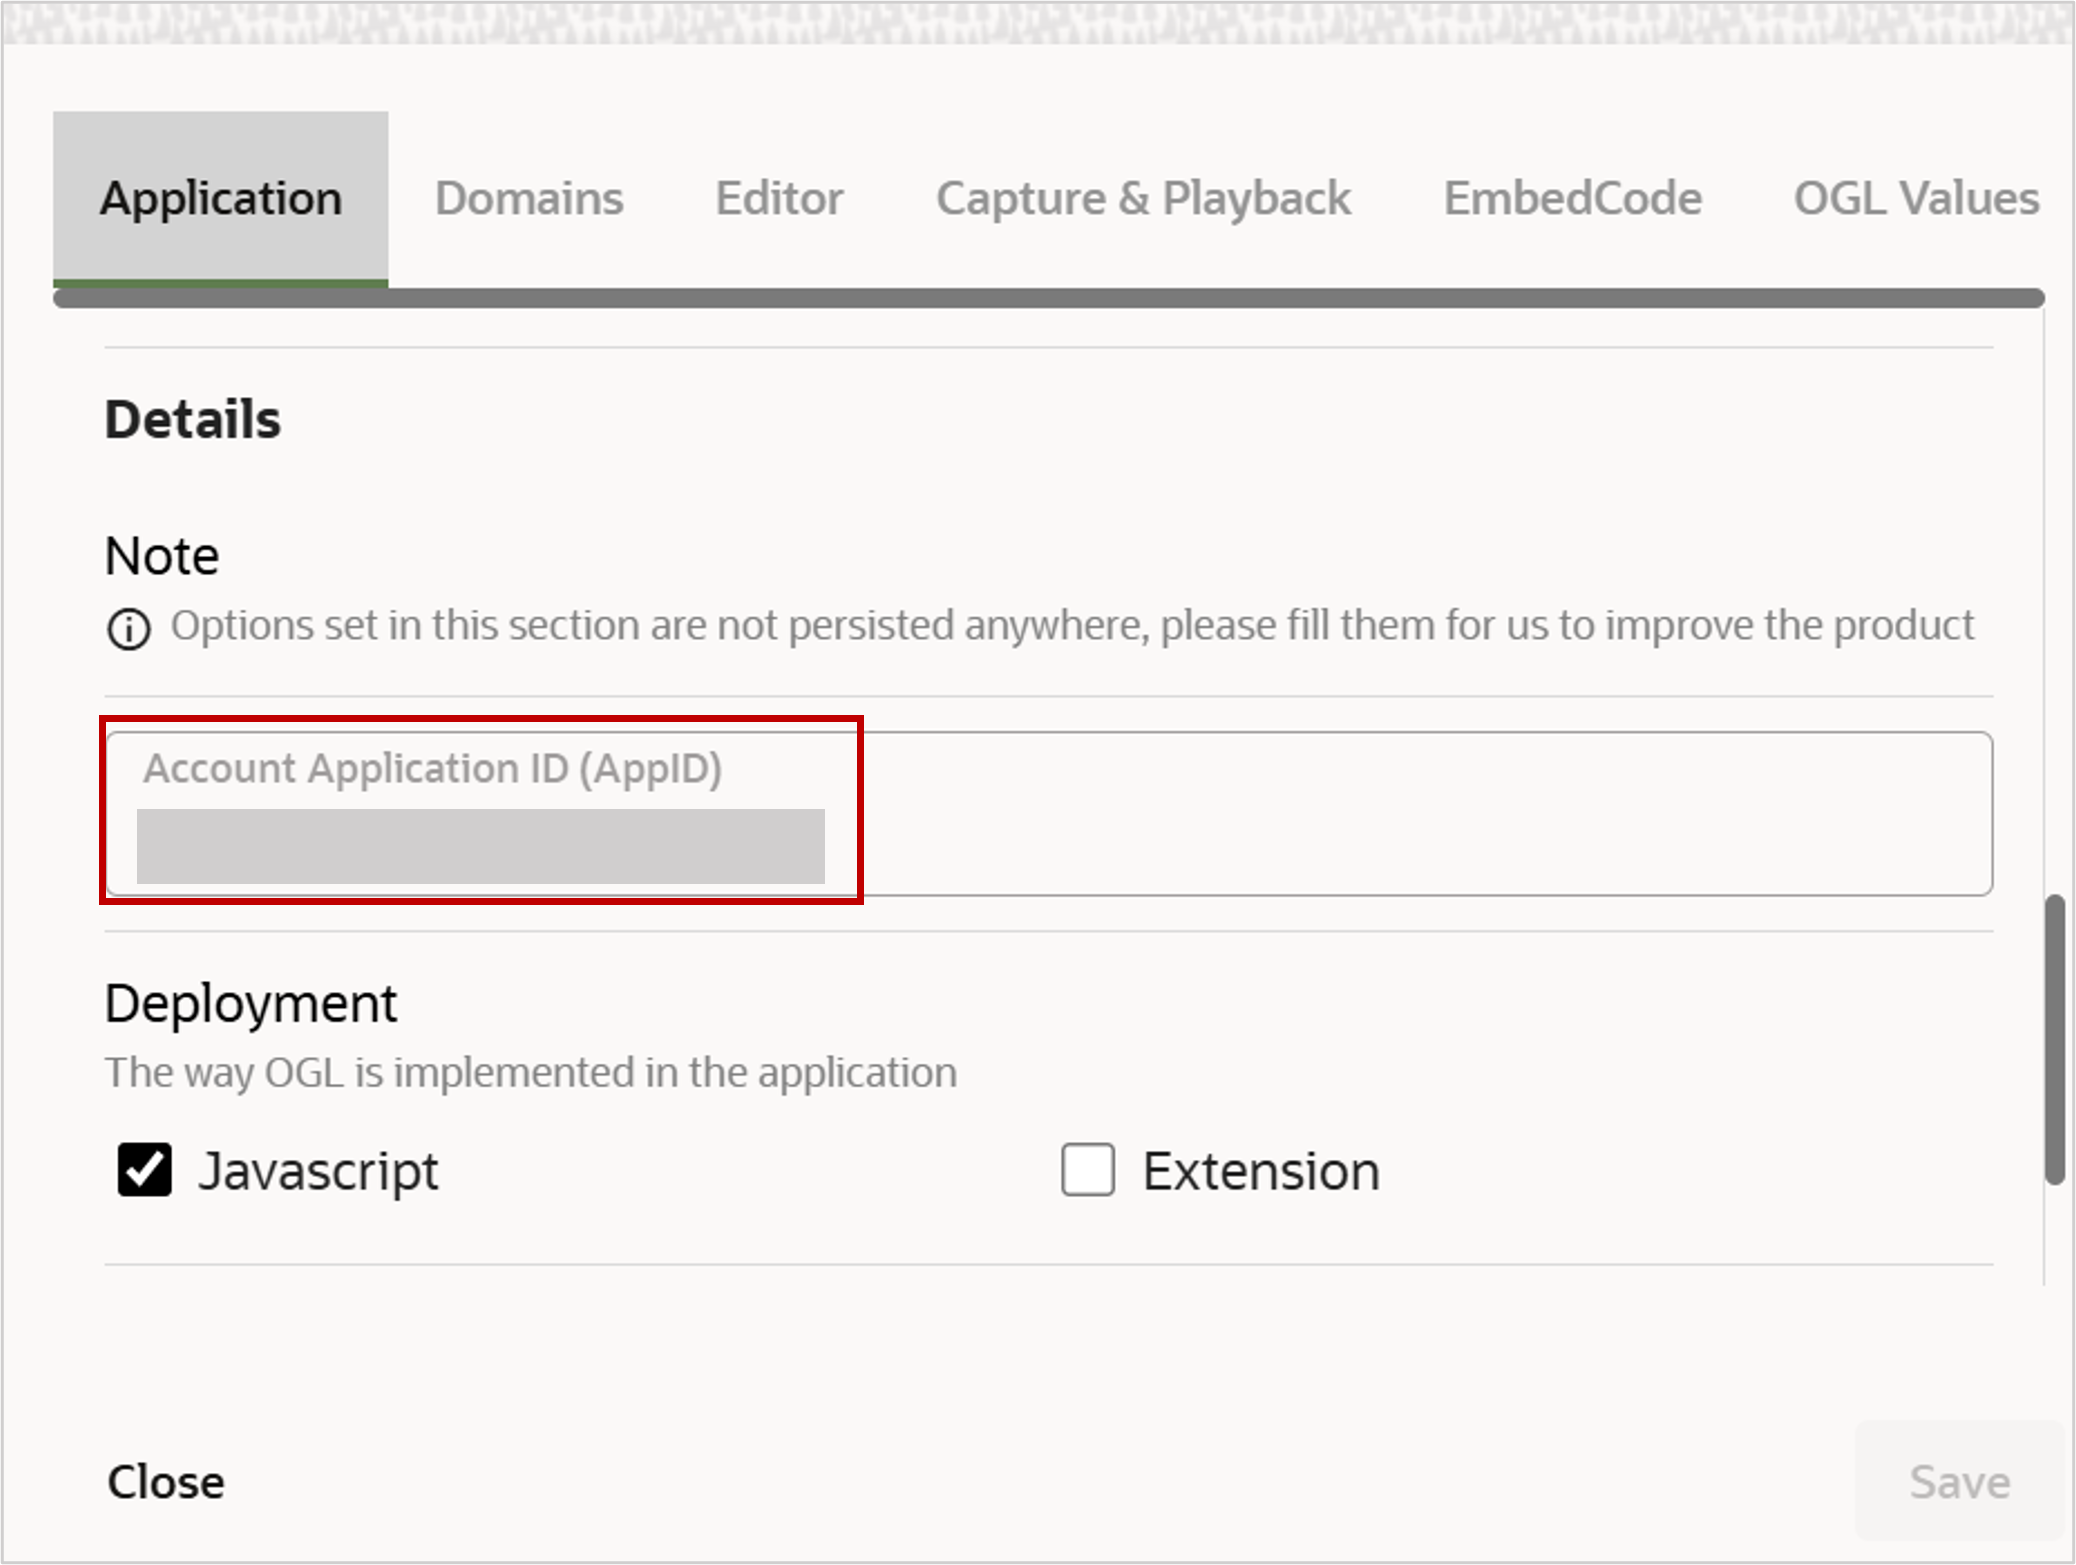
- Navigate to Settings and click Application to retrieve your Application ID (AppID). It’s used for configuring extensions in OAC.
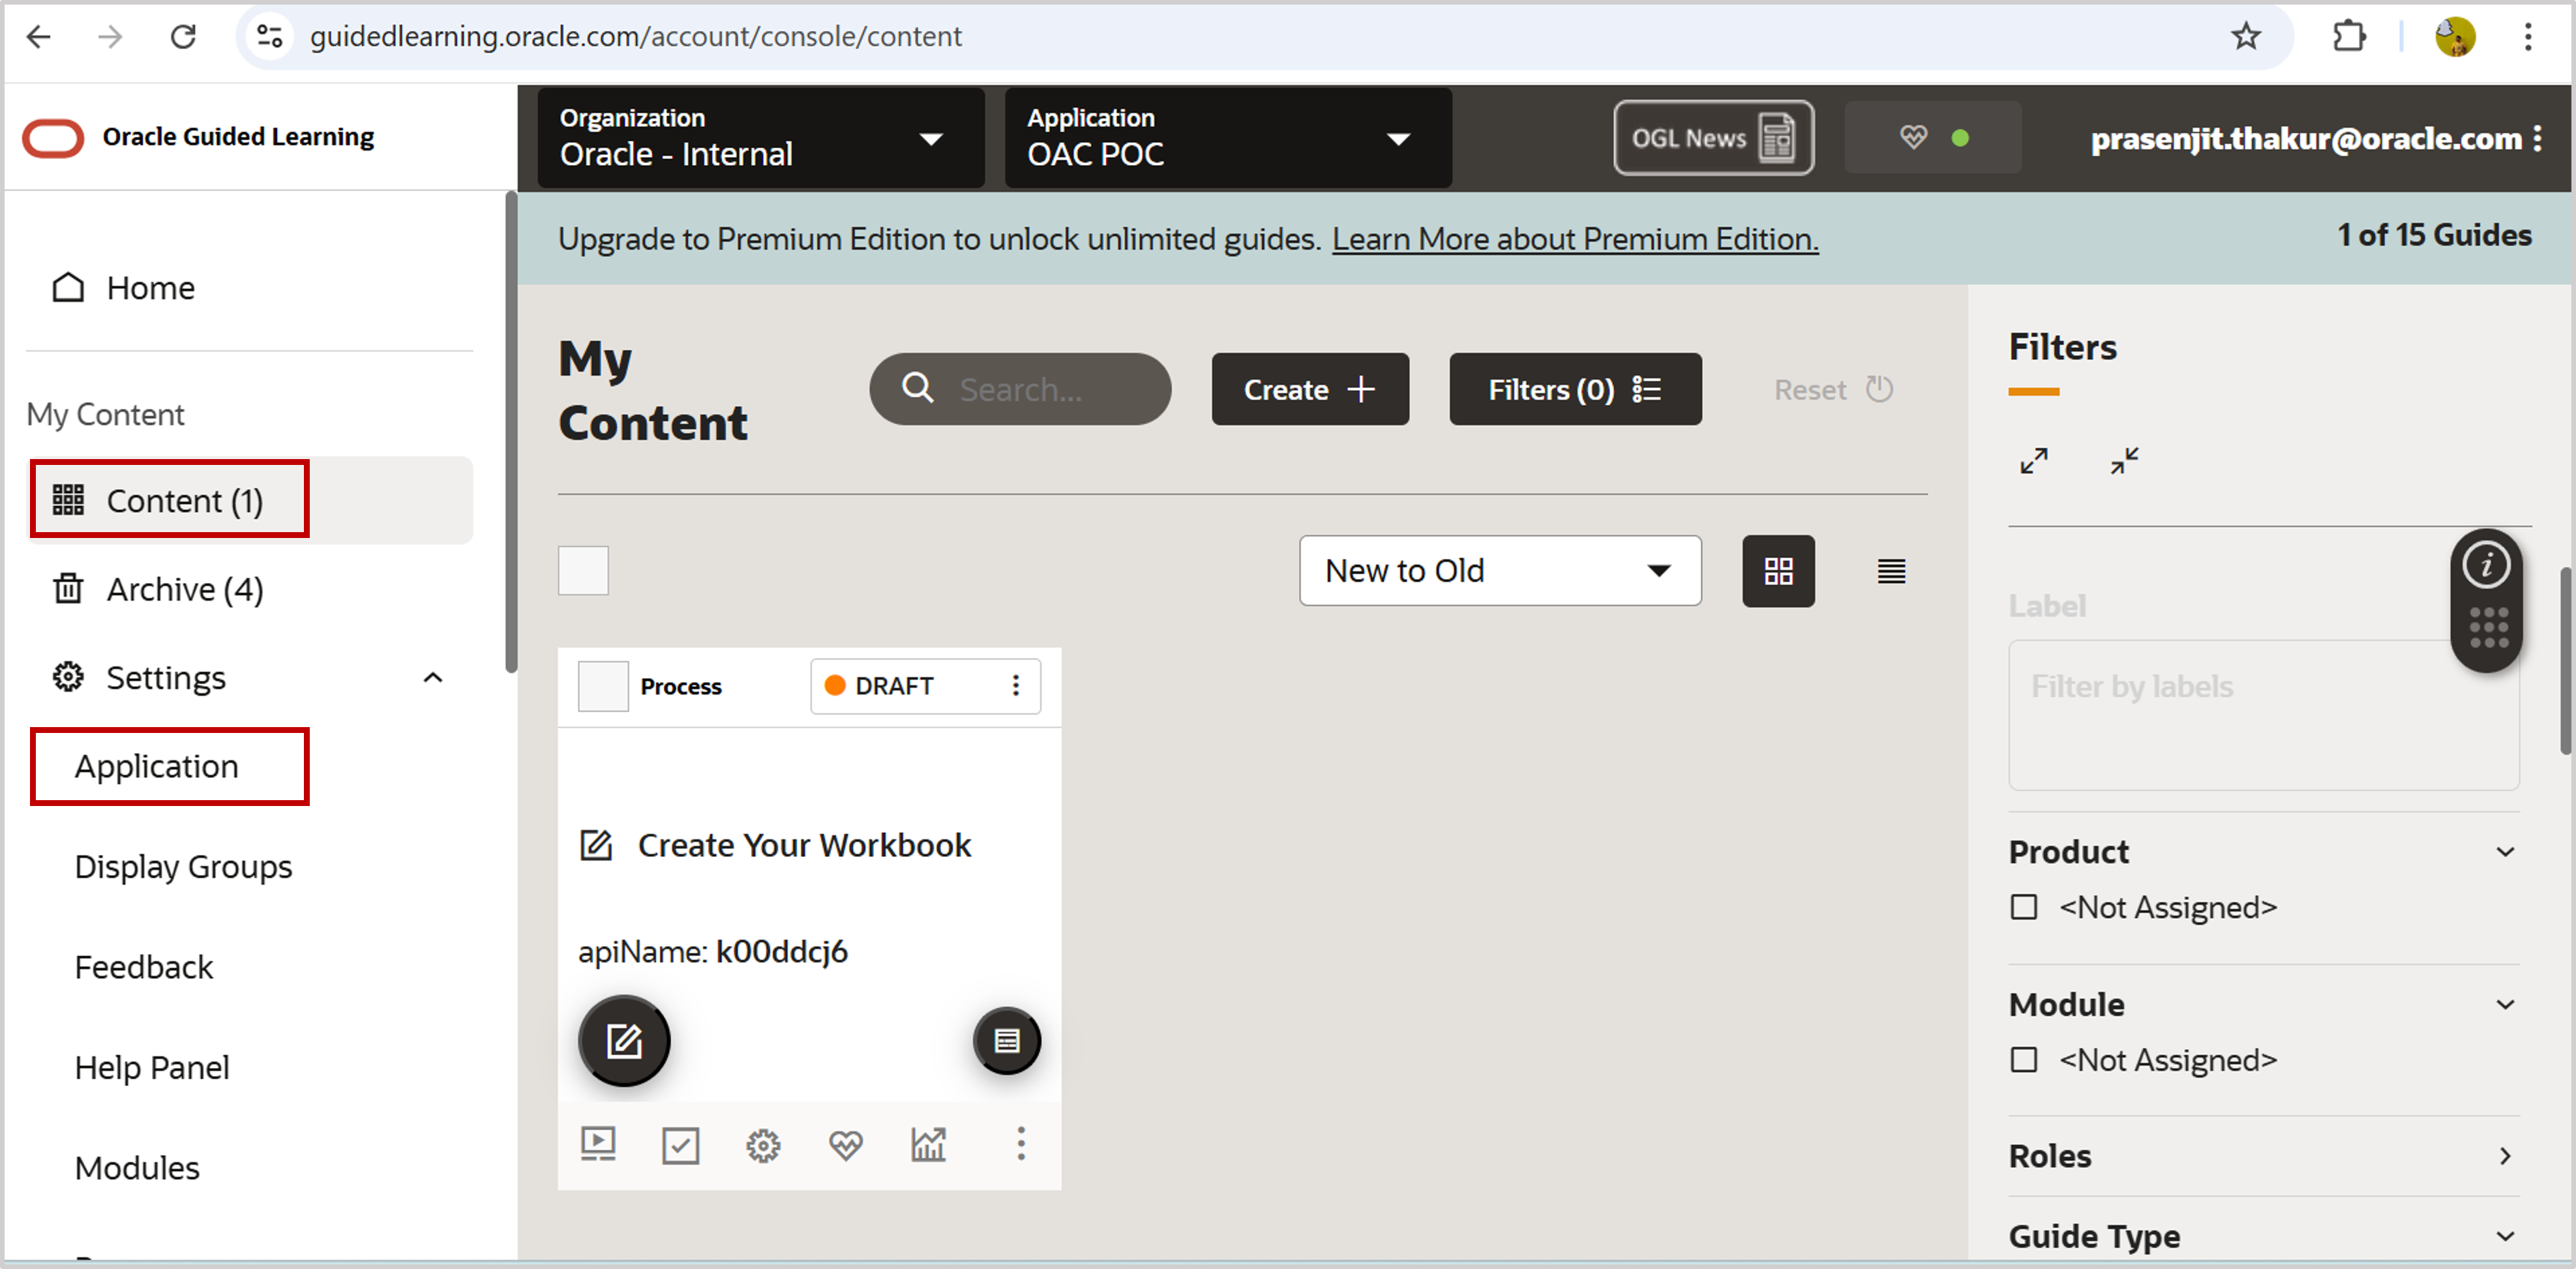
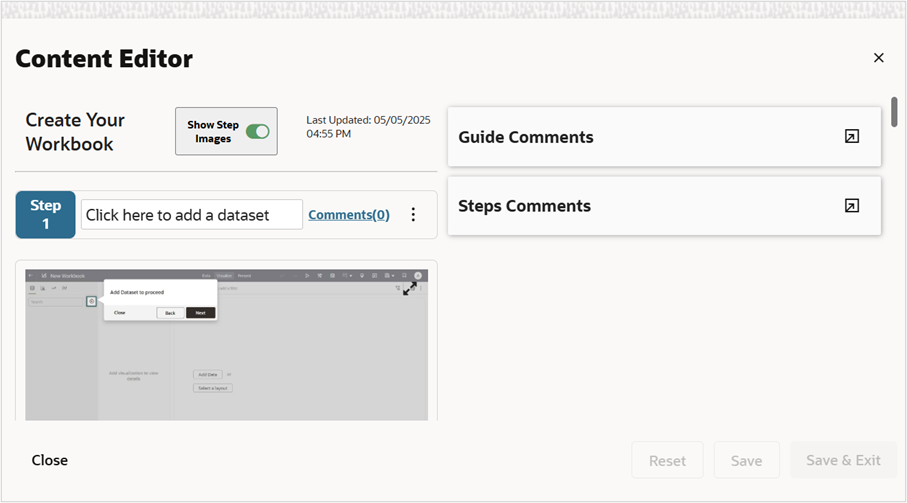
- Next, navigate to the Content section on the Home page to begin authoring. For example, you create a guide to help new users build a bar chart in Oracle Analytics. Once published, this guide can be launched directly from the OAC interface with the custom extension.
OGL Custom Extension Versions
Once your OGL guide is ready, you make it available in OAC. There are two OGL custom extensions that launch the OGL widget in OAC, but each one is designed for different scenarios:
- OGL data visualization extension
- Requires a workbook visualization where you configure the App ID and Server URL.
- Needs data in the visualization grammar to activate the widget.
- Supports usage tracking by passing user name (via visualization grammar) to the OGL server.
- Widget availability can be configured to stay only inside a workbook or globally outside workbooks through activation settings, as described later in this article.
- OGL workbook extension
- Does not require creating a visualization — simply click the extension and the widget launches.
- Usage tracking is not supported.
- The widget remains active globally across OAC, even outside workbooks.
Which one should you choose?
- Use the data visualization extension if you need usage tracking and workbook-specific control.
- Use the workbook extension if you want persistent widget availability outside the workbook.
Setting Up the OGL Custom Extension in OAC
Once your guide is created, follow these steps to set up the OGL extension in OAC:
1. Download the extensions
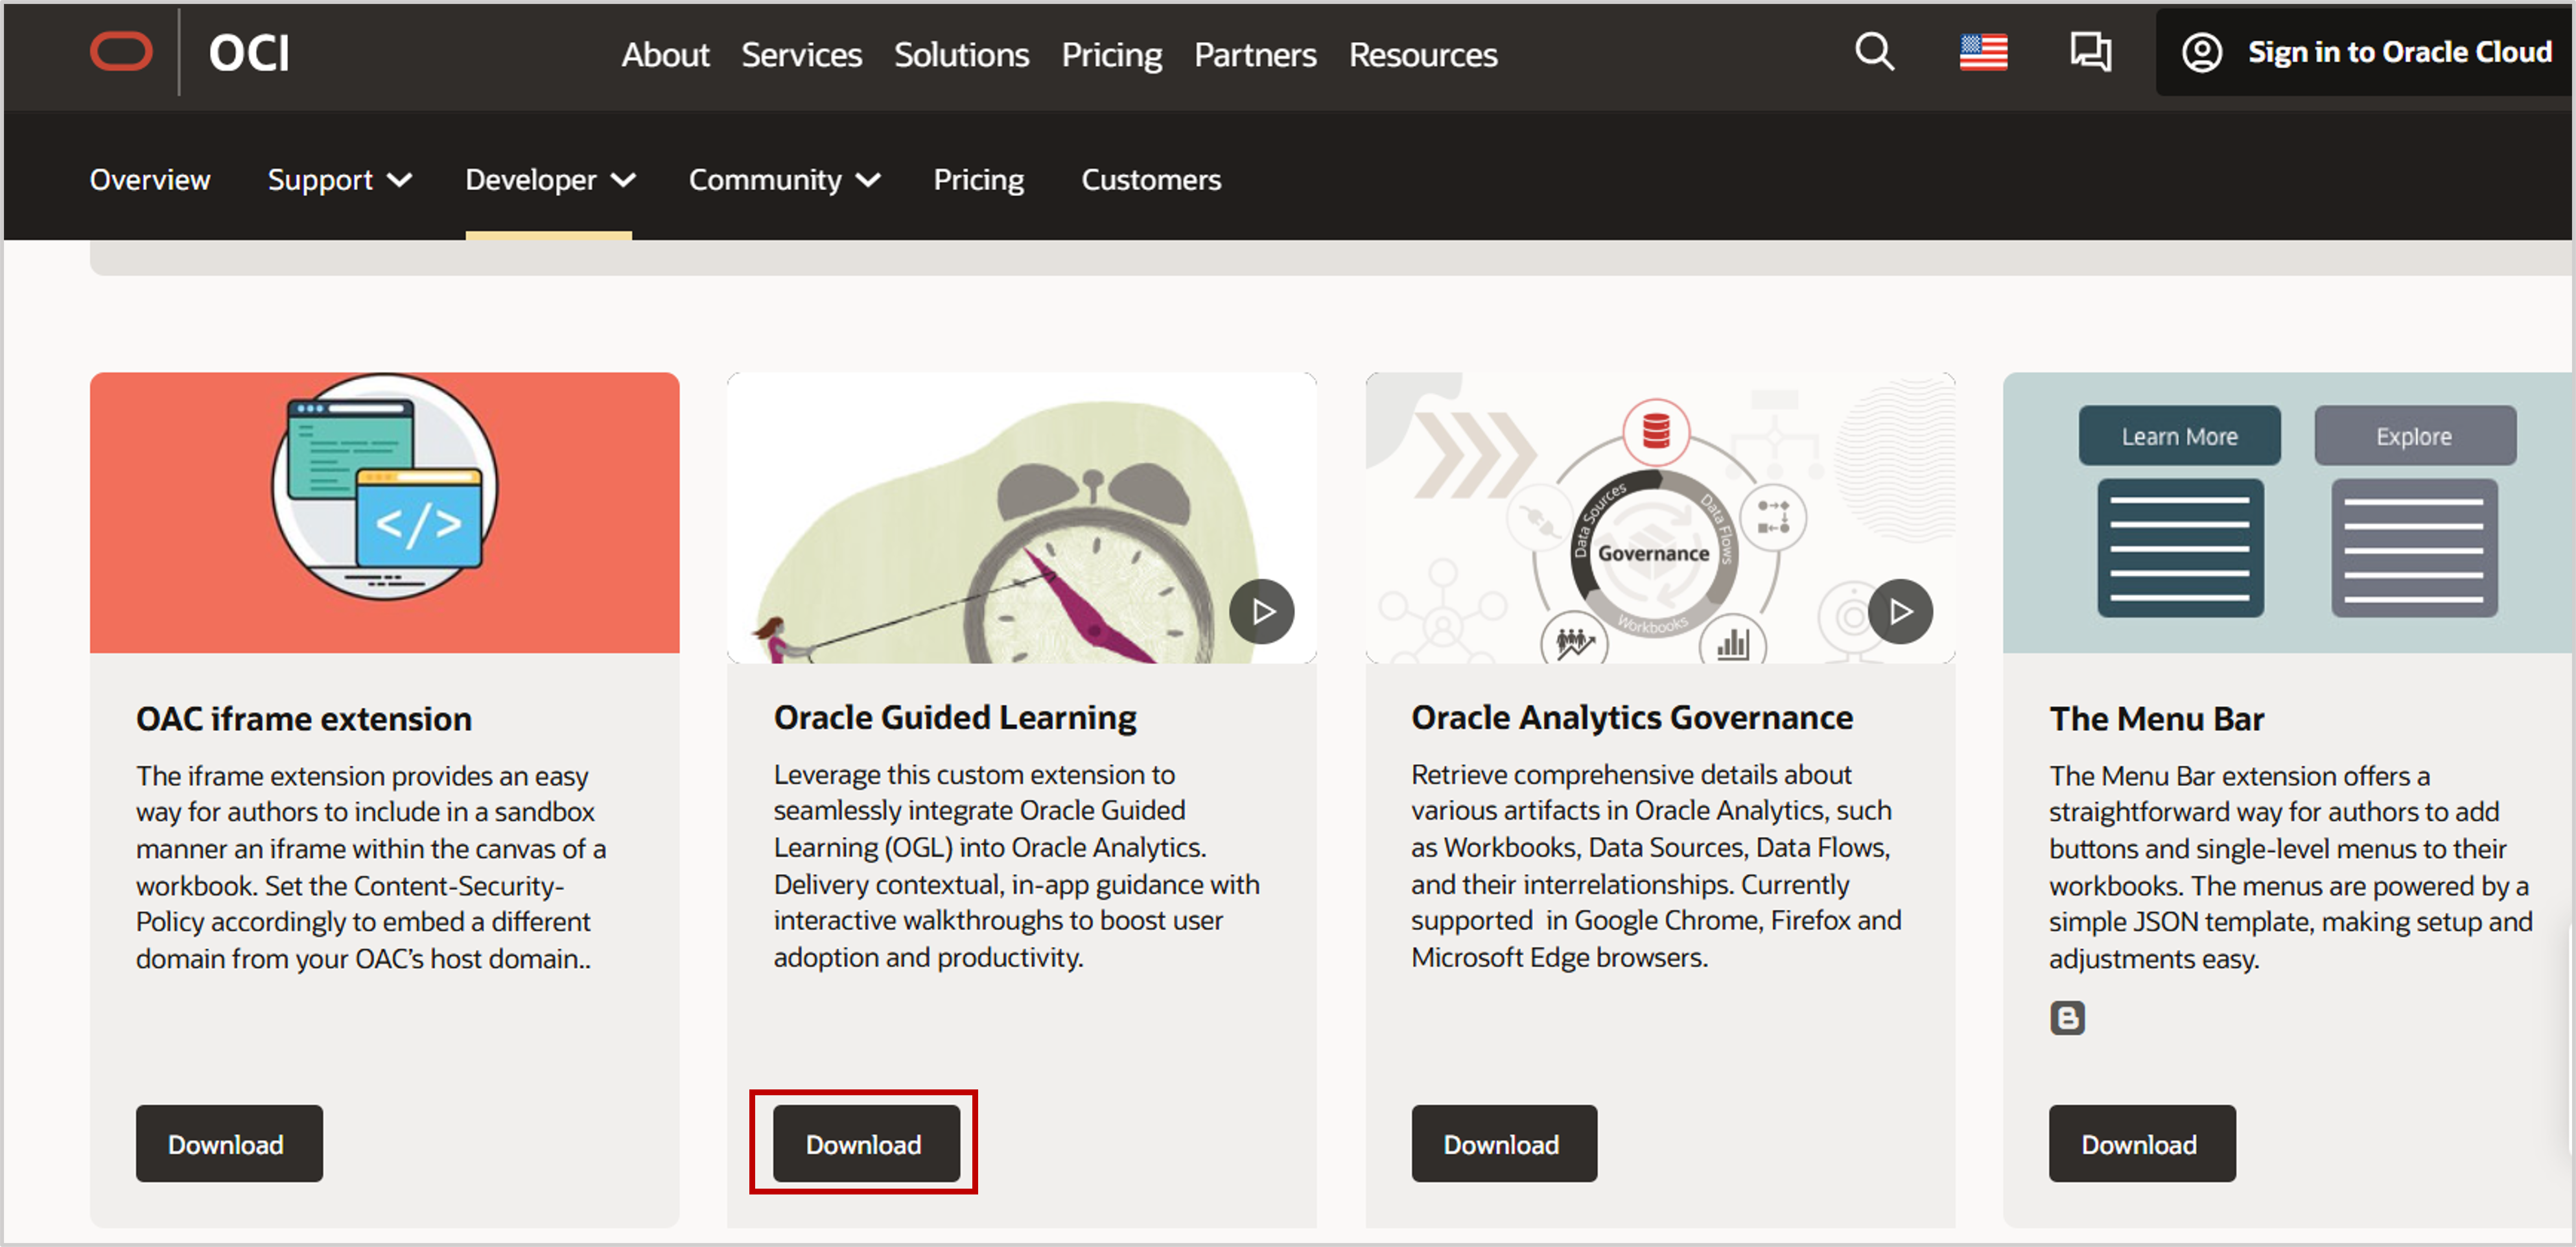
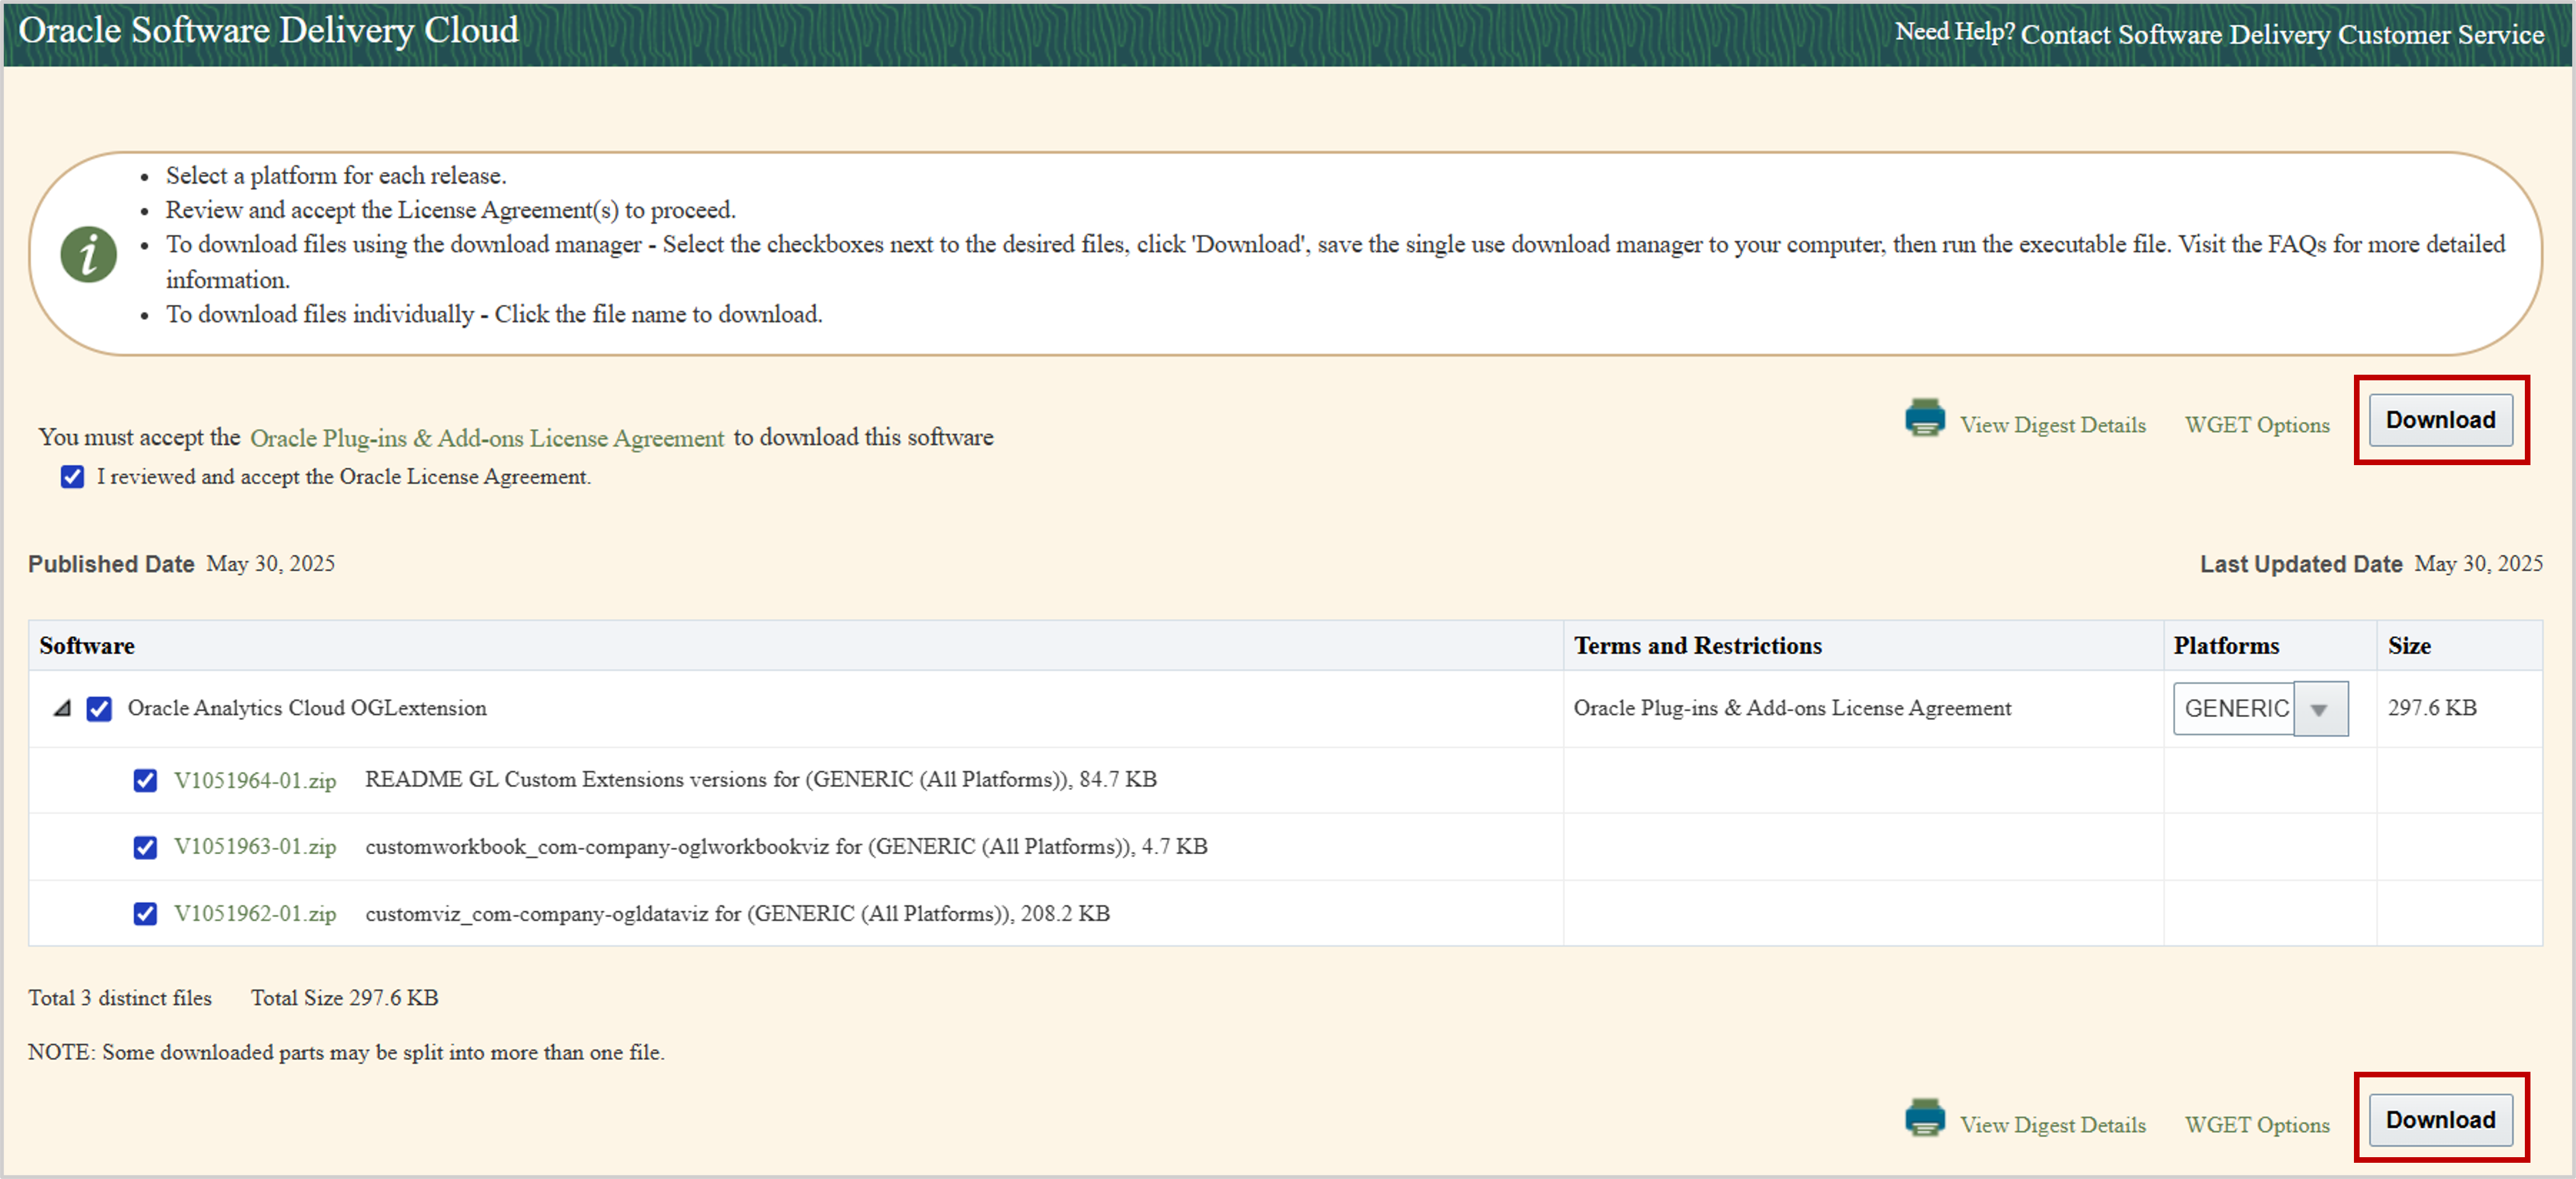
- From the Oracle Analytics Extensions Public Library, download the OGL extension package.
- Both versions (data visualization and workbook) are included. Choose one that fits your use case.
2. Upload the extension
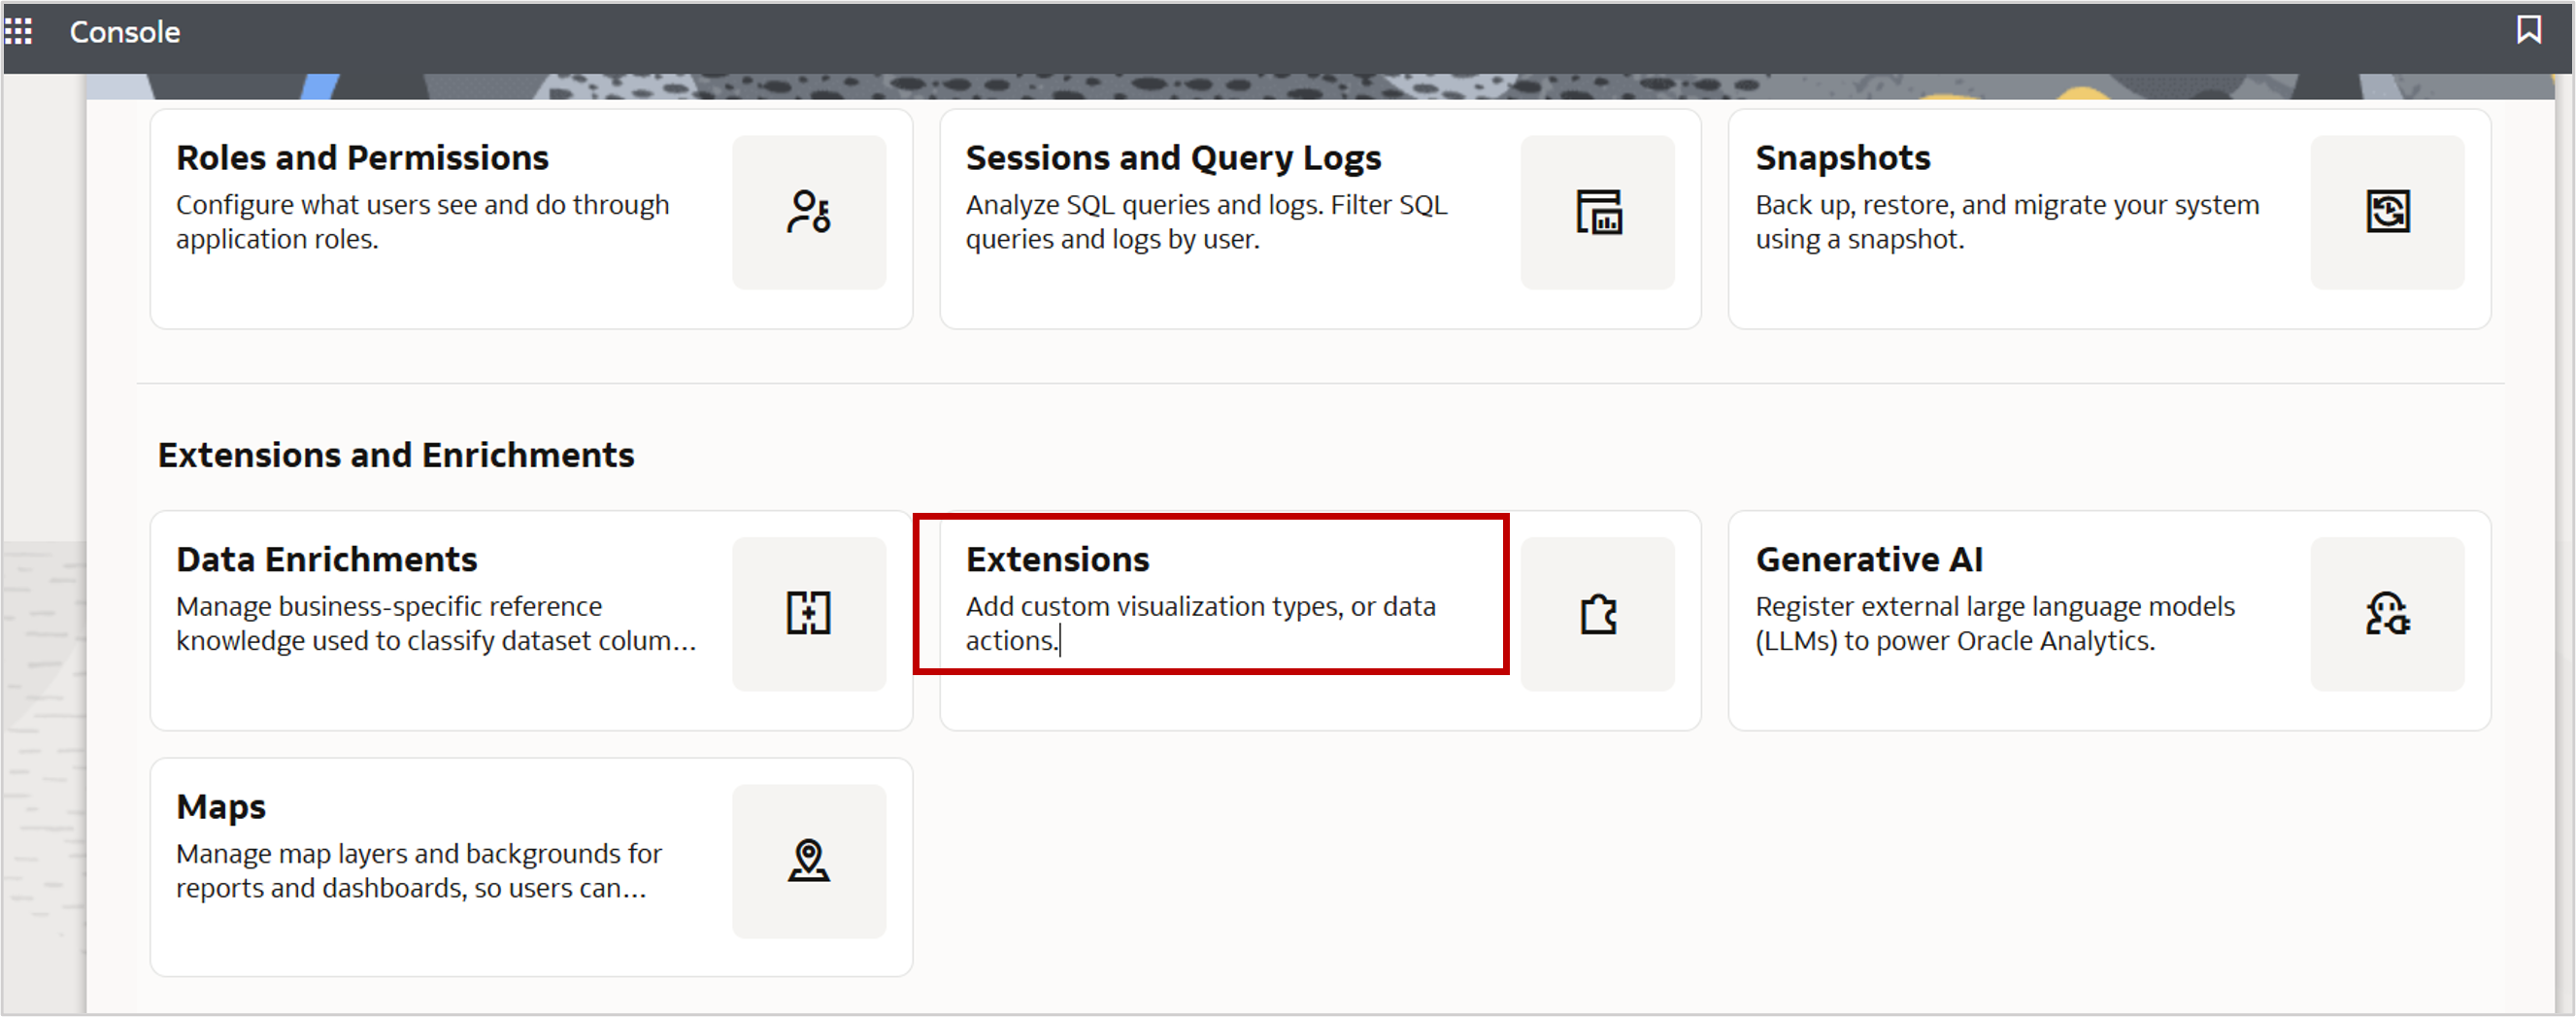
- In OAC, navigate to the Console and click Extensions.
- Upload the desired version of the extension.
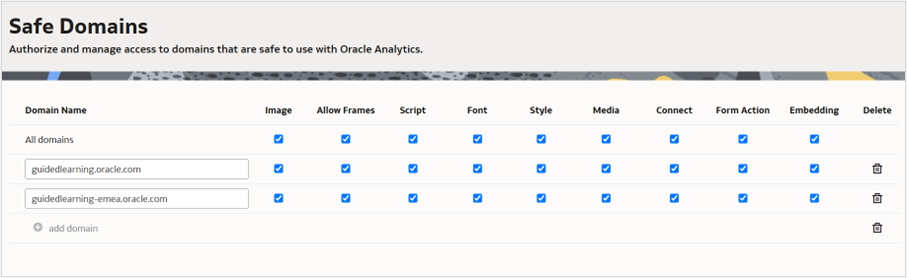
3. Whitelist the OGL server
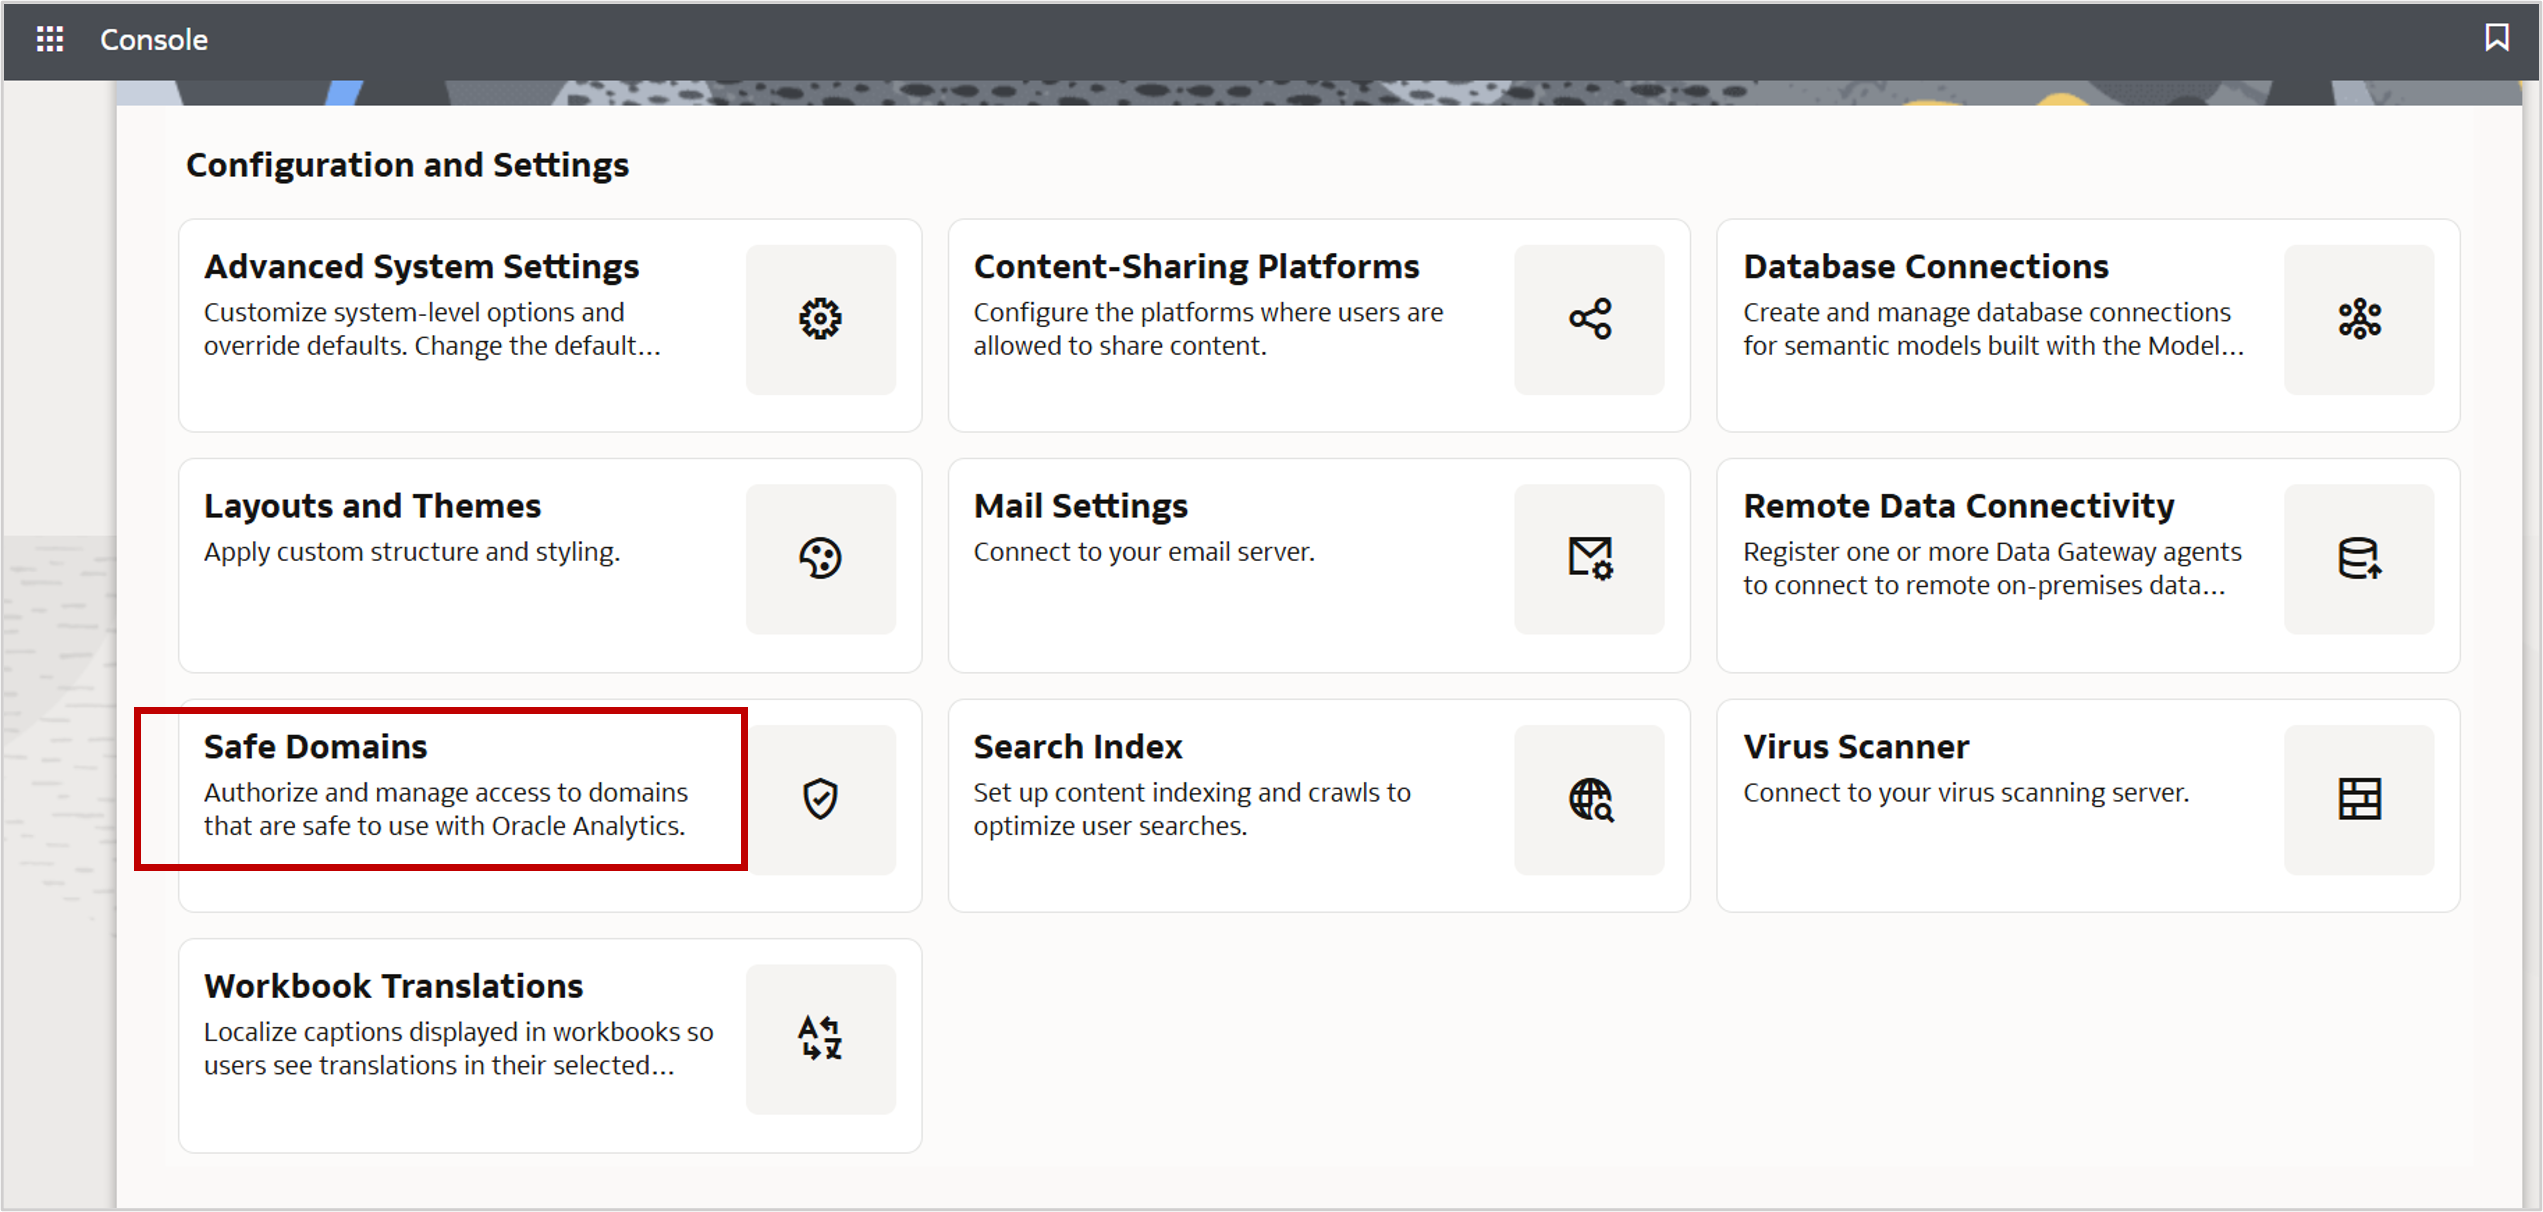
- Navigate to the Console and click Safe Domains.
- Add the OGL Server URL (e.g., guidedlearning.oracle.com).
- Select the relevant options to comply with CORS policies.
You are now ready to activate the widget using either extension.
Using the OGL Data Visualization Extension
Use the data visualization extension when you want workbook-specific activation and usage tracking.
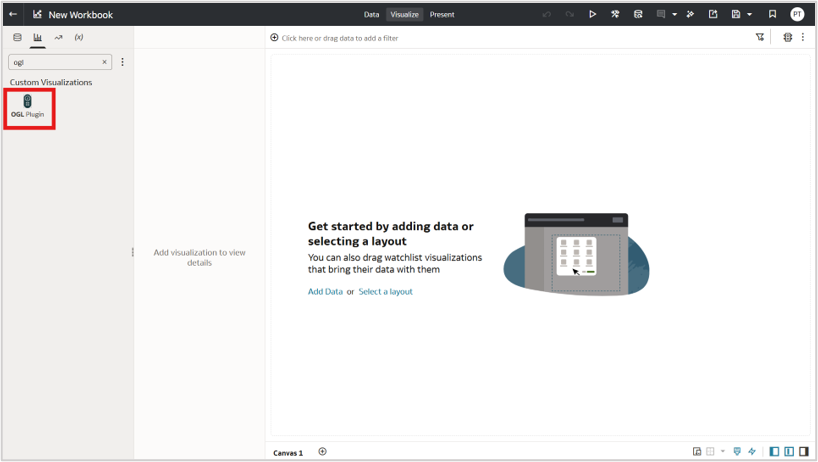
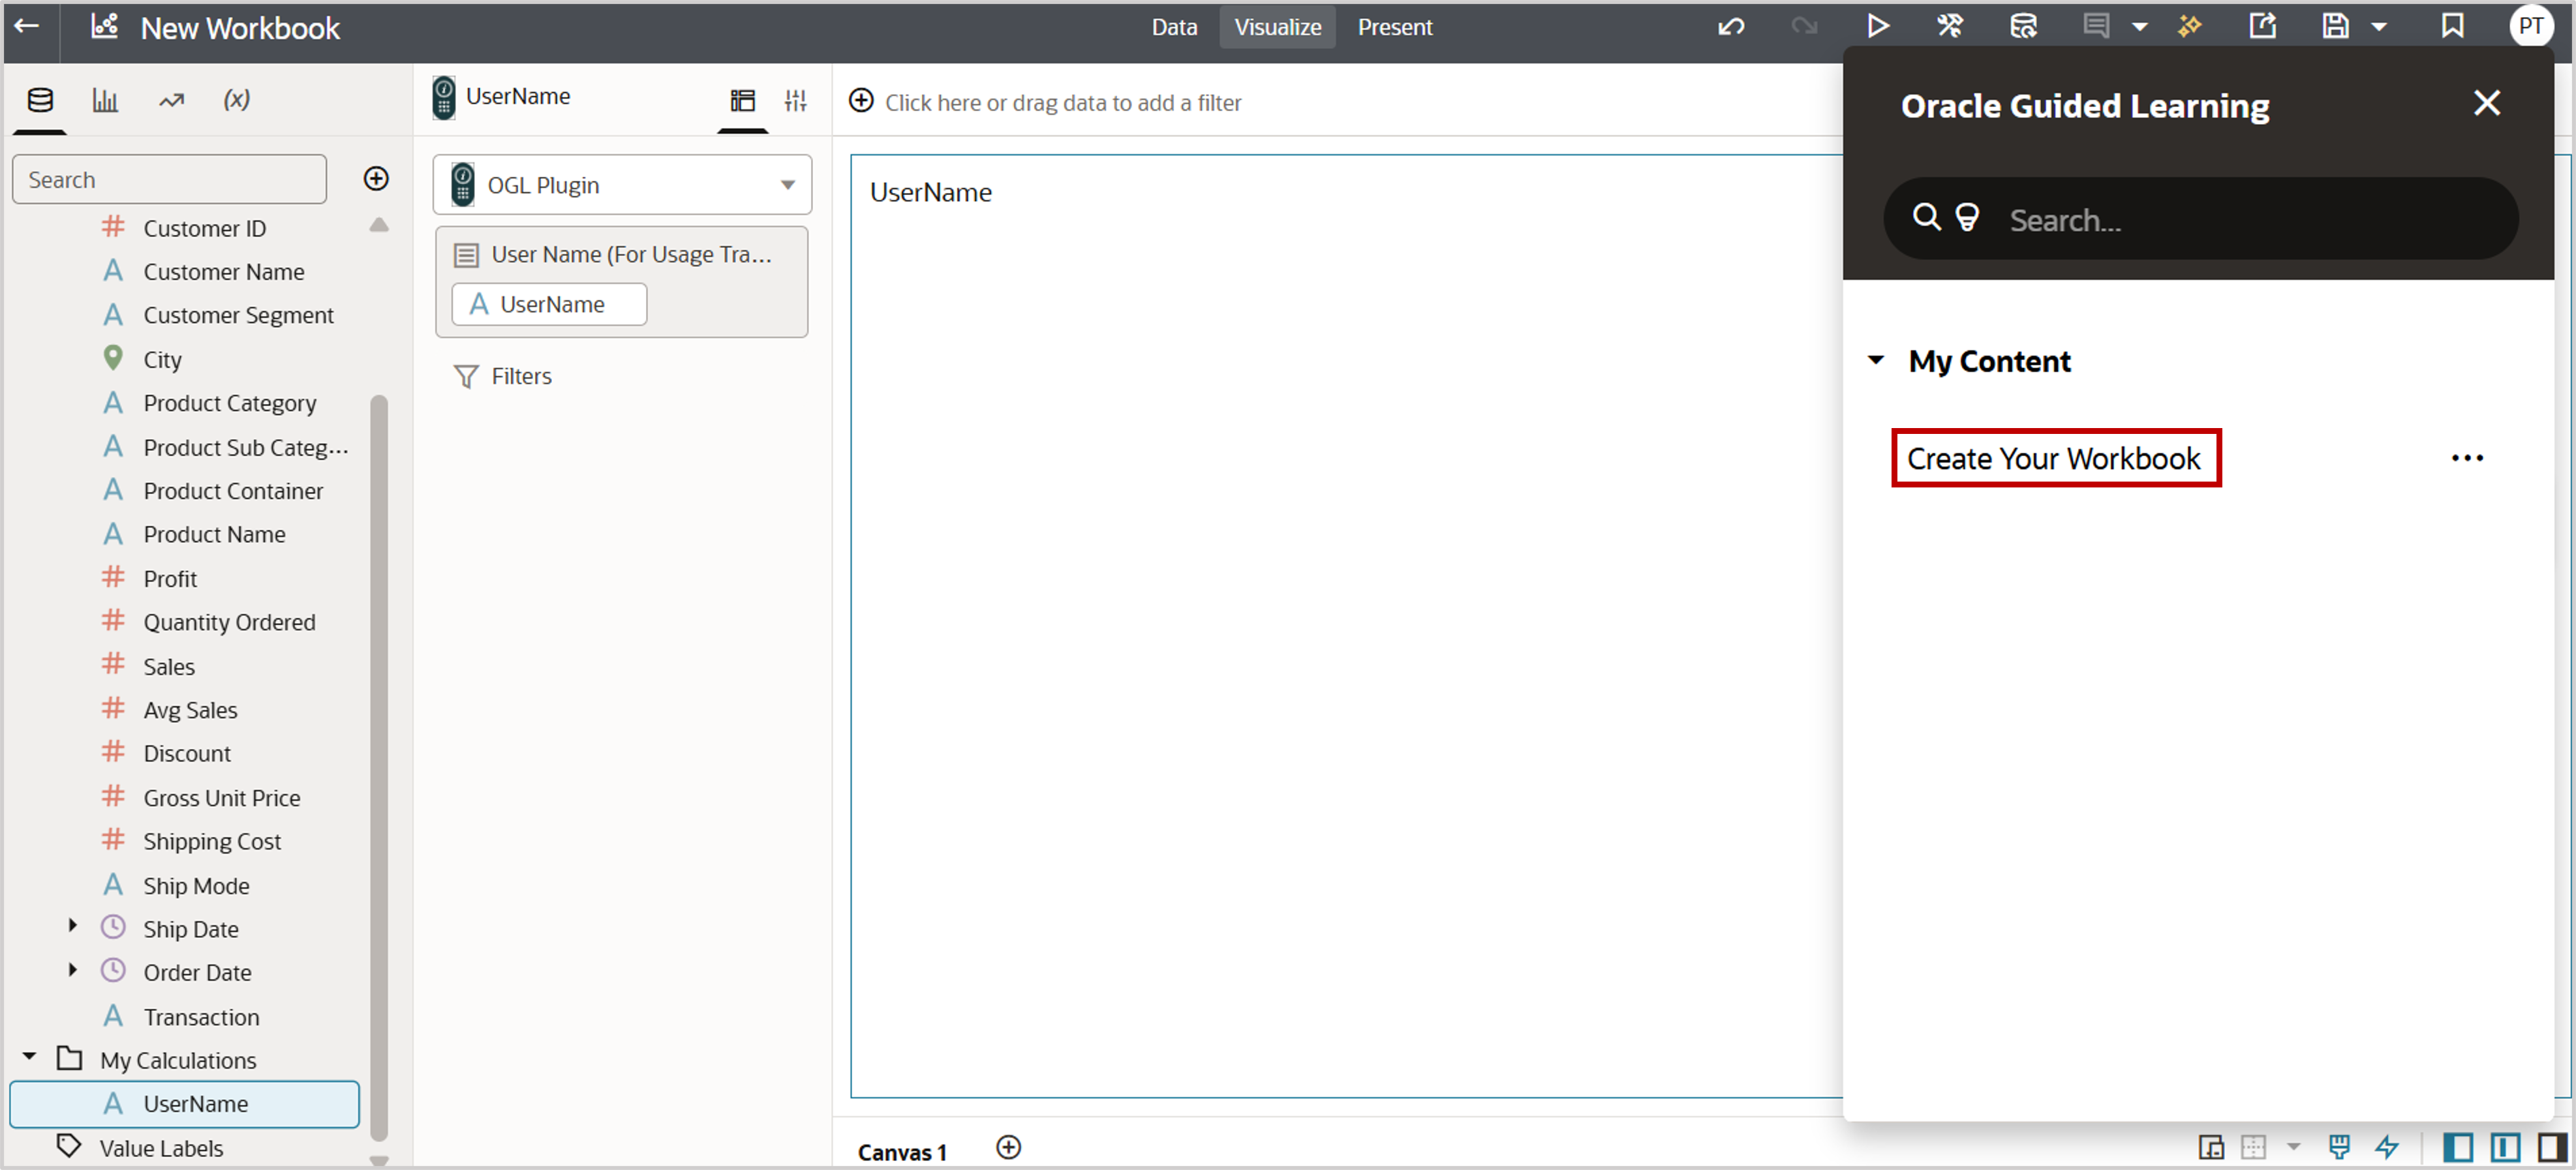
1. Create a workbook
Drag the OGL custom extension onto a canvas and select a dataset.
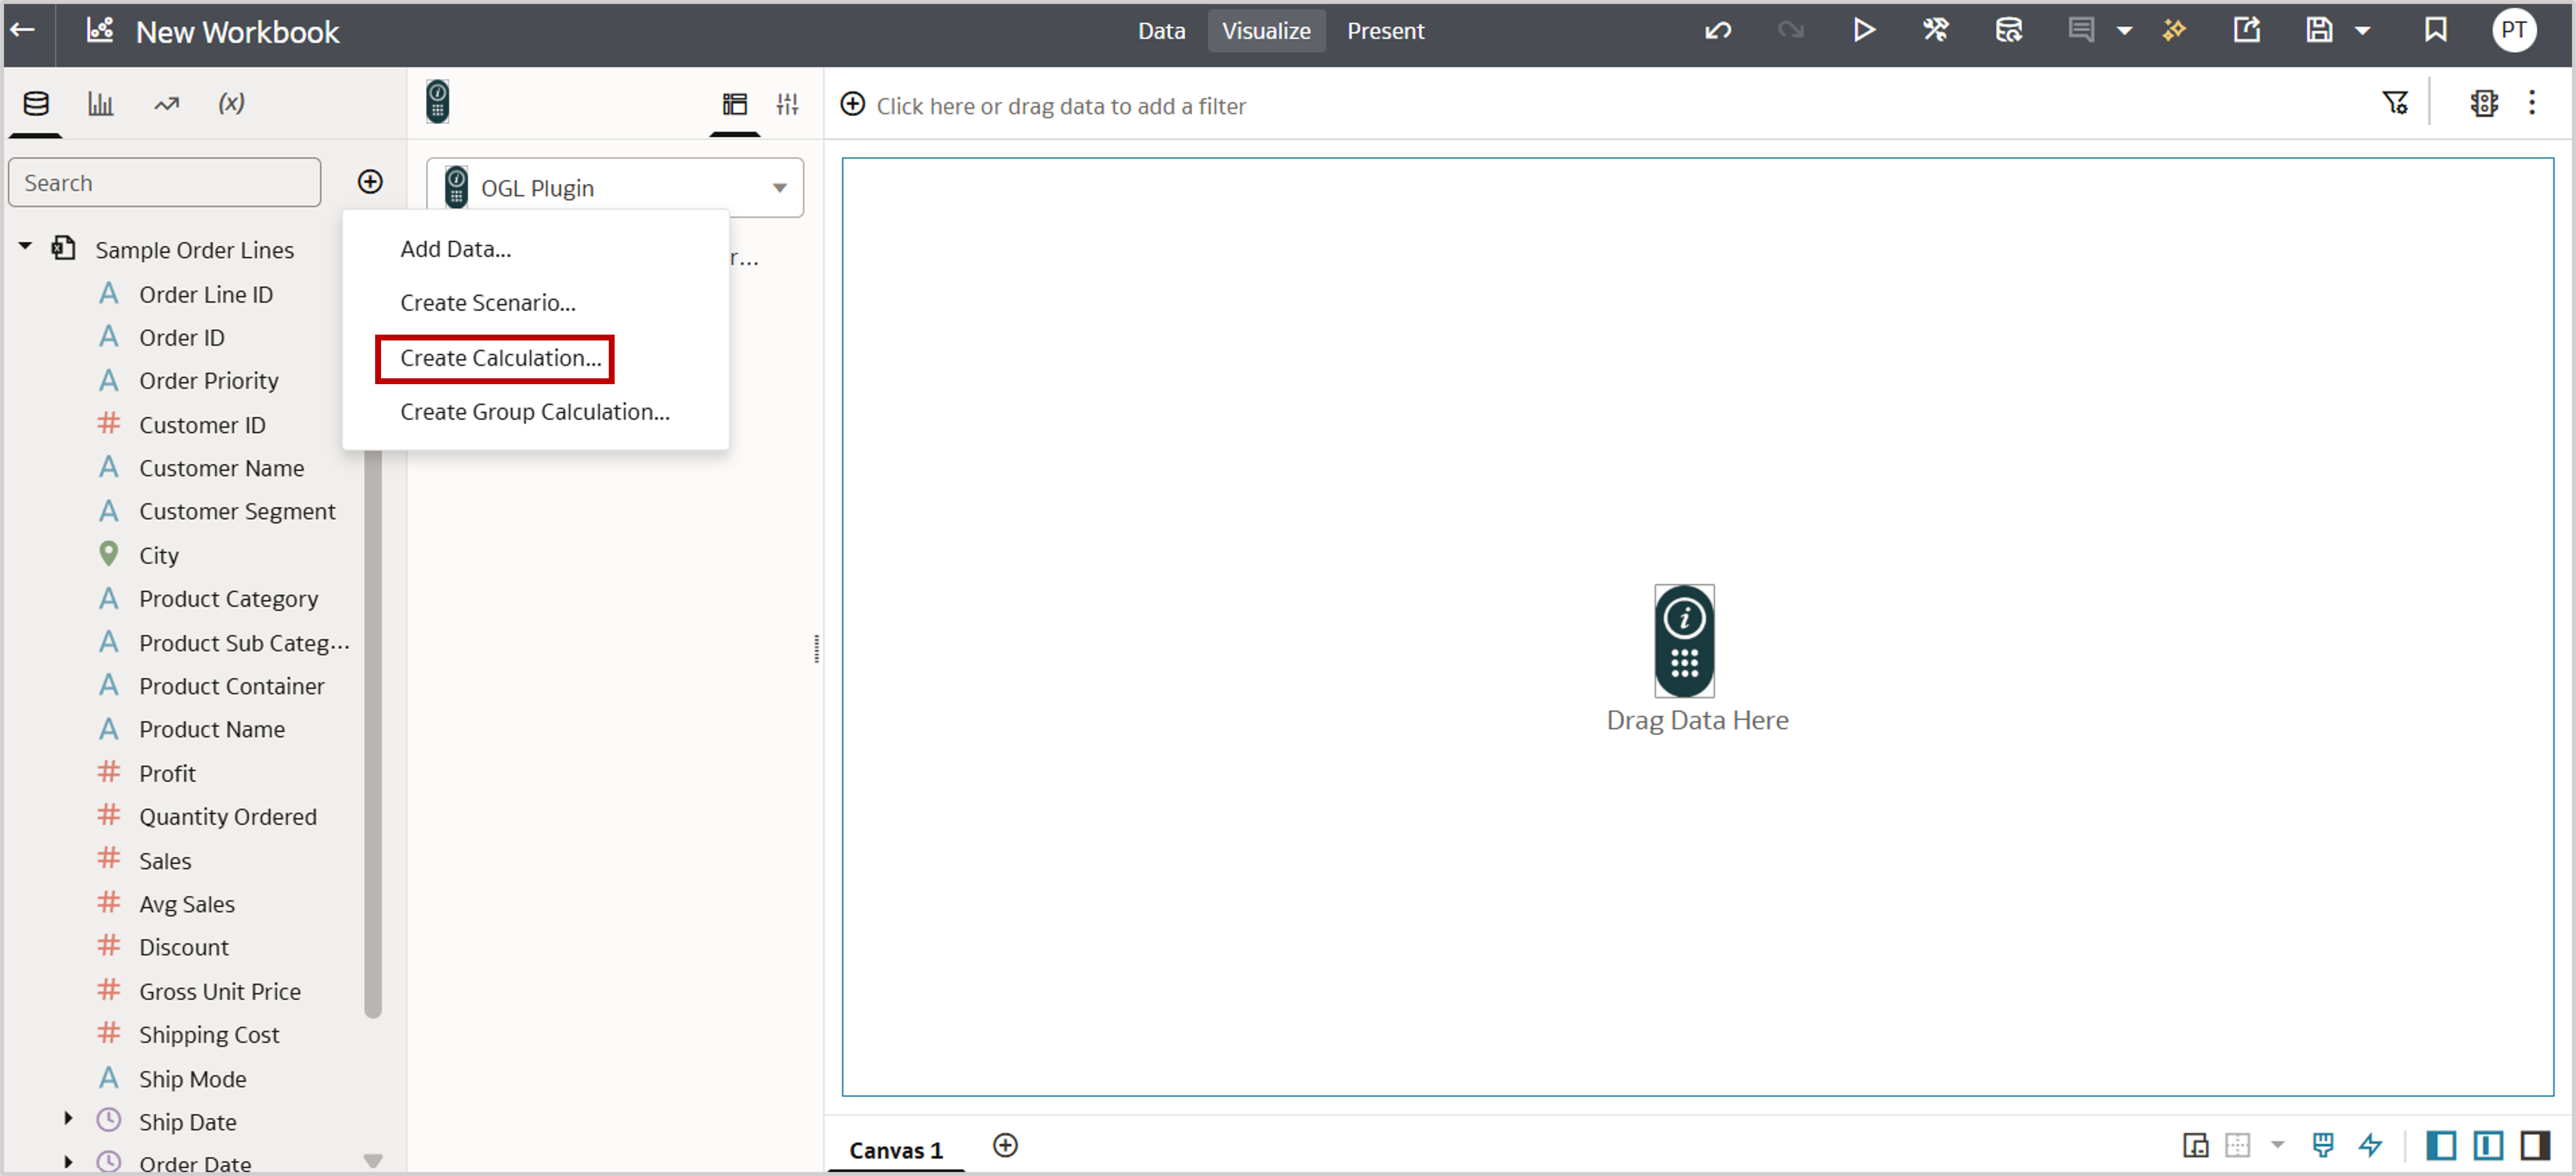
2. Enable usage tracking (optional)
- Under System, and User, create a calculation. In the example below, the calculation is named UserName.
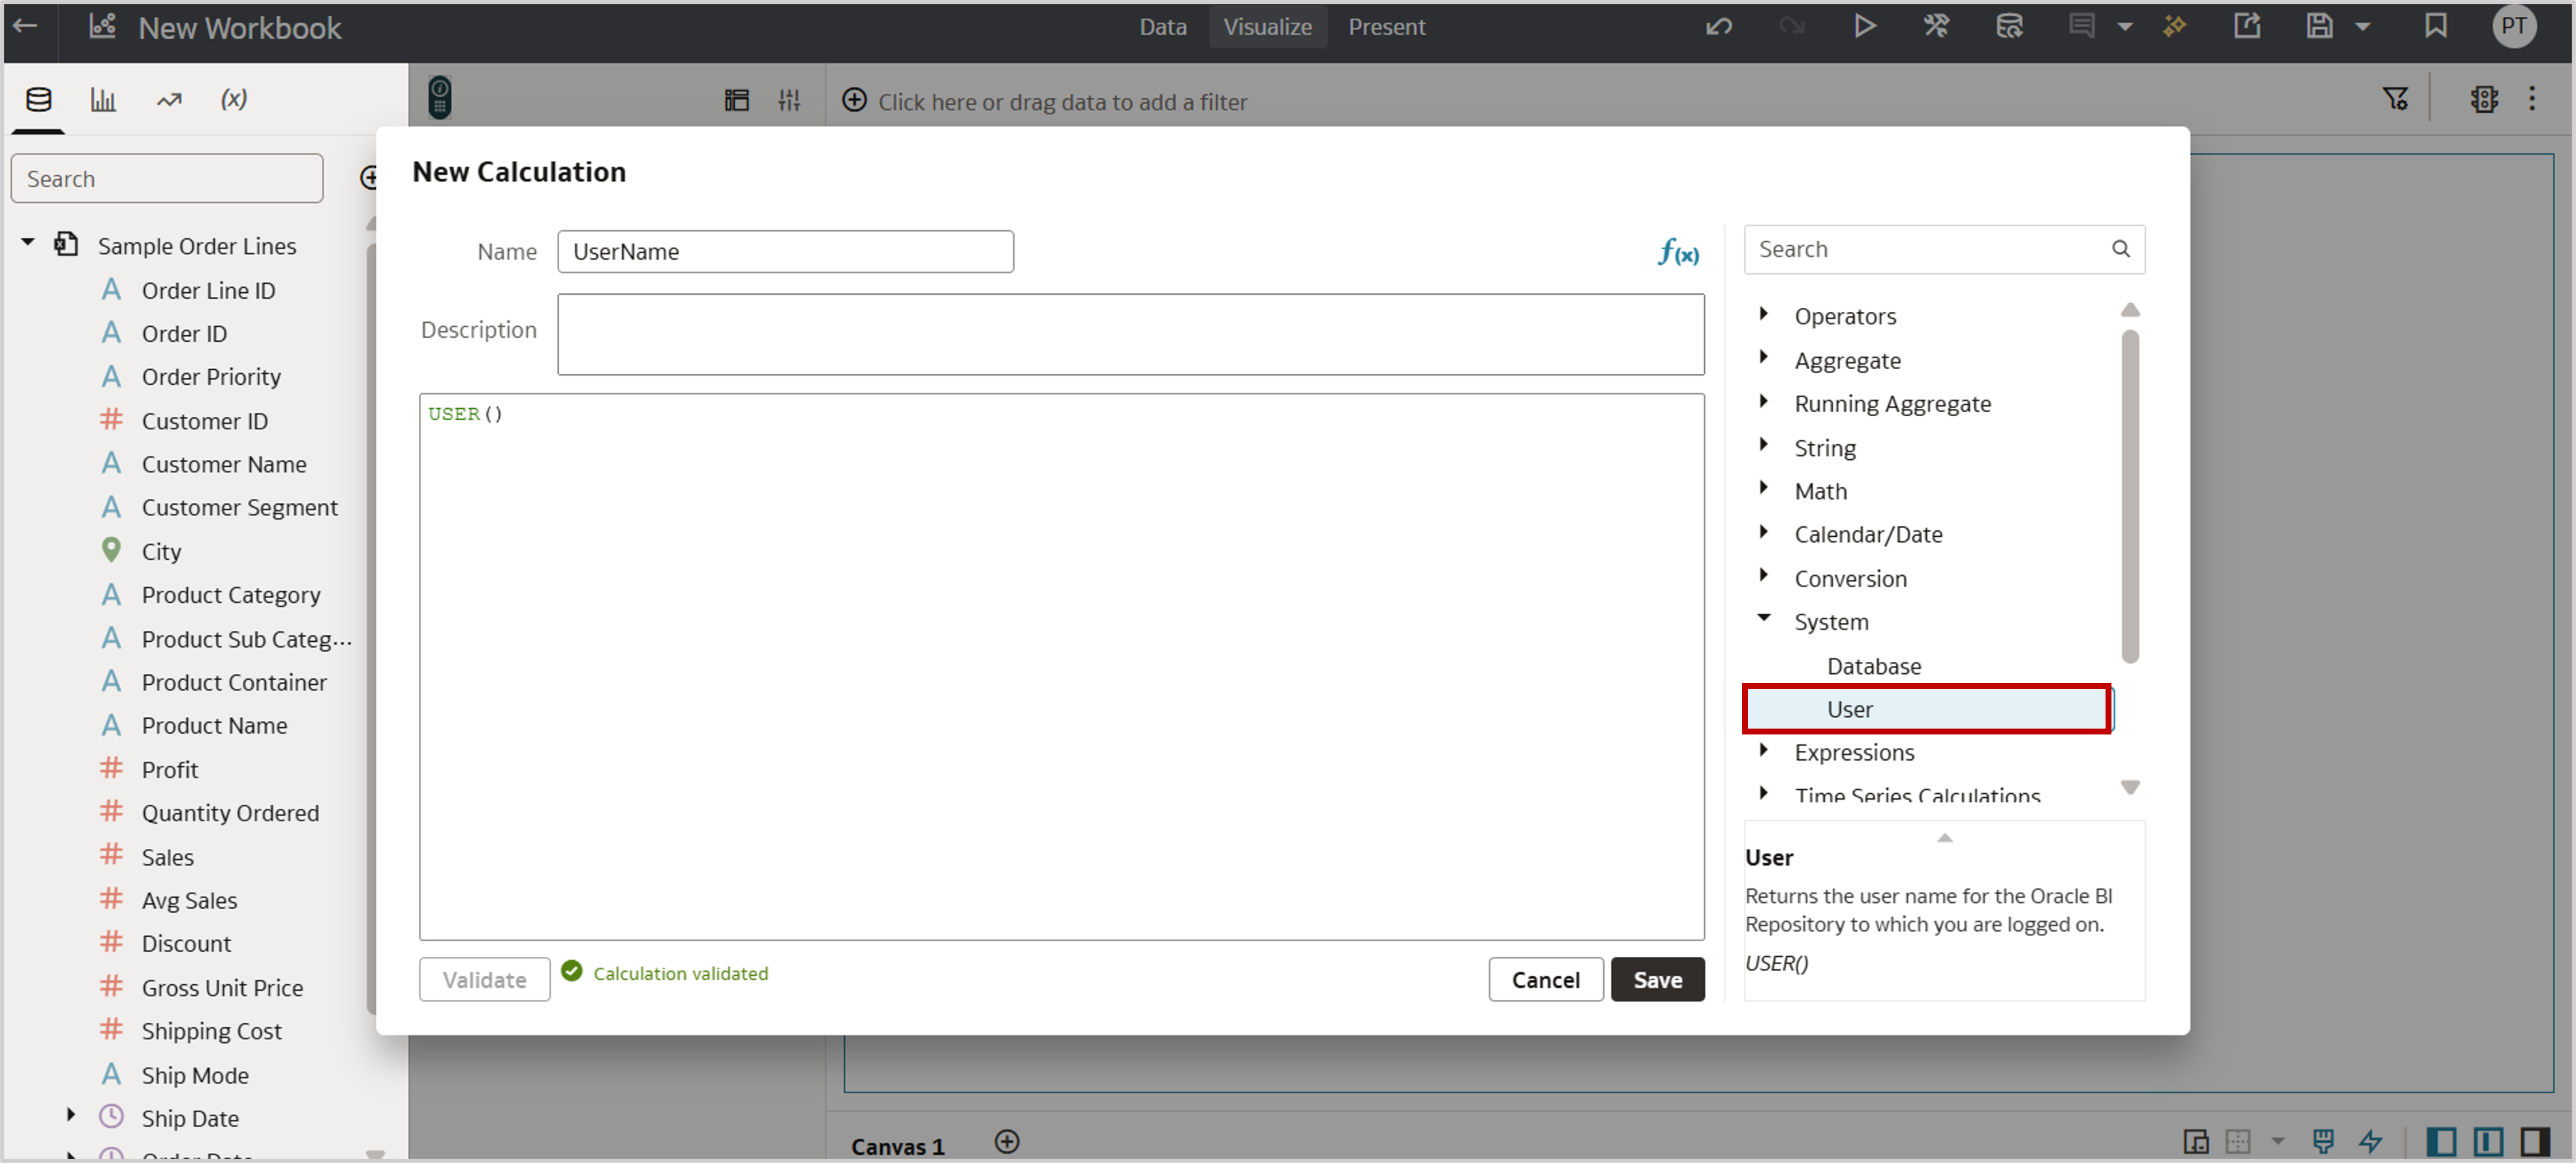
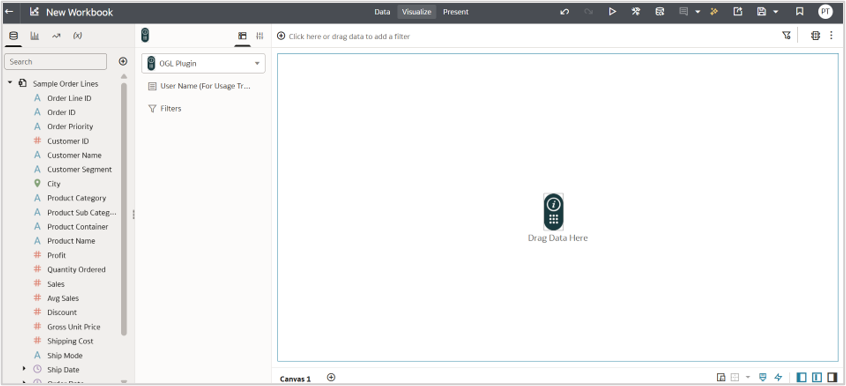
-
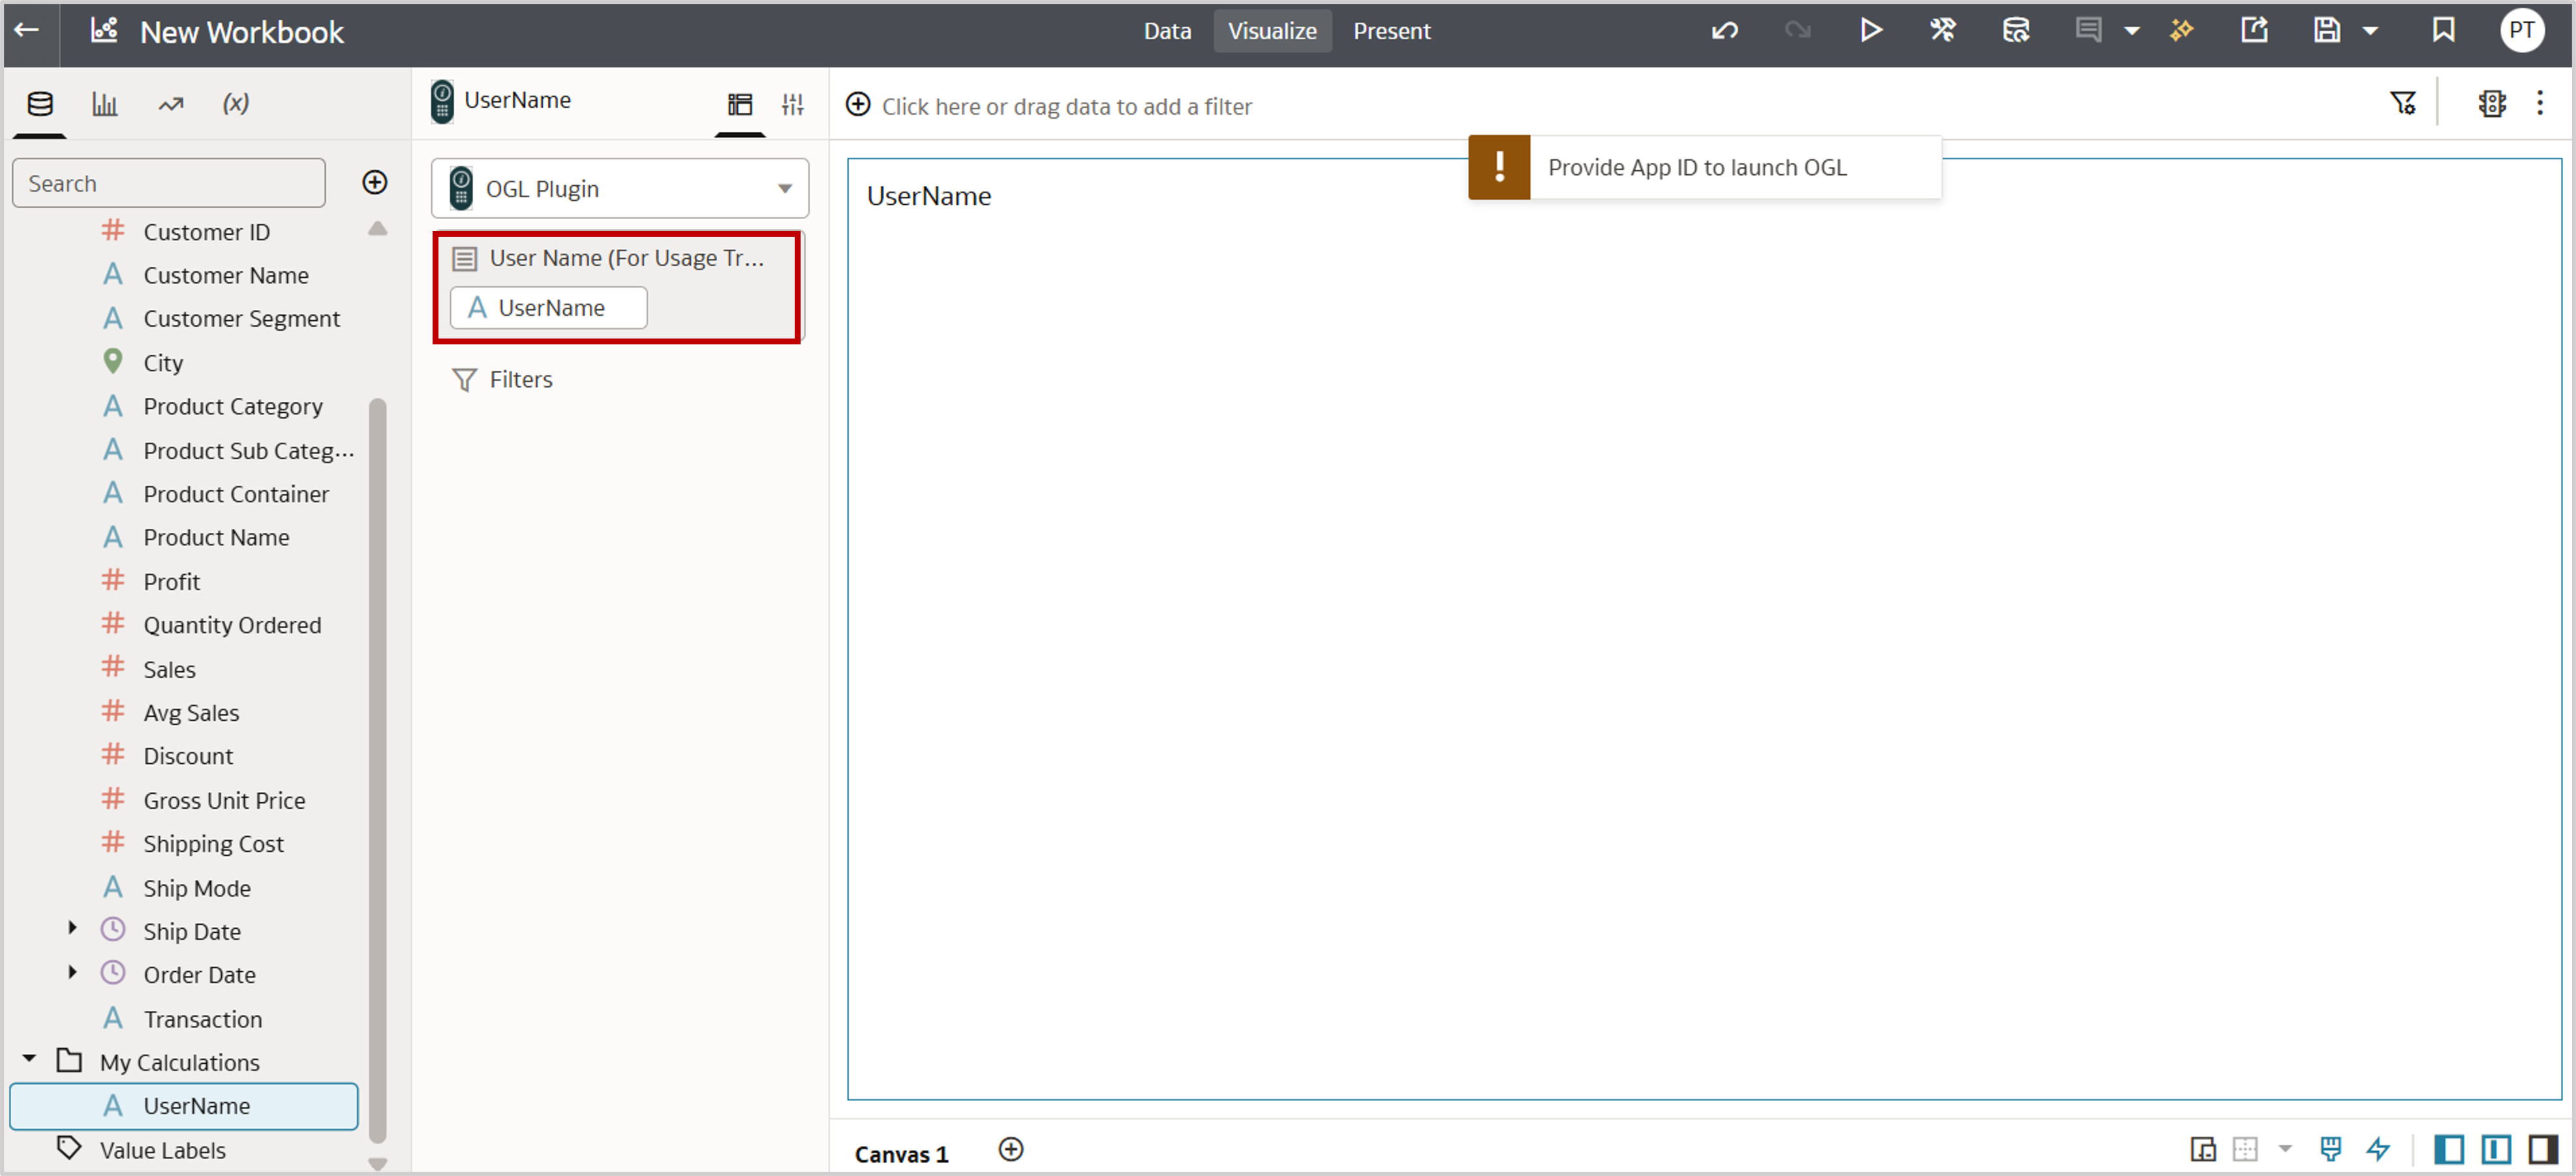
Add the calculation to User Name (For Usage Tracking) in the Grammar panel to enable OAC to pass user details to OGL.
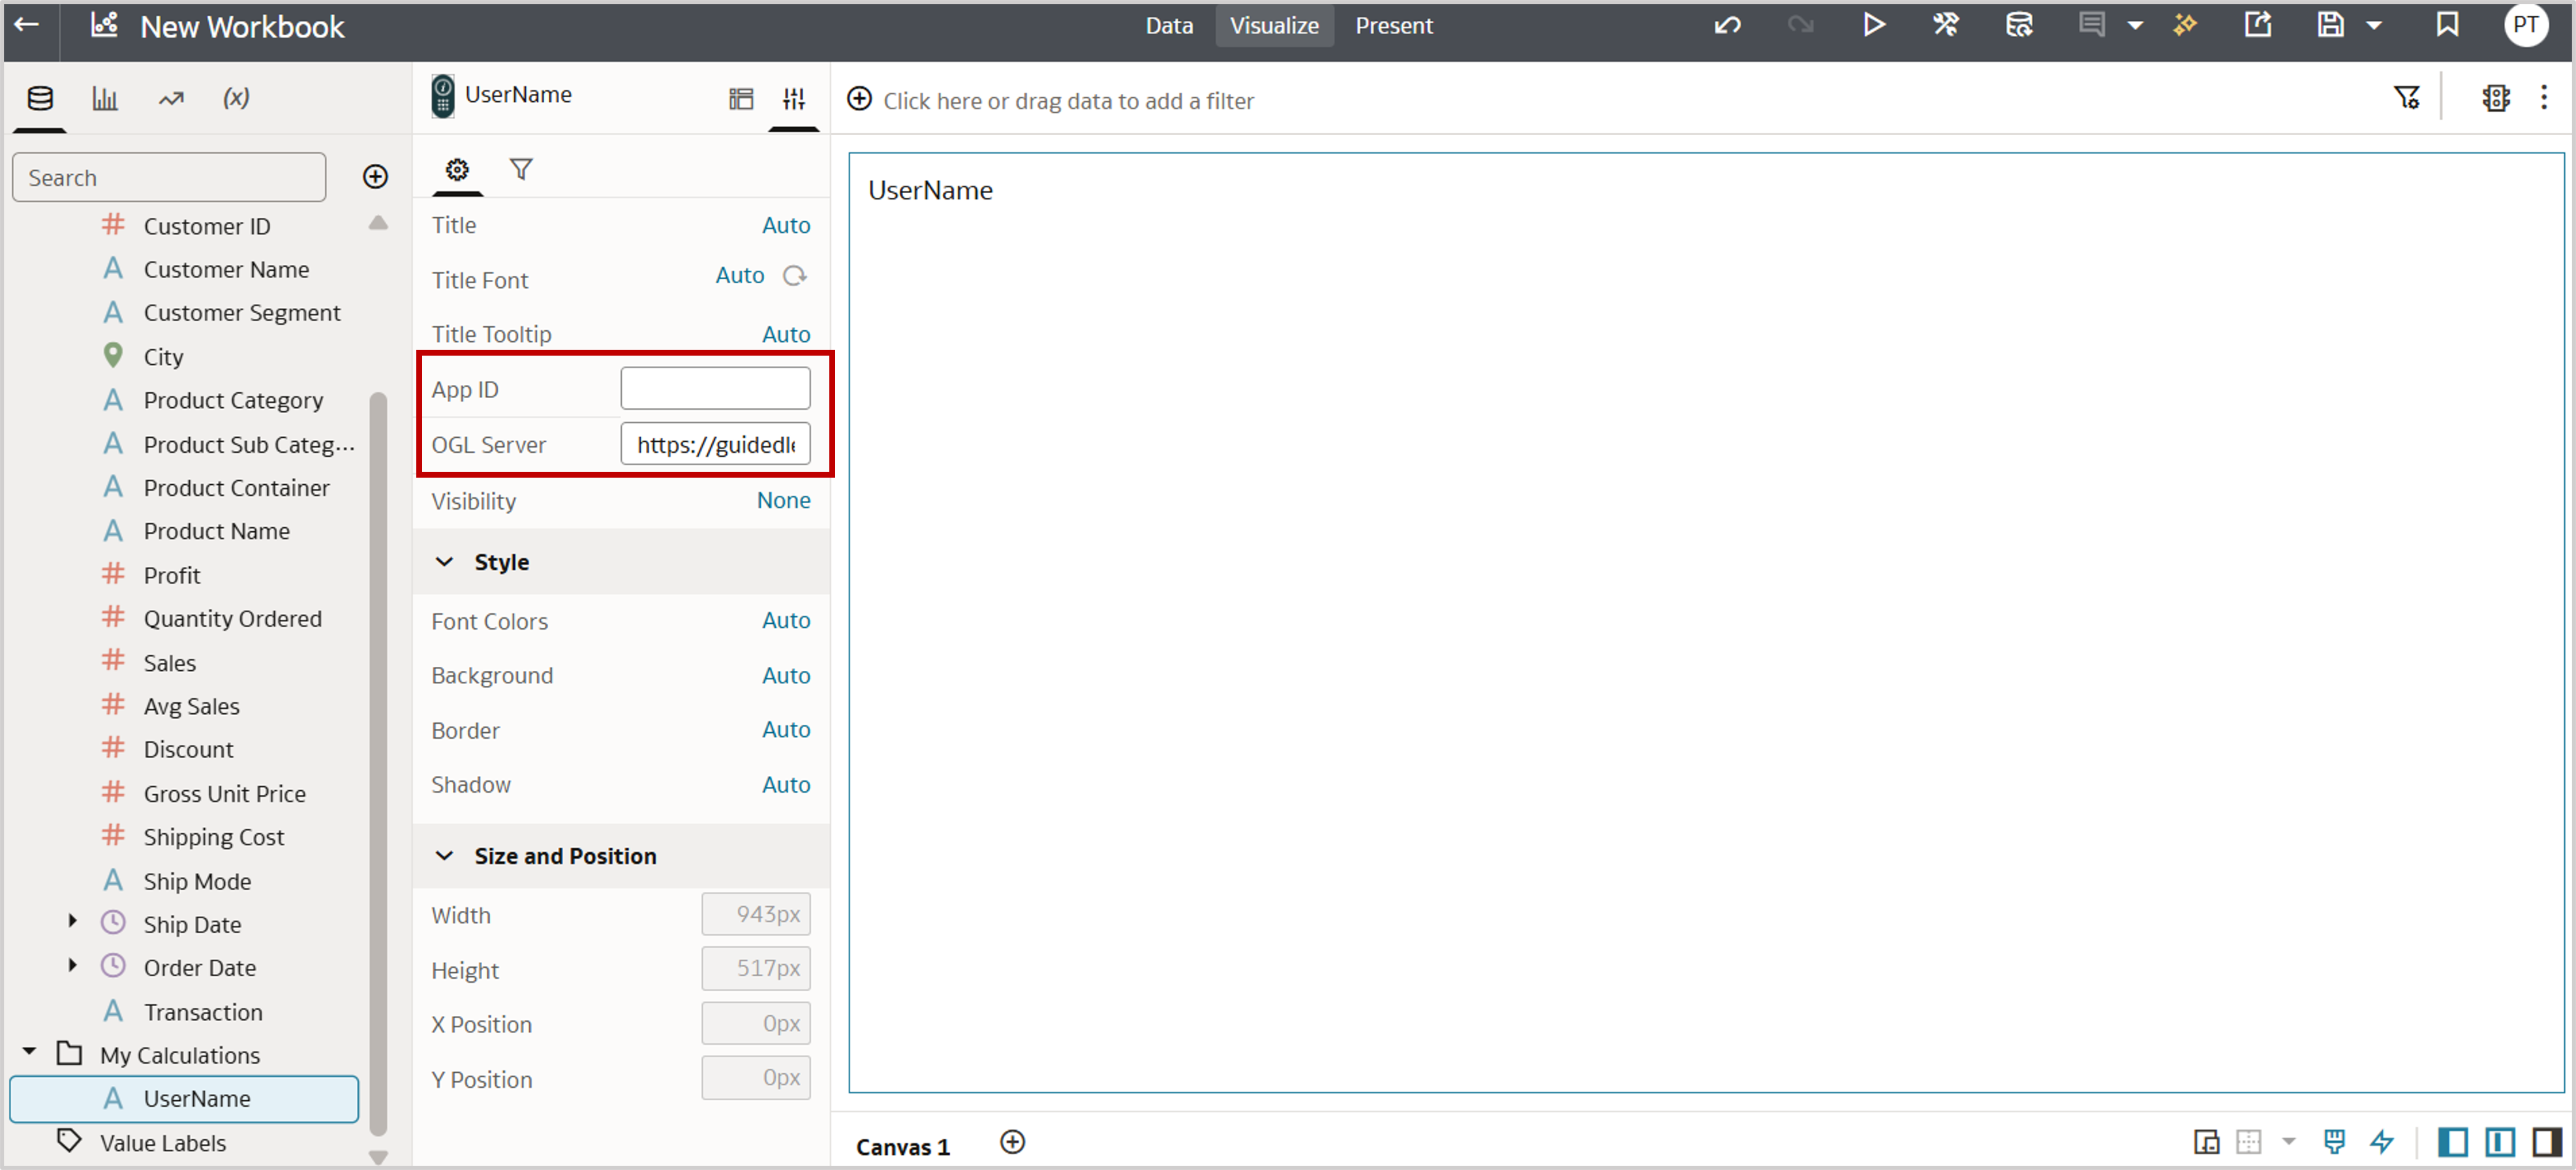
3. Configure OGL properties
- Enter the App ID (from the OGL guide setup) and OGL Server (typically the URL is https://guidedlearning.oracle.com).
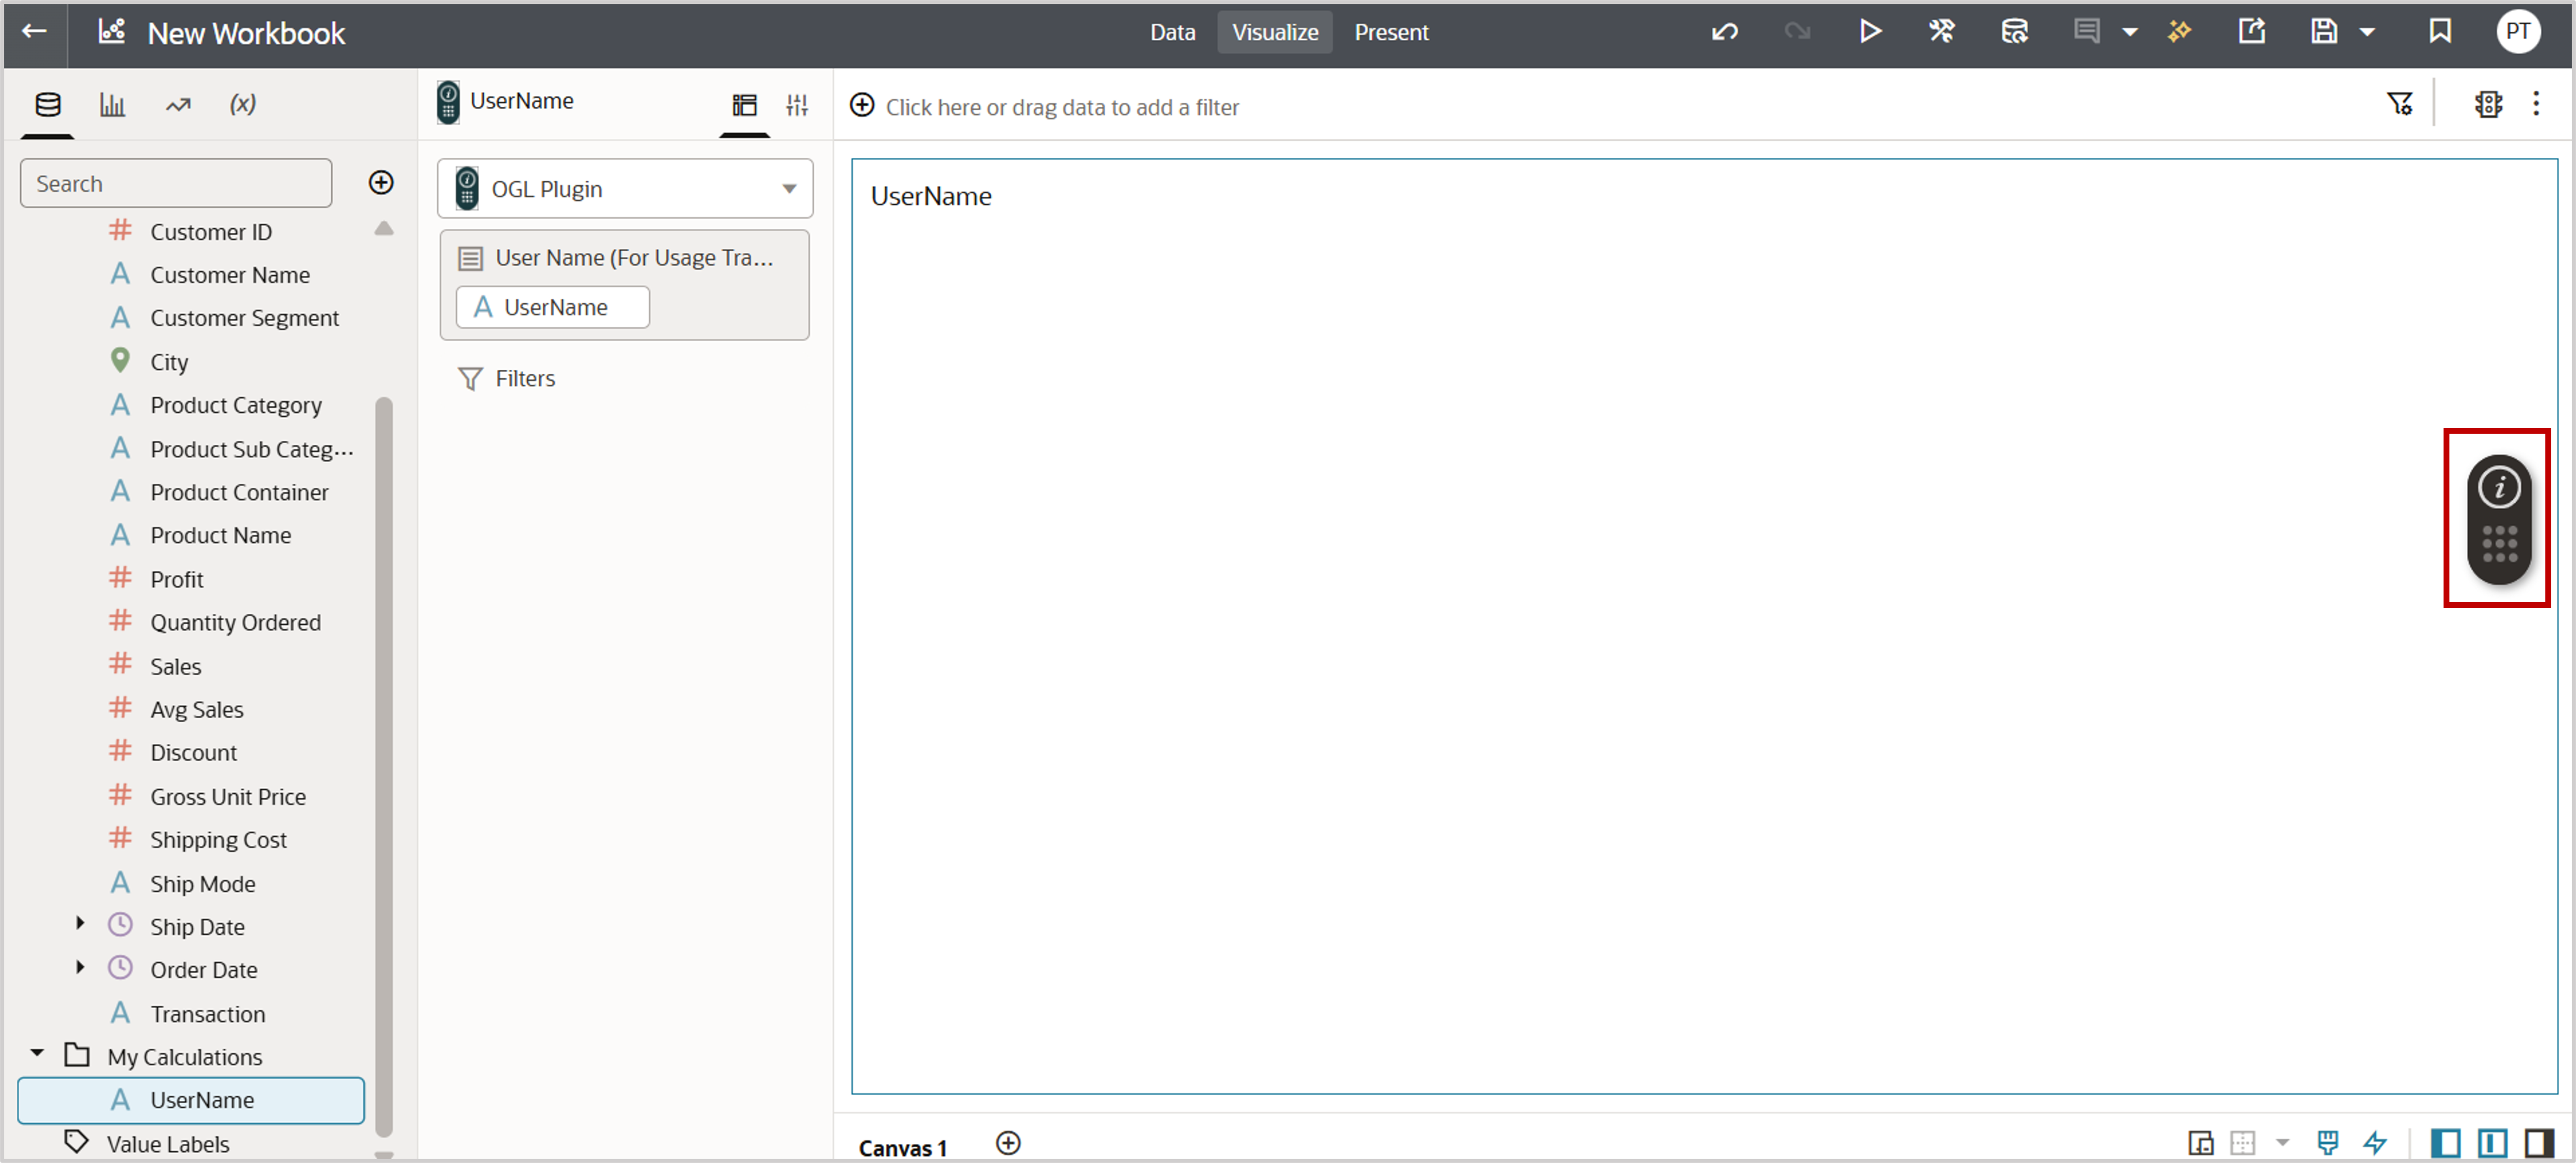
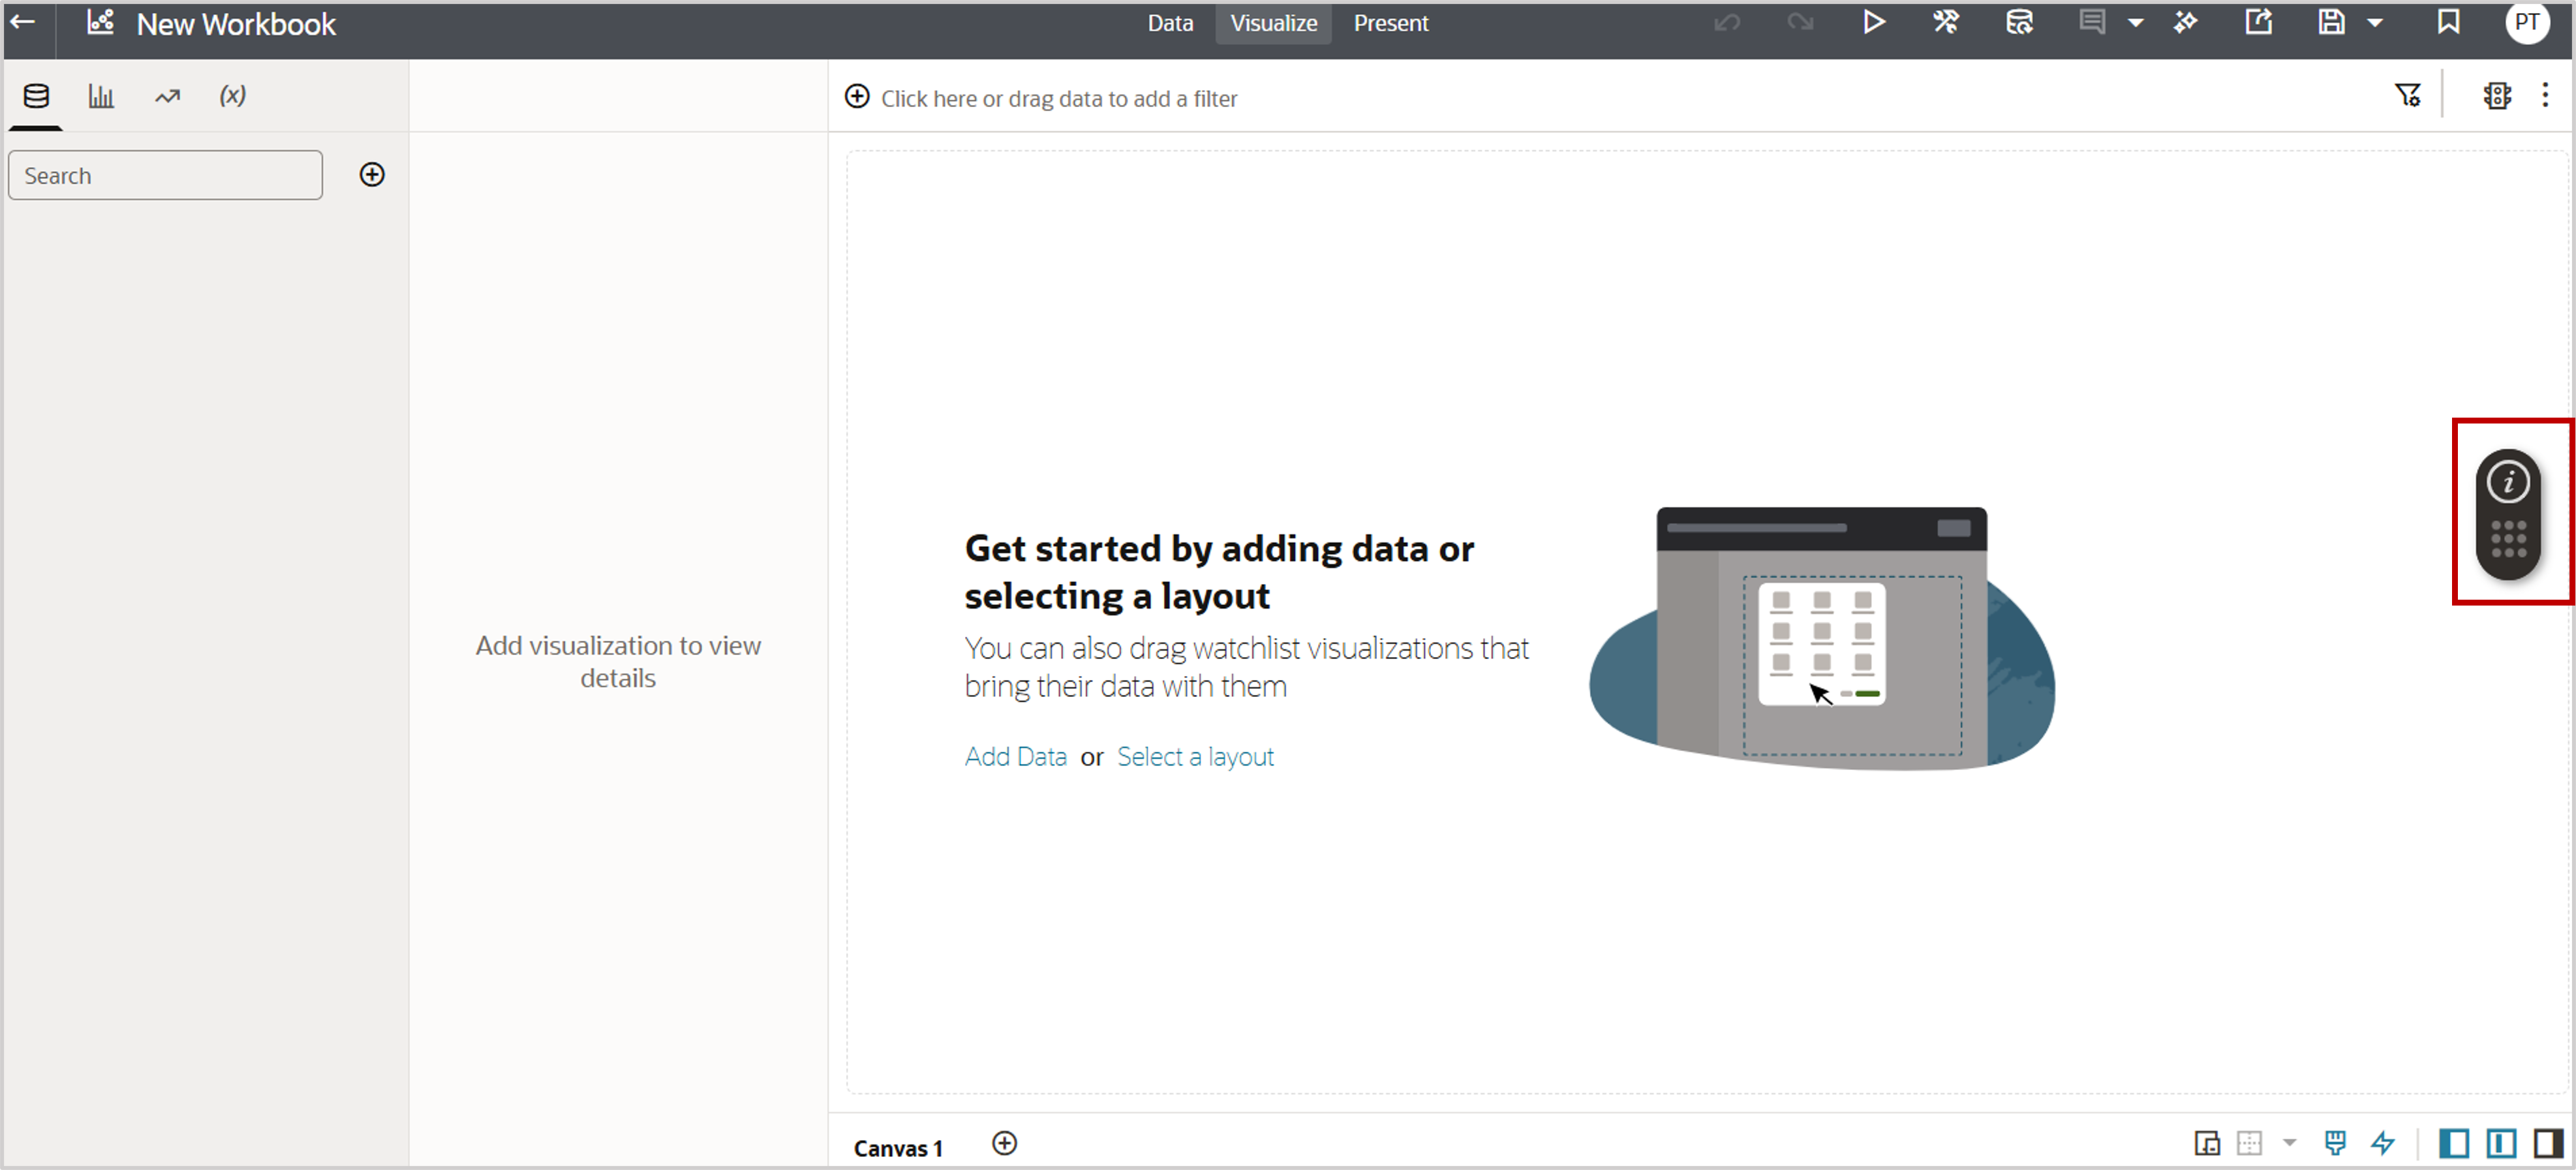
4. Launch the widget
- The extension connects to OGL and retrieves guides linked to the App ID.
- Click the widget to start a guide.
Controlling Widget Availability with the Data Visualization Extension
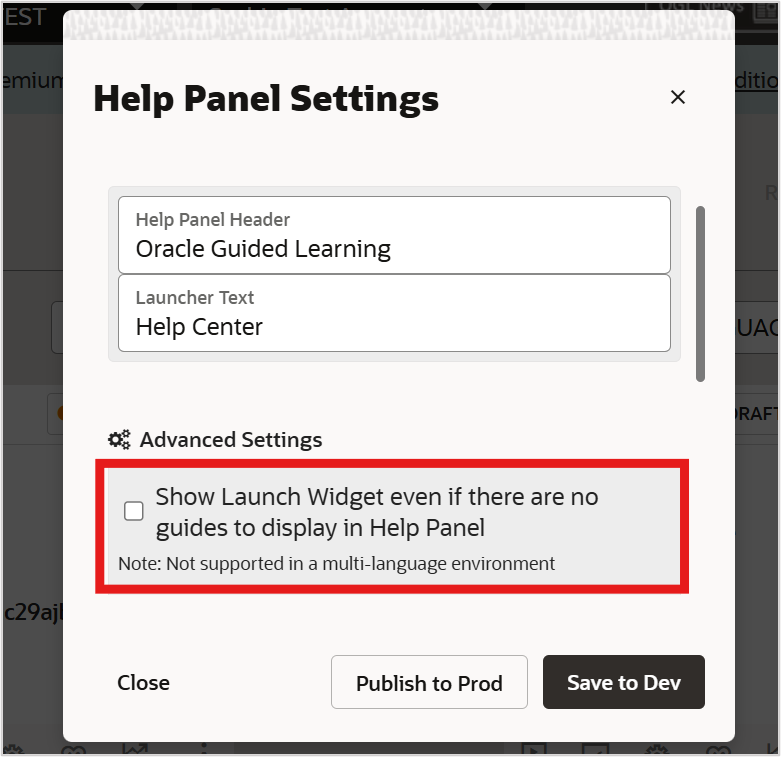
The OGL widget’s visibility can be scoped either to a workbook or made available globally across OAC. This is controlled in OGL Help Panel settings:
- In the OGL authoring environment, navigate to Settings, then Help Panel, and then Advanced Settings.

- Locate the Show Launch Widget even if there are no guides to display in Help Panel option to make a selection:
- Option selected: The widget is available globally, even outside a workbook.
- Option not selected: The widget is restricted only to specific workbook(s).
Using the OGL Workbook Extension
The workbook extension is simpler and provides persistent activation:
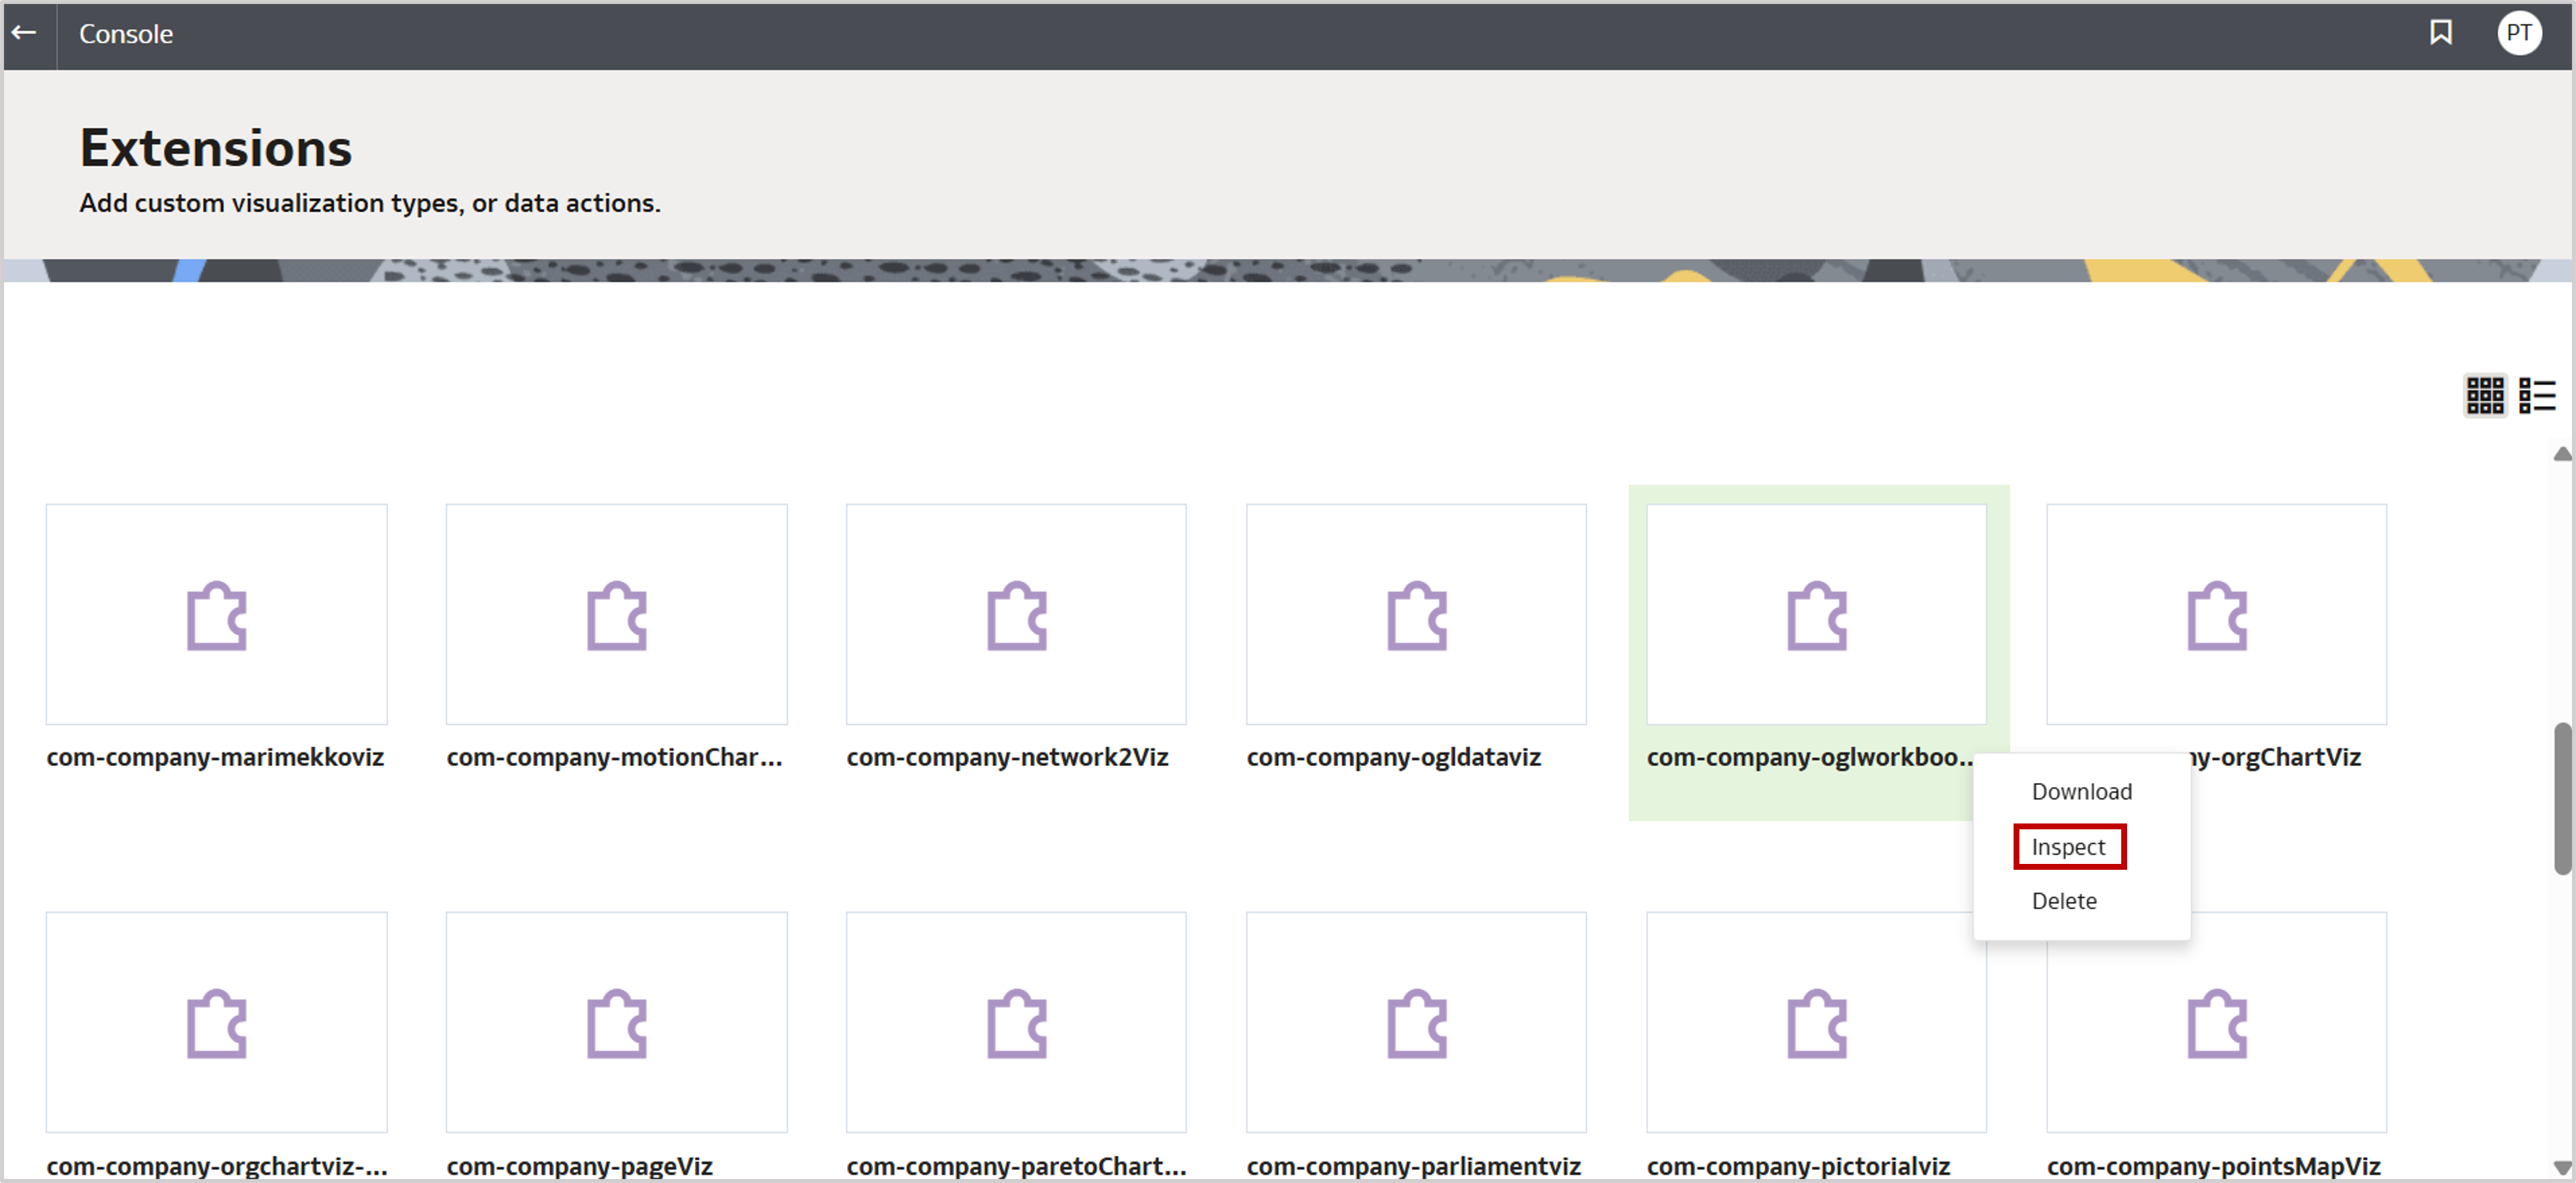
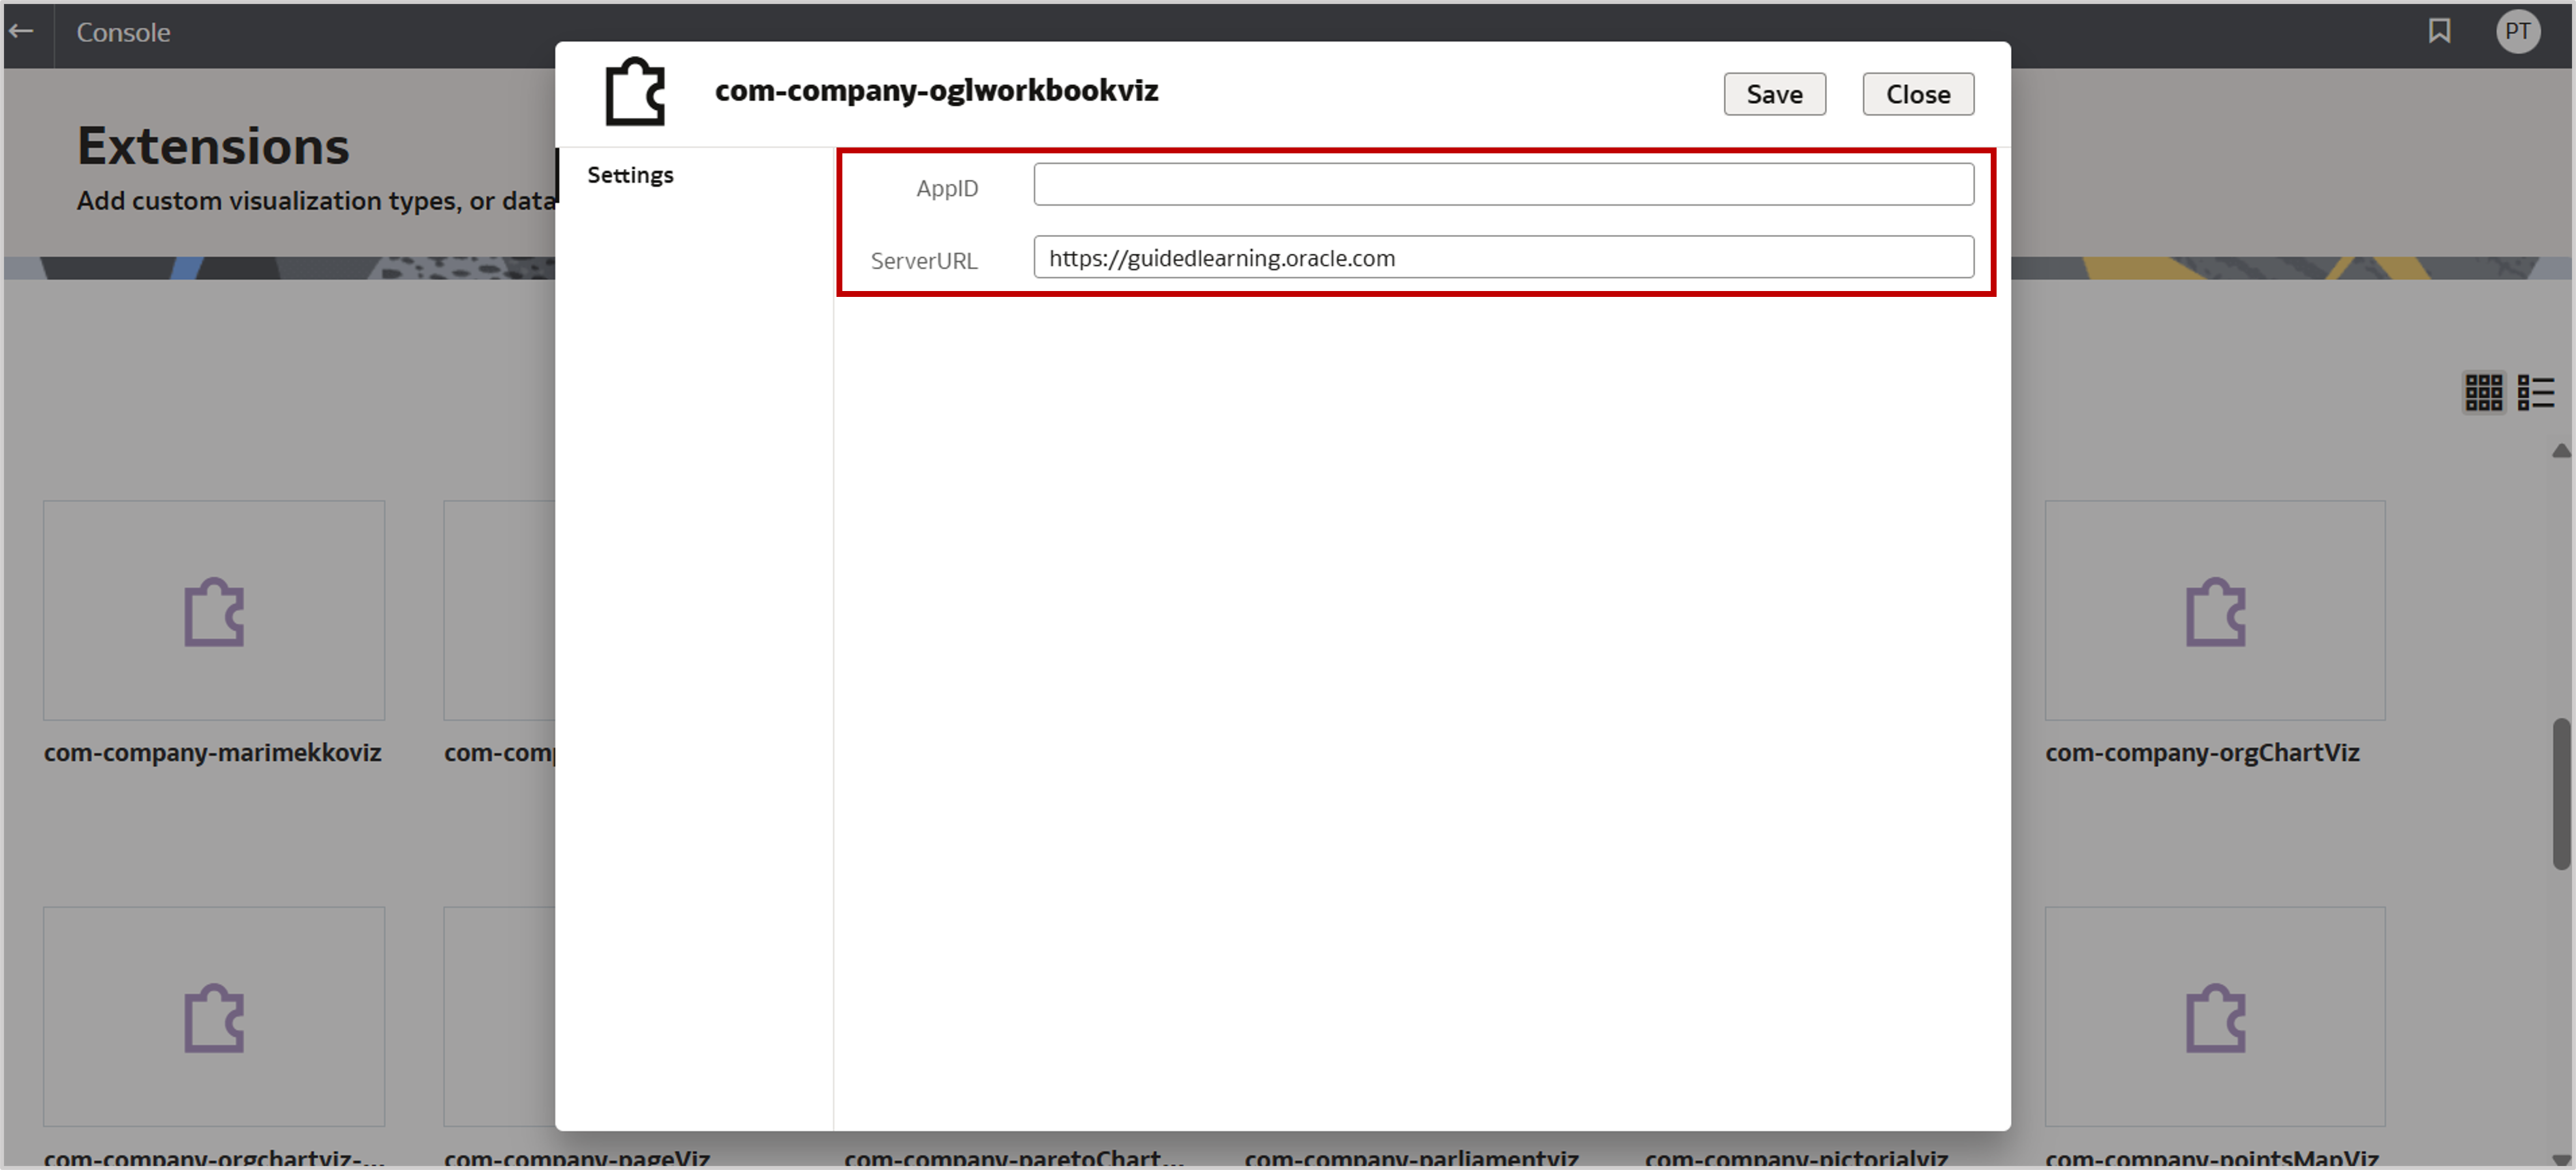
1. Register OGL App details
- In Console, click Extensions.
- Right-click a workbook extension, and select Inspect.
- Enter the OGL App ID and Server URL, and then save.
2. Create a workbook
- No dataset is required.
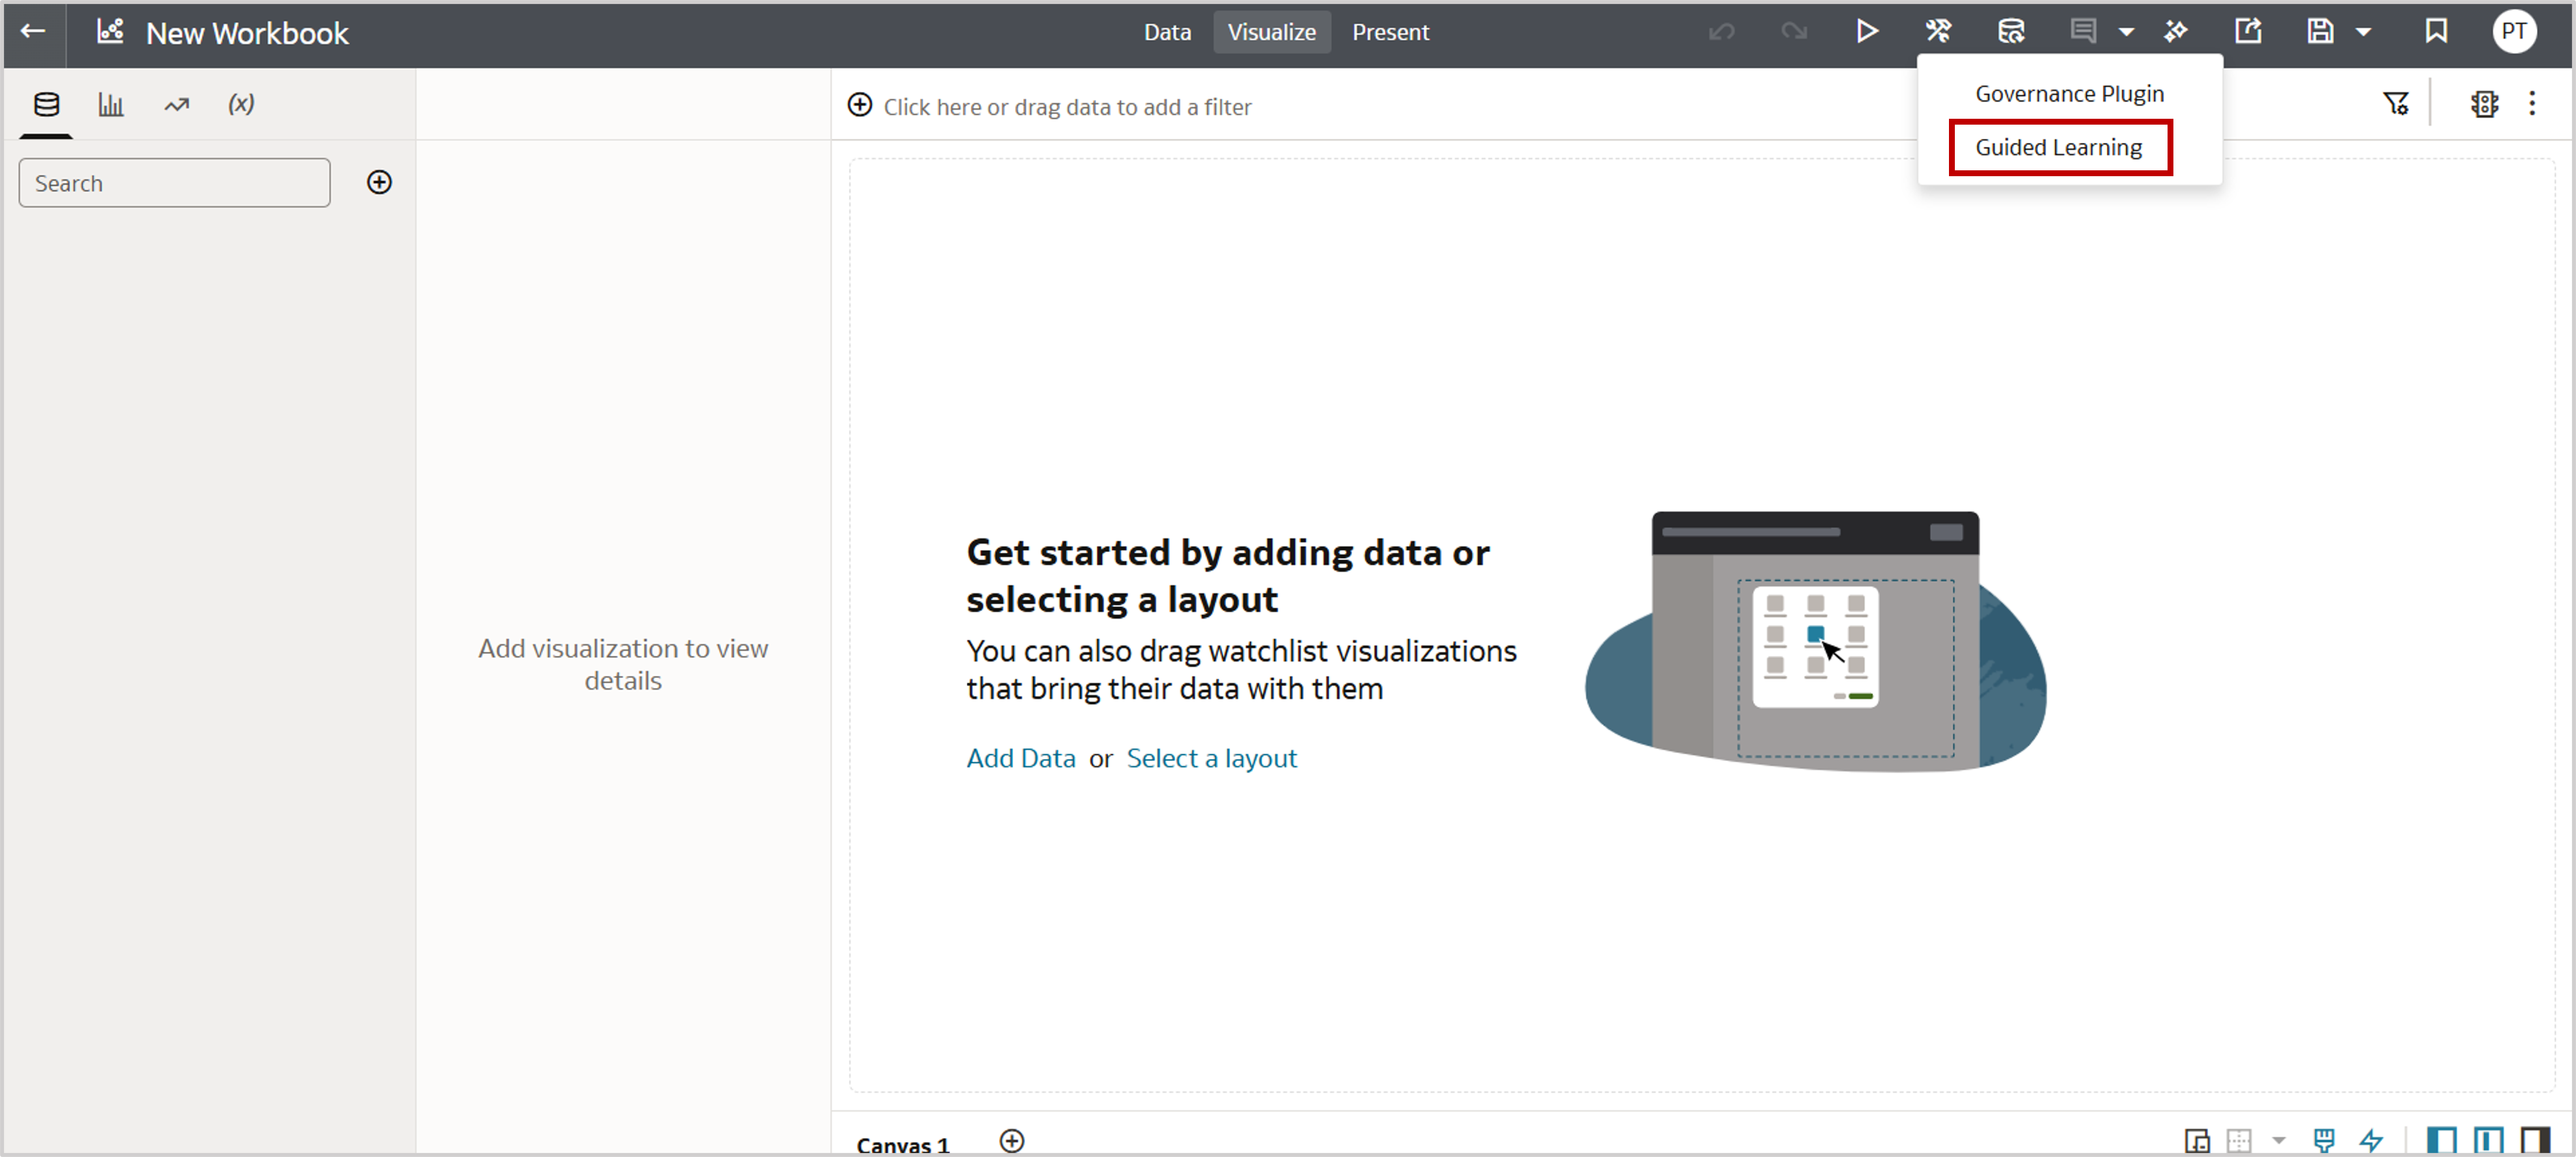
- From the custom workbook extension menu, select Guided Learning.
3. Launch the widget
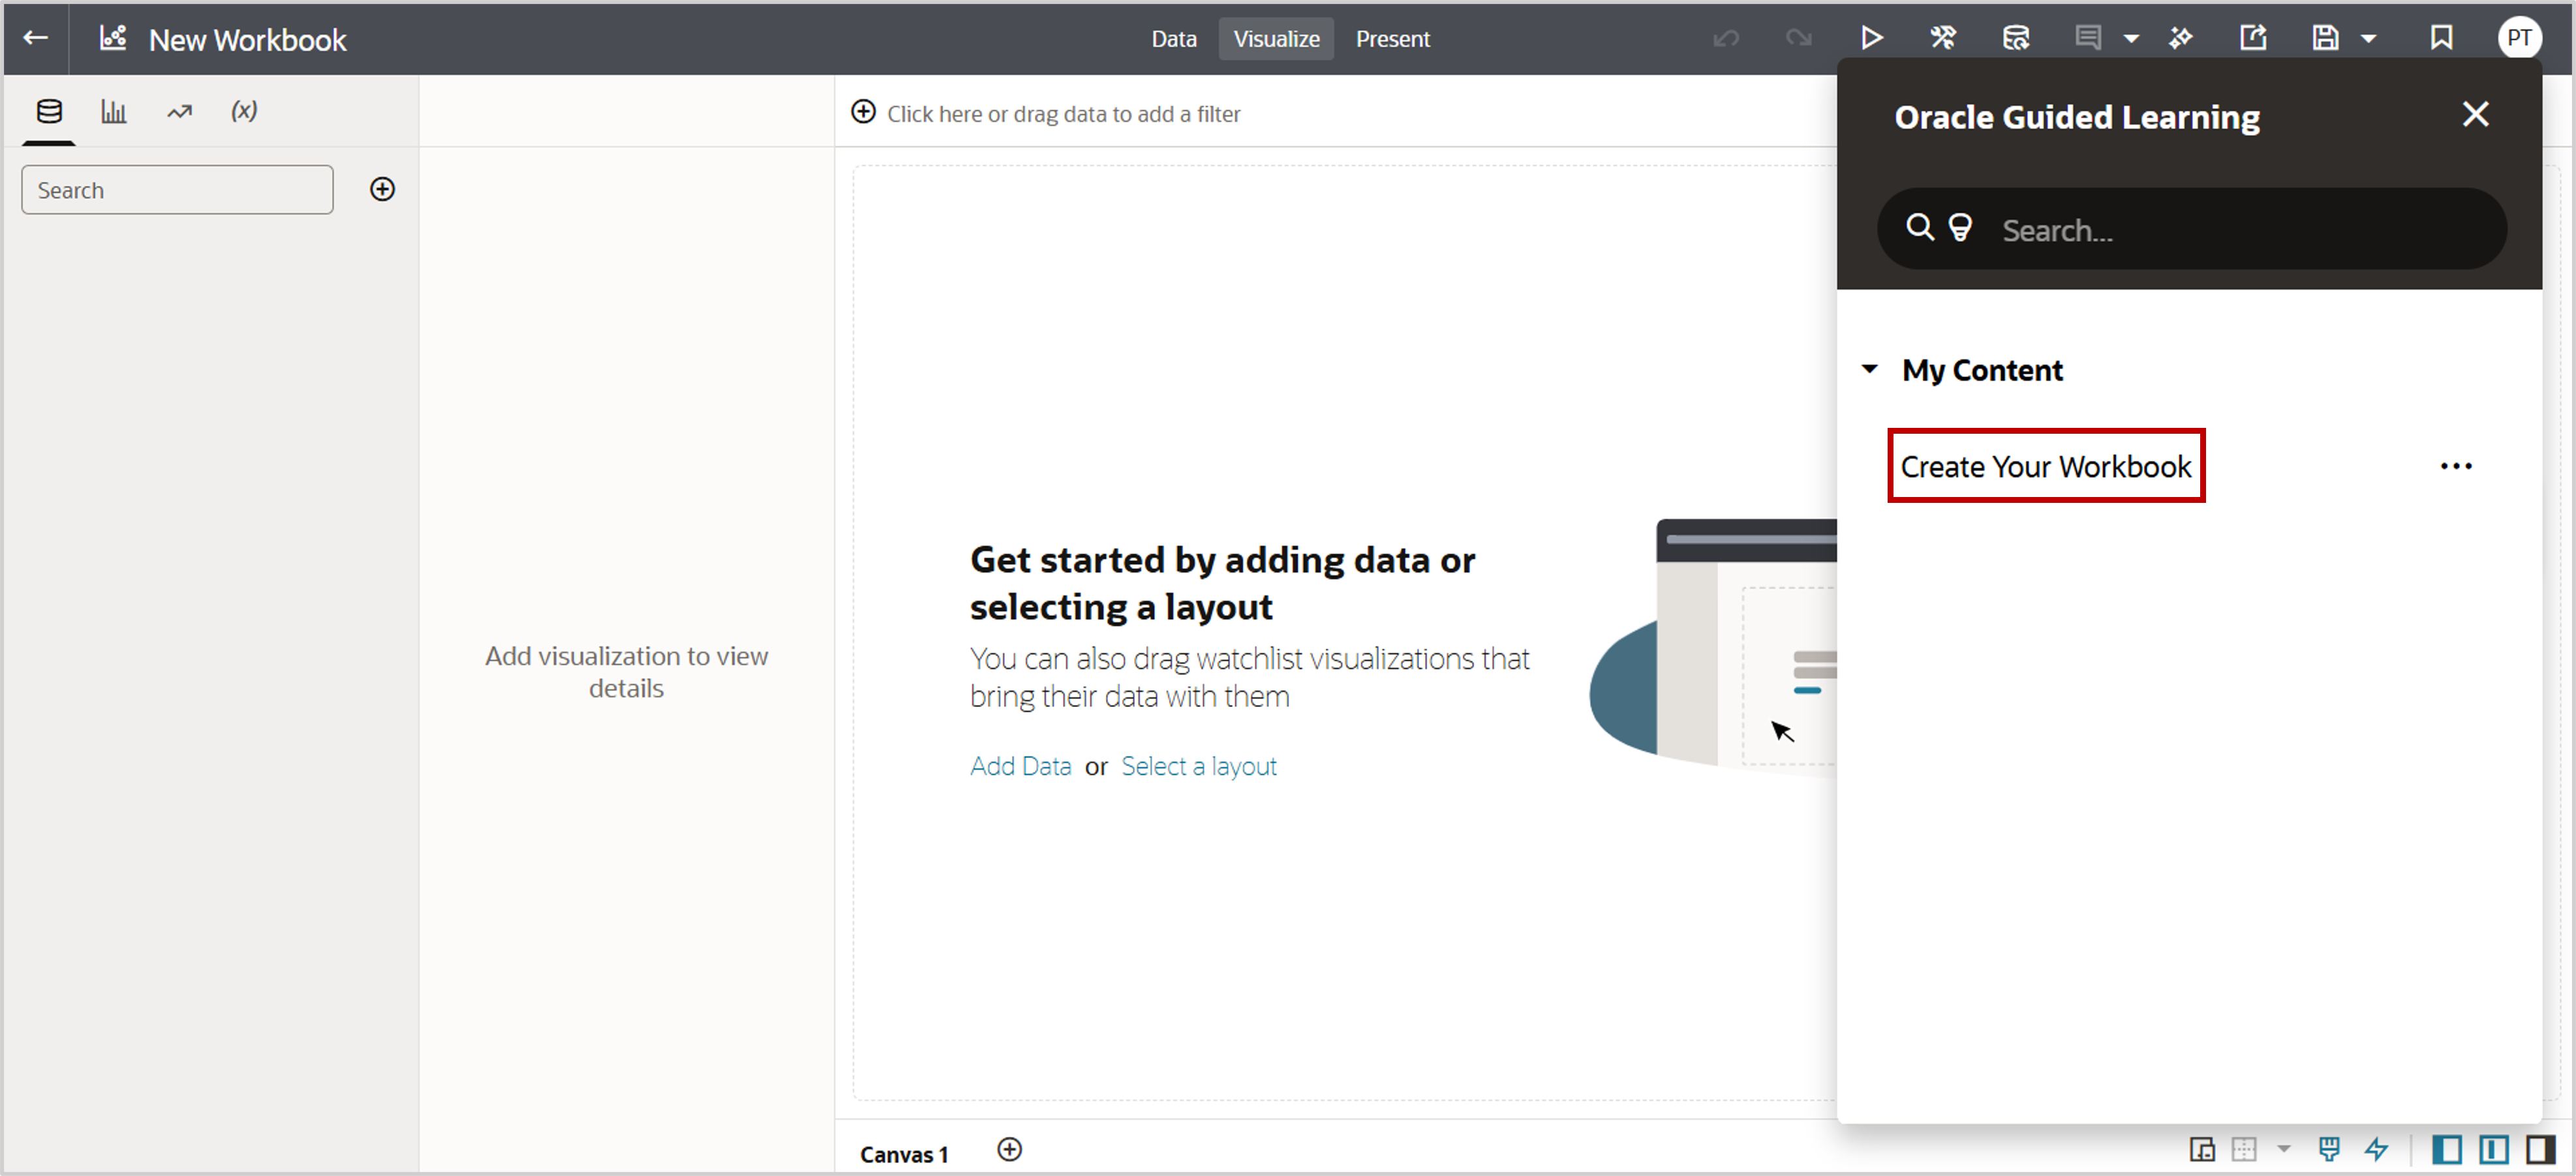
- The widget connects to OGL and retrieves guides linked to your App ID.
- Click any guide to launch it.
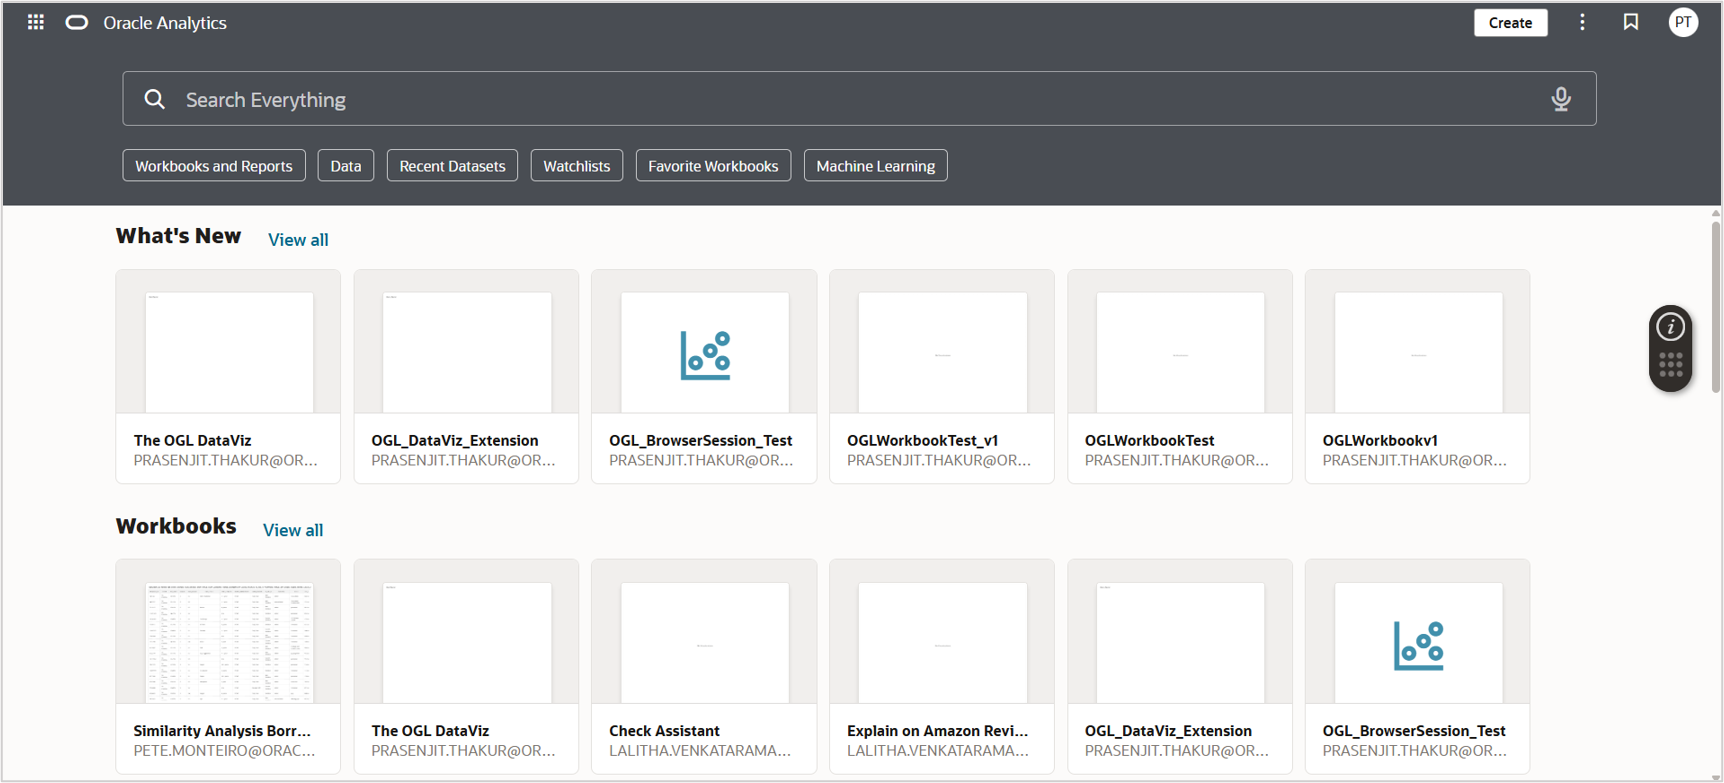
Note: Unlike the data visualization extension, the workbook extension doesn’t offer workbook-only control. The widget remains active globally across OAC during your session.
Targeting the Widget for a Specific Workbook
Sometimes you may want the OGL widget to appear only in a specific workbook.
- Save the workbook and note the URL.
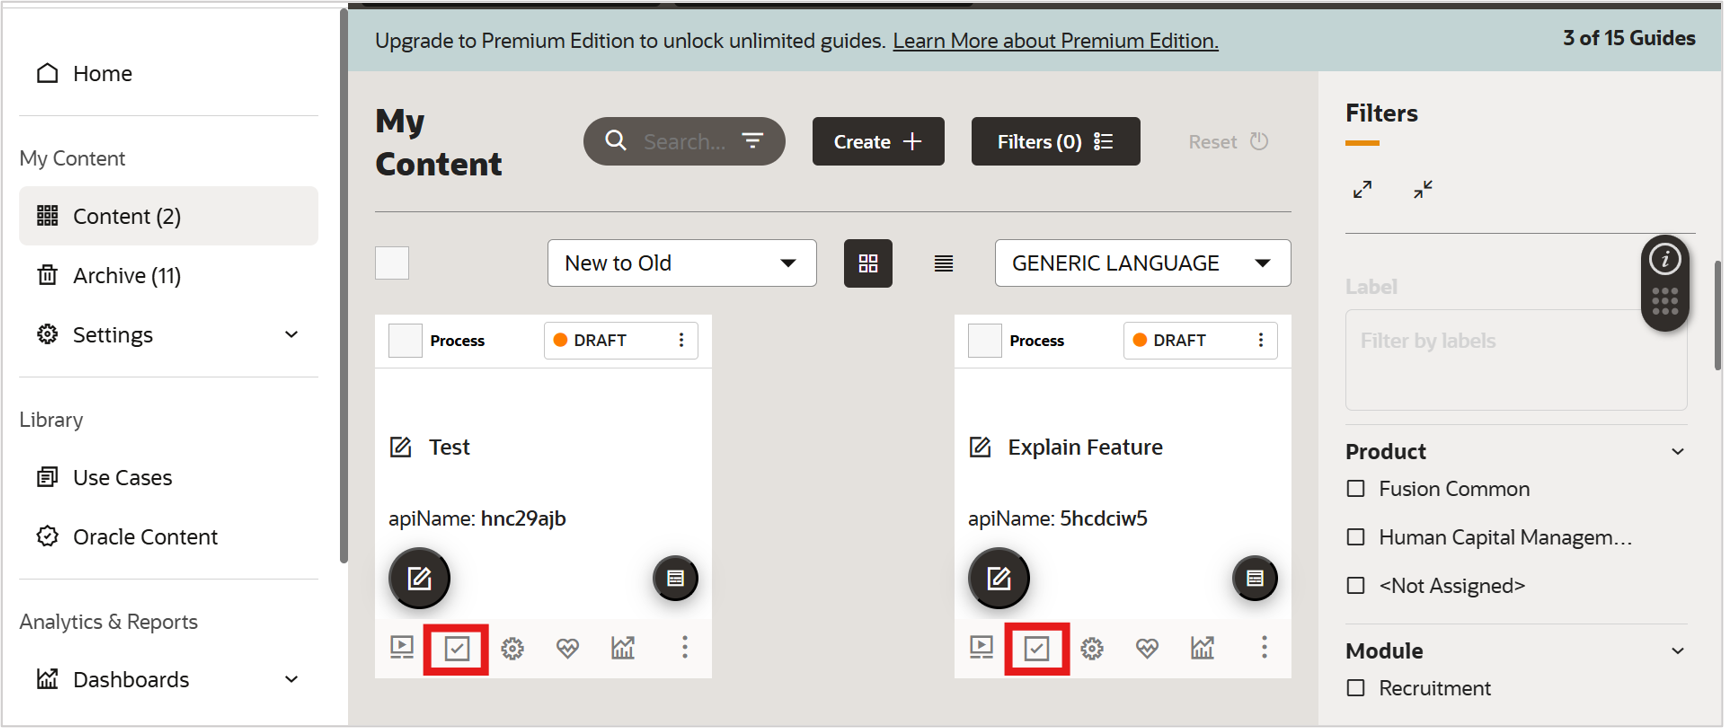
- In the OGL authoring environment, navigate to Home, and then Content.
- Refer to your guide by clicking Activation and enter the saved workbook URL in Enter URL Value.
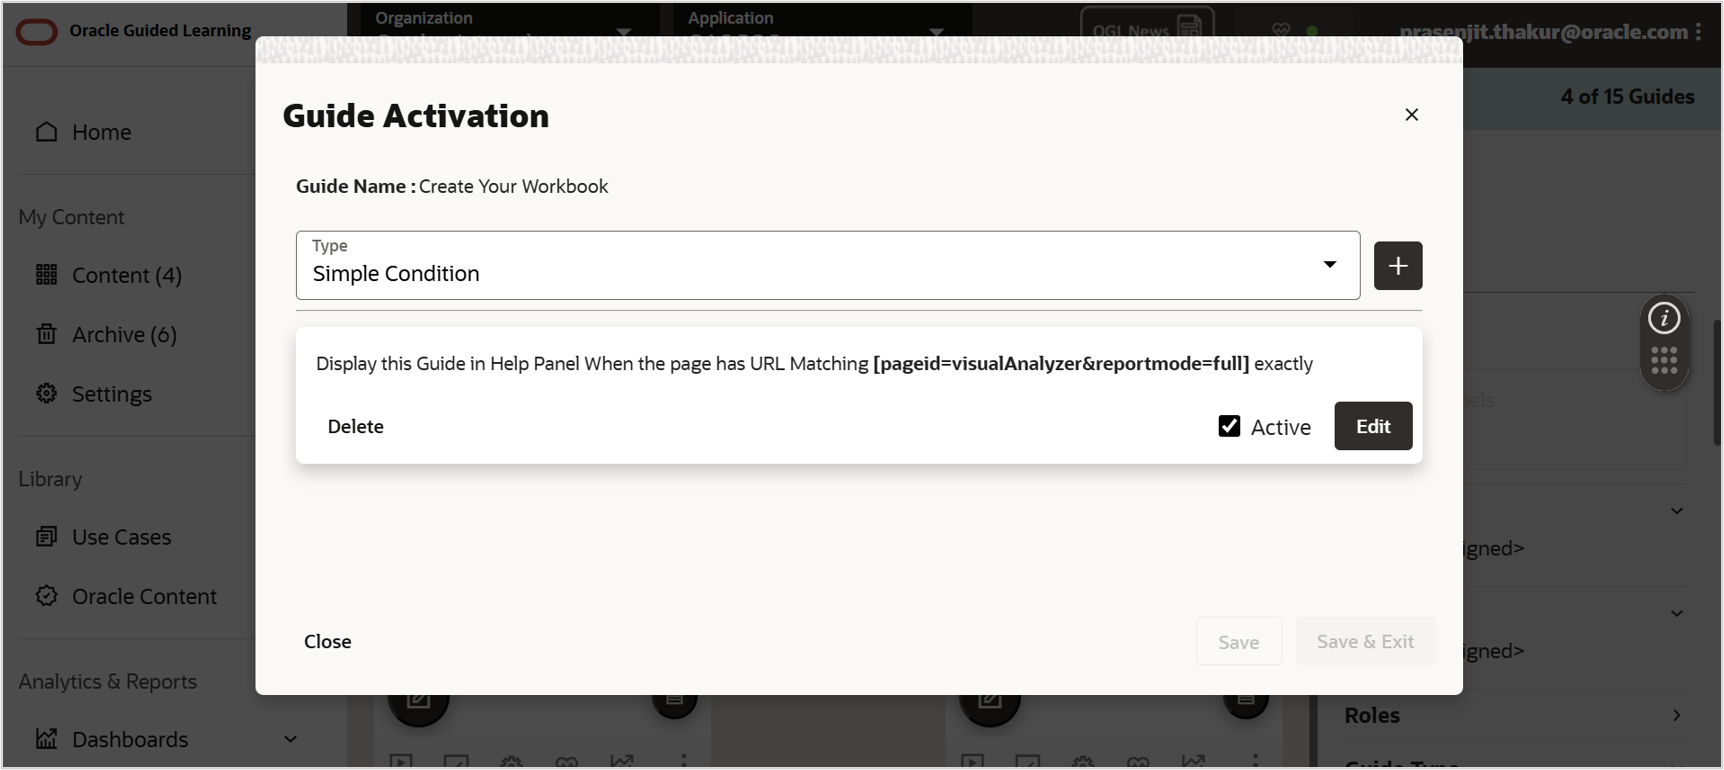
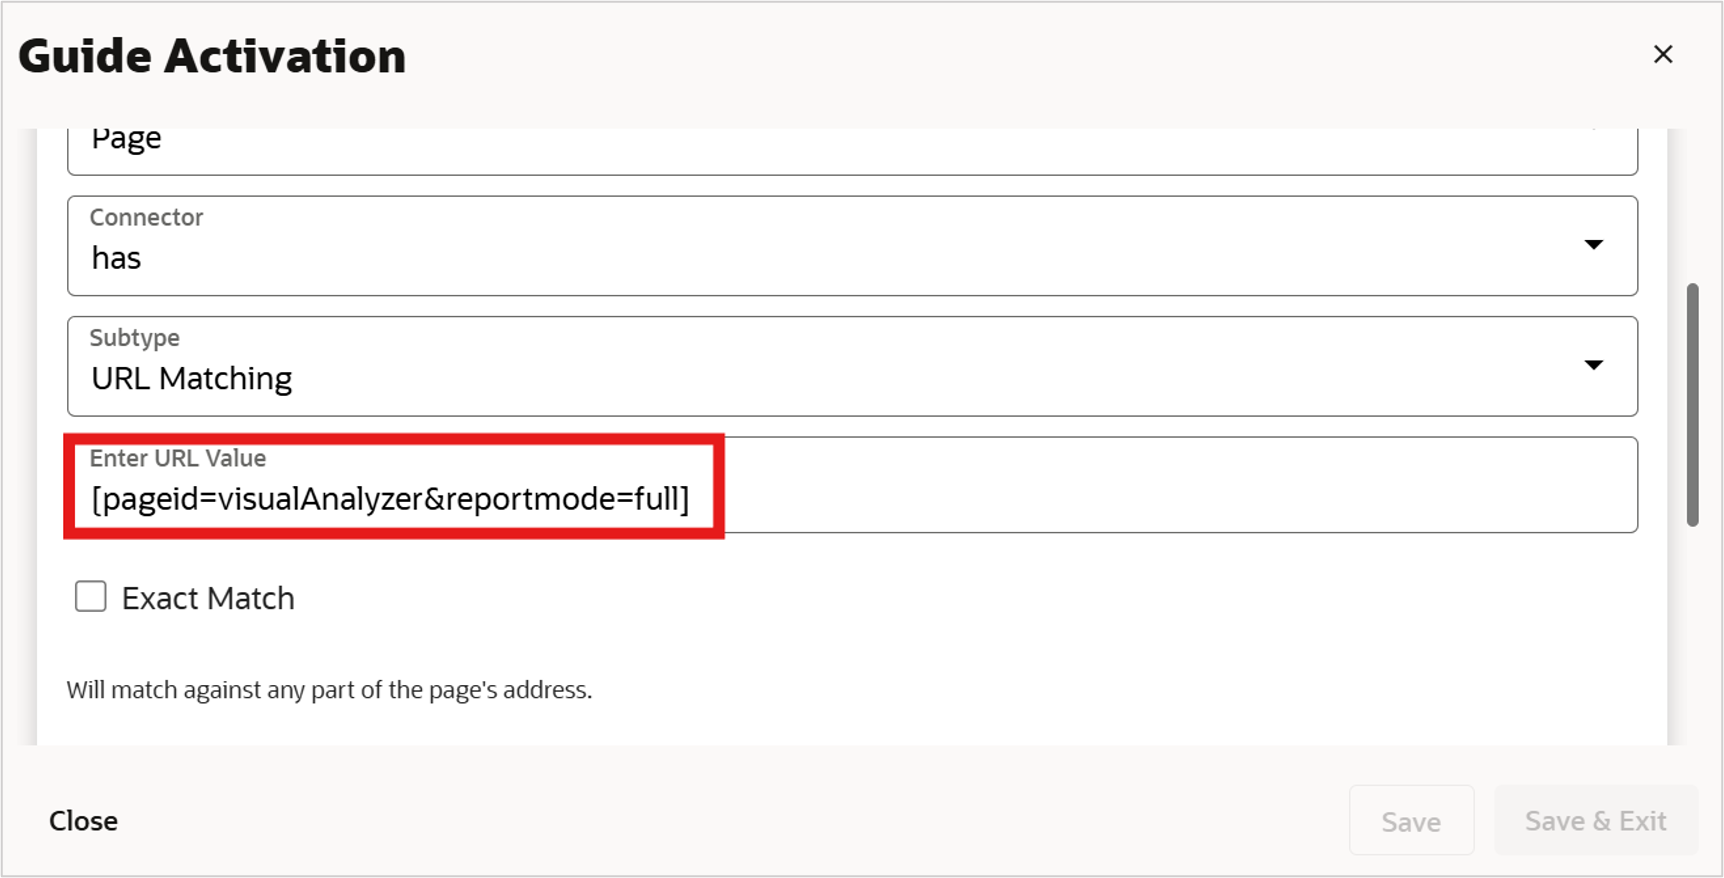
- Save and exit.
- With the data visualization extension, the widget only displays in that workbook.
- With the workbook extension, the widget launches from that workbook but stays active across the session.
Wrapping Up
With the OGL custom extension, you can deliver seamless, contextual learning inside OAC.
- Use the data visualization extension for workbook-level control and usage tracking.
- Use the workbook extension for persistent availability without requiring a visualization.
- Use Targeted Activation to link guides to workbooks.
Call to Action
Download the OGL custom extension from the Oracle Analytics public library and try it in your environment.
Watch a quick demo of the OGL extension in action and start guiding your users smarter inside Oracle Analytics.
To explore more about authoring guides or enabling OGL in your instance, contact your Oracle account team.
Stay update with the latest innovations on the Oracle Analytics Community.