Synchronize Oracle Applications Cloud with Oracle Identity Cloud Service and Set Up Single Sign-On to Access Oracle Fusion Analytics Warehouse (was Oracle Analytics for Applications)
You must synchronize users and roles in Oracle Applications Cloud with Oracle Identity Cloud Service (IDCS) and then set up single sign-on to enable these users to access Oracle Fusion Analytics Warehouse.
Here are the steps that you must complete:
- Note the IDCS details in the mail notifying you of the Oracle Applications Cloud Account.
- Set up synchronization of Oracle Applications Cloud with the IDCS instance specified in your Oracle Applications Cloud Account.
- Federate the IDCS instance specified in your Oracle Applications Cloud Account to the Oracle Cloud Infrastructure (OCI) tenancy where Fusion Analytics Warehouse is provisioned.
- Sign in to the OCI tenancy where Fusion Analytics Warehouse is provisioned using the Federated IDCS stripe.
- Create your Fusion Analytics Warehouse instances.
1. Note the IDCS Details Specified in Your Oracle Applications Cloud Account
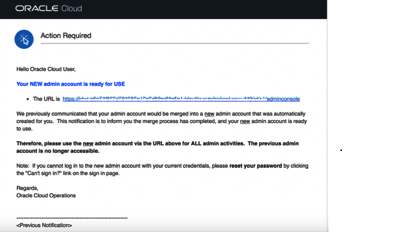
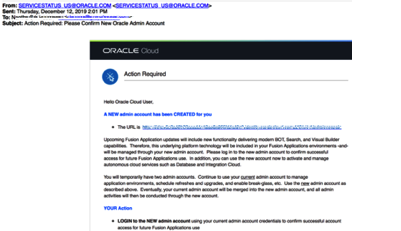
As the Oracle Applications Cloud administrator, you would have received emails from “servicestatus_us” notifying you of your Oracle Applications Cloud Account. The email is titled “Action Required: Please Use the NEW Oracle Admin Account”. You must’ve received this email sometime between October – December 2019.
- Save the IDCS details for each of the pod instance (Development and Production) from the email for each of the Oracle Applications Cloud environments.
- If the email is not available, then you can raise a service request to obtain information about your Oracle Applications Cloud Account.
Sample email:
2. Set Up Synchronization of Oracle Applications Cloud with IDCS
You must set up the synchronization of Oracle Applications Cloud with the IDCS stripe specified in your Oracle Applications Cloud Account.
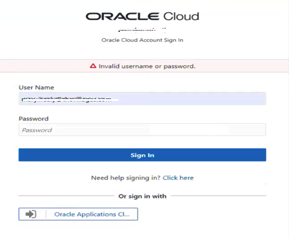
- Sign in to IDCS using the URL that you obtained in Step 1.
If you don’t remember the password or have changed the password, then request for the password by clicking Click here next to Need help signing in?
- Get the federation details (client ID and secret) from your Oracle Applications Cloud account using these steps:
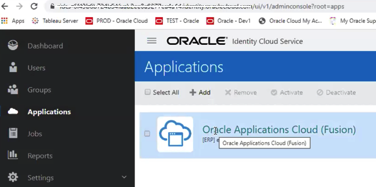
- Navigate to Home and then Applications.
- Click Oracle Applications Cloud (Fusion).
-
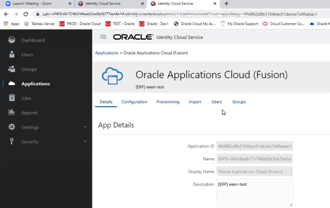
- Open a text file.
- Copy the URL from the browser until “identity.oraclecloud.com” and paste it in your text file.
-
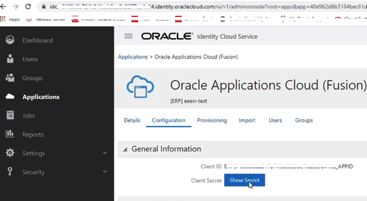
- On the Oracle Applications Cloud (Fusion) page, click Configuration and then expand General Information.
- Copy the Client ID and paste it in the text file.
- Click Show Secret, copy the text, paste it in the text file, and then save the text file.
- Enable synchronization of Oracle Applications Cloud with the IDCS stripe specified in your Oracle Applications Cloud Account using these steps:
- On the Oracle Applications Cloud (Fusion) page, under Configuration, expand Client Configuration.
- Scroll down and click Add.

iii. Select Application Administrator and Domain Identity Administrator and then click Add.
iv. On the Oracle Applications Cloud (Fusion) page, click Provisioning and perform these ste
| Navigation |
Action |
| Provisioning |
Click on – Enable Provisioning |
| Provisioning -> Select Provisioning Operations |
Select – Authoritative Sync |
| Provisioning |
Select – Enable Synchronization |
-
- Click Save.
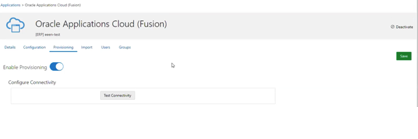
- Under Provisioning, expand Configure Connectivity and click Test Connectivity.
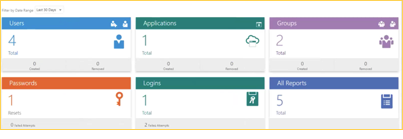
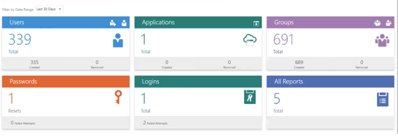
- Confirm that the synchronization of Oracle Applications Cloud with IDCS was set up successfully by viewing the users and job roles along with user to roles mappings before and after synchronization.
Before Sync:
After Sync:
3. Federate the IDCS stripe to the OCI tenancy
Federate the IDCS stripe specified in your Oracle Applications Cloud Account to the Oracle Cloud Infrastructure (OCI) tenancy where Fusion Analytics Warehouse is provisioned.
- Sign in to your Oracle Cloud account that contains the tenancy where Fusion Analytics Warehouse is provisioned (in certain cases this can be same as Fusion Cloud Account).
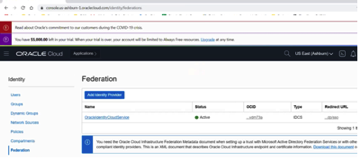
b. On the Oracle Cloud Home, navigate to Identity and then click Federation.
- On the Federation page, click Add Identity Provider.
- Federate the IDCS stripe to the OCI tenancy using these steps:
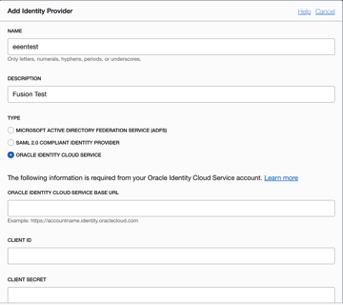
- On the Add Identity Provider page, enter a name in lower case.
- Enter a description.
- Select Oracle Identity Cloud Service.
- Enter the URL, Client ID, and Client Secret that you had saved in a text file in Step 2 (b.)
- Scroll down and click Continue at the bottom of the dialog.
-
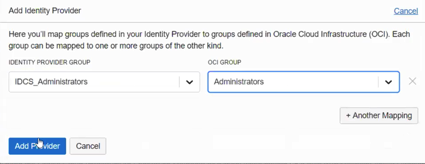
- In the next page, map IDCS_Administrators to Administrators and click Add Provider.
-
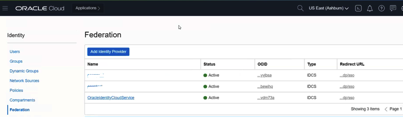
- On the Federation page, note the name of the newly added provider.
4. Sign in to OCI using the Federated IDCS Stripe
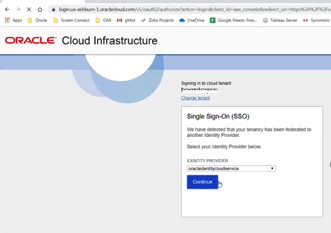
- Sign in to the OCI tenancy where Fusion Analytics Warehouse is provisioned using the Federated IDCS stripe.
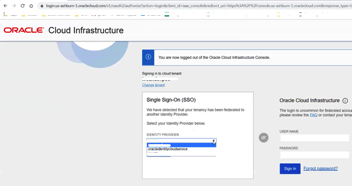
b. Click Oracle Applications Cloud. On the login screen
c. On the Sign In page, use your Oracle Applications Cloud credentials and click Sign In.

This will take you to the main dashboard for your cloud account.
5. Create a Fusion Analytics Warehouse Instance
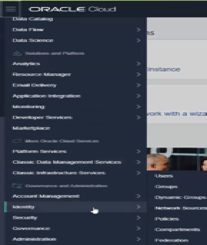
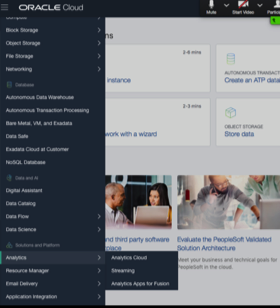
Navigate Home -> Analytics-> Fusion Analytics Warehouse
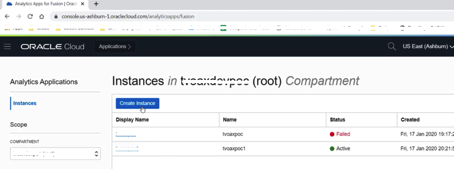
From the Compartment drop down, Pick root or any compartment.
Click Create Instance button.
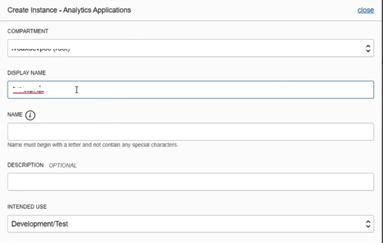
Fill out form details:
Display Name: Provide a display Name for the instance
Name: Provide an alphanumeric name without space
Intended Use: Pick Production from the drop down if you are creating a production environment or else Development/Test
Offerings: Select the appropriate offering (ERP/HCM)
Fusion Application URL: Enter the fusion url until oraclecloud.com
User:FAWservice
Password: Incase this needs to be reset the link ishttps://docs.oracle.com/en/cloud/saas/applications-common/19c/faser/implementation-users.html#FASER2249673
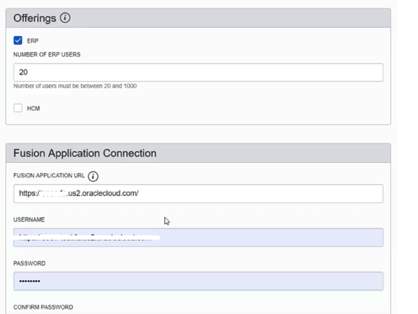
Confirm Password: Renter the password for Fusion application
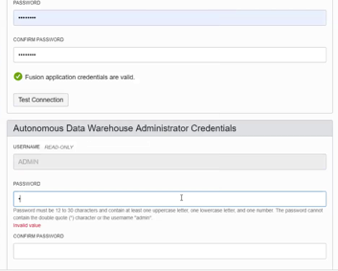
Click Test Connection button
ADW Admin Password: Set a password following the provided guidelines.
Confirm Password: Enter the password for ADW Admin User
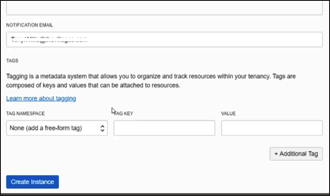
Notification Email: Enter a valid email address
Click Create Instance button
Instance Details page will be populated with details OAX App URL
ADW Instance details
OAC App URL
After the instance creation is complete.
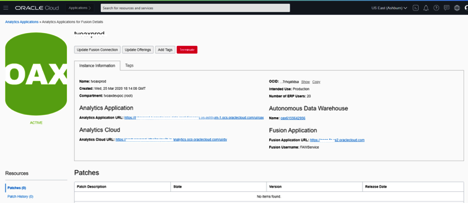
This completes provisioning an Instance
After your Fusion Analytics Warehouse instance is created, from the instance details page, note the URLS. You can launch Fusion Analytics Warehouse directly going forth and sign in using single sign-on.