
Workbook authors often know the analytical result they want but not the exact expression needed to produce it. Creating a calculation or a complex filter can require recalling function syntax, selecting the correct data elements, and carefully assembling nested expressions. This can interrupt the analytical flow and make even a clear business question harder to implement.
In Oracle Analytics Cloud (OAC ), Expression Assistant helps authors translate a natural-language request into an expression. Authors can type or speak a request in the Expression Assistant section, review the generated expression and its explanatory comment, and continue editing the expression before applying it. Expression Assistant is available in two workbook authoring workflows:
- Workbook Calculation Editor – Create a custom workbook calculation using Expression Assistant
- Expression Filter dialog – Create an expression filter using Expression Assistant
Create a custom workbook calculation using Expression Assistant
Custom calculations extend a workbook’s analysis beyond the data elements already available in the data source. For example, an author might want to aggregate a measure, combine fields inside a nested calculation, or derive a new metric for use across visualizations.
Open the Workbook Calculation Editor
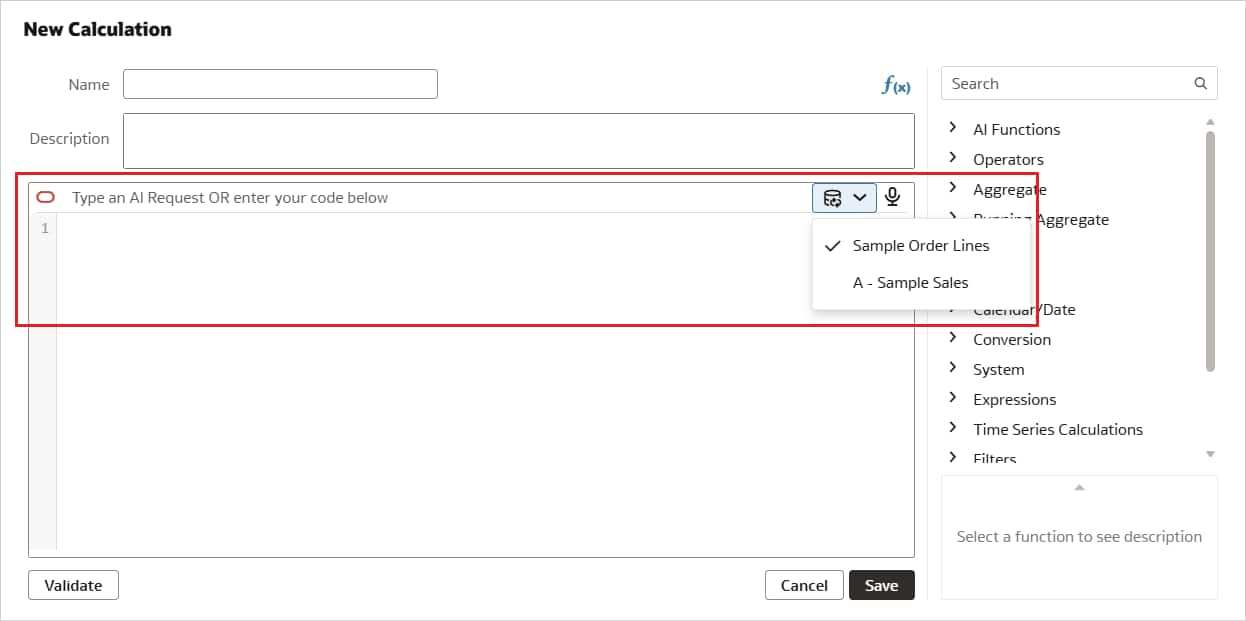
You can open the calculation editor from the context menu for the My Calculations folder or from the context menu in the Data Panel. The Expression Assistant section appears at the top of expression builder as shown in the image.
Generate and save a calculation
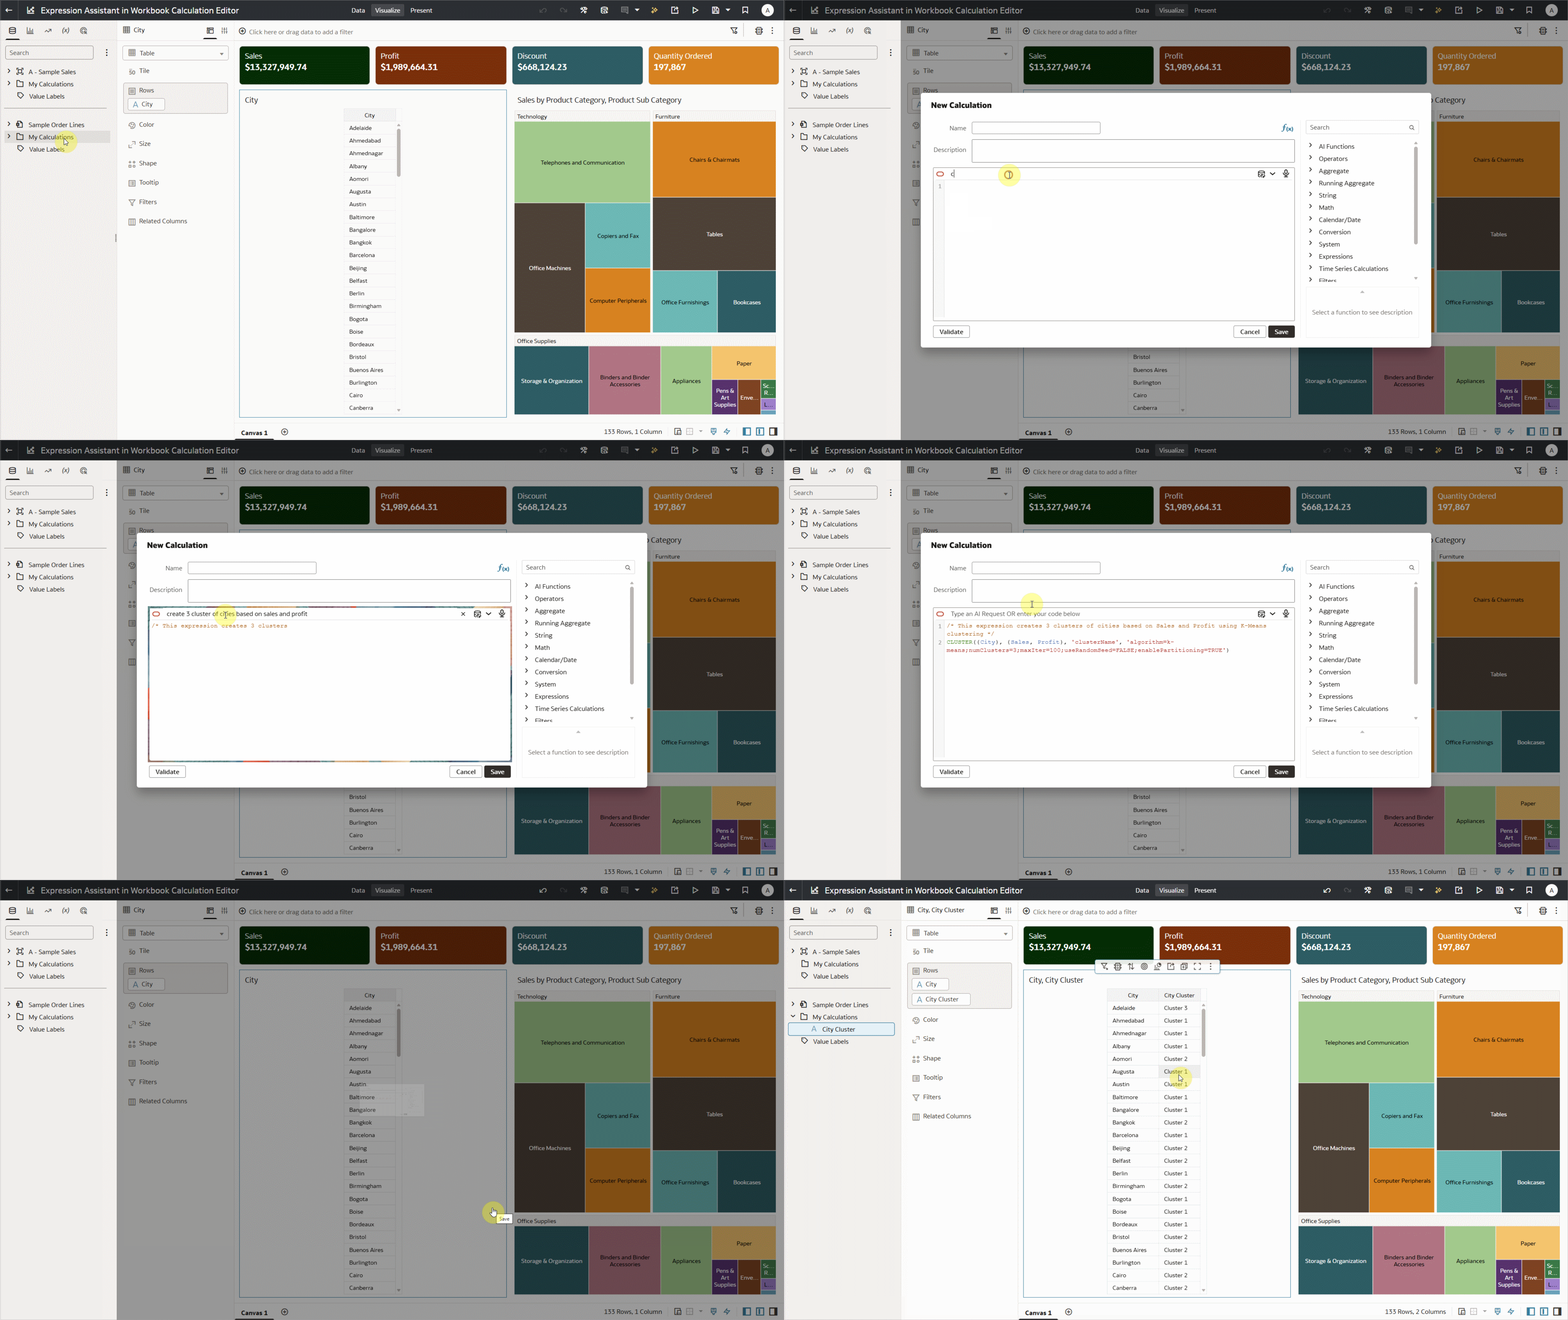
- Type a request that describes the calculation you want or click the microphone icon and speak your request.
Expression Assistant analyzes the request and writes the calculation in the expression builder. It also adds a comment above the expression to explain the generated logic. - Review the comment and expression, make any needed changes, give the calculation a meaningful name, and save it.
The calculation is added to My Calculations which you can use as a data element in the workbook.
Refine the calculation with a follow-up request
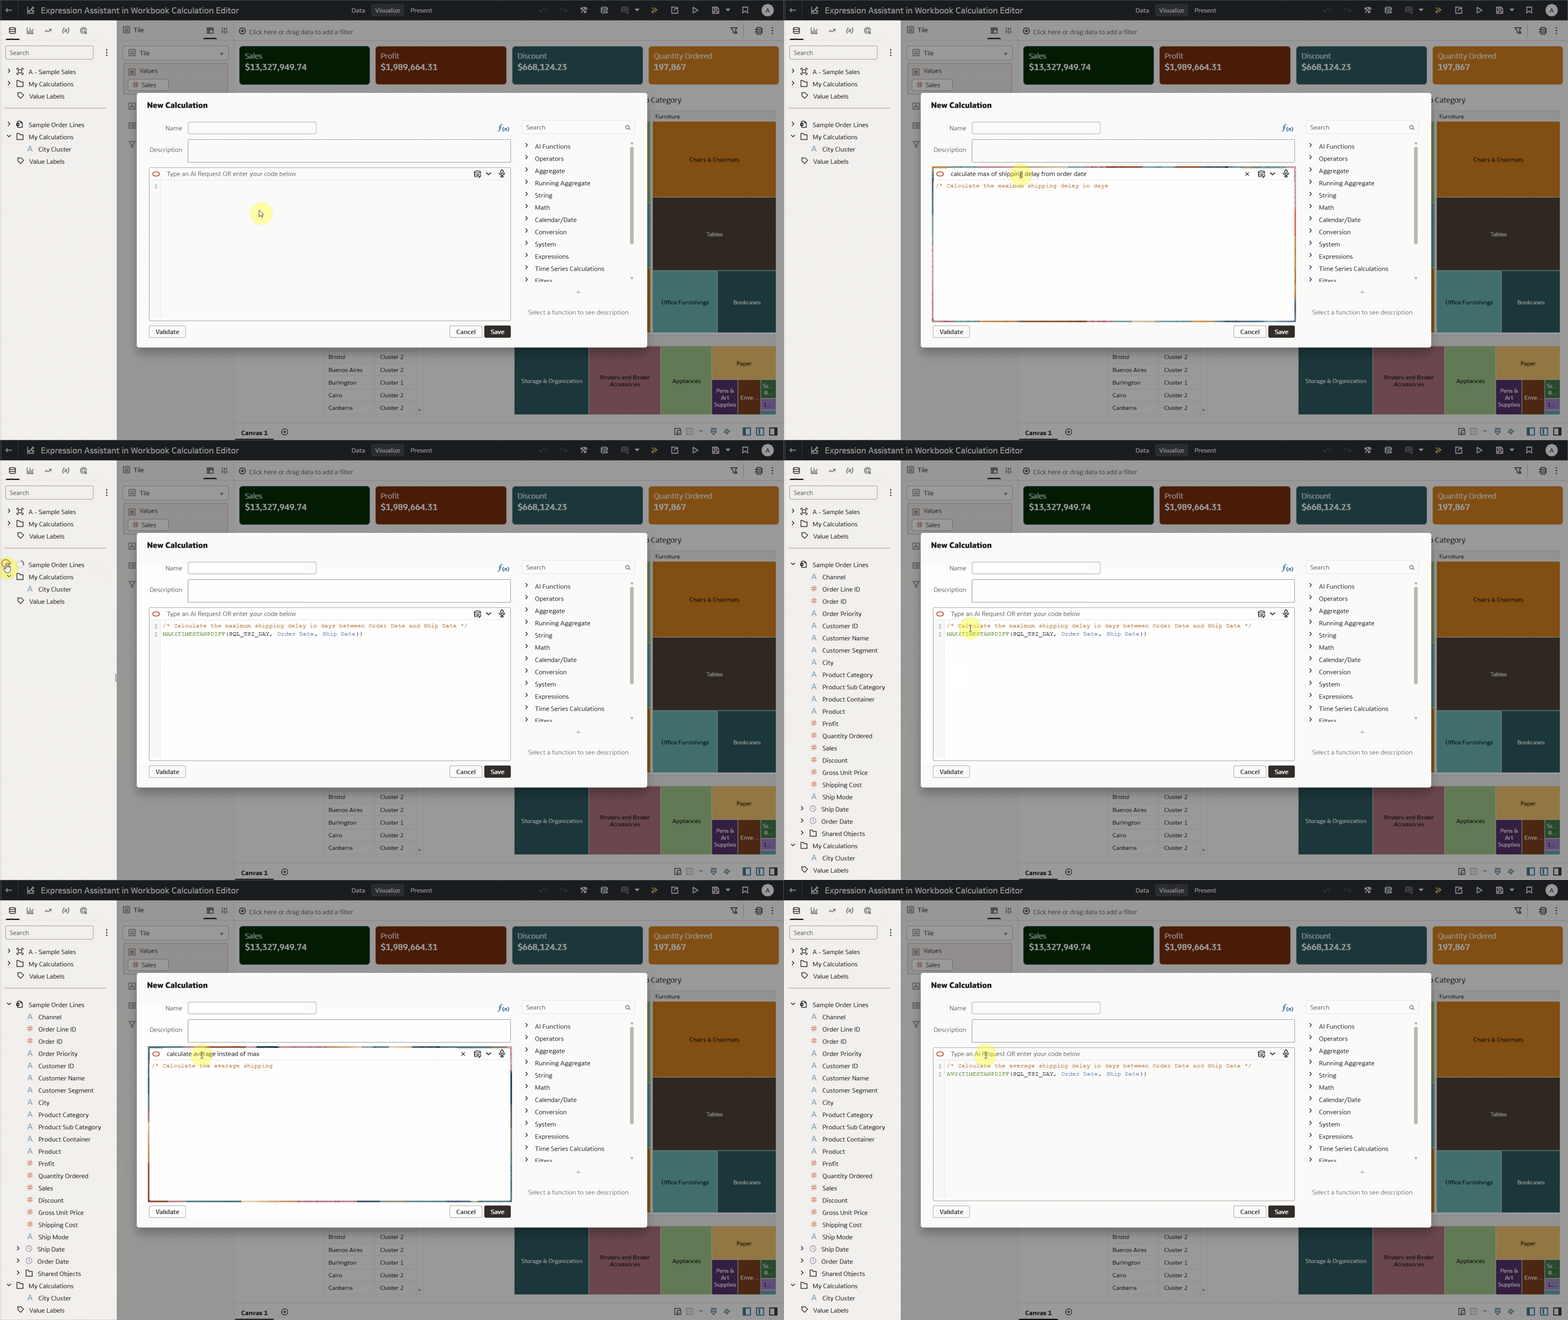
Expression Assistant supports an iterative authoring workflow. If the first result is close to what you need, enter a follow-up request instead of starting over. For example, after generating a maximum calculation, you can ask the assistant to change it to an average. Review the updated expression and save the calculation when it meets your requirements.
Create an expression filter using Expression Assistant
Expression filters are useful when a standard list, range, or date filter isn’t enough. They let authors define more complex filter logic with an expression that evaluates to true or false. Expression filters can be applied in the workbook filter bar at workbook or canvas scope, or in a visualization filter so that they affect only the selected visualization.
Open the Expression Filter dialog
- Select the visualization and display its Grammar panel.
- Select Create Expression Filter from the Filters drop target options.
- For a workbook- or canvas-level expression filter, select Create Expression Filter from the Add Filter menu in the workbook filter bar.
Describe the filter condition in natural language
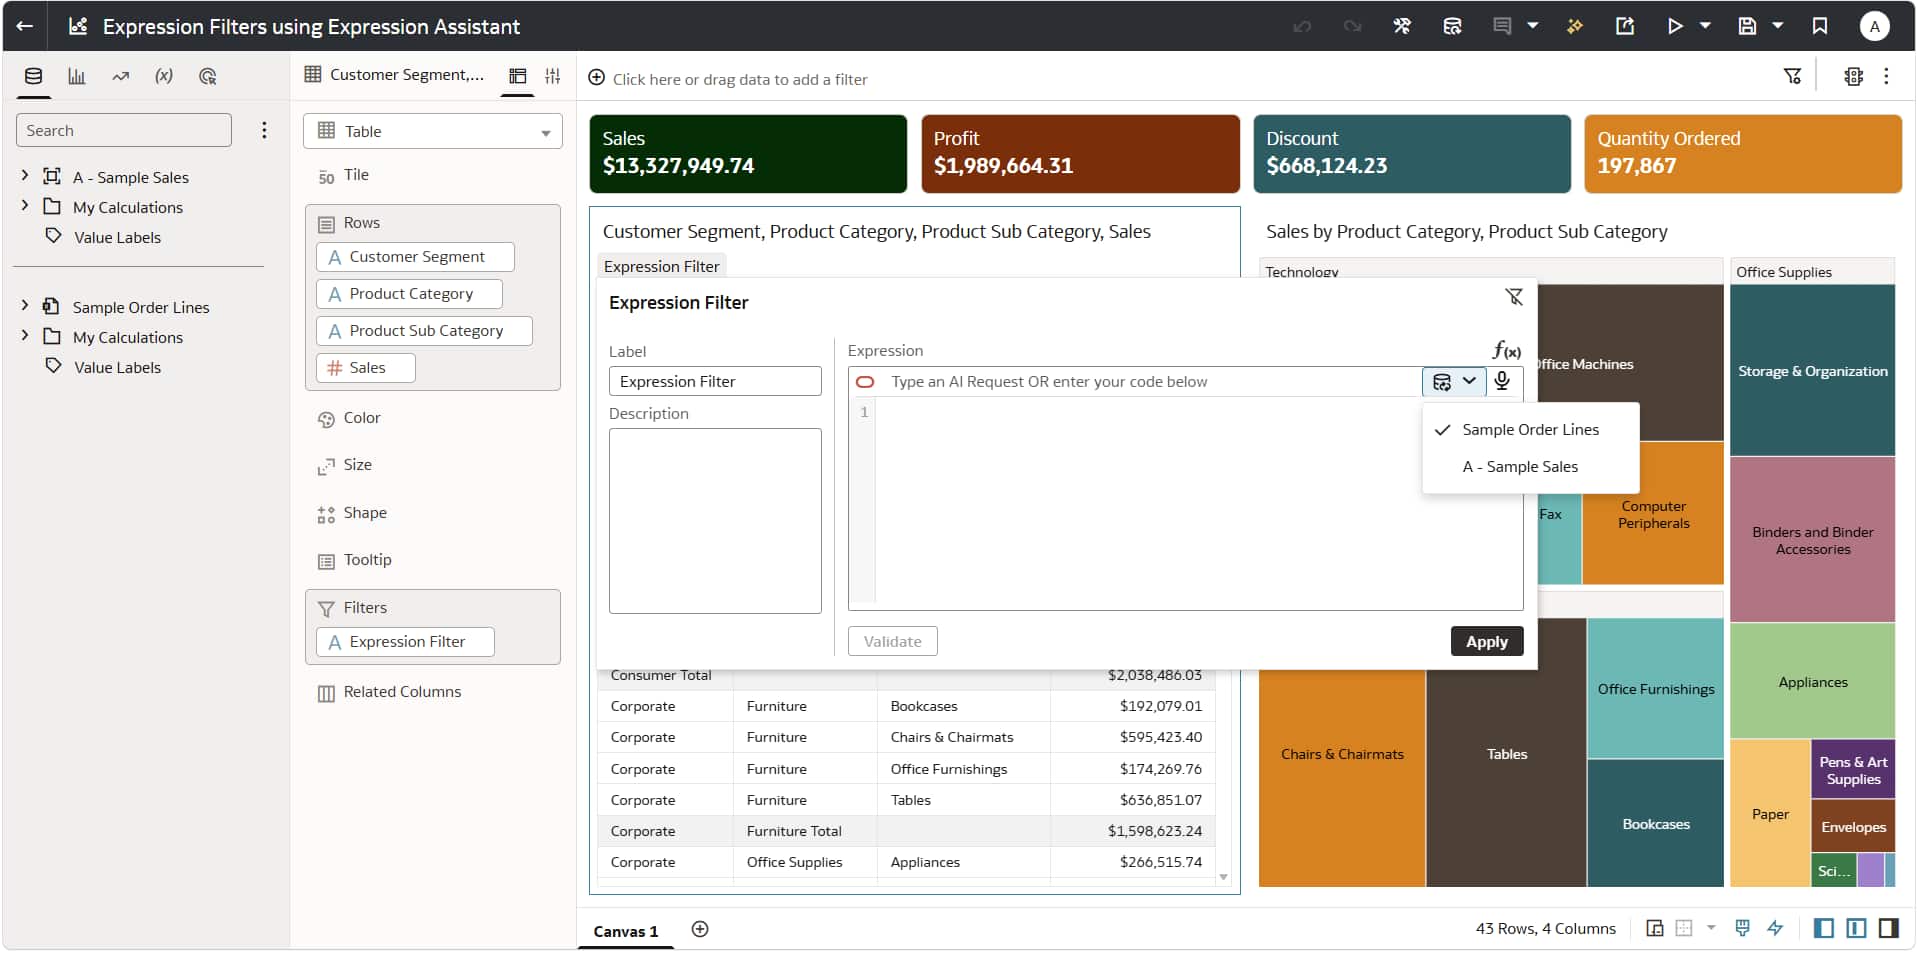
- In the Expression Filter dialog, enter a label and a description.
- Confirm the data source that the assistant should use, then type or speak the filter condition in the Expression Assistant section.
The assistant uses the selected data source context to identify relevant fields and generate the filter expression. - Review the expression, click Validate to check its syntax, and then click Apply.
In the accompanying demo, the author creates a visualization-level expression filter for a table containing Customer Segment, Product Category, Product Sub Category, and Sales. The goal is to display only Customer Segment and Product Category groups whose Sales exceed one million.
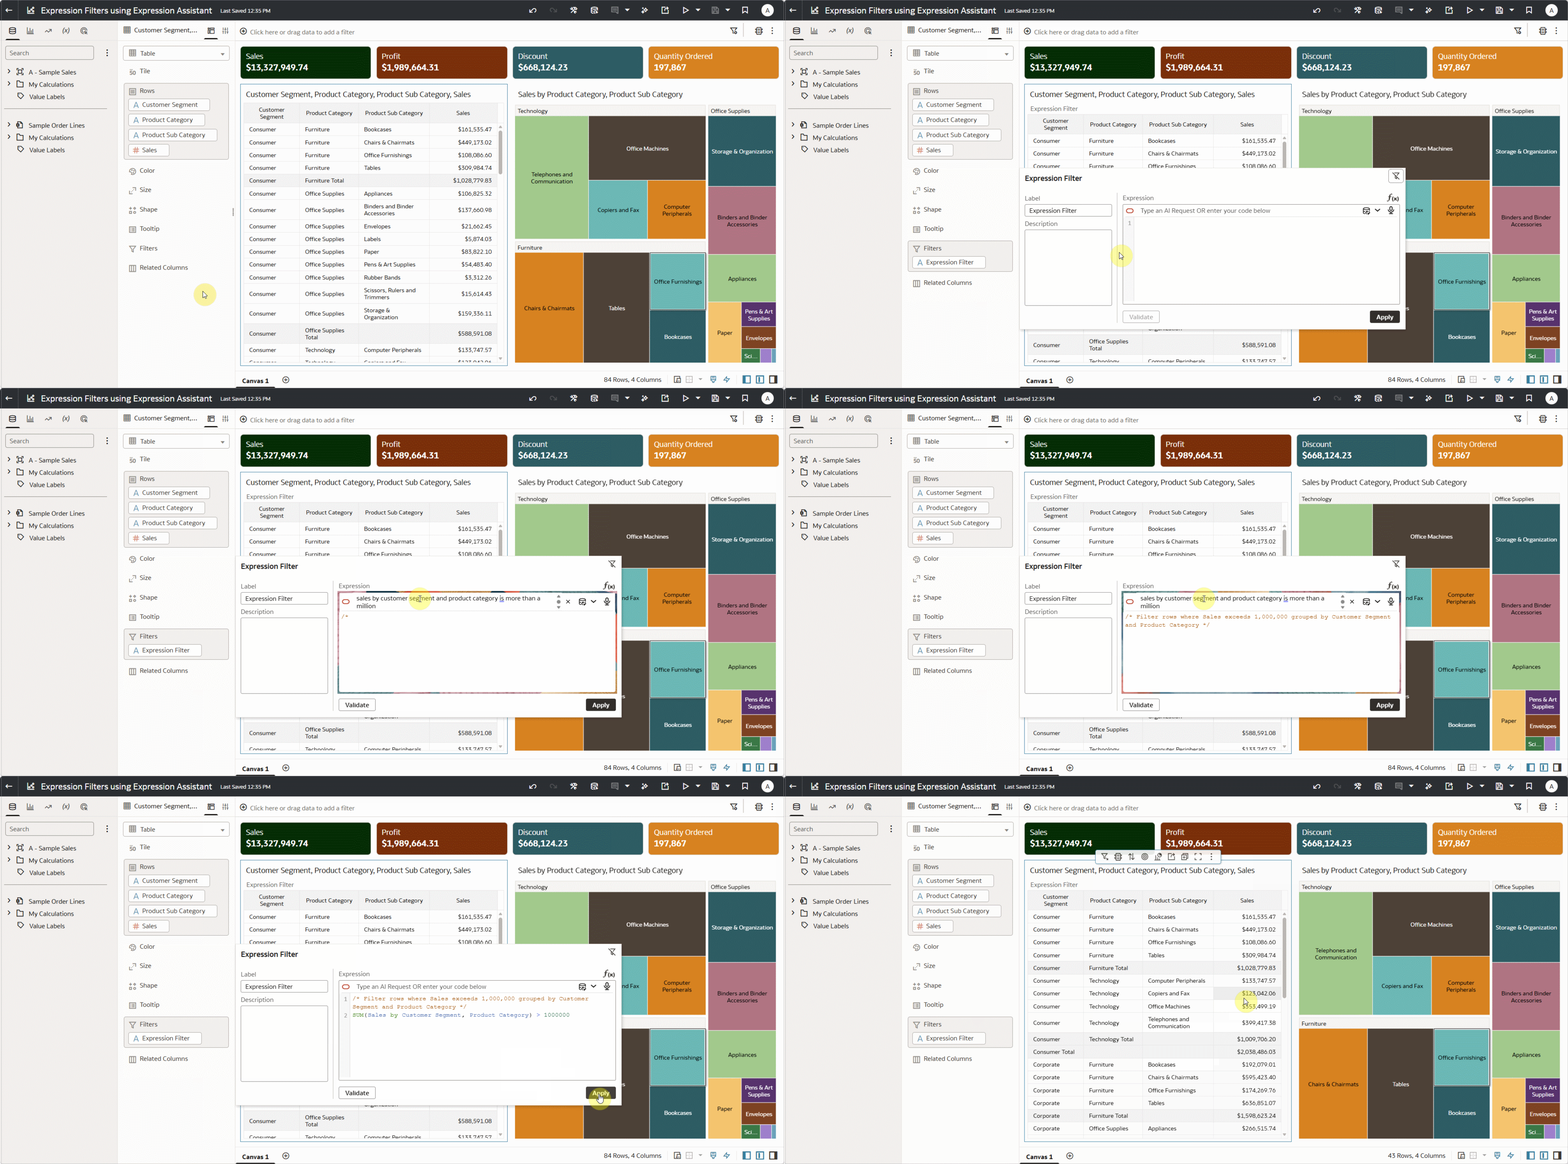
Expression Assistant adds a comment explaining the generated logic and writes the expression in the editor.
In the demo, the expression filter reduces the table from 84 rows to 43 rows by retaining only the groups that satisfy the condition.
Expression Assistant is also available in the Expression Filter dialog when workbook consumers use the expression filter in viewer mode.
Work with the active data source context
In both workflows, Expression Assistant generates an expression using fields from the selected data source. The calculation editor and the Expression Filter dialog let the author select the data source before submitting the request. Choosing the correct data source helps the assistant map the business terms in the request to the intended data elements.
Choose the language model that powers suggestions
Expression Assistant uses the language model configured for the feature. Administrators can open the Console’s Generative AI page and select a model for Expression Assistant from the language models registered in the OAC environment.
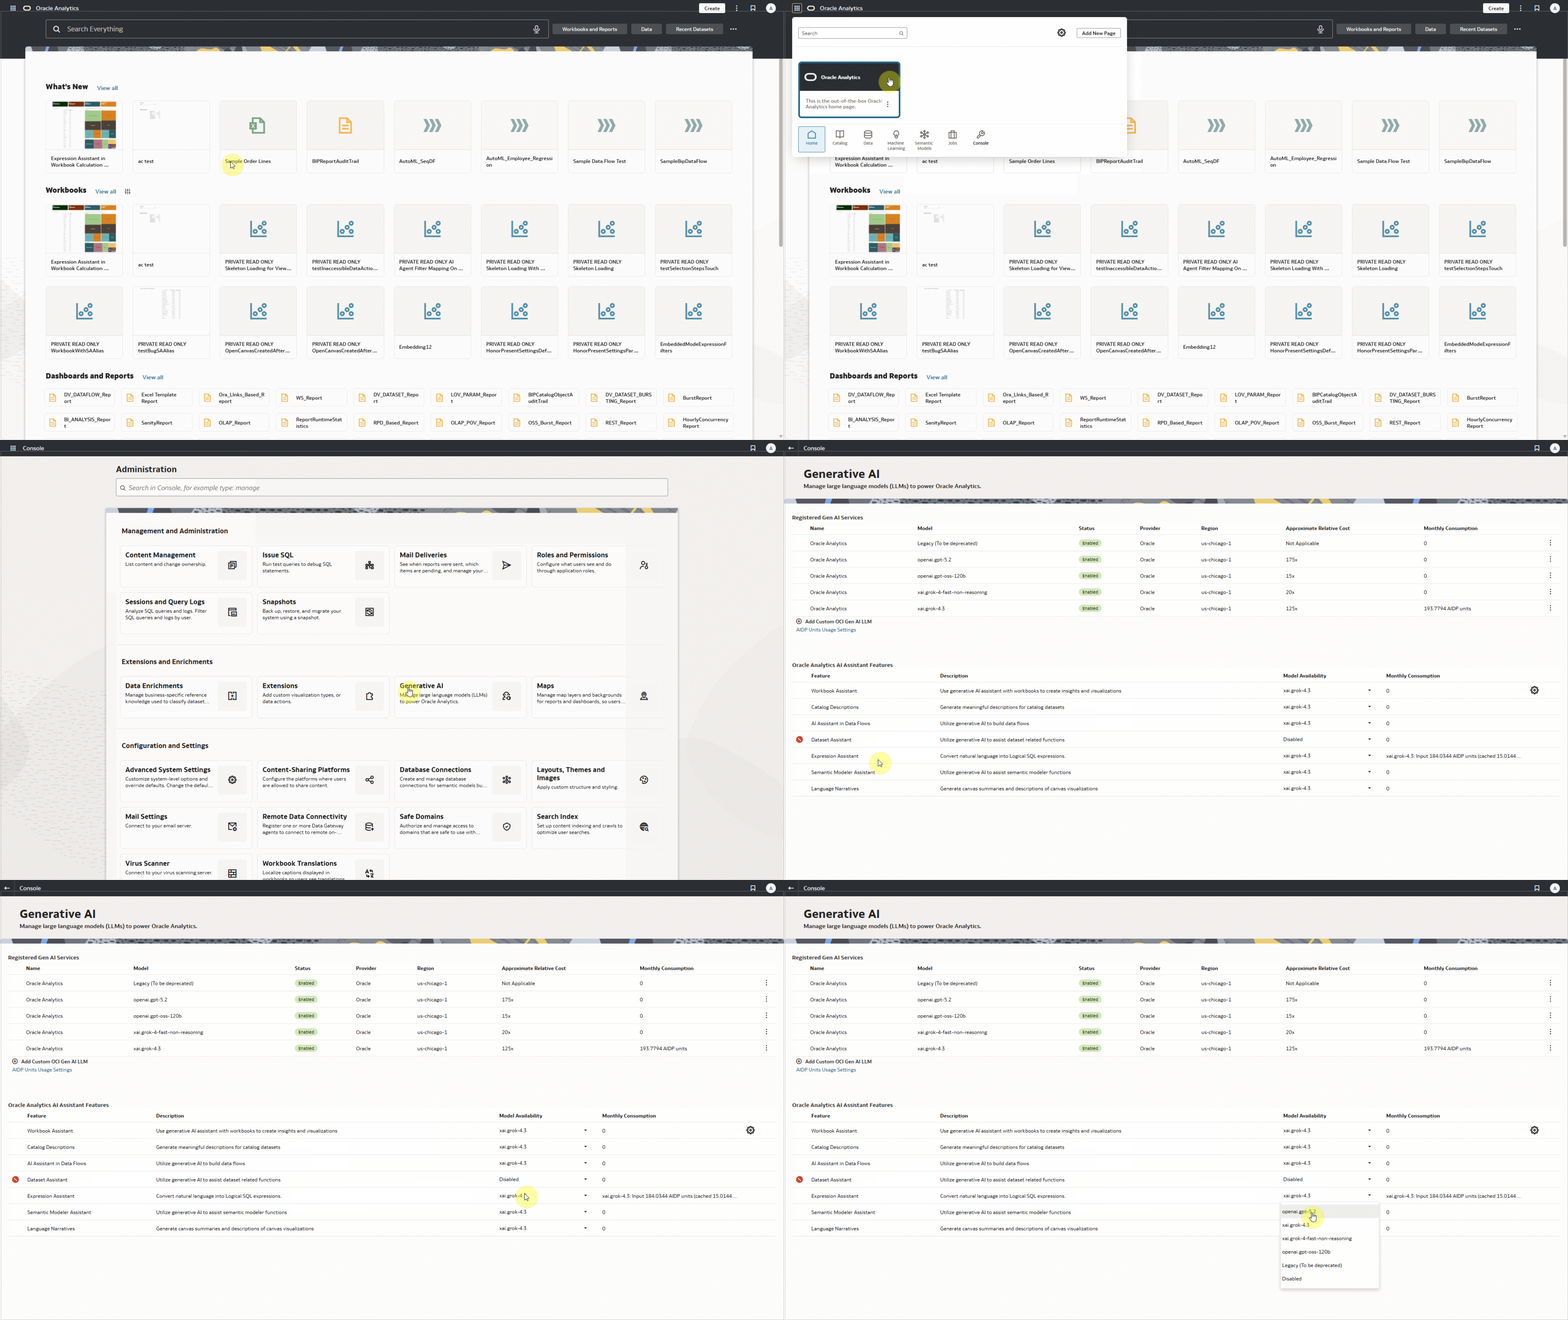
Note: Always review generated expressions before saving or applying them. Expression Assistant accelerates expression writing, while the workbook user remains responsible for confirming the expression’s logic, scope, and result.
Call to Action
Expression Assistant gives workbook users a consistent natural-language experience in two important places:
- Use it in the Workbook Calculation Editor when you want to create a reusable calculated data element.
- Use it in an Expression Filter when you want to convert a business condition into filter logic and control which data appears in a workbook, canvas, or visualization.
For more information:
- Watch Expression Assistant in the Workbook Calculation Editor demo video.
- To learn more about the Expression Assistant in Expression Filter dialog, watch Use Natural Language to Write Expression Filters.
- Refer to the documentation for more details on getting started with calculations and expression filters.
- Visit the Oracle Analytics Community to ask questions, share feedback, and learn from other Oracle Analytics users.