With inputs from:
Nicolas Barasz, Software Development Director, Oracle Fusion Data Intelligence
Archana Singh, Consulting Solutions Architect, Oracle Fusion Data Intelligence
Rajesh Lakra, Senior Principal Technical Support Engineer, Oracle Fusion Data Intelligence
Introduction
Oracle Fusion Data Intelligence (FDI) is a cloud-native analytics application that features prebuilt analytics, Artificial Intelligence (AI) and Machine Learning (ML) models, which are ready to use, and designed to simplify gaining valuable deep insights from your Oracle Fusion Applications to drive better decisions.
Background
FDI offers prebuilt hierarchies for Oracle Fusion Applications Enterprise Resource Planning (ERP), which makes it easy to analyze patterns in data and provides flexibility to explore them from varied angles. The prebuilt hierarchies in FDI are designed to support several levels (1-31), which may be cumbersome to navigate for users in organizations with only four to five levels.
This article explains how you can create an alternate presentation hierarchy to simplify the navigation through hierarchies using the Semantic Model Extension in FDI. The solution provides the ability to also display the description of the hierarchy codes. The only caveat with this solution is that descriptions are displayed in English and not translated to the user’s preference language. Oracle recommends that you create no more than five level presentation hierarchies for performance reasons.
High Level Steps to Create an Alternate Presentation Hierarchy
- Create a database view on the existing dimension hierarchy that will be used for the presentation hierarchy.
- Create a sandbox using the Semantic Model Extensions capability.
- Extend the prebuilt model using Extend Dimension and Add Hierarchy with levels capabilities.
- Add the hierarchy to a subject area.
- Merge the changes to the main sandbox and publish it.
Create a View on an Existing Dimension Hierarchy Table
In the example in this article, you use the cost center dimension hierarchy and concatenate code along with descriptions available in the prebuilt table. The view will be created in the OAX_USER schema. Refer to the attachment for the DDL script.
Create a Sandbox
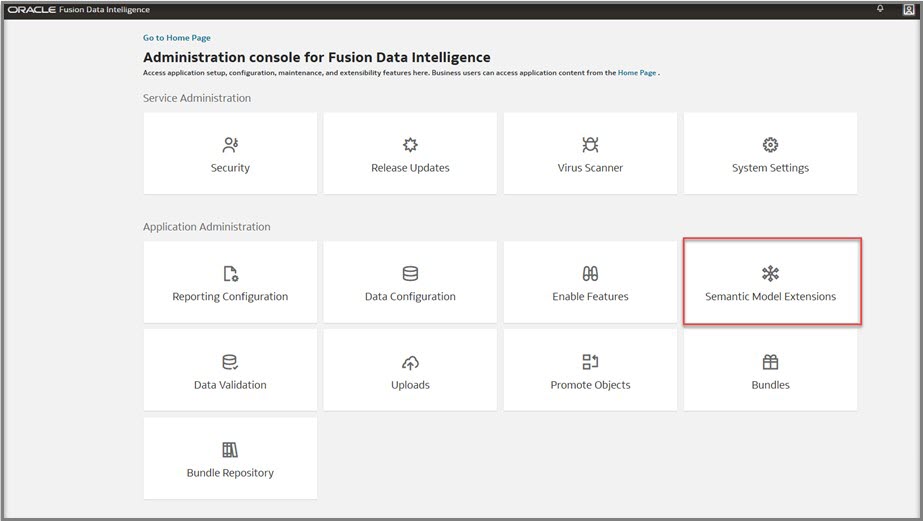
- Log in to the Administration console for FDI and click Semantic Model Extensions.
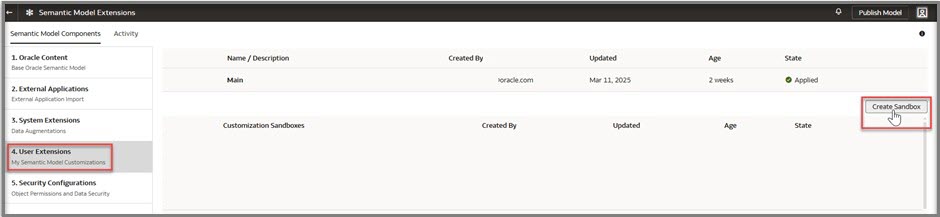
- Navigate to 4. User Extensions and click Create Sandbox.
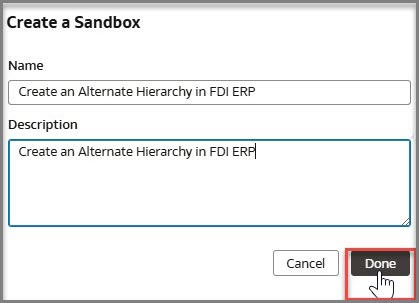
- On the Create a Sandbox dialog, provide a name and description, and click Done.
Extend the Prebuilt Model
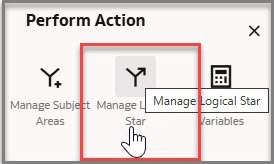
1. Click Perform Action and select Manage Logical Star.

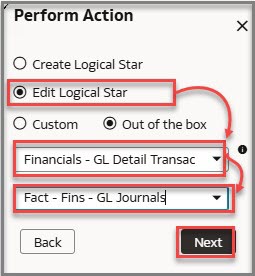
2. On the Perform Action dialog, select Edit Logical Star and then Out of the box. You select these options because you want to extend a prebuilt dimension hierarchy.
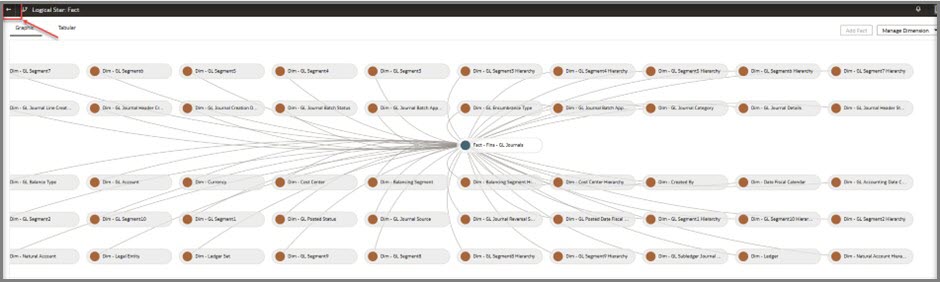
3. Select the logical subject area and fact. In this example, use Financial – GL Detail Transactions and Fact – Fins GL Journals as the subject area and fact respectively.
4. Click Next.
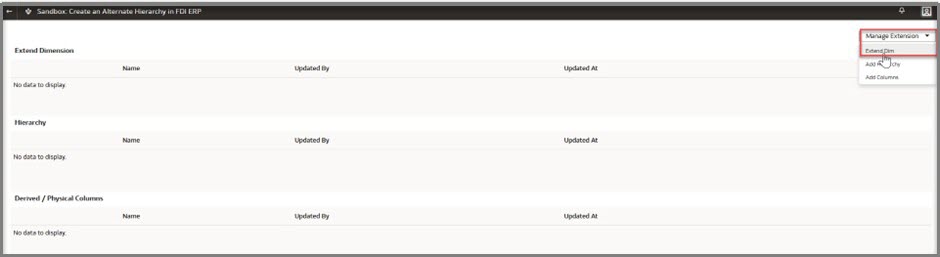
5. Right-click Dim – Cost Center Hierarchy and select Manage Extension.

6. In this step, you begin by extending the dimension. Click Manage Extensions and select Extend Dim.
7. On Step 1 of the Extend a Dimension page:
- Select OAX_USER for the schema and WCV_DW_COST_CENTER_DH for the view created in the schema.
- Select columns for the alternate hierarchy and keys for the join. You’re creating a 5-level hierarchy, so select levels 31 through 28 and the base level.
- Rename columns you’ll use in the hierarchy.

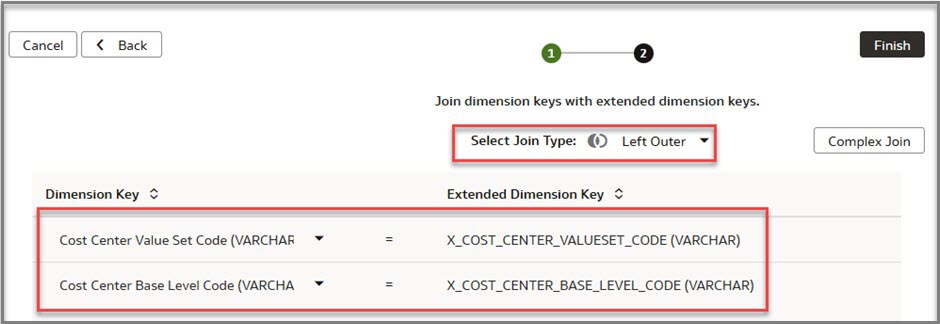
8. On Step 2 of the Extend Dimension page:
- Select the join type as Left Outer, and join on COST_CENTER_VALUESET_CODE and COST_CENTER_BASE_LEVEL_CODE.
- Click Finish.
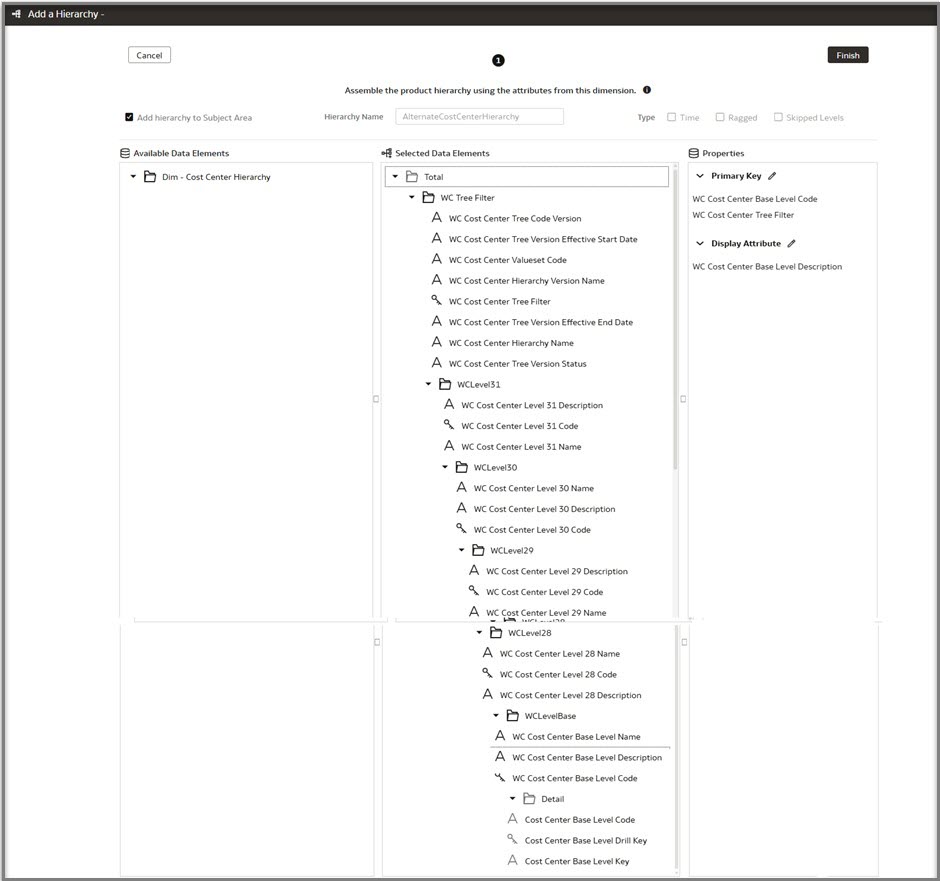
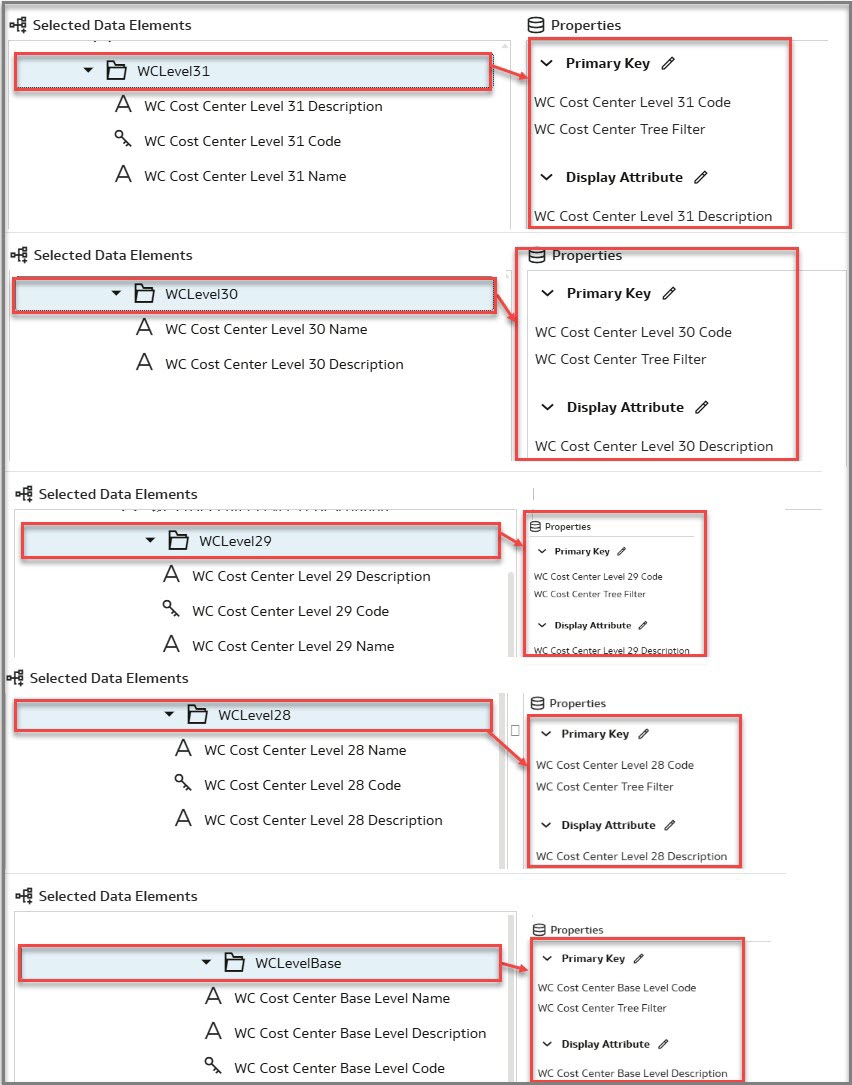
9. Continue by addding the hierarchy. Click Manage Extensions and select Add Hierarchy.
10. In Selected Data Elements, under Total, add child levels.
11. In Properties, select the primary keys and display attributes for each level.
12. Click Finish after all levels are added.
You just extended the dimension and created an alternate hierarchy.
13. Click Go back (back arrow).
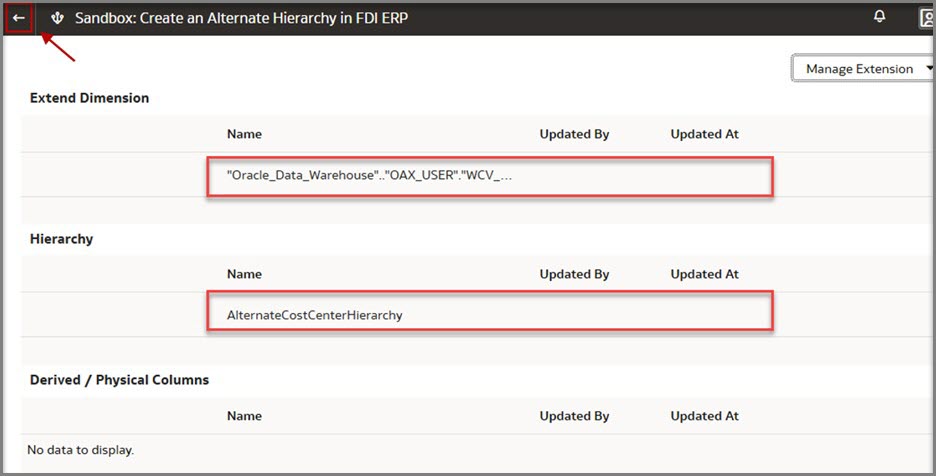
14. Click Go back (back arrow) again to navigate back to the main sandbox page.
Add the Alternate Hierarchy to a Subject Area
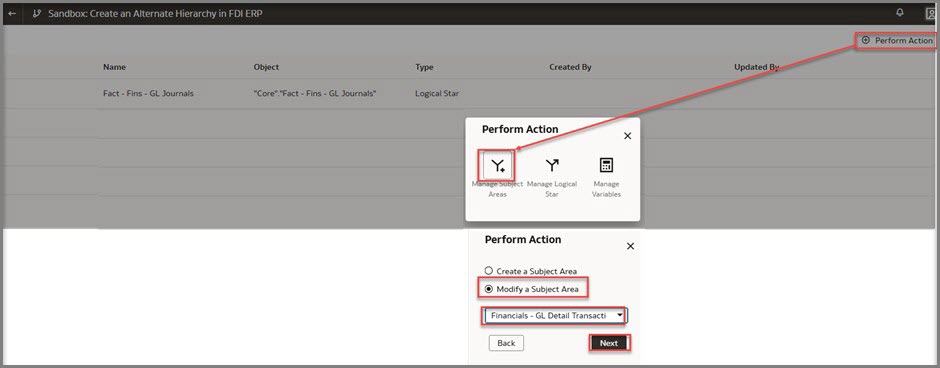
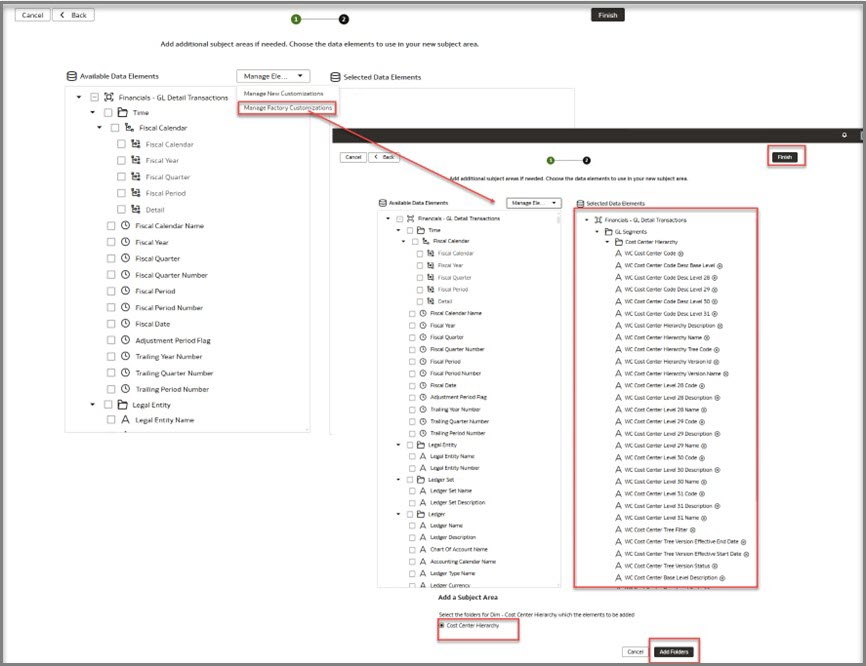
1. Click Perform Action and select Manage Subject Areas.
2. Select Modify a Subject Area, select a subject area (for example: Financials – GL Detail Transactions) and click Next.
3. Navigate to Manage Factory Customizations, add the alternate hierarchy, then add it to the Dim-Cost Center Hierarchy folder, and then click Finish.
4. Select a subject area (for example: Financials – GL Detail Transactions) and click Next.
5. Click Go back (back arrow) to navigate back to the main sandbox page.

6. To merge and publish the change, navigate to 4. User Extensions, then right-click the sandbox and click Apply Changes.
7. Check the Activity tab to ensure the previous step completes successfully.
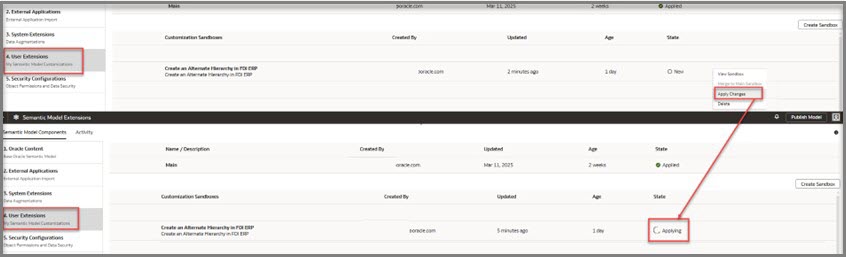
8. After Apply Changes has completed successfully, right-click the sandbox again and click Merge to Main Sandbox.
9. Check the Activity tab to ensure the previous step completes successfully.

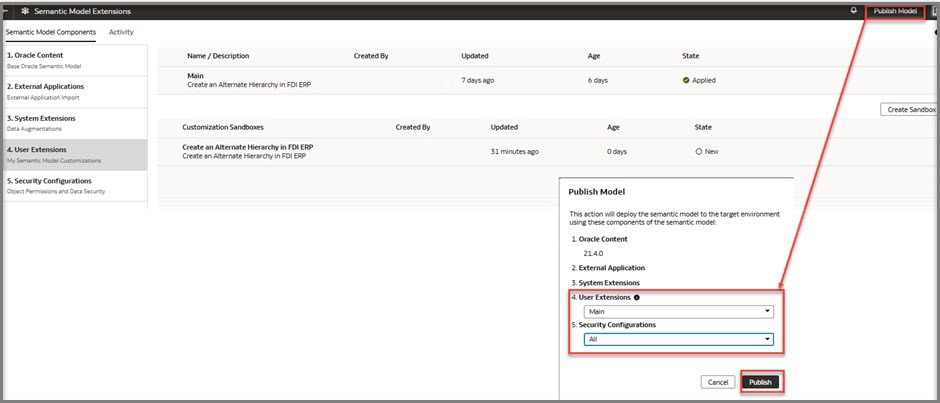
10. After Merge to Main Sandbox is completed successfully, click Publish Model.
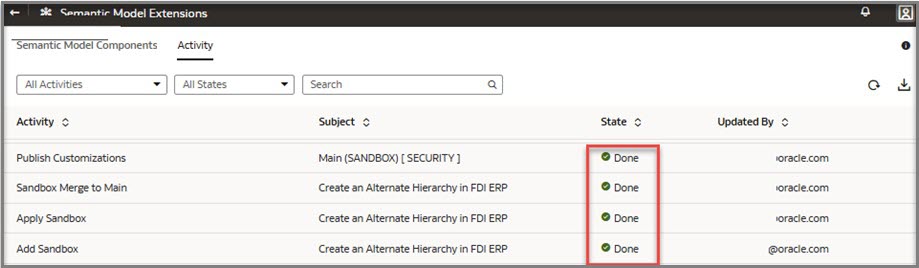
11. Check the Activity tab to ensure the previous step completes successfully.
- The Activity tab should display the state as “Done” to indicate all steps are completed successfully.
View the Change Using Oracle Analytics Data Visualization
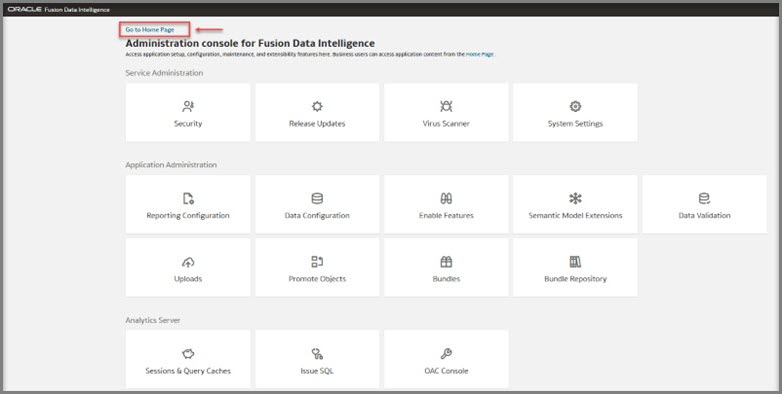
1. Navigate to the Oracle Fusion Data Intelligence Console.
2. Click Go to Home Page to launch the Oracle Analytics Home page.
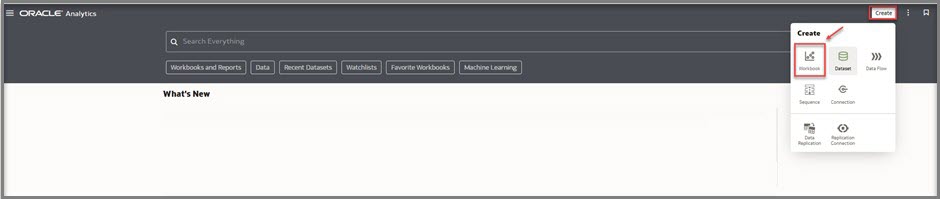
3. On the Oracle Analytics Home page, click Create and select Workbook.
4. On the Add Data dialog, select Financials – GL Detail Transactions.
5. In the workbook Data pane, navigate to the GL Segments, Cost Center Hierarchy and drag AlternateCostCenterHierarchy to the canvas to display the hierarchy.
Summary
This article presents an approach to create an alternate presentation hierarchy. This approach utilizes the Semantic Model Extension feature to simplify the navigation through subject areas. But be aware that this approach only displays data in English and doesn’t use the user preferred language.
Call to Action
Check out the About Semantic Model Customization documentation to learn more about extending the semantic layer using the sandbox framework.
Now that you’ve read this article, try it yourself and let us know your results in the Oracle Analytics Community, where you can also ask questions and post ideas.
Contribution
Many thanks to Padma Rao Padala and Suzanne Gill for reviewing and all the useful feedback!