Oracle Analytics Cloud (OAC) is a scalable and secure Oracle Cloud service that provides a comprehensive set of capabilities to explore and perform collaborative analytics for you, your workgroup, and your enterprise. With Oracle Analytics Cloud, you also get flexible service management capabilities including fast setup, easy scaling and patching, and automated lifecycle management.
In my last blog “How to setup and configure OAC”, I explained the process of provisioning and configuring OAC. In that blog, I also detailed the instructions for setting up and configuring OAC with a private end point when both OAC and the data source are in the same Oracle Cloud Infrastructure (OCI) Virtual Cloud Network (VCN).
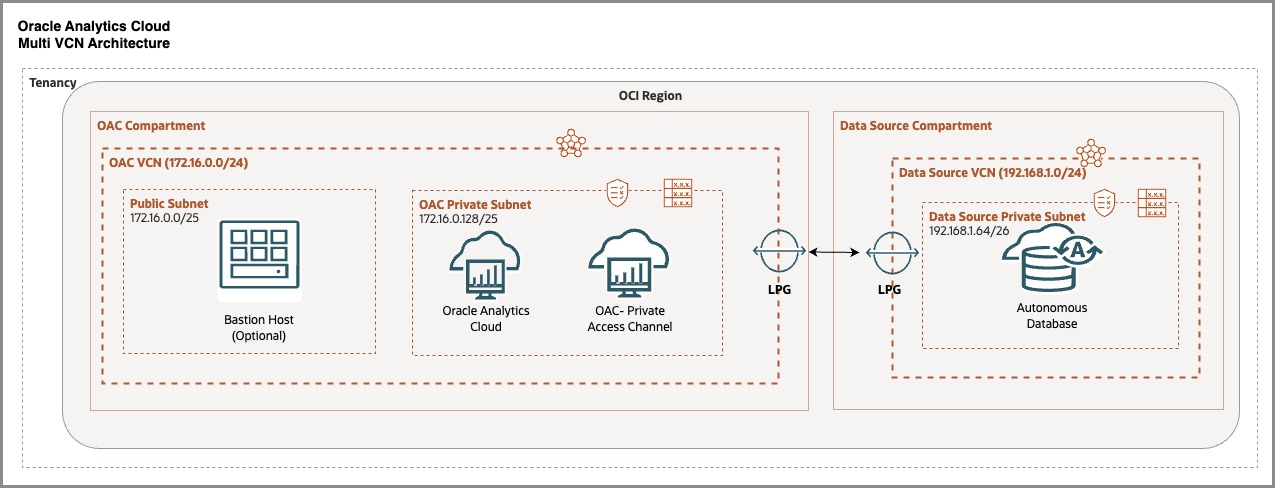
There is another architecture, as shown below, when OAC and the data source are in different VCNs in the same OCI region. This blog explains the required steps to set up OAC and private access channels so that OAC can connect with data sources provisioned in a different VCN.
In the architecture diagram below:
- There is an OAC VCN with the appropriate Classless Inter-Domain Routing (CIDR) in an OCI compartment. Any examples in this blog, e.g., 172.16.0.0/24, are simply for illustration.
- In the OAC VCN, OAC is provisioned with a private access channel in a private subnet. Please see my blog, “How to set up and configure OAC”, for details.
- There is a public subnet and Bastion host, which are optional. This example shows using the Bastion Host to access OAC as it cannot be accessed through the public internet, but in the actual scenario, you could use an OCI VPN.
- There is a data source VCN with a different CIDR in the other OCI compartment (192.168.1.0/24).
- The data source, e.g., Oracle Autonomous Data Warehouse (ADW), has been provisioned in the private subnet of the data source VCN.
These are the setup instructions to configure the OAC private access channel and establish a connection between OAC and ADW.
Local VCN Peering
Local VCN peering is the process of connecting two VCNs in the same region so that their resources can communicate using private IP addresses without routing the traffic over the Internet. Please follow the steps below to do VCN peering.
Set up IAM policies and Create Local Peering Gateways
- Before doing VCN peering, appropriate Identity and Access Management (IAM) policies should be set up. Please refer to “Local Peering using an LPG” in this OCI Documentation. In this example, OAC VCN is a “Requestor” and the data source VCN is “Acceptor”.
- Create a Local Peering Gateway in the OAC VCN and the data source VCN. Go to Networking > Virtual Cloud Network and select your VCN. Under Resources, click Local Peering Gateway and then “Create Local Peering Gateway.” Provide a suitable Local Peering Gateway name and compartment, click Create Local Peering Gateway, and the LPG will be created.
- Similary create a Local Peering Gateway for the Data Source VCN.
Establish the Connection
The next step is to establish the connection with both Local Peering Gateway (LPGs). This connection will be established from the requestor VCN, which is the OAC VCN in this case.
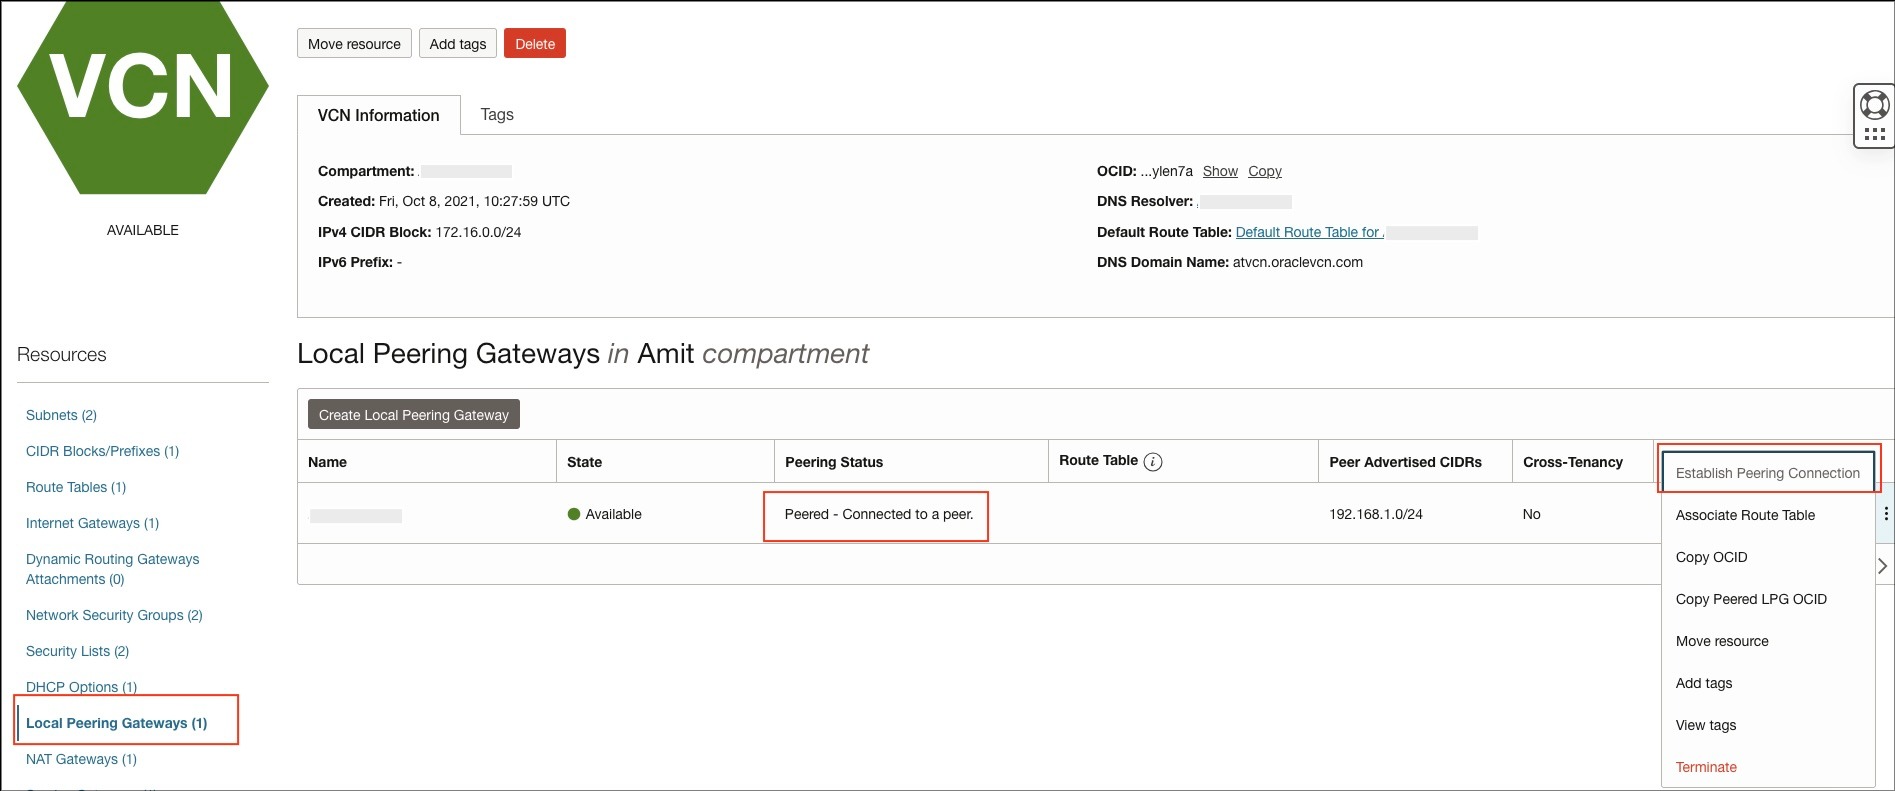
- Go to Networking > Virtual Cloud Network and select your VCN. Under Resources, click Local Peering Gateway.
- Click the three dots next to Local Peering Gateway, then click “Establish Peering Connection” in the pop-up menu.
- In a minute, you will see the peering status “Peered-connected to a peer”.
Set up Route Tables
Add routing rules to each VCN route table to enable traffic between peered VCNs (OAC and the data source VCN).
For the OAC VCN, as shown in the screenshot below, add a routing rule for the Data Source private subnet (192.168.1.64/26).

For the data source VCN, as shown in screenshot below, add a routing rule for the OAC private subnet (172.16.0.128/25).

Set up Security Rules
Update both VCN’s security rules to enable traffic between the peered VCNs based on your requirements.
The screenshot below shows adding a security rule to the data source private subnet security list to allow OAC to access ADW on port 1522. In this example, there’s a rule for the whole OAC private subnet (172.16.0.128/25), but you can also restrict it to the OAC private access channel egress Ips.

Associate Private View to DNS Resolver
To enable communication between VCNs using DNS names, private views should be associated. You can associate private views within same region to VCN’s resolver. Please note that private views can not be used for remote peering, i.e., when VCNs are in different OCI regions.
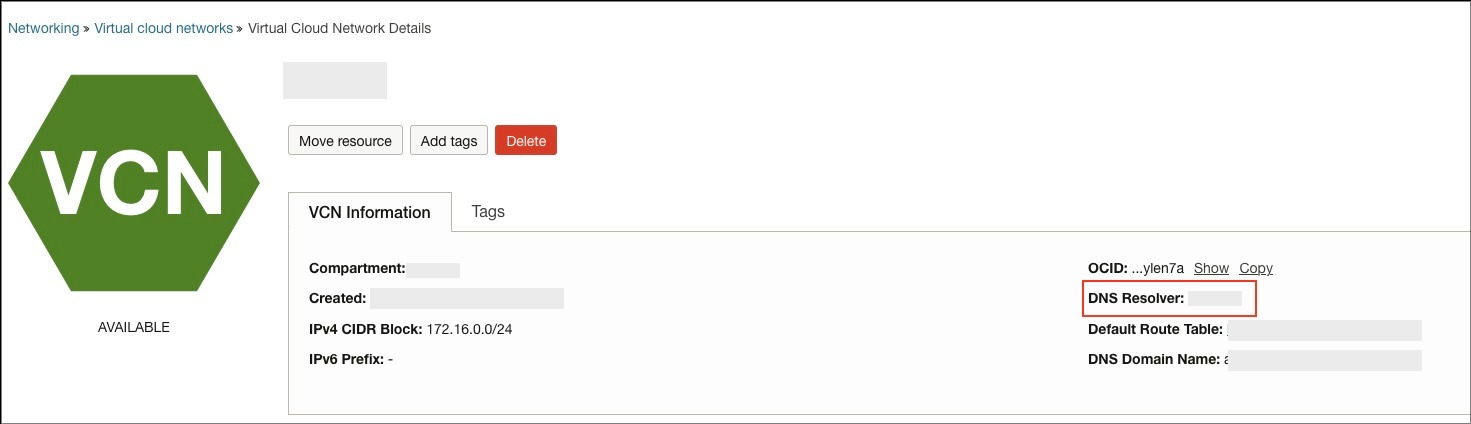
- Go to the OAC VCN and click the VCN’s DNS resolver (as shown in the first screenshot).
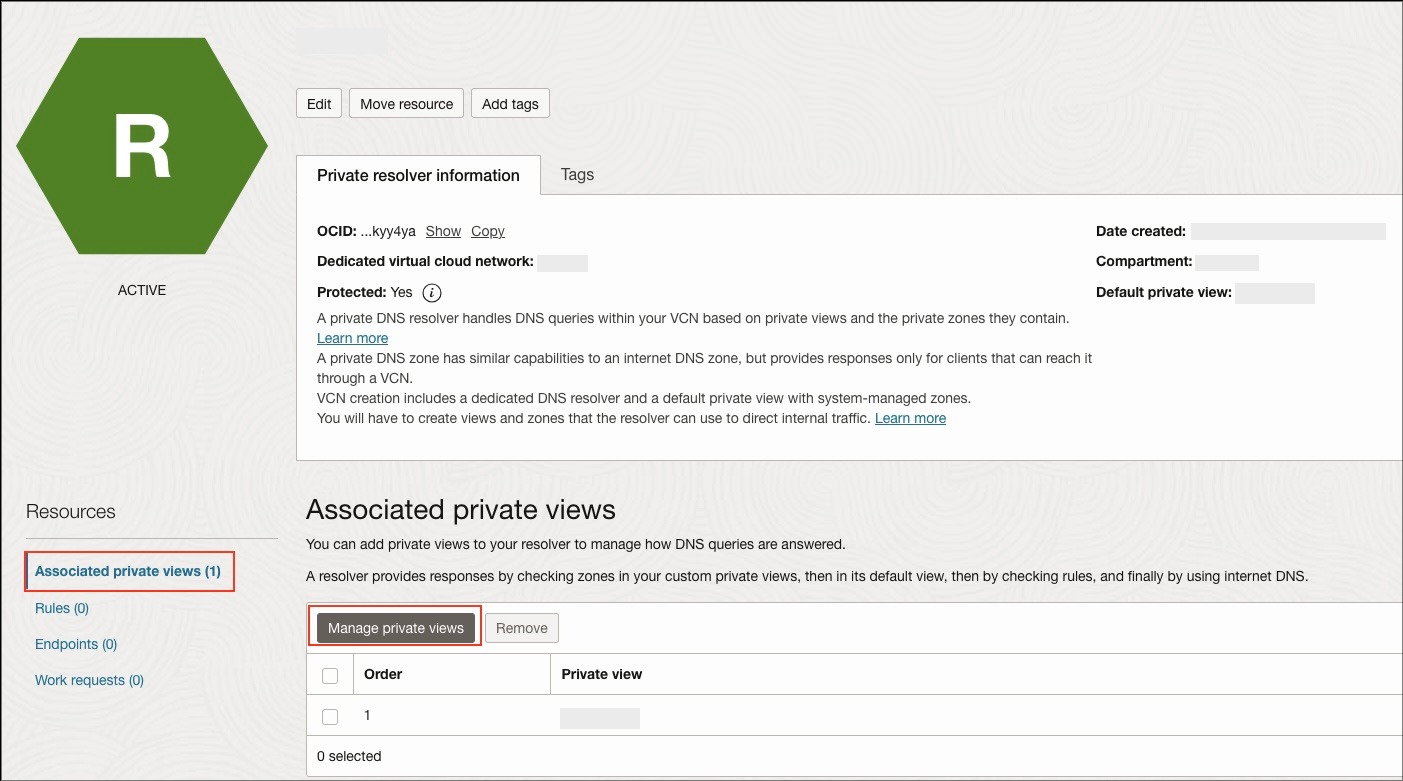
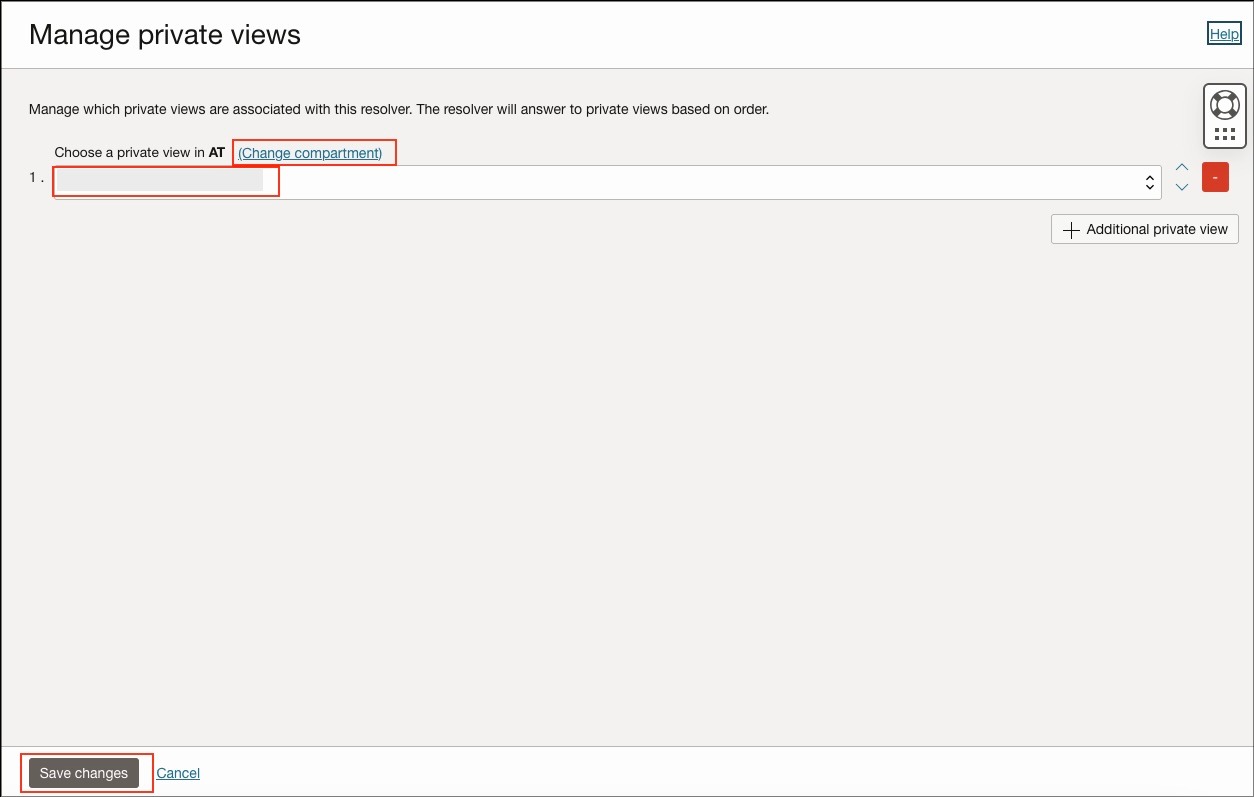
- The DNS resolver page will open. Under Resources, click “Associated private views” and then “Manage private views” (as shown in the second screenshot).
- The Manage private view page will open. Now click “Change compartment” and select your Data Source VCN compartment.
- Choose the private view of the data source VCN from the drop down and save changes.
- Repeat same steps for the data source VCN to associate the private view of the OAC VCN.
Configure the OAC Private Access Channel
The OAC private access channel is used to connect OAC with private data sources, e.g., an Oracle Database hosted in a private network such as an OCI private subnet, on-premises corporate network, and other clouds. Please note that a private access channel is only available for OAC Enterprise Edition and can’t be deployed with OAC Professional Edition.
Follow these instructions to deploy a private access channel.
- Navigate to your OAC Instance and click “Private Access Channel”.
- Click “Configure Private Access Channel, and a new web page will open.
- Provide the name of the private access channel.
- Select your compartment by clicking “Change Compartment,” and select your VCN and Subnet.
- The Private Access Channel can be deployed in a new subnet or in the same subnet where your OAC instance exists.
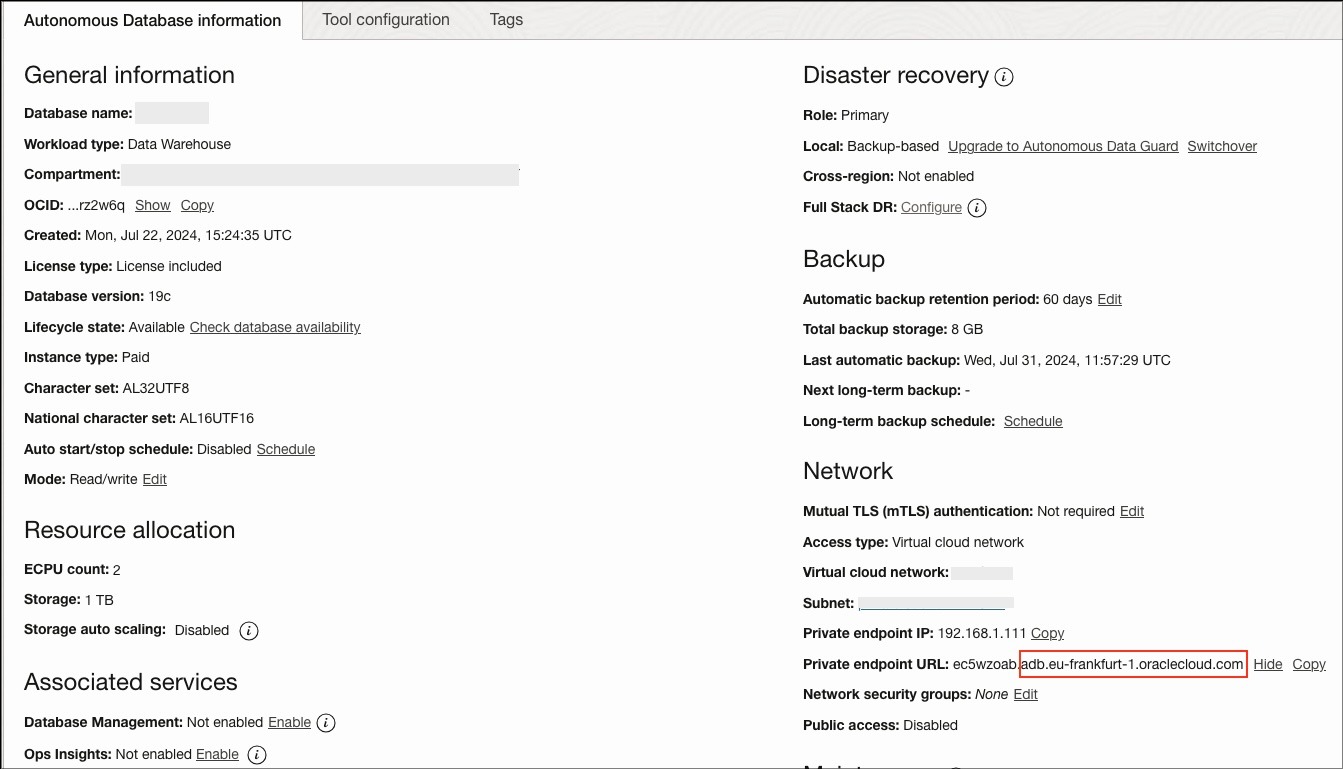
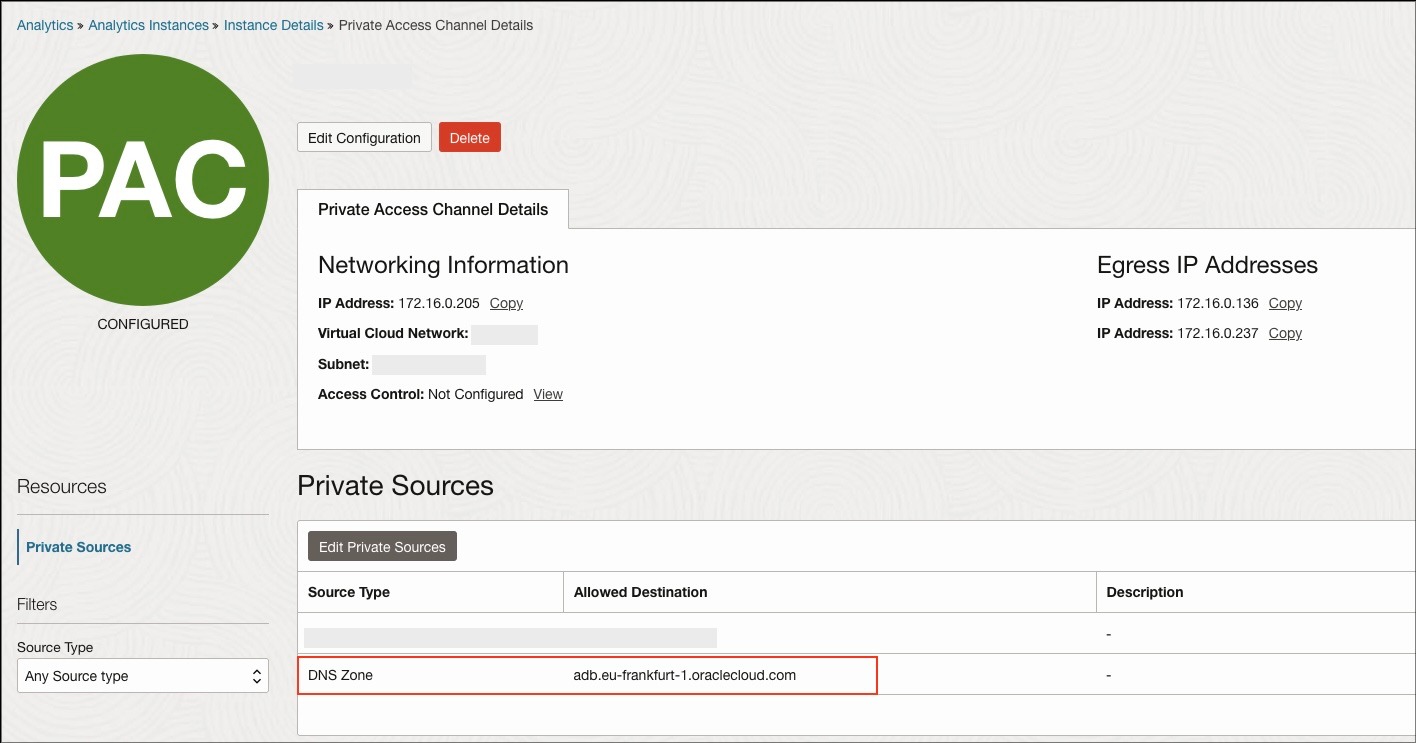
- Note down the ADW domain name from the ADW home page, as shown in the first screenshot, and add as the DNS Zone of the Private Access Channel.
- Click “Configure”. The Private Access Channel will start provisioning, and the OAC instance will show the status as updating. It will take some time to complete this process.
Create and Test the OAC Connection with ADW
Acess your OAC instance using a Bastion host or VPN, as OAC with a private endpont is not accessible through the public Internet. Now create and test the OAC conection with the data source. Please follow these steps to make OAC connection with ADW.
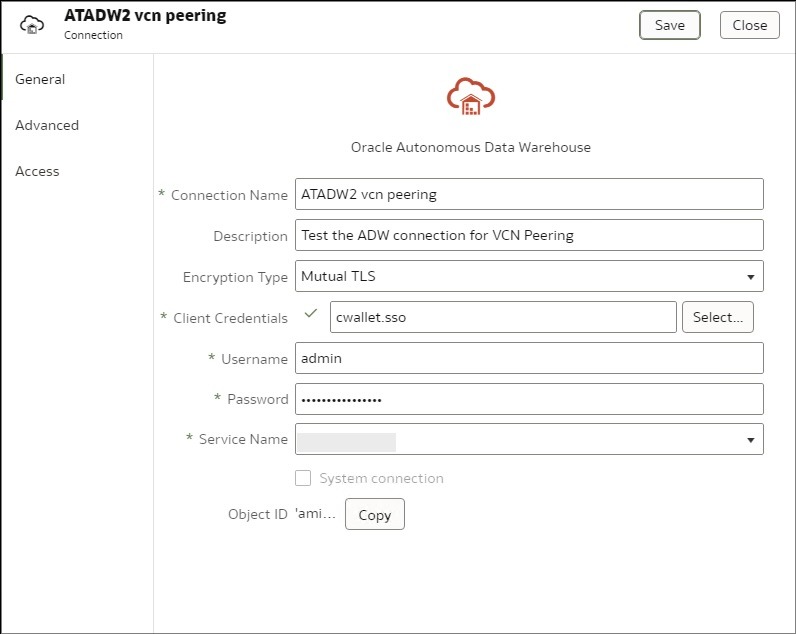
- In the right-upper corner, click the “Create” button and select ADW.
- Enter the details as shown in the example by filling out the Connection name, your username, password and by uploading the ADW Wallet.zip file.
- Click Save and OAC will show a successful connection message.
- To download the ADW wallet:
- Navigate to the Oracle Autonomous Database instance
- Click the Database connection
- Under wallet type, make sure Instance Wallet is selected and then click Download wallet
- Enter a wallet Password and click Download
Want to know more about Oracle Analytics Cloud?
To explore more about OAC, check the links below, and always feel free to share your experience in the Oracle Analytics Community.
Oracle Analytics Cloud GitHub repository