Oracle Analytics Cloud (OAC) enhances your machine learning experience by directly consuming Oracle Cloud Infrastructure (OCI) Data Science machine learning models within OAC data flows. OCI Data Science models are first defined within the OCI Data Science machine learning platform, then deployed so they can be consumed by OAC.
In the model building process, data scientists often encounter the problem of supplying the right columns in the right format to the machine learning model. For example, the Random Forest Classifier model expects input columns to be numeric, but the real-world use cases might not always have only numeric columns. It isn’t reasonable to require end-users to convert all the non-numeric columns to the appropriate required type, apply the model, and debug any issues – including determining what caused them. There’s a smart and simple way to address this.
This article describes transforming input columns to the required format expected by the model, as part of data preparation. It includes the following steps:
- Read the data
- Segregate the columns
- Transform the columns
- Prepare and save the model
Refer to Create a Data Science Model for Oracle Analytics Cloud for detailed steps on creating a data science model for OAC.
1. Read the data
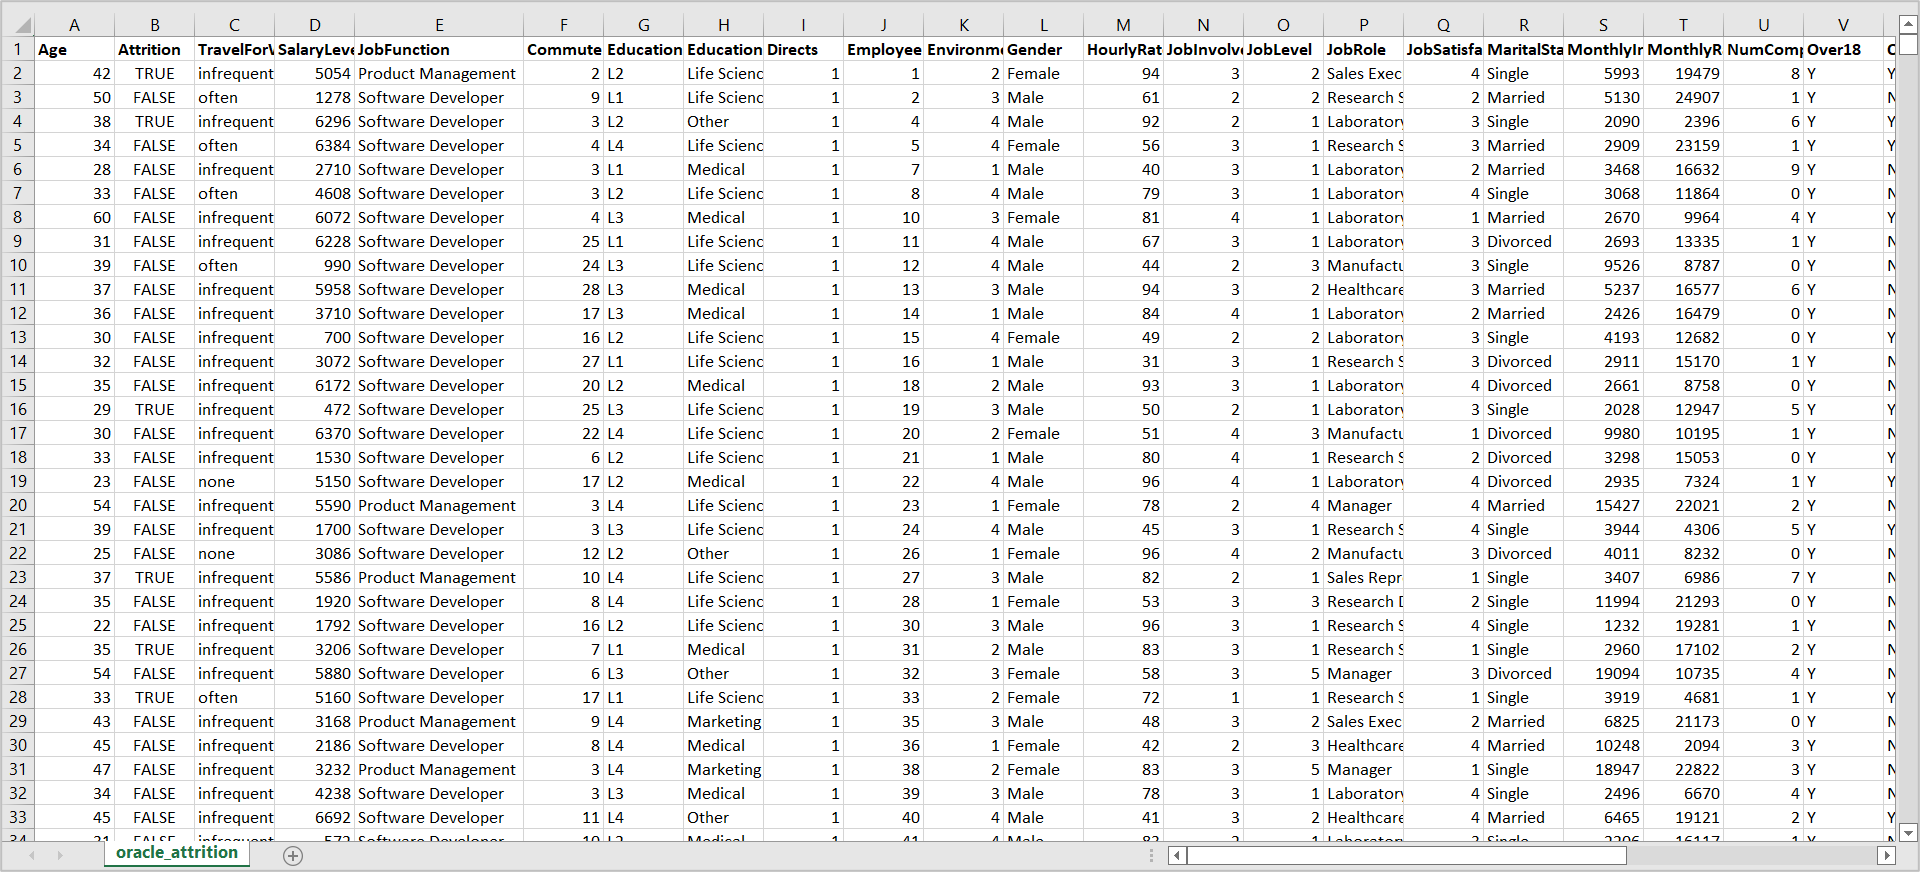
Consider the use case of Employee Attrition. “Attrition” is the target column of this model.
Read the input dataset with the following commands:
import pandas as pd
df =pd.read_csv('oracle_attrition.csv')
2. Segregate the columns
Before you segregate the columns, explore the different data types in the dataset. Enter the following command to find these:
df.dtypes
You see output such as the following:
Age                   int64
Attrition              bool
TravelForWork        object
SalaryLevel           int64
JobFunction          object
EducationalLevel     object
Gender               object
JobRole              object
JobSatisfaction       int64
WeeklyWorkedHours     int64
dtype: object
Ignore the “Attrition” column, because it’s the target. Other columns in the list fall into two categories: “int64” and “object”. “int64” is a numeric type, and “object” is a categorical type. Int, float, long complex are numeric types in Python and str and object are categorical types.
To segregate the columns, create a DatasetFactory from the data frame, using the Oracle ADS library as in these example commands:
import ads
from ads.dataset.factory import DatasetFactory

ds = DatasetFactory.from_dataframe(df,target="Attrition")
train, test = ds.train_test_split(test_size=0.15)
Once you have the dataset factory, you can segregate the columns manually or by selecting the data types.
To segregate manually, simply create a list of all numeric columns in the dataset as numeric_features and all the non-numeric columns as categorical_features:
numeric_features = ['Age', 'SalaryLevel', 'JobSatisfaction', 'WeeklyWorkedHours']
categorical_features = ['TravelForWork', 'JobFunction', 'EducationalLevel', 'Gender', 'JobRole']
This approach works well for datasets with a small number of columns. For datasets with a large number of columns, it’s better to select by data types by using the function “select_dtypes” as shown in this example:
numeric_features = ds.select_dtypes(include=['int64', 'float64']).columns
categorical_features = ds.select_dtypes(include=['object']).columns
You can add the data types in the “include” list to segregate columns by type.
3. Transform the columns
Once you have numeric and categorical columns separated, create pipelines with SimpleImputer and encoders as required by the model. SimpleImputer is used for completing missing values with simple strategies. Replace missing values using a descriptive statistic (for example: mean, median, or most frequent) along each column, or using a constant value. The StandardScaler function is used to standardize the format for data values. One-hot encoding is a process by which categorical data (such as nominal data) is converted into numerical features of a dataset.
from sklearn.pipeline import Pipeline
from sklearn.impute import SimpleImputer
from sklearn.preprocessing import StandardScaler, OneHotEncoder

numeric_transformer = Pipeline(steps=[
    ('imputer', SimpleImputer(strategy='median')),
    ('scaler', StandardScaler())])
categorical_transformer = Pipeline(steps=[
    ('imputer', SimpleImputer(strategy='constant', fill_value='missing')),
    ('onehot', OneHotEncoder(handle_unknown='ignore'))])
Next, create a pre-processor ColumnTransformer with the pipelines and features. The sklearn preprocessing package provides several common utility functions and transformer classes to change raw feature vectors into a representation that’s more suitable for downstream estimators. In general, learning algorithms benefit from dataset standardization.
from sklearn.compose import ColumnTransformer

preprocessor = ColumnTransformer(
    transformers=[
        ('num', numeric_transformer, numeric_features),
        ('cat', categorical_transformer, categorical_features)])
Once you have this preprocessor, create the RandomForestClassifier model with the preprocessor and train your model.
from sklearn.ensemble import RandomForestClassifier

rf = Pipeline(steps=[('preprocessor', preprocessor),
                      ('classifier', RandomForestClassifier())])
rf.fit(train.X, train.y)
4. Prepare and save the model
Prepare the model that’s created using ADS library functions:
import ads
import logging
import os
import tempfile
import warnings

from ads.catalog.model import ModelCatalog
from ads.common.model import ADSModel
from ads.common.model_export_util import prepare_generic_model
from ads.common.model_metadata import (MetadataCustomCategory,
   UseCaseType,
   Framework)
from ads.dataset.factory import DatasetFactory
from ads.feature_engineering.schema import Expression, Schema
from os import path

logging.basicConfig(format='%(levelname)s:%(message)s', level=logging.ERROR)
warnings.filterwarnings('ignore')

from ads.model.framework.sklearn_model import SklearnModel

from ads.common.model_metadata import UseCaseType

ads.set_auth('resource_principal')
path_to_ADS_model_artifact = tempfile.mkdtemp()
sklearn_model = SklearnModel(estimator=rf, artifact_dir=path_to_ADS_model_artifact)
model_artifact = sklearn_model.prepare(inference_conda_env="generalml_p37_cpu_v1", training_conda_env="generalml_p37_cpu_v1",
    X_sample=train.X, y_sample=train.y, use_case_type=UseCaseType.BINARY_CLASSIFICATION)
Once the model is prepared, save it to the OCI Data Science model catalog with the following command:
mc_model = sklearn_model.save(project_id=os.environ['PROJECT_OCID'],
compartment_id=os.environ['NB_SESSION_COMPARTMENT_OCID'],
            training_id=os.environ['NB_SESSION_OCID'],
            display_name="RF_Classifier",
            description="A Random Forest classifier",
            ignore_pending_changes=True,
            timeout=100,
            ignore_introspection=True,
            freeform_tags={"key" : "value"}
Successfully saved models are listed in the Models section of the Project details page. 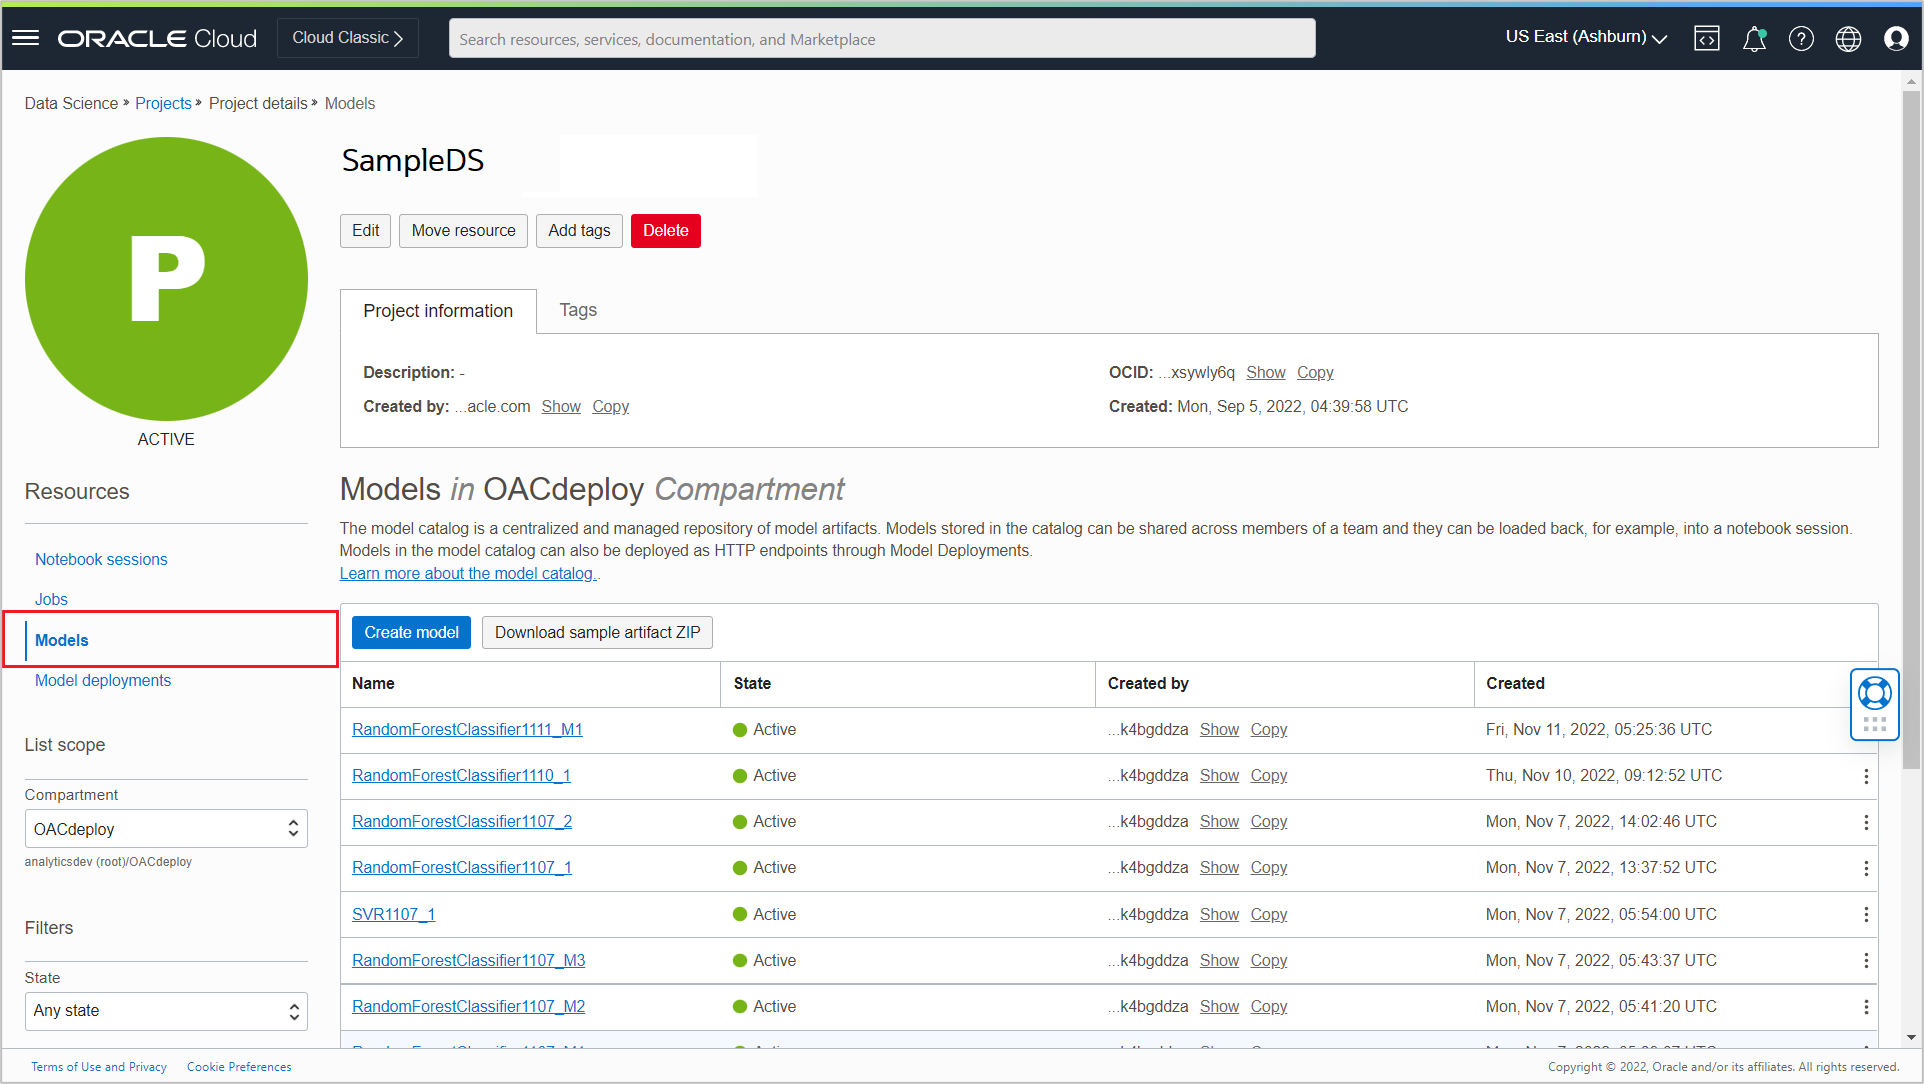
Call to Action
In this article, you learned how to transform columns from the input dataset to the required format expected by the model. As a next step, you can register this model in OAC and apply it to your input dataset using OAC data flows. For more information, see the articles Register a Data Science Model in OAC and Invoke a Data Science Model from OAC and in OAC documentation, Use OCI Data Models in Oracle Analytics.