Have you ever had a column in your data that included multiple values that were actually the same value with variant names or misspellings? These data quality issues greatly impact the accuracy and usefulness of your data analysis and must be corrected during the dataset authoring process. Let’s examine a use case using the Replace Value List dialog in the Oracle Analytics Cloud Dataset editor. We’ll start with a demo dataset that has some spend information from our approved vendors in the column MerchantName. Even during initial dataset creation, it’s evident by reviewing the Data Quality Insights that the Merchant Name column is very unstandardized and needs to be cleaned up.
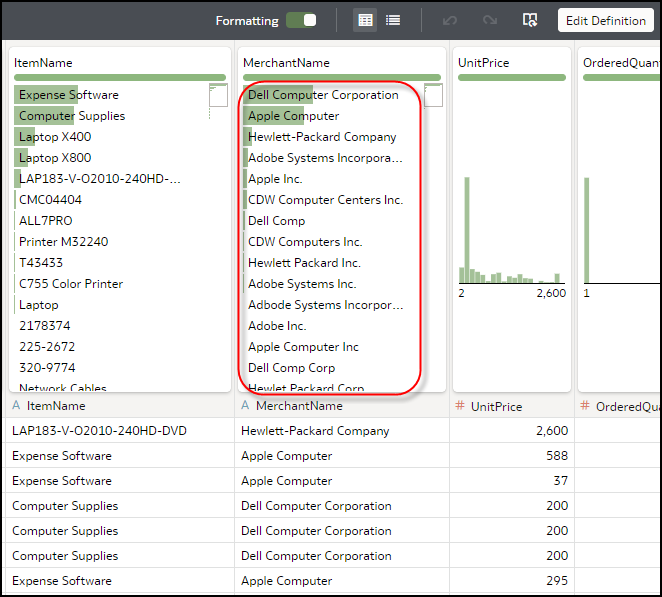
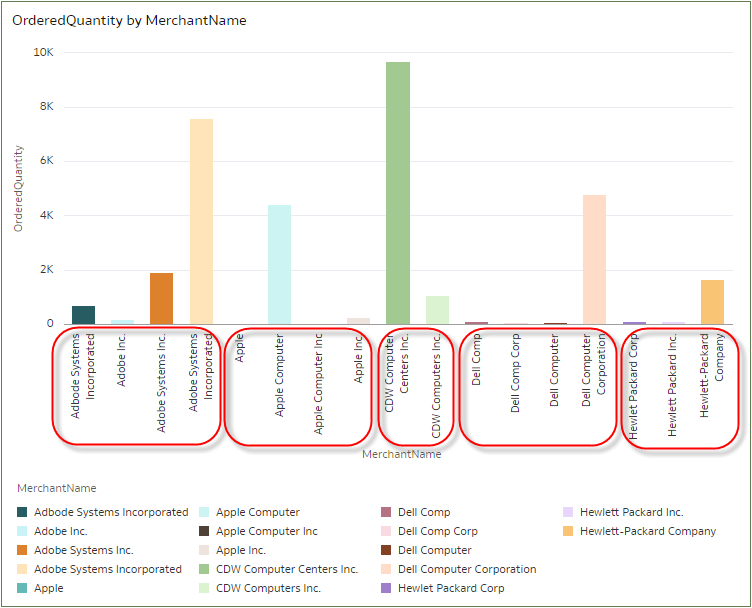
If we create a workbook from this data, our spend visualization isn’t very useful due to the unstandardized approved vendor names, such as Apple Computer and Apple Inc.
We need all the vendor names to be standardized so that our spend analysis makes sense. Standardizing data values isn’t the same as spelling corrections. Most of the variants in our example are correctly spelled; however, they’re in different variant forms that need to be standardized or changed to all be the same so that our spend analysis for each vendor is accurate. Let’s return to the dataset and use the new Replace Value List feature. To invoke the dialog, click the menu and select Replace Value List from the drop-down list. The system populates the left-hand side with the original values and by double-clicking the replace value side, we can start typing the replacement values. After entering in the new value and pressing Enter or Tab, the system automatically puts the cursor on the next value in the list ready to be replaced.
For this example, we standardize all the values to our ficticious company for these approved vendors. As we enter the new values, the Quality Insights below are refreshing, showing the results of our progress toward standardizing all the values. Once done, we click the OK button to apply the changes and the Quality Insights and sample values reflect our changes. We notice that the Transform Script panel has a single transform called Replace List for Supplier Name, which we can edit if we need to change some values or add values.
An additional note is that directly changing values from the Quality Tiles automatically adds these replacement values to the Replace Value List, which we can then edit by clicking the Pencil icon. After we save the changes and create a workbook with the same visualization as above, notice how our visualization is now much more accurate and insightful regarding our vendor spend.
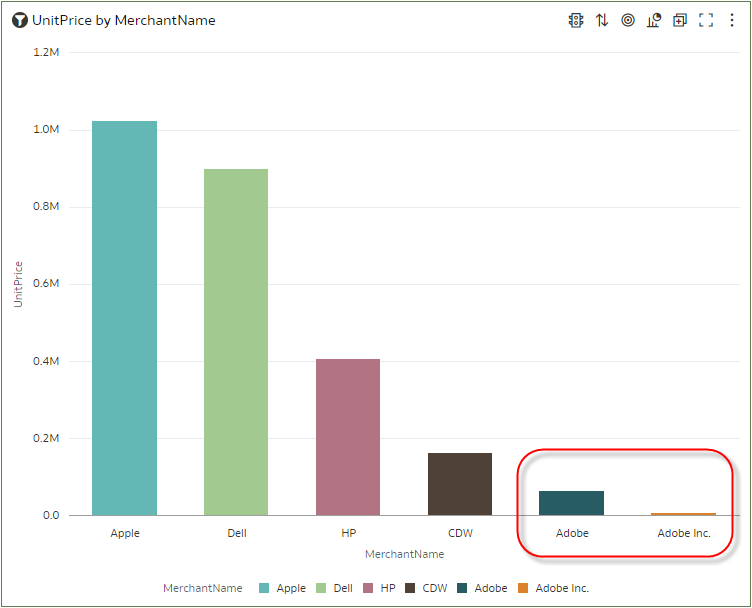
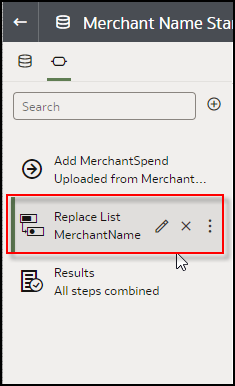
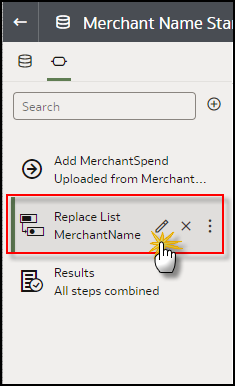
However, there’s still one issue with our merchant names; some rows for Adobe, Inc. aren’t standardized to Adobe. The reason is that the quality insights are based on representative random samples of the data and some low cardinality rows such as Adobe, Inc. might not have been picked up during the sampling pass. But there is a way to address this in the Replace dialog. To fix this issue, let’s return to the Dataset editor, locate the Replace List Merchant name, and click the Pencil icon to edit our previous work.
The Replace List dialog with our previous replace values is displayed. To add a value that’s not on the list, let’s scroll to the bottom of the list to find a field where we can enter both the old value and the replace value. We enter “Adobe Inc.” as the old value and standardize it to “Adobe” as we did all the other variants of Adobe.

This should have fixed the issue in our visualization. Let’s take a look.
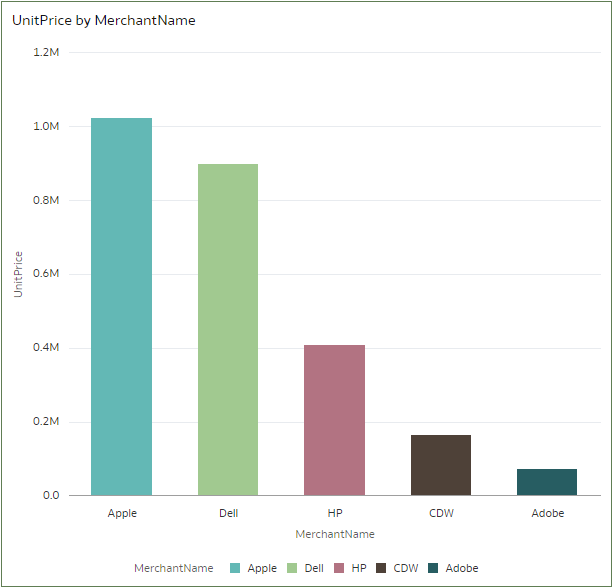
We now have a crisp visualization that reflects the actual spend for each of our approved vendors.
Call to Action
We hope that you found this information useful and that you’ll experiment with standardizing data with the Multi Replace feature. As you’ve learned from this example, replacing multiple values is very easy to do with the new dialog and you can always go back and edit within a single transform. See Transform Data Using Replace. And make sure to stay tuned for additional blogs with more tips and tricks!