
Imagine managing your data at Oracle NoSQL Database Cloud Service like a pro from the comfort of a couch with your cat on your lap or anywhere else your heart takes you. You swipe and tap on your phone and let those graceful moves manage the service for you.
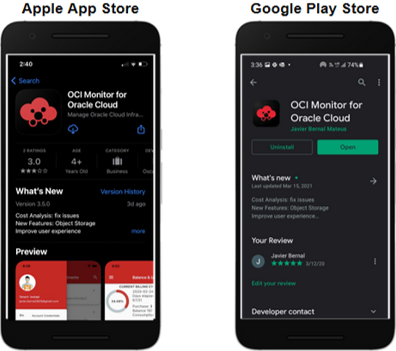
Let me unveil a nifty and powerful mobile application that helps me do that. Lately, I installed a mobile app called OCI Monitor for Oracle Cloud found at the Apple App Store or Google Play Store.
Before I walk through the app, here’s an overview of the Oracle NoSQL Database Cloud Service. It is a serverless, fully managed NoSQL data store that delivers predictable single-digit millisecond response times at massive scale. Applications built with this service can scale on-demand based on the workload. It supports document, fixed schema, and key-value data models. Developers can focus on application development without worrying about managing the underlying servers, storage, cluster deployments, software installation, or backup.
Download and Install the App
Go to your favorite mobile phone app store, search for “OCI Monitor”. You should find the following app in the Apple and Google app stores. Tap to download and install.
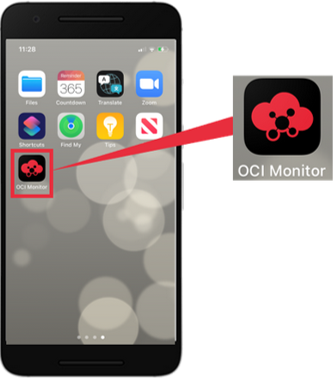
The download and installation should complete in less than 30 seconds. After install, you should find the app on your phone home screen — tap OCI Monitor to launch the app.
Sign In
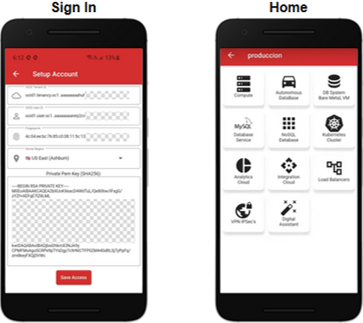
Sign in using the Oracle Cloud credentials: OCI Tenant ID, User ID, Fingerprint, and Private Pem Key. Select a region and tap the access button. Once you are signed in, the app home screen will list the Oracle cloud services you can access.
Oracle NoSQL Database Cloud Service
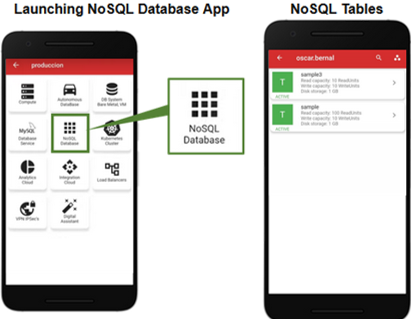
Locate NoSQL Database and tap the icon to start. You will see a list of the NoSQL tables in your tenancy. This release supports managing the tables already created in the “Service”. Future releases will support table creation.
NoSQL Tables
A NoSQL table has the following properties:
- A collection of rows – Each row consists of key and data fields defined using DDL (Data Definition Language) during table creation or alteration. The shard and primary keys are required. The data field supports scalar and non-scalar data types, e.g., integer, string, JSON, array.
- Throughput and storage capacities – Each table capacity is limited by the number of read units and write units, gigabytes of storage provisioned. These capacities can be scale up or down on-demand to meet different workloads.
- Others: Time to Live (TTL), secondary indexes.
Since you can provision each NoSQL table throughput and storage capacity individually, these resources scale linearly to meet any dynamic workload at a very granular scale.
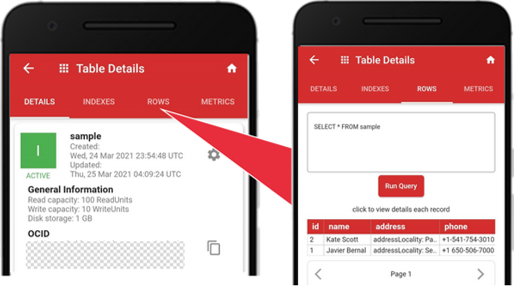
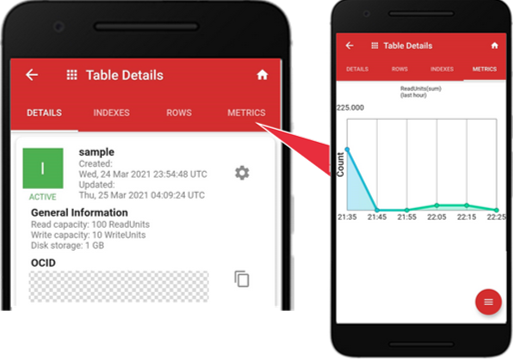
Let’s start by tapping the NoSQL table called “sample” created by me using the service console earlier. The “Table Details” is the default screen. There are four tabs: “DETAILS”, “INDEXES”, “ROWS”, “METRICS”. The “DETAILS” is the default tab showing the table capacities and data definition.
In the “sample” table, the capacities are as follows: the “Read capacity” is 100 ReadUnits, the “Write capacity” is 10 WriteUnits, the “Disk storage” is 1 GB.
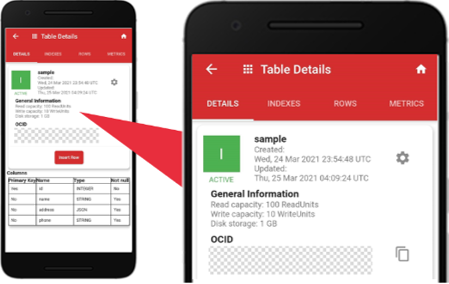
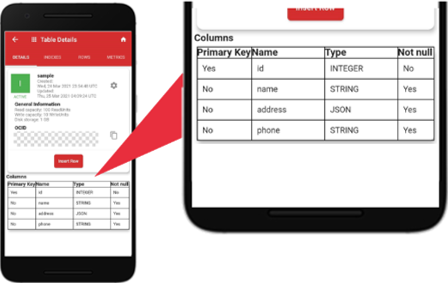
The table data definition is as follows: “id” is the primary key, “name, address, phone” are columns with different data types and null settings. The data types used are id: integer, name: string, address: JSON, and phone: string.
Oracle NoSQL Database Cloud Service supports the following scalar and non-scalar data types: binary, boolean, double, float, long, integer, string, number, timestamp, enum, array, map, record, and JSON.
Manage Table Capacities
Each table capacity is defined by the number of read units and write units, gigabytes of storage provisioned.
For the read capacity, Read Unit is the measurement. One Read Unit is defined as the throughput of up to one kilobyte (KB) of data per second for an eventually consistent read operation. To achieve the throughput of up to one kilobyte (KB) of data per second for an absolute consistent read operation, two Read Units need to be provisioned. In this sample table, 100 Read Units is the max capacity for eventually consistent read operations of up to 100 KB per second or 50 KB per second for absolute read operations.
For the write capacity, Write Unit is the measurement. One Write Unit is defined as the throughput of up to one kilobyte (KB) of data per second for a write operation. In this example, 10 Write Units is the max capacity for write operations of up to 10 KB per second.
For the disk storage, Gigabyte(GB) is the measurement. One GB is defined as a gigabyte of computer storage space used by Oracle NoSQL Database Cloud Service. In this sample table, 1 GB is the max capacity for data storage.
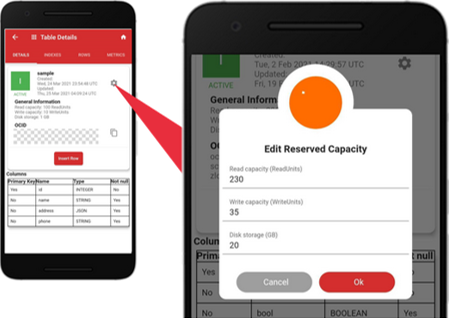
To change the throughput and storage capacities, tap the setting gear icon. Use the Edit Reserved Capacity screen to change the capacities, e.g., the “Read capacity” equals 230, the “Write capacity” equals 35, and the “Disk storage” equals 20 GB. Tap “Ok” to save.
Manage Table Data
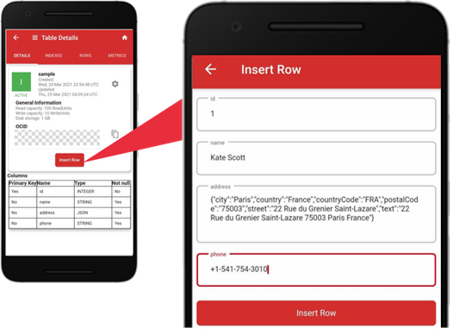
You can insert, query, update, or delete records. To insert a new record, tap Insert Row on the “DETAILS” tab. The “Insert Row” screen shows “id”, “name”, ”address”, and “phone” as the fields for the new row. Enter the value for each field. The data type for the “address” field is JSON. Please make sure to enter a valid JSON object. Tap the “Insert Row” button to add the new record.
To query records, tap the “ROWS” tab. It shows two records currently stored in the table. The default query is the “SELECT * FROM” clause and the table name that list all records. You can enter other SQL clauses in the input box, then tap Run Query to query specific records.
To update a record, tap a specific row. The “Details Row” screen will show the field values for the row, e.g., “id”, ”name”, ”address”, and “phone”. Tap the red menu icon to show the pop-up, tap the “Update Row” icon.
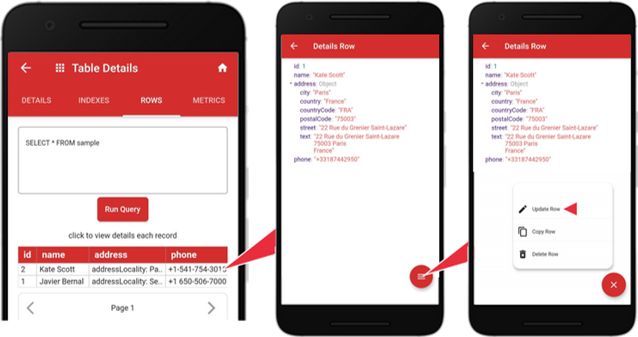
After editing the values, tap the “Update Row” button to complete the update.

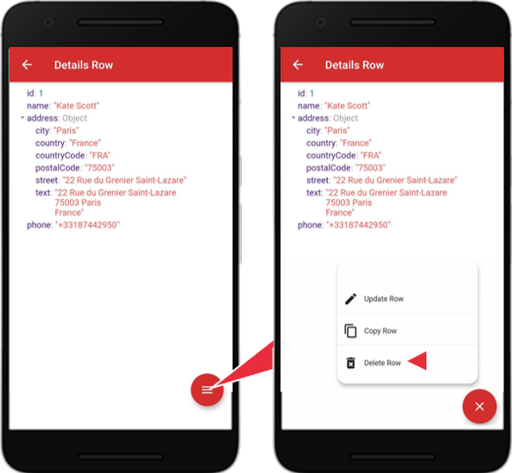
To delete a record, tap a specific row. The “Details Row” screen will show the fields for the row. Tap the red menu icon to show the pop-up, tap the “Delete Row” icon.
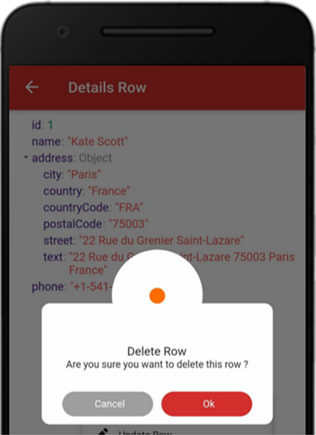
The following “Delete Row” confirmation screen will pop up. Tap the “Ok” button to delete the record.
Monitor Table Metrics
You can monitor the following table metrics:
- Read units, write units, storage GB provisioned
- Read throttle count, write throttle count, storage throttle count
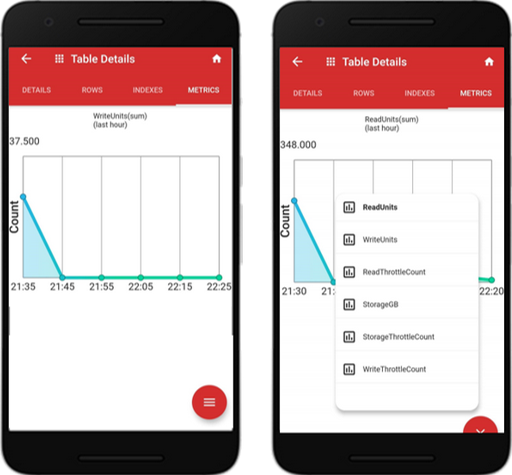
Tap the “METRICS” tab to show these metrics. The default metric is “ReadUnit (sum)”. To select other metrics, tap the red icon at the bottom right.
Below is the metric for the “WriteUnit (sum)”. To access other metrics, tap the bottom right red icon and pick the metric you want to monitor.
Manage Table Indexes
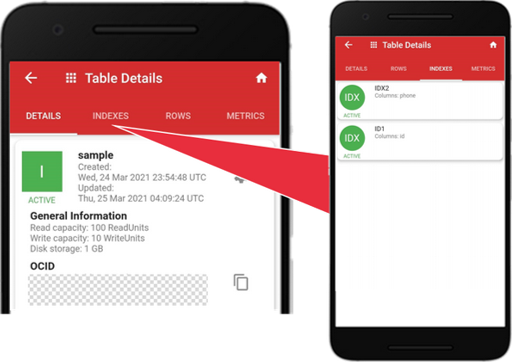
You can only view the secondary indexes currently. A future release will support the creation of secondary indexes.
Tap the “INDEXES” tab, and you will find the “id” and “phone” columns are indexed.
Summary
This blog goes through a series of steps using the OCI Monitor mobile app to manage Oracle NoSQL Database Cloud Service. It is effortless to use, and you can take the service anywhere.
Go ahead and try it. The download and installation process is less than 30 seconds. The good news is you can try this app with the Always-Free Oracle NoSQL Database Cloud Service and start learning to manage the service from anywhere. Sign up here.
Acknowledgment: Thanks to Javier Bernal, the very talented software engineer at Oracle with whom I have the privilege to work alongside during the app development and testing.