The Oracle Machine Learning AutoML User Interface makes it easy for you to build and deploy machine learning models in just a few clicks. The OML AutoML UI, a component of Oracle Machine Learning on Oracle Autonomous Database Serverless provides a no-code interface that automates the machine learning modeling process for classification and regression use cases.
Building on OML4Py’s AutoML Python API, the AutoML UI supports automated machine learning and serves as an accelerator for data scientists and an enabler for non-experts for in-database machine learning. Like OML4Py AutoML, the no-code AutoML UI accelerates machine learning projects by giving users quick feedback on data set suitability for producing useful models – alleviating the repetition and trial-and-error of the machine learning modeling process.
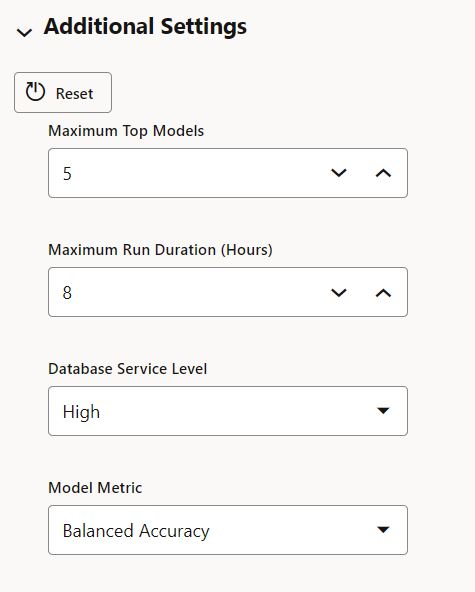
OML AutoML UI automates model building with minimal user input – just specify the data and the target in what’s called an experiment and the tool does the rest. However, you can adjust some settings, such as the number of top models to produce, the model selection metric, the Autonomous Database service level to enable parallelism, and even the specific algorithms to use.
With a single click, you can generate editable “starter” notebooks. These notebooks contain Python code using OML4Py that specifies the actual data columns used, builds the selected model using the settings AutoML chose to produce that model, scores data, and evaluates results. You can enhance this generated notebook to apply your own domain expertise and augment the solution. Using OML Notebooks scheduling, run your notebooks on a recurring schedule to periodically rebuild the model on the latest data. In addition, deploy models to OML Services from the AutoML UI as REST endpoints in just a few clicks.
Simplify machine learning model building
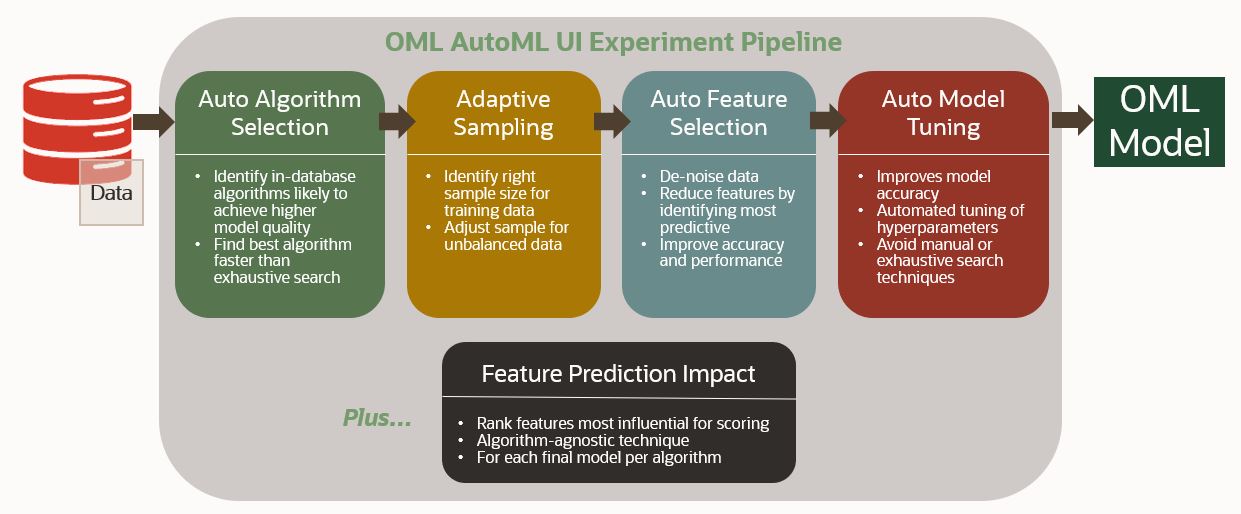
With OML AutoML UI, create experiments that automate several time consuming and repetitive steps in the machine learning modeling process, namely:
- Selecting the algorithm(s) that could work best with the provided data
- Settling on the right data sample for you models
- Identifying which features (i.e., predictor columns) in your data provide the most signal and minimize noise
- Building, tuning, evaluating, and selecting ML models
- Understanding which features have the most impact for each model and overall
OML AutoML UI condenses these into algorithm selection, adaptive sampling, feature selection, model tuning, and feature prediction impact as highlighted below.
OML AutoML UI automates the modeling step and facilitates deployment
For context, consider the steps in the overall ML process as captured by the Cross Industry Standard Process for Data Mining, or CRISP-DM. You still need to understand the basic ML process for framing the problem and selecting and preparing the data. OML AutoML UI automates the modeling step and simplifies deployment. Let’s expore each step in the following diagram.
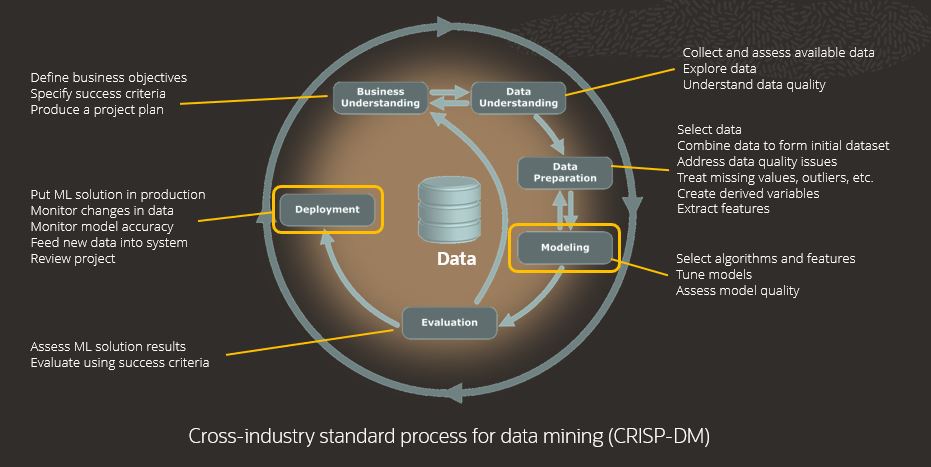
In business understanding, you define the problem to be solved and identify business objectives and success criteria against which to assess the solution. Data understanding includes data exploration and visualization, which is key to understanding what data you have, where it is, what it means, and to what extent it’s usable. For data preparation, we need to clean data, combine data from multiple sources and derive new variables.
In the modeling step, the typical manual process is to try multiple algorithms, select the most useful features for each while eliminating noisy features, and tune algorithm settings (or hyperparamters). This is a highly iterative and repetitive process, often involving much trial and error. For tuning, it helps if you understand the specific hyperparamters applicable to each algorithm, but this is usually the domain of a data scientist.It’s the modeling step where OML AutoML UI first steps in to automate and intelligently reduce the search space to produce models. Note that the AutoML UI uses in-database algorithms, which have been designed for scalability and performance – taking advantage of the Exadata platform and optimizing memory usage.
The evaluation step requires the “business understanding” team to assess how well the machine learning solution meets the business objectives and success criteria. This is aided by system-provided model performance metrics, model explainability, and prediction details.It’s in the evaluation step that the decision to deploy the ML solution is made.
For deployment, you need to be able to include model results quickly and easily in applications and dashboards, using interfaces that mesh well with the target environment. In database machine learning streamlines this process, as data and ML models reside in the database as first class objects – ready for use. Of course, if you want to score data using REST endpoints, you can deploy models to OML Services either using the REST API or through the AutoML UI. There are other aspects to deployment, including data and model monitoring. OML Services provides support for each of these and ADB Serverless supports no-code monitoring user interfaces.
Define and run an experiment
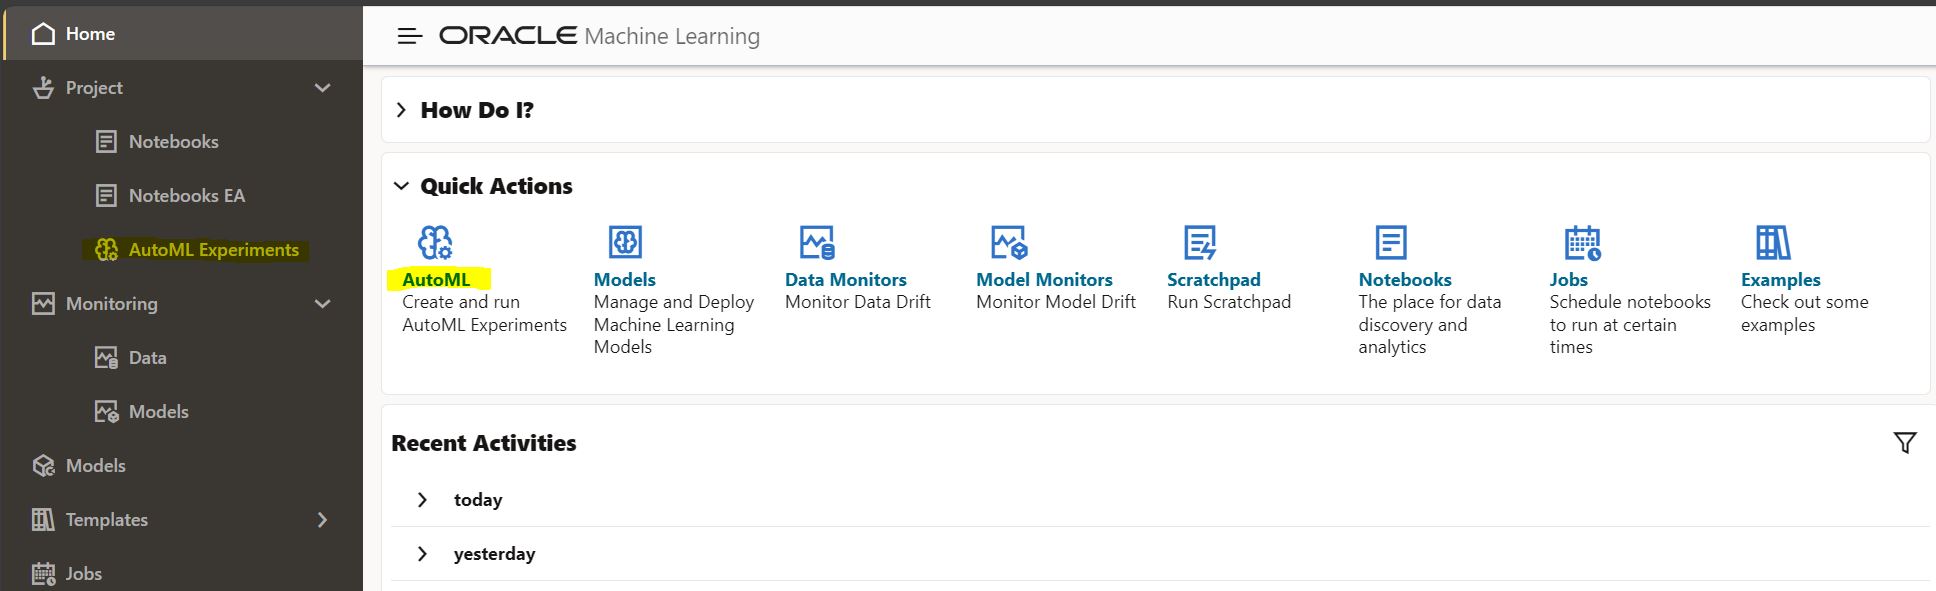
From the OML user interface, click “AutoML” or from the menu, select “AutoML Experiments.”
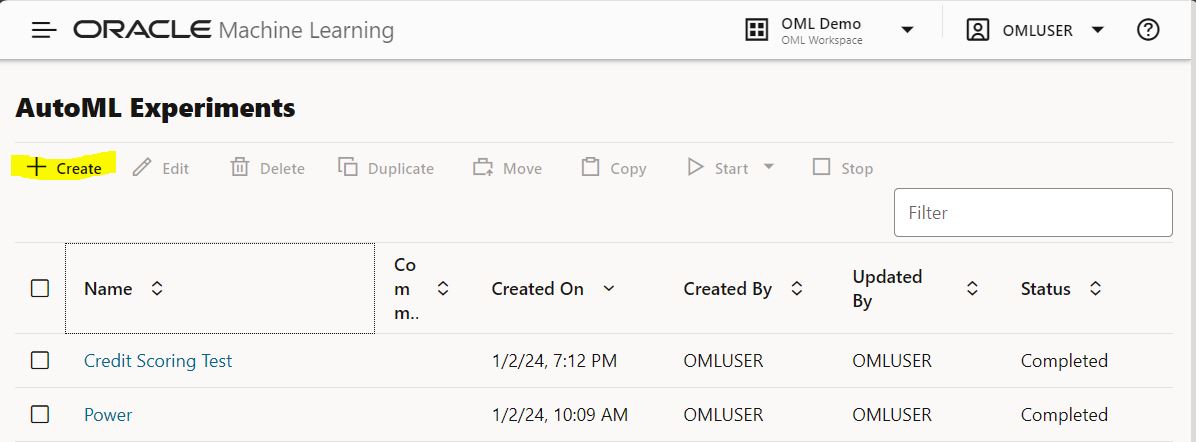
This brings you to the AutoML Experiments listing page, where you click “+ Create” to create a new experiment.
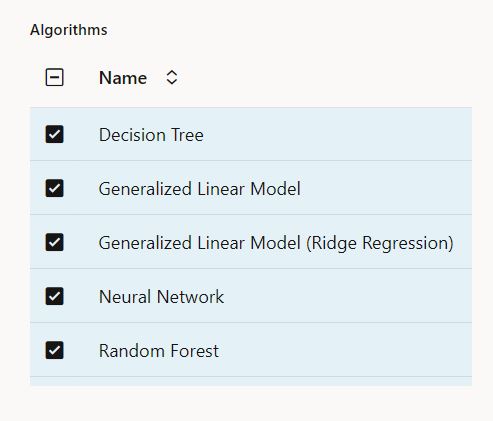
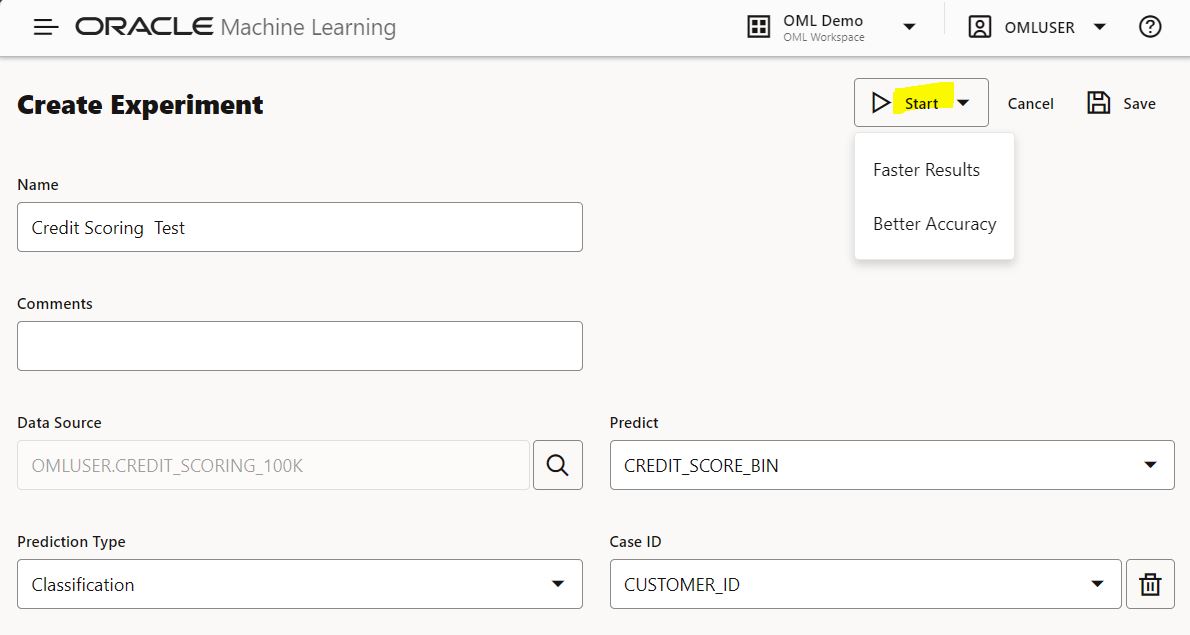
This brings up the “Create Experiment” page where you specify a name for your experiment, any comments, the data source, and the target column you wish to predict. The prediction type is selected based on the type of column and number of distinct values. As noted above, there are some addition settings, like the number of models to produce, ADB service level, and the model selection metric. The algorithms applicable for either classification or regression are automatically provided, however, if there are algorithms you don’t want considered, you can deselect them.
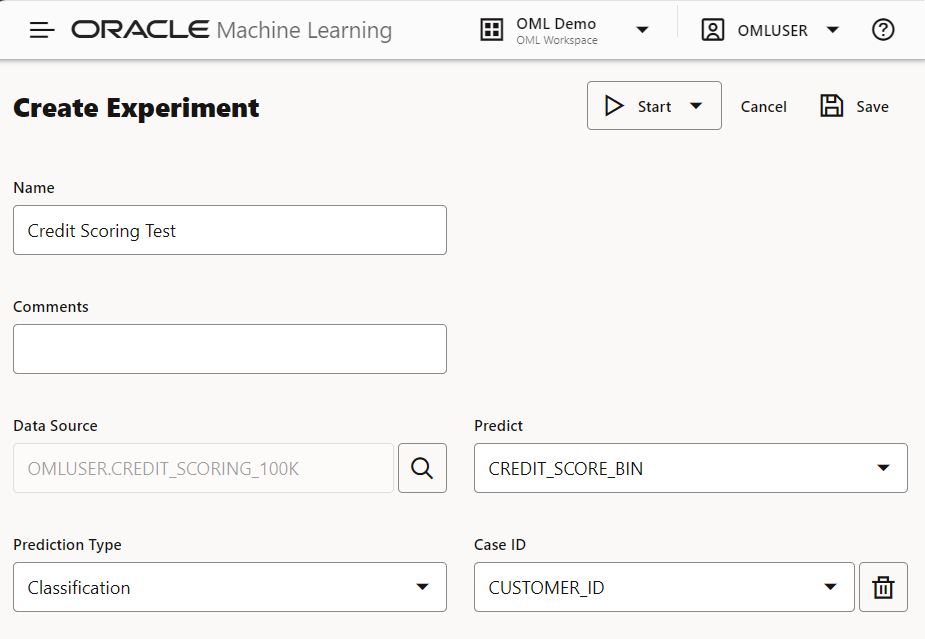
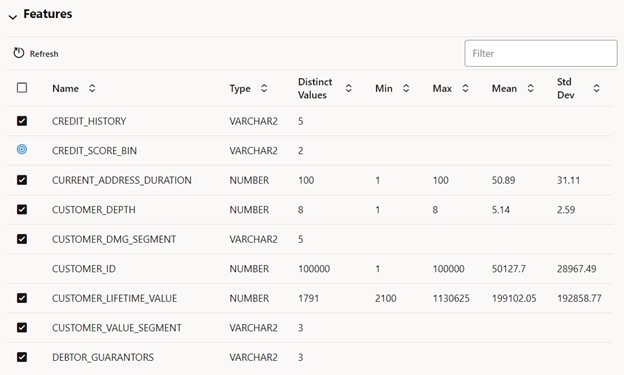
After selecting the data, the “Features” section is populated with the column names and available statistics. The target column and case ID columns are flagged and you can deselect features you wish to exclude as predictors in your model.
At this point, you can start your experiment. Clicking the “Start” button provides two options: “Faster Results” and “Better Accuracy.” Faster results tries fewer pipeline combinations, whereas better accuracy will try more such pipeline combinations, which consist of data, algorithms, and settings.
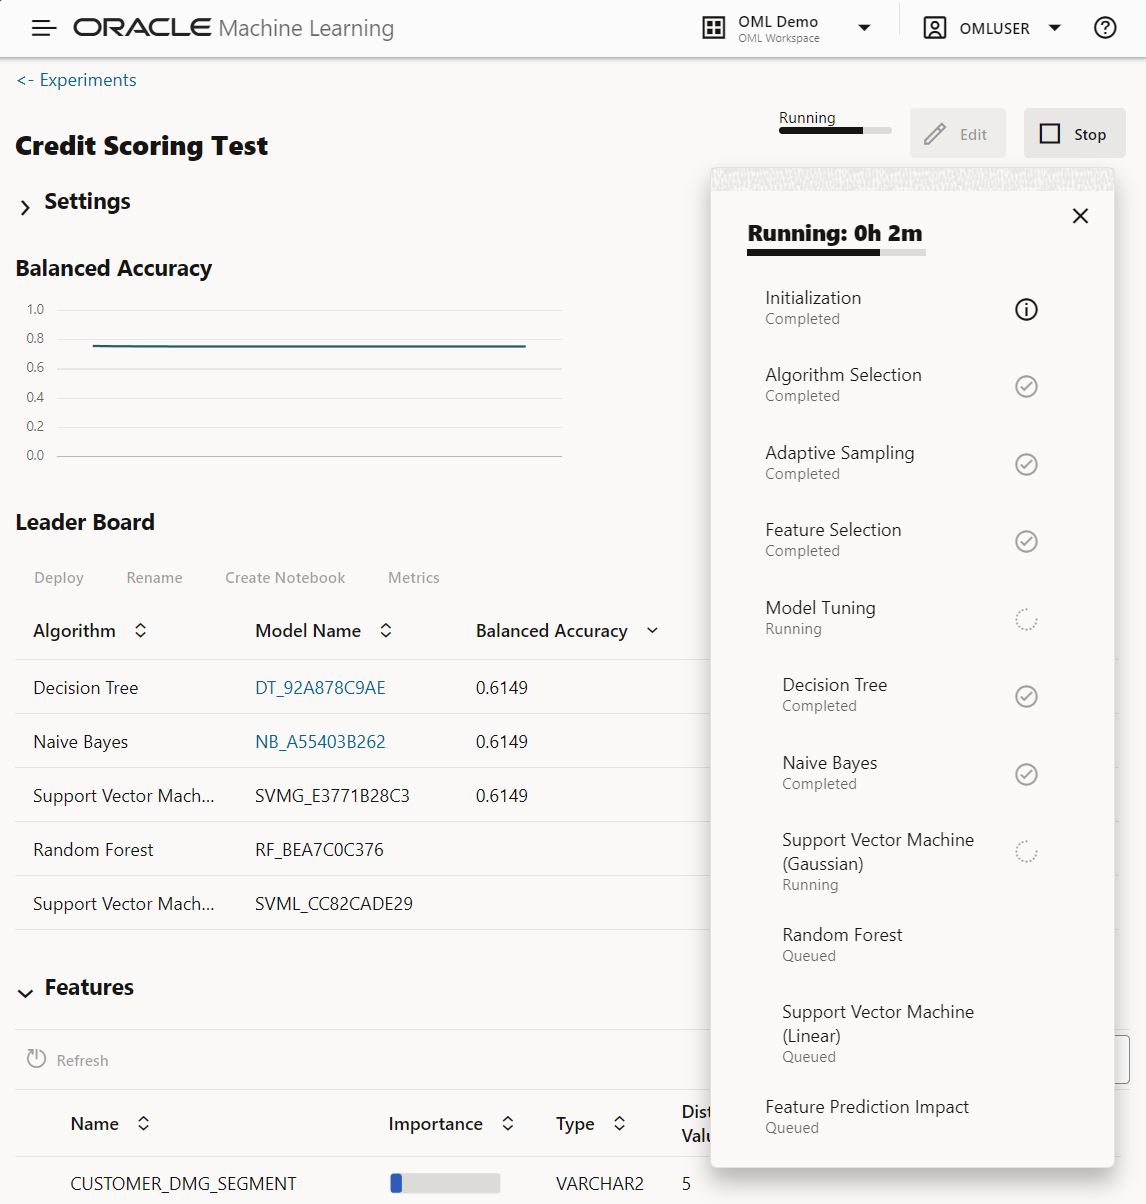
As the experiment runs, you see the progress bar and the workflow steps be checked off as they complete. The leaderboard is also updated as models are built and the highest performing model for each algorithm is found.
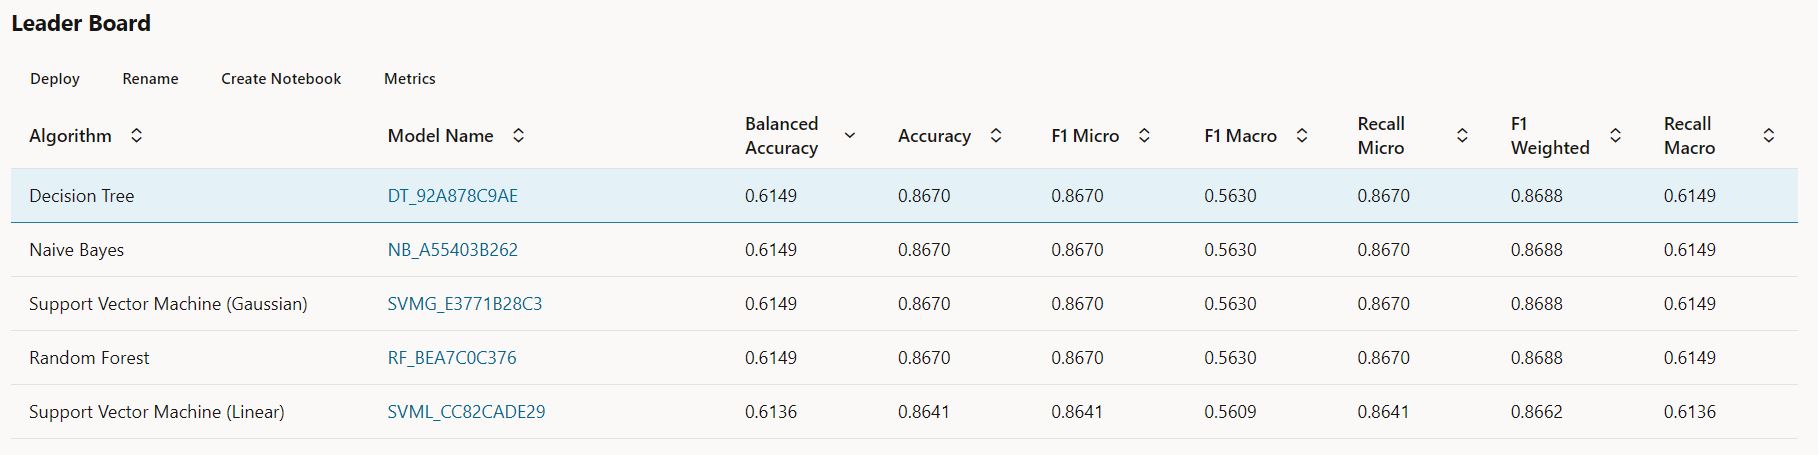
Once the experiment completes, you can select additional metrics to compare models using the “Metrics” button.
Selecting one of the model rows, you can deploy the corresponding model to OML Services for access using REST endpoints. Just specify the URI, version, namespace, and whether you want to share this model with others.

Of course, you can also use models produced from experiments directly through SQL queries for ease of integration with, e.g., enterprise applications, Oracle Analytics Cloud, and Oracle APEX – basically anything that can invoke SQL queries.
Take OML AutoML UI for a test drive
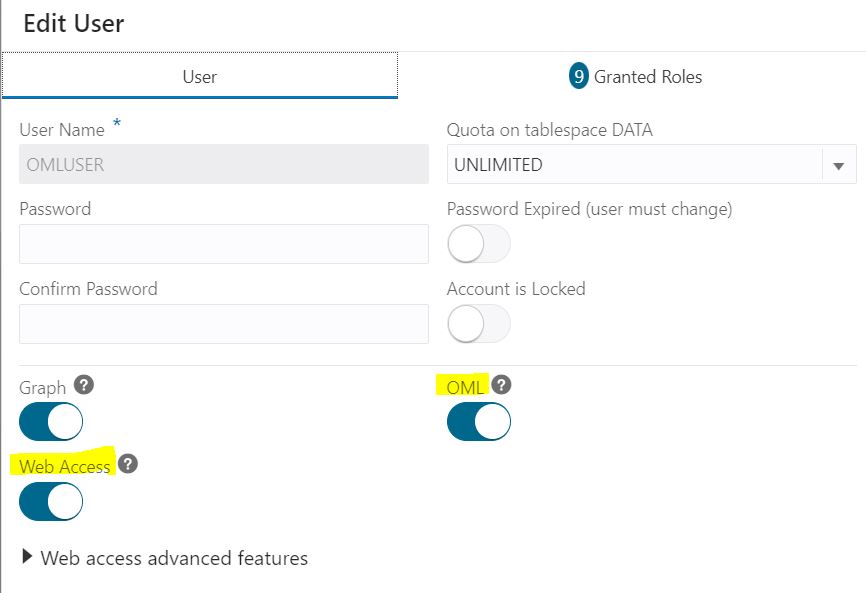
Access OML AutoML UI in Oracle Autonomous Database Serverless alongside OML Notebooks. If you’re already an ADB user, just enable your database user for OML access. As the ADMIN user in the ADB Database Actions, click the “DATABASE USERS” tile under Administration. Then toggle on “OML” and “Web Access” as shown below.
If you don’t have ADB readily available or you want to experiment in a separate environment, try OML AutoML UI today using Oracle LiveLabs through the Oracle Machine Learning Fundamentals on Autonomous Database workshop and other OML LiveLabs.
Additional resources
Oracle Machine Learning on oracle.com
Documentation
Oracle LiveLabs