Introduction
You can enhance user experience by creating defaulting and validation rules using Business Rules in Visual Builder Studio. These features ensure data quality, consistency, and streamlined user experiences, and allow for quick adaptation to HR compliance requirements in Cloud HCM Redwood applications.
Accessing Defaulting and Validation Capabilities
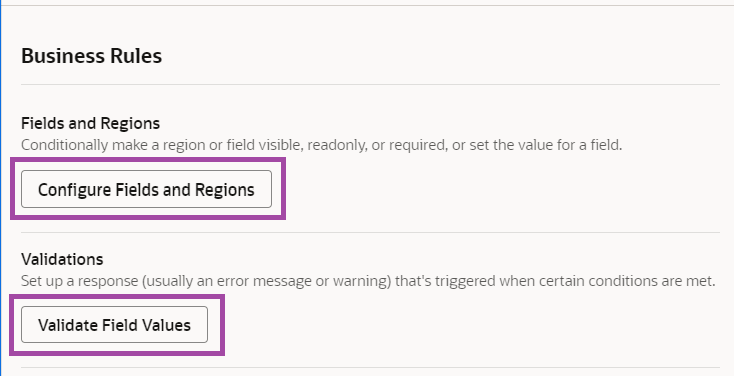
The new defaulting and validation feature in Oracle Cloud HCM are accessible through the Business Rules section in VB Studio. These features include:
Configure Fields and Regions: This allows for defaulting field values, which pre-populates fields based on specific criteria. This is also where you could define the rules that related to hiding and un-hiding fields and regions or making them required or read-only etc.
Validate Field Values: This ensures that user entries meet the required validation rules before being saved.
Prior to creating a rule, refer to the implementation guidelines to check feasibility and support for the page you want to personalize. Business rules can be created without approval as long as they follow the guidelines. As we write this blog, we are on 24D and below are the Redwood pages supported for defaulting and validation.
| Update 24B | Update 24C | Update 24D |
|---|---|---|
|
|
|
Use Case for Defaulting and Validation in Change Assignment
Defaulting a Field Value
Let’s create a defaulting rule for Assignment Change to default Full Time Part Time and Hourly / Salaried field based on the Working Hours.
Access Business Rules:
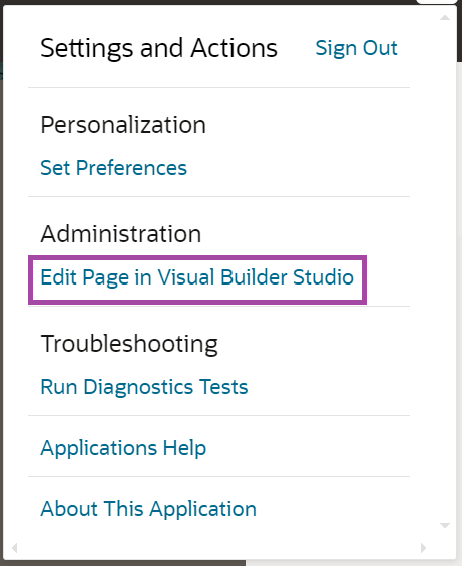
Navigate to the Change Assignment page in Oracle Cloud HCM. Click on “Edit page in Visual Builder Studio”.
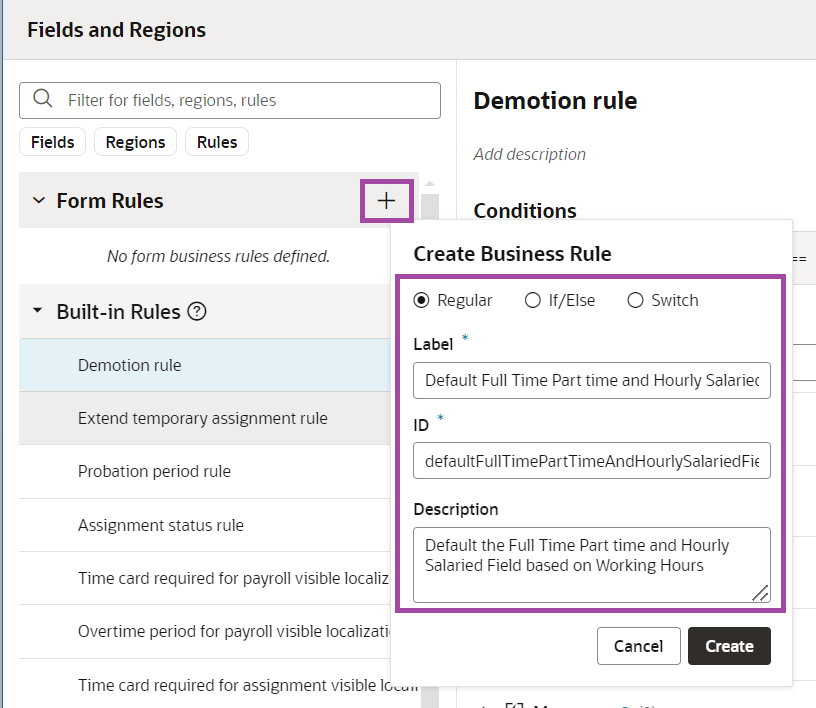
After the page opens in VB Studio, click on Configure Fields and Regions from the menu present in the right side of the page.
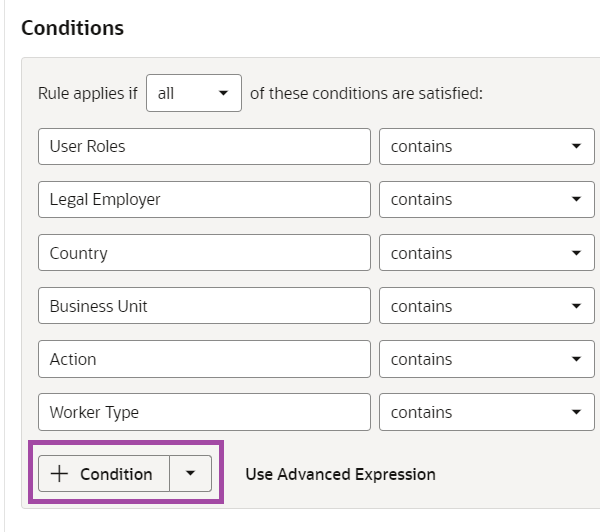
Click on + to create a new Business Rule.
Add a rule label as “Default Full Time Part time and Hourly Salaried Field”. ID field would generate automatically.
We can also add an appropriate description as shown below.
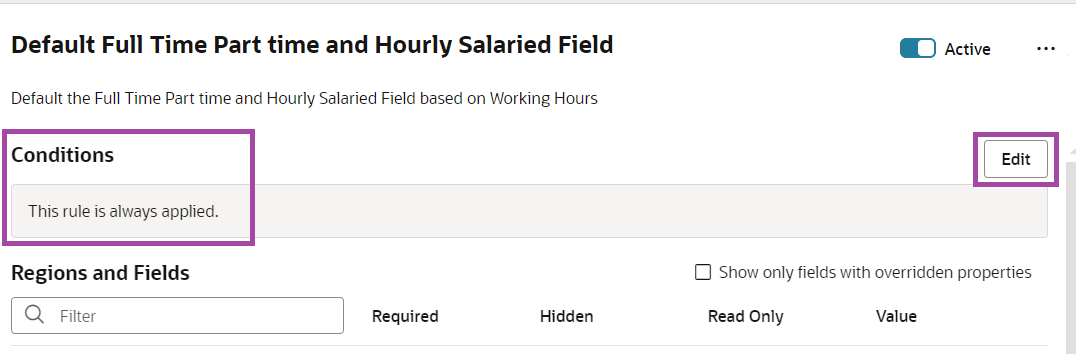
On Conditions section, click Edit.
Click on the + Conditions button at the bottom and Search for Working Hours and select the field from “Field Values” as this represents the data present in the UI.
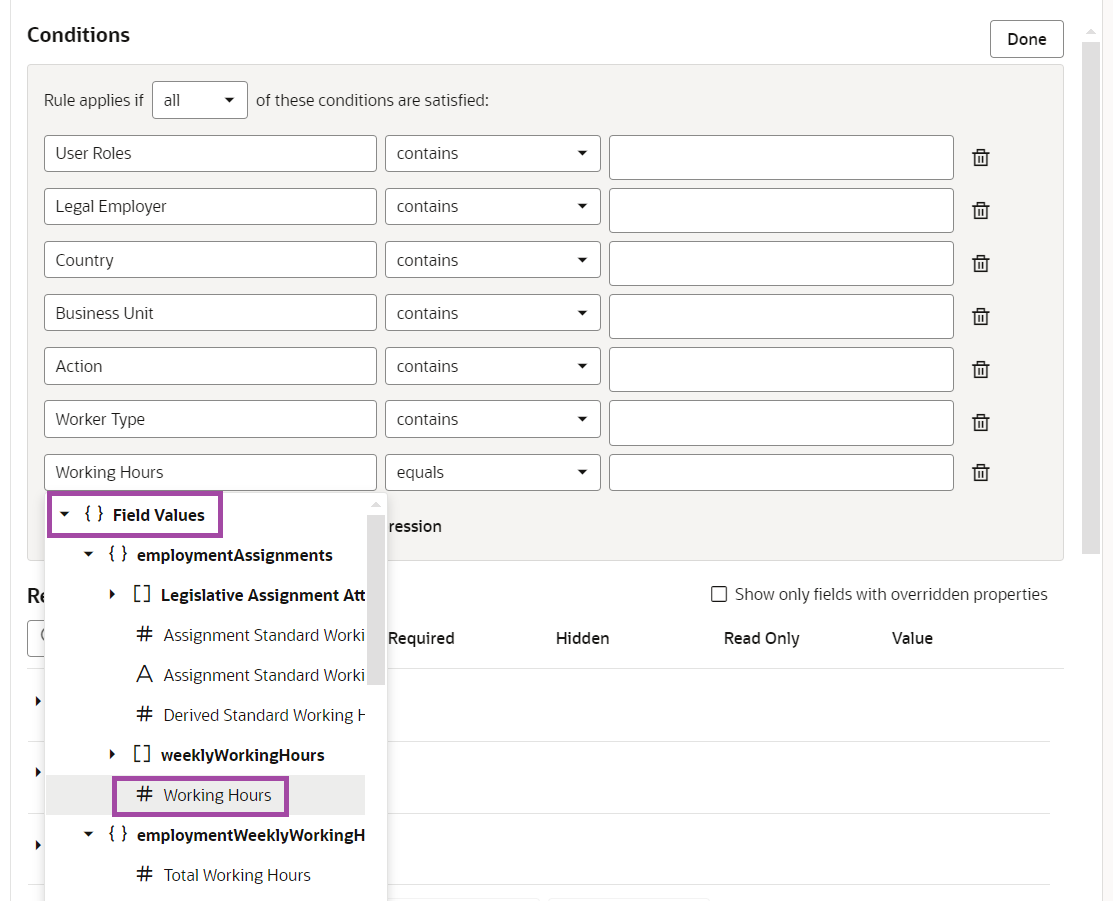
Select clause as less than or equals and value as 35. After adding the conditions, click Done.
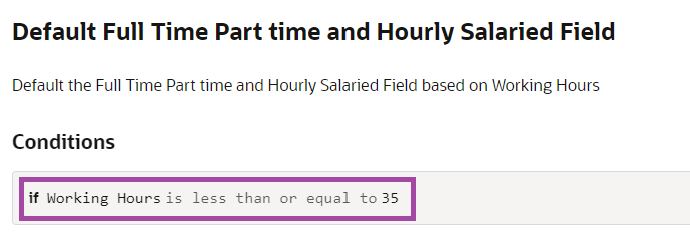
The condition would look like below.
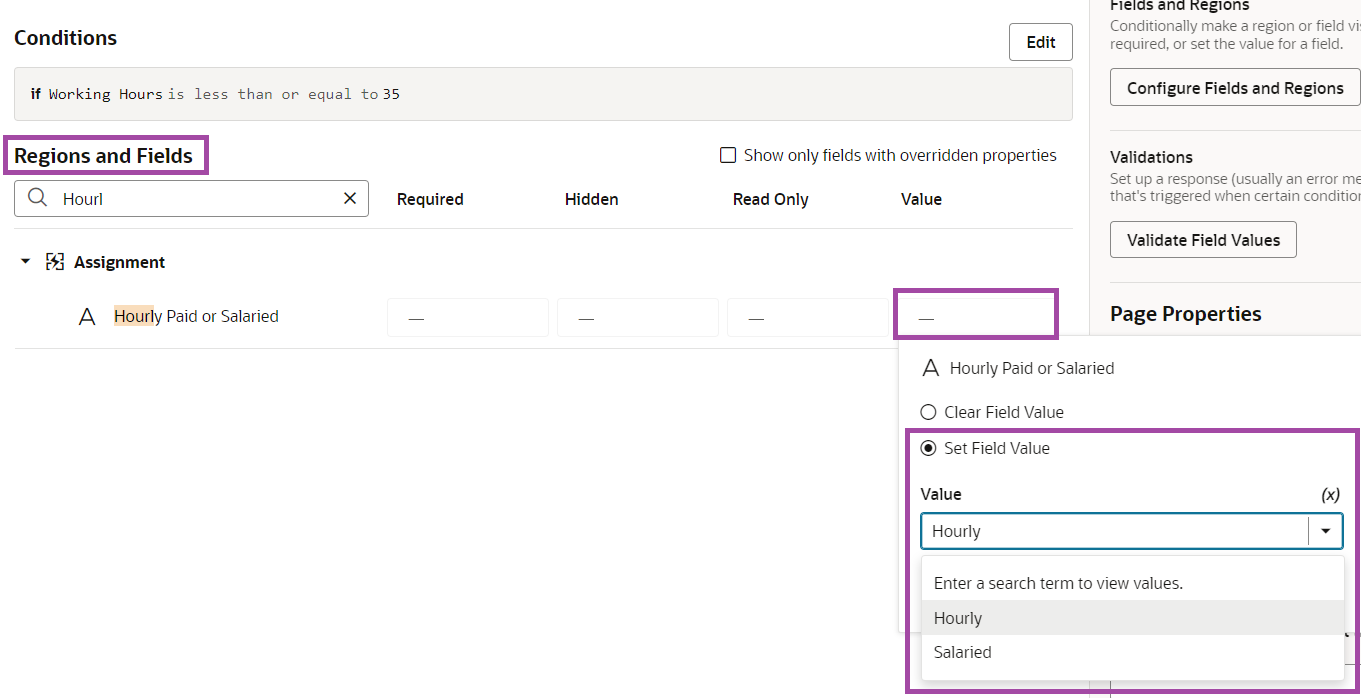
After adding the conditions, select “Hourly Paid or Salaried” field from the Regions and Field. Select Value column and choose the option Set Field Value.
From the drop down select the required option. For our test case, we will select “Hourly”.
Similarly, add the field Full Time or Part Time and select the value column as Part time.
The final rule should look like this-
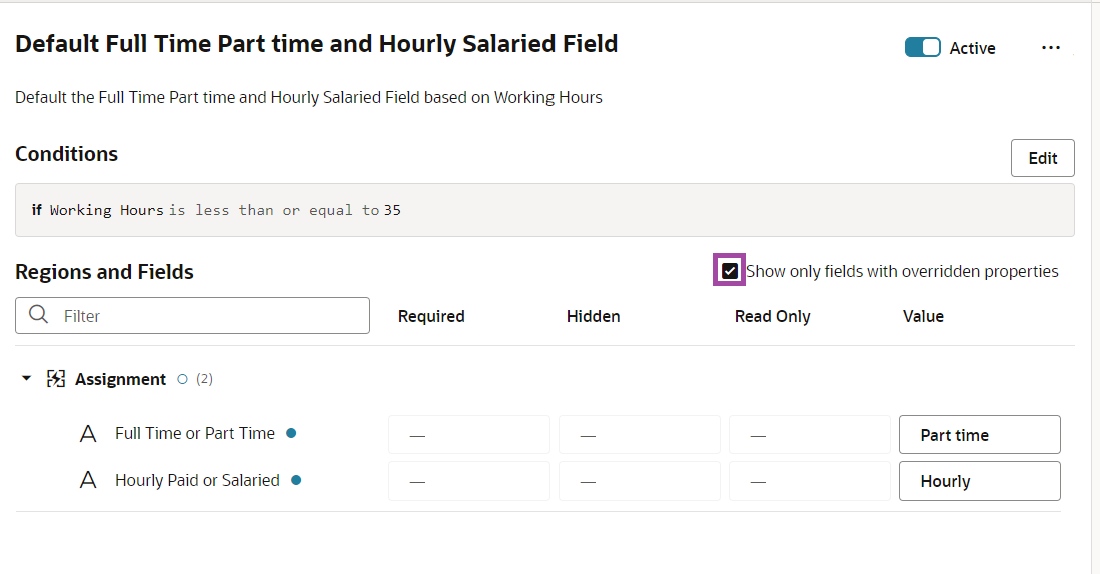
These two fields are hidden by default. So, we shall also make sure that they are visible.
We will create another rule “Show Additional Fields” to show these two fields always and set the Hidden column as “Visible”.

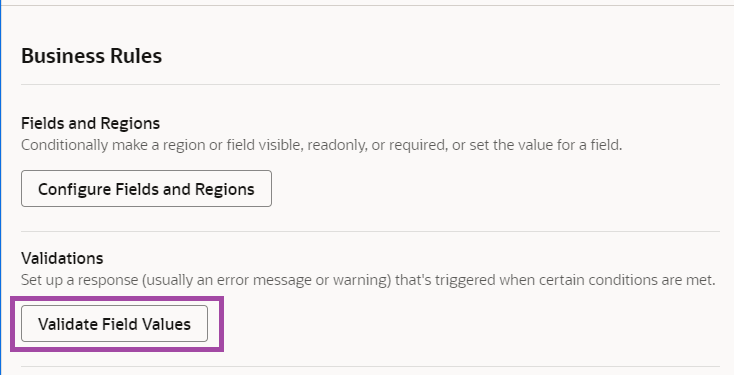
Validating a Field Value
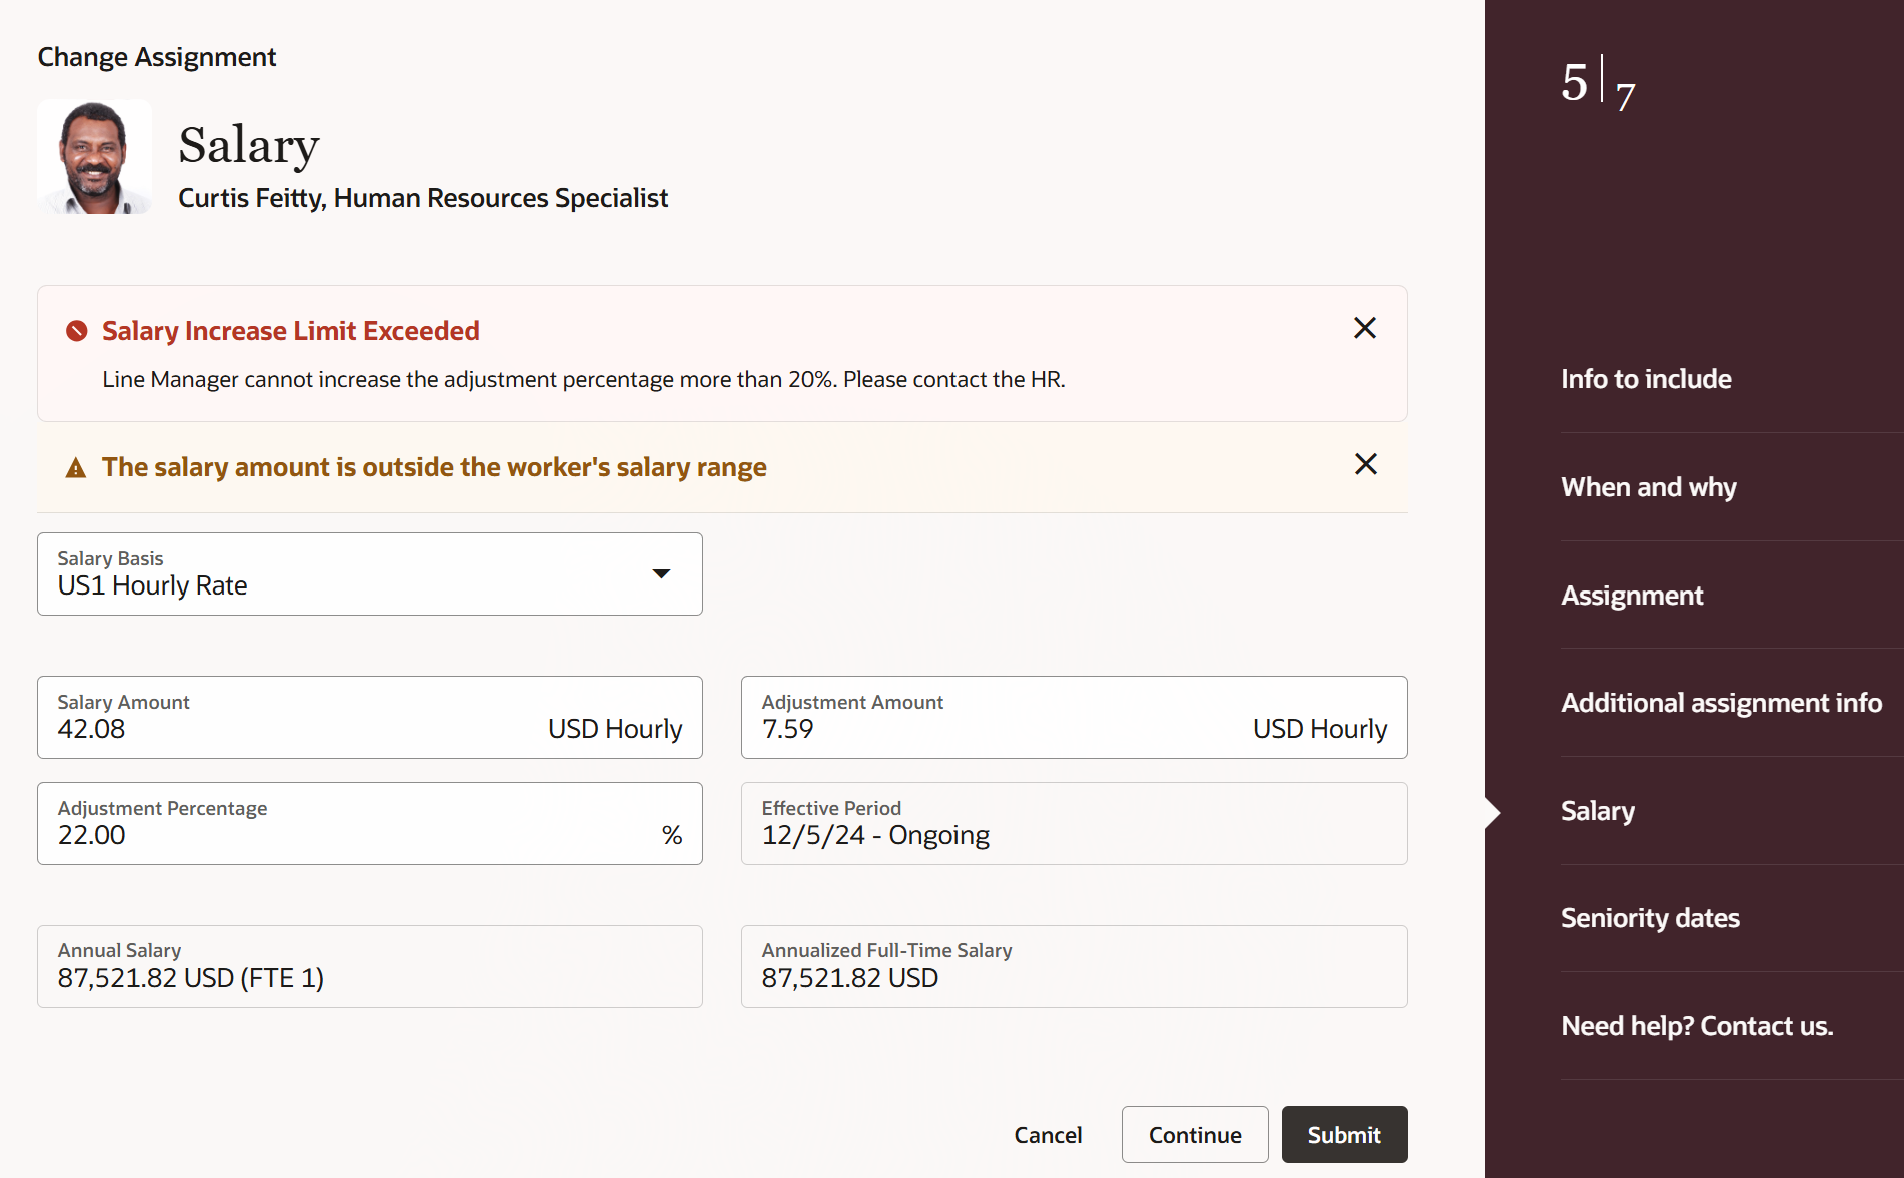
Now, let’s implement a validation rule for the Salary Change within Change Assignment. We will validate that, a line manager (not having HR admin role) cannot add a salary increases of more than 20%.
Select the Validate Field Values option.
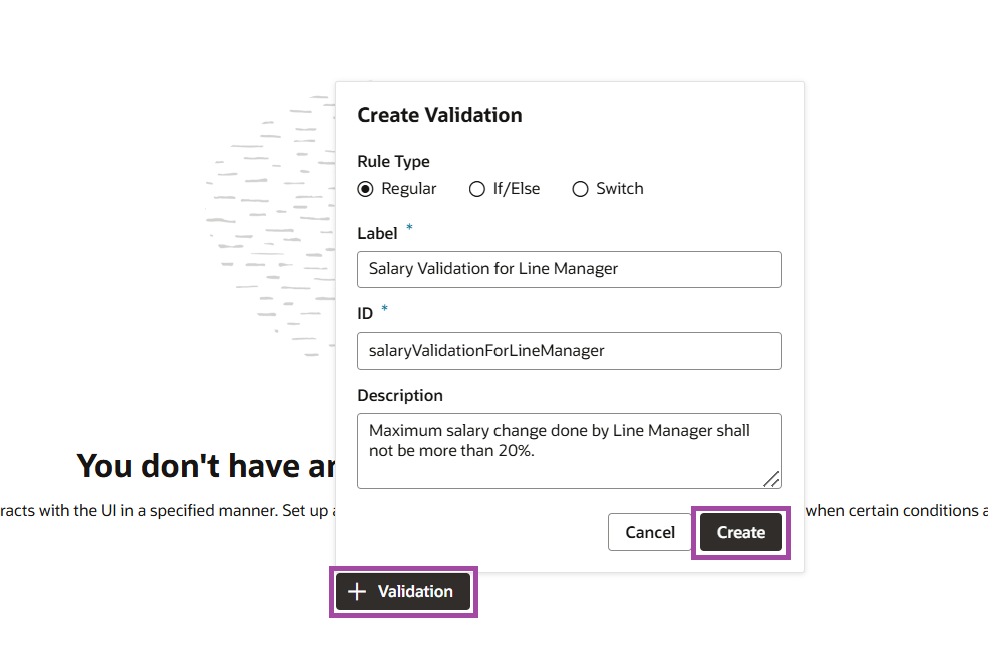
Click on the + Validation and add a name for the new validation Rule. We will create a rule with label “Salary Validation for Line Manager”. ID field would get generate automatically.
We can also use description as appropriate.
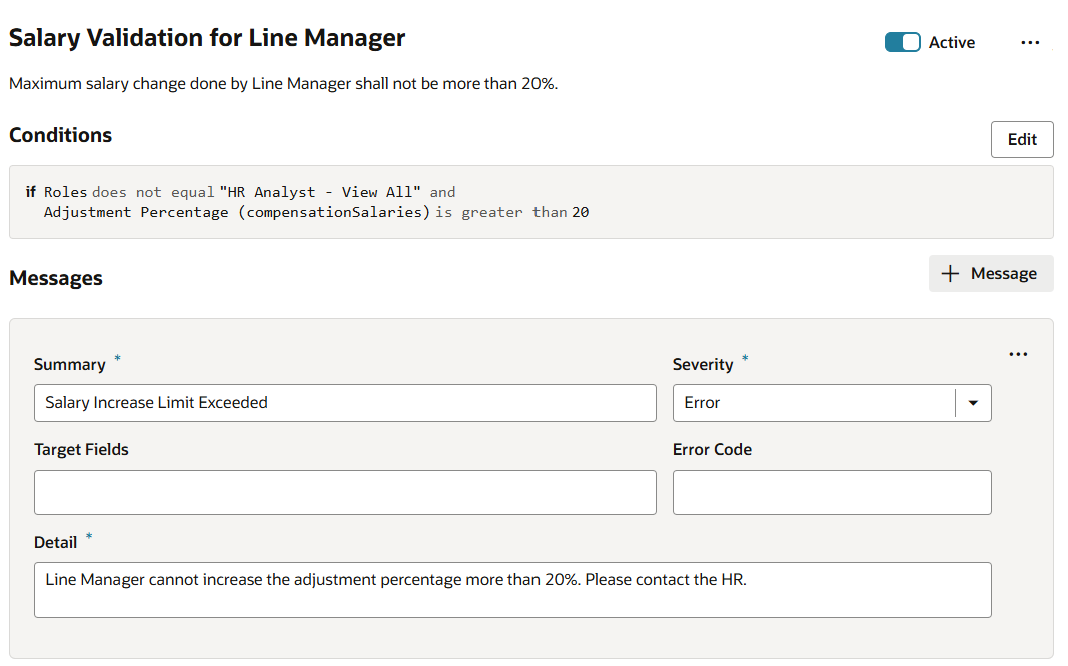
On Conditions section, click Edit and select the User role with clause as does not contain and value as HR Analyst – View All.

Click + Condition to add Adjustment Percentage as a condition.
![]()
Select the field Adjustment Percentage from “CompensationSalaries” section in “Field Values”.

Select the clause as greater than and value as 20.

Click Done.
In the Message section, we can add an appropriate error message similar to below.
Summary: Salary Increase Limit Exceeded
Severity: Error
Description: Line Manager cannot increase the adjustment percentage more than 20%. Please contact the HR.

We can also setup the Target Fields which if selected, displays the error message on that field. Otherwise, it will display the error message on the top of screen. We will not use this for our test case here.
The final rule should look like this-
Preview changes:
Preview your changes by clicking the play button.

In the preview, make sure you select “Salary” from “Info to Include” page. You can navigate to salary page and increase the adjustment amount to a value more than 20% and see the error message as below.
Conclusion
Defaulting and validation are essential for maintaining data integrity and enhancing user efficiency. By leveraging Business Rules within VB Studio, you can personalize these functionalities to better suit your organizational needs. Implementing defaulting and validation rules helps automate data entry processes, enforce data integrity, and improve the overall user experience.