Oracle HCM Cloud provides several features to configure and extend the application’s capabilities beyond what is provided out-of-box. These tools are already available to you at your fingertips and what’s best is these tools do not require any setup for you to get started. The configurations are simple and do not require technical skills so can be easily performed by business users as well. This blog is to highlight various real life scenarios where you can leverage HCM configurations to customize HCM Journeys.
Here’s a consolidated view of various configurations that are available to you along with a suitable real life use case for each feature –
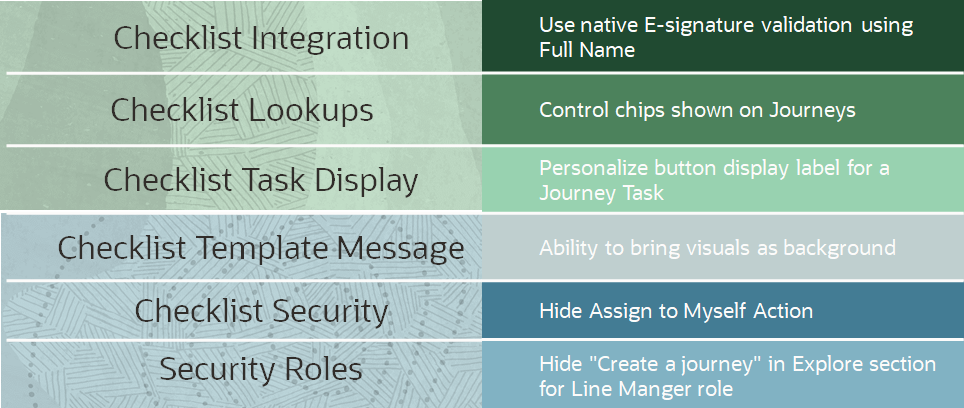
Let’s look at each feature one by one.
- Use native E-signature validation with Full Name instead of Display Name in Journeys.
Oracle HCM Journeys enhances employee onboarding experience and makes it easy to get them all signed up with all the relevant paperwork. Journeys has Native Electronic Signature as well as Electronic Signature with DocuSign.
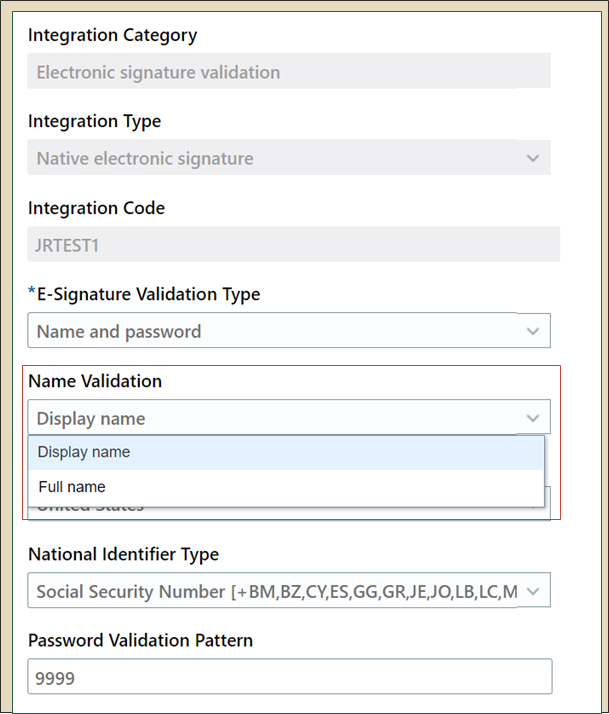
When you are using Native E-signature, by default “Full Name” is used for the Name Validation. However, you can use Checklist Integration to have “Display Name” as the type of name validation in Journeys. You will also be able to choose “Last Name” type name validation from 23B.
This is how Sign the Confidentially Agreement task in Journeys will appear with Display Name validation –

Here is a screenshot from Checklist Integration where you can make the change.
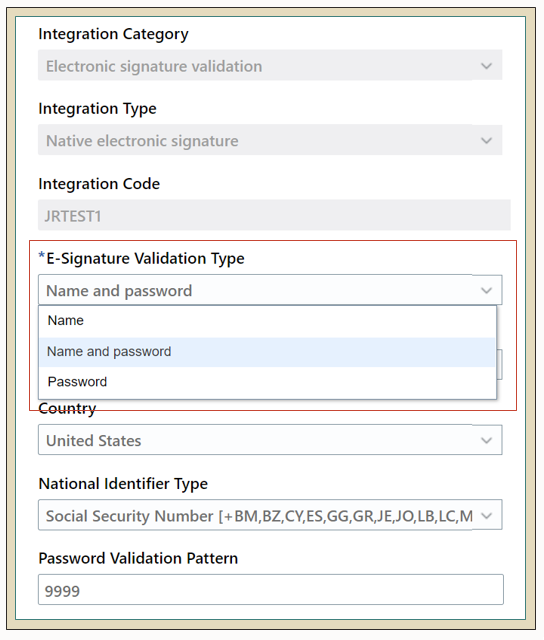
You can also use Checklist Integration to change validation type from “Name” to just “Password” or “Name and Password” as shown below –
- Control chips shown on Journeys App
You see checklist categories and status chips on Journeys and may want to change for your business needs. You can use Checklist Lookups to modify description of particular chip. Here is an example of using Checklist Lookup to display “Absence JAPAC” checklist category instead of “Absence”.
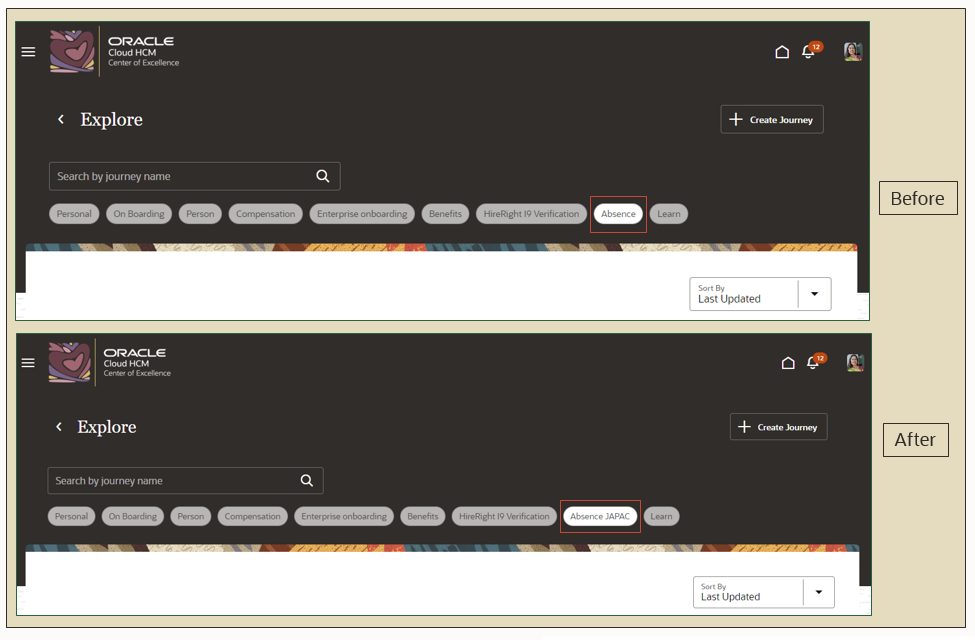
You can modify “Meaning” on Checklist Lookups page to have a suitable checklist lookup description as shown below.

- Personalize button display label for a Journey Task
You can use Checklist Task Display setting to re-label buttons as per your requirement. You can use Rename Action Labels on Checklist Task Display setting to customize Journey button labels as shown below-
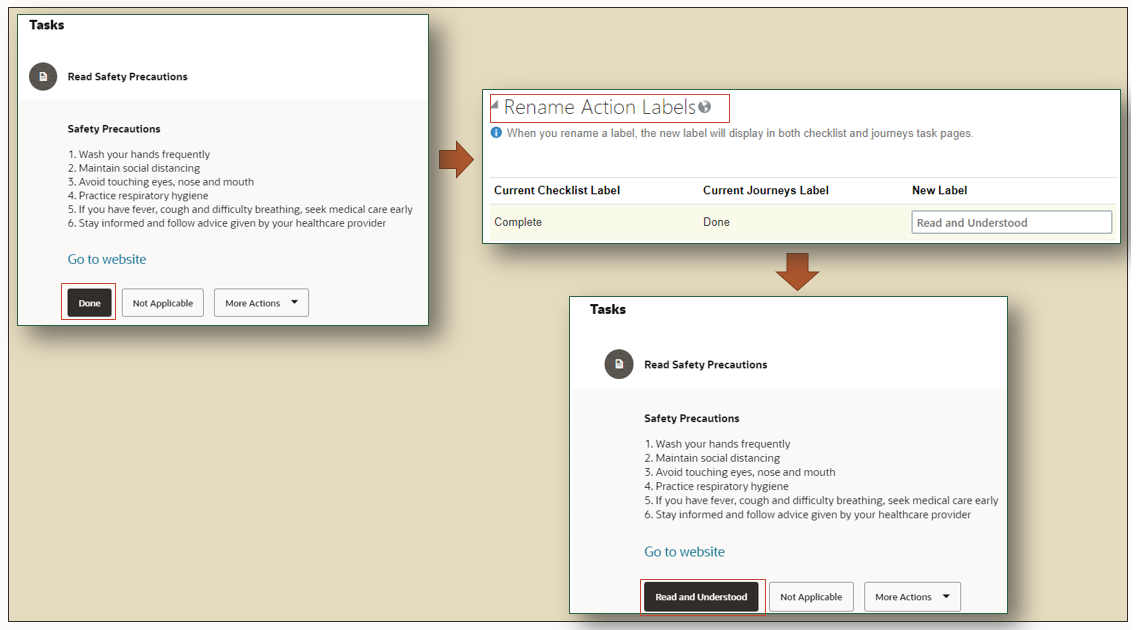
You can use this method to say change label of “Not Applicable” to “Refuse to Sign” only for native eSignature task type.
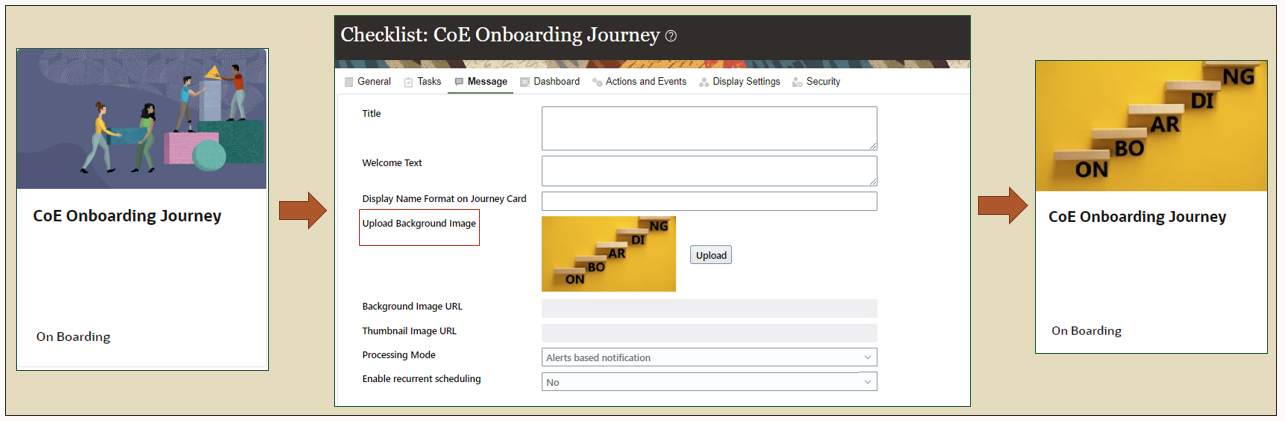
- Ability to bring visuals as background
You can change images for Journeys tile cards from checklist template by Uploading Background Image in Checklist Template Message tab as shown below.
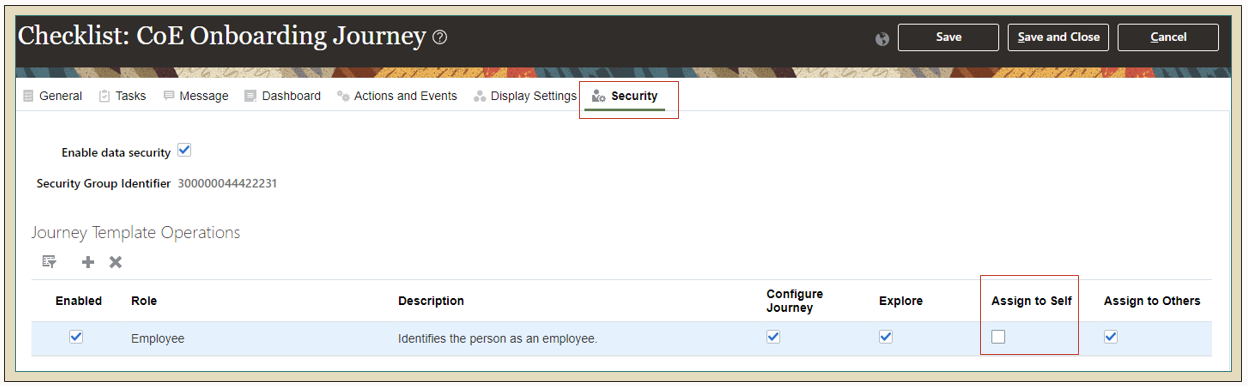
- Hide Assign to My Journeys action
You can use Checklist Security to control access to Journey operations. If you do not want employees to be able to assign Journey to themselves then, you can leverage Checklist Security to hide Add to My Journeys action.

- Hide “Create Journey” button in Explore section for Line Manger role
Access to the “Create Journey” button is secured using the Manage Journey (PER_MANAGE_JOURNEY) function security privilege. This function security privilege is granted out-of-the box for the line manager role. Say if you are an organization where you do not want line manager to create a journey then, make a copy of line manager role and remove privilege PER_MANAGE_JOURNEY_PRIV from ORA_PER_MANAGE_JOURNEY_BY_MANAGER role. You can then assign this new line manager role to all line managers to hide “Create Journey” button for Line manager.
Similarly, if you need to hide “Explore” Tab then, first identify the role that is allowing user PER_MANAGE_JOURNEY_PRIV privilege. Using security console, create a copy of the role and remove privilege PER_MANAGE_JOURNEY_PRIV to hide “Explore” tab in Journeys App.
Overall, many HCM configurations are already available to you and very easy to use so make the most of it and configure the application for your business needs before building any extensions using VB Studio.