Introduction
This blog describes the Redwood Personalization Helper Tool which you can use to assist with the migration of your personalizations from the Responsive UI (ADF) to the new Redwood UI (VBS) pages. The blog provides details of how to download and install the tool, as well as describing how to use the tool.
The Redwood Personalization Helper Tool must be run in the environment where your VB Studio instance is installed. In addition, the ADF personalizations that you will migrate must be downloaded from the Fusion instance that is associated with your VB Studio instance. The Tool does not help migrating personalization between environments instead it should be used within same environment. Once you have migrated your personalizations and have completed your testing, you can deploy the personalizations to other environments.
The Redwood Personalization Helper Tool can be run in ‘Report Only’ mode or in ‘Migrate and Report’ mode. In Report Only mode it lists out the personalizations for the Responsive (ADF) pages that were done using Page Composer and those that were done in HCM Experience Design Studio. It also indicates whether the personalization can be migrated to the corresponding Redwood (VBS) page. In Migrate and Report mode the tool goes a step further and generates a zip file containing code that can be imported into the VBS page which will create the equivalent personalizations to those in the Responsive pages.
Additional Details relating the list of modules supported for migration can be found at MOS Doc Id 2999756.1
If you need further assistance please use the Redwood Personalization Helper Forum on Cloud Customer Connect.
Downloading the Tool
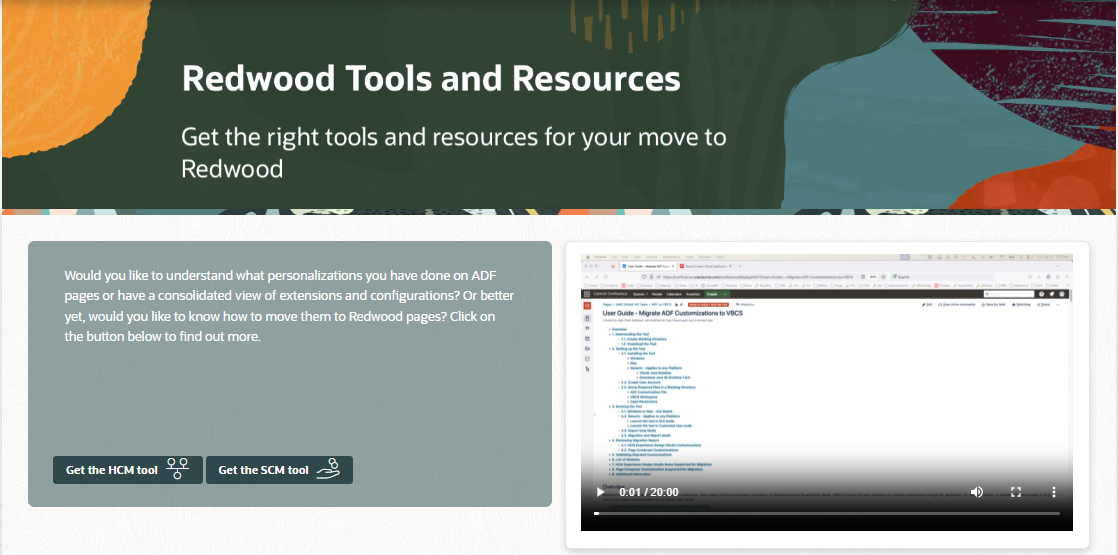
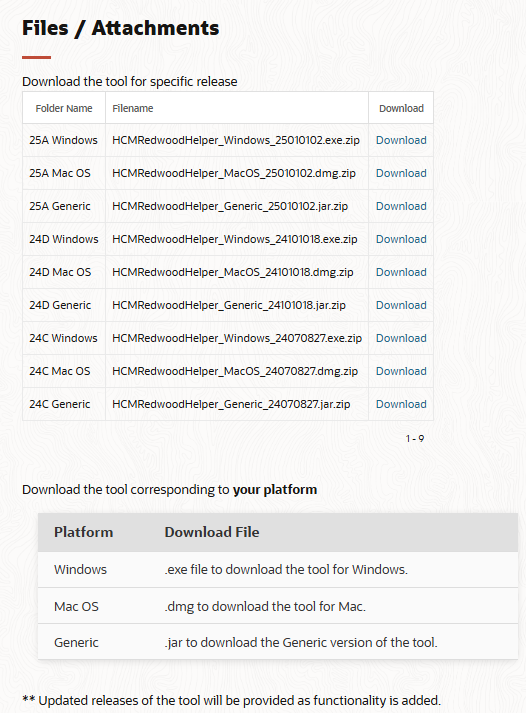
Download the Redwood Personalization Helper Tool from the CoE Central site. From the CoE Central home page, navigate to Tools and Resources and click on ‘Get the HCM Tool’ or ‘Get the SCM Tool’. You should download the version of Redwood Personalization Helper Tool that is specific to your platform and the version of VB Studio version.
Installing the Tool
Follow the below steps based on your platform to install the tool
Windows
To install the app on Windows,
- Unzip file HCM Redwood Personalization Helper-24.01.exe.zip
- Double click on the EXE file
- Follow the instructions to install the app
- When prompted, trust the app to launch it
Mac
To install the app on Mac,
- Unzip file HCM Redwood Personalization Helper-24.01.dmg.zip
- Double click on the DMG file
- Drag and drop the app to Applications
- Launch the application HCM Redwood Personalization Helper
- Go to Settings → Privacy and Security and allow the app to be opened
Using the tool
You should create a working directory where you will host the files used during the migration process. Download the ADF Personalizations from your Fusion instance into your working directory by following these steps:
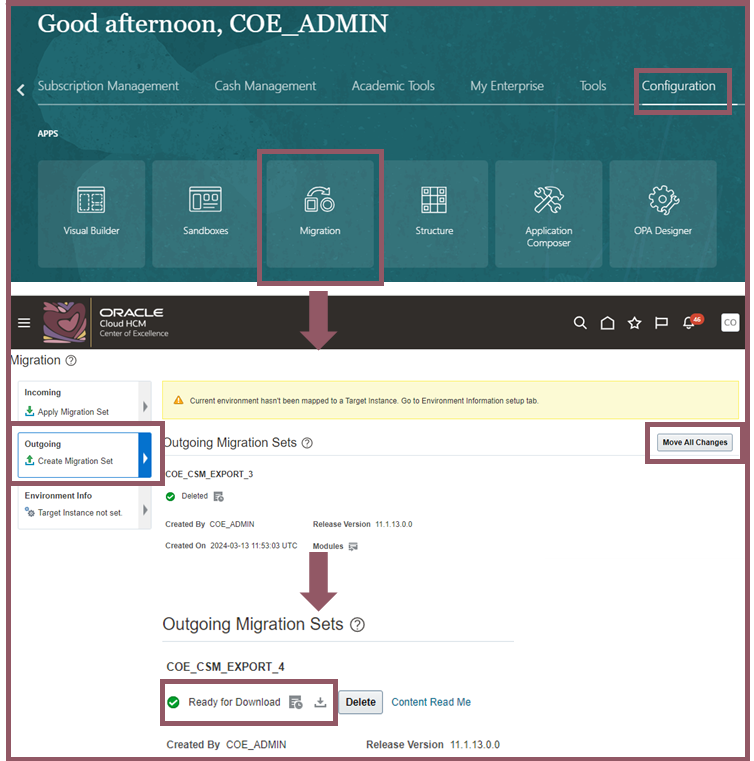
- Go to Navigator → Configuration → Migration
- Click on Create Migration Set in the Outgoing tile
- Click on Move All Changes and provide a name for the Configuration Set
- ADF personalization are exported by default as part of module “Application artifacts” hence, all other options can be unchecked
- Click Save and Close to submit request to export
- Click Refresh icon periodically to check the status of the process
- Once the process completes, the archive can be downloaded from the page
Configuration set file download
- Extract the CS_ADF_MDS_*.jar from the downloaded file. Copy the jar file to the working directory and rename to an appropriate name to easily identify the instance where it was downloaded
Note: The tool will work only with the MDS jar file. Extract the MDS file using any unarchiving tool after downloading the Configuration set file. You should also rename the ‘.jar’ file to .zip extension to extract the MDS file.

Extracted Input MDS Jar file
If you do not have any existing Business Rules in your VB Studio instance you can continue to the next step, Running the Tool. However, if you have existing rules, follow the below steps to export the VB Studio workspace.
- Go to the Redwood page, (for example, Personal Details) that you want to customize
- Click on Edit Page in Visual Builder Studio
- Create new project or open existing project
- Click on Advanced Mode from top. Advanced Mode should only be used for Import/Export of the workspace.
- Click on Export
- Copy downloaded zip file to working directory. This will be used as Input VBS workspace
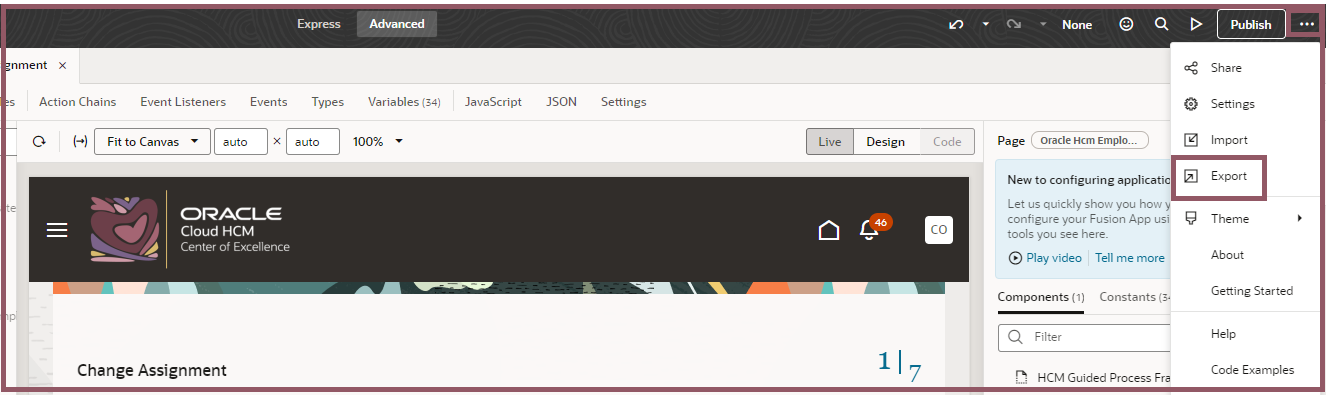
Export Workspace from VB Studio
Note: If you need to migrate personalization for more than one Redwood page, you are required to create a dummy rule for each page so that it creates the required configuration files in the workspace. In other words, if you create a VB workspace only for Personal Details page and export the workspace, you can use it to migrate personalization tied to Personal Details page. If you are selecting multiple pages in the tool the workspace should have existins rules in the page or dummy rule has to be created in those page for the process to run successfully
Running the Tool
Once the required files are placed in the working directy open the tool and enter the input parameters. The table below has details on the input parameter required to run the process:
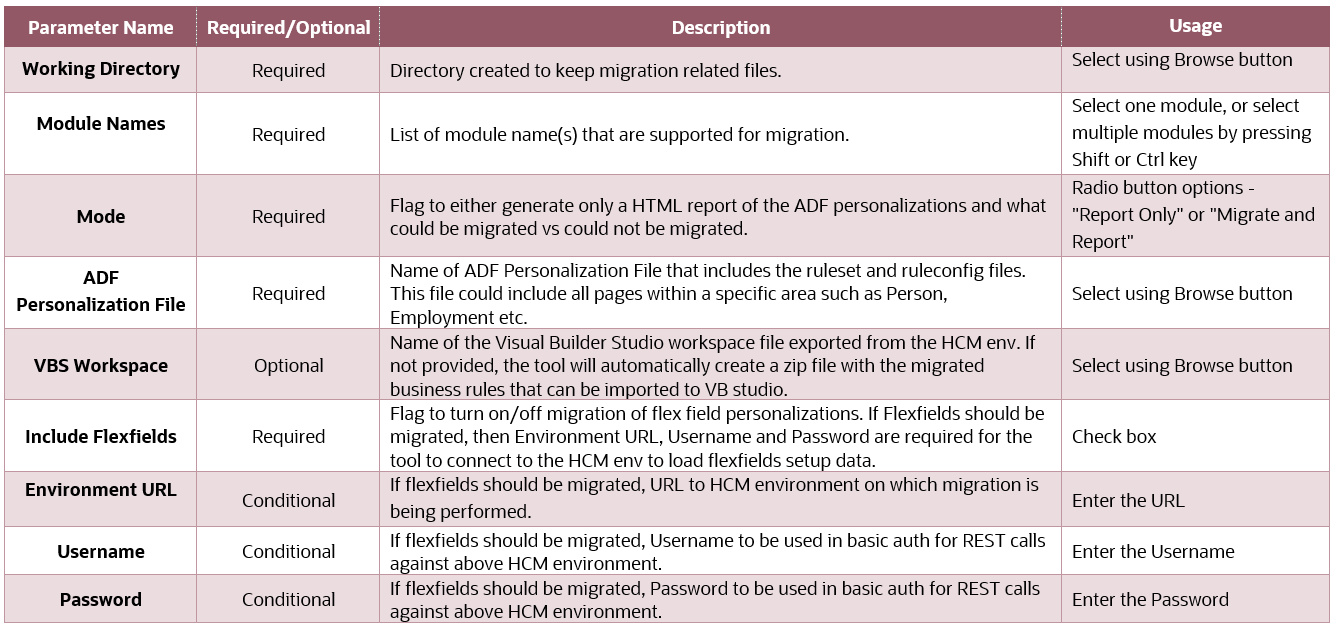
After entering the input parameters click on submit to run the tool
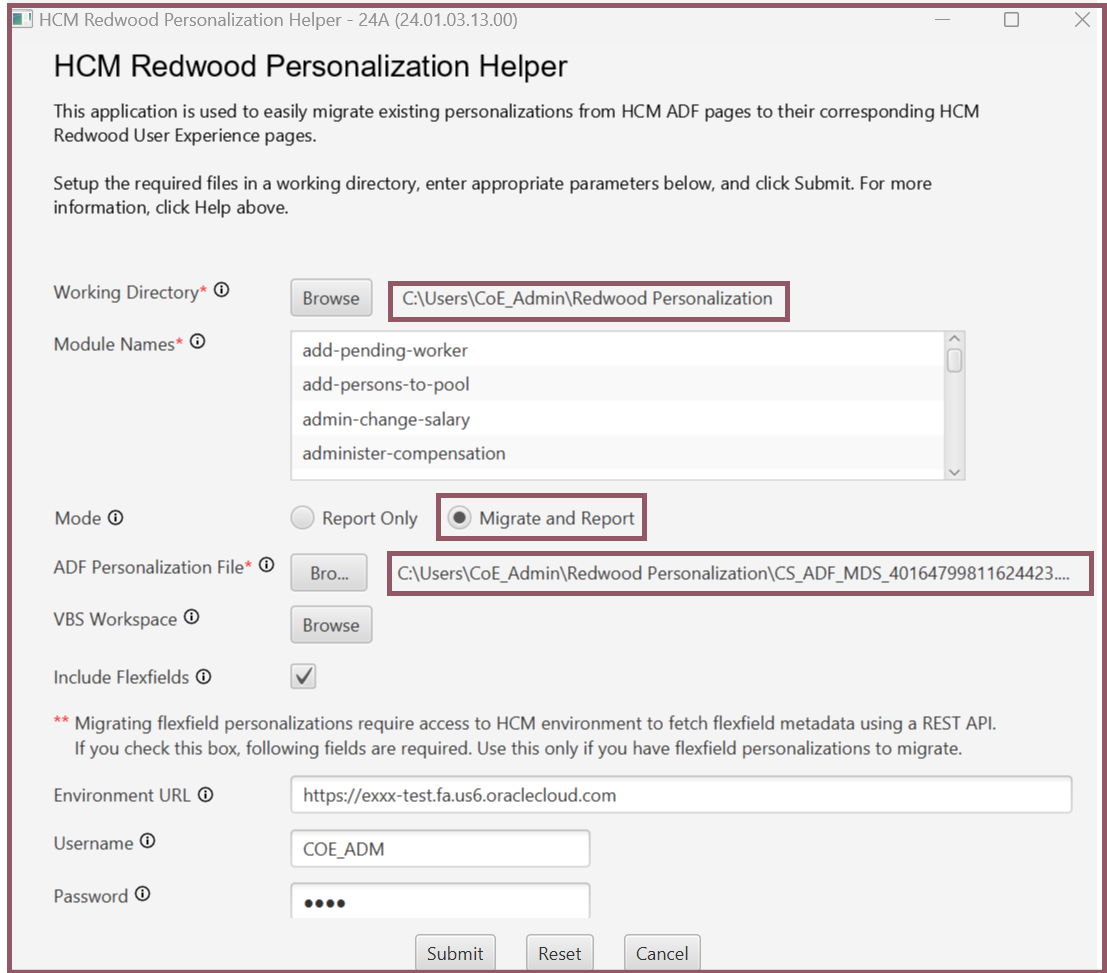
Redwood Personalization Helper Tool
Upon successful completion the process will create the following files in the output folder within the working directory.
- HTML Output file: Report of personalizations in ADF pages
- VBSWorkspace-updated.zip: File containing the “migratable” ADF personalization on selecting ‘Migrate and Report’ mode
- VBSWorkspace-guidedJourney-updated.zip: File containing the Guided Journey personalization present at page level on selecting ‘Migrate and Report’ mode
- Log: Log file containing details of the process

Process completion message
Review Report Output
The report provides a detailed view of all personalizations done in the existing ADF UI pages using Page Composer and HCM Experience Design Studio.
This report contains two sections
- Personalization done via HCM Experience Design Studio
- Personalization done via Page Composer
In this example usecase the following personalizations were made to the ‘Change Assignment’ Responsive page prior to exporting the customization set file.

Personalization in Responsive page

Screenshot from Change Assignment Responsive Page
Below is a sample report output for the Design Studio Personalizations.
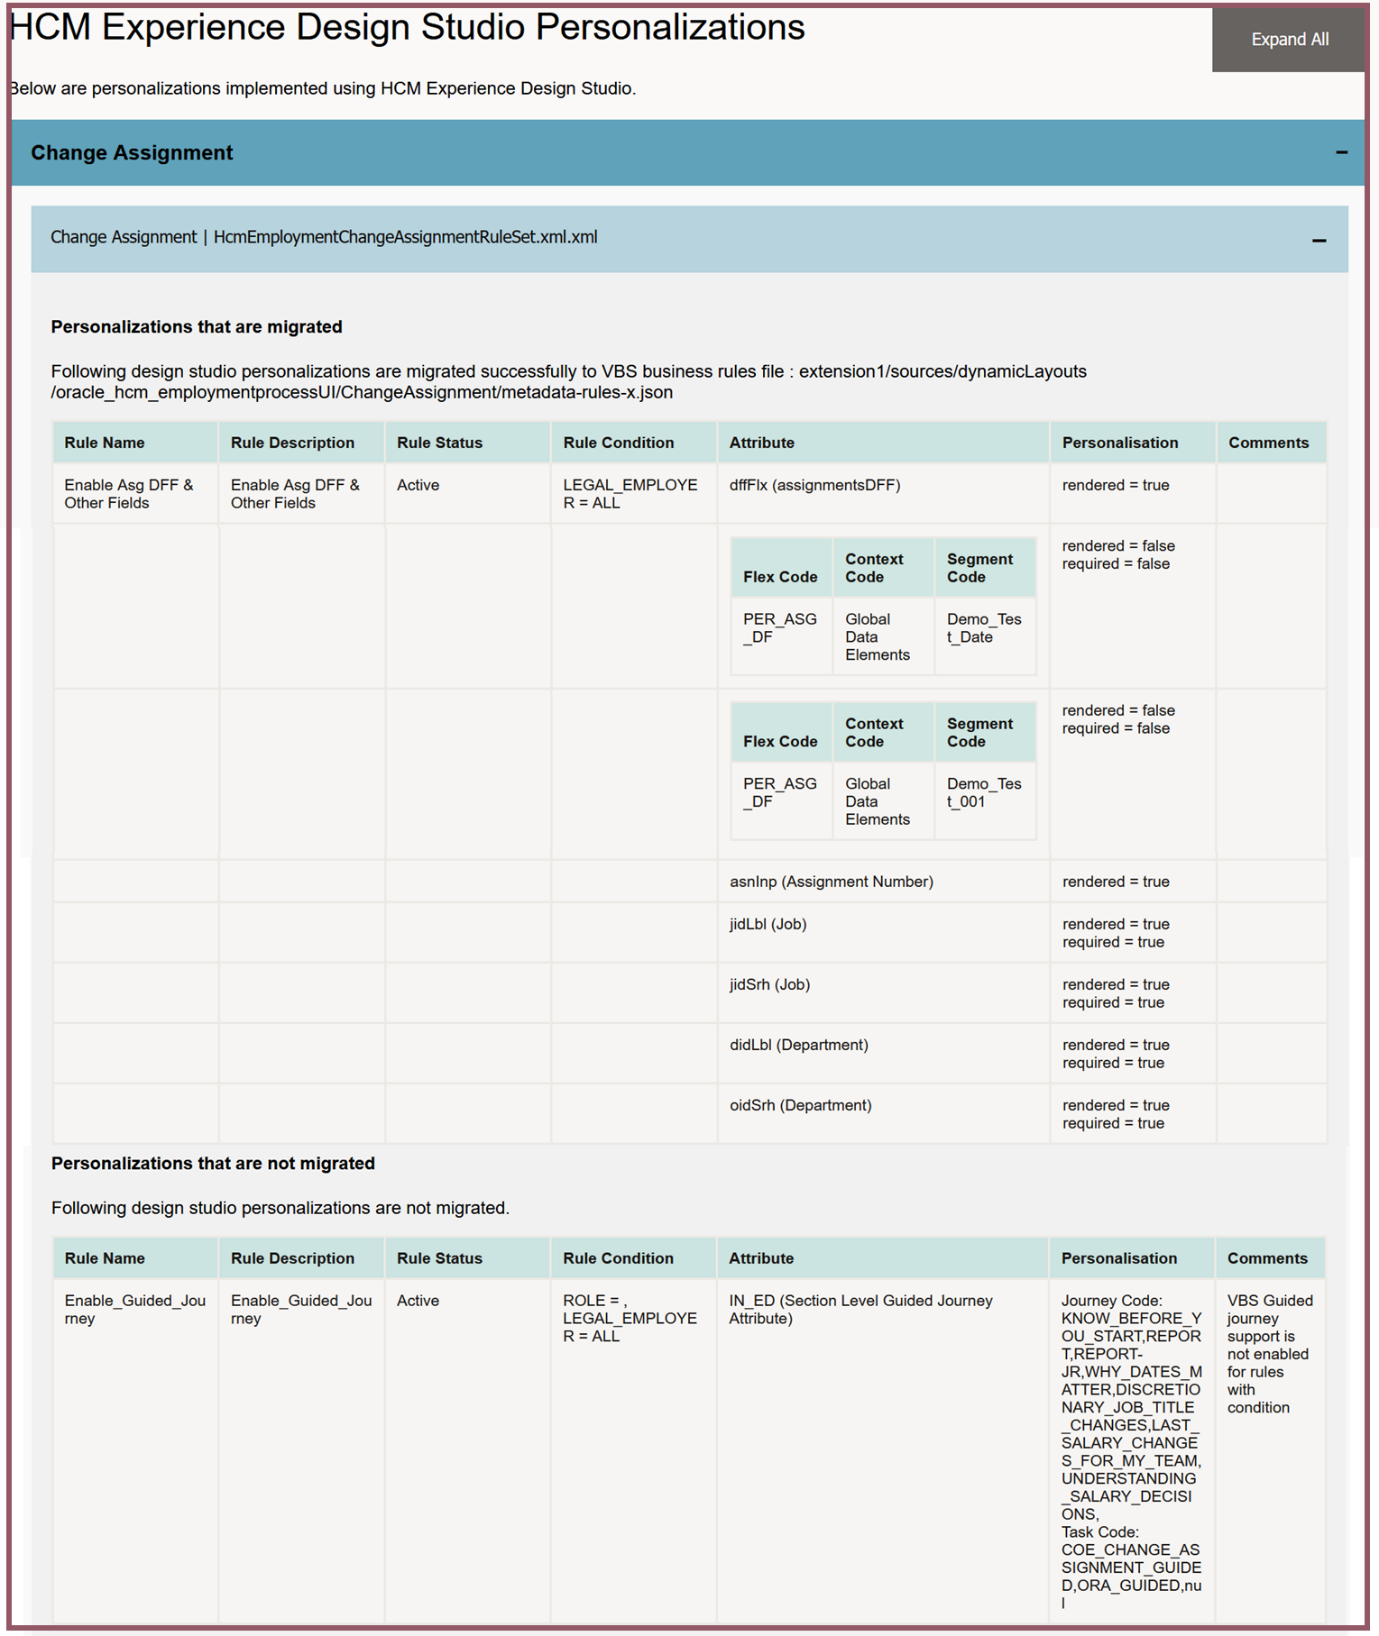
Sample Report Output for Design Studio Personalization
Below is a sample report output for the Page Composer Personalizations

Sample Report Output for Page Composer Personalization
The report includes the personalizations that can be migrated and provides details in the comment section for that personalization which cannot be migrated.
Migrate to VB Studio
Import the workspace named VBSWorkspace-updated.zip into the VB Studio environment and review the migrated Business Rules. To import the zip file you should switch to Advanced mode. Once you have imported the file into your workspace you should revert to Express mode to view the imported rules.
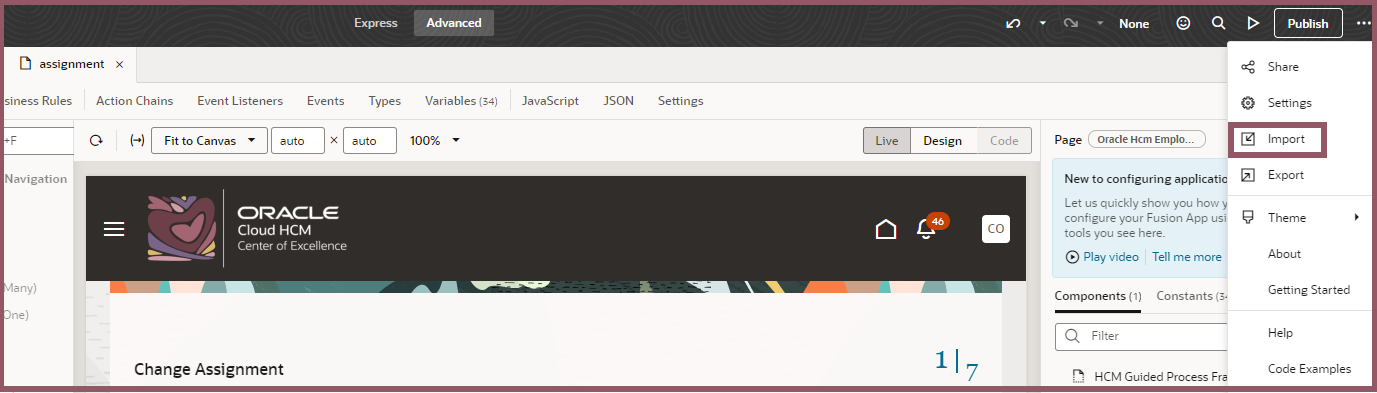
Import output file into VB Studio
Upon successful import of the rules, the page can be previewed to verify the imported business rules. Here is a screenshot of the imported rules which shows the list of field properties overridden by the rule.
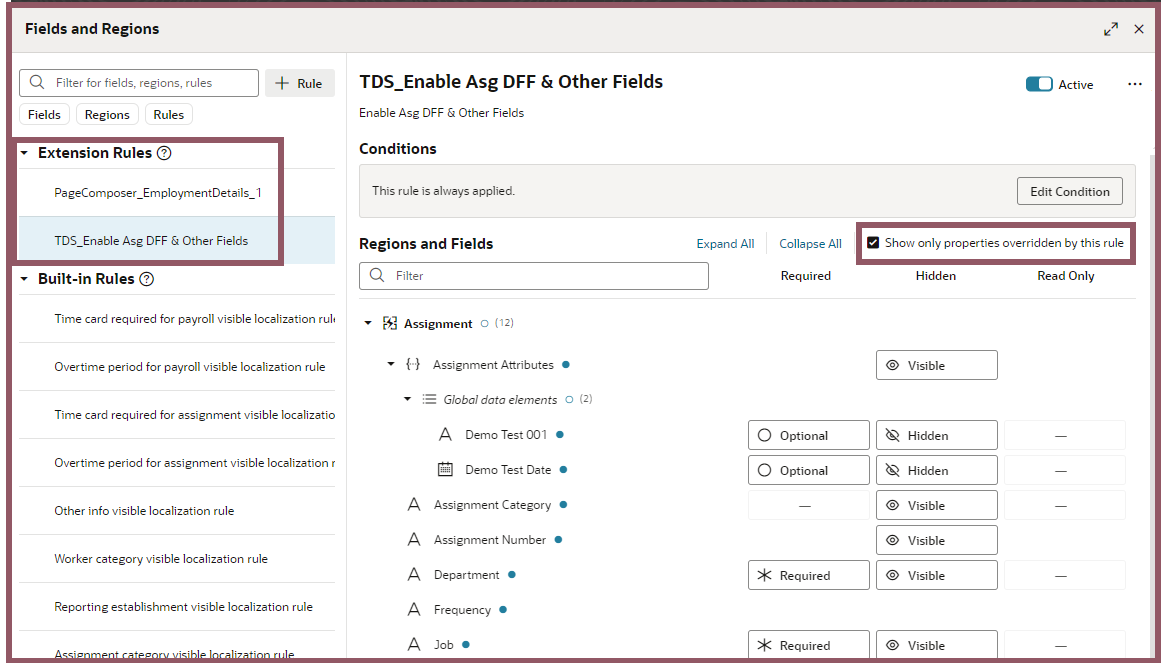
Imported Business Rules
The output report provides the status of whether the personalization can be migrated to VB Business Rules. You can review the ones that aren’t migrated and implement them manually in VB Studio as per your requirements.
We hope the tool will make transitioning to Redwood User Experience pages much smoother for you.
Need help or have questions? Please use the forum Redwood Personalization Helper Forum on Cloud Customer Connect.