Oracle Cloud Infrastructure (OCI) uses images to create compute instances. You specify which image to use when you create an instance.
You can also create a custom image of a bare metal instance’s boot disk and use that image to create other instances. These instances include the customizations, configuration, and software that was installed when you created the image. Custom images do not include data from any block volumes that are attached to the original instance. Use cases for custom image would be:
Creating a golden base image to spin instances from
Backing up the base OS image in case of Disaster
Cross Tenancy Base Image migration
Cross Region Base Image migration
Figure 1: OCI custom images provide consistency
Limitations and considerations
Custom images have some limitations that you should consider before you create one:
Certain IP addresses are reserved for OCI use and can’t be used in your address numbering scheme.
Before you create a custom image of an instance, you must disconnect all iSCSI attachments and remove all iscsid node configurations from the instance.
When you create an image of a running instance, the instance shuts down and remains unavailable for several minutes. The instance restarts when the process completes.
You can’t create more than one custom image of a single instance at a time. When you start to create a custom image, the system implements a 20-minute timeout during which you can’t create another image of the same instance. You can, however, create images of different instances at the same time.
Custom images are available to all users who are authorized for the compartment in which the image was created.
Custom images inherit the compatible shapes that are set by default from the base image.
You can import a custom image with a maximum size of 400 GB.
The export a custom image with a maximum size of 400 GB.
You can’t create an image of an Oracle Database instance.
If you use a custom image and update the OS kernel on your instance, you must also upload the update to the network drive.
Oracle Server X5, X6, and X7 compatibility for custom images
Oracle Server X5, X6, and X7 have different host hardware. As a result, using an X5 or X6 image on an X7 bare metal or virtual machine (VM) instance might not work without modifications. We recommend that you use the Oracle-provided images for X7 hosts.
If you try to use an existing X5 image on X7 hardware, note the following compatibility:
CentOS 6 and all Windows versions are not cross-compatible.
Oracle Autonomous Linux 7 and Oracle Linux 8 are cross-compatible.
Oracle Linux 6, Oracle Linux 7, Ubuntu 16.04, and CentOS 7 are cross-compatible. However, you must update the kernel to the most recent version to install the latest device drivers. Run the following commands from a terminal session:
Oracle Linux
yum update
CentOS 7
yum update
Ubuntu 16.04
apt-get-update
apt-get dist-upgrade
If you try to use an X6 image on non-X6 hardware, note the following compatibility:
Oracle Linux 6, all CentOS versions, and all Windows versions are not cross-compatible.
Oracle Autonomous Linux 7 and Oracle Linux 8 are cross-compatible.
Oracle Linux 7, Ubuntu 18.04, and Ubuntu 16.04 are cross-compatible. Use the Oracle-provided images for X6.
The primary device drivers that are different among X5, X6, and X7 hosts are as follows:
Network device drivers
NVMe drive device drivers
GPU device drivers
More updates might be required depending on how you customize the image.
Create a custom image
Let’s create a custom image in the OCI.
Sign in to the OCI Console.
Open the navigation menu, go to Compute, and click Instances.
Click the instance that you want to use as the basis for the custom image.
Click More Actions, and then click Create Custom Image.
Figure 2: Create a custom image from an instance
In the Create inCompartment list, select the compartment to create the custom image in.
Enter a name for the image. You can change the name later, if needed. You can’t use the name of an Oracle-provided image for a custom image.
Click Create Custom Image.
To track the progress of the operation, you can monitor the associated work request from the image’s details page.
Edit the compatible shapes for a custom image
After an image is created, you can change the compute shapes that are compatible with it. One would want to change it to meet the performance requirements, such as, vertical scaling of the instance.
Open the navigation menu, go to Compute, and click Custom Images.
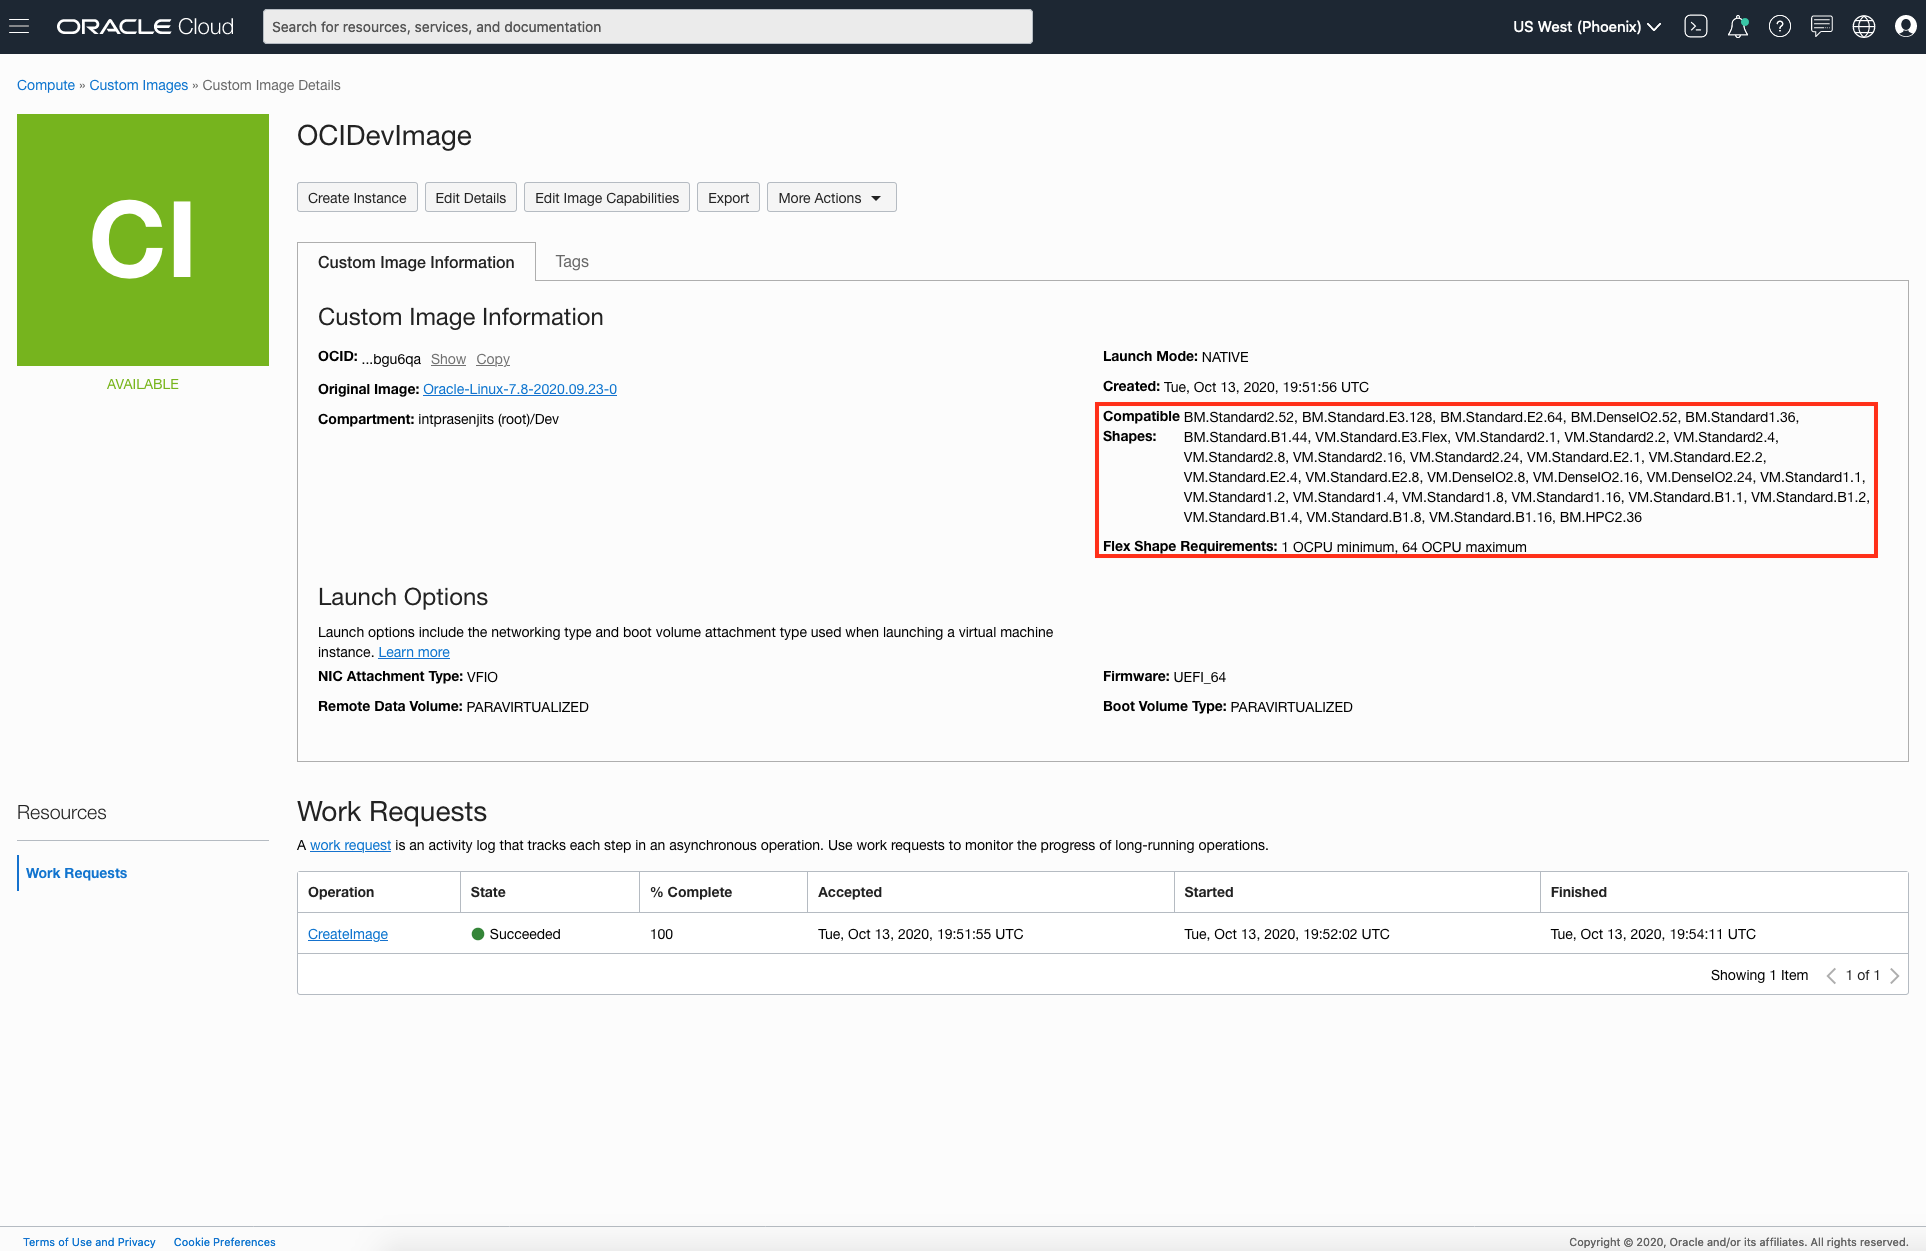
Click the custom image that you want to edit. The image details page lists compatible shapes associated with the image.
Figure 3: Shapes compatible with a custom image
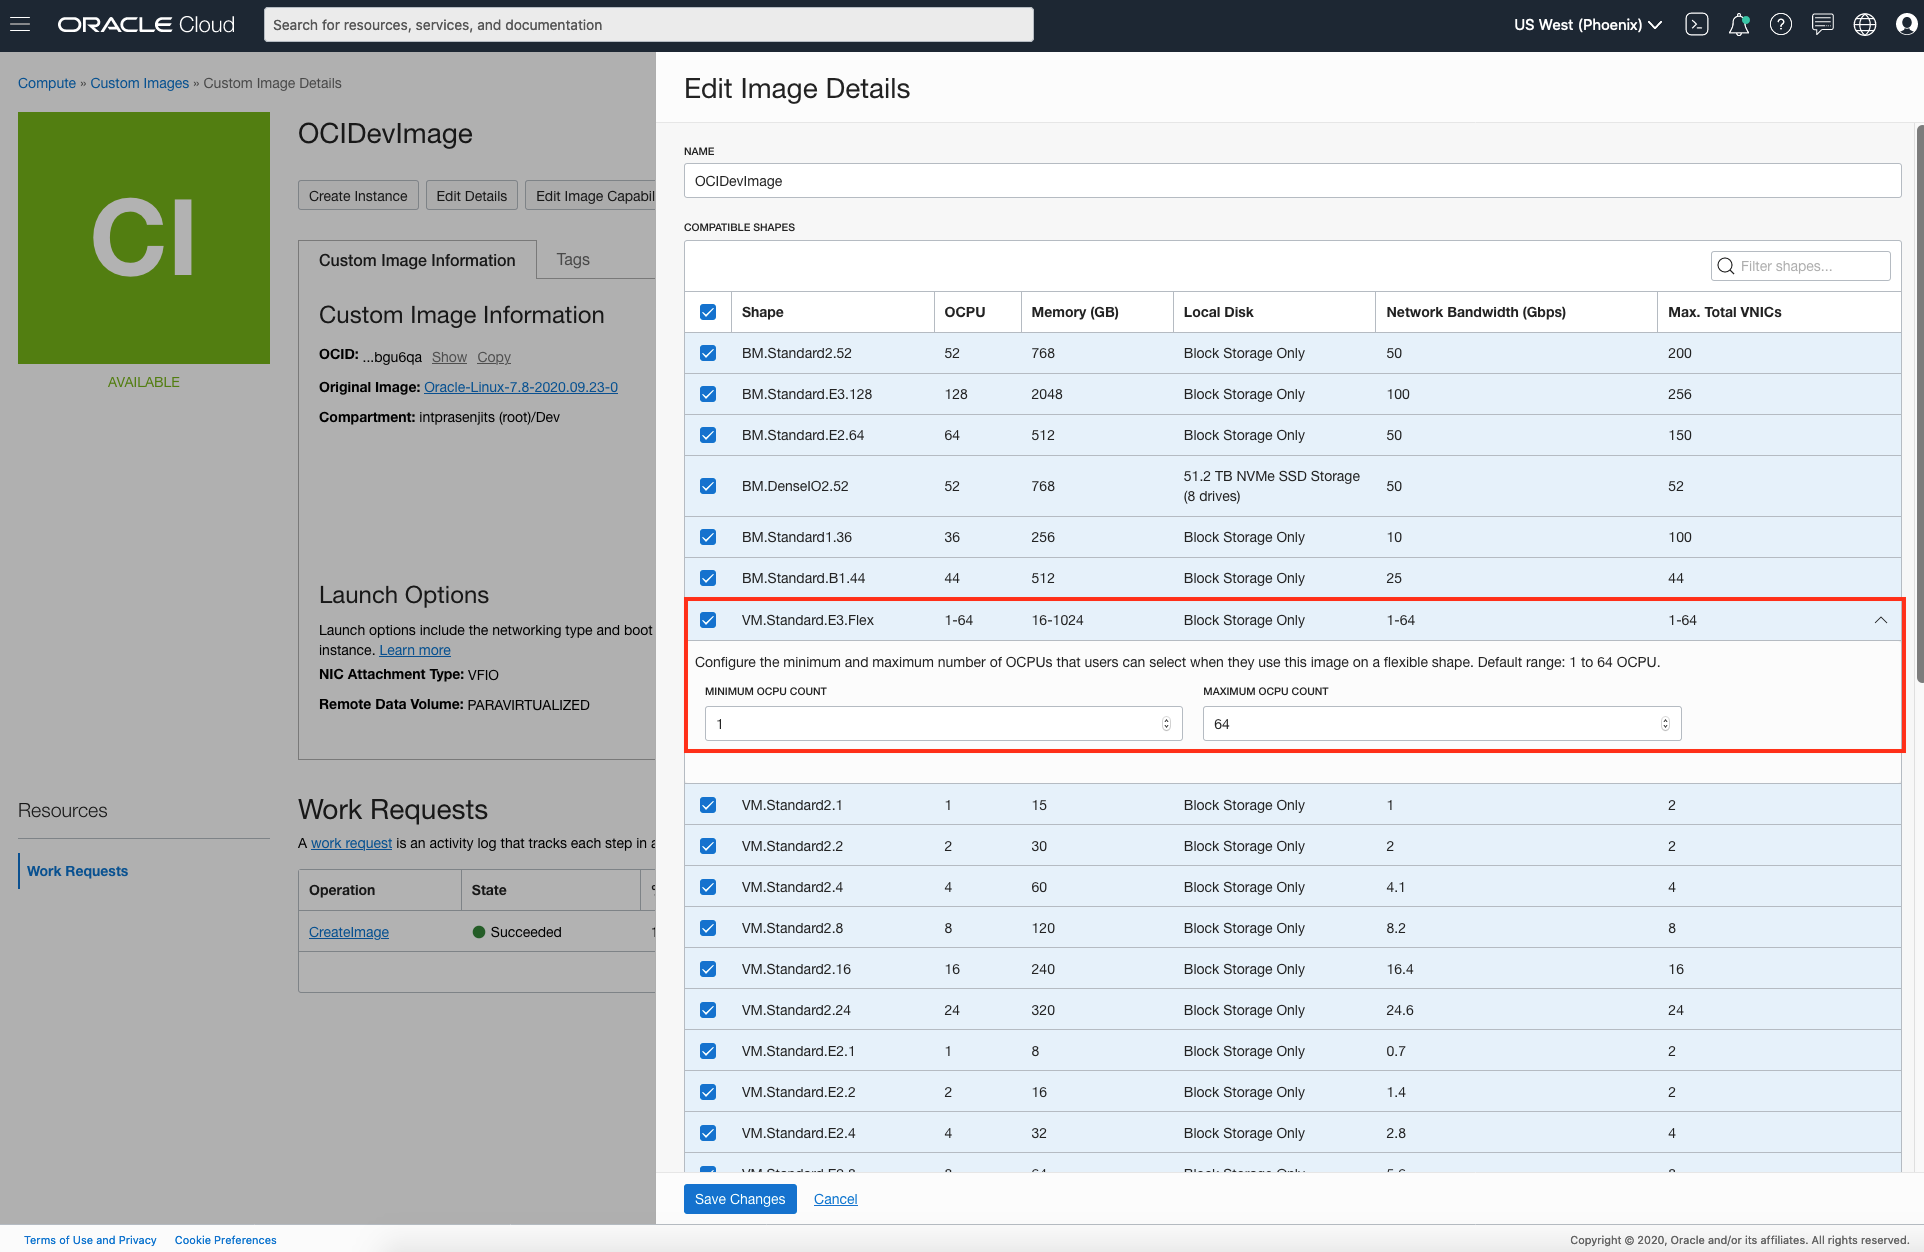
Click Edit Details and add or remove compatible shapes. You can also configure the minimum and maximum number of OCPUs that users can select when they use this image with a flexible shape. Click the down arrow in the row for the shape, and then enter the minimum and maximum OCPU counts.
Figure 4: Edit custom image shape compatibility
Click Save Changes.
Note: After you add a compatible shape to an image, test the image on the shape to ensure that the image works on the shape. Some images (especially Windows) might never be compatible with other shapes because of driver or hardware differences.
Launch an instance from a custom image
Now that you have a custom image, let’s create an instance from it.
Open the navigation menu, go to Compute, and then click Custom Images.
This blog post provides an overview of how you can create custom compute images in Oracle Cloud Infrastructure. Custom compute images enable you to maintain a custom operating system image of your choice that includes all the required configuration and tools that need to be installed within it.
Oracle Cloud Infrastructure provides Enterprise features for developers to build modern cloud applications. Try the Oracle Cloud Free Tier with 300$ credits for a 30 Day Free Trial. Free Tier also includes a number of “Always Free” services that are available for an unlimited period of time even after your free credits expire.
Authors
Prasenjit Sarkar
Senior Principal Product Manager
Prasenjit Sarkar is a Senior Principal Product Manager & Cloud Native App/Dev Lead at Oracle for their Cloud Native Services on Oracle Cloud Infrastructure with the primary focus on Cloud Native Applications and Micro Services. His primary focus is driving Oracle’s Cloud Computing business with Startups & Key Enterprise customers; helping to shape and deliver on a strategy to build broad use of Oracle’s Cloud Native Services. He is also responsible for developing public/private cloud integration strategies, customer’s Cloud Computing architecture vision, future state architectures, and implementable architecture roadmaps in the context of the Cloud Native Services that Oracle offers.
He has 12 Granted Patent in US PTO and authored numerous research articles.
He is also an author of Virtualization blog http://blog.kube-mesh.io and also authored six industry-leading books on Virtualization, SDN, Physical Compute etc.
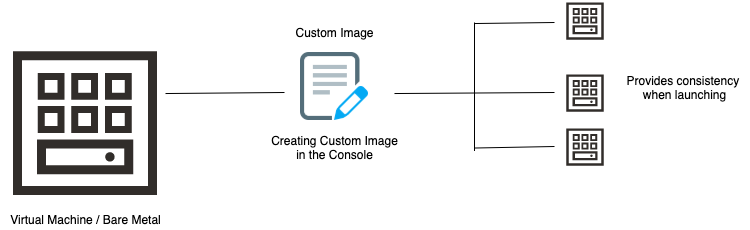
 Figure 2: Create a custom image from an instance