Overview
With the B2B DCS Reference Implementation (RI) there are two ways to integrate and provide Chat for your customers:
- The out of the box DCS Chat Component that is included with the B2B DCS RI
- Integrating a Chat Inlay from the DCS Inlays solution
The DCS team recommends option 2
DCS Chat
Customizing DCS Chat
Locate the DCS Chat within the B2B DCS RI
- Open your DCS App in VB
- On the left navigation, select “Web Apps”

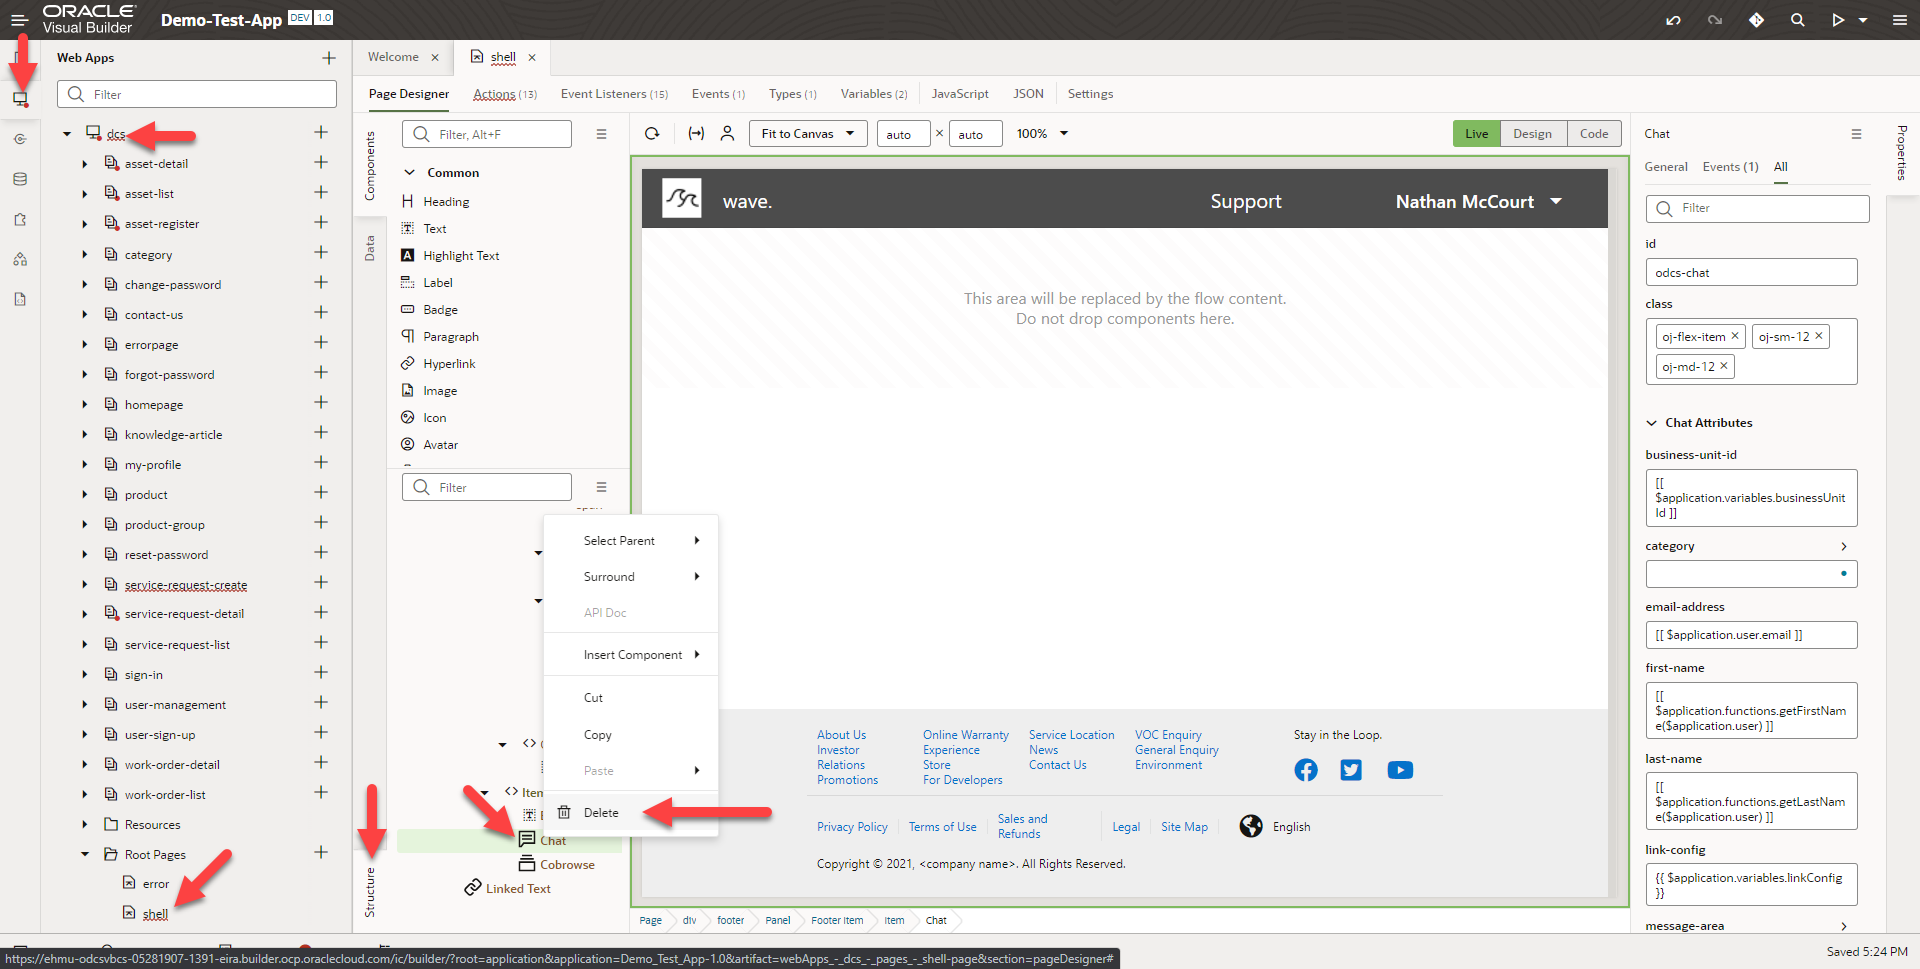
- Open the “dcs” Web App > “Root Pages” and select the “shell” page
- When the “shell” page opens, look for the “Structure” tab in the VB Editing window
- Scroll to the bottom of the “Structure” tab
- Locate the “Chat” Component and select it
- This is the “DCS Chat” Component that can be used to enable Chat for end-users. This is the Chat Component that is provided out of the box with the B2B DCS RI.

Customize the Properties of DCS Chat
- Once you have located the DCS Chat Component, you can customize various properties of the Chat Component
- Select the Chat Component, then on the open “Properties” tab in the VB Editor, select “All” to view the Chat Components properties
- From here you can edit the “Chat Attributes” to change some basic functionality of the Chat Component
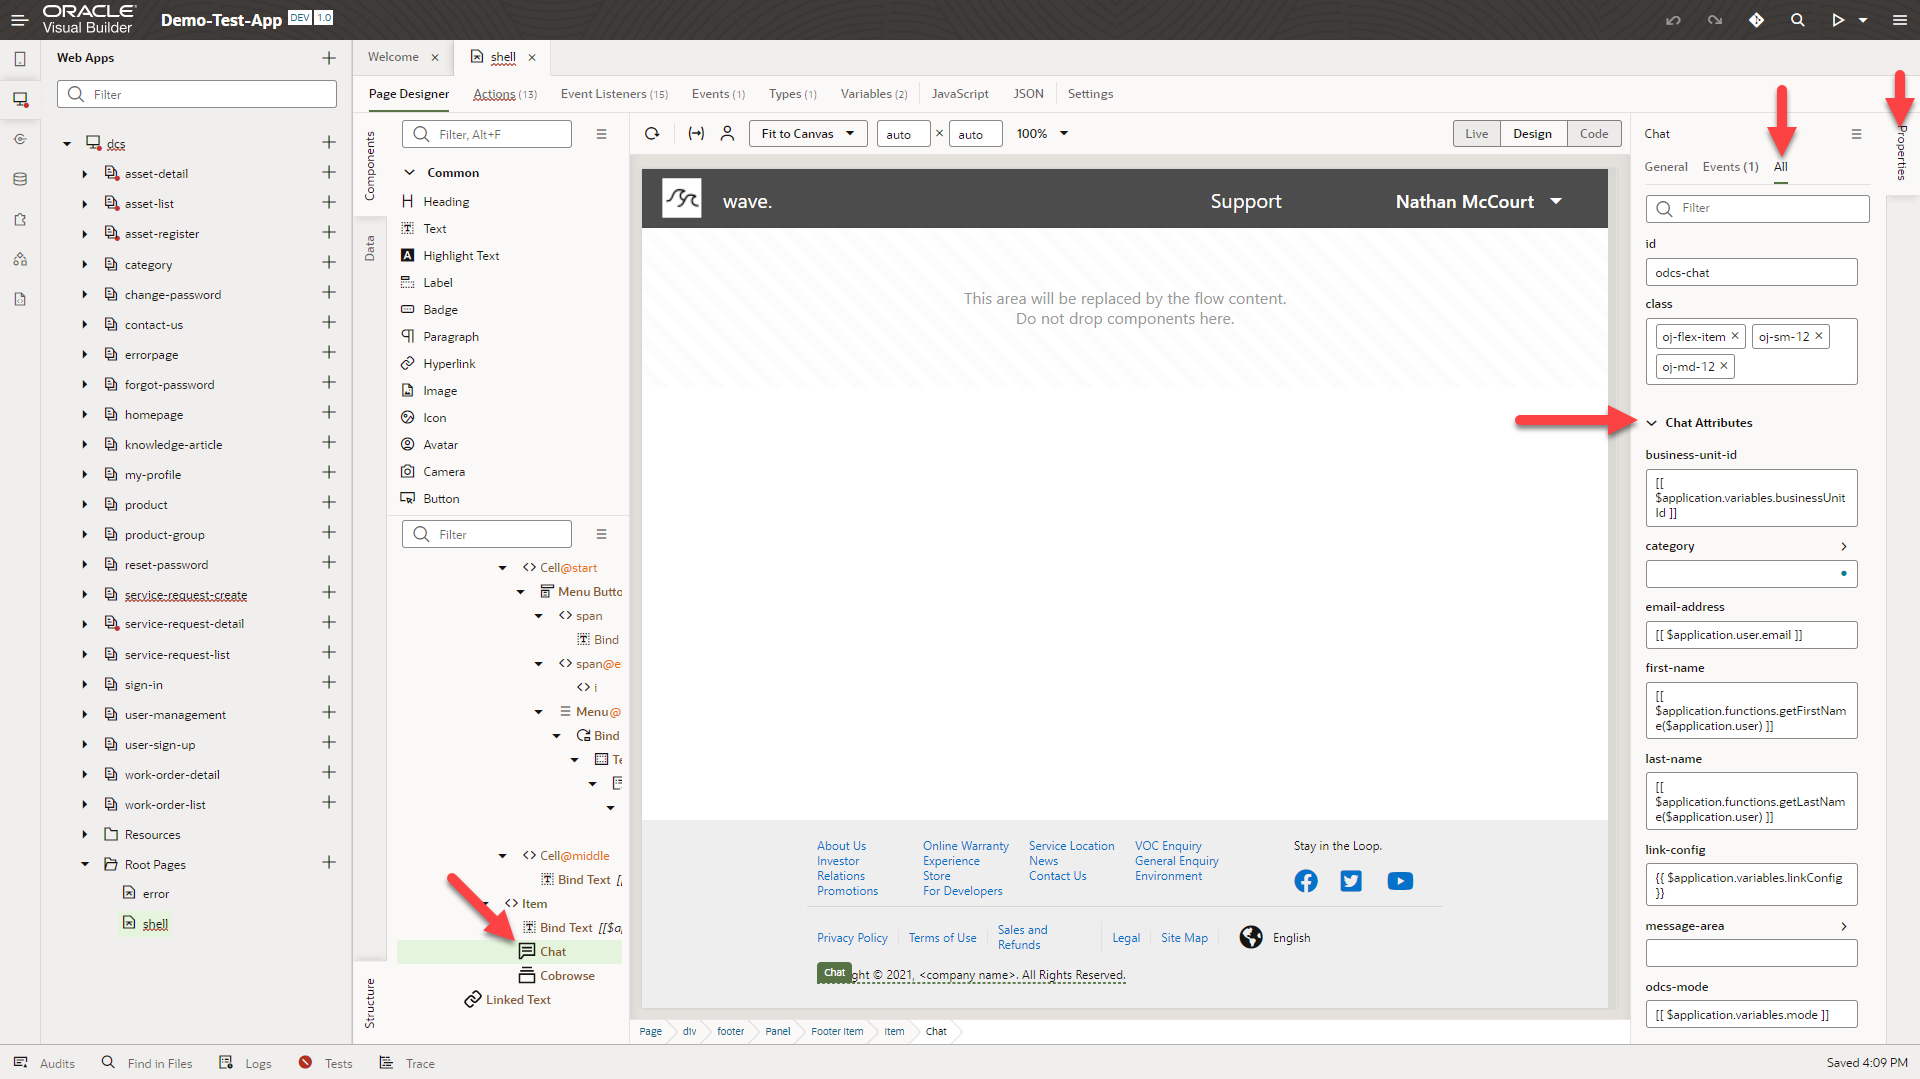
- Examples of some “Chat Attributes”:
- Business Unit ID
- Product and Category variables for routing
- User Information variables
- Email Address
- First Name
- Last Name
- User Subject
- User Message
- Queue ID for routing
- Service Request for the chat session
- Window Sizes
- Height
- Width
Customize the Look and Feel of DCS Chat using CSS Variables
- To change the look and feel of the DCS Chat, we will need to update some CSS variables for the DCS App in VB
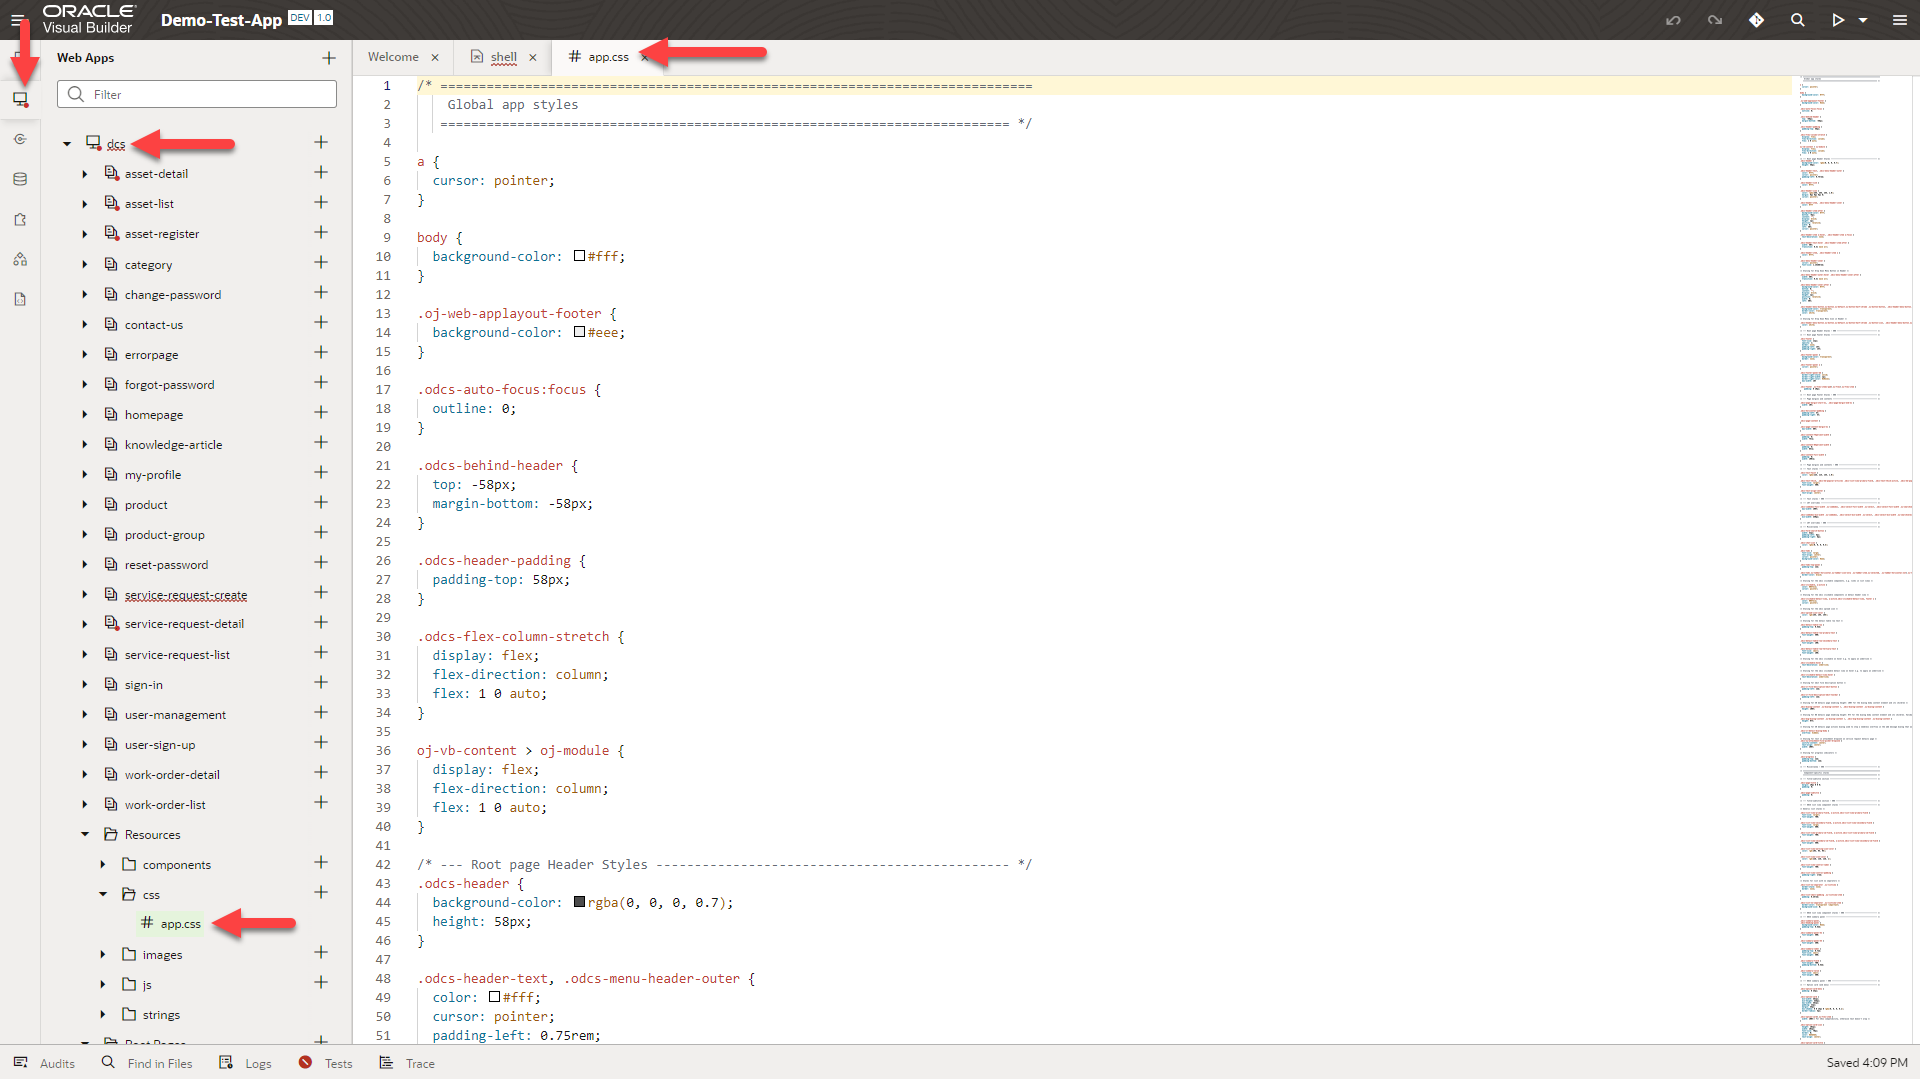
- On the left navigation, select “Web Apps”
- Open the “dcs” Web App > “Resources” > “CSS” > “app.css”
- This will open the main CSS file for the B2B DCS RI
- Search through the “app.css” file by entering CTRL+F and search for “dcs-chat”
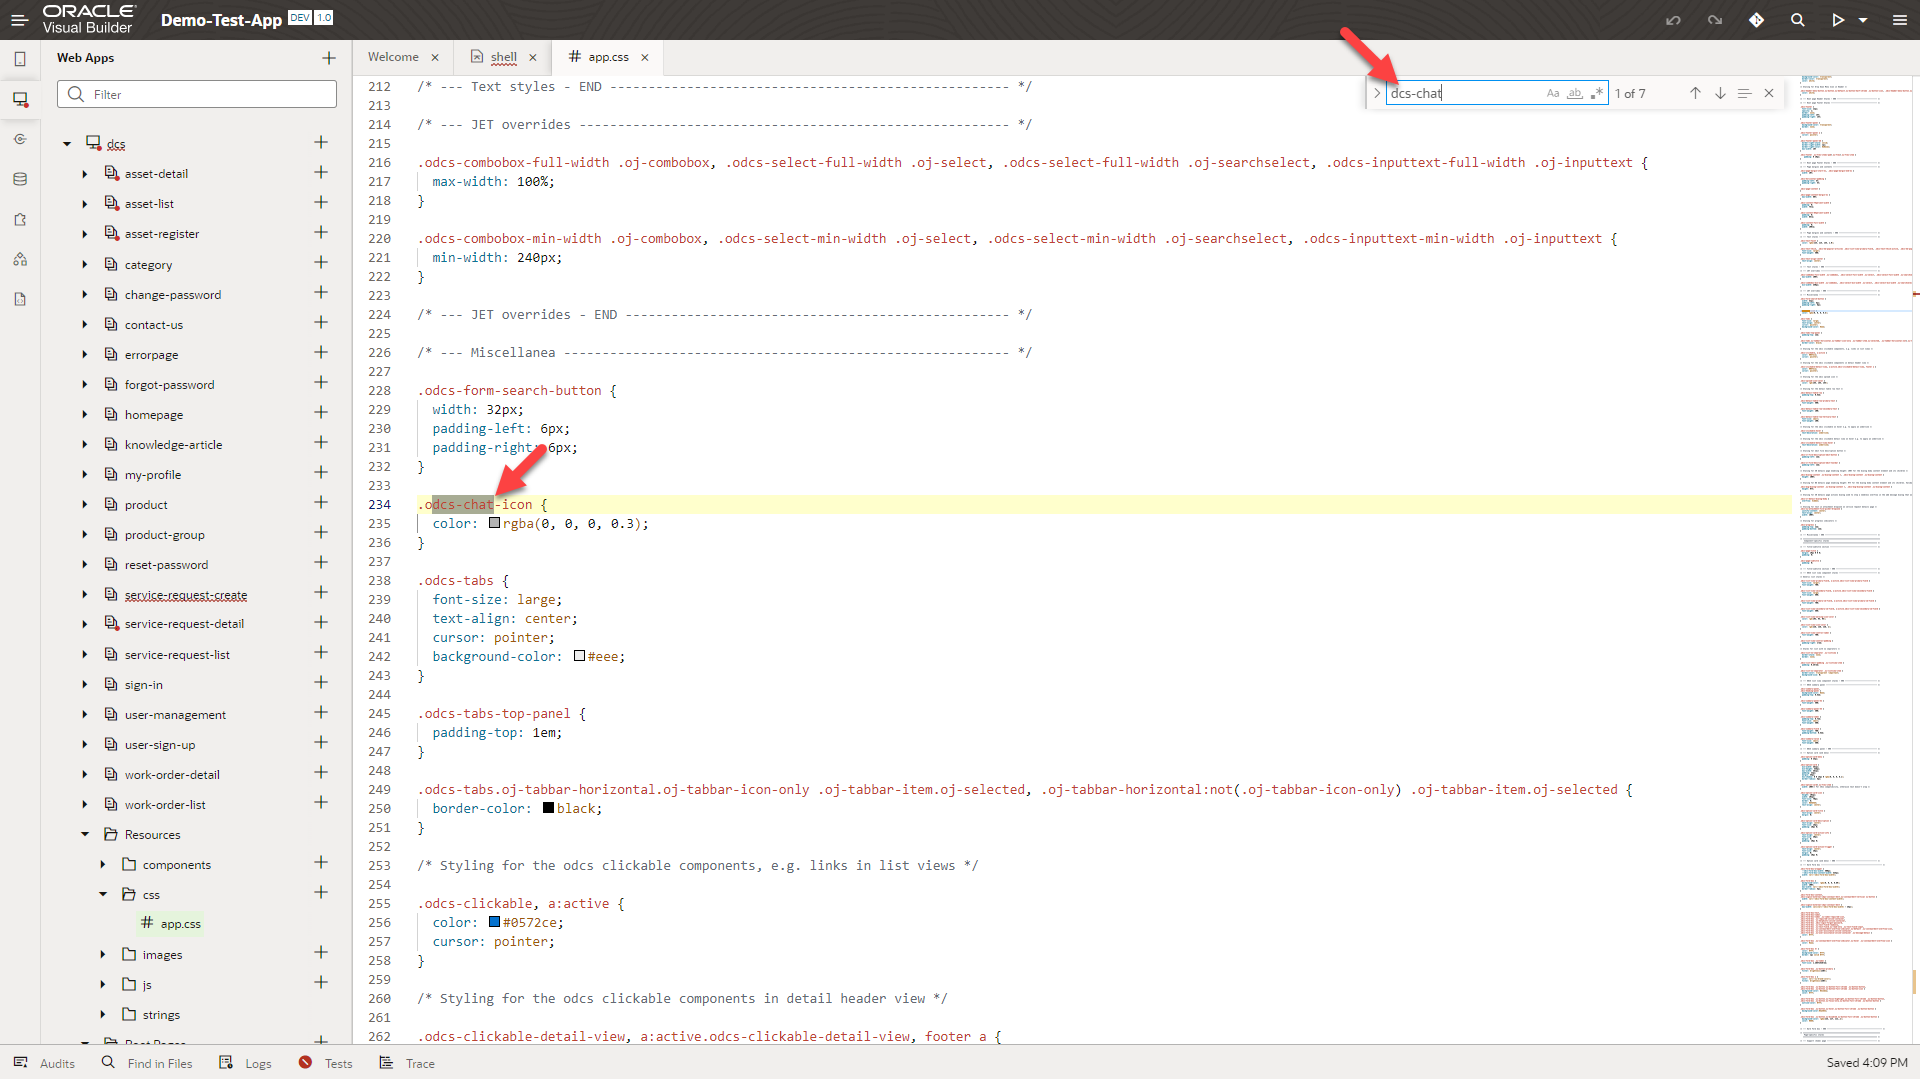
- This will find all text entries of “dcs-chat” within the “app.css” file
- Locate the CSS variable changes that need to be made or add your own CSS variables to override the defaults
- Under “odcs-chat-icon”
- “color” – Changes the chat icon color on the homepage of the B2B DCS App
- “color” – Changes the chat icon color on the homepage of the B2B DCS App
- Under “odcs-chat-footer .oj-button.oj-enabled.oj-default.oj-button-outlined-chrome .oj-button-button”
- “color” – Changes the color of the “Start Chat” text in the button of the footer (HEX or rgba)
- Under “odcs-chat-icon”
Customize the Look and Feel of DCS Chat by Adding CSS Classes
- To change the look and feel of the DCS Chat, you can add CSS classes to the DCS App in VB
- On the left navigation, select “Web Apps”
- Open the “dcs” Web App > “Resources” > “CSS” > “app.css”
- This will open the main CSS file for the B2B DCS RI

- Add your own CSS classes to customize the DCS Chat Component and be sure to include “!important” with each variable
-
Add “.odcs-chat-dialog .odcs-chat-header” to customize the DCS Chat header
-
“background” – Changes the color of the header background (HEX or rgba)
-
“padding” – Changes the size of the header (Default: “1em”)
-
odcs-chat-dialog .odcs-chat-header {
  background: #123456!important;
  padding: 3em!important;
}
-
Add “.odcs-chat-dialog .odcs-chat-header span” to customize the DCS Chat header text and icon colors
- color” – Changes the color of the header text and icons (HEX or rgba)
.odcs-chat-dialog .odcs-chat-header span {
  bcolor: #6aad74!important;
}
-
Add “.odcs-chat-dialog .odcs-chat-form-content” to customize the main DCS Chat dialog window
- “padding” – Changes the size of the form content (Default: “2em”)
.odcs-chat-dialog .odcs-chat-form-content {
  padding: 5em!important;
}
-
Add “.odcs-chat-dialog .odcs-chat-footer” to customize the DCS Chat footer
- “background” – Changes the color of the footer background (HEX or rgba)
-
“padding” – Changes the size of the footer (Default: “1em”)
.odcs-chat-dialog .odcs-chat-footer {
  background: #123456!important;
  padding: 3em!important;
}
-
Add Custom Avatars to messages in DCS Chat
- First, you will need to import SVG or PNG assets to represent the Agent/System messages as well as the User messages, these will need to be accessible in Visual Builder
- Example: “agent_icon.png” and “user_icon.png”
-
Then, you will need to add the following code to the “app.css” file
- First, you will need to import SVG or PNG assets to represent the Agent/System messages as well as the User messages, these will need to be accessible in Visual Builder
/* Chat Custom Avatars */
.odcs-chat-message-user::before { /* Change to ::after if you would like the avatar to be on the right, leave as ::before if you would like the avatar to stay on the left */
  content:"";
  --avatar-size: 24px; /* Resize all the Avatars */
  width: var(--avatar-size);
  height: var(--avatar-size);
  background-size: var(--avatar-size) var(--avatar-size);
  display: inline-block;
  vertical-align: middle;
}

.odcs-chat-message-box-agent .odcs-chat-message-user::before {
  background-image: url("../images/agent_icon.png"); /* Change to the name of your Agent/System Avatar */
}

.odcs-chat-message-box-user .odcs-chat-message-user::before {
  background-image: url("../images/user_icon.png"); /* Change to the name of your User Avatar */
}
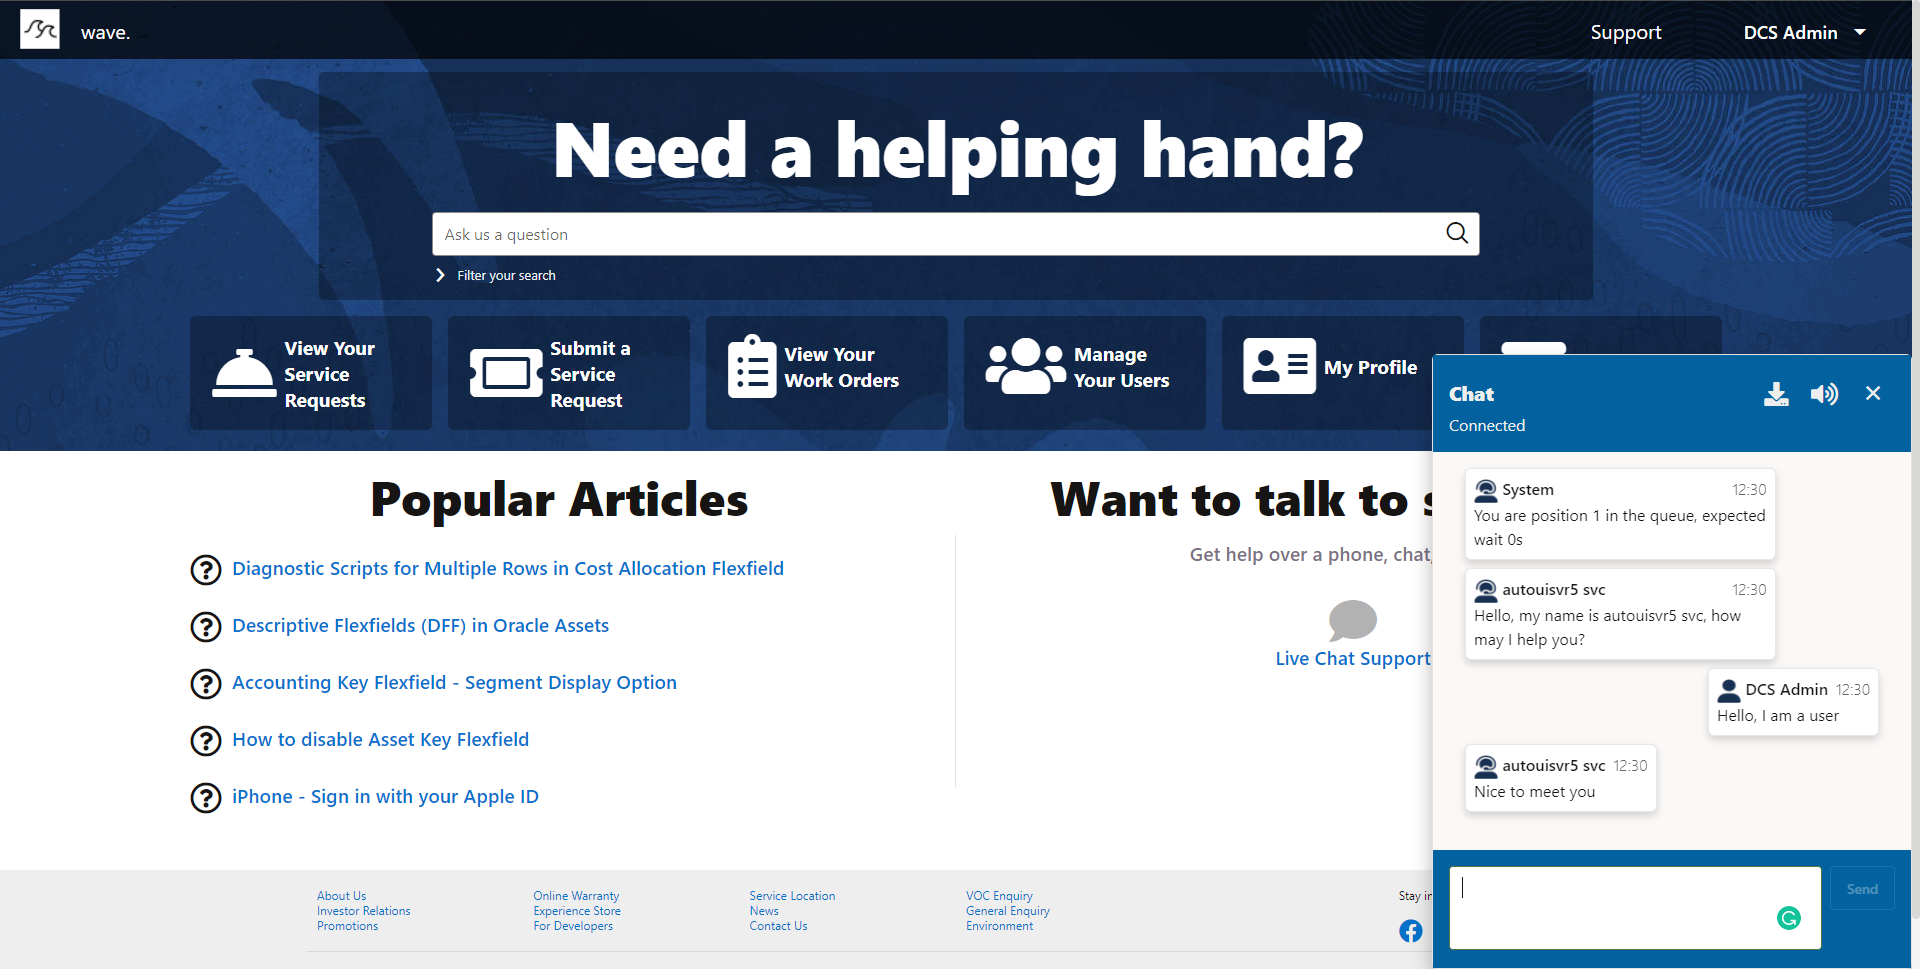
- Now you should see an Avatar for both the Agent/System as well as the User messages
-
To find ALL possible customizations for DCS Chat by adding CSS classes, use Google Chrome’s Developer Tools
-
Preview the DCS App in Google Chrome by clicking the “Preview” button in VB

-
When the app opens, hit F12 to open Chrome Developer Tools OR right-click on the DCS Chat Component when it is open to directly view the CSS of the object

- When viewing Chrome Developer Tools, navigate the HTML and CSS to find the CSS variables you would like to change

- After adding and editing the CSS classes, the look and feel of the DCS Chat Component changes the next time you “Preview” the DCS App

-
Chat Inlay
Enabling Chat Inlay for B2B Service
Documentation for Setting up Chat Inlay for B2B Service
Adding Chat Inlay to DCS App
- Open your DCS App in VB
- On the left navigation, select “Web Apps”
- Open the “dcs” Web App > “Root Pages” and select the “shell” page
- When the “shell” page opens, look for the “Structure” tab in the VB Editing window
- Scroll to the bottom of the “Structure” tab
- First, we want to remove the DCS Chat Component since we will be using Chat Inlay instead
- Right-click on the DCS Chat Component and click “Delete”
- Now with the DCS Chat Component gone, we want to add the Chat Inlay Component
- In the “Components” tab of the VB Editor, search for “Chat Embedded” to find the Chat Inlay Component
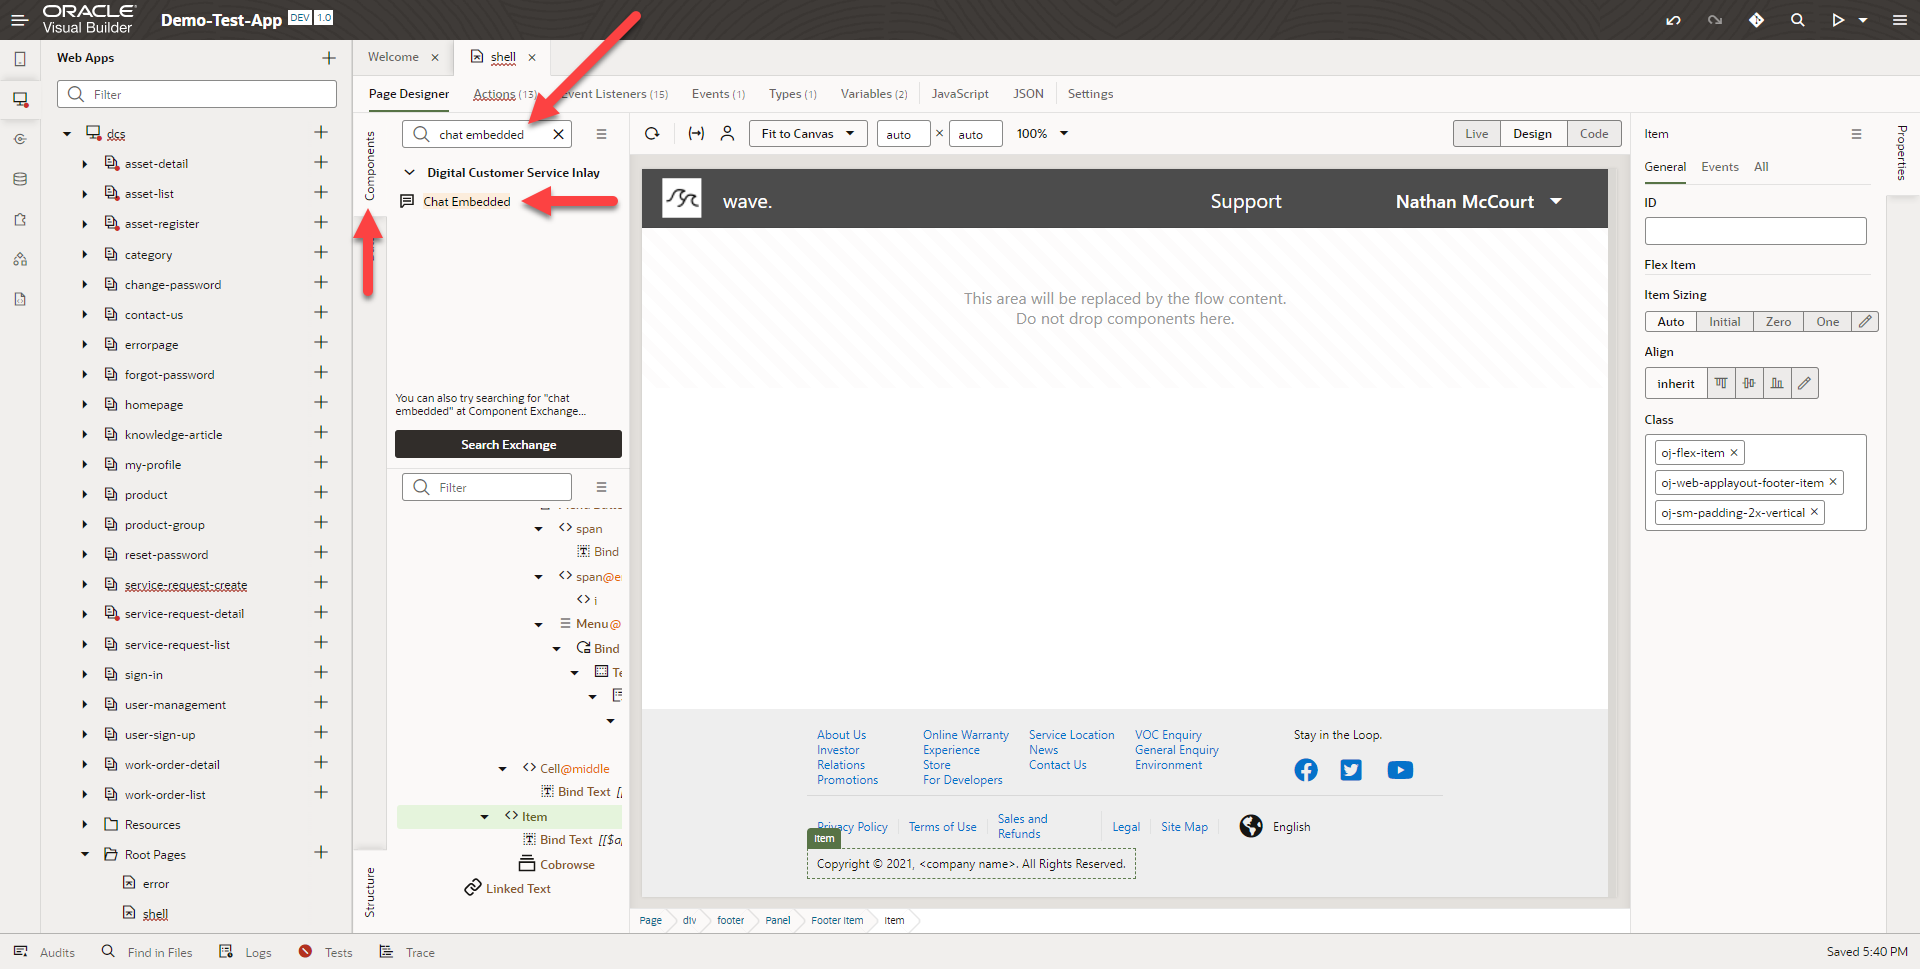
- If you do not see the Chat Inlay Component (“Chat Embedded”) click on “Search Exchange” and install it from the resulting search
- Drag and drop in the Chat Inlay Component (“Chat Embedded”) right above the Cobrowse Component
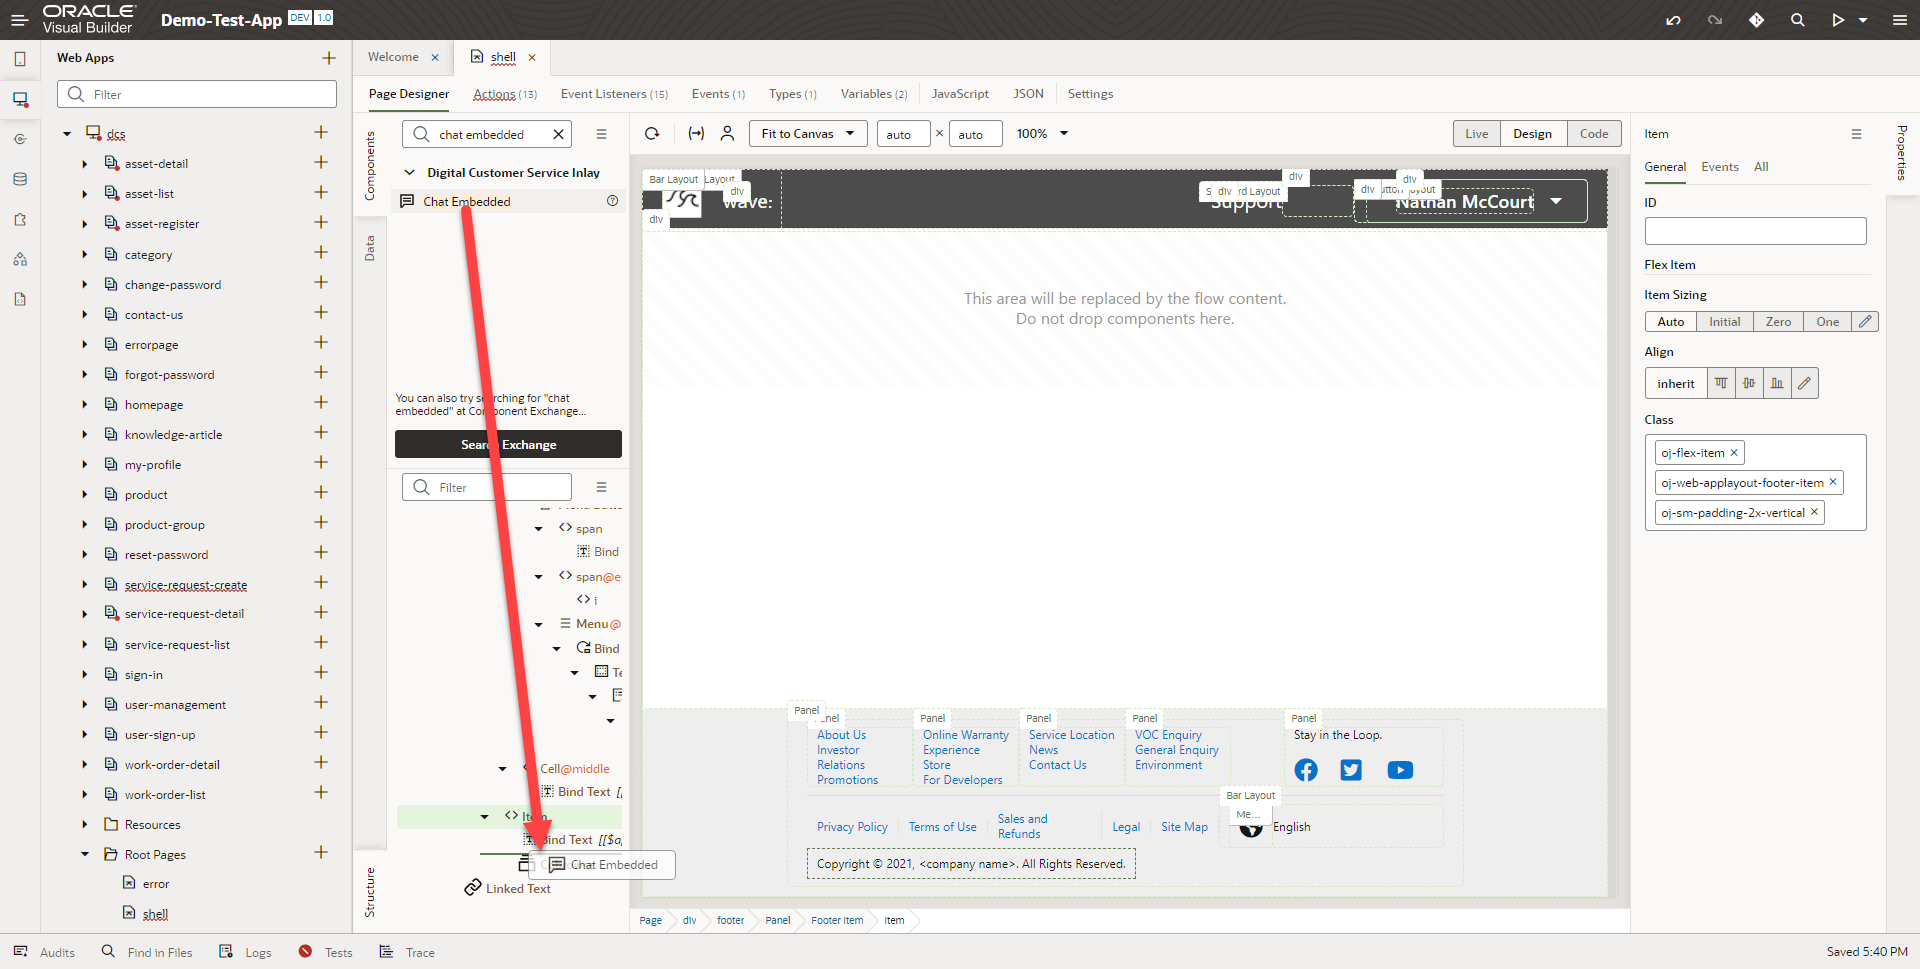
- Now the Chat Inlay Component (“Chat Embedded”) is added to the DCS App
Customizing Chat Inlay
Customize the Properties of Chat Inlay
- Once you have added the Chat Inlay Component (“Chat Embedded”) to the DCS App, you can customize various properties of the Chat Inlay Component
- Select the Chat Inlay Component (“Chat Embedded”), then on the open “Properties” tab in the VB Editor, select “General” to view the Chat Inlay Component (“Chat Embedded”) properties
- From here you can edit the “Chat Properties” to change some basic functionality of the Chat Inlay Component (“Chat Embedded”)
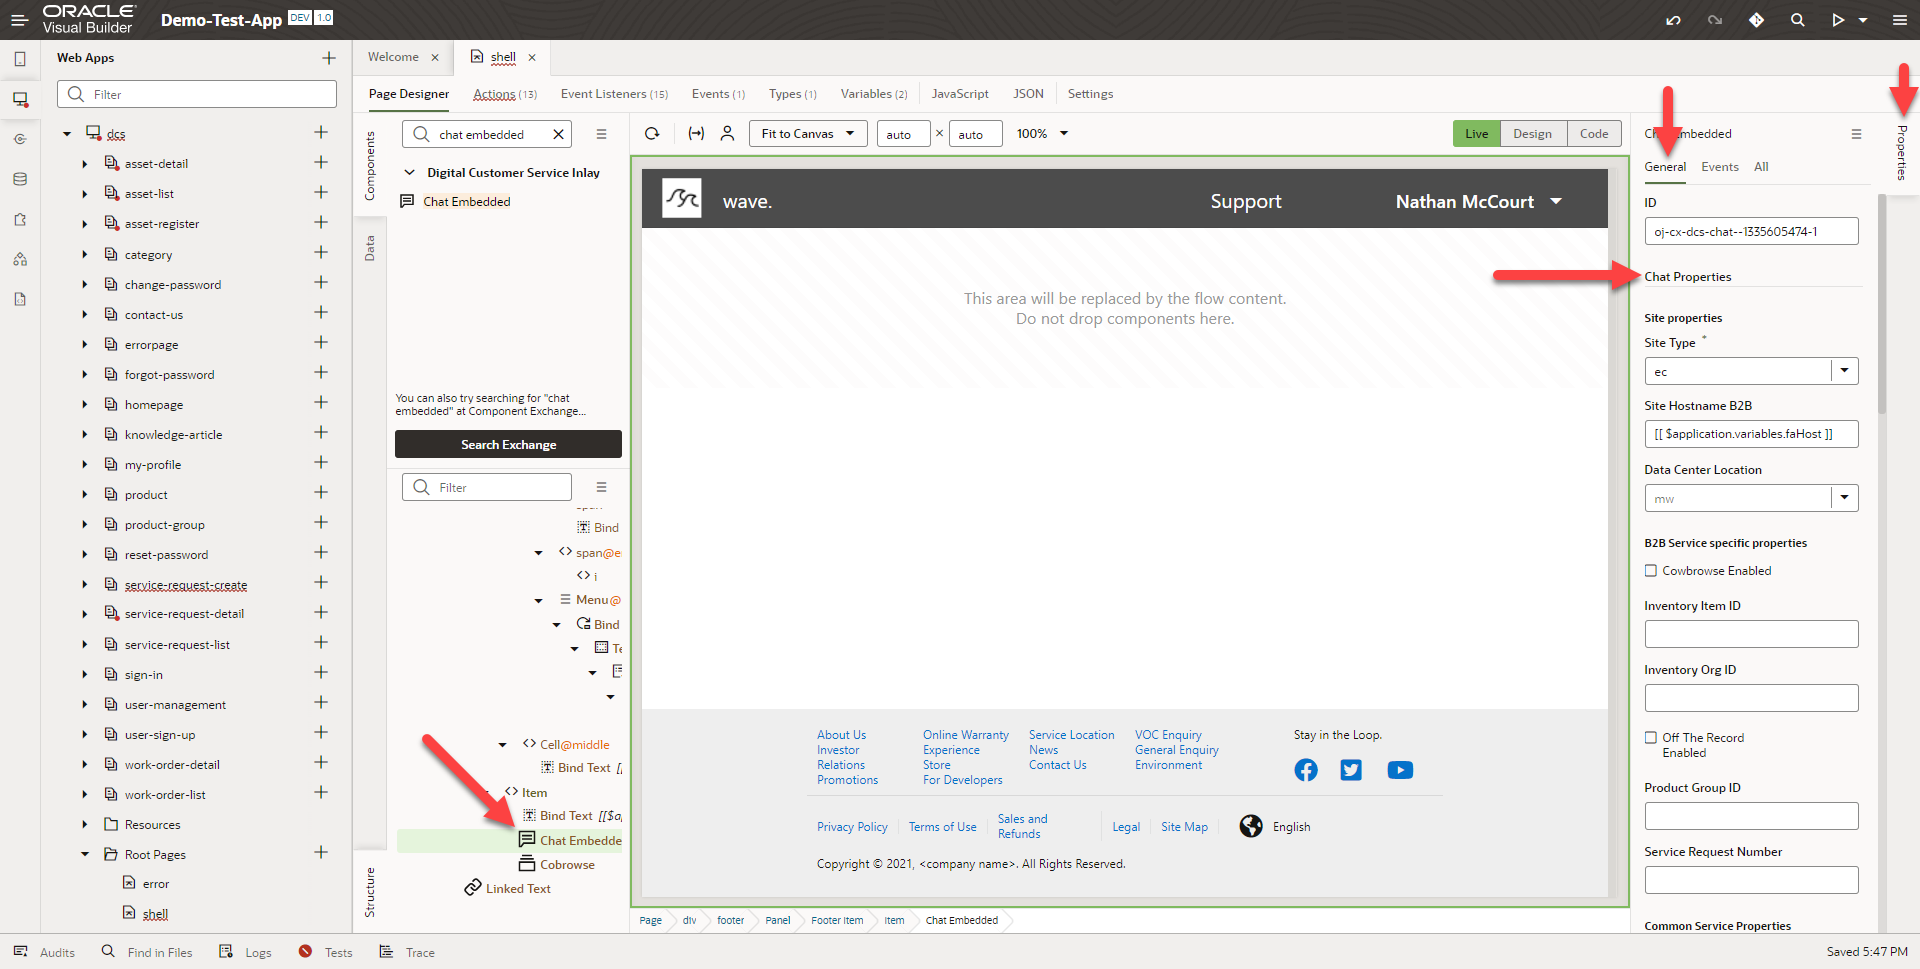
- Examples of some “Chat Properties”:
- Site Type
- Site Hostname B2B
- Product and Category variables for routing
- User Information variables
- Email Address
- First Name
- Last Name
- User Subject
- Queue ID for routing
- Service Request for the chat session
- Theme Variable, Brand Color
- Customizing these “Chat Properties” will update the Chat Inlay Component (“Chat Embedded”) in realtime in the VB Editor