In this article, we will explain how to set up a JBoss Datasource configured in OCI (Oracle Cloud Infrastructure) DB Tools Connections.
The concept is the same as the one described in this blog article. In this case, you use OCI DB Tools Connections to store all your connection configuration values and then refer to the DB Tools Connection Identifier (OCID) to let the Oracle JDBC Extensions retrieve the configuration for you.
As a result, middleware administrators and developers don’t need to know database url, username, password, timeouts, etc. They just use the DB Tools Connection OCID. Other benefits of using a centralized configuration solution like OCI DB Tools Connection are: only administrators can create/rotate users/passwords, these changes are not affected in the application (because the apps use a reference), these values are shared across platforms (different coding languages); and fine-tune database configuration parameters (time-outs, auto-commit, etc.) are configured only by administrators in a centralized way.
Create your OCI DB Tools Connection.
In this step, you create the OCI DB Tools Connection by providing the values required to connect to your database:
-
Name
-
Database (in this example we will connect to an Autonomous Database in the same tenancy)
-
Username
-
Password
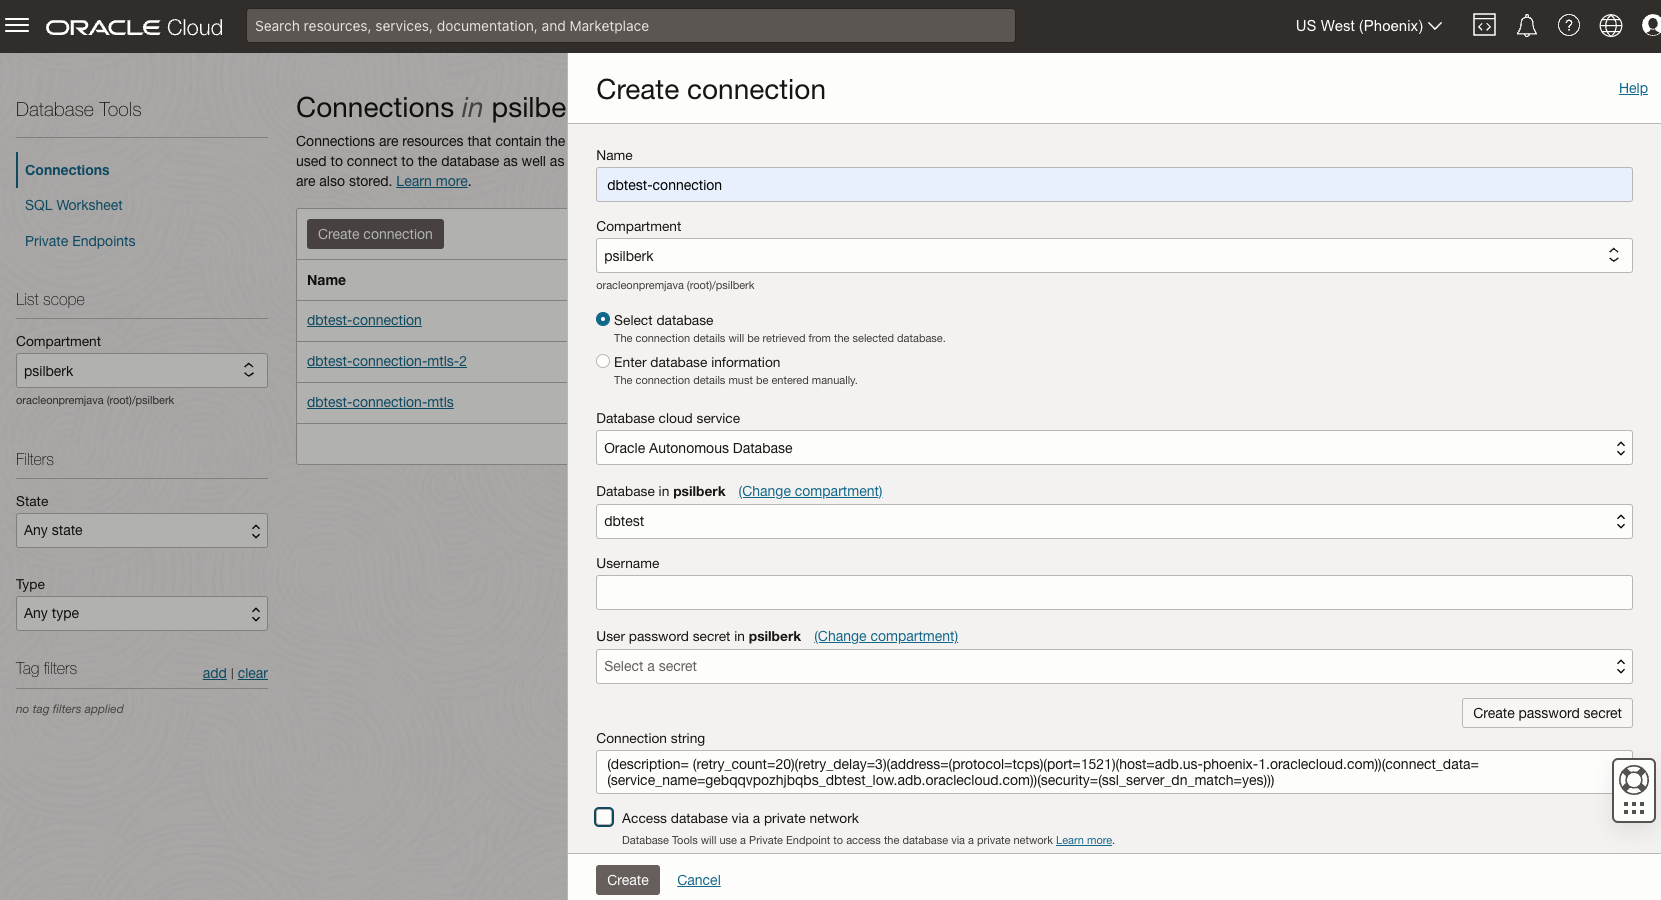
Keep in mind that you can also use the Database Tools Connection to set more connection properties, the wallet, etc.
After the Database Tools Connection is created, you can see the OCID. We will use this value to create the datasource in JBoss.

Set up local credentials for the OCI Java SDK.
The JDBC Driver Extensions use the OCI Java SDK to call the required APIs in OCI and replicate its authentication methods. For the purpose of this article, we will use the API Key-Based Authentication method, in which you create a local file with the required parameters (user OCID, tenant OCID, region, private key path, and fingerprint). You can follow this article to create your local credentials.
Copy the JDBC Extensions libraries into a temporary folder.
mkdir ~/Downloads/temp
cd ~/Downloads/temp
git clone git@github.com:oracle/ojdbc-extensions.git
cd ojdbc-extensions
mvn dependency:copy-dependencies -DoutputDirectory=../jars
Add JBoss module with JDBC Extensions libraries
(if JBoss is not running) ./bin/standalone.sh -b 0.0.0.0 -bmanagement=0.0.0.0 &
Connect to the CLI and add module
./bin/jboss-cli.sh –connect
(if exists) module remove –name=com.oracle.jdbc
To get the list of libraries, from the ‘jars’ directory of point 2, execute
<List of jars>=
find `pwd` -name “*.jar” -exec printf “%s:” {} + | sed ‘s/:$//’
module add –name=com.oracle.jdbc –resources=<List of jars> –dependencies=javax.api,javax.transaction.api
For example:
module add –name=com.oracle.jdbc –resources=/Users/psilberk/Downloads/temp/ojdbc-extensions/ojdbc-provider-oci/jars/oci-java-sdk-common-3.37.0.jar:/Users/psilberk/Downloads/temp/ojdbc-extensions/ojdbc-provider-oci/jars/jakarta.xml.bind-api-2.3.2.jar…. –dependencies=javax.api,javax.transaction.api
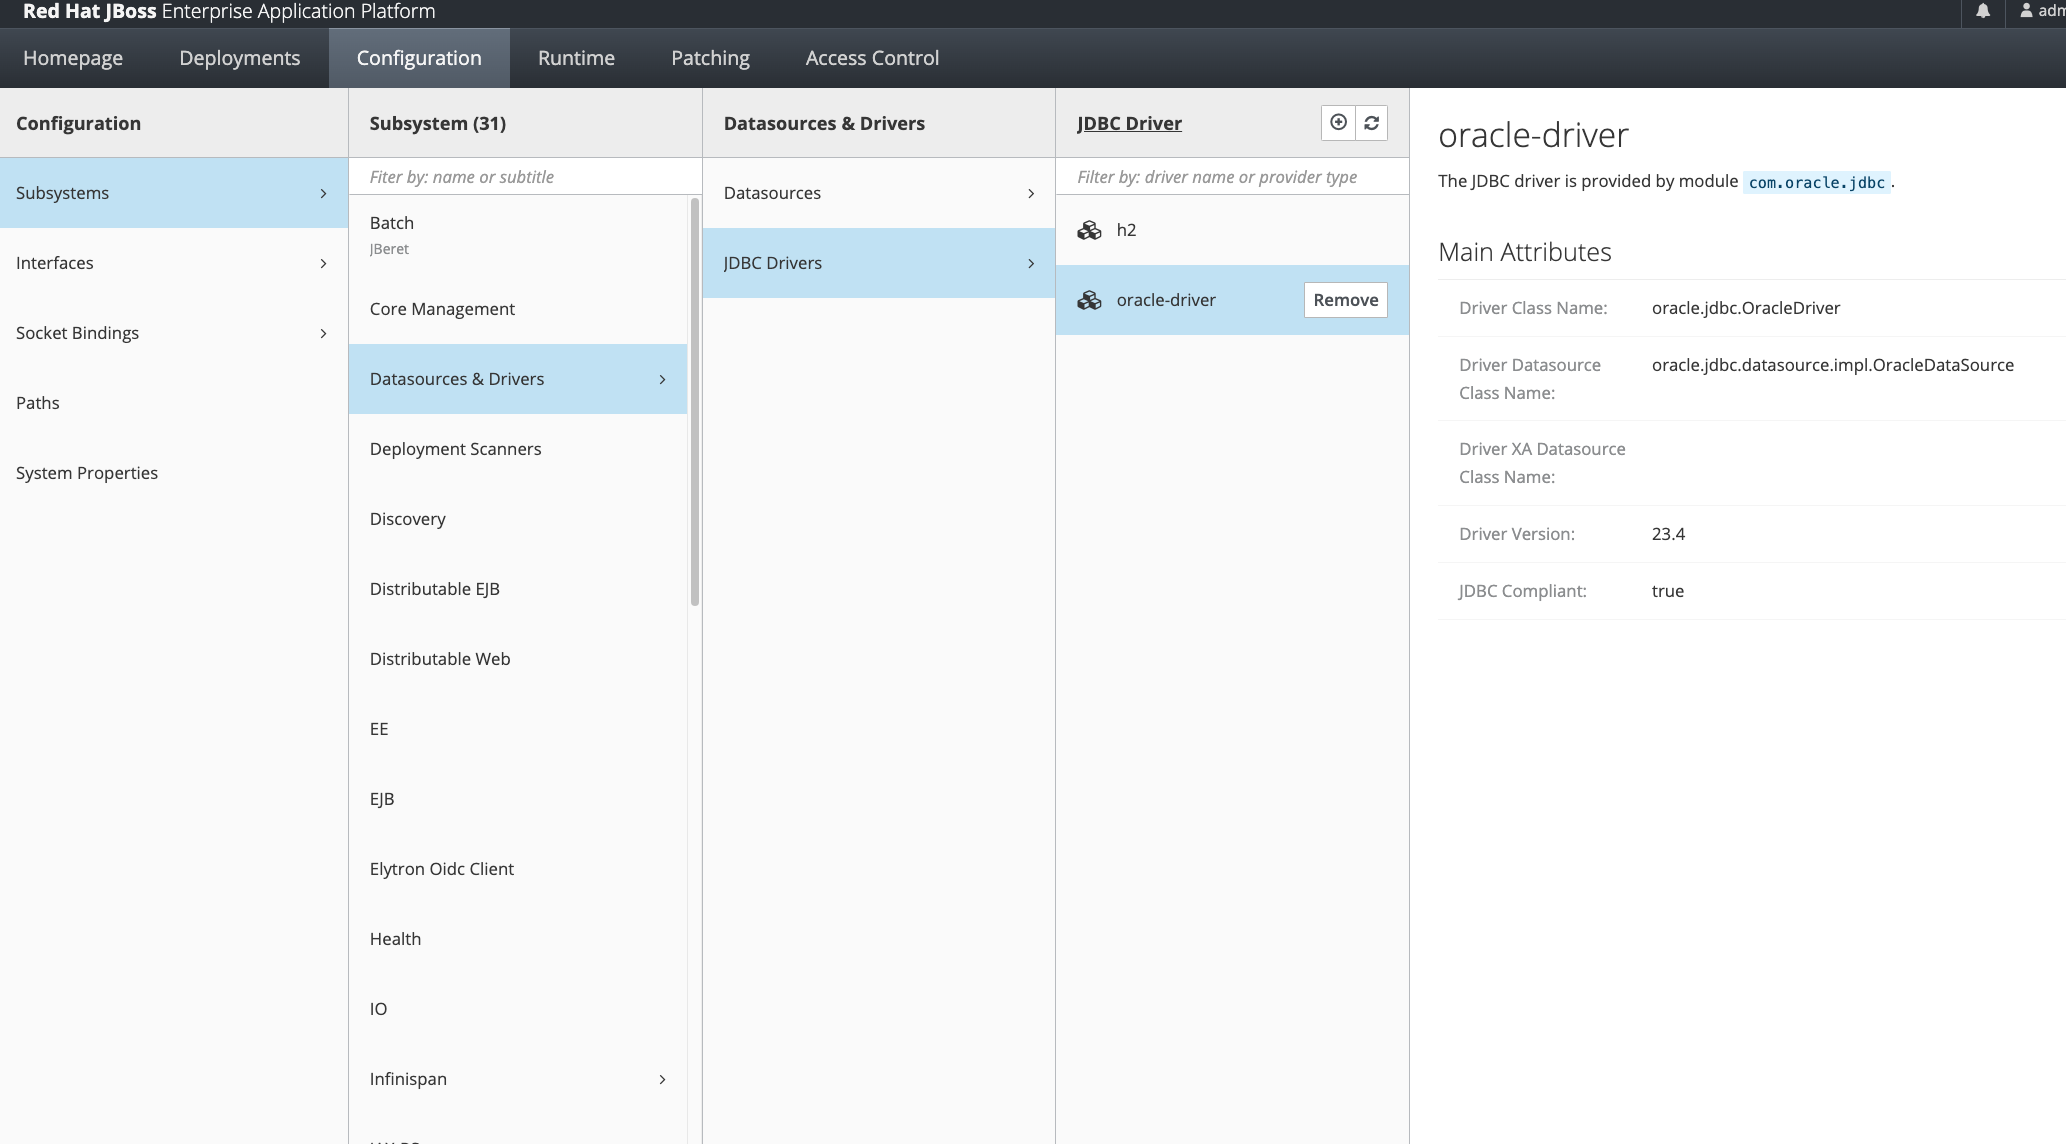
Add Driver
You can validate its creation in the console.
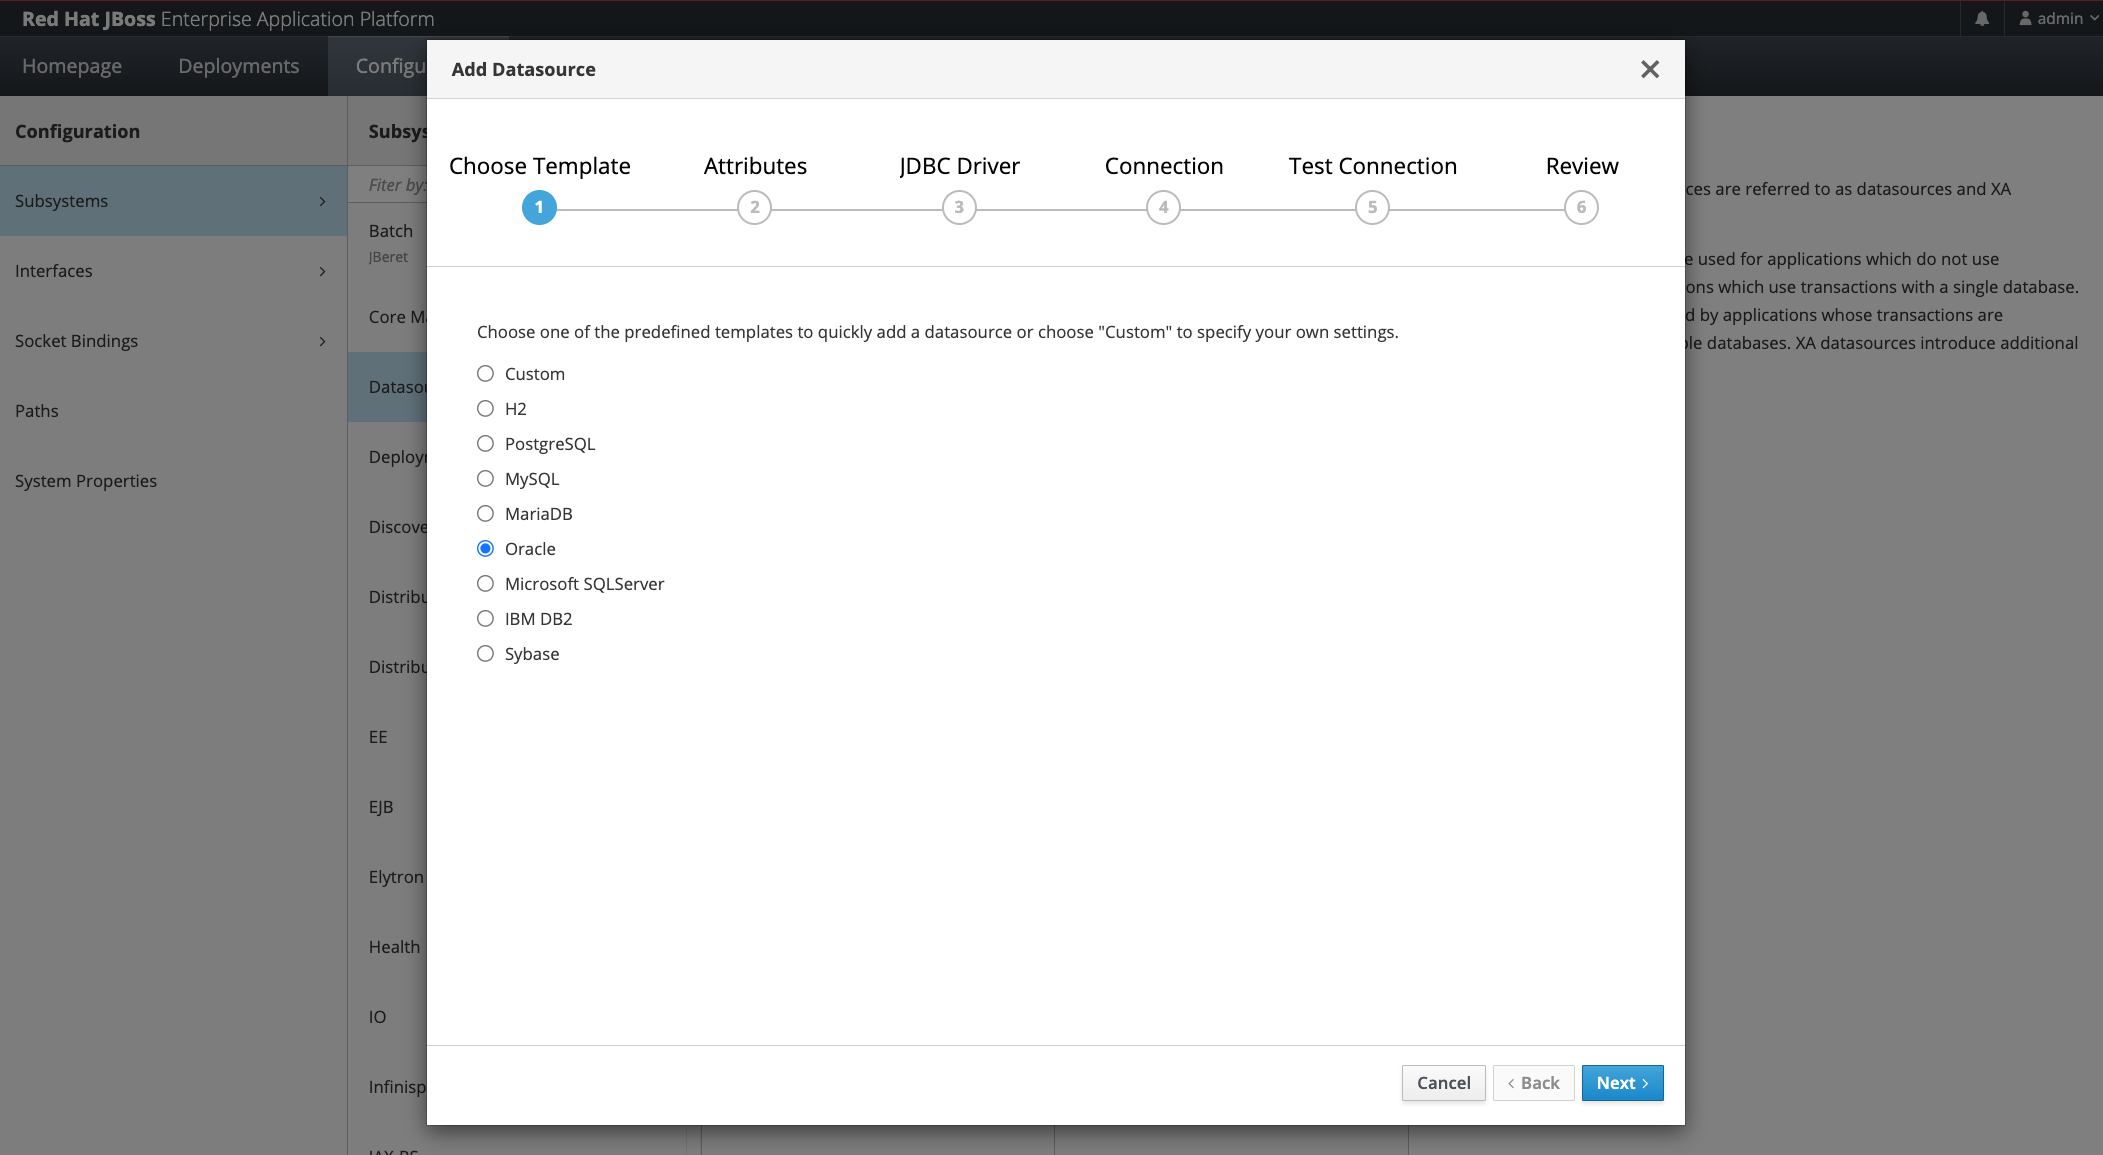
Add Datasource
From JBoss Console: Add Datasource
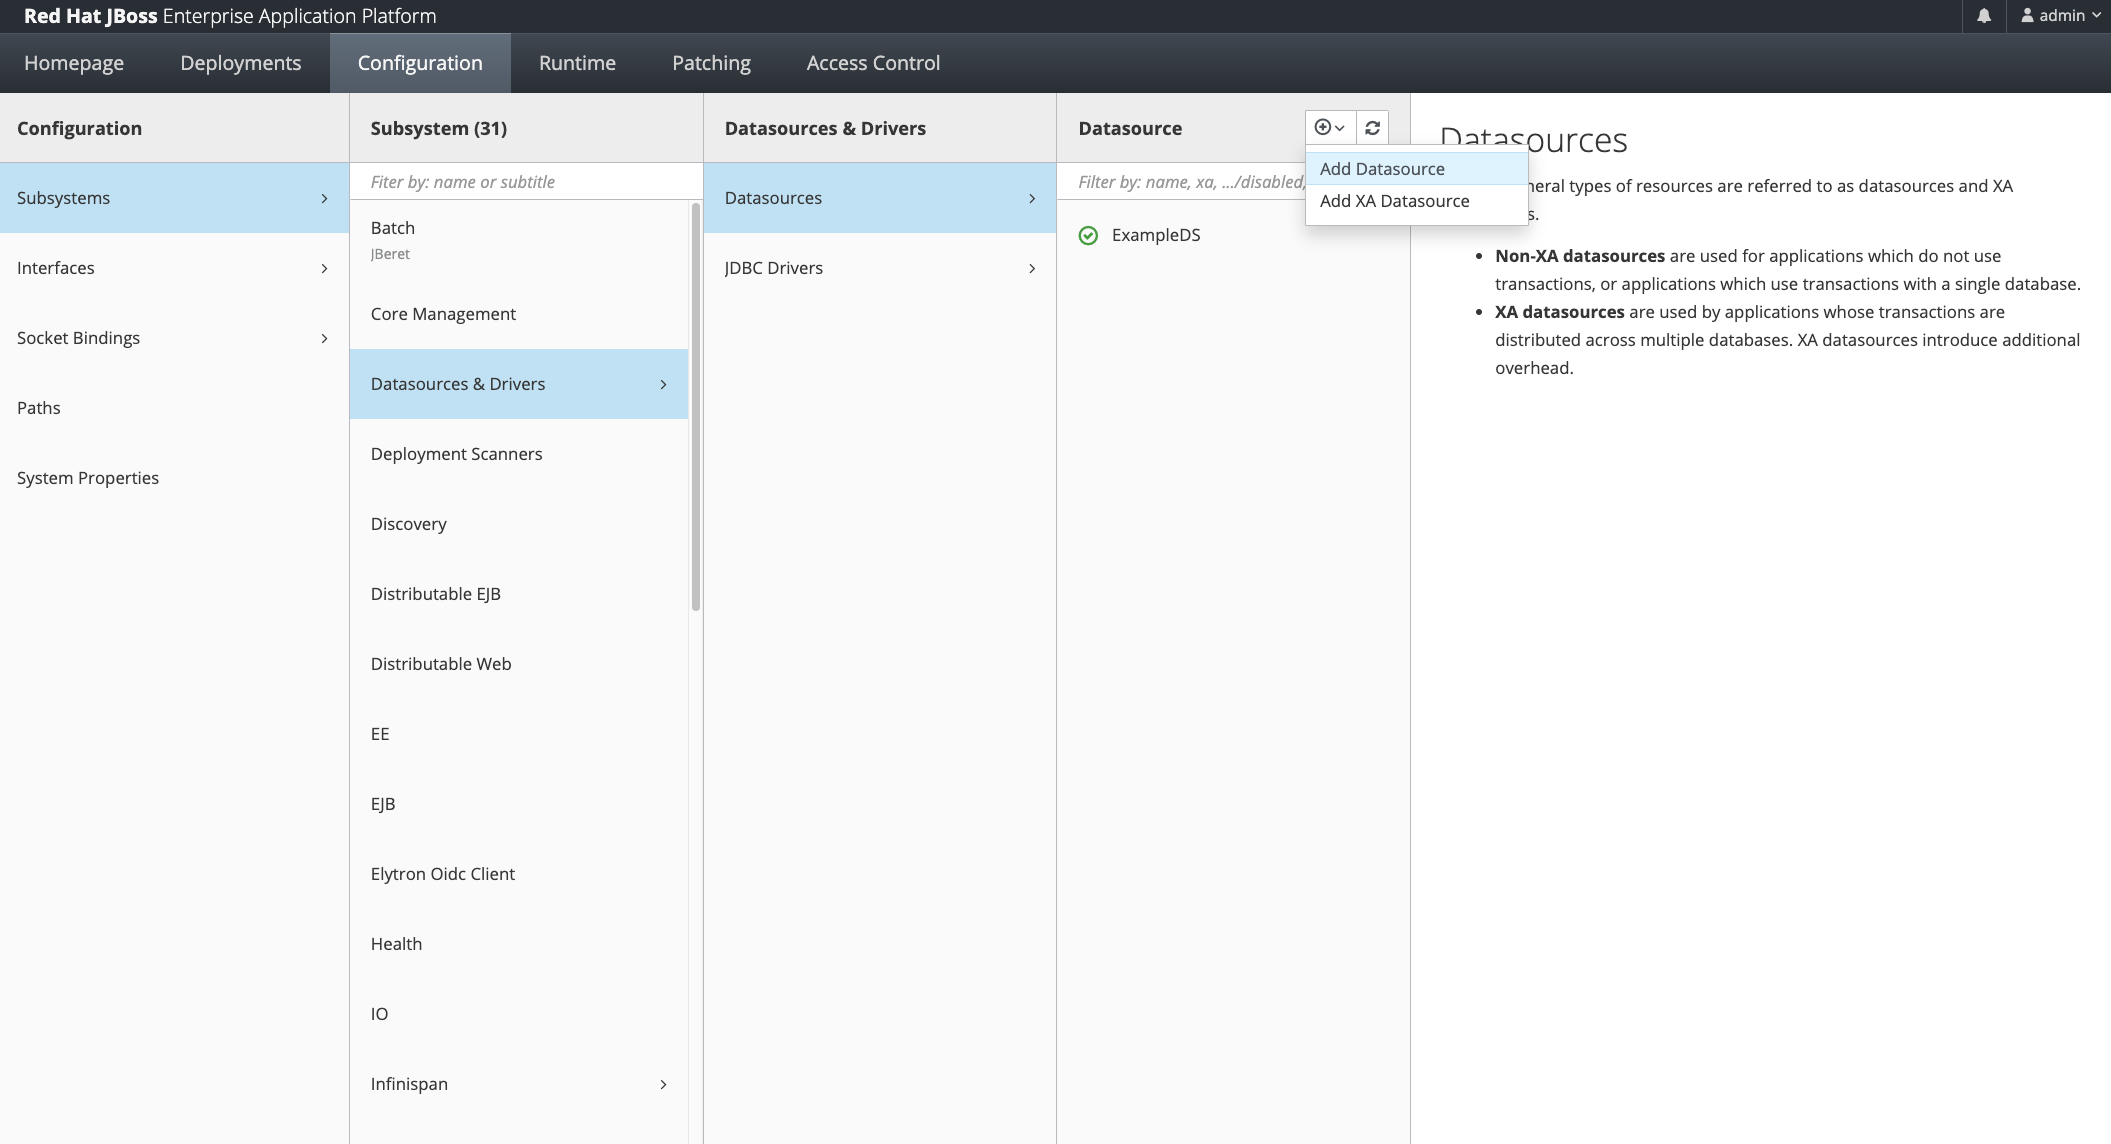
Select “Oracle” Type
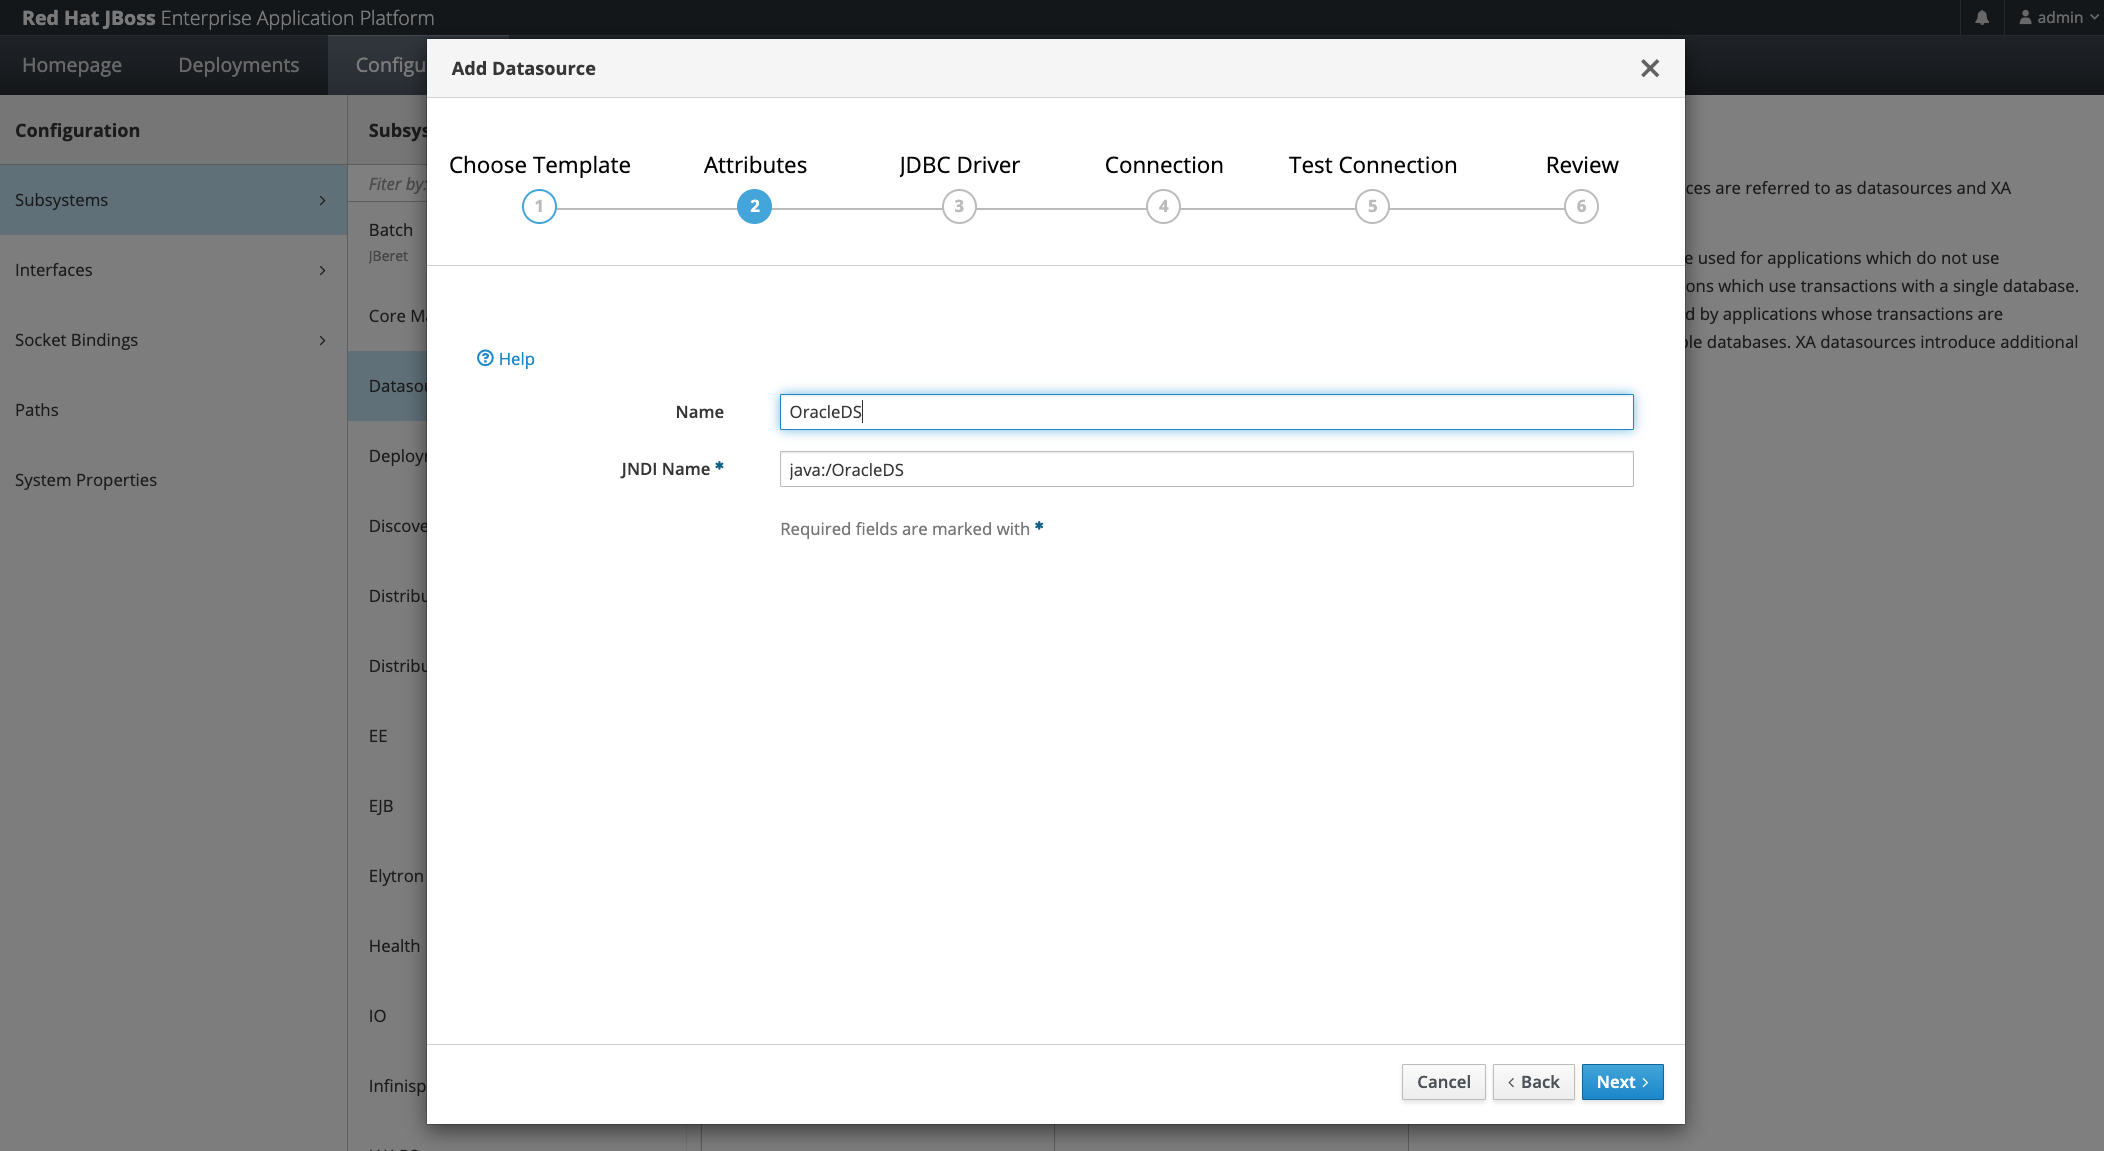
Select Preferred Name and JNDI
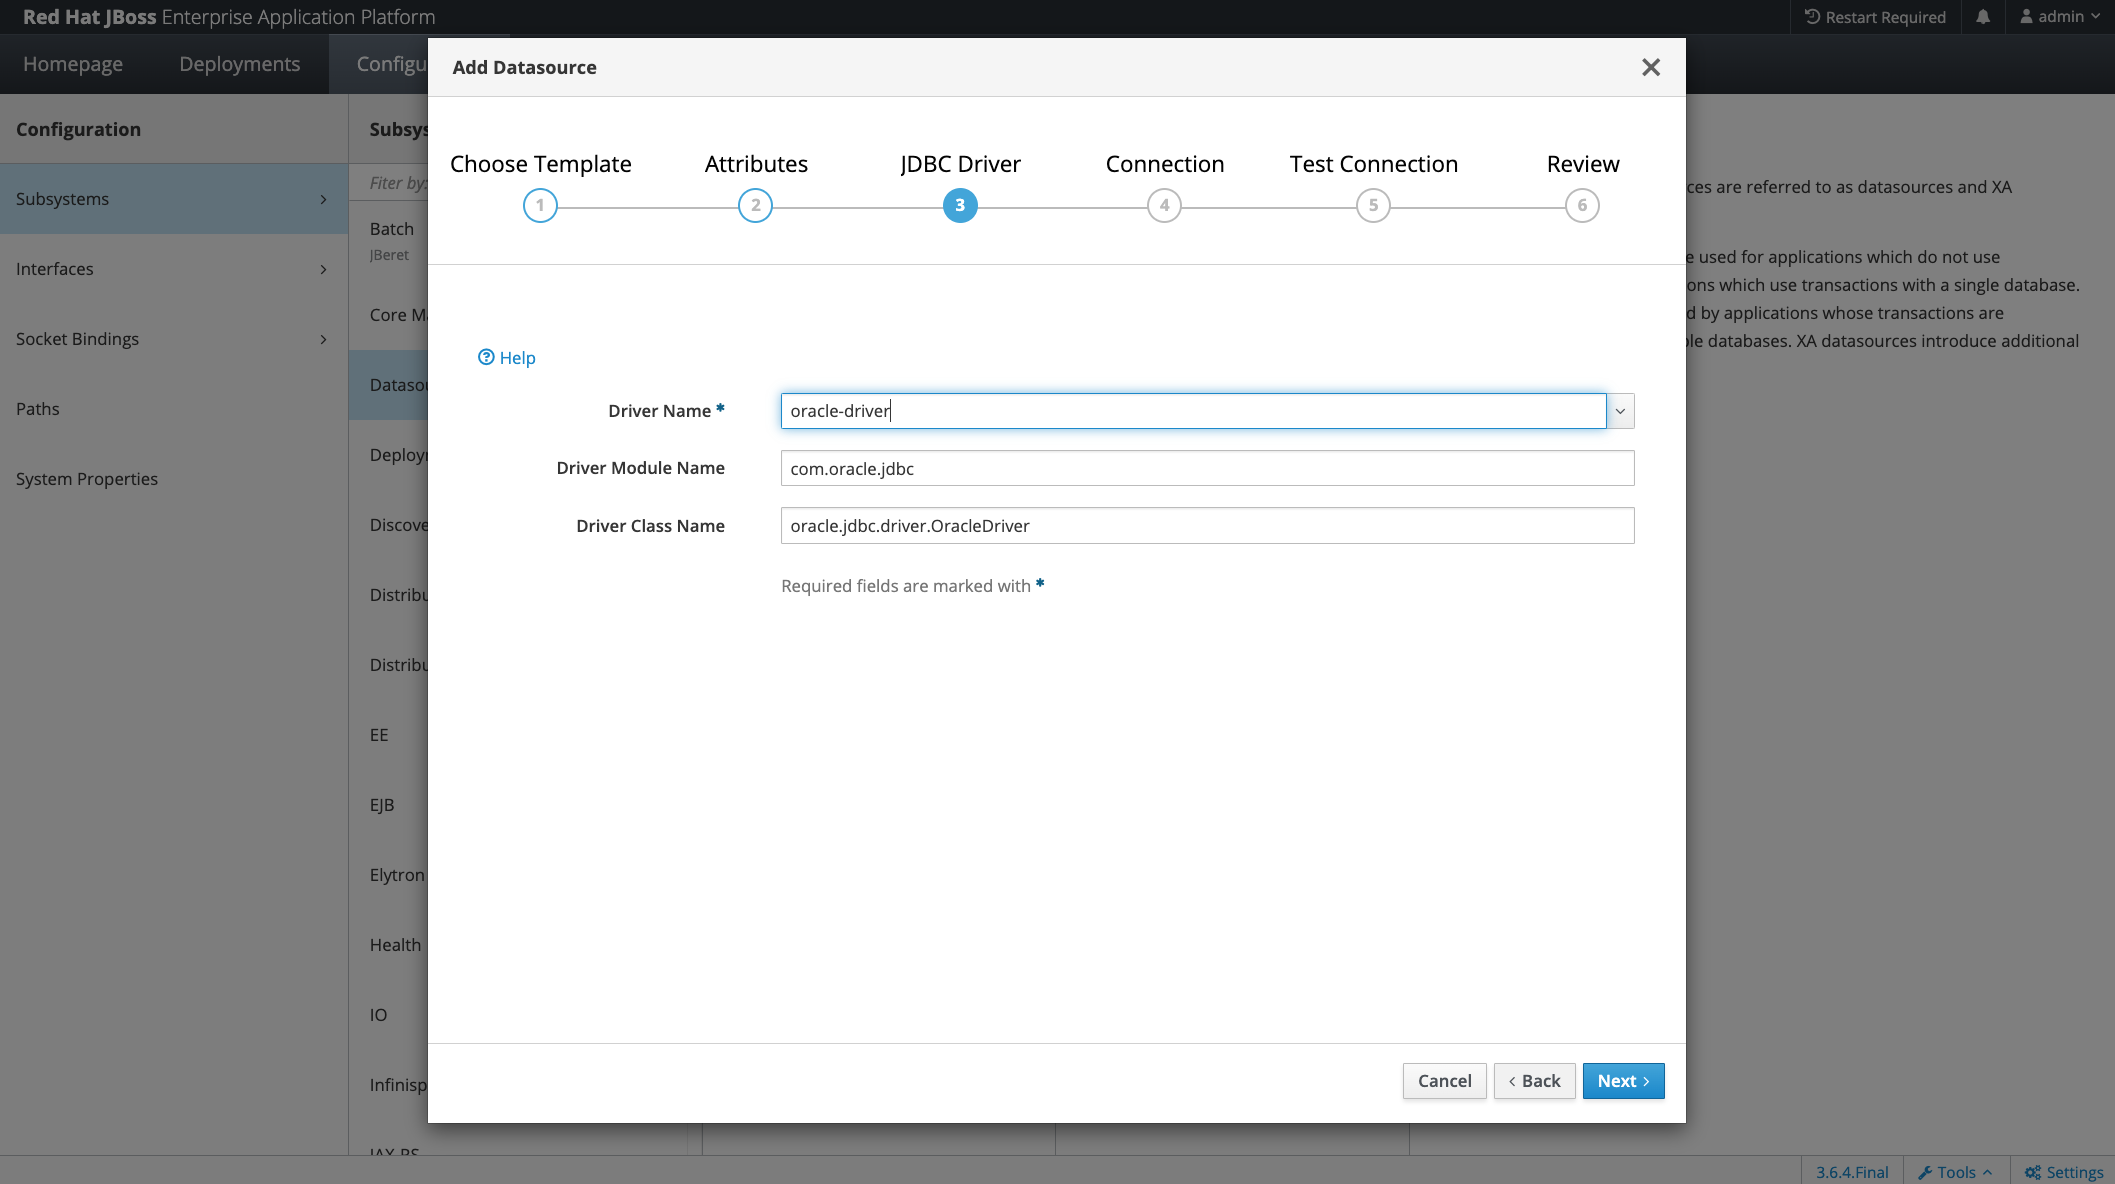
Choose the previously created driver and module
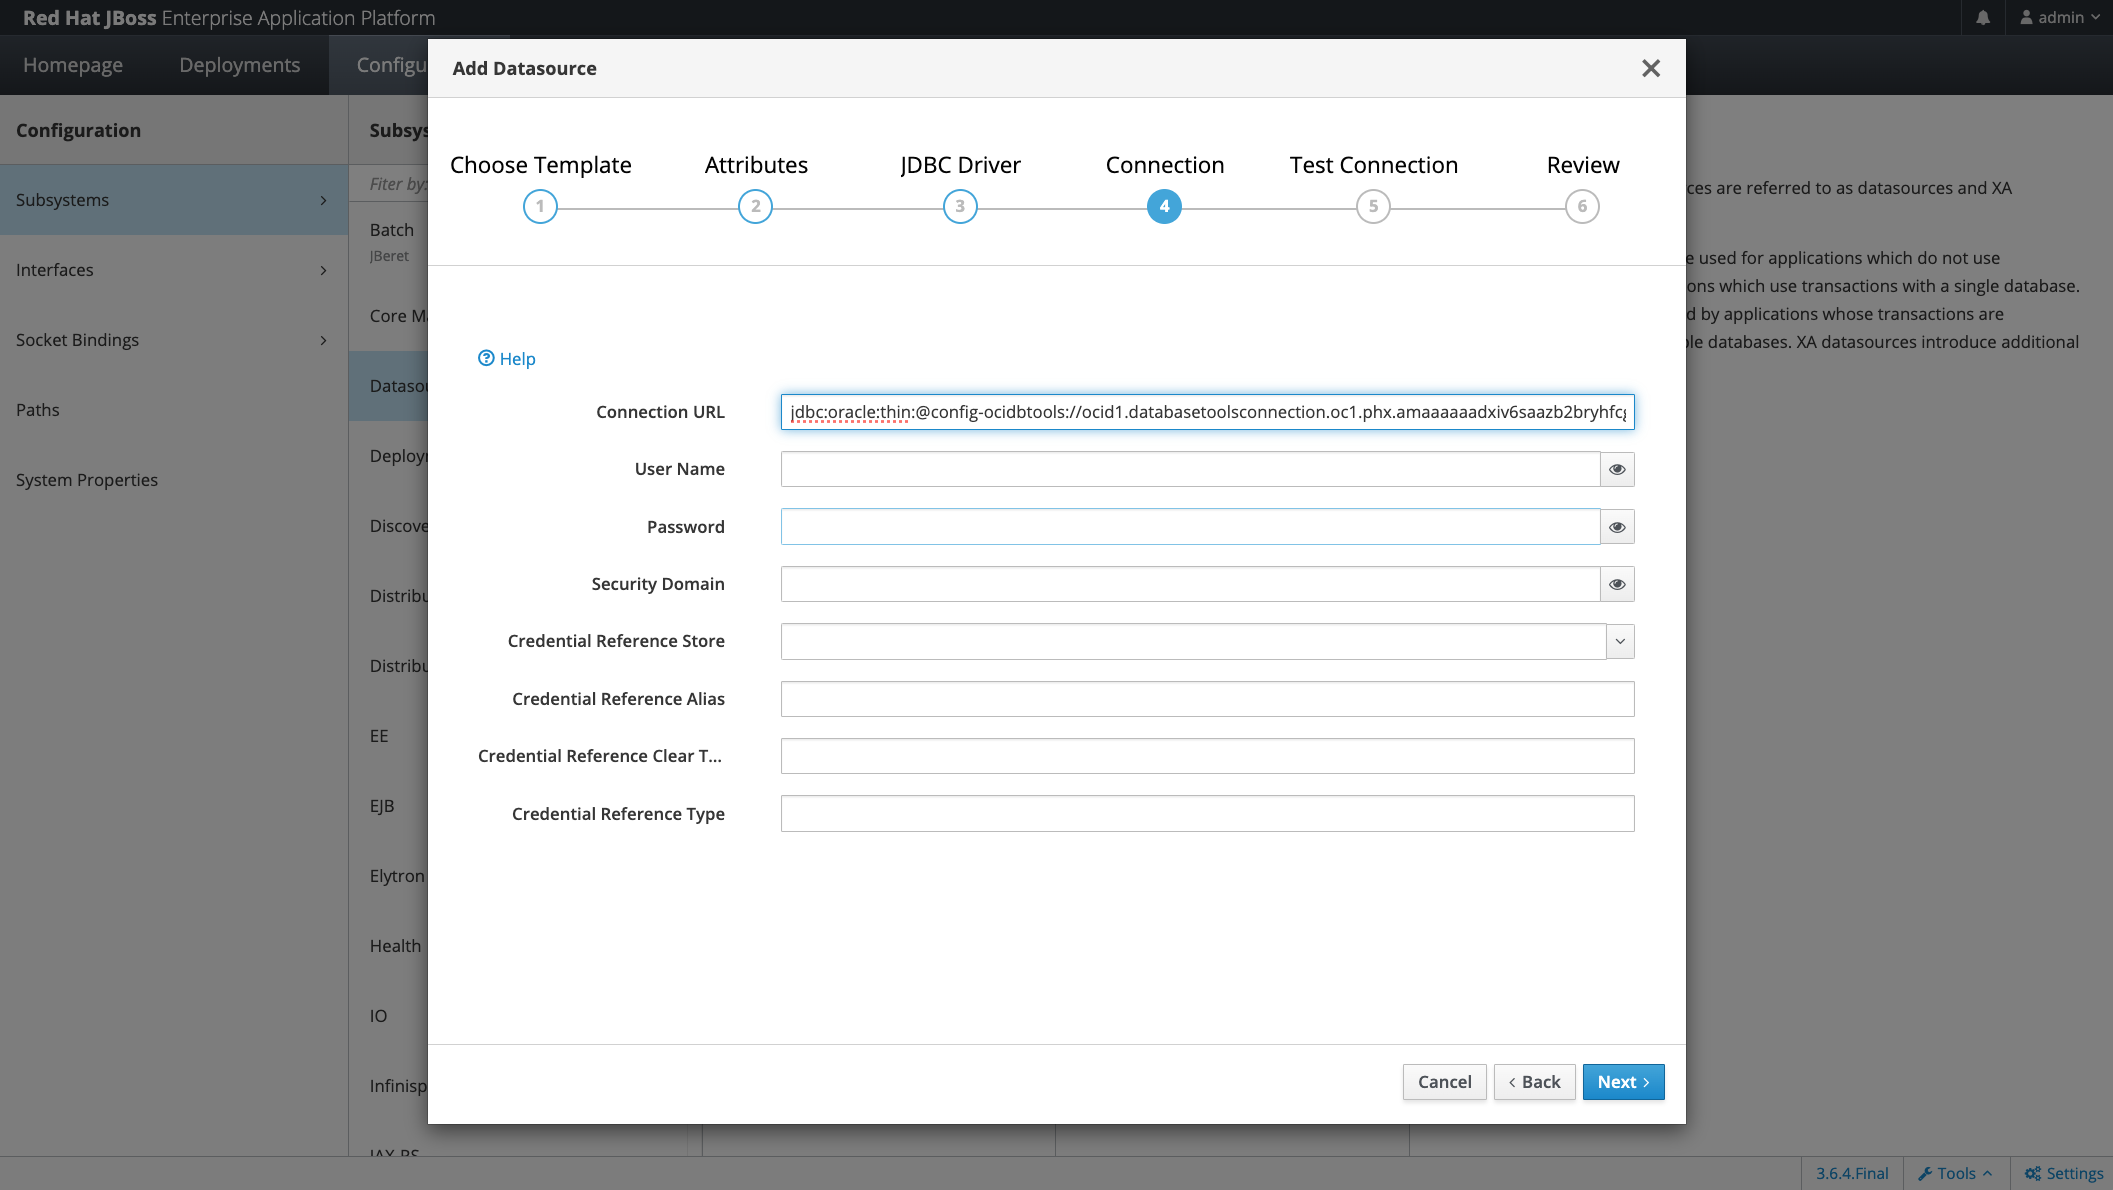
In the connection dialogue, you only need to provide the URL, which is formed by
jdbc:oracle:thin:@config-ocidbtools://<OCID of the created DB Tools Connection in point 1>
And you don’t need any other property because all the values are retrieved from the DB Tools Connection!
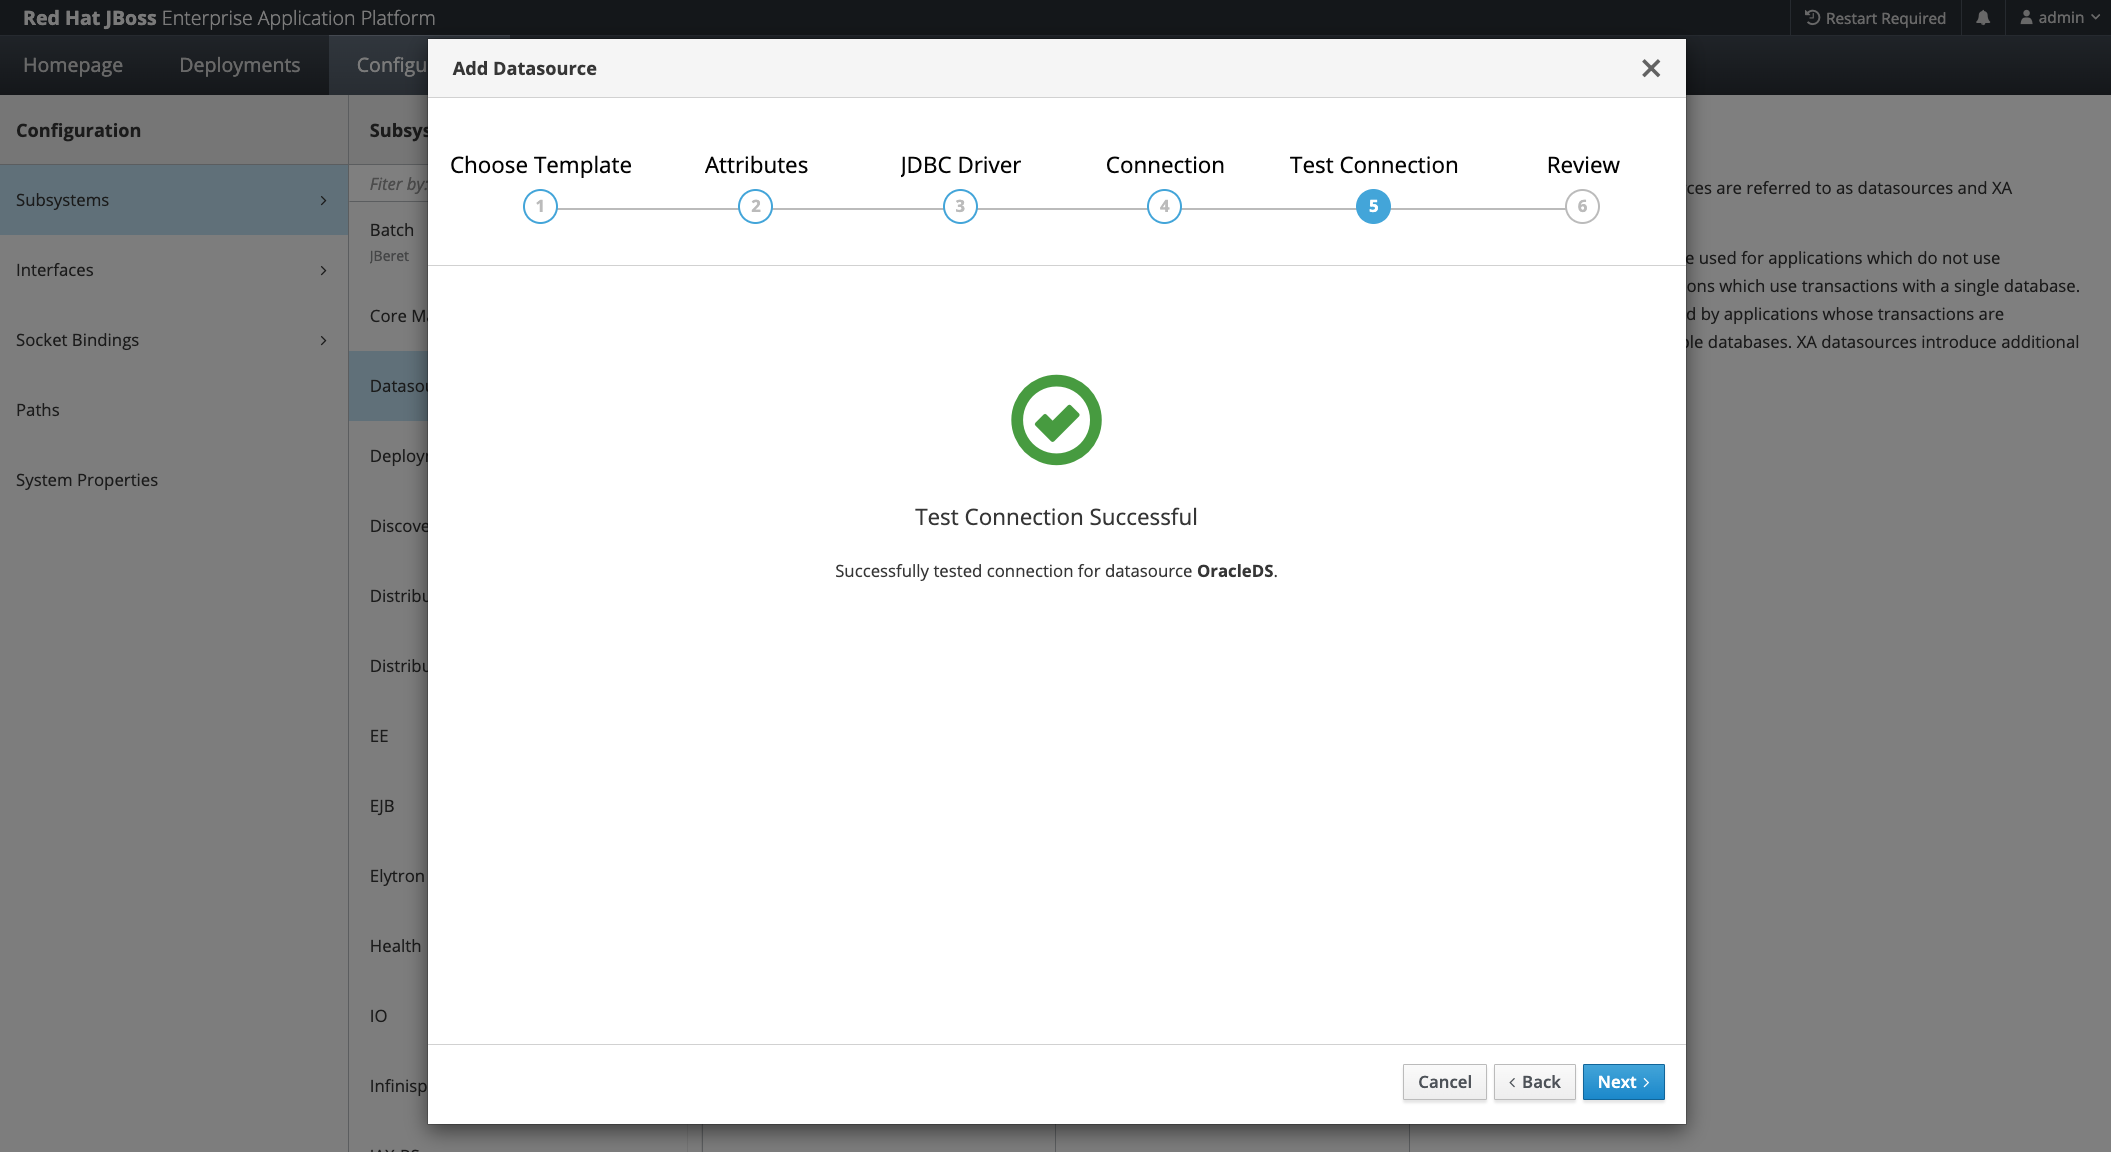
And you can test (and later use) the connection!