Oracle Autonomous Database Select AI is a powerful tool that enables you to leverage AI capabilities directly within your database environment. This guide provides a step-by-step walkthrough on setting up and using Select AI in Oracle Autonomous Transaction Processing (ATP) databases. It outlines simple steps to seamlessly integrate and set up your chatbot with the database.
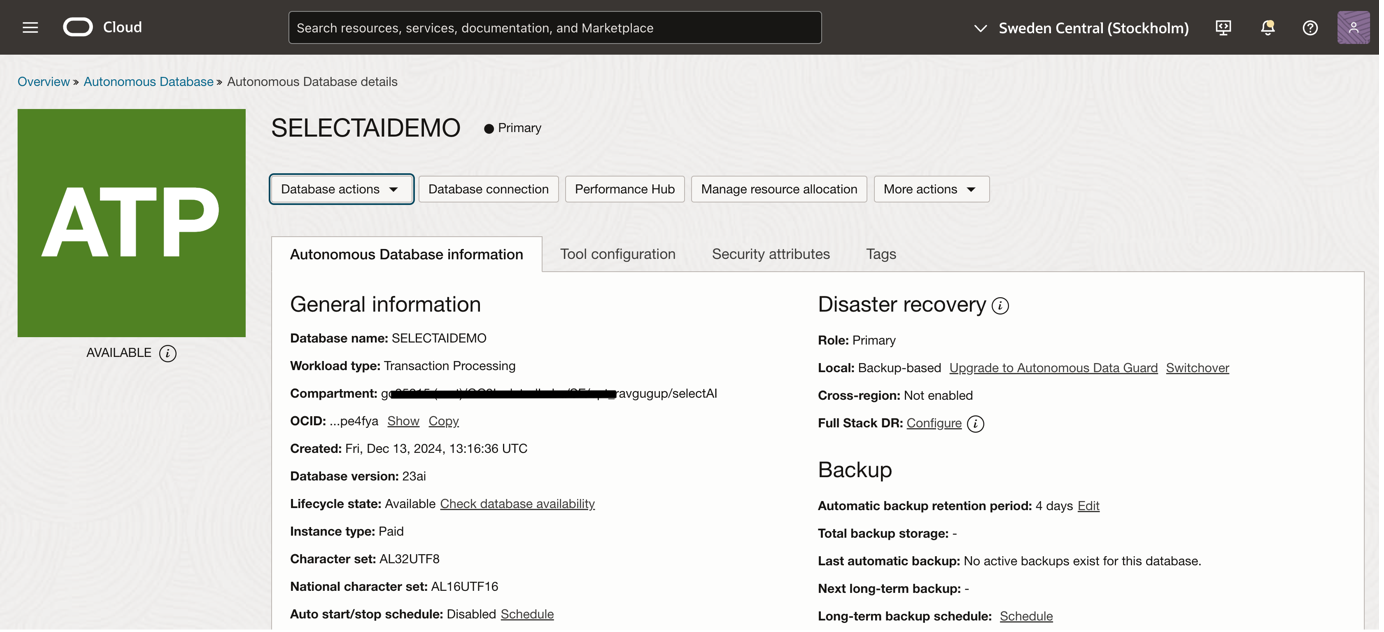
Step 1: Create an ATP Database
To get started, provision an ATP database. In this example, I created a database named SELECTAIDEMO.
If you’re new to this process, refer to the comprehensive guide on provisioning ATP databases: Hands-on Guide: Security Provisioning and Access via Bastion Service.
Step 2: Create a Database User
Create a database user for applying Select AI features. Run the following SQL commands to set up the user (On Admin user) :
SET DEFINE OFF;
CREATE USER SELECT_AI_USER IDENTIFIED BY "Oracle##2025AI";
GRANT RESOURCE TO SELECT_AI_USER;
GRANT CREATE SESSION TO SELECT_AI_USER;
GRANT CREATE VIEW TO SELECT_AI_USER;
GRANT CREATE TABLE TO SELECT_AI_USER;
GRANT CONNECT TO SELECT_AI_USER;
GRANT ALTER SYSTEM TO SELECT_AI_USER;
GRANT ALTER USER TO SELECT_AI_USER;
ALTER USER SELECT_AI_USER QUOTA 10M ON temp;
GRANT CONSOLE_DEVELOPER TO SELECT_AI_USER;
GRANT DWROLE TO SELECT_AI_USER;
GRANT EXECUTE ON DBMS_CLOUD TO SELECT_AI_USER;
GRANT EXECUTE ON DBMS_CLOUD_AI TO SELECT_AI_USER;
Step 3: Create a Profile with OCI Generative AI
Different use cases, like where your Autonomous Database is deployed (OCI, Google Cloud or Azure) or how you want to apply AI to your data, may require different models. Select AI lets you choose the right model(s) for that use case. Select AI profiles capture details about your AI provider (OCI Generative AI, Google Gemini, Azure OpenAI, Anthropic, and more) and the tables used for natural language queries. Below, we’ll create a Select AI profile to integrate ADB with Oracle Cloud Infrastructure (OCI) Generative AI. To create a profile:
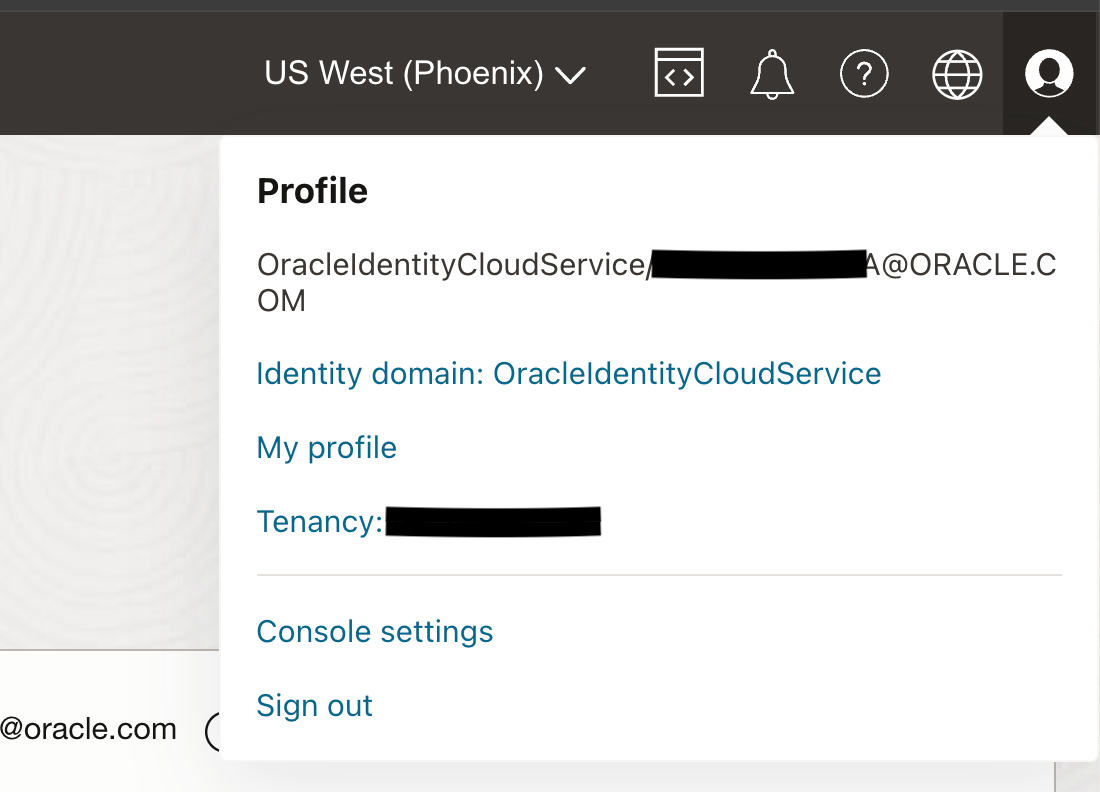
1. Collect the Required Information
- User OCID: The user’s unique identifier in OCI.
- Tenancy OCID: The tenancy’s unique identifier.
- Fingerprint: The fingerprint of the API key.
- Private Key: Generated when creating the API key.
Ensure your OCI user has access to Generative AI. Verify this via the OCI Generative AI playground documentation:
OCI Generative AI Playground.
2. Generate an API Key to collect all details
- Navigate to My Profile > API Key > Add API Key in OCI.
- Download the private and public keys for later use.
3. Create the Credential
Run the following PL/SQL block to create the credential (On created user – SELECT_AI_USER):
BEGIN
  DBMS_CLOUD.create_credential(
    credential_name => 'OCI_GENERATIVE_AI_CRED’,
    user_ocid       => '<UserOCID>',
    tenancy_ocid    => '<TenancyOCID>',
    fingerprint     => '<Fingerprint>',
    private_key     => '<Private Key>'
  );
END;
/

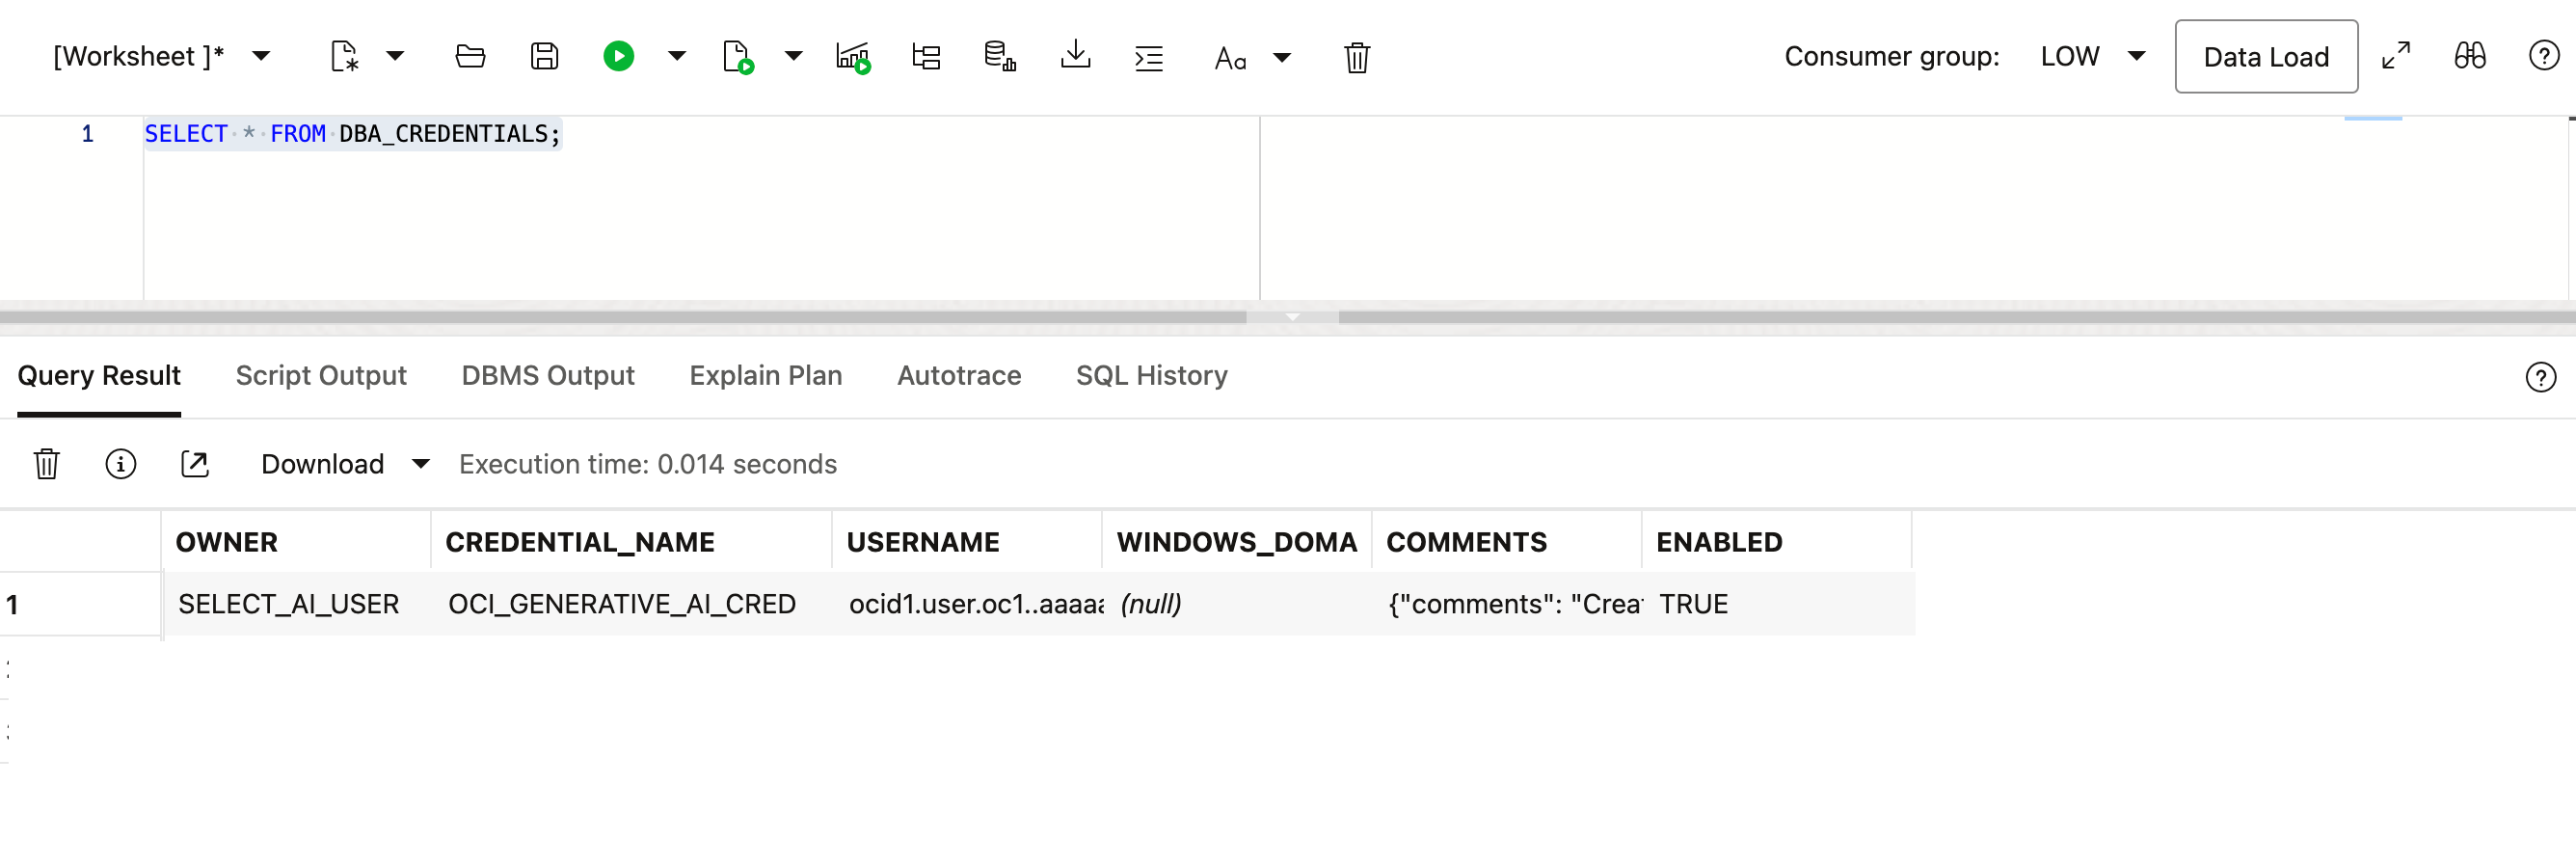
4. Verify the Credential
Execute the following query (On created user – SELECT_AI_USER):
SELECT * FROM DBA_CREDENTIALS;
5. Create Tables
Set up a table to apply Select AI (see code at the end of this post) for the created user – SELECT_AI_USER.
For reference, if your table has the following structure:
- T1: Table Name
- C1: Customer Name
- C2: Customer Address
- C3: Amount
You can manage this by applying the appropriate commands on the table and columns. For further guidance, refer to this blog: Improving Natural Language Queries in Autonomous Databases.
6. Create a Profile Based on the Credential and Referenced Tables
To proceed, you need the compartment ID where your OCI (Oracle Cloud Infrastructure) user has access to Generative AI resources. Use the following PL/SQL block to create the profile (On created user – SELECT_AI_USER):
BEGIN
  DBMS_CLOUD_AI.CREATE_PROFILE(
      profile_name => 'OCI_GENERATIVE_AI_PROFILE' ,
      attributes   =>
      '{
        "provider": "oci",
        "region": "us-chicago-1",
        "oci_compartment_id": "<CompartmentID>",
        "credential_name": "OCI_GENERATIVE_AI_CRED",
        "object_list": [
          {"owner": "SELECT_AI_USER", "name": "Customers"},
          {"owner": "SELECT_AI_USER", "name": "Branches"},
          {"owner": "SELECT_AI_USER", "name": "Accounts"},
          {"owner": "SELECT_AI_USER", "name": "Transactions"},
          {"owner": "SELECT_AI_USER", "name": "Loans"},
          {"owner": "SELECT_AI_USER", "name": "LoanPayments"},
          {"owner": "SELECT_AI_USER", "name": "Employees"},
          {"owner": "SELECT_AI_USER", "name": "Cards"},
          {"owner": "SELECT_AI_USER", "name": "Services"},
          {"owner": "SELECT_AI_USER", "name": "CustomerServices"}
        ],
        "model": "meta.llama-3.1-70b-instruct"
      }');

END;

This script defines a profile named OCI_GENERATIVE_AI_PROFILE using the DBMS_CLOUD_AI.CREATE_PROFILE procedure. Ensure that the compartment ID, region, credential name, and object list align with your OCI setup. The profile includes references to specific database tables required for AI operations.
7. Verify the Profile
Execute the following query:
SELECT * FROM USER_CLOUD_AI_PROFILES;

Step 4: Import ChatDB.sql into Oracle APEX
Oracle APEX comes pre-installed with ATP databases. To integrate Select AI:
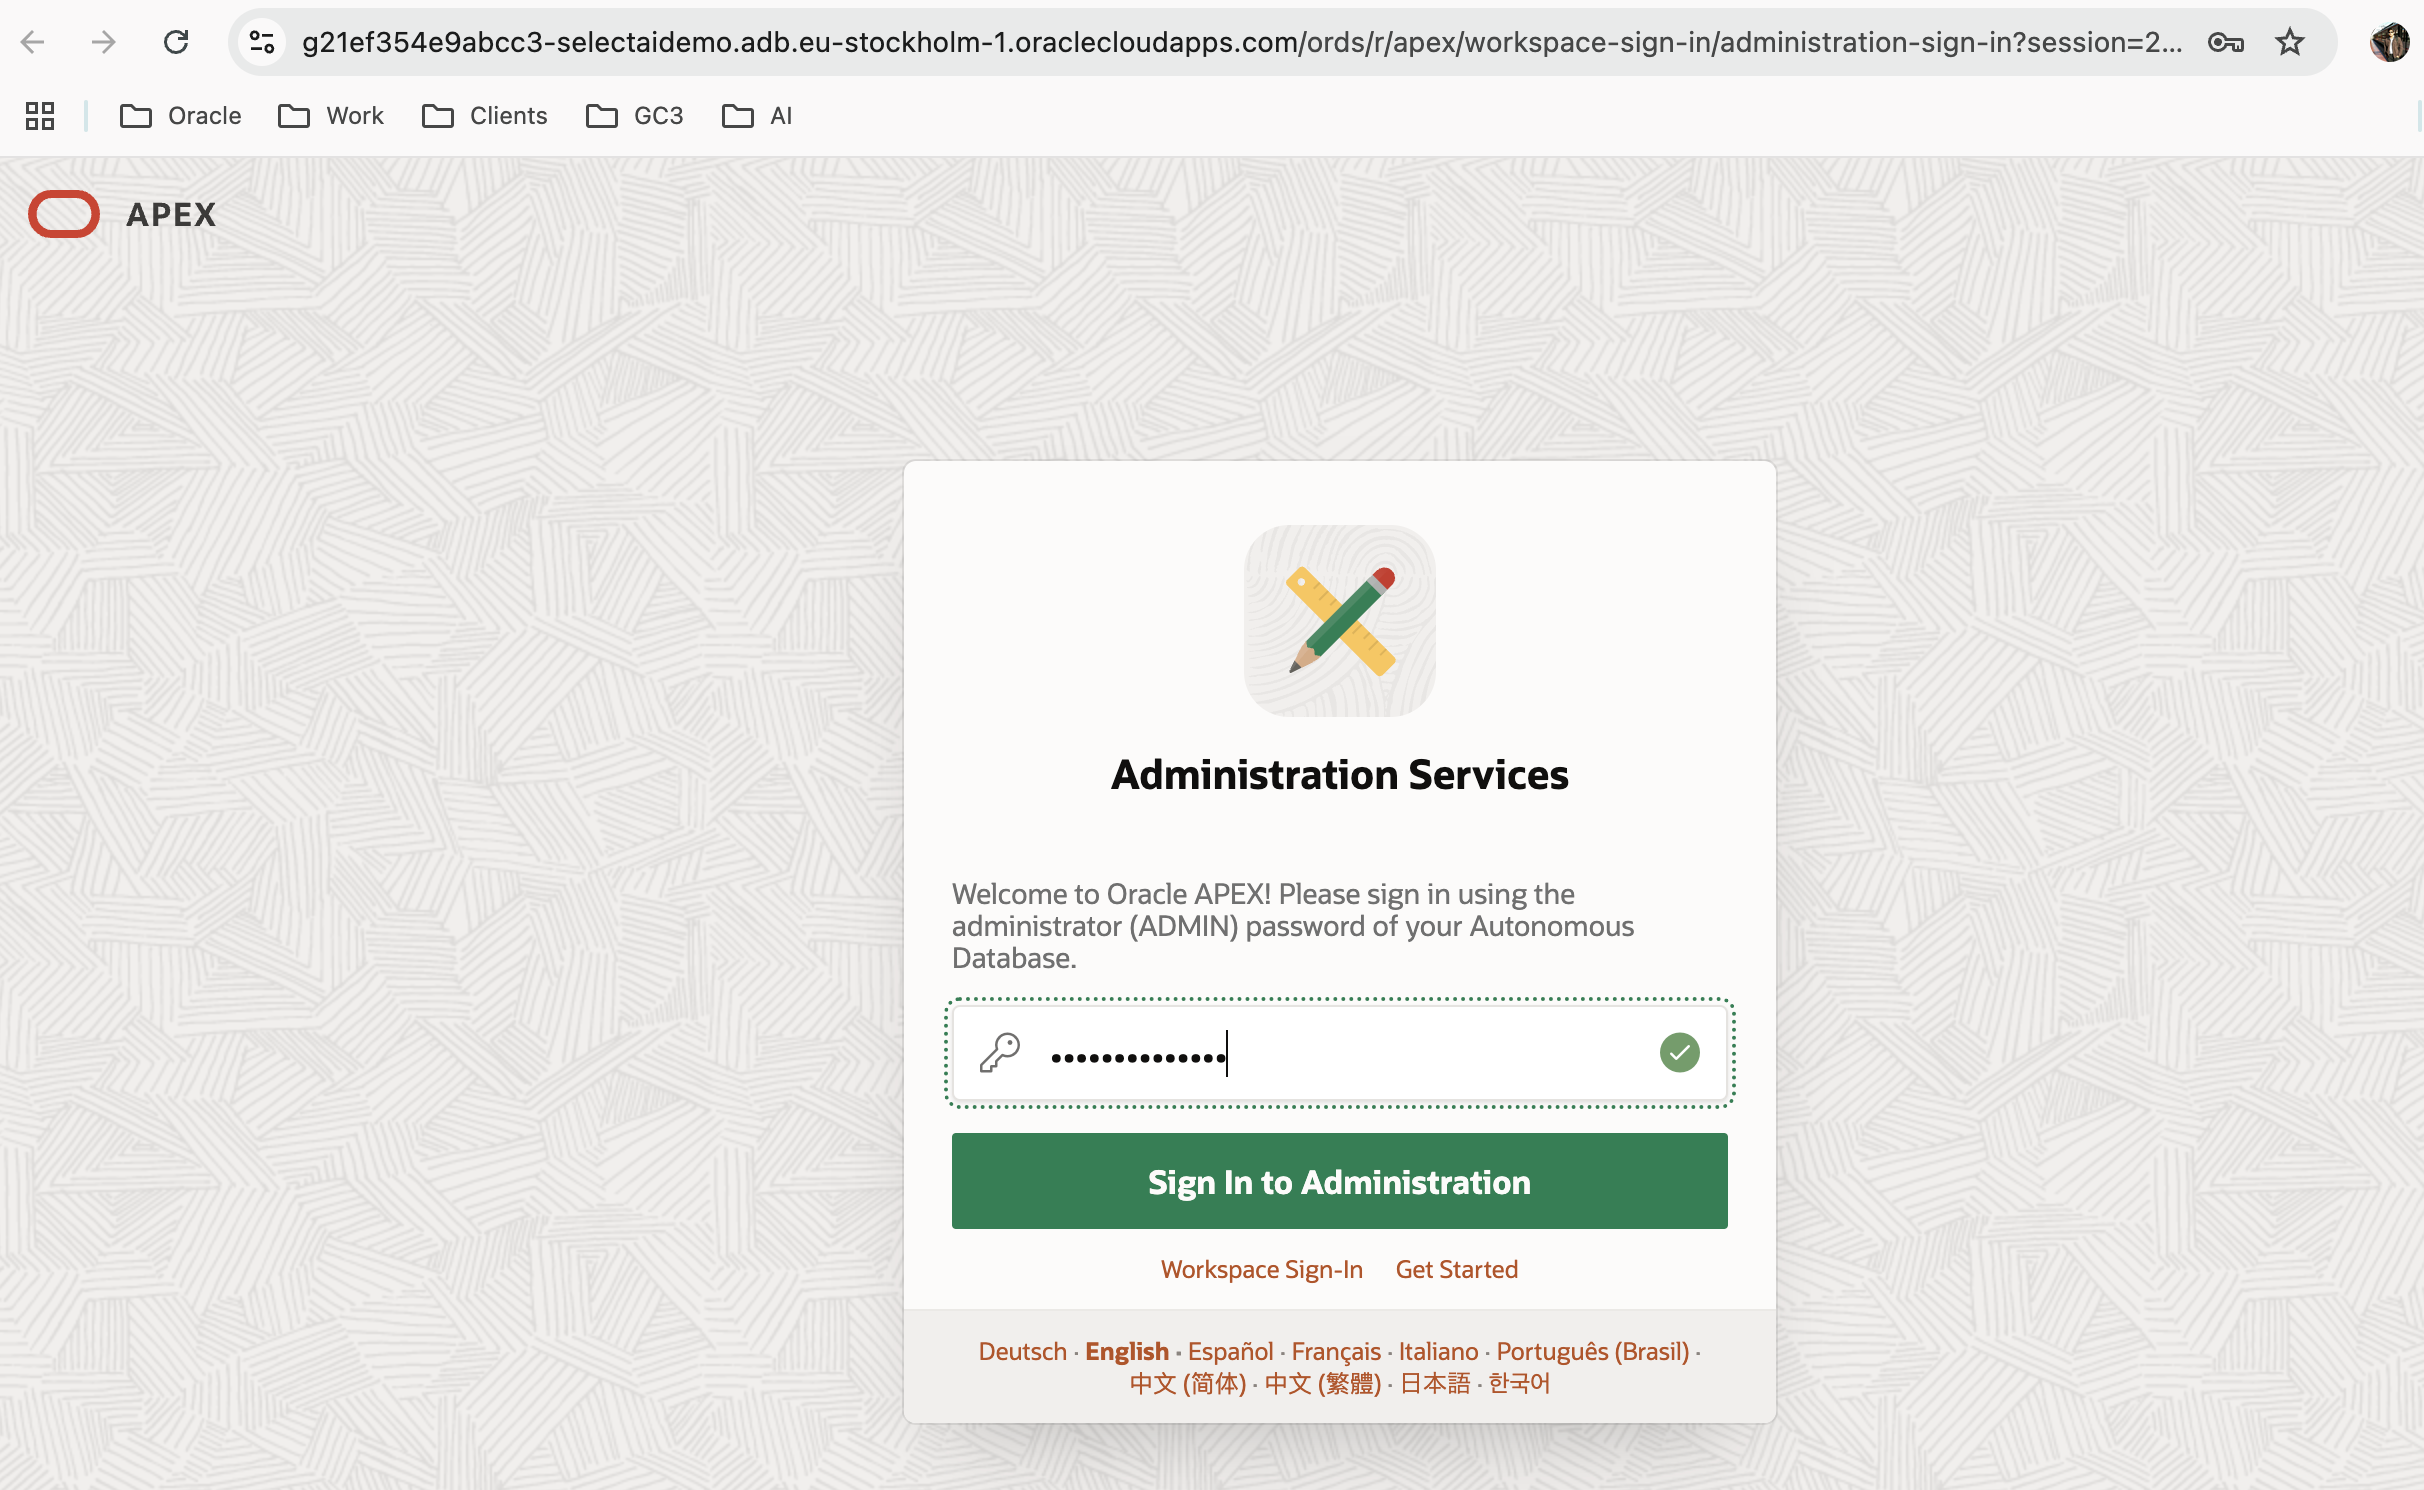
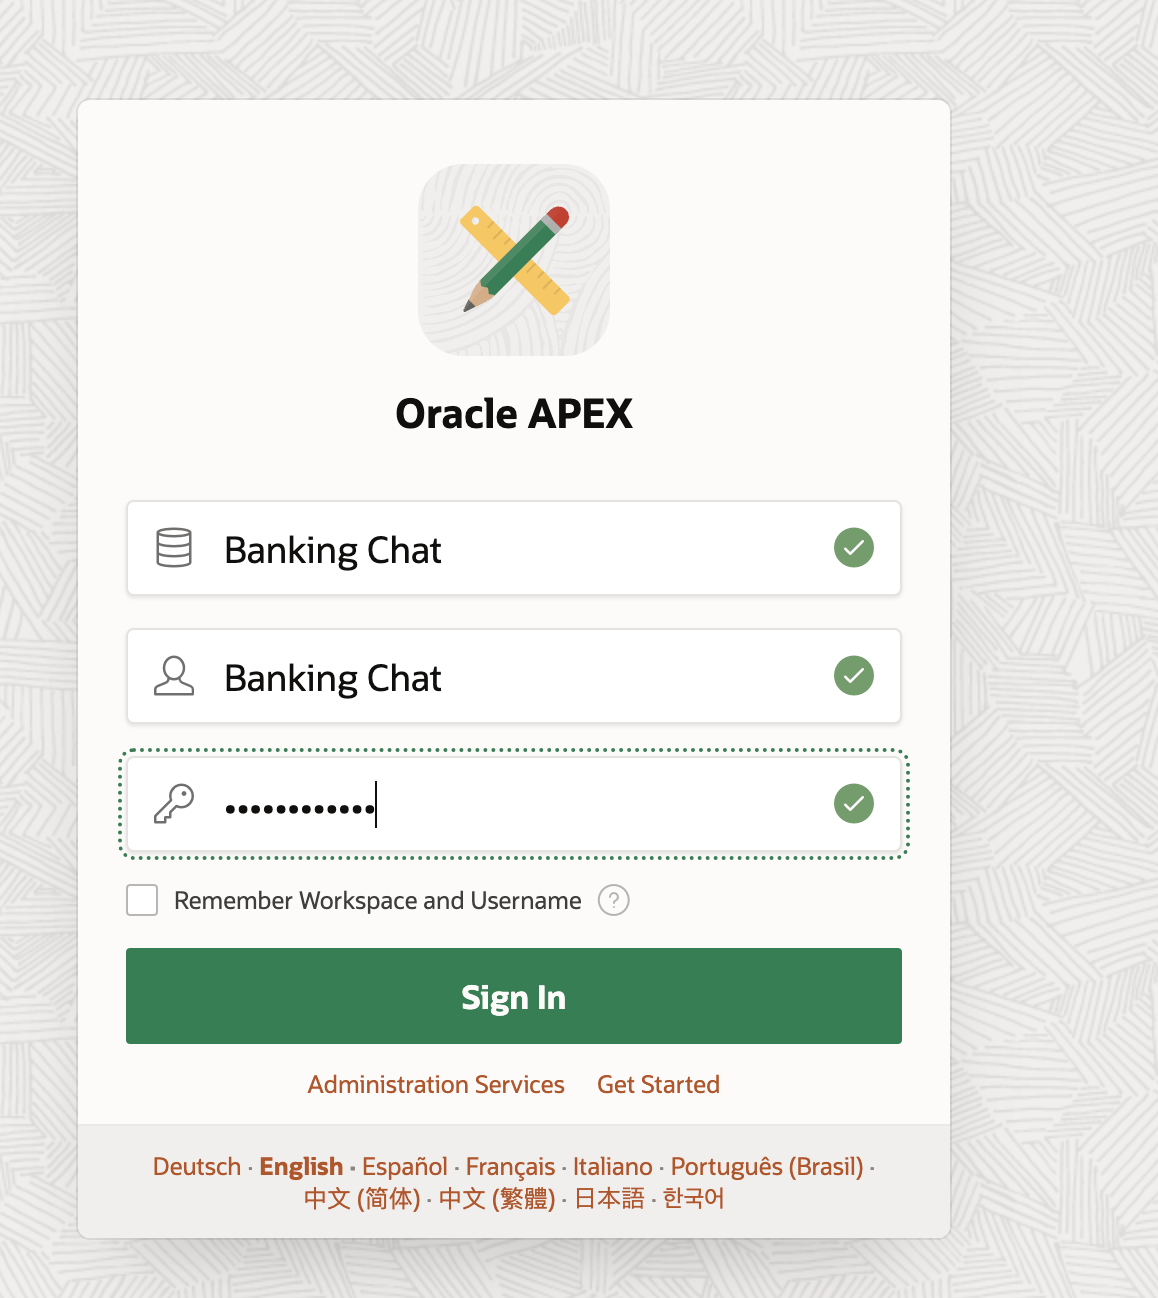
1. Launch APEX

- Open the APEX instance link from your ATP database home page.
- Log in with the admin database password.
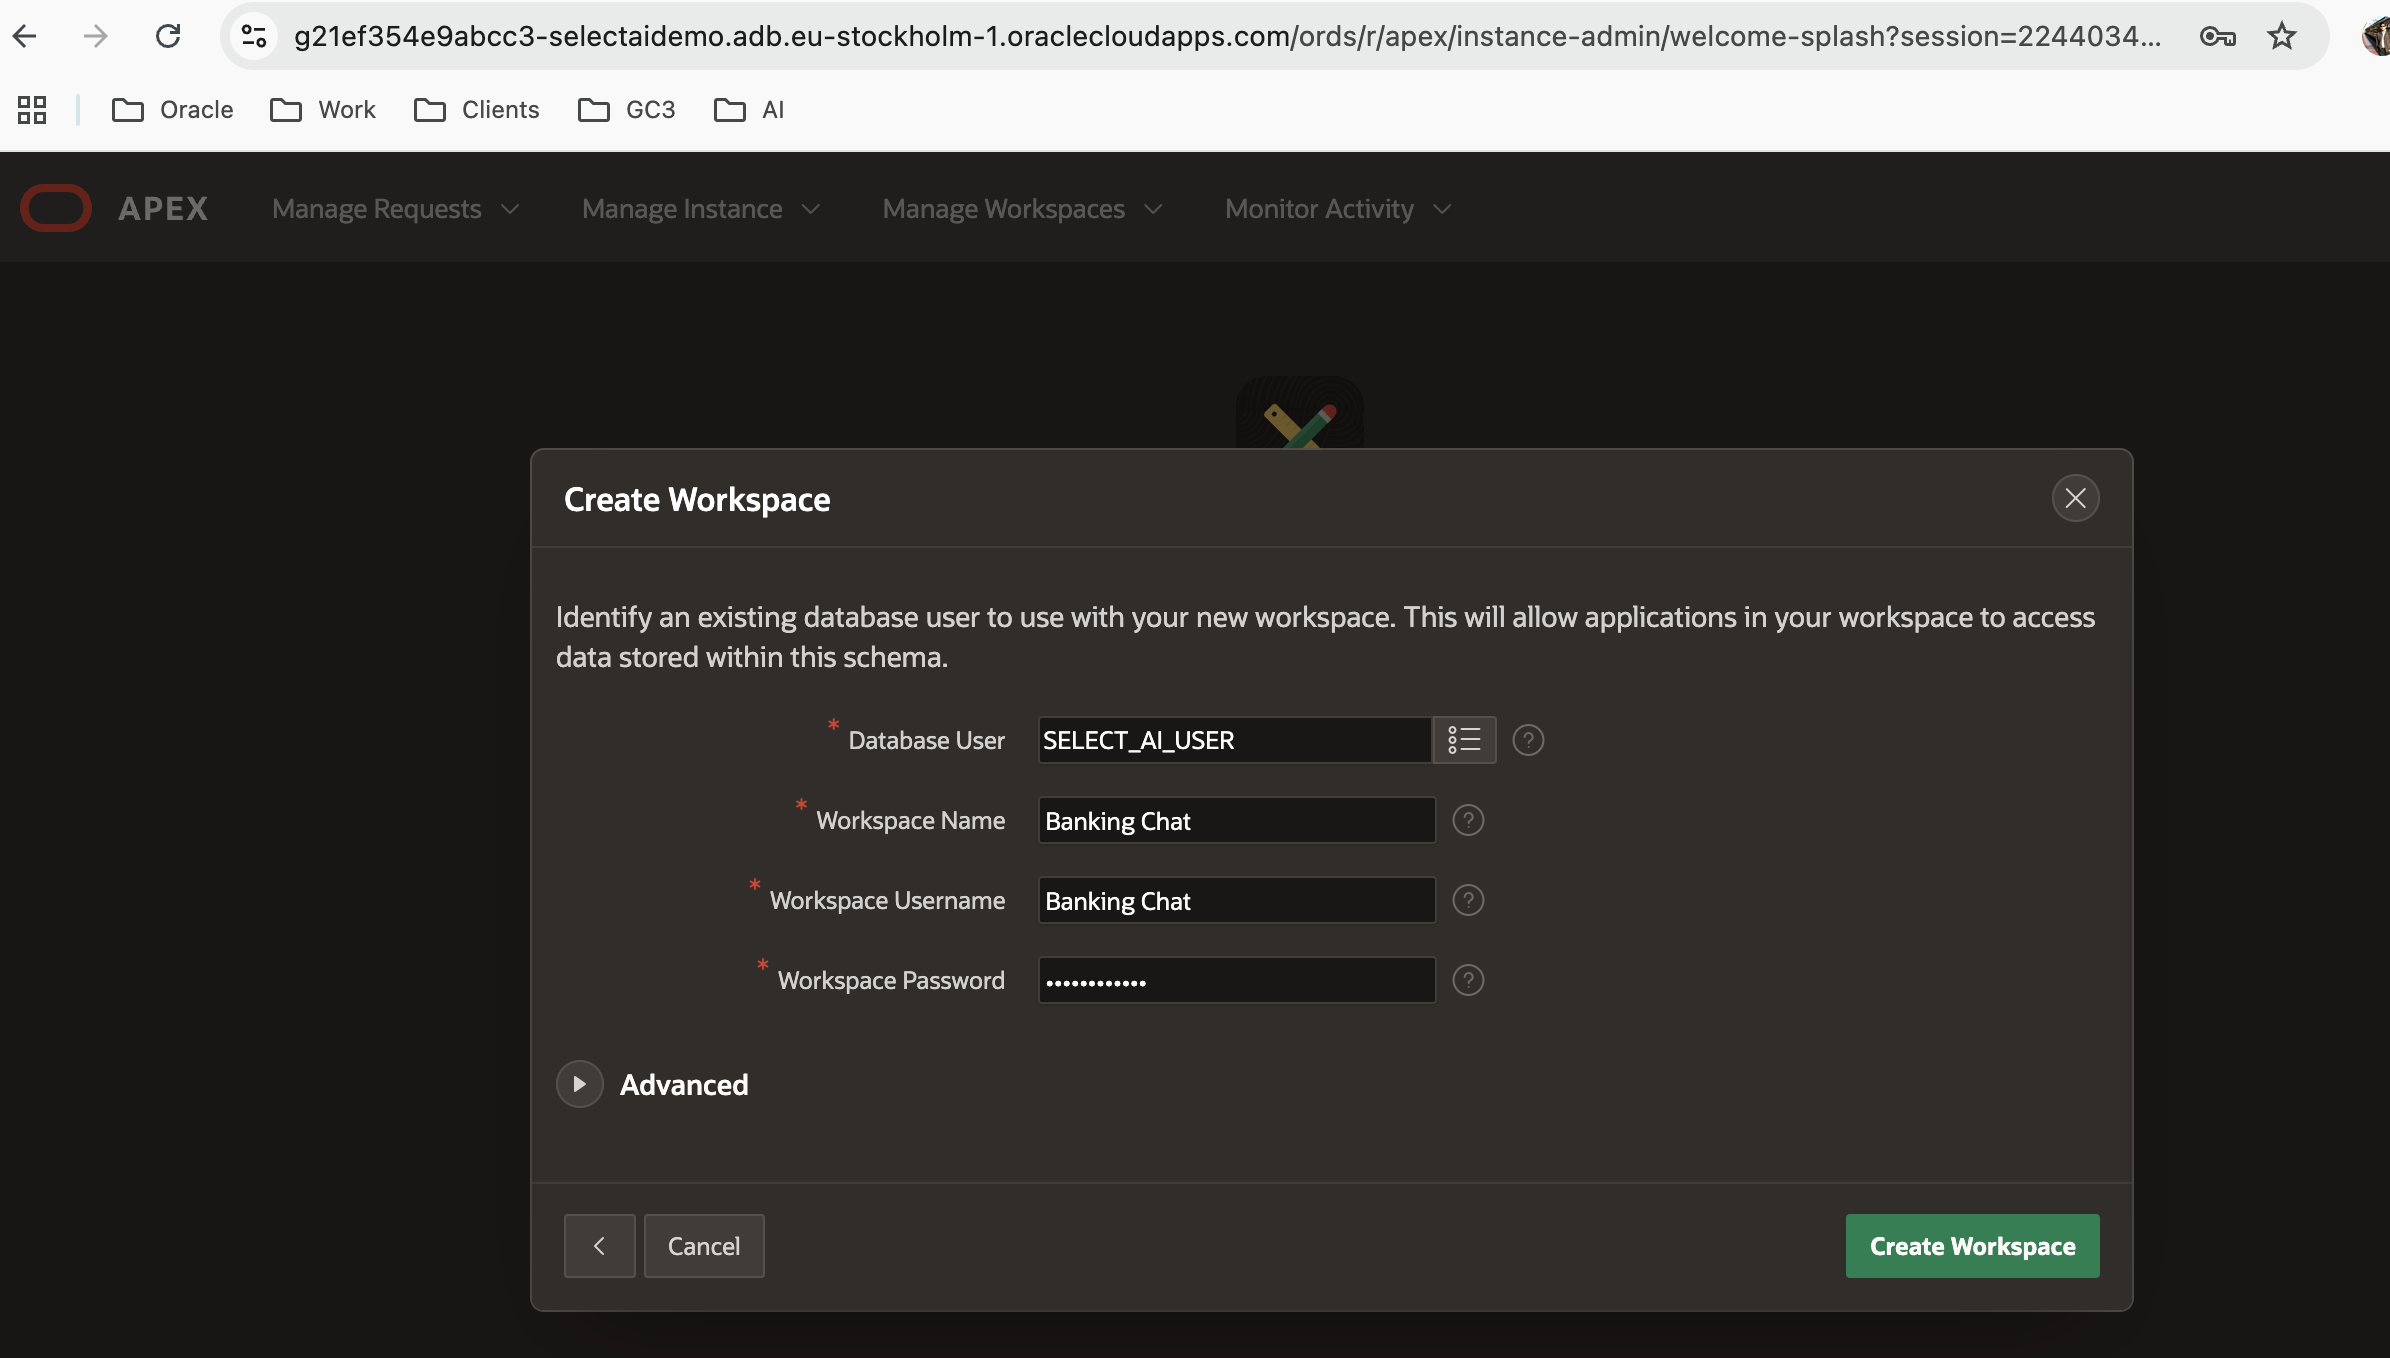
2. Create a Workspace
- Assign it to the schema created earlier (SELECT_AI_USER).
3. Import and Install ChatDB
- Download the ChatDB application
- Navigate to App Builder > Import.
- Drag and drop the f101.sql file and click Next
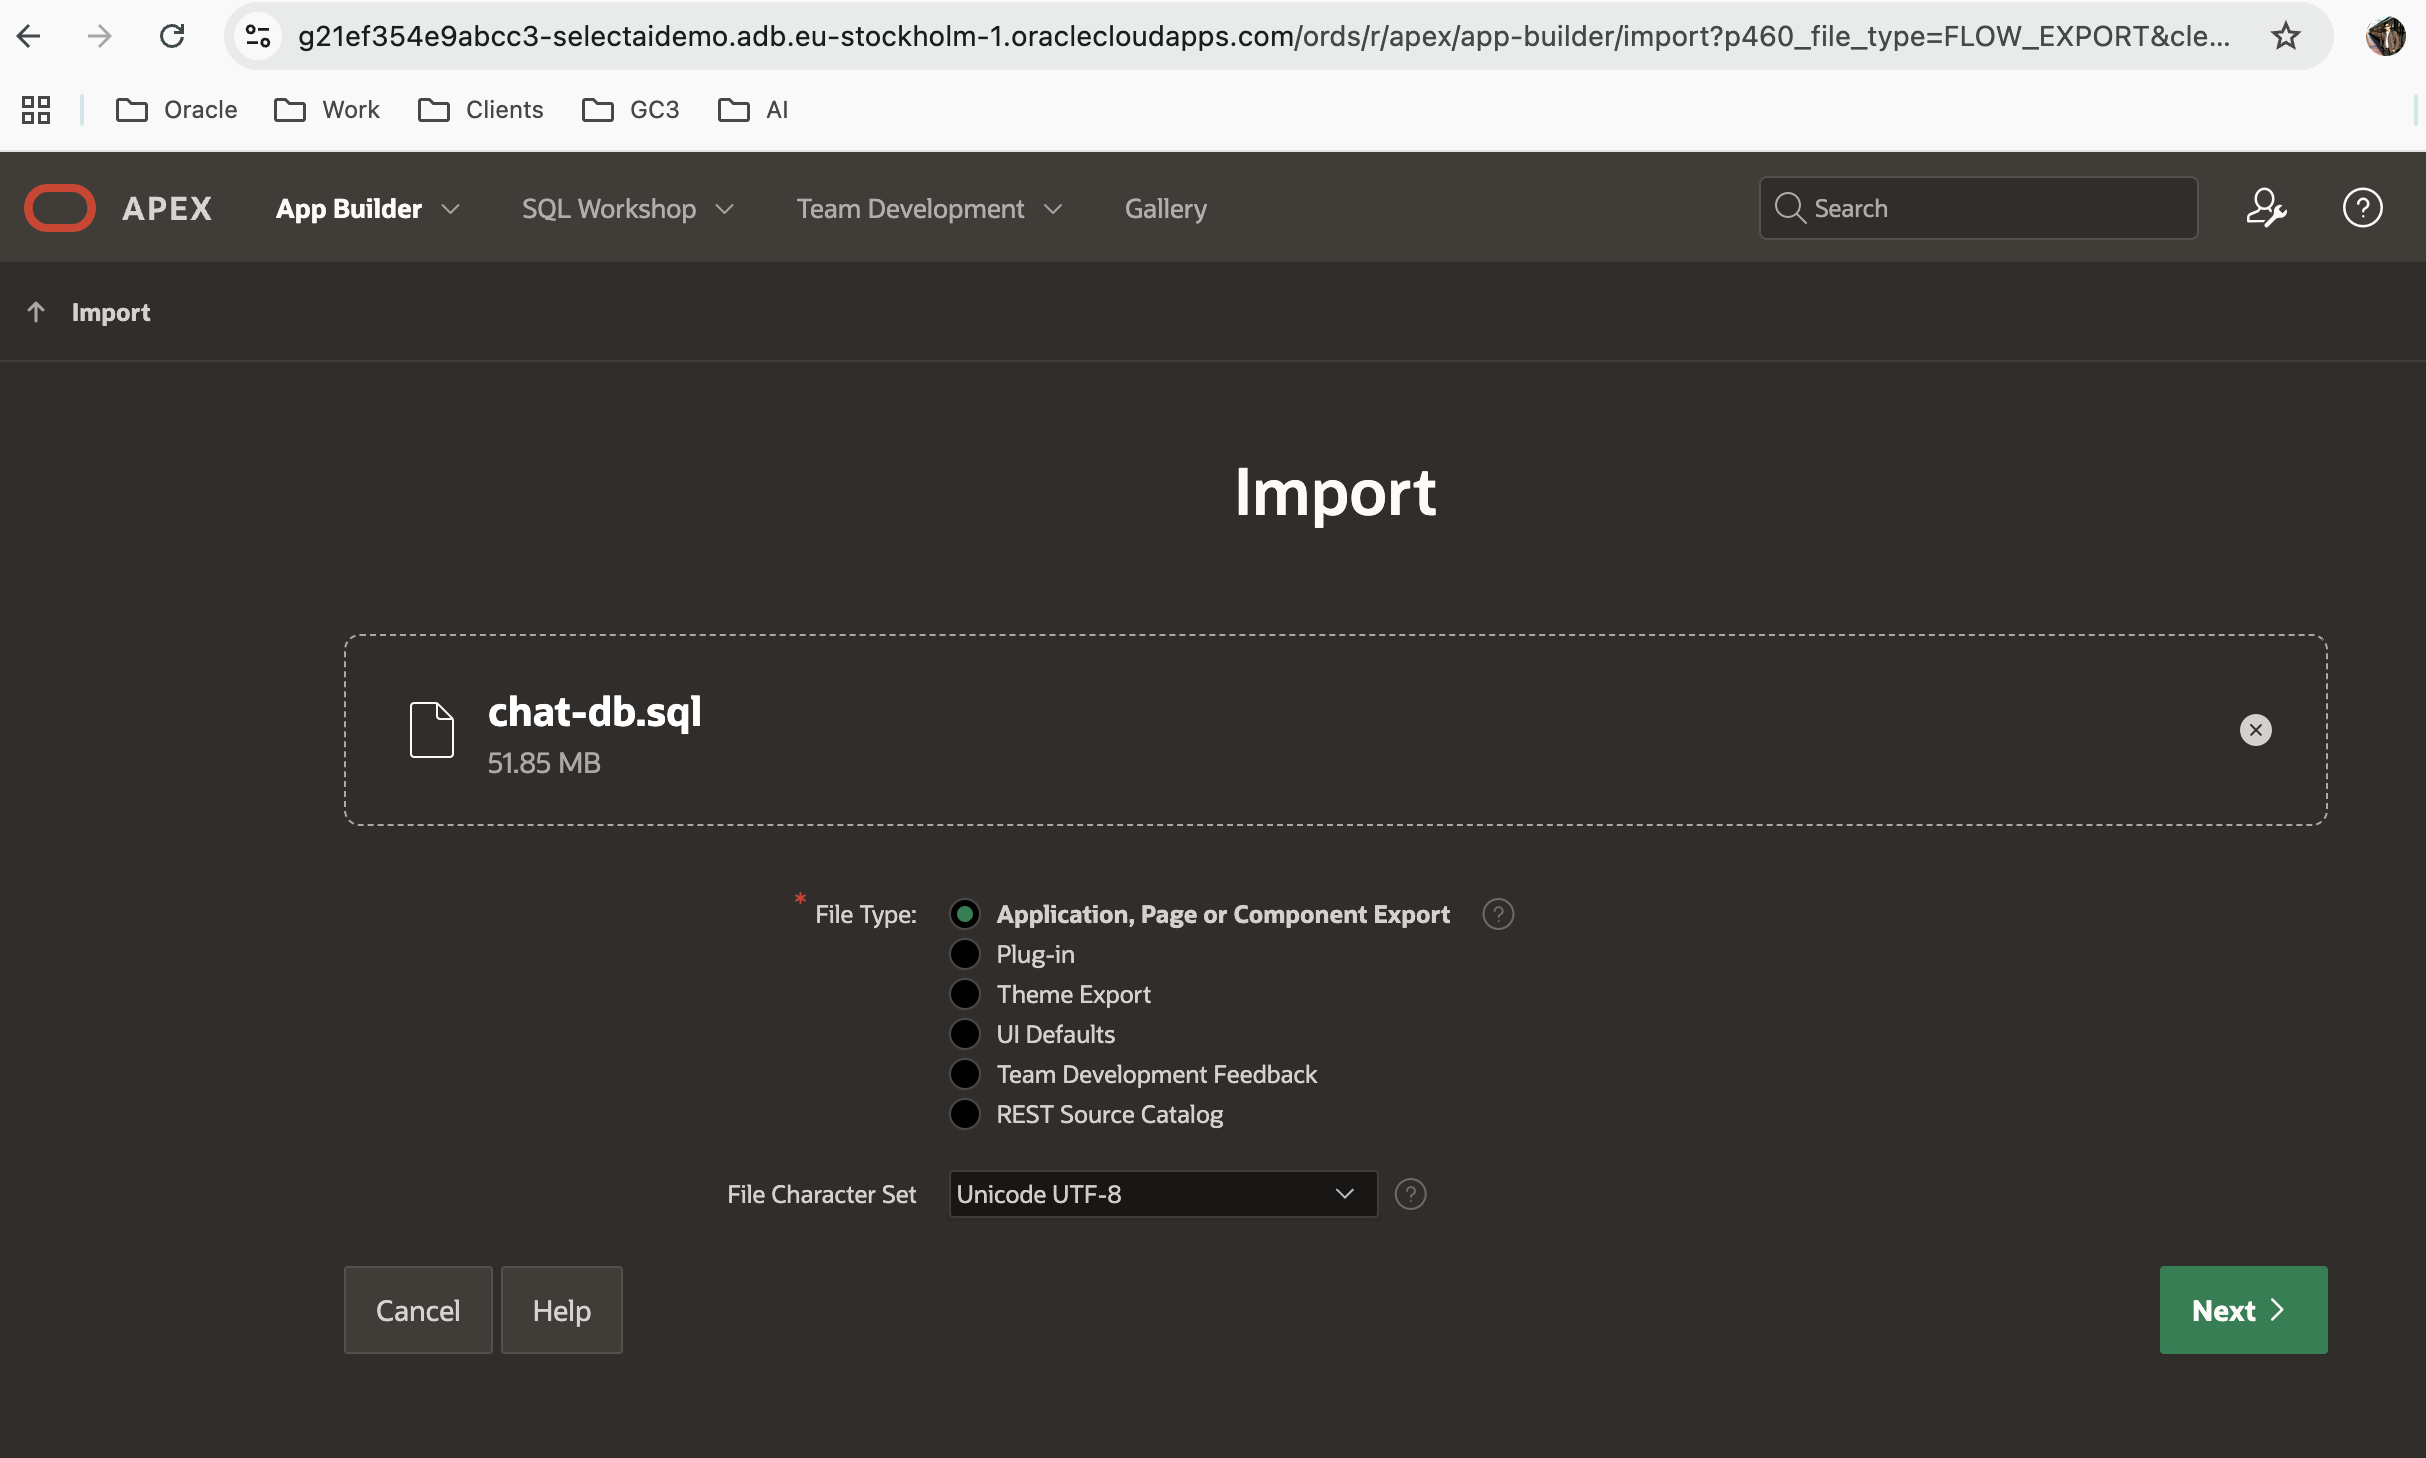
[LINK]
- Click Install Application and then Install Supporting Objects.
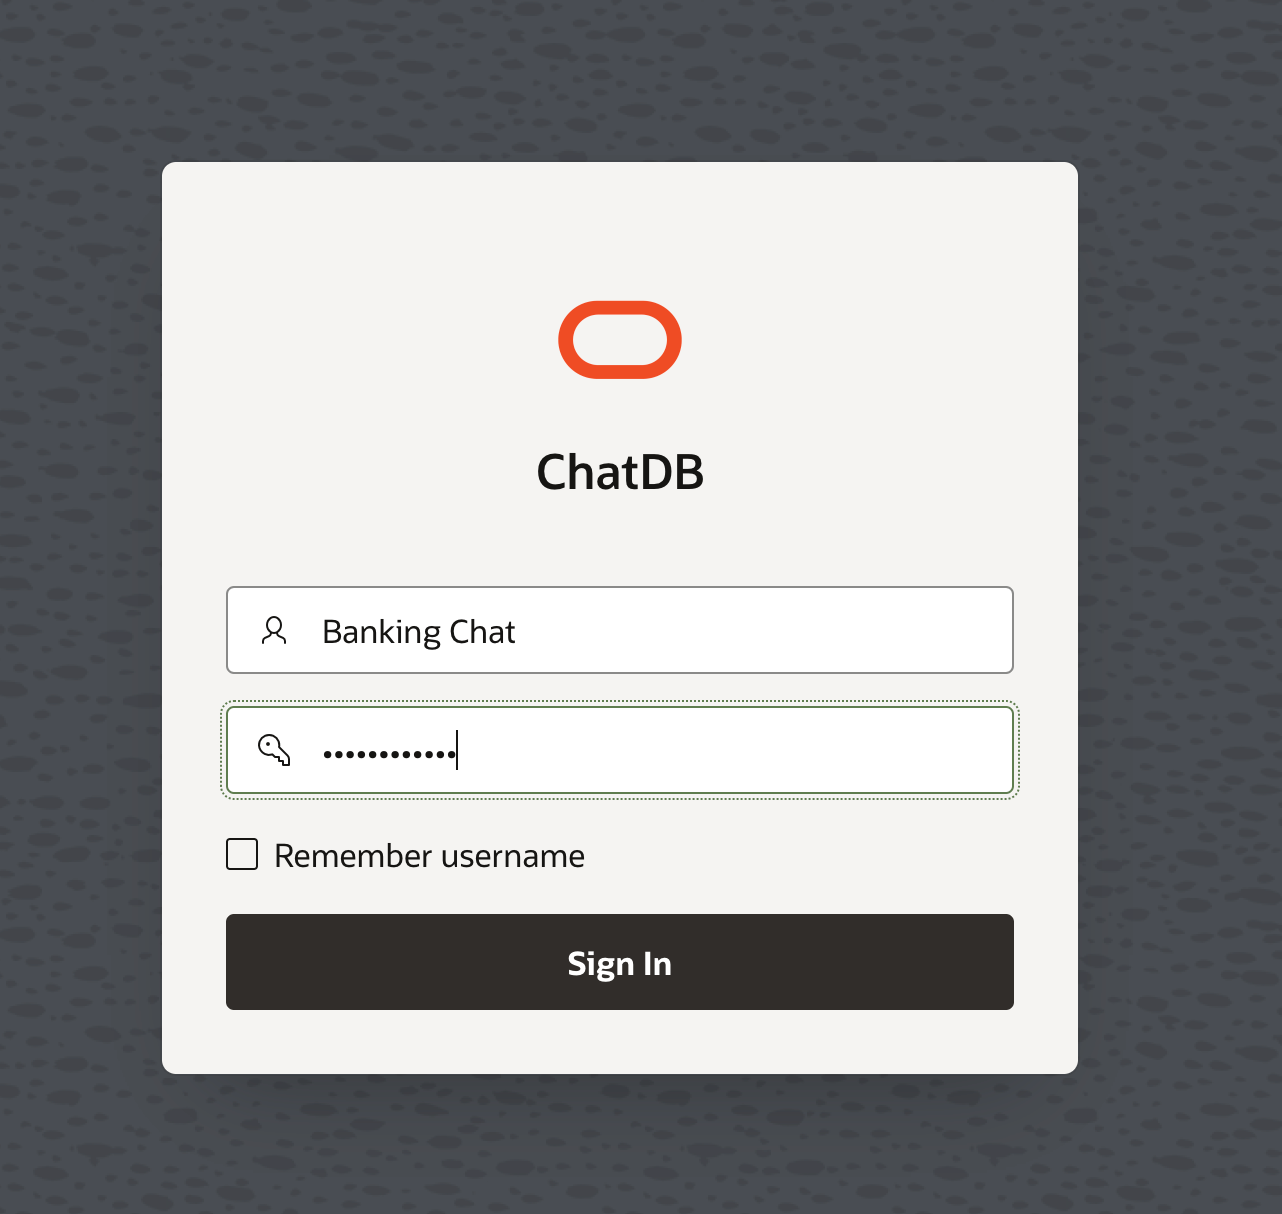
4. Run the Application
- After installation, select your profile and start asking questions.
You can ask a question either by typing it or by speaking into the microphone after clicking the microphone button.
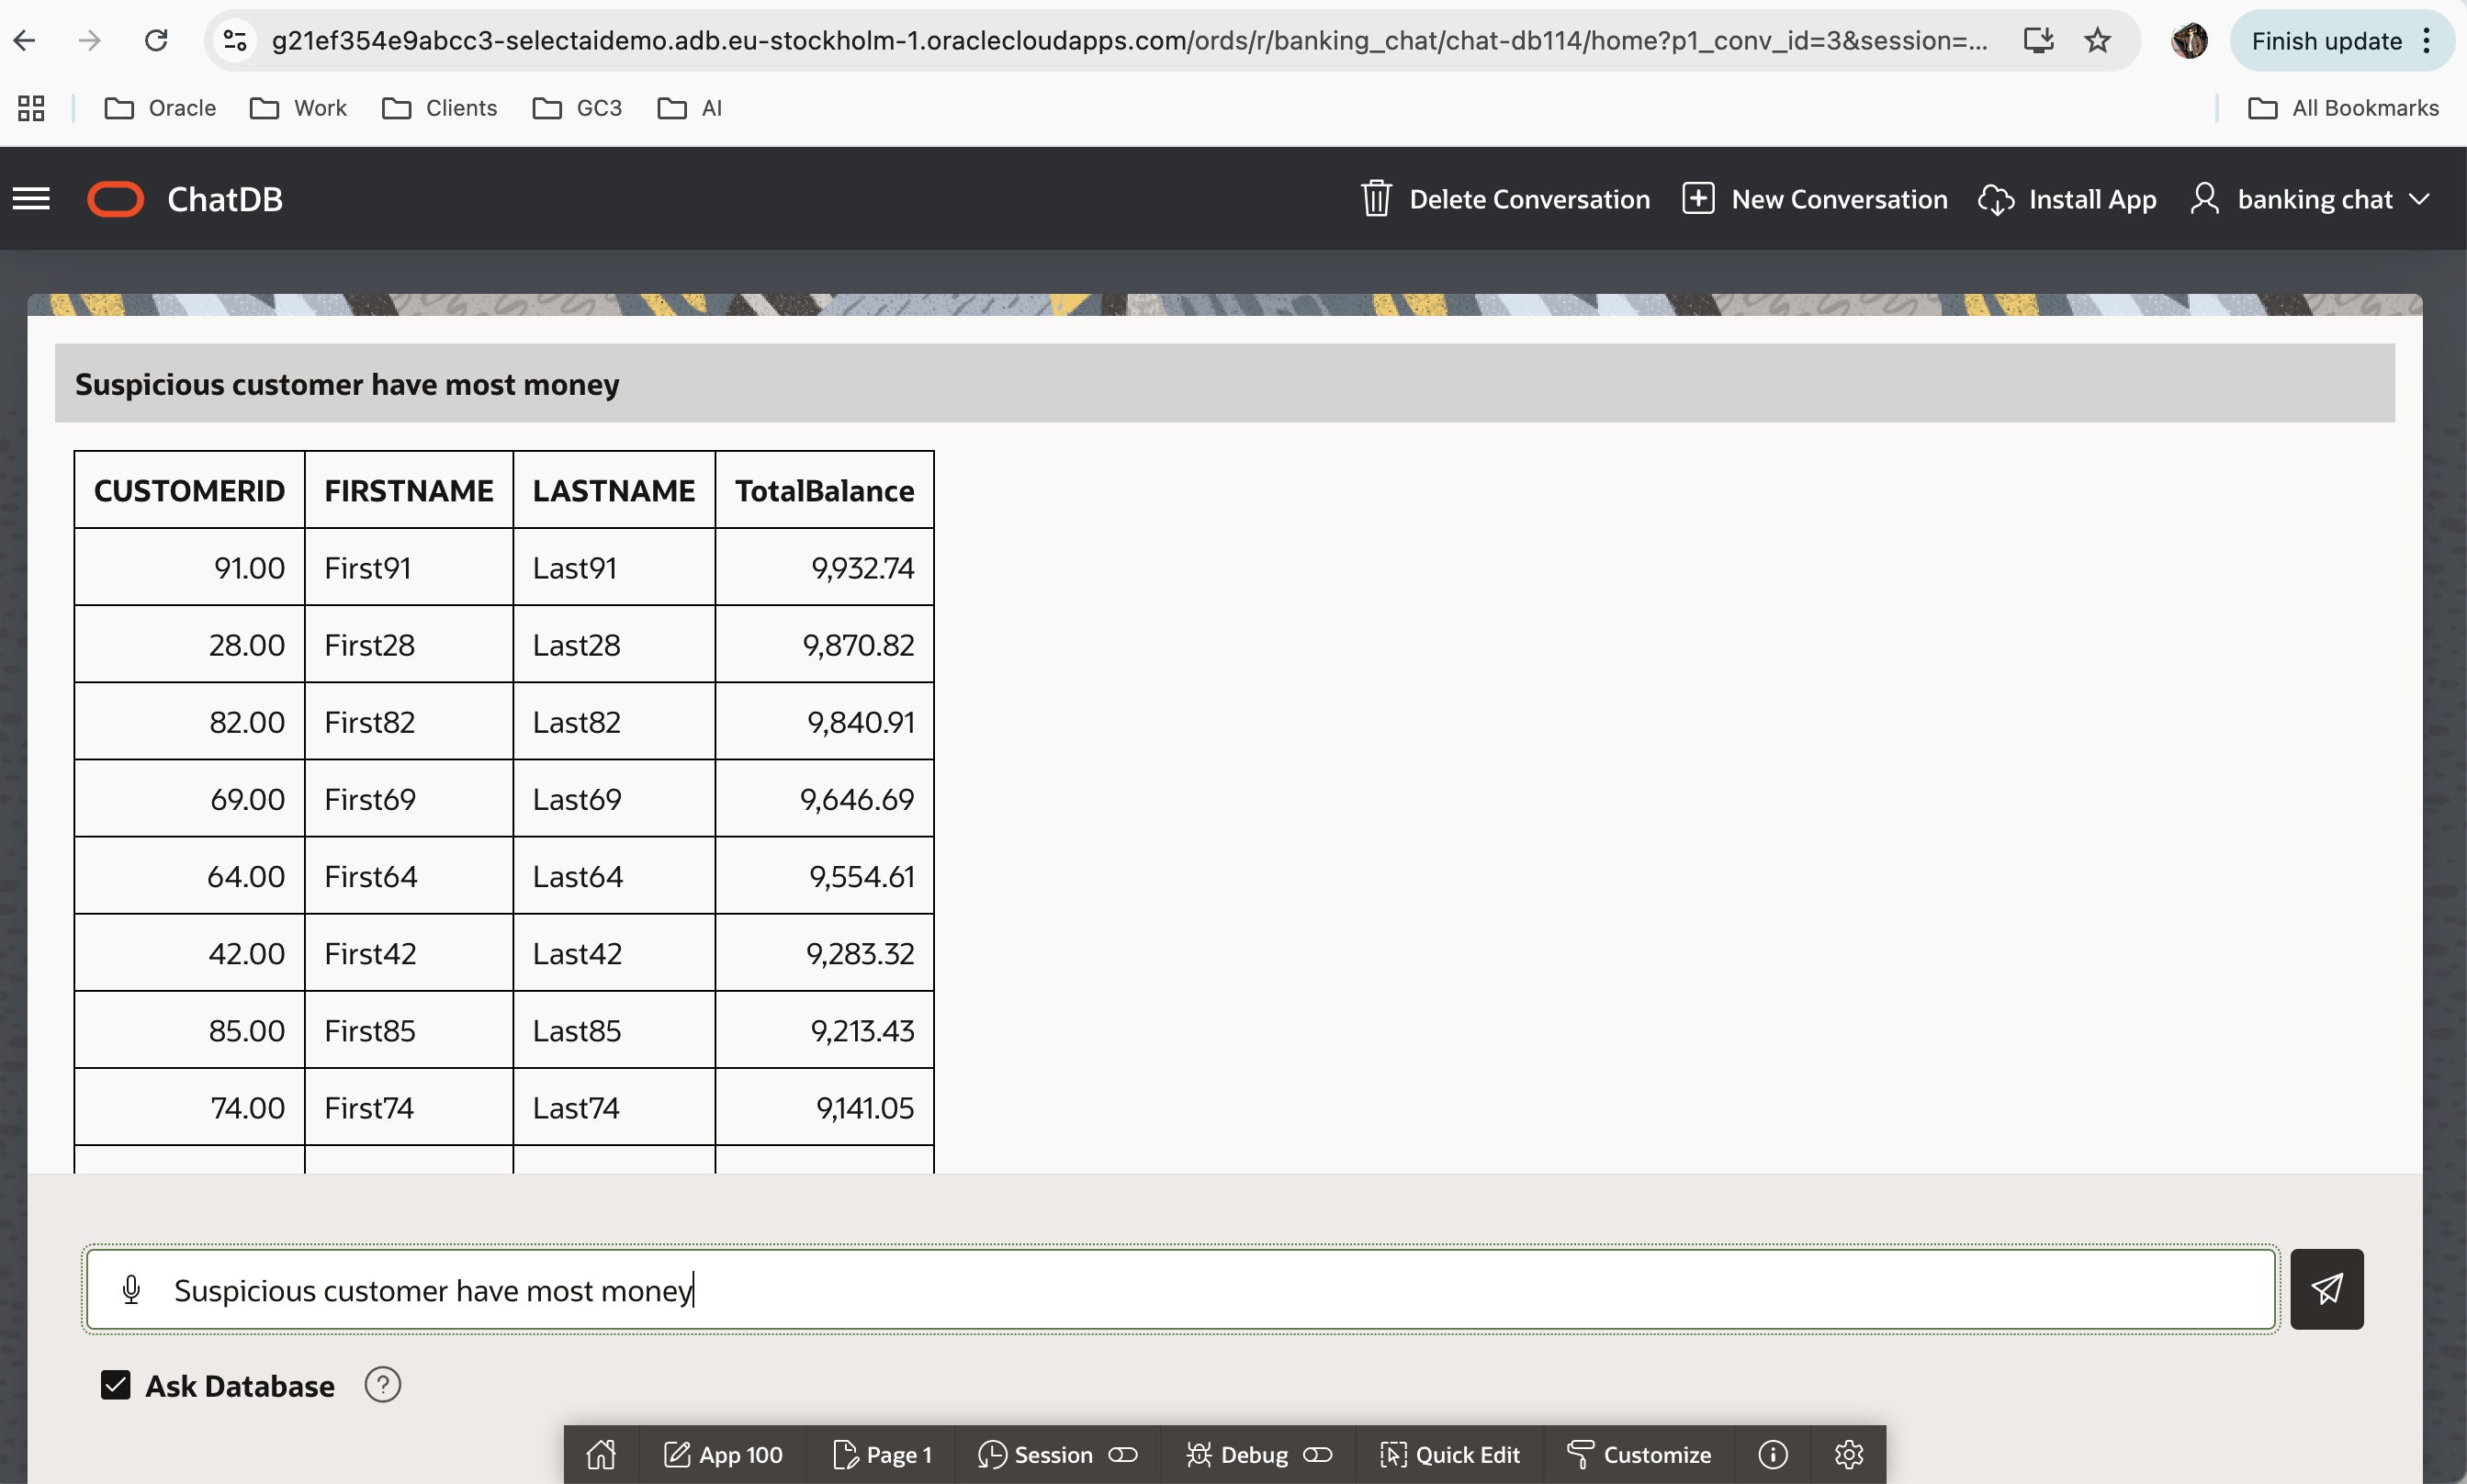
Note: Select “Ask Database”
Tips for other AI models
If you’re integrating with AI models like OpenAI, you’ll need to configure network access.
1. Grant Network ACL Access on Admin user.
BEGIN
  DBMS_NETWORK_ACL_ADMIN.APPEND_HOST_ACE(
    HOST         => api.openai.com',
    LOWER_PORT   => 443,
    UPPER_PORT   => 443,
    ACE          => xs$ace_type(
      PRIVILEGE_LIST => xs$name_list('http'),
      PRINCIPAL_NAME => 'SELECT_AI_USER',
      PRINCIPAL_TYPE => xs_acl.ptype_db
    )
  );
END;
/
2. Verify Access
SELECT * FROM DBA_NETWORK_ACLS;

SELECT * FROM DBA_NETWORK_ACL_PRIVILEGES;
3. Create Profile with OpenAI
BEGIN
  DBMS_CLOUD.CREATE_CREDENTIAL (
      credential_name  => 'OPENAI_CRED',  -- The name of the credential
      username         => 'OPENAI',       -- The username for the credential
      password         => '...'           -- The password (should be securely stored)
  );
END;
/

BEGIN
    DBMS_CLOUD_AI.CREATE_PROFILE(
        profile_name => 'OPENAI_PROFILE',
        attributes =>
            '{"provider": "openai",
            "credential_name": "'OPENAI_CRED",
            "model":"command",
            "object_list": [
                            {"owner": "SELECT_AI_USER", "name": "Customers"},
                            {"owner": "SELECT_AI_USER", "name": "Branches"},
                            {"owner": "SELECT_AI_USER", "name": "Accounts"},
                            {"owner": "SELECT_AI_USER", "name": "Transactions"},
                            {"owner": "SELECT_AI_USER", "name": "Loans"},
                            {"owner": "SELECT_AI_USER", "name": "LoanPayments"},
                            {"owner": "SELECT_AI_USER", "name": "Employees"},
                            {"owner": "SELECT_AI_USER", "name": "Cards"},
                            {"owner": "SELECT_AI_USER", "name": "Services"},
                            {"owner": "SELECT_AI_USER", "name": "CustomerServices"}
                           ],
            }'
    );
END;
/
By following these steps, you’ll be able to harness the power of Oracle Select AI effectively. Whether you’re integrating with OCI Generative AI or third-party AI models, this guide ensures a seamless setup and operation.
Special thanks to Marty Gubar and Sanket Jain for their valuable input and guidance during the implementation and writing of this AI blog.
SQL Code for creating tables used by the example
-- 1. Customers Table

CREATE TABLE Customers (
CustomerID NUMBER PRIMARY KEY,
FirstName VARCHAR2(50),
LastName VARCHAR2(50),
Email VARCHAR2(100),
Phone VARCHAR2(15),
Address VARCHAR2(255),
City VARCHAR2(50),
State VARCHAR2(50),
ZipCode VARCHAR2(10),
CreatedDate DATE DEFAULT SYSDATE
);

-- 2. Branches Table
CREATE TABLE Branches (
BranchID NUMBER PRIMARY KEY,
BranchName VARCHAR2(100),
Address VARCHAR2(255),
City VARCHAR2(50),
State VARCHAR2(50),
ZipCode VARCHAR2(10),
Phone VARCHAR2(15)
);

-- 3. Accounts Table
CREATE TABLE Accounts (
AccountID NUMBER PRIMARY KEY,
CustomerID NUMBER REFERENCES Customers(CustomerID),\
BranchID NUMBER REFERENCES Branches(BranchID),
AccountType VARCHAR2(20),
Balance NUMBER(15, 2),
CreatedDate DATE DEFAULT SYSDATE
);

-- 4. Transactions Table
CREATE TABLE Transactions (
TransactionID NUMBER PRIMARY KEY,
AccountID NUMBER REFERENCES Accounts(AccountID),
TransactionType VARCHAR2(20),
Amount NUMBER(15, 2),
TransactionDate DATE DEFAULT SYSDATE,
Description VARCHAR2(255)
);

-- 5. Loans Table
CREATE TABLE Loans (
LoanID NUMBER PRIMARY KEY,
CustomerID NUMBER REFERENCES Customers(CustomerID),
BranchID NUMBER REFERENCES Branches(BranchID),
LoanType VARCHAR2(20),
Amount NUMBER(15, 2),
InterestRate NUMBER(5, 2),
StartDate DATE,
EndDate DATE
);

-- 6. LoanPayments Table
CREATE TABLE LoanPayments (
PaymentID NUMBER PRIMARY KEY,\
LoanID NUMBER REFERENCES Loans(LoanID),
Amount NUMBER(15, 2),\
PaymentDate DATE DEFAULT SYSDATE
);

-- 7. Employees Table
CREATE TABLE Employees (
EmployeeID NUMBER PRIMARY KEY,
BranchID NUMBER REFERENCES Branches(BranchID),
FirstName VARCHAR2(50),
LastName VARCHAR2(50),
Position VARCHAR2(50),
Salary NUMBER(10, 2),
HireDate DATE DEFAULT SYSDATE
);

-- 8. Cards Table
CREATE TABLE Cards (
CardID NUMBER PRIMARY KEY,
AccountID NUMBER REFERENCES Accounts(AccountID),
CardType VARCHAR2(20),
CardNumber VARCHAR2(16),
ExpiryDate DATE
);

-- 9. Services Table
CREATE TABLE Services (
ServiceID NUMBER PRIMARY KEY,
ServiceName VARCHAR2(100),
Description VARCHAR2(255)
);

-- 10. CustomerServices Table
CREATE TABLE CustomerServices (
CustomerServiceID NUMBER PRIMARY KEY,
CustomerID NUMBER REFERENCES Customers(CustomerID),
ServiceID NUMBER REFERENCES Services(ServiceID),
StartDate DATE DEFAULT SYSDATE
);

-- Sample Data Inserts for Customers (100 records)

BEGIN
FOR i IN 1..100 LOOP
INSERT INTO Customers (CustomerID, FirstName, LastName, Email, Phone, Address, City, State, ZipCode)
VALUES (i, 'First' || i, 'Last' || i, 'customer' || i || '@bank.com', '1234567890',
'Address ' || i, 'City' || MOD(i, 10), 'State' || MOD(i, 5), 'ZIP' || MOD(i, 100));
END LOOP;

COMMIT;
END;
/

-- Sample Data Inserts for Branches

BEGIN
FOR i IN 1..10 LOOP
INSERT INTO Branches (BranchID, BranchName, Address, City, State, ZipCode, Phone)
VALUES (i, 'Branch ' || i, 'Branch Address ' || i, 'City' || i, 'State' || MOD(i, 5), 'ZIP' || i, '123456789' || i);
END LOOP;
COMMIT;

END;
/

-- Sample Data Inserts for Accounts (100 records)

BEGIN
FOR i IN 1..100 LOOP
INSERT INTO Accounts (AccountID, CustomerID, BranchID, AccountType, Balance)
VALUES (i, i, MOD(i, 10) + 1, CASE MOD(i, 2) WHEN 0 THEN 'Savings' ELSE 'Checking' END, DBMS_RANDOM.VALUE(1000, 10000));
END LOOP;

COMMIT;
END;

/

-- Sample Data Inserts for Transactions (100 records)

BEGIN
FOR i IN 1..100 LOOP
INSERT INTO Transactions (TransactionID, AccountID, TransactionType, Amount, Description)
VALUES (i, MOD(i, 100) + 1, CASE MOD(i, 2) WHEN 0 THEN 'Credit' ELSE 'Debit' END, DBMS_RANDOM.VALUE(50, 500), 'Transaction ' || i);
END LOOP;

COMMIT;

END;
/


-- Sample Data Inserts for Loans (100 records)

BEGIN
FOR i IN 1..100 LOOP

INSERT INTO Loans (LoanID, CustomerID, BranchID, LoanType, Amount, InterestRate, StartDate, EndDate)
VALUES (i, i, MOD(i, 10) + 1, CASE MOD(i, 2) WHEN 0 THEN 'Home' ELSE 'Car' END, DBMS_RANDOM.VALUE(5000, 50000),
DBMS_RANDOM.VALUE(3, 15), SYSDATE - DBMS_RANDOM.VALUE(1, 365), SYSDATE + DBMS_RANDOM.VALUE(365, 3650));

END LOOP;
COMMIT;

END;
/


-- Sample Data Inserts for LoanPayments (100 records)

BEGIN
FOR i IN 1..100 LOOP
INSERT INTO LoanPayments (PaymentID, LoanID, Amount)
VALUES (i, MOD(i, 100) + 1, DBMS_RANDOM.VALUE(100, 1000));
END LOOP;

COMMIT;
END;
/

-- Sample Data Inserts for Employees (100 records)

BEGIN

FOR i IN 1..100 LOOP
INSERT INTO Employees (EmployeeID, BranchID, FirstName, LastName, Position, Salary)
VALUES (i, MOD(i, 10) + 1, 'EmpFirst' || i, 'EmpLast' || i, CASE MOD(i, 3) WHEN 0 THEN 'Manager' WHEN 1 THEN 'Clerk' ELSE 'Teller' END, DBMS_RANDOM.VALUE(30000, 80000));
END LOOP;

COMMIT;

END;
/

-- Sample Data Inserts for Cards (100 records)

BEGIN
FOR i IN 1..100 LOOP
INSERT INTO Cards (CardID, AccountID, CardType, CardNumber, ExpiryDate)
VALUES (i, i, CASE MOD(i, 2) WHEN 0 THEN 'Credit' ELSE 'Debit' END, LPAD(i, 16, '0'), SYSDATE + DBMS_RANDOM.VALUE(365, 1825));
END LOOP;

COMMIT;

END;
/


-- Sample Data Inserts for Services (10 records)

BEGIN
FOR i IN 1..10 LOOP
INSERT INTO Services (ServiceID, ServiceName, Description)
VALUES (i, 'Service ' || i, 'Description of Service ' || i);
END LOOP;

COMMIT;

END;
/

-- Sample Data Inserts for CustomerServices (100 records)

BEGIN
FOR i IN 1..100 LOOP
INSERT INTO CustomerServices (CustomerServiceID, CustomerID, ServiceID)
VALUES (i, i, MOD(i, 10) + 1);
END LOOP;

COMMIT;

END;
/