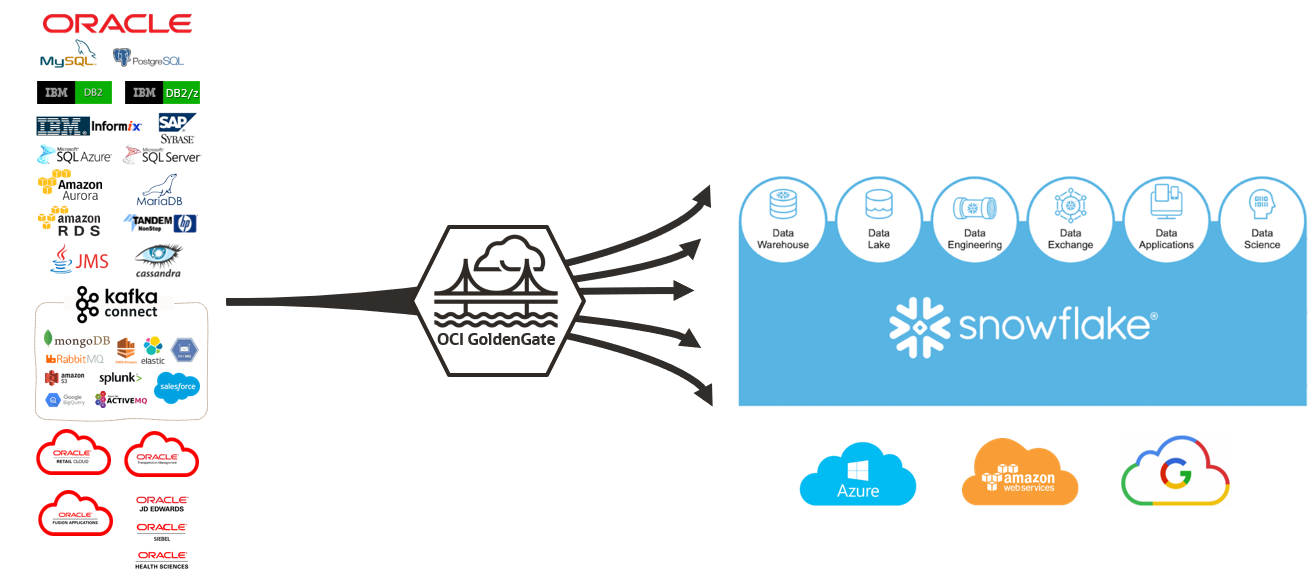
OCI GoldenGate is a fully managed service providing a real-time data mesh platform, which uses replication to keep data highly available and enable real-time analysis. Several new Connections, including Snowflake, were recently launched in all OCI regions. In this article, we will learn more about integrating with Snowflake using a Big Data deployment and a Snowflake Connection.
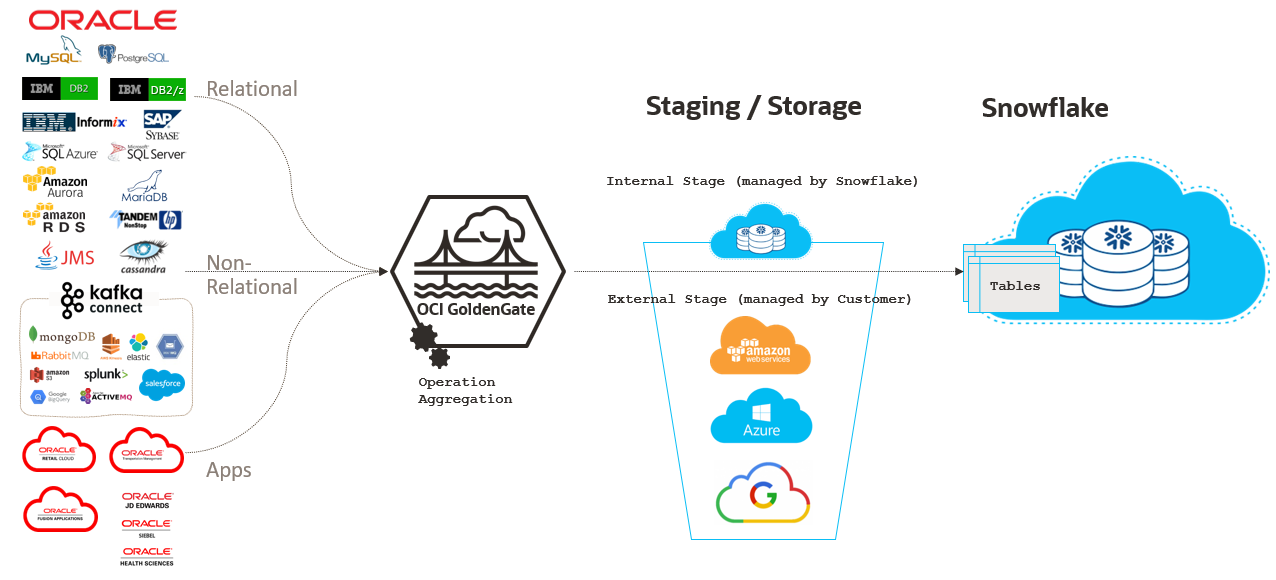
When integrating with Snowflake, GoldenGate supports both internal and external stage. With internal stage, your data is stored internally within Snowflake, while with external stage your data is stored in Amazon S3, Microsoft Azure, or Google Cloud Storage buckets. As of today, OCI GoldenGate supports external stage on Amazon S3 and Azure Data Lake Storage.
Creating a Big Data Deployment
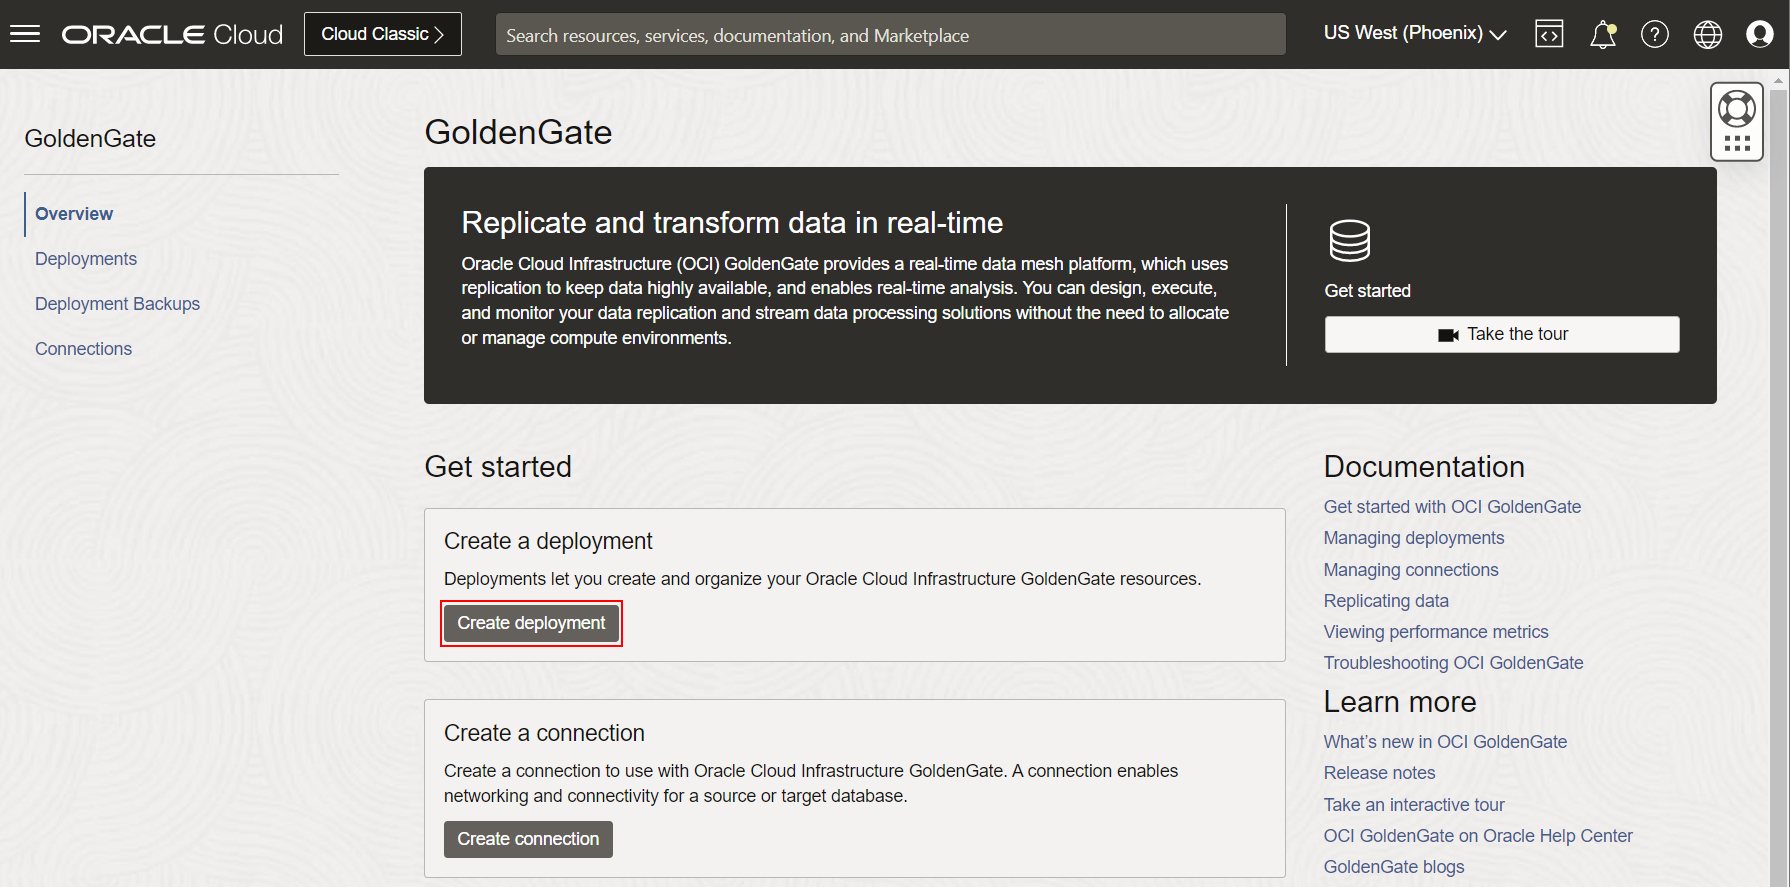
Support for Snowflake in OCI GoldenGate is included with Big Data deployments. You can create a Big Data deployment using the OCI Console, CLI, or APIs. From the OCI Console menu, go to Oracle Database, click GoldenGate, and click Create deployment.
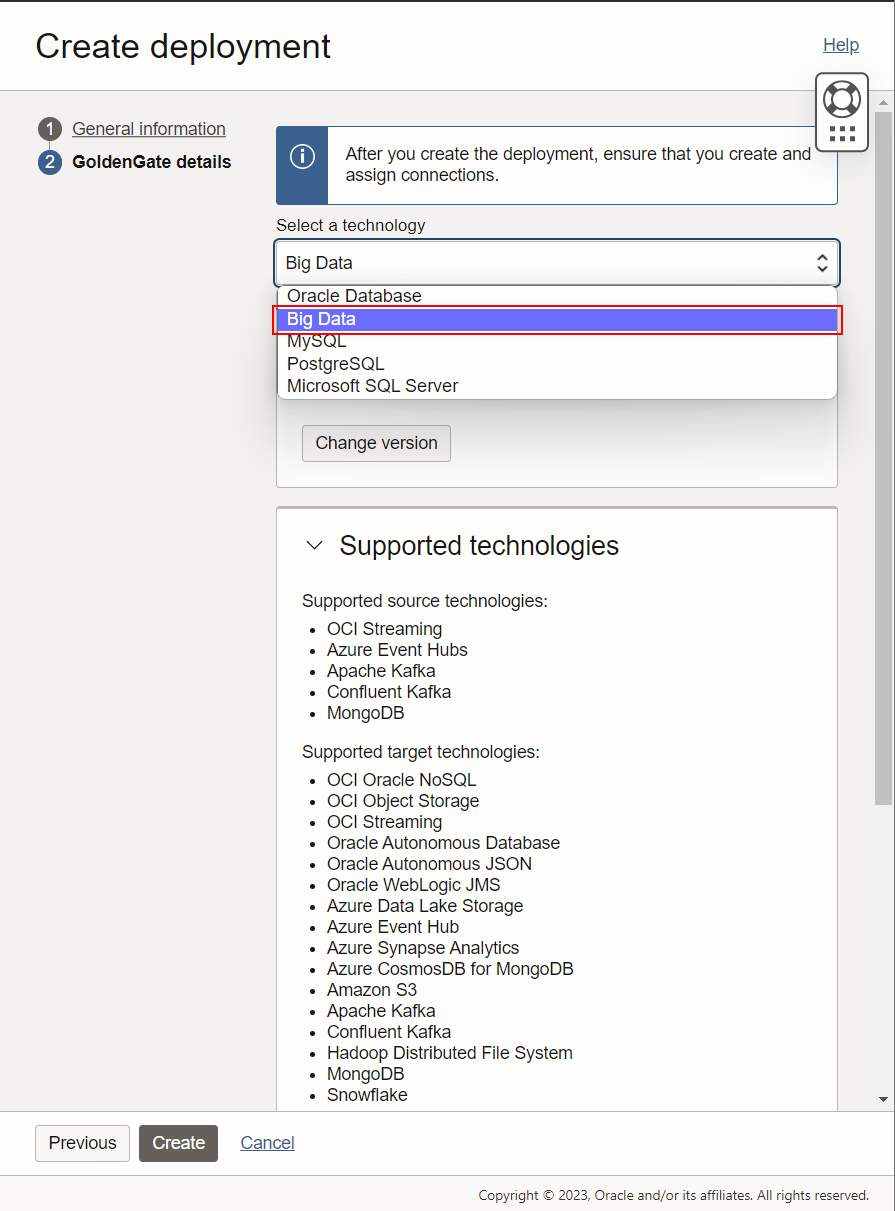
Go through the deployment creation screens, and select Big Data when prompted for a technology. Finally, click Create to start the creation of the deployment.
Create a Connection to Snowflake
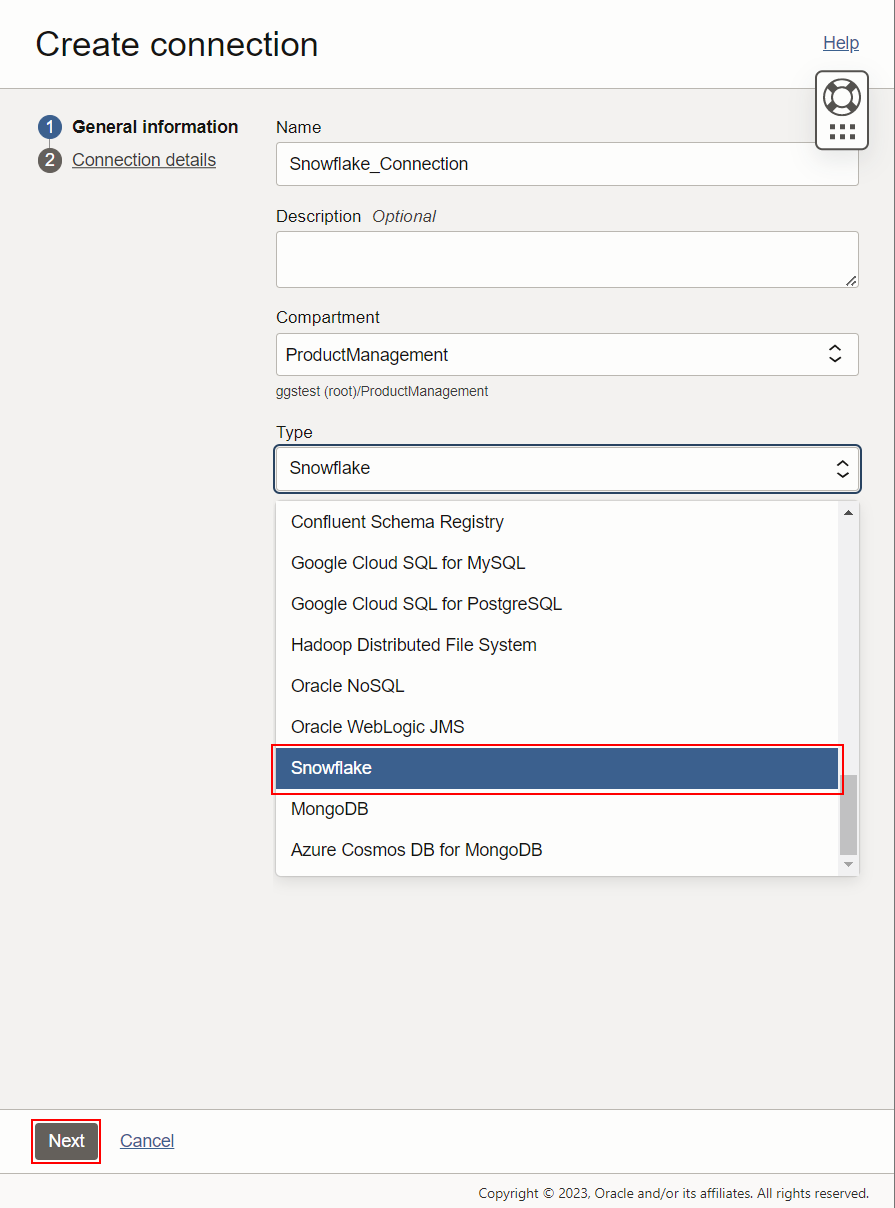
To create a Connection, go to the Overview or Connections page and click Create connection. Pick Snowflake as the Type and click Next.
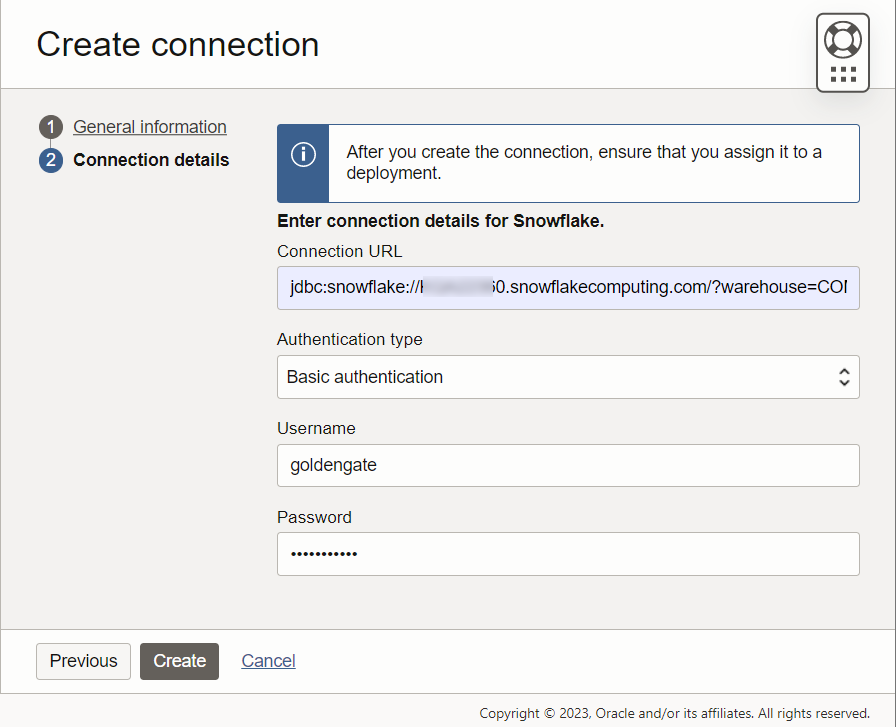
Enter the JDBC Connection URL in the Connection URL field: jdbc:snowflake://<account_identifier>.snowflakecomputing.com/?<connection_params>. See JDBC Driver Connection String for more details.
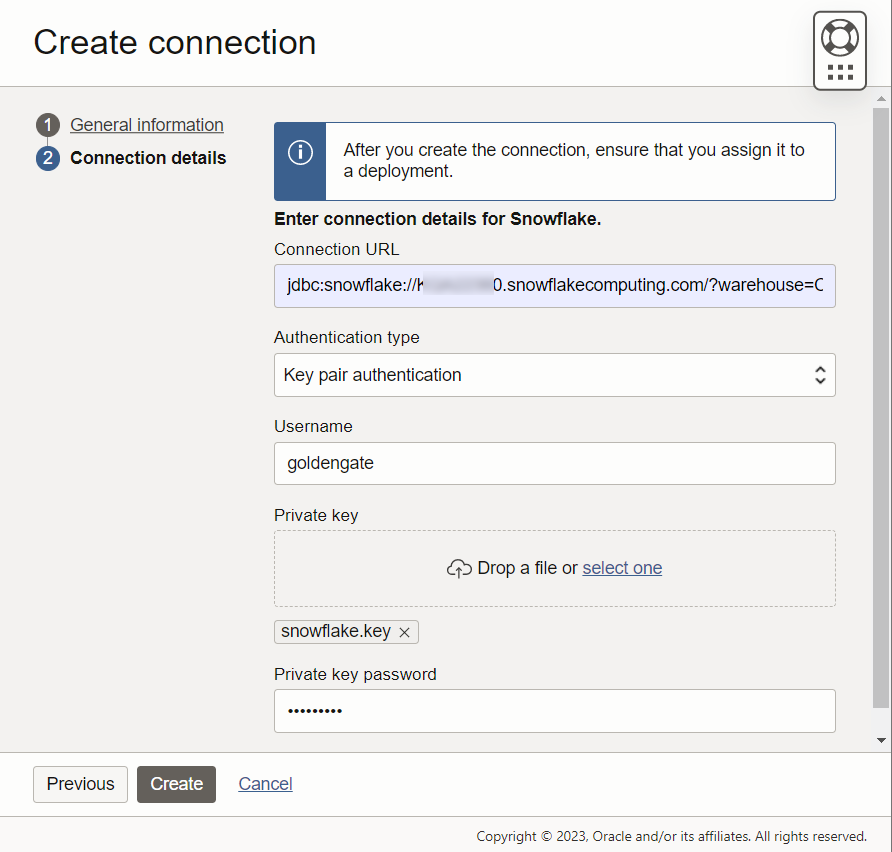
Use either Basic authentication with a username and password, or Key pair authentication as the Authentication Type, then provide the required information.
Click Create to proceed with the Connection creation.
Open your Deployment, click Assigned connections, then click Assign connection.
Select your Connection in the list and click Assign connection to create the assignment.
Note:Connection types are compatible with specific deployment types. Snowflake Connections can only be assigned to Big Data Deployments, for example. In heterogeneous use cases, you must use different Deployments and connect them using Distribution Paths. So, if you plan to send data from a PostgreSQL database into Snowflake, you will need two OCI GoldenGate Deployments:
One for PostgreSQL (deployment type: PostgreSQL)
One for Snowflake (deployment type: Big Data)
Replicate data into Snowflake
OCI GoldenGate supports Snowflake as a target. You can start designing your Replicats once you have assigned the required Connections to your Deployment(s).
Go to your Deployment details page and click Launch console to start the OCI GoldenGate Console.
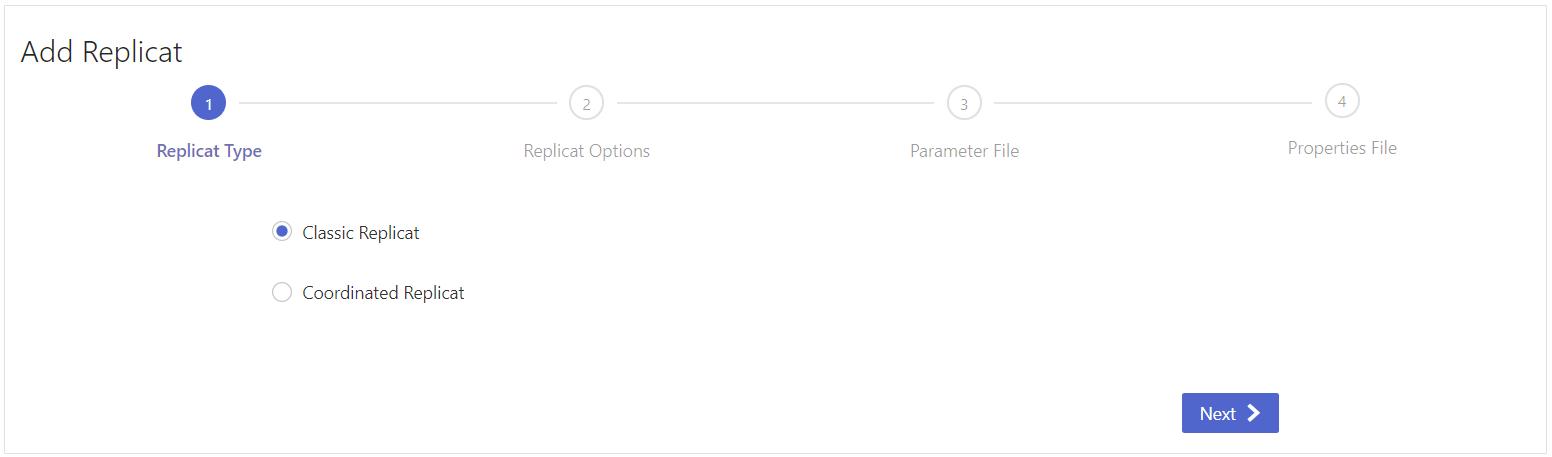
Click Overview and click Add Replicat (plus icon).
Select a Replicat type from Classic or Coordinated. You can find more information about the different Replicat types here. We will select Classic in this example and click Next.
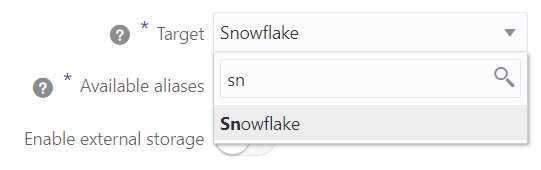
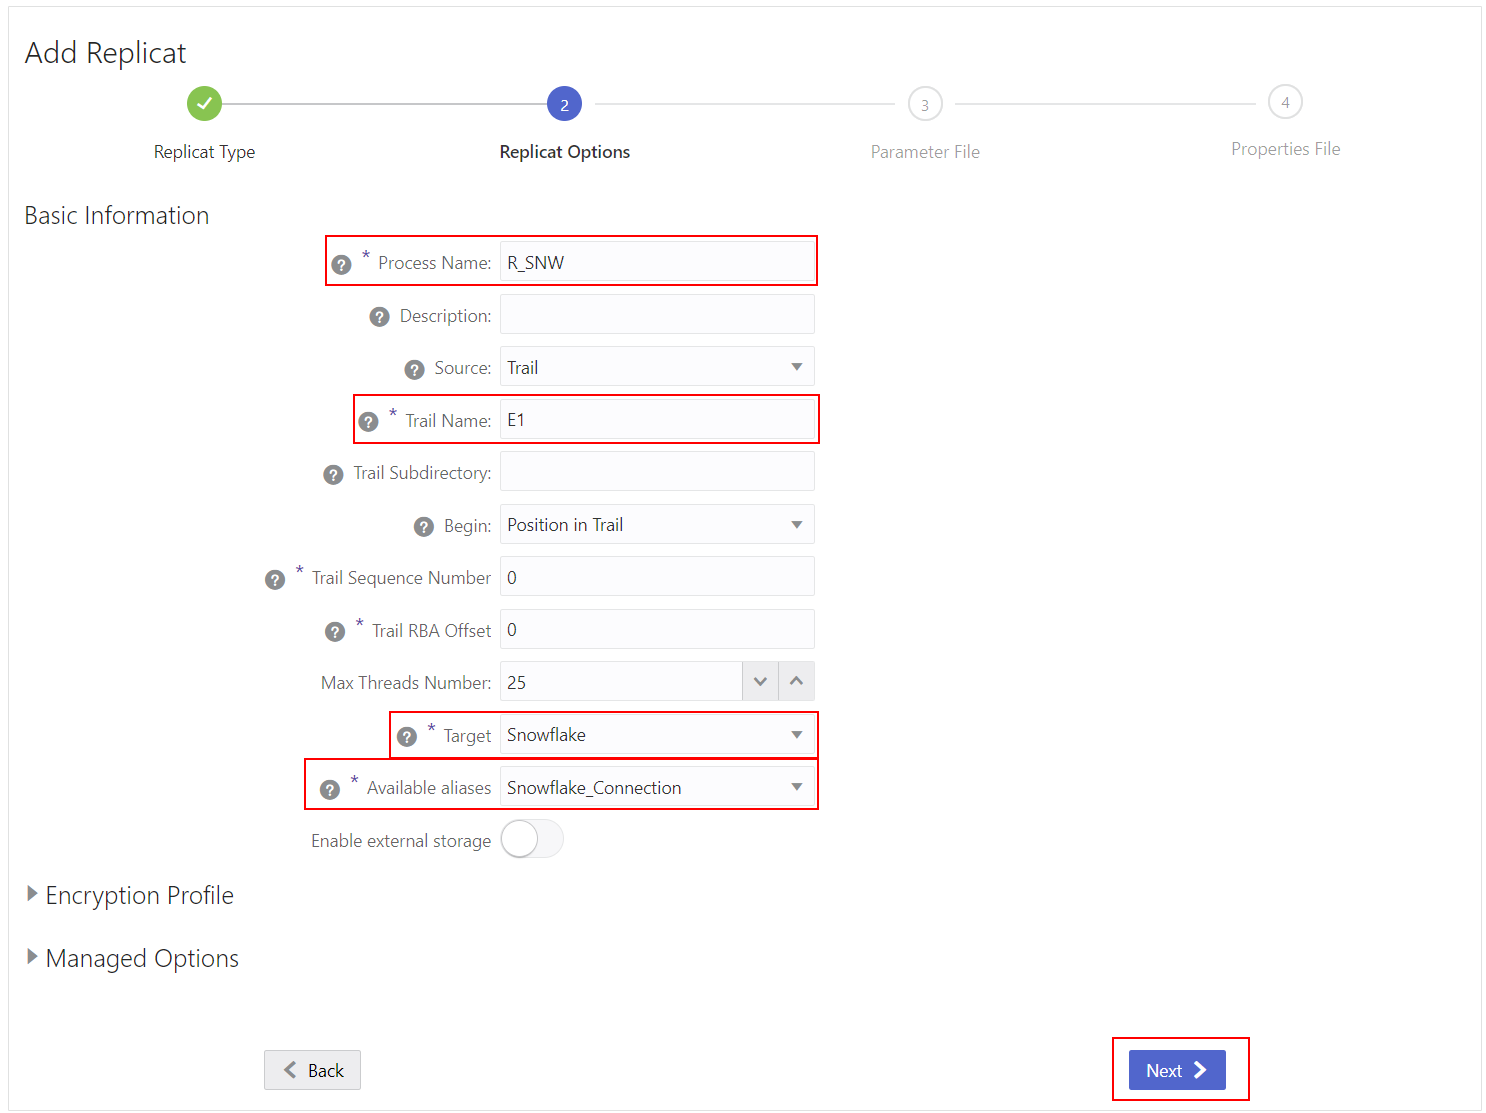
Enter a Process Name, specify the Trail Name, select Snowflake in the Target field, and select the Alias corresponding to the Connection you created. You can enable external storage optionally if you plan to use the external stage approach. Otherwise, leave Enable external storage unchecked to use internal stage.
Note: You can type in the Target field to search for Snowflake and other Targets that don’t appear in the list by default.
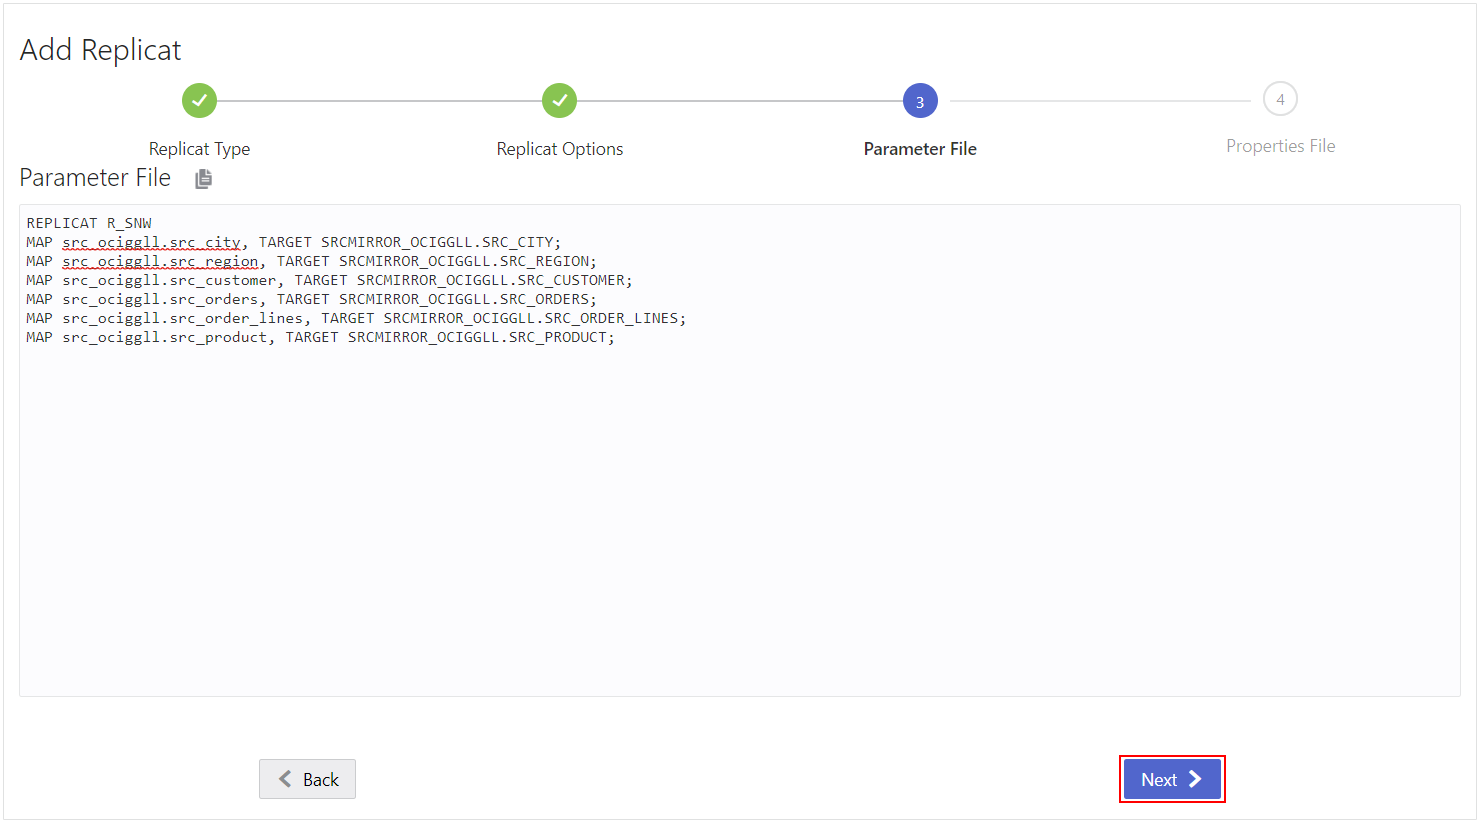
Specify how the source and target tables will be mapped by the Replicat and click Next.
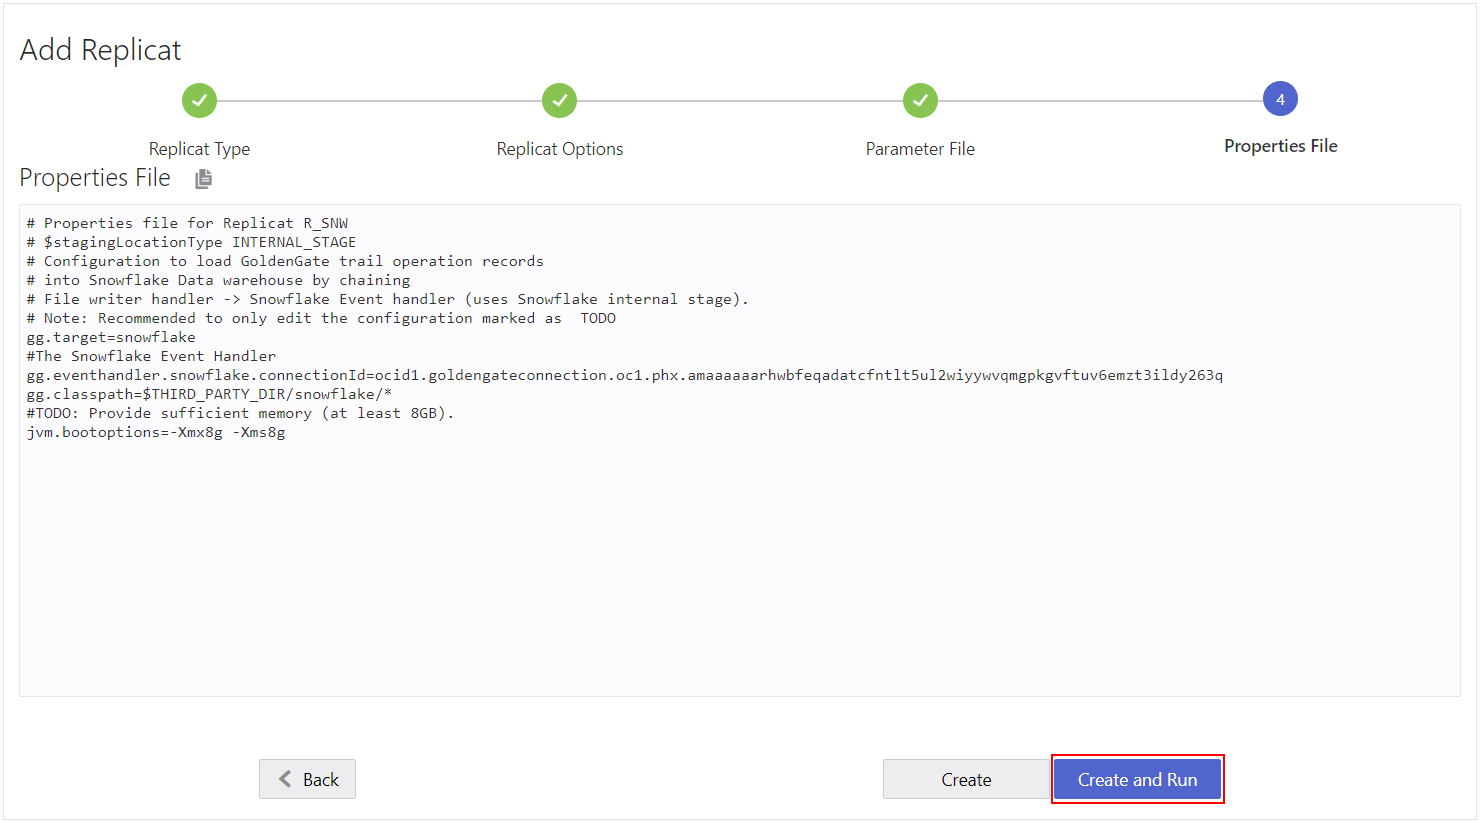
Finally, review the Properties and click Create and Run.
Do not modify the gg.eventhandler.snowflake.connectionId and gg.classpath values.
The following properties are already pre-configured when selecting the Alias and do not apply to OCI GoldenGate: gg.eventhandler.snowflake.connectionURL, gg.eventhandler.snowflake.UserName, gg.eventhandler.snowflake.Password and gg.eventhandler.snowflake.storageIntegration.
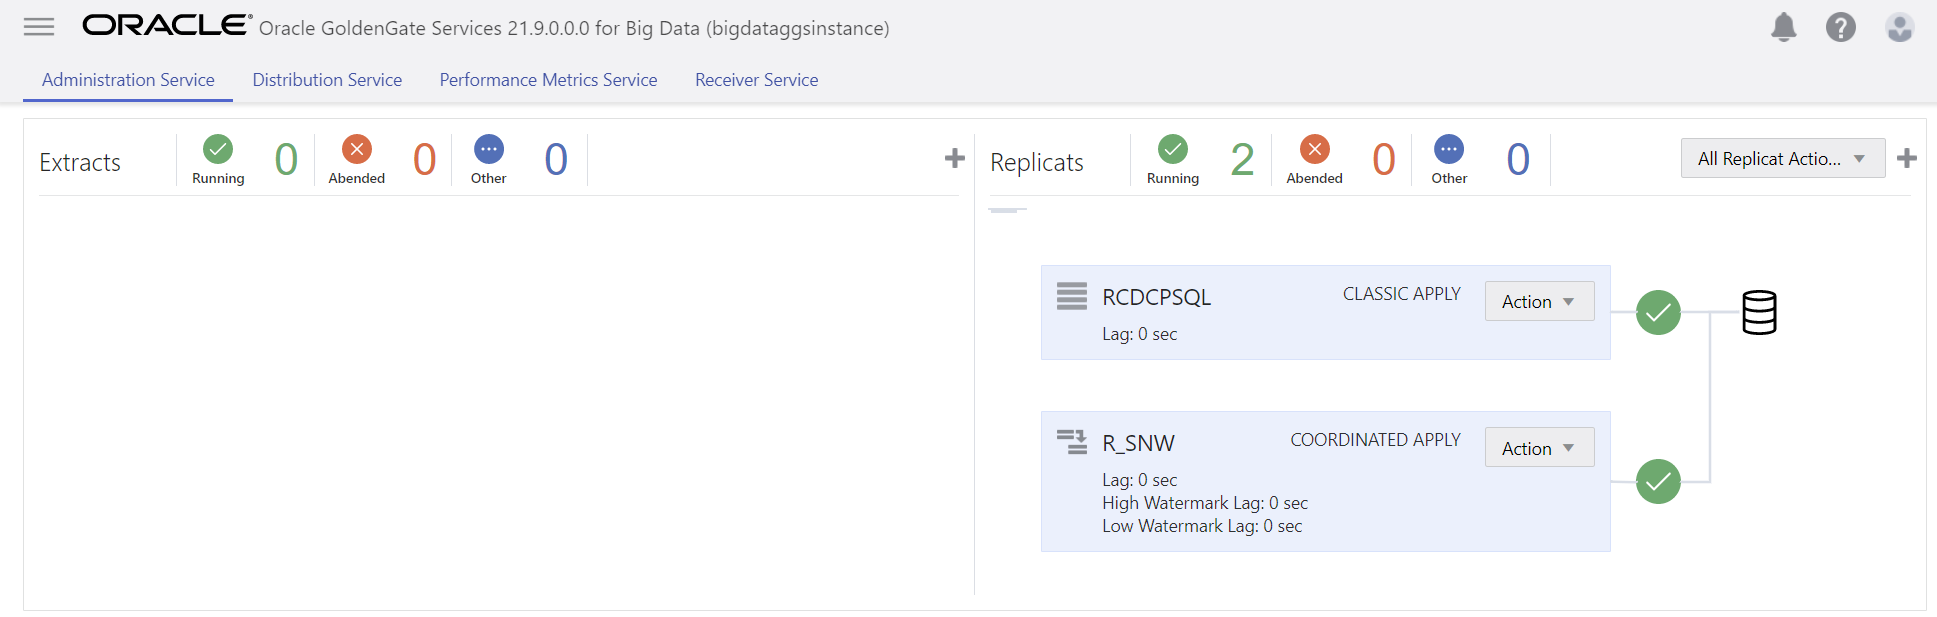
You should now have a running Replicat listed in the Administration Service tab.
We have seen how easy it is to replicate data into Snowflake with OCI GoldenGate. You can follow similar steps to integrate Snowflake with any source supported by GoldenGate on-premises and OCI GoldenGate. As a next step, I recommend going through the following quickstart to get familiar with OCI GoldenGate and its integration with Snowflake: Replicate data from PostgreSQL to Snowflake. Stay tuned for new blogs coming up soon!
Authors
Julien TESTUT
Senior Principal Product Manager
Julien Testut is a Senior Principal Product Manager in the Oracle GoldenGate group focusing on OCI GoldenGate and GoldenGate for Big Data. He previously led product management activities for OCI Data Integration, Data Integration Platform Cloud (DIPC), Oracle Data Integrator (ODI), and ODI Cloud Service. Julien has an extensive background in Cloud, Big Data, Data Integration, Data Quality, and Data Governance solutions. He is also a co-author of the 'Getting Started with Oracle Data Integrator: A Hands-on Tutorial' and 'Oracle Data Integrator Cookbook' books. Before joining Oracle, he was an Applications Engineer at Sunopsis, which Oracle then acquired.