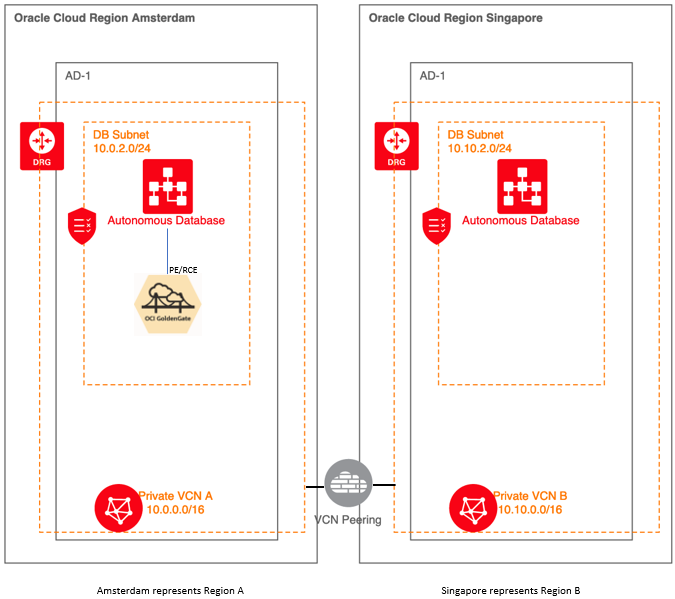
In this article, I will show how to replicate data from one Oracle Autonomous Database source in Amsterdam into another Oracle Autonomous Database target in Singapore. This can be a real-world scenario of a High Availability (HA) and Disaster Recovery (DR) solution for a mission critical application. To implement it we need to peer the VCNs from both regions and deploy one OCI GoldenGate Instance.
If you do not have access to Oracle Cloud Infrastructure, you can create a free account and explore the different options and services.
Components required:
- Access to two OCI regions
- A source database in Region A that must be up and running
- A target database in Region B that must be up and running
We will learn how to:
- Use VCN peering
- Create an OCI GoldenGate (OCI-GG) Deployment
- Work with tokens in Oracle GoldenGate (OGG) as a bonus
Architecture:
Here is an overview of the steps:
- VCN Peering between 2 regions – AMS (Amsterdam) and SIN (Singapore)
- Create one database in each region in a private subnet
- Create a Virtual Machine (VM) to access OGG deployment in AMS (or use bastion service)
- Create a Virtual Machine (VM) to access DB actions in SIN (or use bastion service or CMAN)
- Create OCI-GG deployment in AMS
- Create a Connection for the database in SIN and assign it to OCI-GG deployment in AMS
- Create a Connection for the database in AMS and assign it to OCI-GG Deployment in AMS
- Setup users and tables
- Create Extract and Replicat processes
Long steps I know right, but it’s worth it. Bear with me on the Networking part to peer the two OCI regions:
In Region A (Amsterdam), in OCI Console, click Networking then Virtual Cloud Networks. Click Create VCN and go through the wizard. In the end, I have created two subnets:

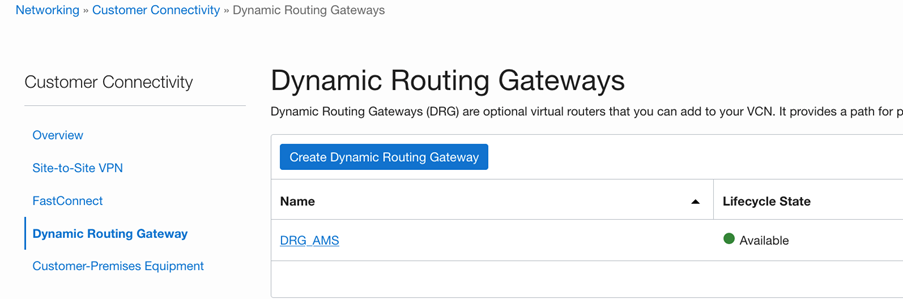
Go to OCI Console, click Networking then Customer Connectivity to create the Dynamic Routing Gateway (DRG): Click on Dynamic Routing Gateway and click on Create Dynamic Routing Gateway.
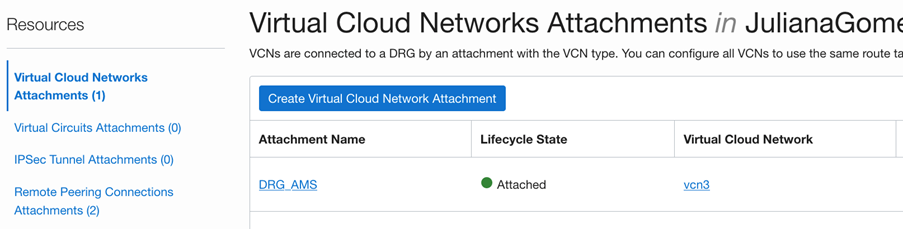
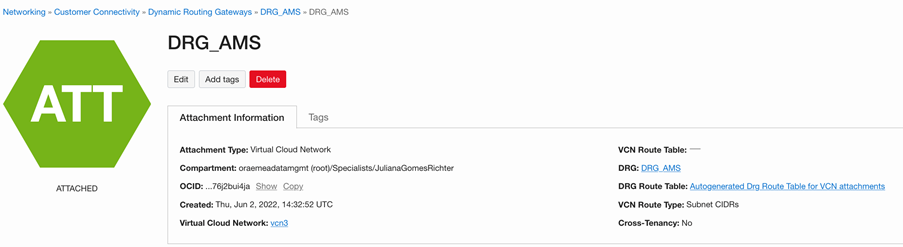
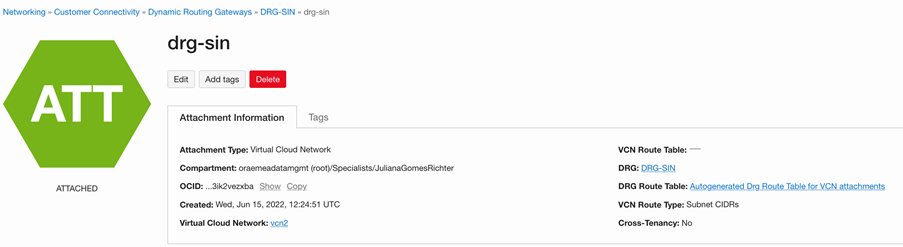
Click on Virtual Cloud Networks Attachments and press Create Virtual Cloud Network Attachment.
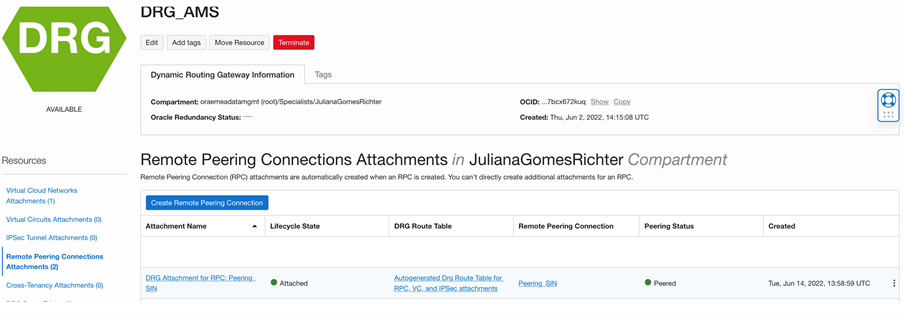
Move to the other Region B and repeat the steps if you don’t have a VCN and a DRG attached to it yet. Your setup should be like this:
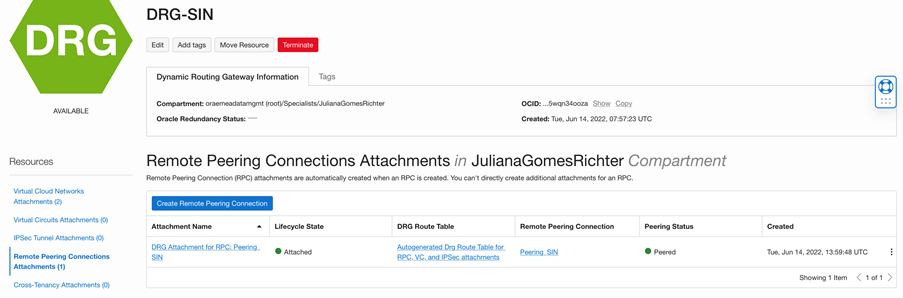
Now, go to RPC Attachments, click Create RPC (Remote Peering Connection) to create a RPC in both Regions:
Now for the fun part: click on the Remote Peering Connection in Amsterdam region, and click Establish Connection:
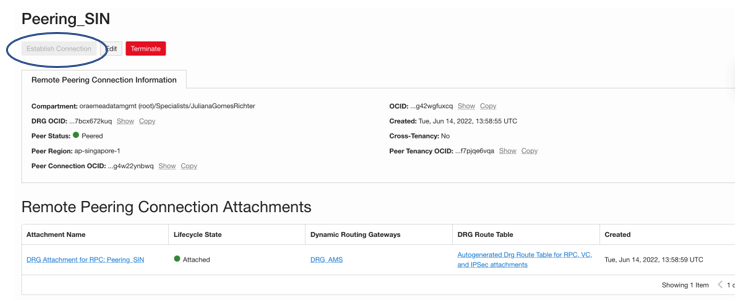
You will be asked to provide the region (Singapore in my case) and the Remote Peering Connection OCID from the RPC you created earlier:
Example:
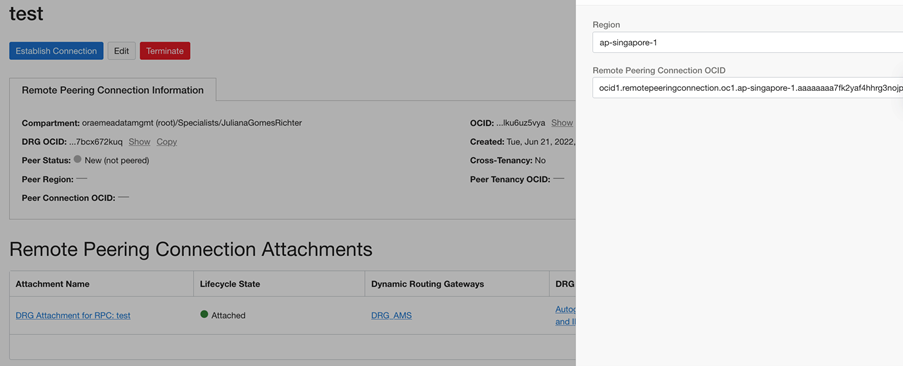
Press Establish Connection again and wait for Peer Status to change from Pending to Peered.

Almost there! The last steps are to create the proper routing using DRG’s and the Security Lists rules.
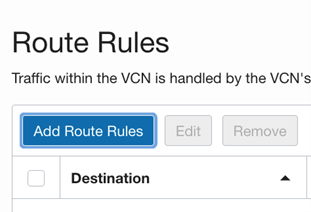
In Region A (Amsterdam), go to OCI Console, click Networking, then Virtual Cloud Networks, then click on the Default Route Table.

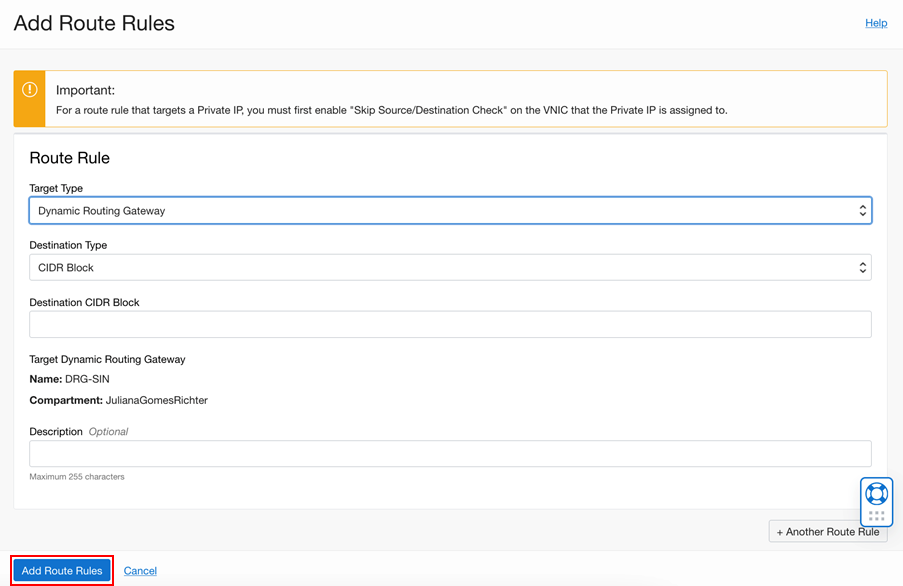
Now, create a route to Region B (Singapore) by clicking Add Route Rules:
In the field Target Type select Dynamic Routing Gateway, in the field Destination Type select CIDR Block and in the field Destination CIDR Block insert the IPv4 CIDR Block you have defined for Singapore private subnet. Example:
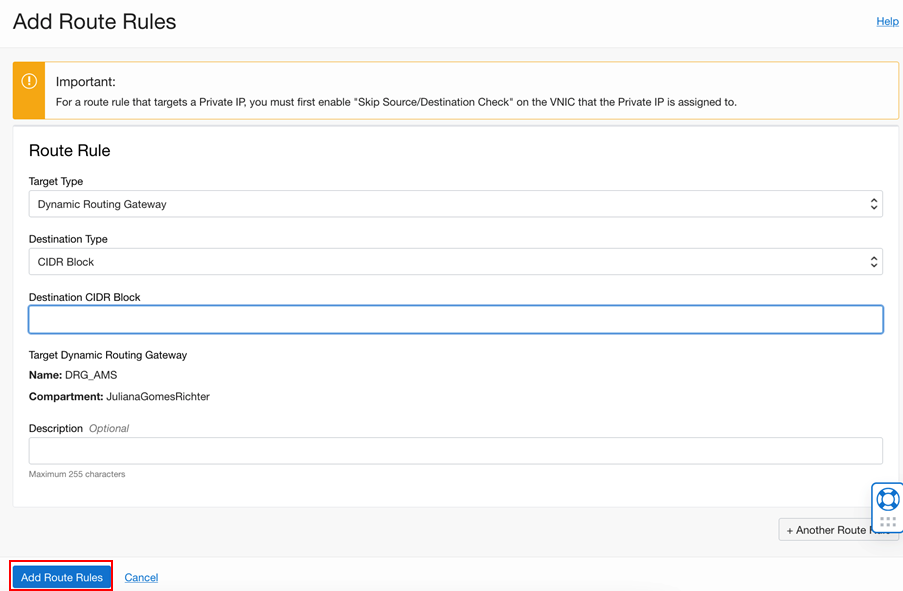
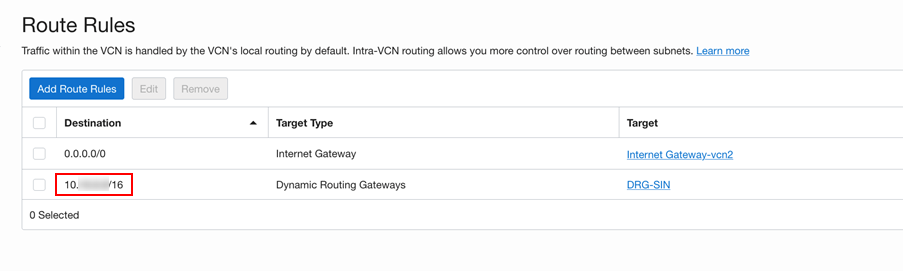
Click Add Route Rules. After that you should see a new route has been created:
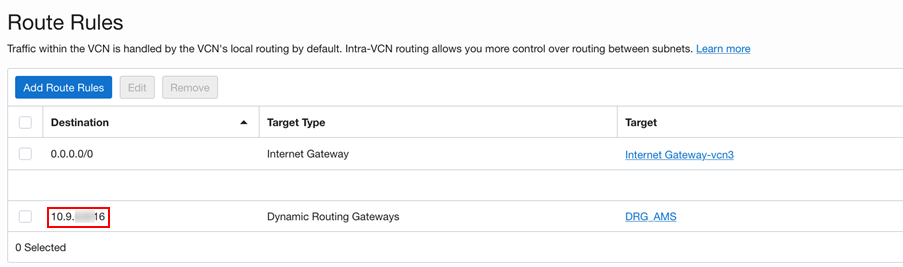
Now the other way around: we should create the Route to Region A (Amsterdam) CIDR block in Region B (Singapore) using the same steps as above.
Select Singapore as region, go to OCI Console, click Networking, then Virtual Cloud Networks, then click on the Default Route Table.

Click Add Route Rules:

In the field Target Type select Dynamic Routing Gateway, in the field Destination Type select CIDR Block and in the field Destination CIDR Block insert the IPv4 CIDR Block you have defined for Amsterdam private subnet. Example:
Click Add Route Rules. After that you should see a new route has been created:
Configure Security Lists:
- In Region A (Amsterdam):
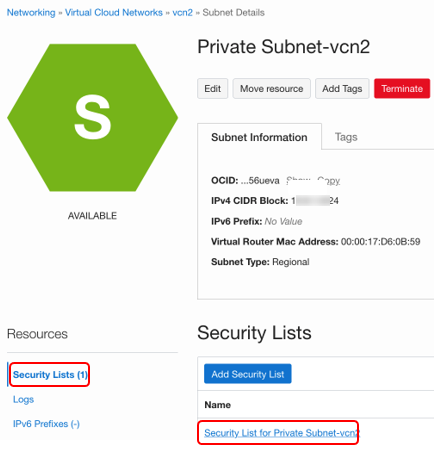
Select Amsterdam Region, go to OCI Console, click Networking, then Virtual Cloud Networks, then click on your VCN name, select your private subnet, then on the left-hand side click Security Lists as below:

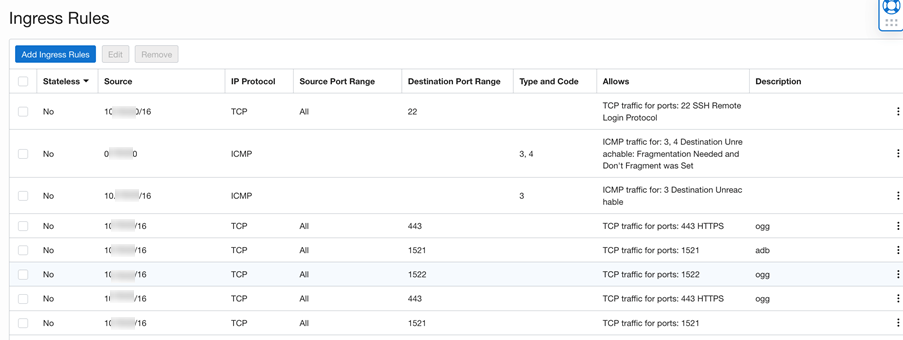
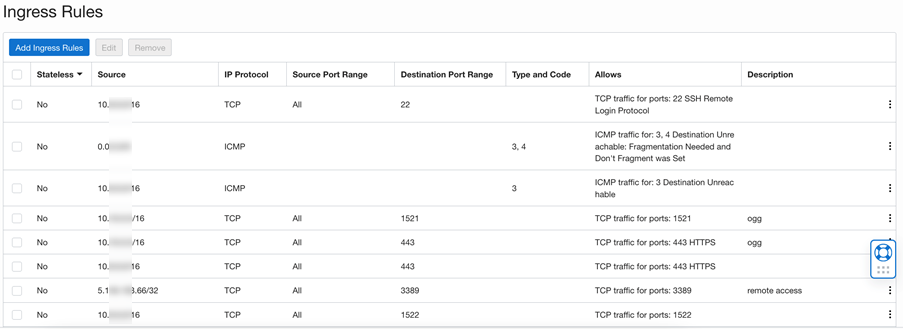
Then click on the security list name for your private subnet and add in the Ingress Rules the source CIDR IPs and Ports from Singapore database resources.
- In Region B (Singapore):
Repeat the same steps for the Region Singapore:
Select Singapore Region, go to OCI Console, click Networking, then Virtual Cloud Networks, then click on your VCN name, select your private subnet, then on the left-hand side select Security Lists as below:
Then click on the security list name for your private subnet and add in the Ingress Rules the source CIDR IPs and Ports of the OCI GoldenGate Deployment in Amsterdam and the databases resources (normally ports 443, 1521, 1522 are enough).
We are done with the OCI Networking setup! Let’s move on:
I have created one compute instance in each region to access the OCI-GG deployment and the databases. I won’t describe the steps do this, refer to this link if you need any help.
Finally, we will cover the GoldenGate configuration:
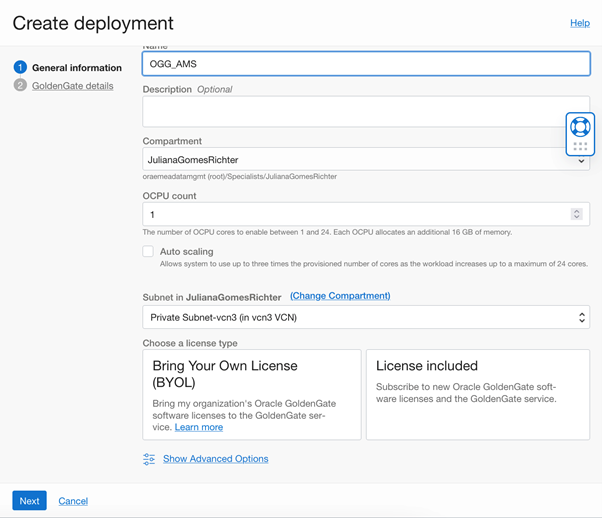
Create an OCI-GG Deployment in Amsterdam (Region A). Ensure that you use VCN A in Region A, which was peered with VCN B in Region B.
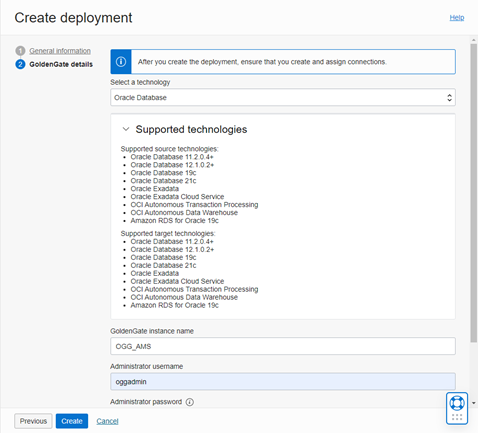
Go to OCI Console, click on Oracle Databases, then click on GoldenGate and press Create Deployment:
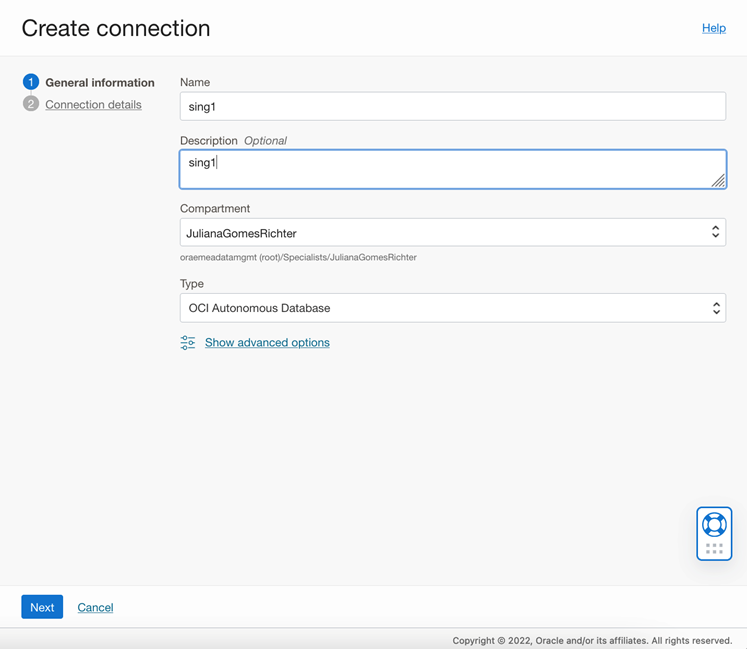
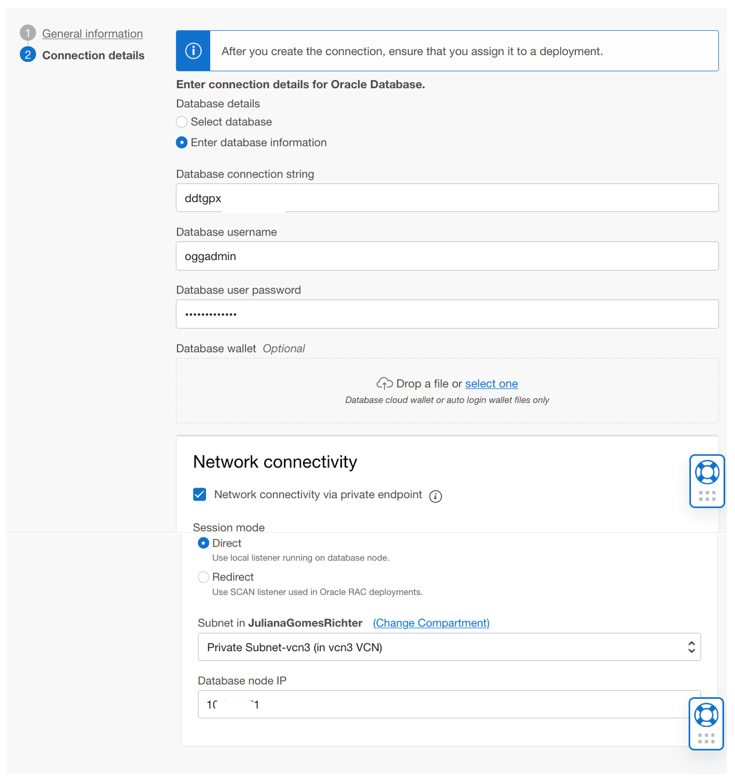
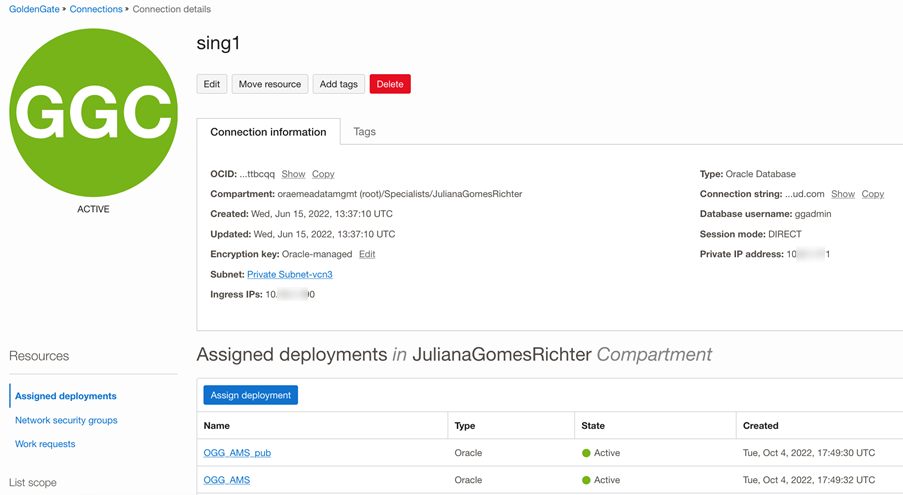
Now, create a new connection for the database in Singapore and assign it to the OCI GoldenGate deployment in Amsterdam. Learn more about connection creation here.
Assign the new connection to OGG_AMS Deployment:
Notes:
In my case, I use Autonomous Databases (ADB), but if you have an on-prem databases or Oracle Database Systems in OCI use the appropriate service names.
- Enter <Database FQDN>:1522/<service name> in the Database Connection String field.
- You can get this information from the ADB Details page.
- Don’t forget to upload database wallets if you have any.
- Select Network Connectivity via Private Endpoint.
- Enter the Private Endpoint IP of the database host in the Database node IP field.
- For the Subnet field, select the Subnet included in the VCN you peered to VCN A (Region A).
If you run into any connectivity issues, please refer to this blog: Troubleshoot network connectivity issues in Oracle Cloud Infrastructure (OCI) GoldenGate.
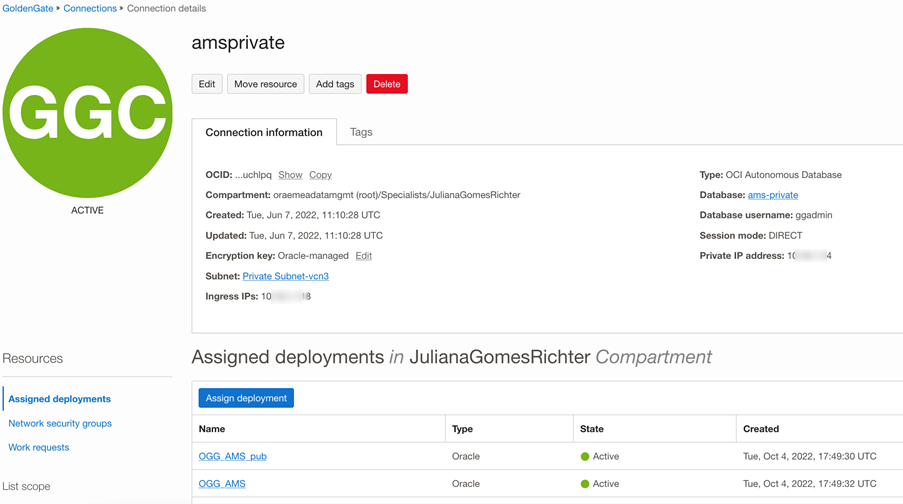
Perform the same steps to create a Connection for the database running in AMS and assign it to the OCI-GG Deployment in AMS.
Good work so far, we have a few remaining steps to setup the database users and tables we want to work with:
In AMS DB:
ALTER DATABASE ADD SUPPLEMENTAL LOG DATA;
Alter pluggable database add supplemental log data;
CREATE USER “SRC_OCIGGLL” IDENTIFIED BY “*********”;
GRANT CREATE SESSION TO “SRC_OCIGGLL”;
ALTER USER “SRC_OCIGGLL” ACCOUNT UNLOCK;
GRANT CONNECT, RESOURCE, DWROLE TO “SRC_OCIGGLL”;
GRANT UNLIMITED TABLESPACE TO “SRC_OCIGGLL”;
CREATE TABLE “SRC_OCIGGLL”.”SRC_CITY”
( “CITY_ID” NUMBER(10,0),
“CITY” VARCHAR2(50 BYTE),
“REGION_ID” NUMBER(10,0),
“POPULATION” NUMBER(10,0),
“TIME_STAMP” DATE
) SEGMENT CREATION IMMEDIATE
PCTFREE 10 PCTUSED 40 INITRANS 1 MAXTRANS 255
NOCOMPRESS LOGGING
STORAGE(INITIAL 65536 NEXT 1048576 MINEXTENTS 1 MAXEXTENTS 2147483645
PCTINCREASE 0 FREELISTS 1 FREELIST GROUPS 1
BUFFER_POOL DEFAULT FLASH_CACHE DEFAULT CELL_FLASH_CACHE DEFAULT)
;
In SIN DB:
—Target Schema
CREATE USER “SRCMIRROR_OCIGGLL” IDENTIFIED BY “S4$eqznhad123”;
GRANT CREATE SESSION TO “SRCMIRROR_OCIGGLL”;
ALTER USER “SRCMIRROR_OCIGGLL” ACCOUNT UNLOCK;
GRANT CONNECT, RESOURCE, DWROLE TO “SRCMIRROR_OCIGGLL”;
GRANT UNLIMITED TABLESPACE TO “SRCMIRROR_OCIGGLL”;
CREATE TABLE “SRCMIRROR_OCIGGLL”.”SRC_CITY”
( “CITY_ID” NUMBER(10,0),
“CITY” VARCHAR2(50 BYTE),
“REGION_ID” NUMBER(10,0),
“POPULATION” NUMBER(10,0),
“TIME_STAMP” DATE
) SEGMENT CREATION IMMEDIATE
PCTFREE 10 PCTUSED 40 INITRANS 1 MAXTRANS 255
NOCOMPRESS LOGGING
STORAGE(INITIAL 65536 NEXT 1048576 MINEXTENTS 1 MAXEXTENTS 2147483645
PCTINCREASE 0 FREELISTS 1 FREELIST GROUPS 1
BUFFER_POOL DEFAULT FLASH_CACHE DEFAULT CELL_FLASH_CACHE DEFAULT)
;
alter table SRCMIRROR_OCIGGLL.SRC_CITY add GGOPTYPE varchar2(10);
alter table SRCMIRROR_OCIGGLL.SRC_CITY add GGCSN number;
alter table SRCMIRROR_OCIGGLL.SRC_CITY add GGCOMMITTIMESTAMP date;
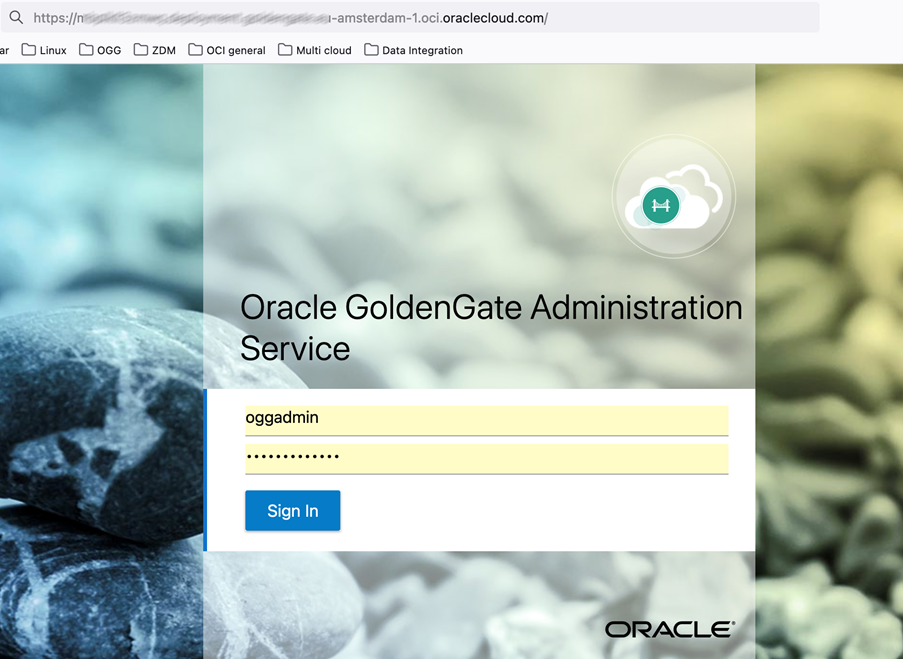
Locate the OCI GoldenGate Console URL to access the OGG_AMS user interface:
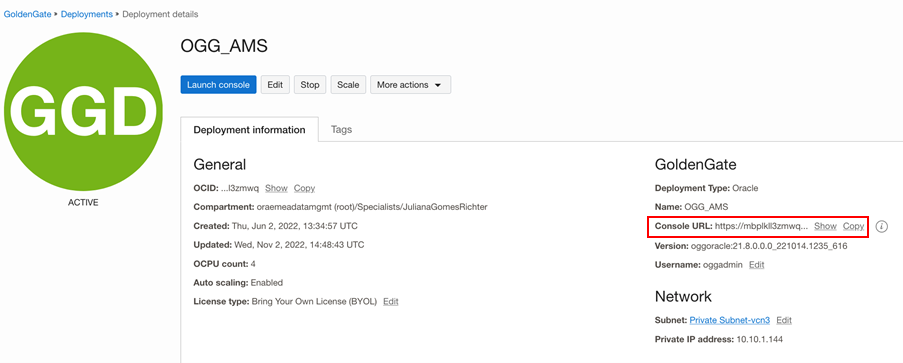
Note that the Console URL can be found on the Deployment Details page as above:
- In this example, we have deployed OCI-GG in a private subnet, you will need either a Bastion service or a Compute instance running on the same Subnet to access OCI-GG Console URL. More information is available here.
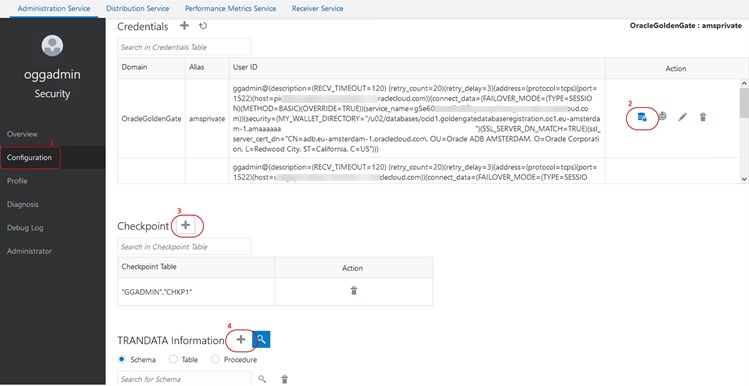
- After logging in, follow the steps below to create a checkpoint table, and add trandata on the source database:
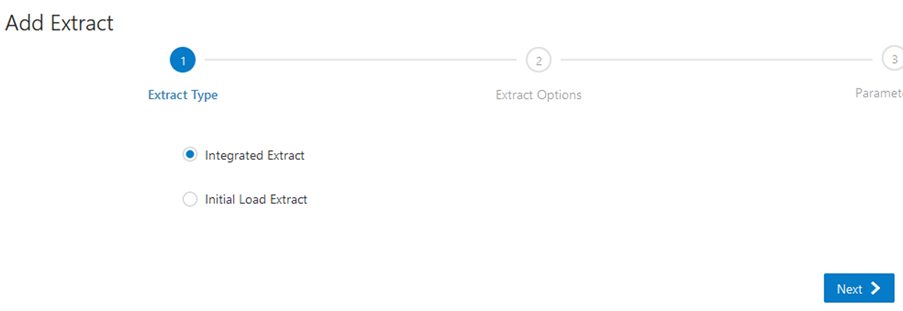
- Create an Extract:

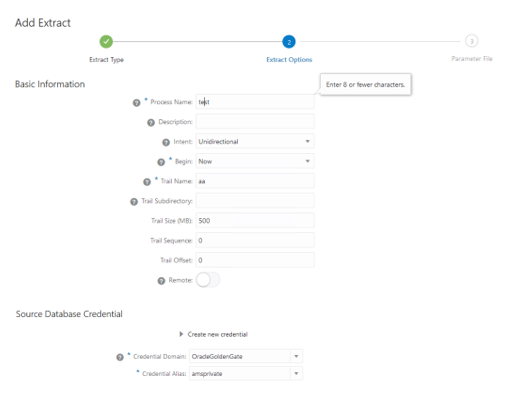
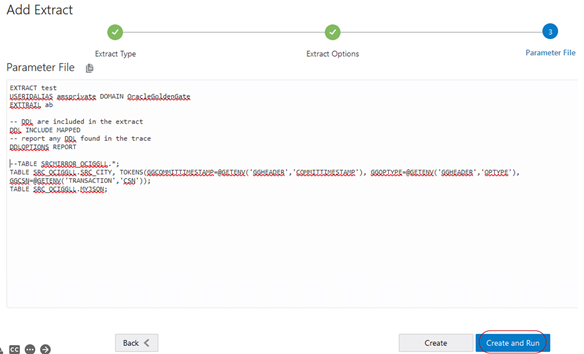
Here is the content of the Parameter file:
EXTRACT test
USERIDALIAS amsprivate DOMAIN OracleGoldenGate
EXTTRAIL ab
— DDL are included in the extract
DDL INCLUDE MAPPED
— report any DDL found in the trace
DDLOPTIONS REPORT
TRANLOGOPTIONS INTEGRATEDPARAMS (_LOGMINER_READ_BUFFERS 256)
FLUSHCSECS 1
CHECKPOINTSECS 1
EOFDELAYCSECS 1
–TABLE SRCMIRROR_OCIGGLL.*;
TABLE SRC_OCIGGLL.SRC_CITY, TOKENS(GGCOMMITTIMESTAMP=@GETENV(‘GGHEADER’,’COMMITTIMESTAMP’), GGOPTYPE=@GETENV(‘GGHEADER’,’OPTYPE’), GGCSN=@GETENV(‘TRANSACTION’,’CSN’));
TABLE SRC_OCIGGLL.MYJSON;
Information on Tokens:
The tokens used here will return information about the Oracle GoldenGate environment, which are available in the header of the GoldenGate trail record.
In my example, the first column “GGCOMMITTIMESTAMP” will return the commit timestamp of the transaction, the second column “GGOPTYPE” will return the operation type (complete list here) and the third column “GGCSN” will return the system change number (SCN) of the transaction.
These values will be inserted into the target table with the same column names as above. Oracle GoldenGate tokens are quite useful for auditing purposes or to maintain a logging table, among other use cases. Learn more about it here.
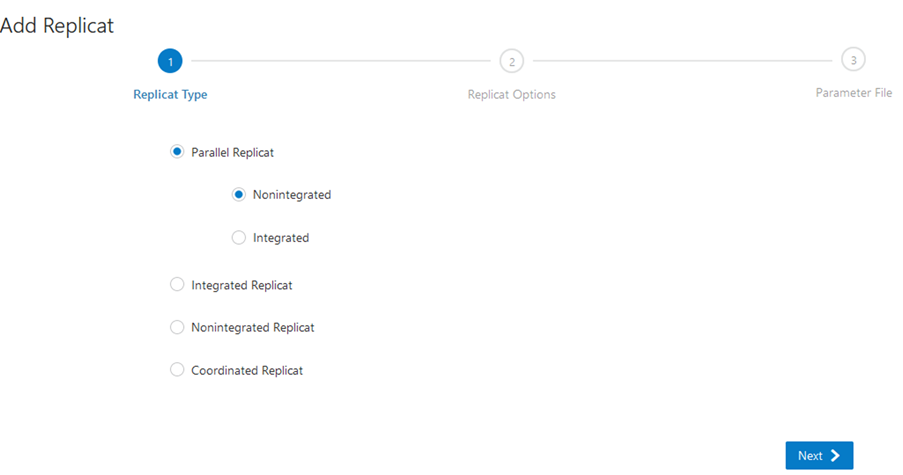
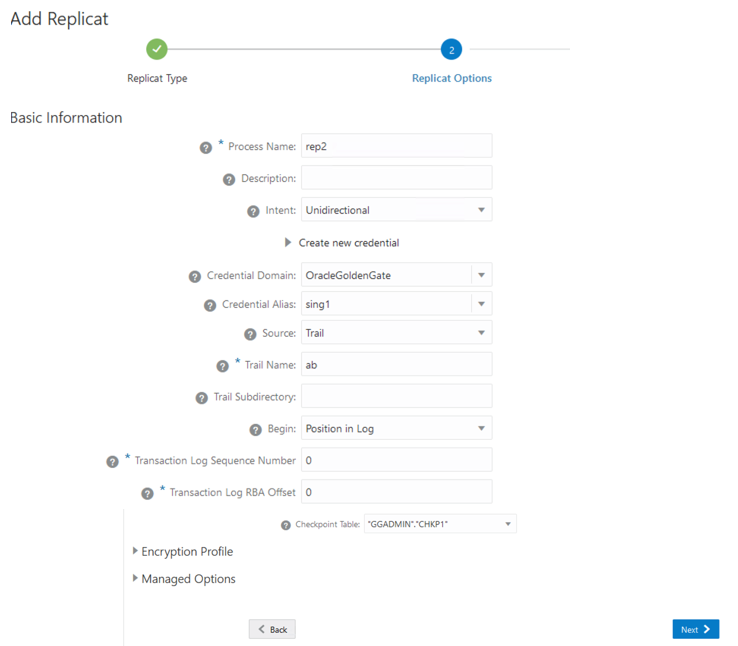
- Create a Replicat:

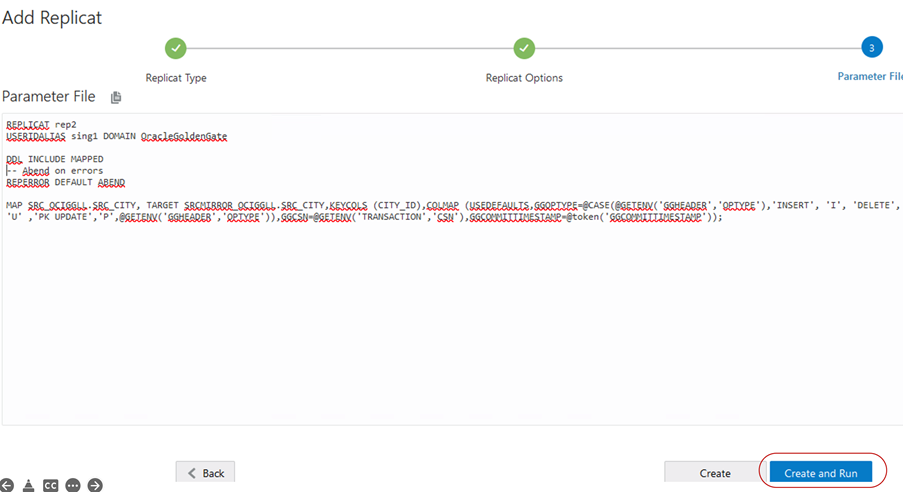
Here is the content of the Parameter file:
REPLICAT rep2
USERIDALIAS sing1 DOMAIN OracleGoldenGate
DDL INCLUDE MAPPED
— Abend on errors
REPERROR DEFAULT ABEND
MAP SRC_OCIGGLL.SRC_CITY, TARGET SRCMIRROR_OCIGGLL.SRC_CITY,KEYCOLS (CITY_ID),COLMAP (USEDEFAULTS,GGOPTYPE=@CASE(@GETENV(‘GGHEADER’,’OPTYPE’),’INSERT’, ‘I’, ‘DELETE’, ‘D’, ‘SQL COMPUPDATE’, ‘U’ ,’PK UPDATE’,’P’,@GETENV(‘GGHEADER’,’OPTYPE’)),GGCSN=@GETENV(‘TRANSACTION’,’CSN’),GGCOMMITTIMESTAMP=@token(‘GGCOMMITTIMESTAMP’));
Now, insert some data in the database in Amsterdam:
BEGIN
EXECUTE IMMEDIATE ‘TRUNCATE TABLE SRC_OCIGGLL.SRC_CITY’ ;
FOR v_LoopCounter IN 1..1000000 LOOP
Insert into SRC_OCIGGLL.SRC_CITY (CITY_ID,CITY,REGION_ID,POPULATION, time_stamp) values (v_LoopCounter,’Houston’,20,743113,sysdate);
commit;
END LOOP;
COMMIT;
END;
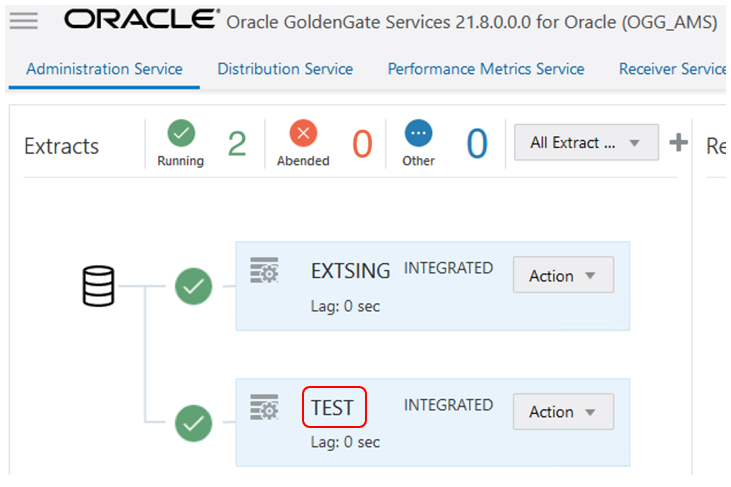
After a few seconds, we can see data flowing between the two regions. To verify if data has been replicated, Oracle GoldenGate provides table statistics information on Extract and Replicat processes.
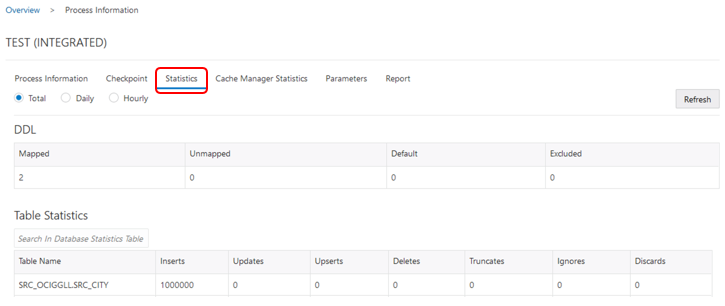
Go to the Administration Service, click on the name of the process, then select Statistics as below:
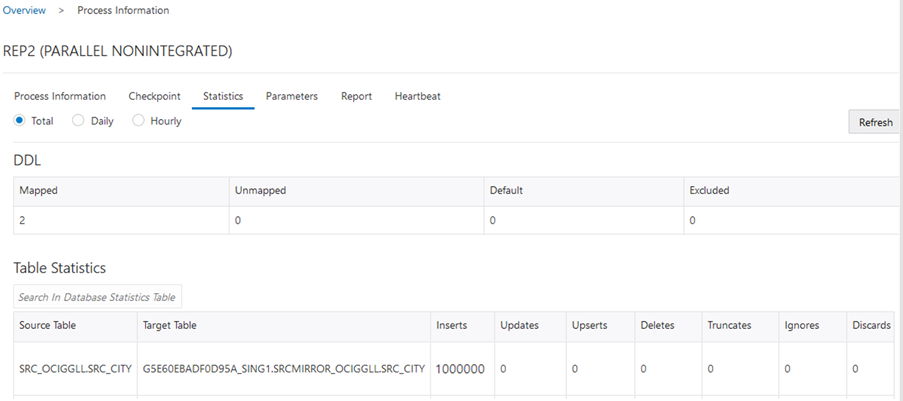
The same information can be seen in the Statistics tab of the Replicat process:
I hope this was helpful. If you have any doubts, feel free to reach out to me through social media platforms.
You can use these links to learn more about the topics discussed in these links:
Stay tuned for new blogs coming up in the future!