Oracle Data Integrator 12c such as Pivot or Unpivot. In this blog post we will
walk you through an example of how to use the new Pivot Component.
You can use the following SQL statements to recreate this
example in your environment. It will create the source (PIVOT_TEST) and target
(TRG_PIVOT_TEST) tables used in this article in your database then you can reverse engineer them in ODI.
( year NUMBER, quarter VARCHAR2(255), sales NUMBER );
insert into pivot_test
values (2012, ‘Q1’, 10.5); insert into pivot_test
values (2012, ‘Q2’, 11.4); insert into pivot_test
values (2012, ‘Q3’, 9.5); insert into pivot_test
values (2012, ‘Q4’, 8.7); insert into pivot_test
values (2013, ‘Q1’, 9.5); insert into pivot_test
values (2013, ‘Q2’, 10.5); insert into pivot_test
values (2013, ‘Q3’, 10.3); insert into pivot_test
values (2013, ‘Q4’, 7.6); commit;
CREATE TABLE
trg_pivot_test ( year NUMBER, q1_sales NUMBER, q2_sales NUMBER, q3_sales NUMBER, q4_sales NUMBER );
Our goal is to pivot the data on the Quarter column when
going from PIVOT_TEST into TRG_PIVOT_TEST as shown below:

Follow these steps to add and configure a Pivot Component in
an ODI 12c Mapping:
- First
add the Source table PIVOT_TEST into your Mapping, to do so drag and drop the PIVOT_TEST
datastore from the Models into the Mapping. - Next
add a Pivot component into the Mapping. This is done by clicking on the Pivot
Component in the Component palette and then clicking on the Mapping diagram. A new PIVOT component will appear in the
Mapping: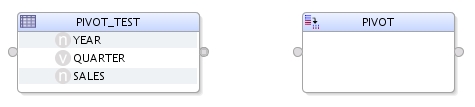
- Drag
and drop the YEAR column from PIVOT_TEST into the PIVOT component. There is no
need to add the QUARTER and SALES attributes yet, they will be used later in
the Row Locator and Attributes sections.
- Click
on the PIVOT component and in the Properties window select the Row Locator
panel. In our example the Row Locator will be the QUARTER column which is
transposed from rows into 4 columns in our target table TRG_PIVOT_TEST.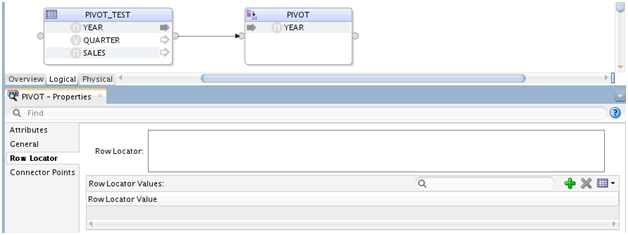
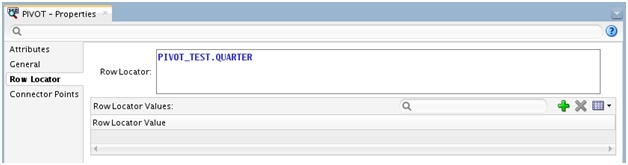
- Open
up the Expression Editor next to the Row Locator field and select the QUARTER
column from our source table PIVOT_TEST. Then click OK.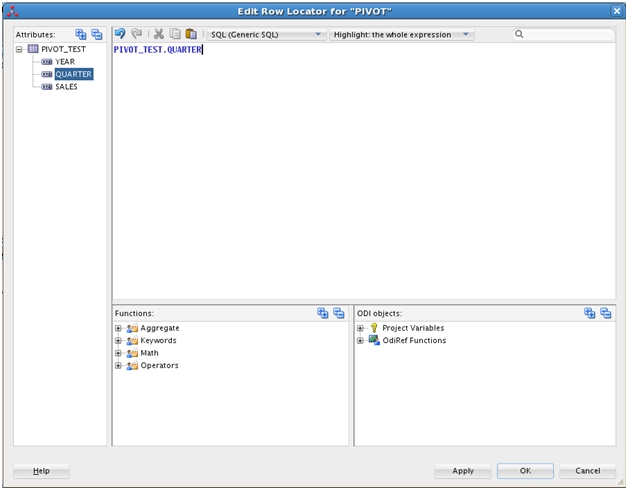
- Now
specify the various values the QUARTER column can take. This is done using the
Row Locator Values table. Click on the + icon under Row Locator Values and add
the 4 possible values: ‘Q1’, ‘Q2’, ‘Q3’ and ‘Q4’.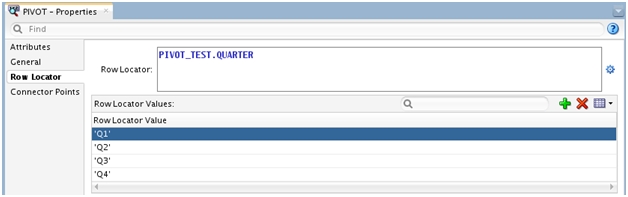
- Then
click on the Attributes panel and add the 4 output attributes which correspond
to each Row Locator values: Q1_SALES, Q2_SALES, Q3_SALES and Q4_SALES.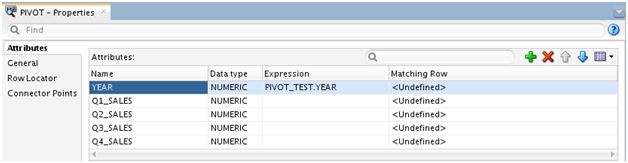
- Next
select a Matching Row for the output attributes you just created. The Matching
Row values come from the Row Locator Values entered earlier.
Pick ‘Q1’ for Q1_SALES, ‘Q2’ for Q2_SALES, ‘Q3’ for Q3_SALES and ‘Q4’ for
Q4_SALES.
Finally enter an expression for each of the new attributes, use
PIVOT_TEST.SALES for all of them as we are interested in getting the Sales data
into those columns. You can type the expression using the Expression Editor or
drag and drop the SALES column from PIVOT_TEST into each of the newly created
attributes.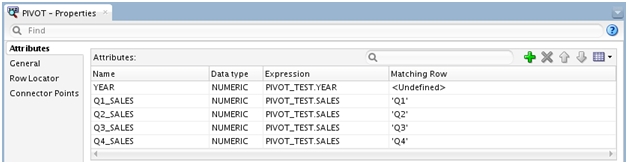
- Finally
add the target table TRG_PIVOT_TEST and connect the PIVOT component to it. Unselect
the Create Attributes on Source checkbox in the Attribute Matching window and
click OK to finish the Mapping configuration.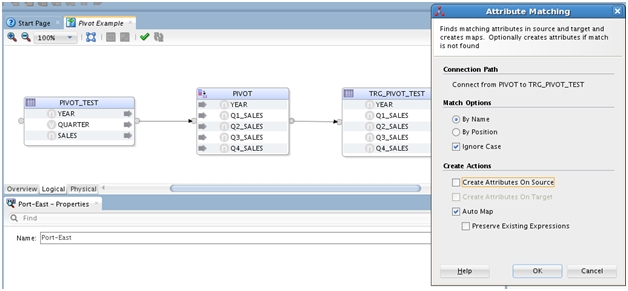
- In
this example you can use the default Physical settings for your Mapping.
Integration Type is set to Control Append by default and the IKM Oracle Insert is used. - Click
on Run to execute the Mapping, 2 inserts are performed and you should see the
following data in your target table.
- If
you review the generated code you will notice that ODI leverages the PIVOT
function on Oracle to perform such operation. The Pivot component supports
Oracle as well as any other database supported by ODI 12c.
You can recreate the following example using the ODI 12c
Getting Started VirtualBox image which is available on OTN: http://www.oracle.com/technetwork/middleware/data-integrator/odi-demo-2032565.html