Introduction
OCI GoldenGate Data Transforms is an ETL / ETL tool built upon the powerful engine of ODI, with a design graphical data transformations such as data flows and workflows to move and transform data between systems. Whether you’re new to Data Transforms or have past experience with Oracle Data Integrator, it’s helpful to familiarize yourself with these concepts before starting with OCI GoldenGate Data Transforms. See Terminology Information in the Using Data Transforms guide to learn more.
In case you are not familiar with OCI GoldenGate Data Transforms, please check this series of blogs to get started.
Oracle Fusion Applications are a suite of SaaS Applications where Enterprise Resource Planning (ERP) is included. In this blog, we will explore how to extract data from Fusion ERP using OCI GoldenGate Data Transforms.
OCI GoldenGate Data Transforms has a Business Intelligence Could Connector(BICC) connector that allow us to extract data directly from ERP Cloud.
The feature described in this blog applies to all Data Transforms deployment channels. To check whether Data Transforms in OCI GG is suitable for your usage, please refer to this blog .
Pre-requisites
- Fusion Cloud Application user with the role — ORA_ASM_APPLICATION_IMPLEMENTATION_ADMIN_ABSTRACT (A-TEAM article);
- Configure the external connection on Fusion (A-TEAM article).
- Access Token
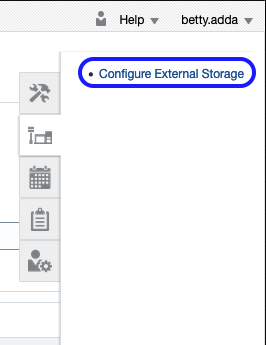
Configuring External Storage
To configure the External Storage on BICC go to https://<url fusion>/biacm:
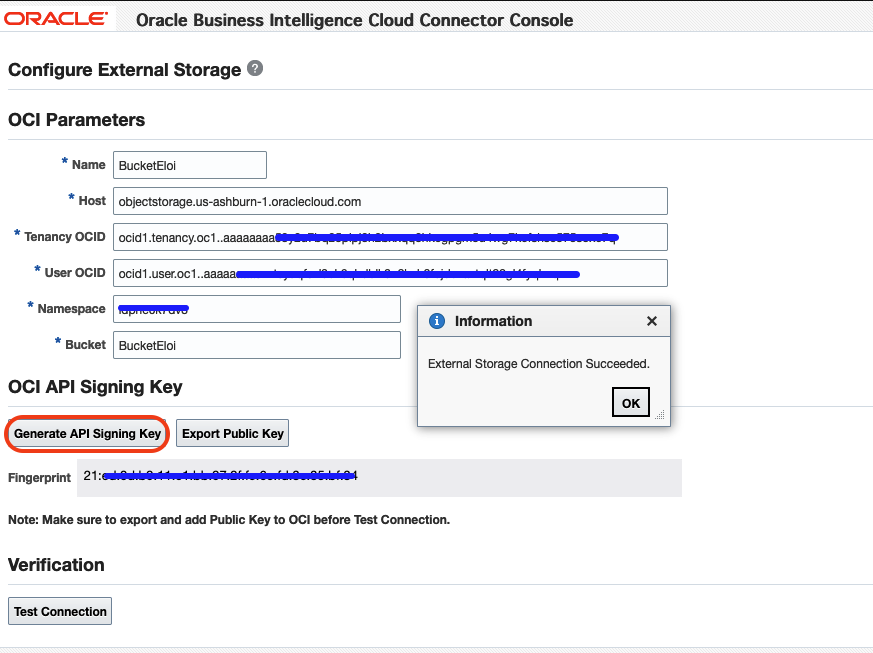
In the example below, the external storage connection name is BucketEloi, the same as my Bucket. Change the host based on your object storage location. First, click Generate API Signing Key and then Export Public Key. Add it to the API Signing Key in your OCI profile user. The Fingerprint must match on both sides. Then, click Test Connection. If you receive an error, save the connection and wait for one minute before trying again.
Creating ADW Connection
In order to successfully test the Autonomous Database (ADB) connection, we need to create a generic connection and assign it to the Data Transforms deployment so that it can recognize the ADB hostname and port.
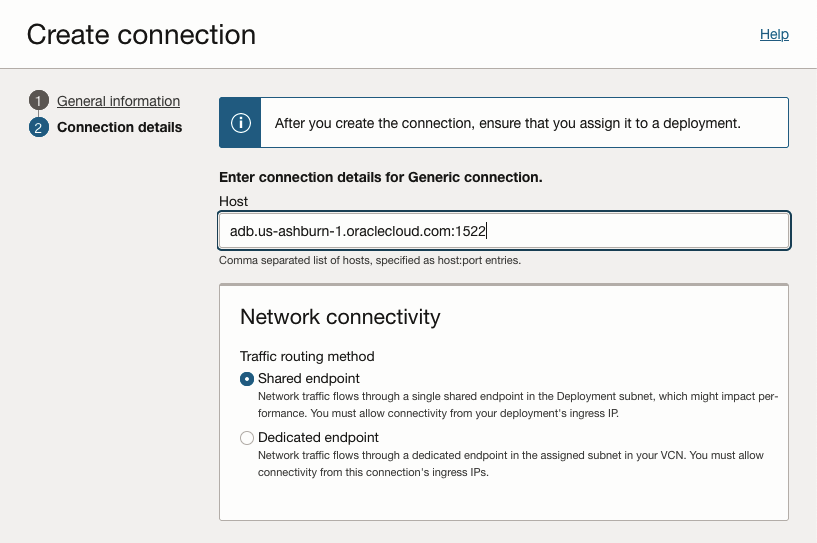
Go to OCI GoldenGate Connections and click on Create Connection:
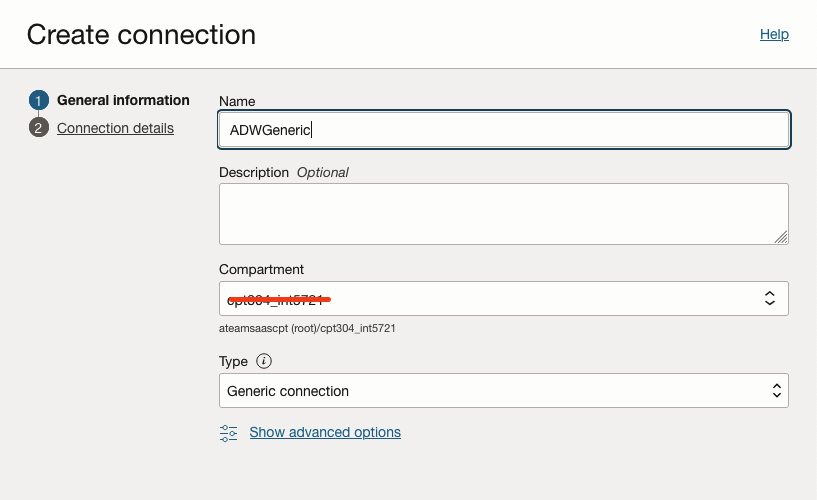
Change the ADB host based on ADB region. Depending on your network configuration, you might need to select the Dedicated Endpoint option.
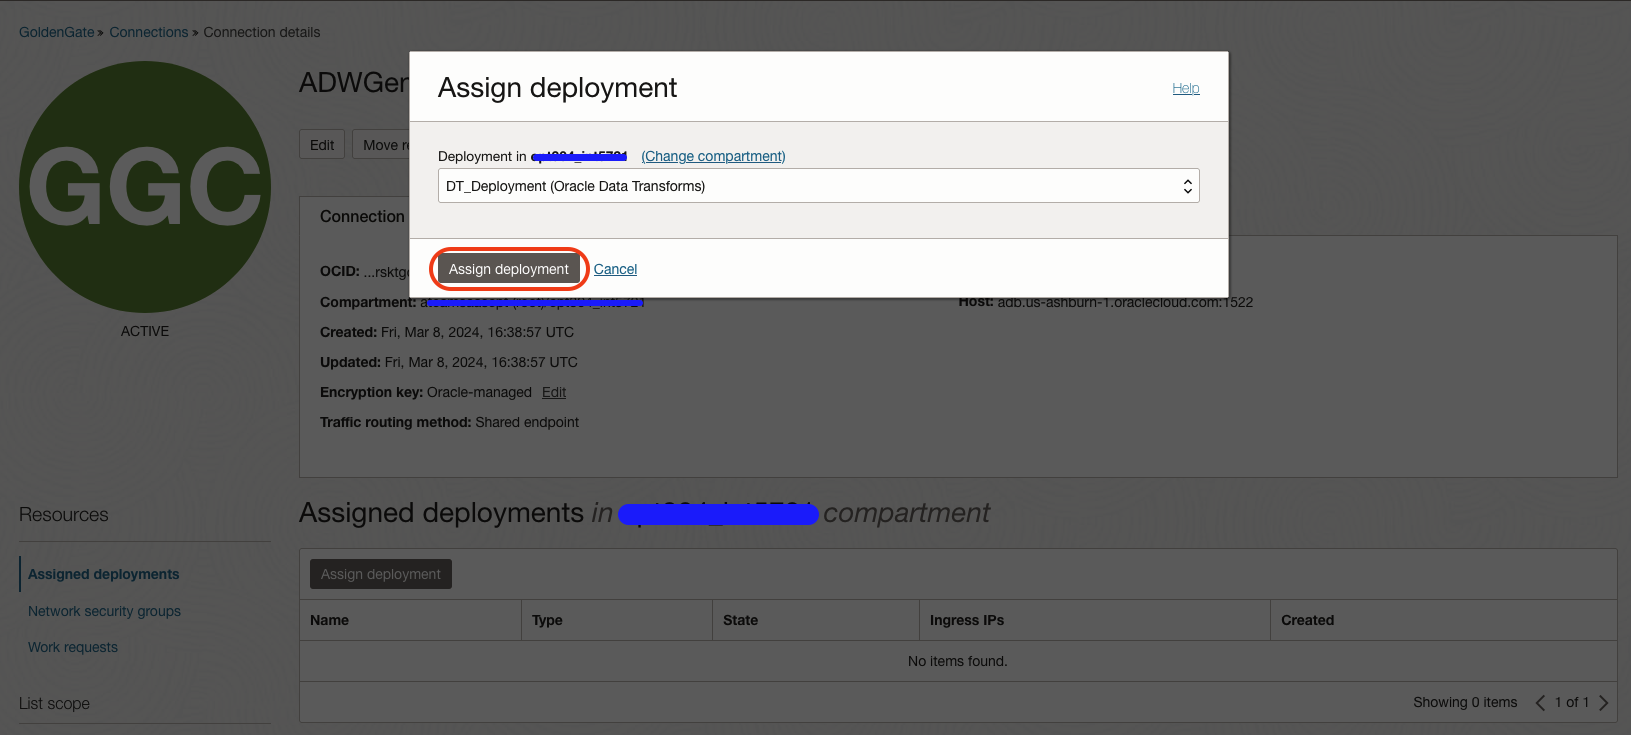
Now, assign the connection to Data Transforms deployment.
Creating ADW Connection on Data Transforms
Go to Connections, click on Create Connection and select Oracle. Click Next.
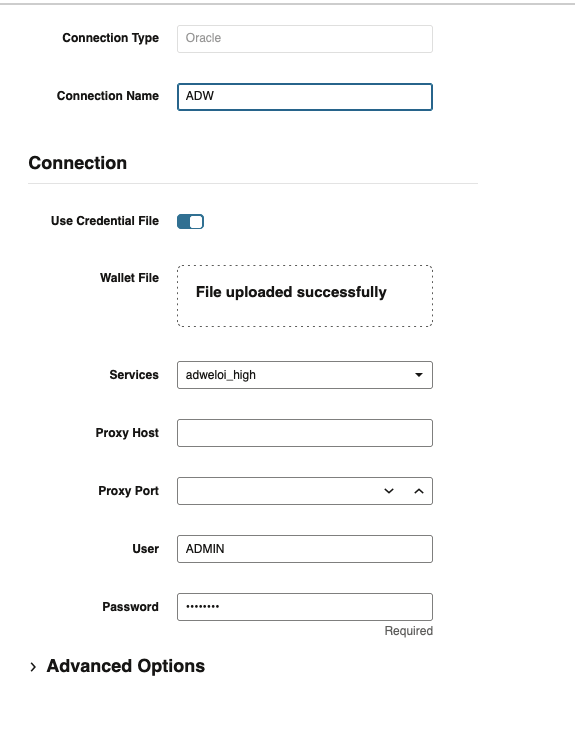
In my case, I’m using wallet, so I uploaded the wallet. Click Create.
Creating BICC Connection
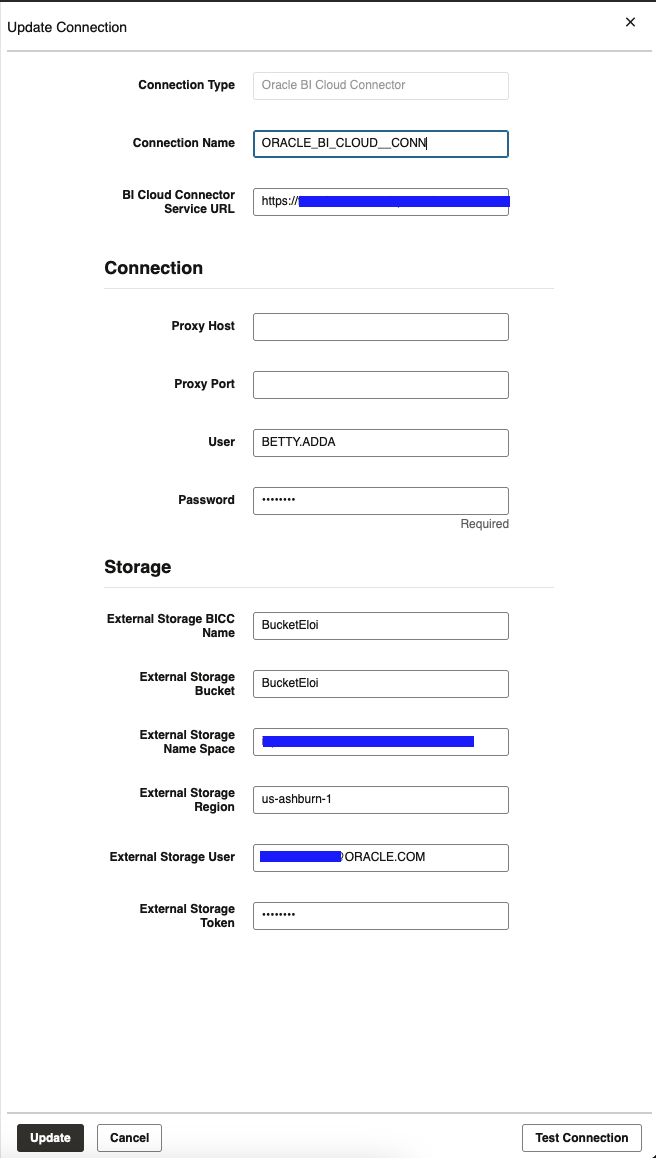
Go to Connections, click on Create Connection and select Oracle BI Cloud Connector. Click Next.
- BI Cloud Connector Service URL – https://<url fusion>
- External Storage BICC Name – It’s the connection name created in first step of this blog.
- External Storage User – Your OCI user name.
- External Storage Token – Token previously generated.
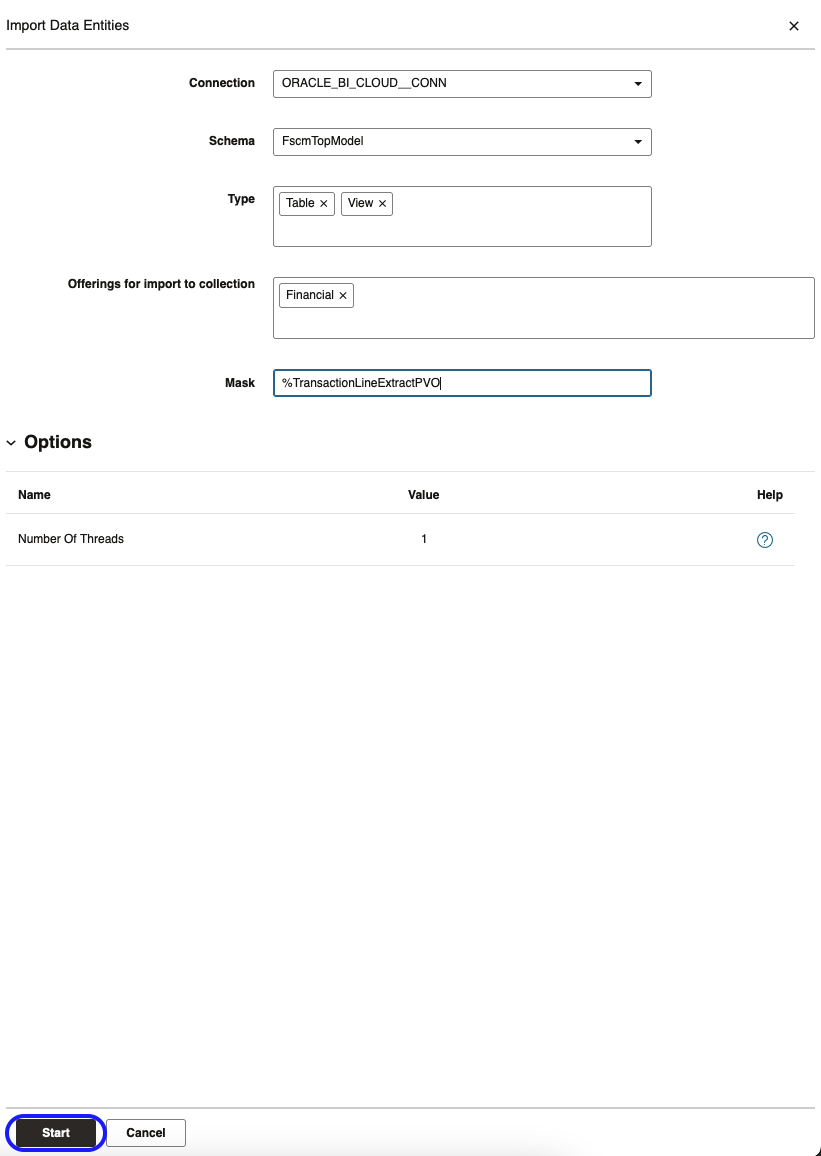
Import Data Entities
The next step is to import the metadata for Fusion ERP Public View Objects (PVO). You can find more information about the PVOs and the information you can extract here. In this example, I’m using the financial model (FscmTopModel) and I filtered by TransactionLineExtractPVO. Notice that I added the ‘%’ to avoid specifyingthe long prefix the PVOs have.
Click Start.
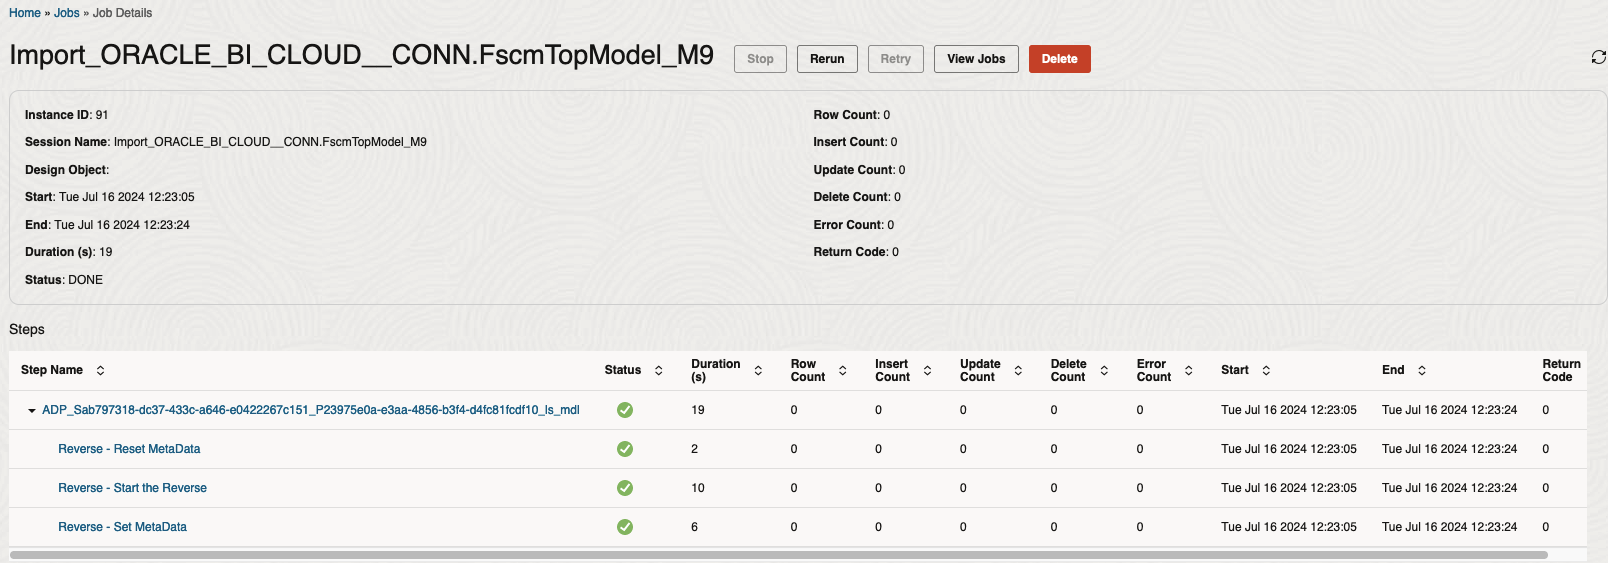
You can find more details about the import data entity in the job details:
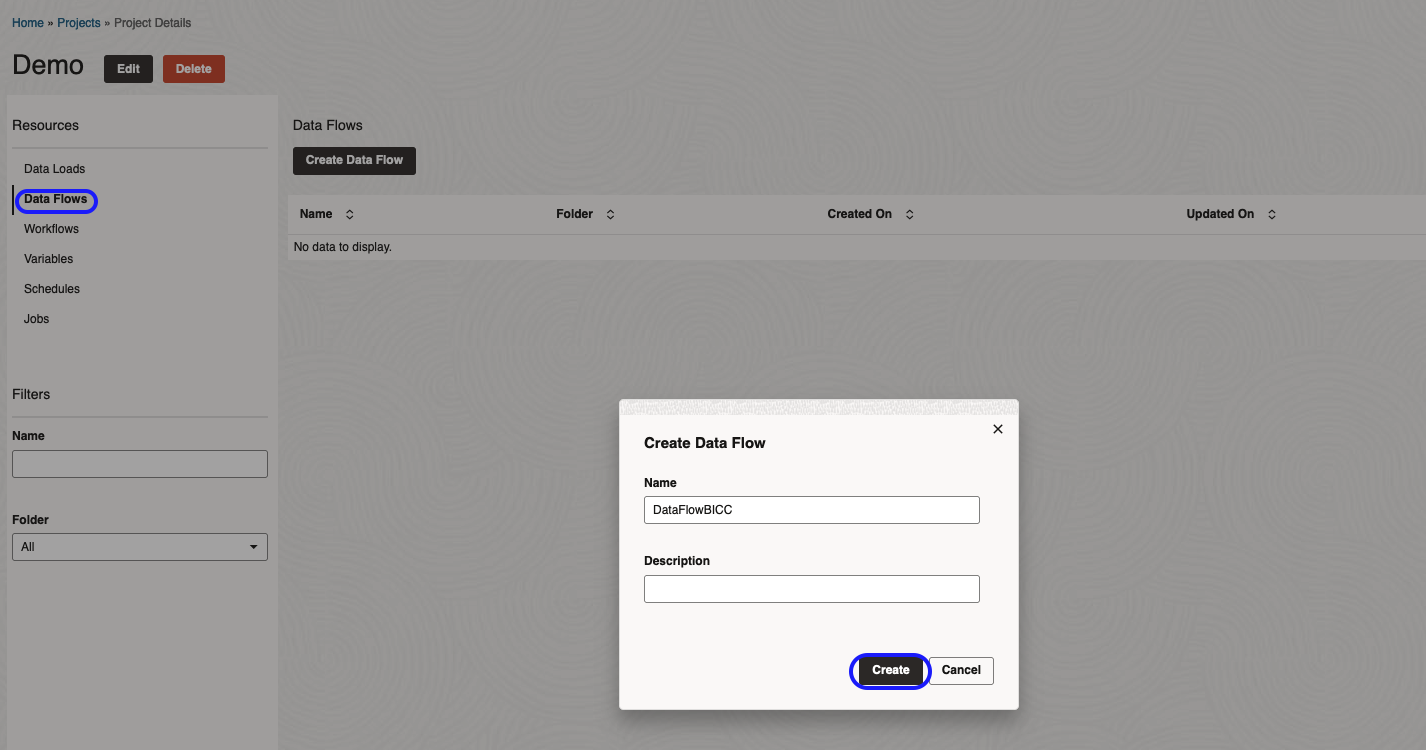
Creating Data Flow
Now that we have created the connections for the source and target and imported the source data entity, we can start creating the Data Flow. Go to Data Flows and click on Create Data Flow, and provide a Name.
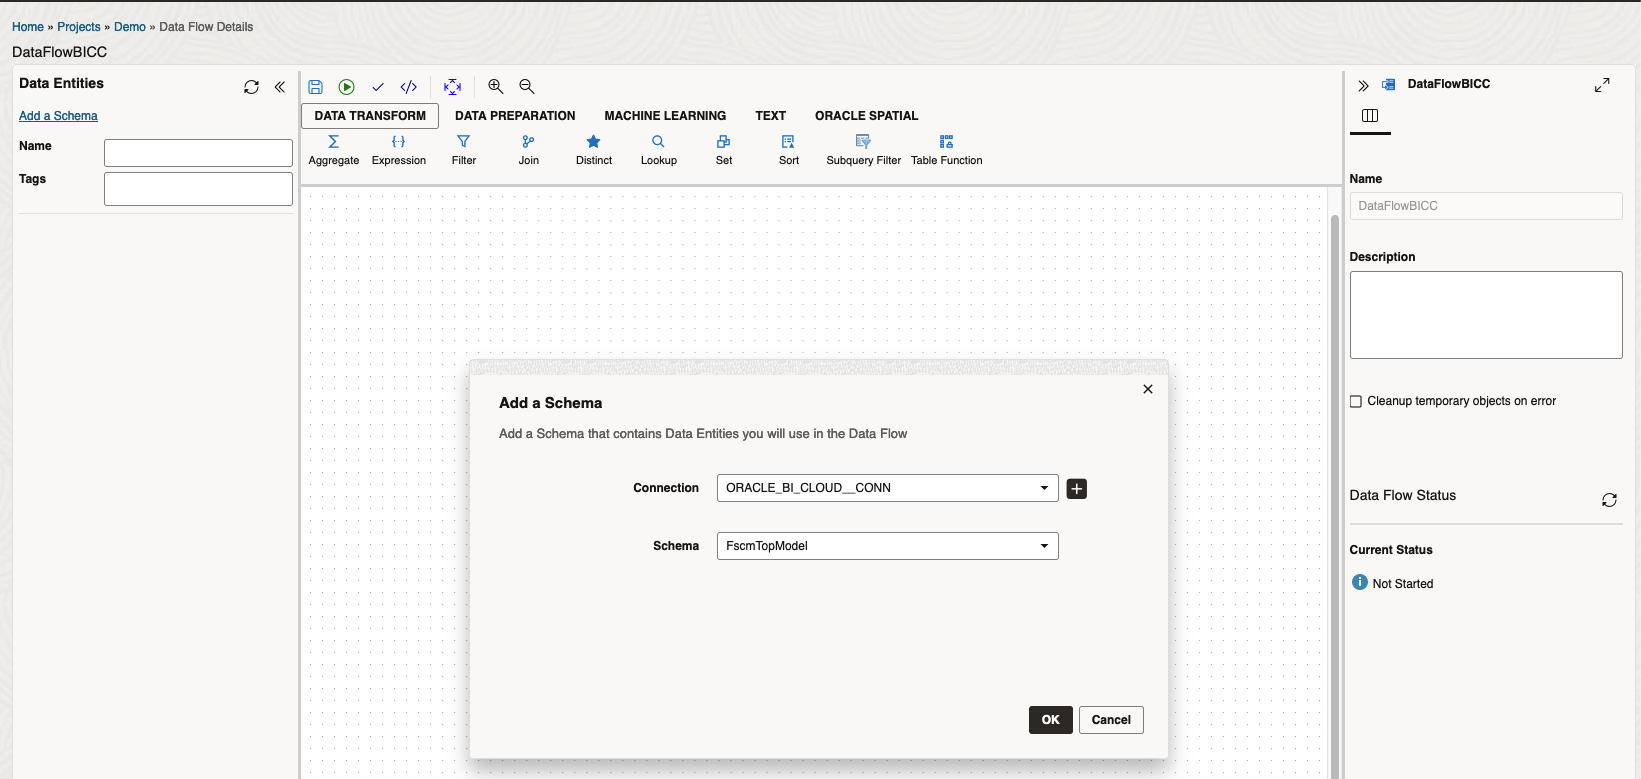
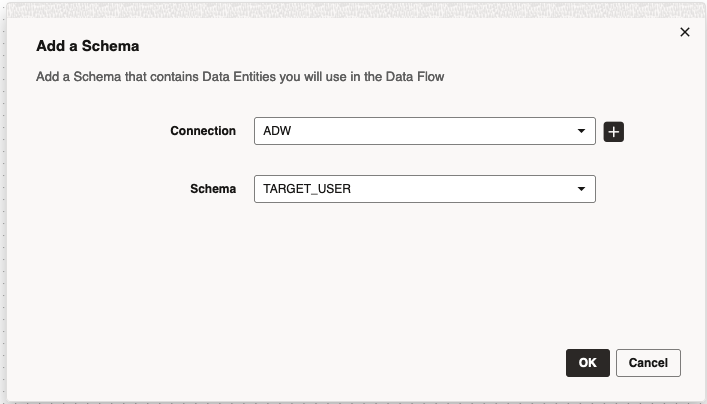
The first time you open the Data Flow, a window will pop up to configure the source schema. Select the Connection and Schema, then click OK.
Click on Add a Schema and add the target ADB schema:
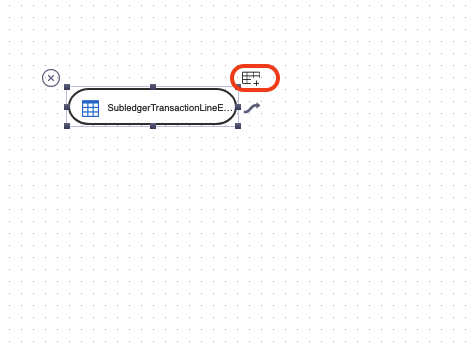
On left side, select the source data entity and drag and drop to panel. To create the target table, click on table icon:
Specify the table name and the Connection and Schema. Click Next to review the columns you want to use and click Save.

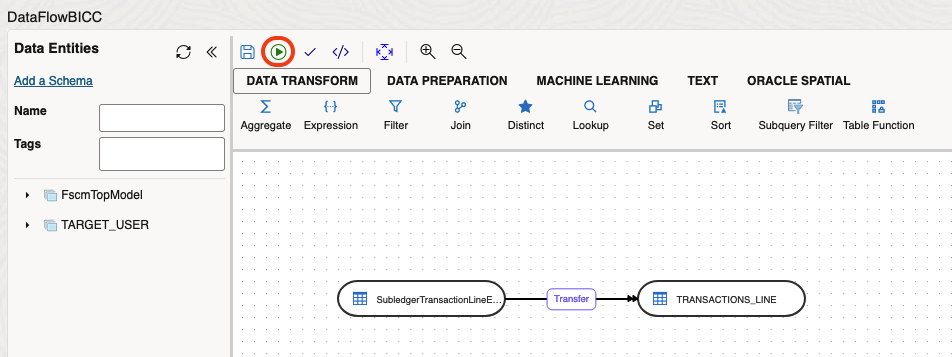
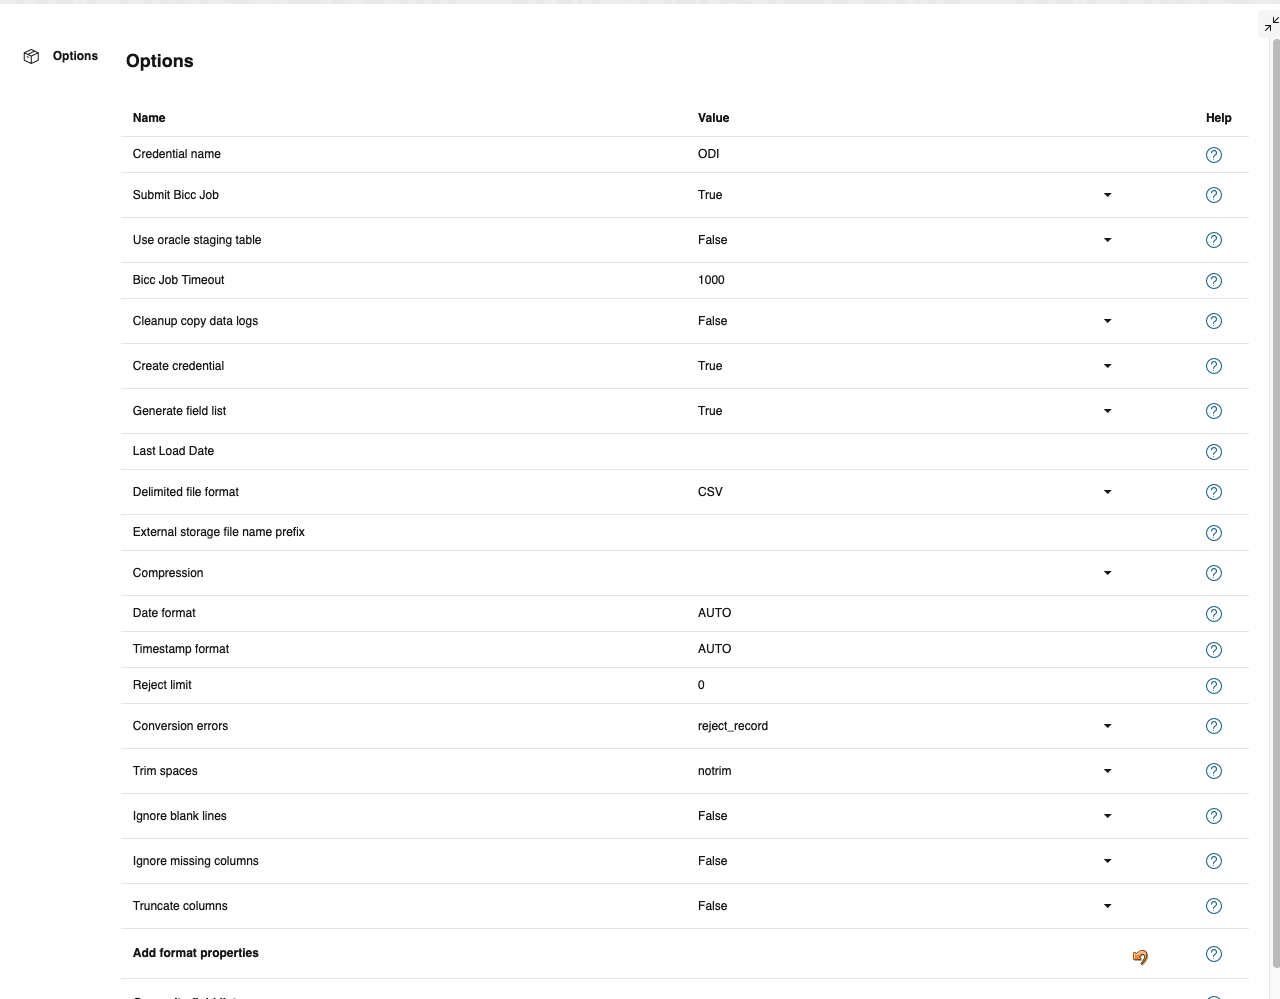
The next step is optional. In case you want to modify how Data Transforms configurations for BICC, you have to click on Transfer arrow:

On the right side you have the options. You can change the below configurations:
Now, you can execute the data flow by clicking on the green arrow:
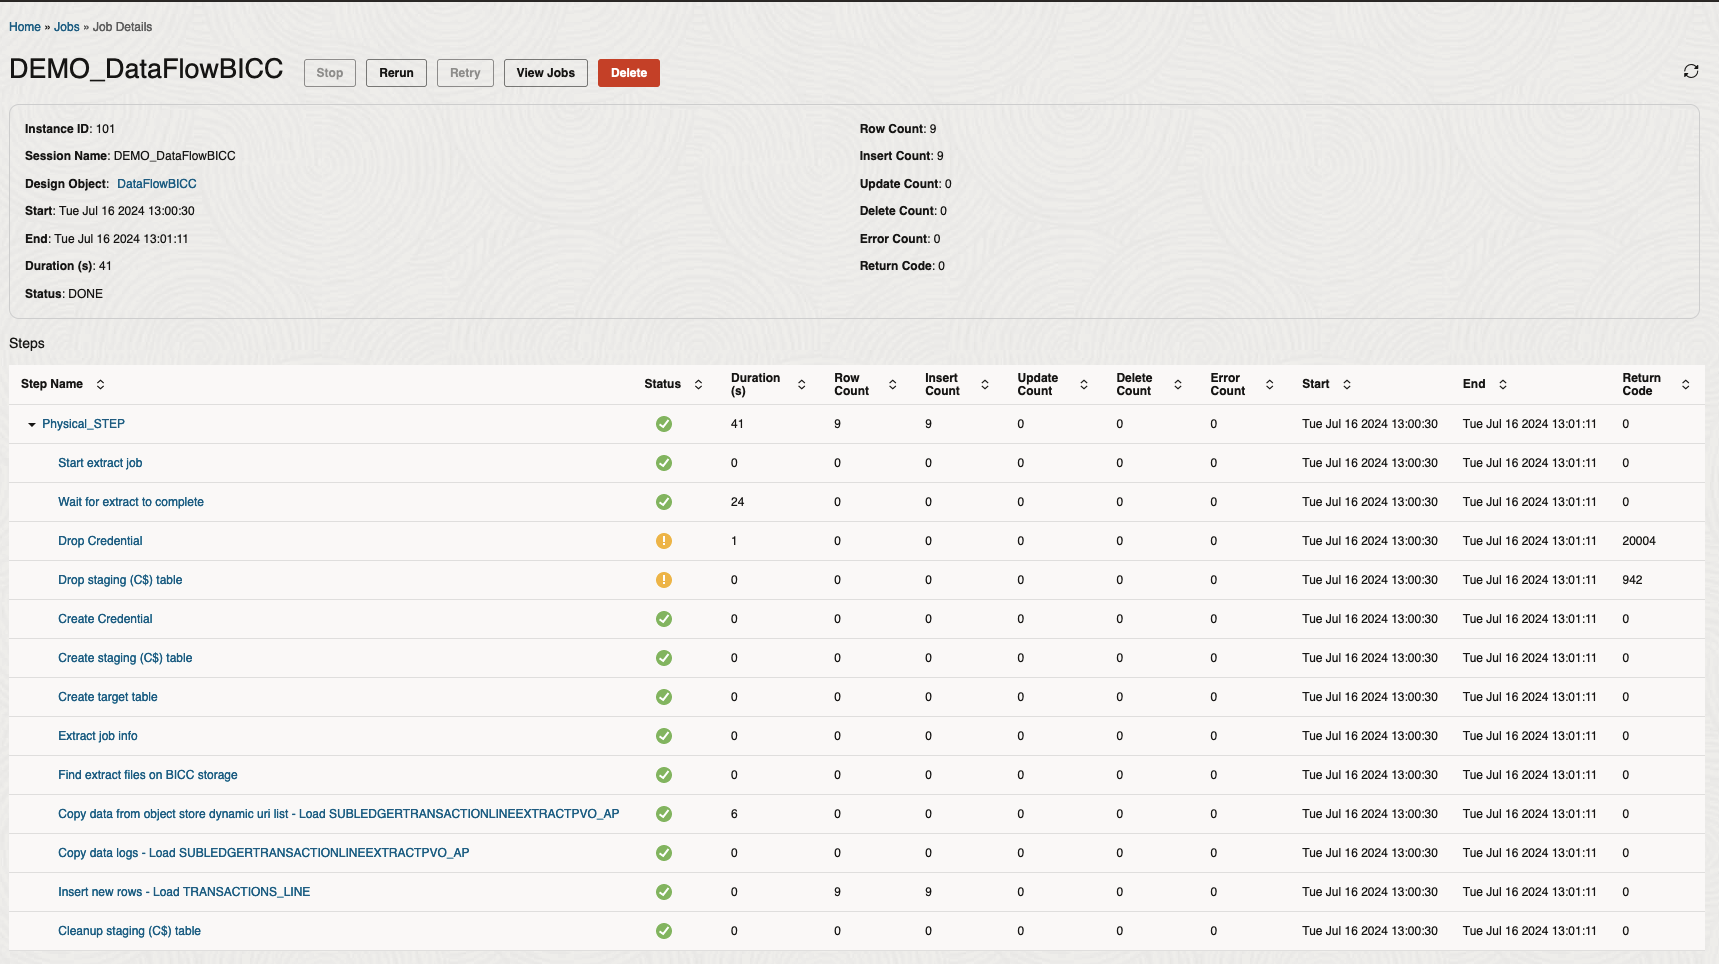
You can review the logs of the data flow on Jobs tab:
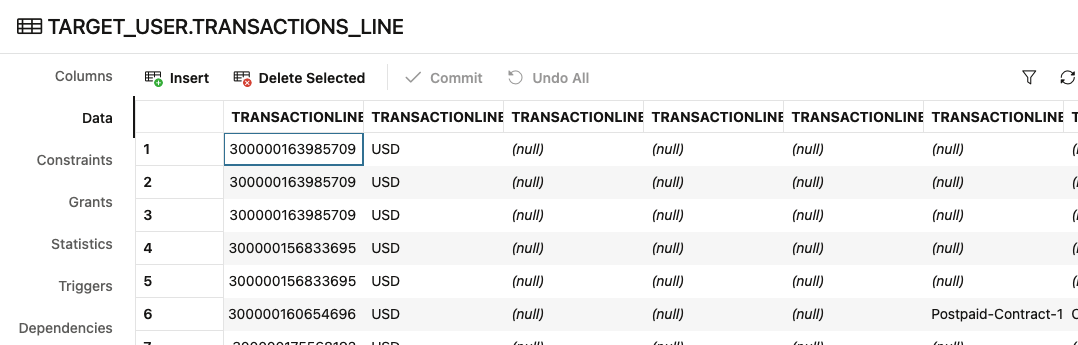
The data on ADW:
Conclusion
I hope that you have enjoyed this blog and that it can help you to start using Oracle GoldenGate Data Transforms.