We recently released a new deployment type in OCI GoldenGate called Data Transforms. This new deployment type adds batch ETL/ELT processing capabilities to the OCI GoldenGate unified data fabric platform.
In this fifth and last technical article in the Get Started with OCI GoldenGate Data Transforms series, we will focus on creating Workflows and managing Job executions.
What is a Workflow?
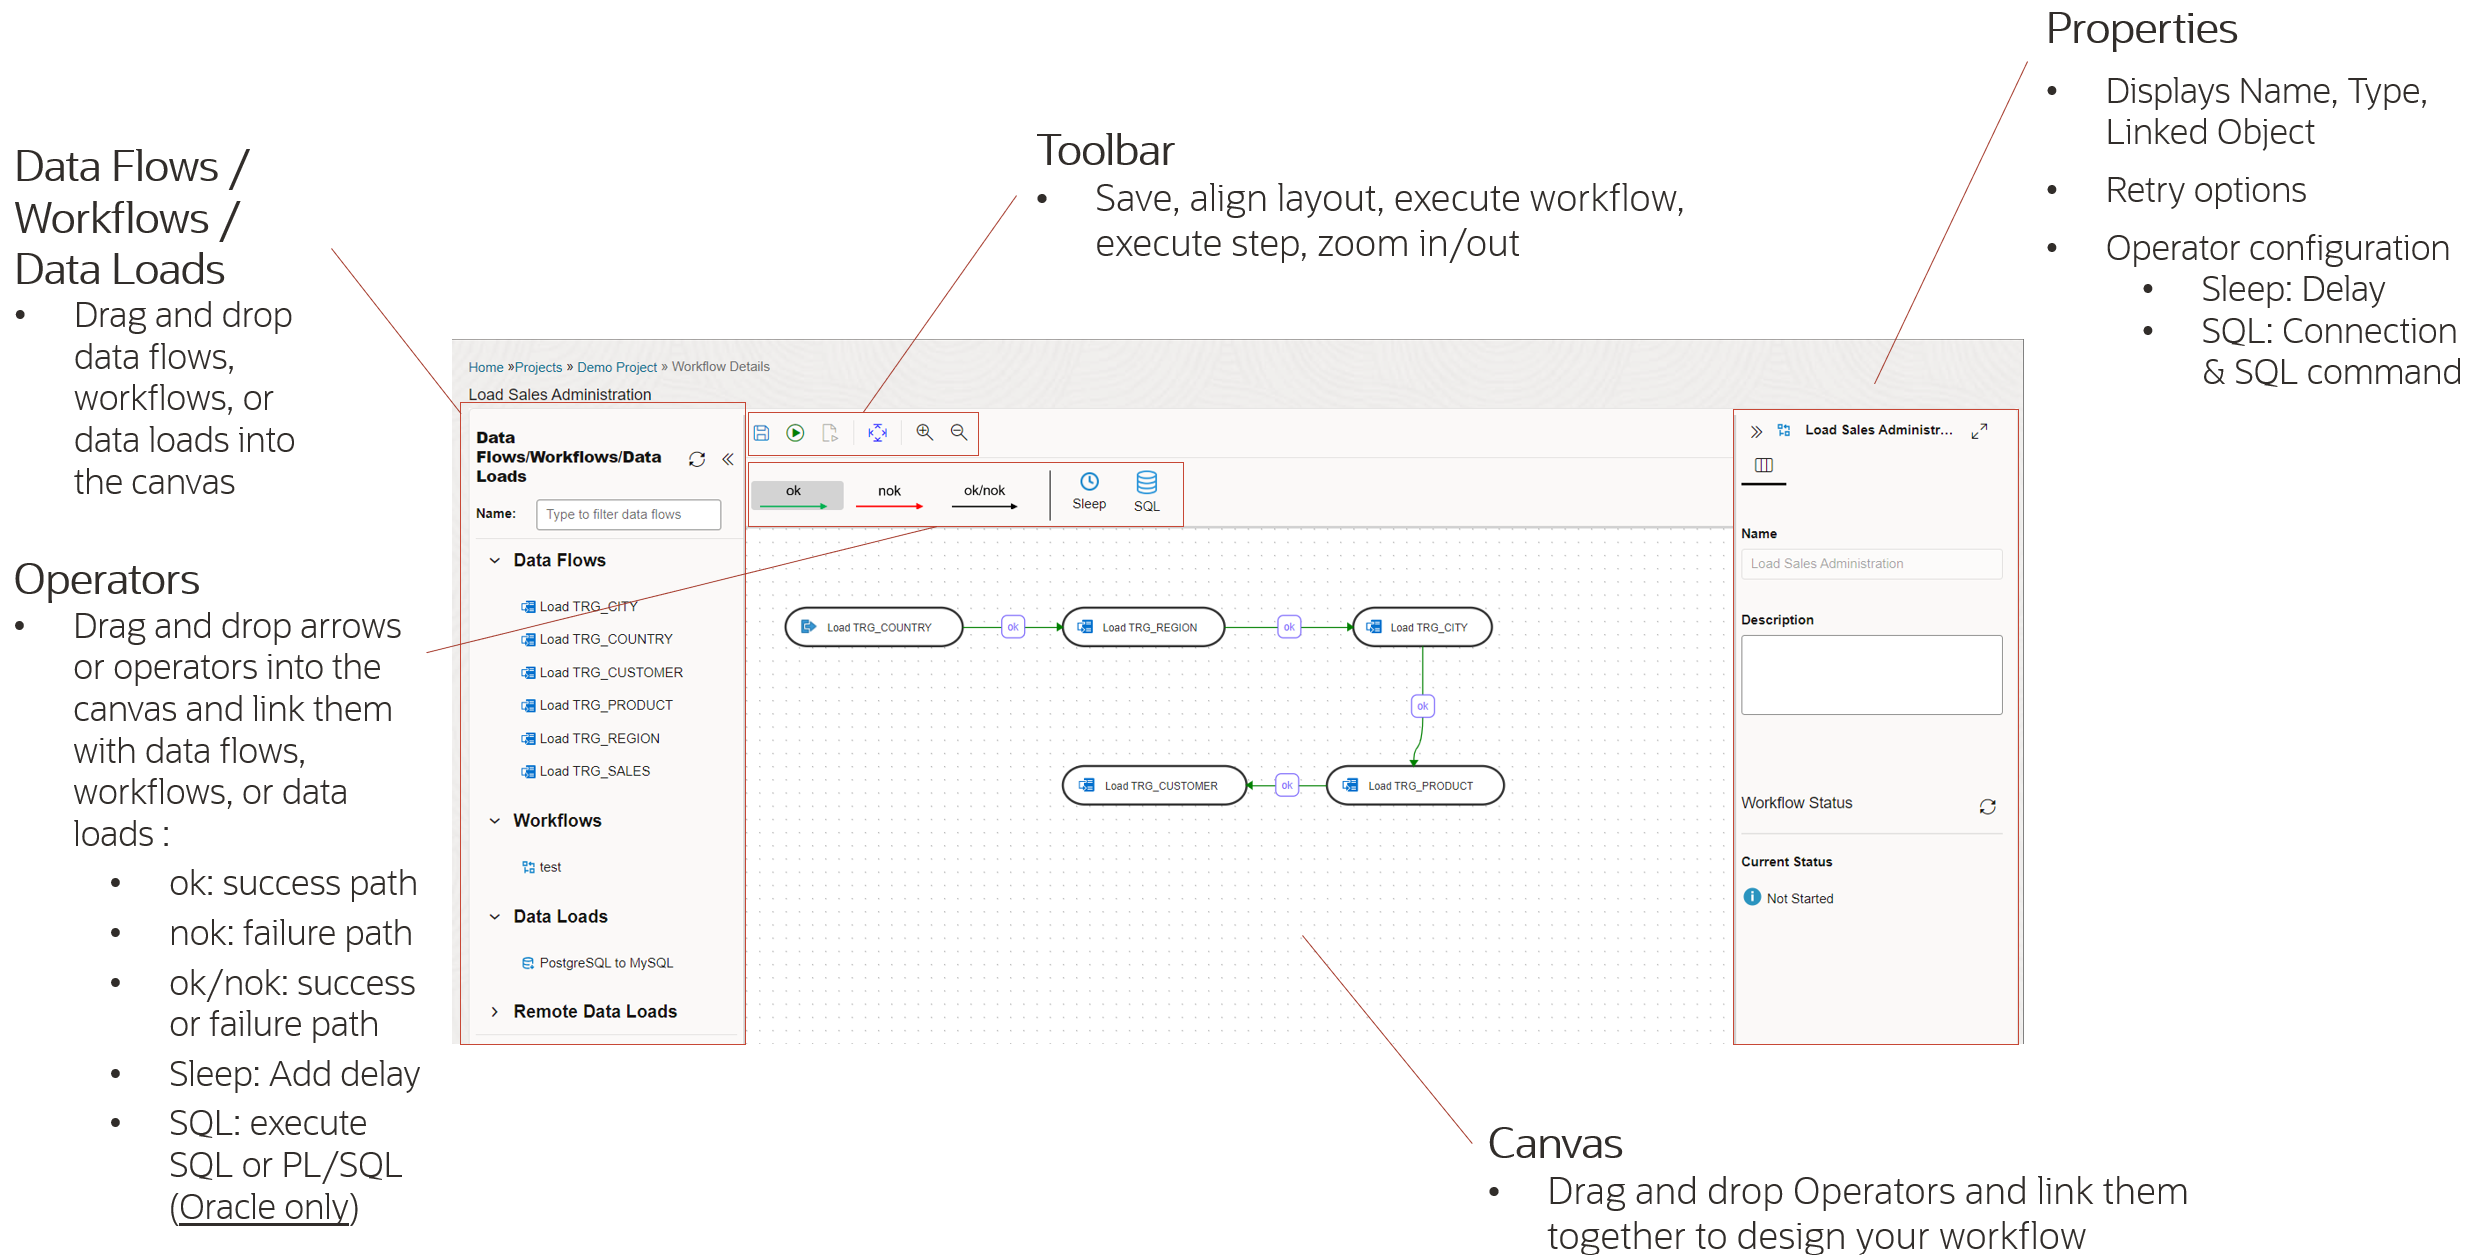
A Workflow in Data Transforms orchestrates the execution of Data Loads, Data Flows, and other Workflows. Workflows are created in a Project using the Workflow Editor.
Create a Workflow
You can create a Project in Data Transforms before creating a Worklow. Refer to Get Started with Oracle Cloud Infrastructure (OCI) GoldenGate Data Transforms – Create a Data Load for more information.
In your Project, click Workflows under Resources and click Create Workflow.
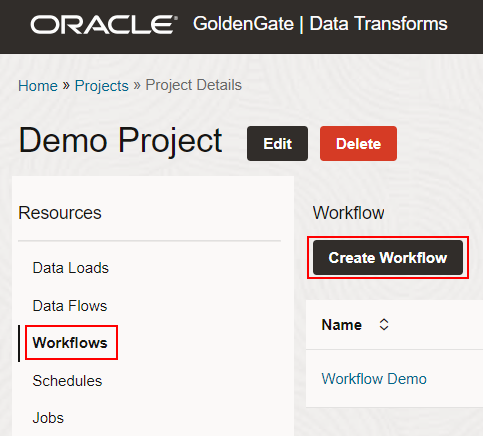
Enter a Name and click Create to open the Workflow Editor.
You can drag and drop Data Flows, Workflows, Data Loads and Workflow components into the canvas to define how the processes will be executed.
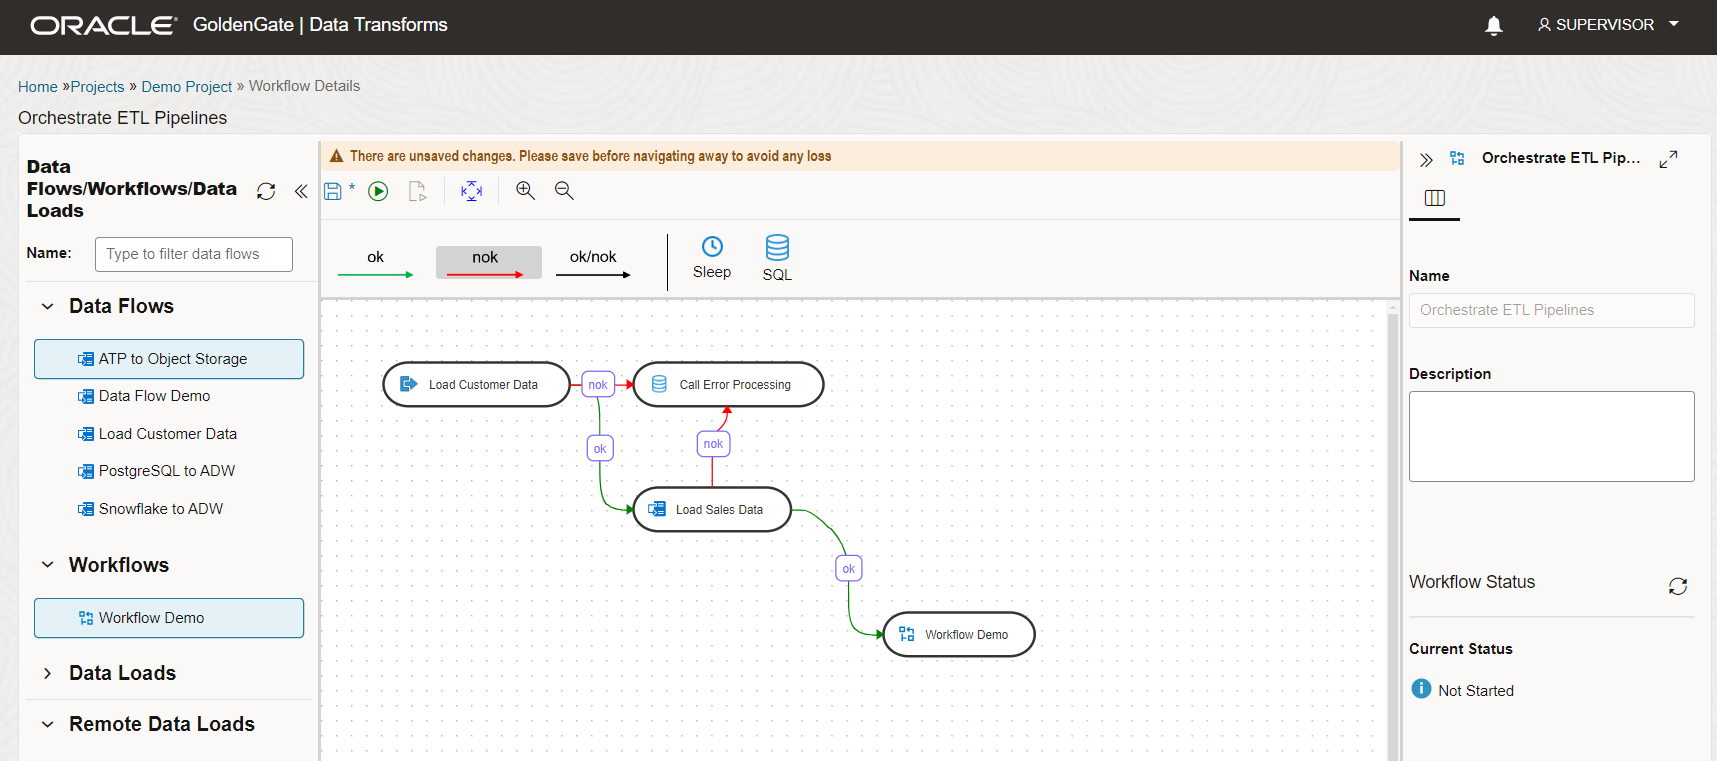
Each Workflow step must be linked to the previous one using ok, nok, or ok/nok arrows.
- ok (green) defines the success path
- not ok (red) defines the failure path
- ok/not ok (black) defines a path that is followed on success or failure
You can also add a Sleep component to delay the execution or a SQL component to execute an SQL or PL/SQL query.
Refer to Workflows in the Data Transforms documentation for more information.
Click Save (![]() ) to save the Workflow configuration. Use the Execute (
) to save the Workflow configuration. Use the Execute (![]() ) button to run the entire Workflow or Execute Step (
) button to run the entire Workflow or Execute Step (![]() ) to run a single step, which can be helpful when debugging.
) to run a single step, which can be helpful when debugging.
Running processes in Data Transforms
Data Loads can be executed from their editor and inside Workflows.
You can run Data Flows and Workflows directly from their editors using the Execute (![]() ) button or from their listing page.
) button or from their listing page.
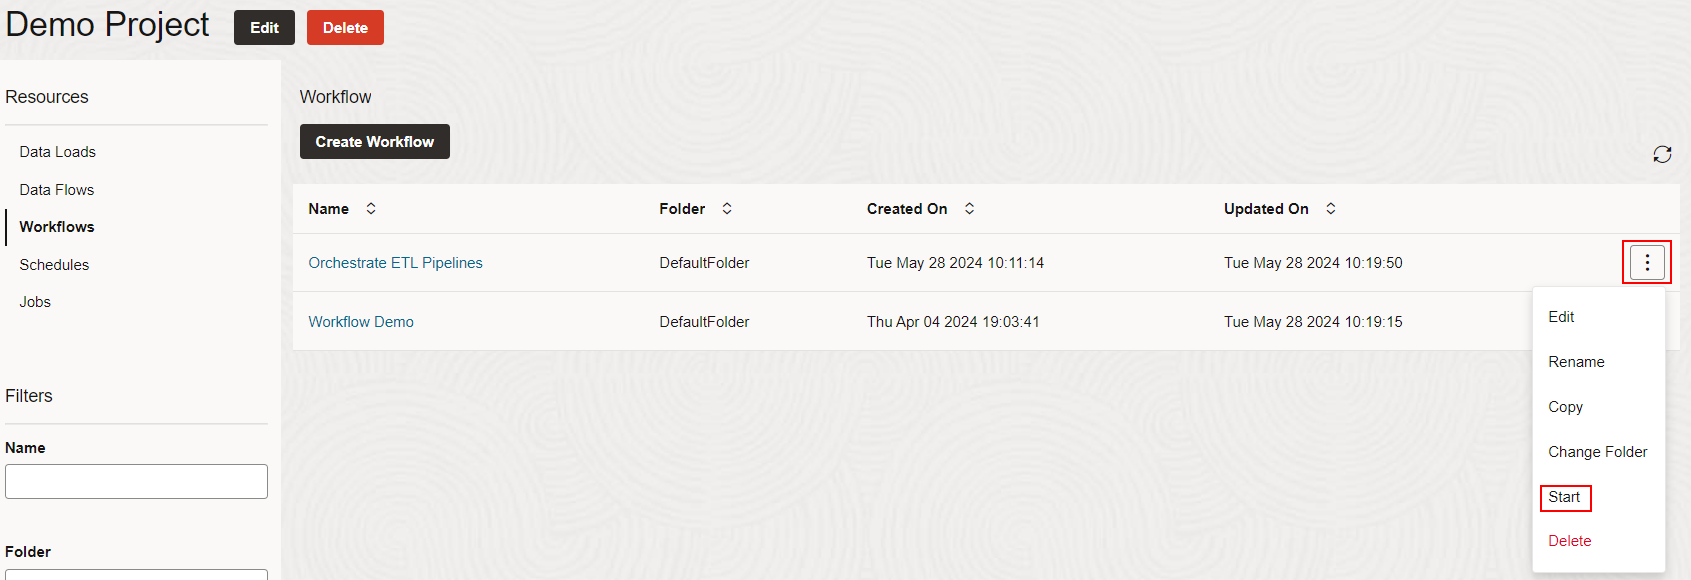
You can also create Jobs from a Data Flow or Workflow directly on the Jobs page. A Job execution is then automatically triggered.
It is also possible to schedule the execution of a Data Flow or Workflow. Click Schedules in your Project, then click Create Schedule. Enter a Schedule Name, pick a type of Resource (Data Flow or Workflow), select a Resource Name, and then define the Schedule Frequency (Daily, Weekly, Monthly, etc.). Fill in the rest of the parameters depending on the Frequency you selected. See Schedule Data Flows or Workflows for more information.
Click Save when you are done configuring the Schedule.
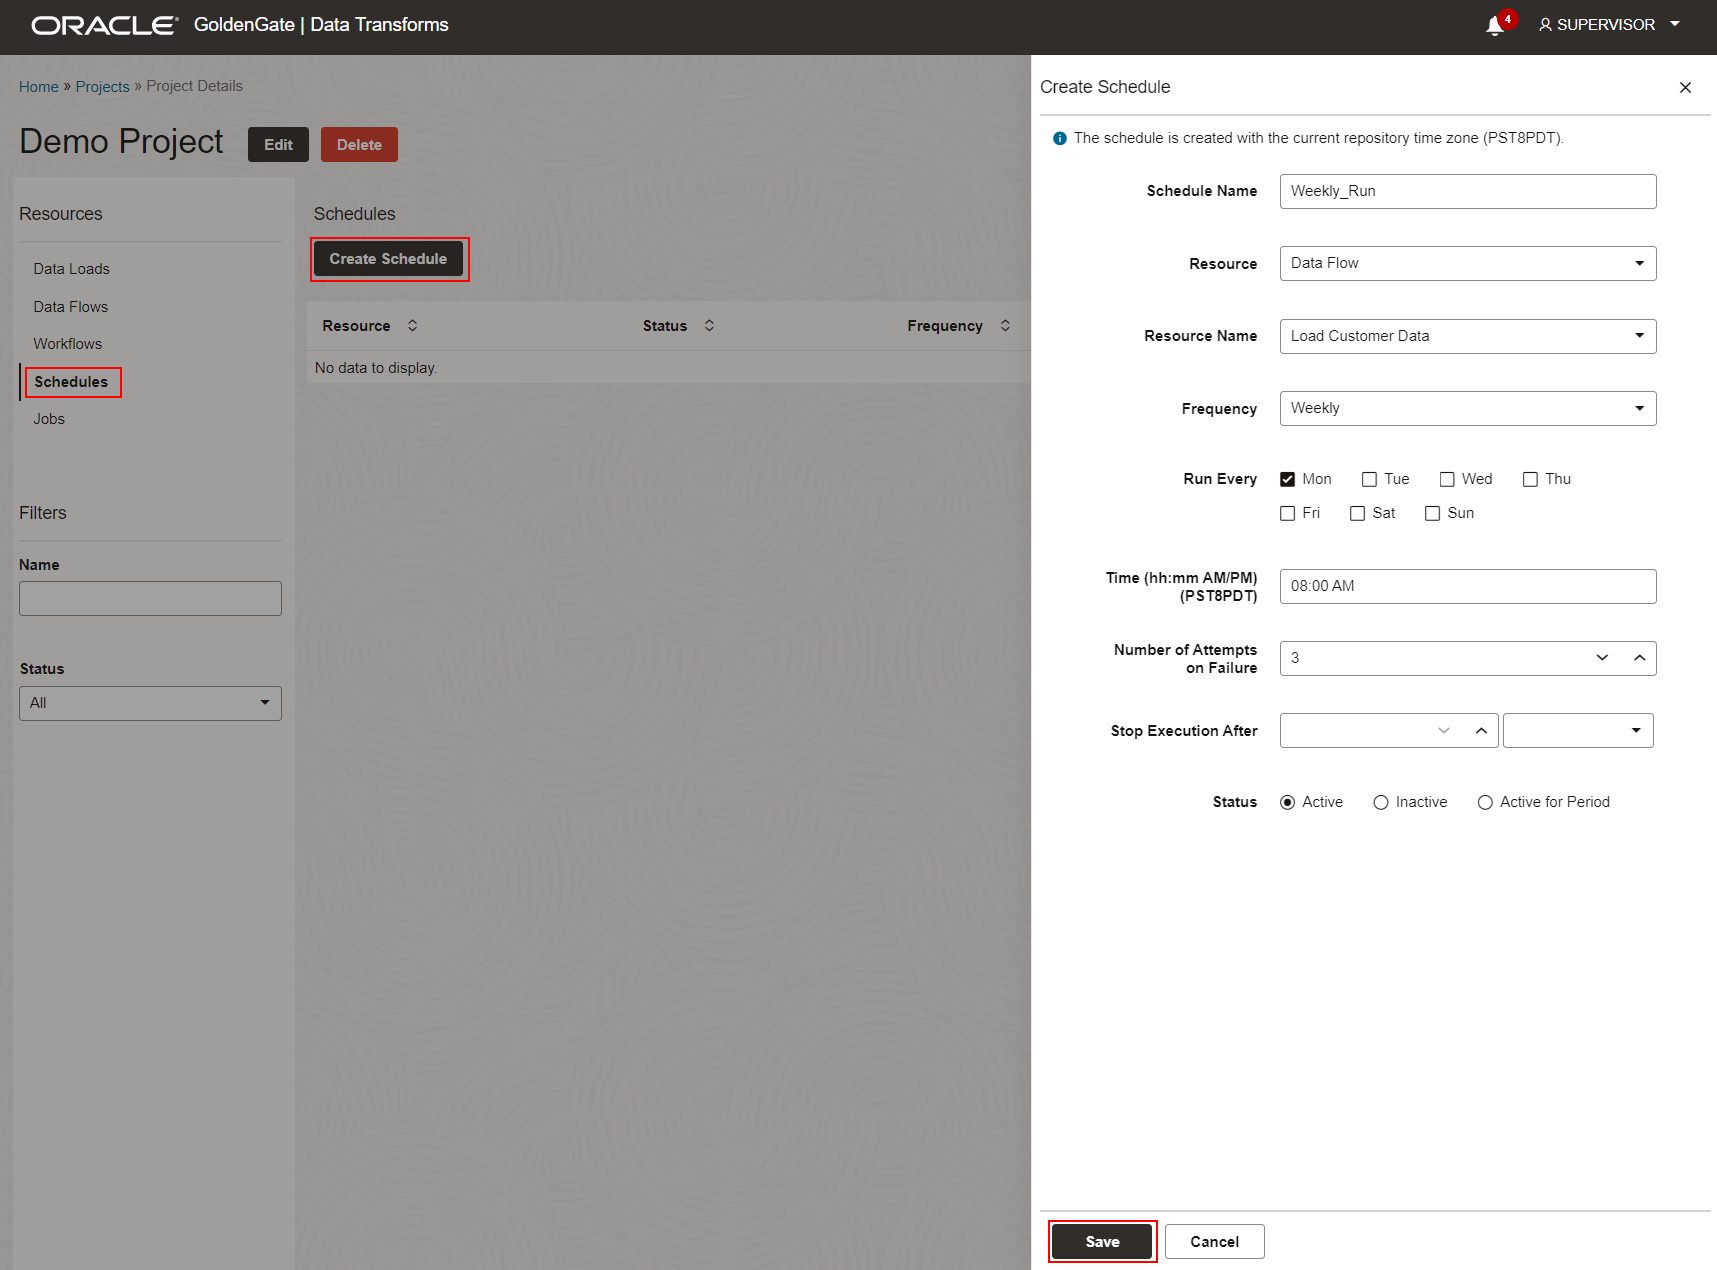
The newly created Schedule appears in the Schedules listing, where users can manage it.
Monitoring Executions
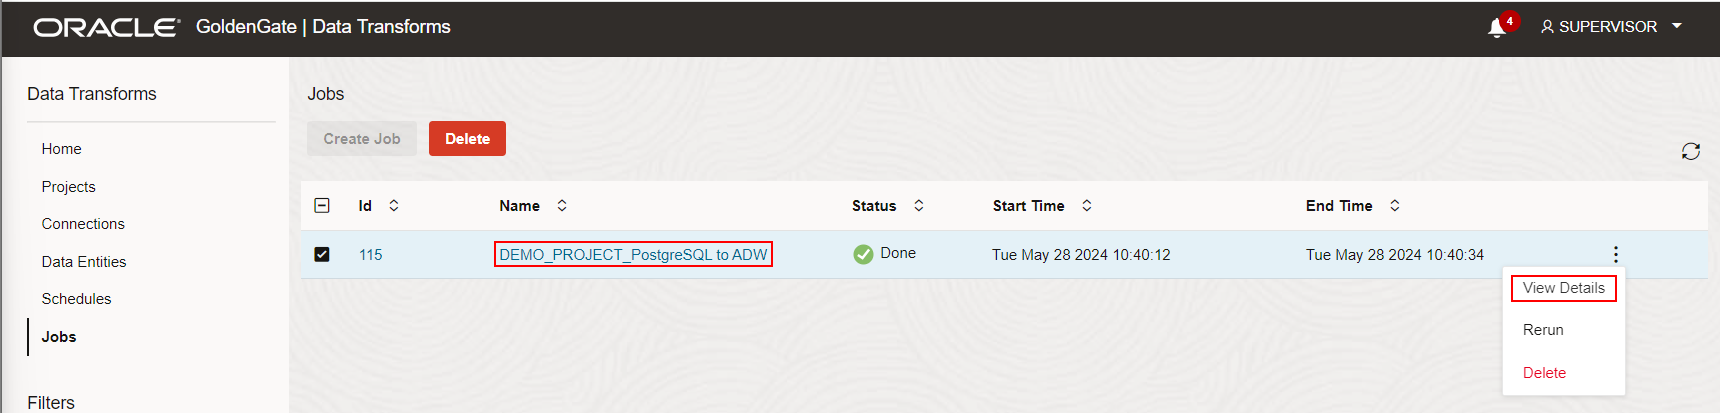
You can monitor all executions from the Jobs page inside your Project or at the Home level. Job runs are listed there, and users can click on the Job name or View Details to access a Job details page.
The Job details page summarizes the Job execution, including the overall execution time (duration) and the number of inserts/updates/deletes performed.
Users can expand the Steps and review all the steps generated by their Job execution and their statistics. You can drill down further and click on any given step to access its details and the generated code.
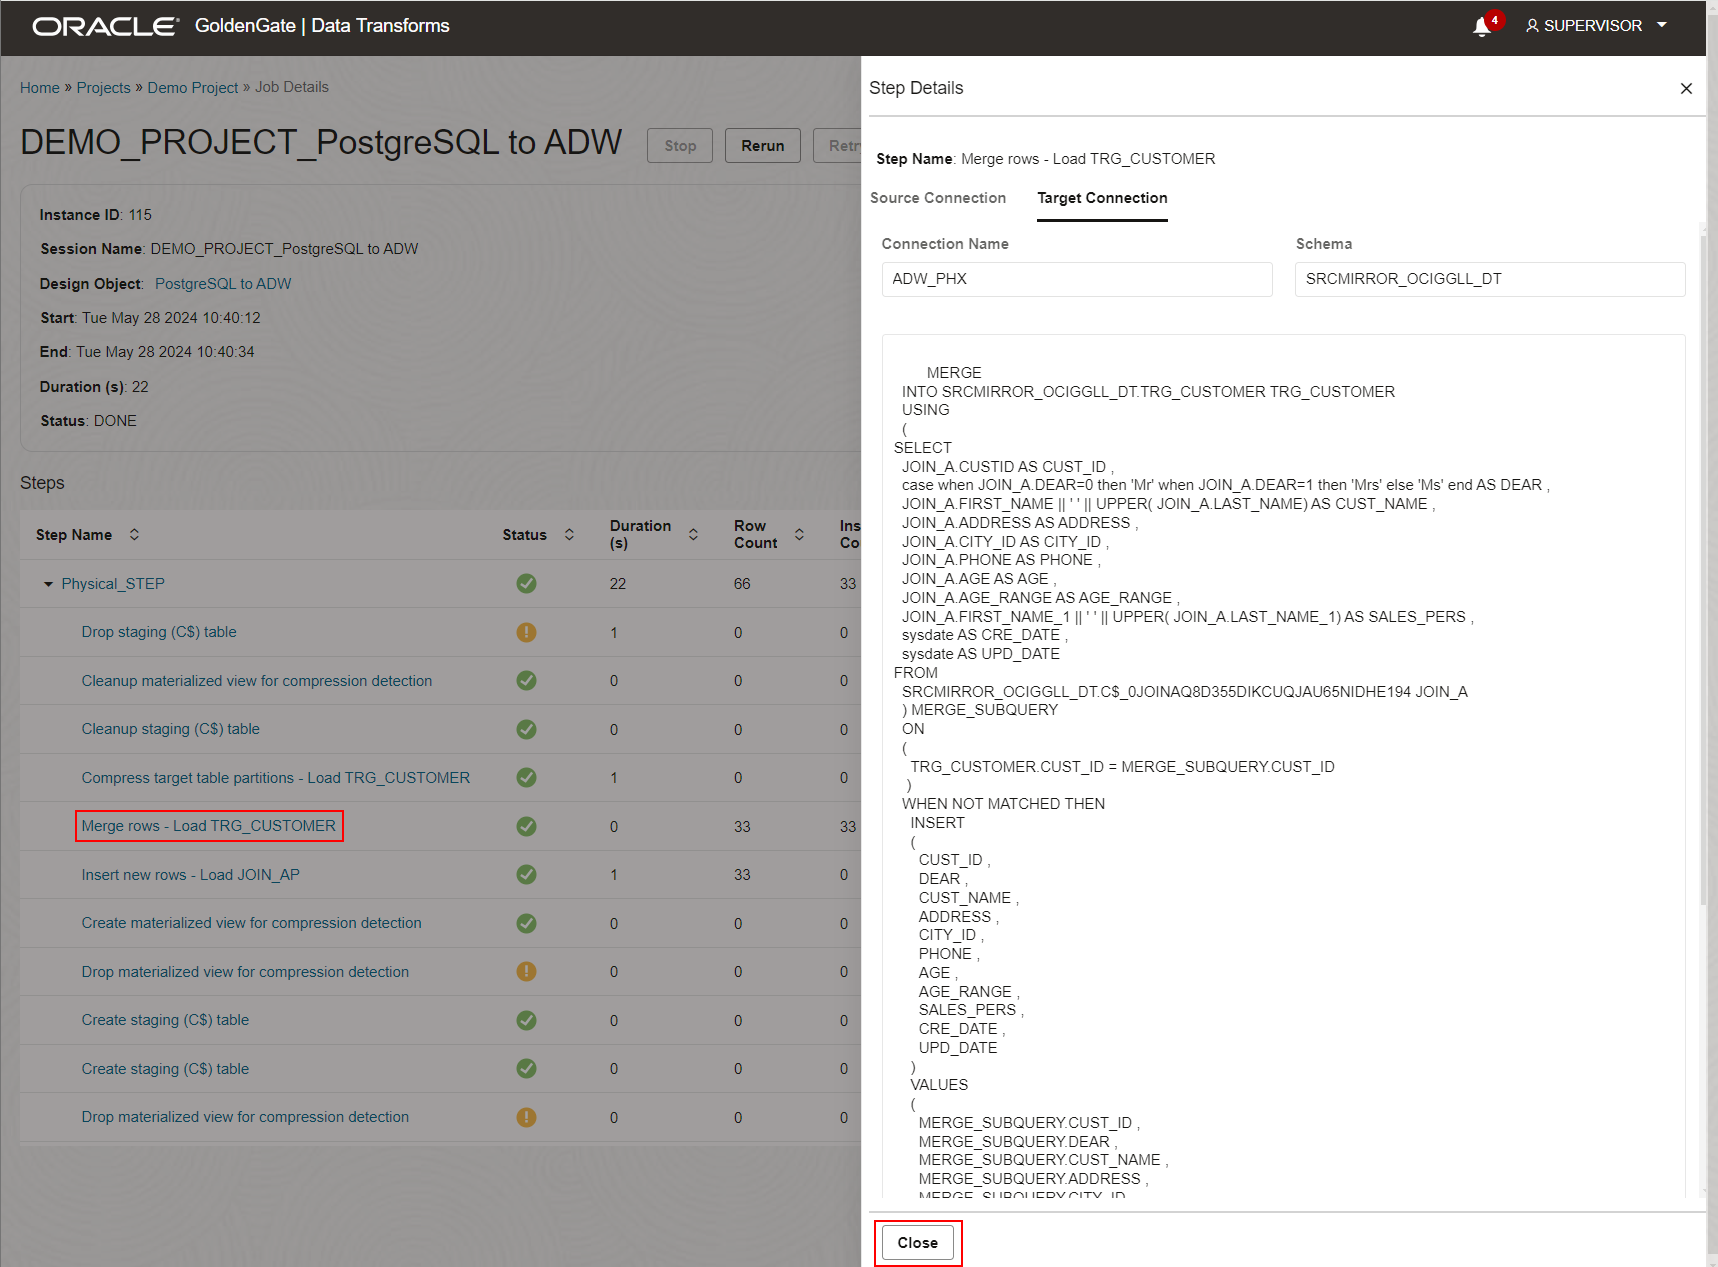
The Job execution can also be managed from its details page using the Stop, Rerun, and Retry buttons.
This article is the last one in the Get Started with OCI GoldenGate Data Transforms series. I highly recommend reading the other ones to get familiar with OCI GoldenGate Data Transforms.
Next Steps
Try it out! OCI GoldenGate Data Transforms is available today. Read the documentation to explore more features and benefits. You can also go through the OCI GoldenGate Data Transforms quickstart to familiarize yourself with the service capabilities.
More resources: