Oracle Cloud Infrastructure (OCI) GoldenGate is a fully managed service providing a real-time data mesh platform, which uses replication to keep data highly available and enable real-time analysis. Monitoring GoldenGate processes is mandatory for our customers. Although we can use OCI GoldenGate metrics with OCI Monitoring and Notifications, some customers want to consolidate everything in Enterprise Manager (EM).
The Oracle GoldenGate Enterprise Manager Plug-In extends the Oracle Enterprise Manager (EM) Cloud Control to support monitoring and managing Oracle GoldenGate processes.
Configuring Enterprise Manager for OCI GoldenGate
I have minimal experience with Enterprise Manager (EM), and my goal is to demonstrate how to configure it for OCI GoldenGate. In this article, you will find a step-by-step guide for this configuration aimed at helping GoldenGate users with no prior EM experience.
Download OCI GoldenGate Certificate
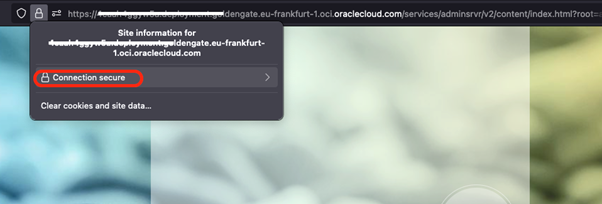
The first step is to download the OCI GoldenGate certificate. Please launch the console and click the lock icon, then select ‘Connection Secure’.
Note: I’m using Firefox. The steps may differ when using other browsers.
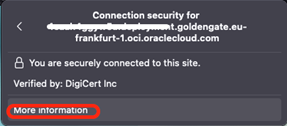
Click on more information, and a new page will open:
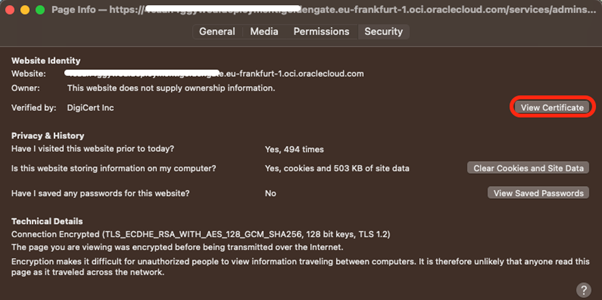
Click on “View Certificate”:
A new tab will be open in Firefox. Click on “PEM(Cert)” in the Miscellaneous section to download the certificate.
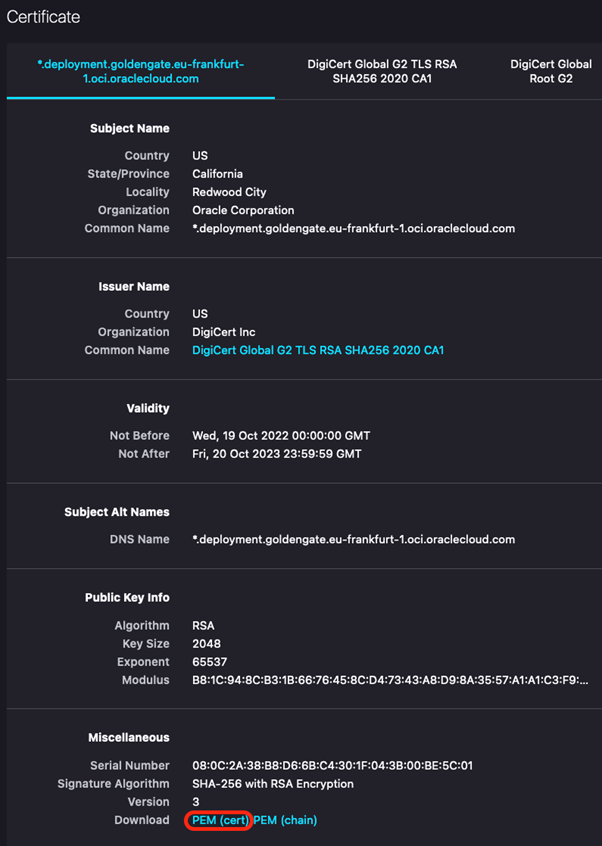
The certificate will be downloaded to your Downloads folder. Please upload the certificate to the EM machine.
Add OCI GoldenGate Certificate to EM Agent
The second step is to add the SSL certificate to the EM Agent, which is used to discover and monitor OCI GoldenGate processes. Go to:
cd /u01/app/oracle/em/emagent/agent_13.5.0.0.0/bin
Assuming you kept the default name, you can run the following command:
[oracle@oms1 bin]$ ./emctl secure add_trust_cert_to_jks -trust_certs_loc deployment-goldengate-eu-frankfurt-1-oci-oraclecloud-com.pem -alias OCI_GG_CERT2
Oracle Enterprise Manager Cloud Control 13c Release 5
Copyright (c) 1996, 2021 Oracle Corporation. All rights reserved.
Password: <type a simple password>
Message : Certificate was added to keystore
ExitStatus: SUCCESS
Note: Adding a certificate with a complex password will result in a failure. To resolve this issue, please use a simple password.
Discover OCI GoldenGate in Enterprise Manager
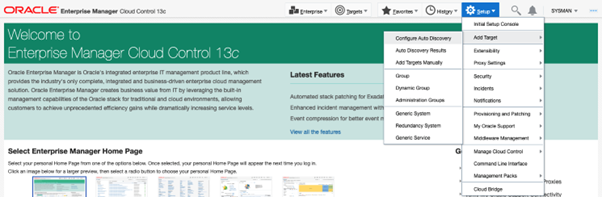
The third step configures the auto-discovery. Go to Setup -> Add Target -> Configure Auto Discovery.
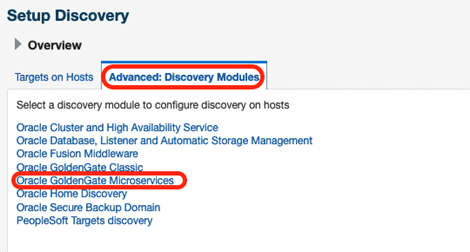
Click on “Advanced: Discovery Modules” and “Oracle GoldenGate Microservices”.
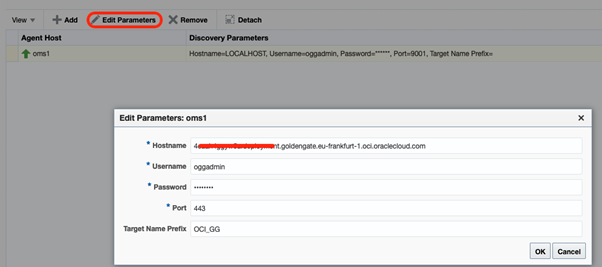
Click on ‘+ Add’ button and select your target:

Click on “Edit Parameters” and configure your OCI GoldenGate hostname (without https://), username, password, and the only allowed port (443) for OCI GoldenGate.
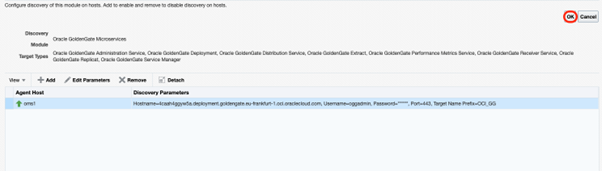
Click OK to finalize the configuration.
Click on “Targets on Hosts”, select the target, and click “Discover Now”.
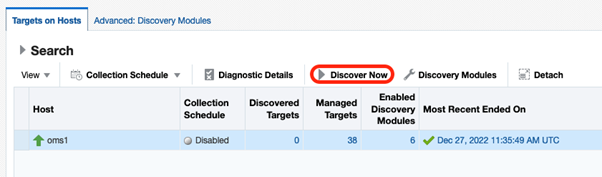
It will open a pop up. Once finished, click OK.
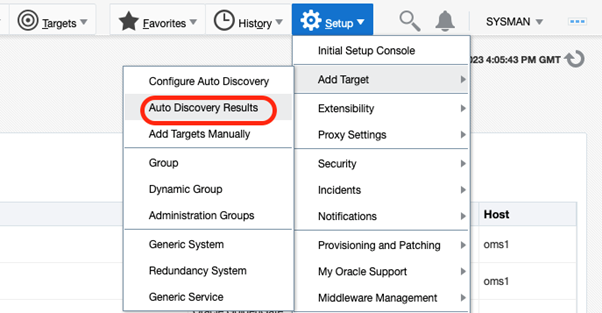
Click on Setup -> Add Target -> Auto Discovery Results:
You should see your OCI GoldenGate deployment listed. Select it and click “Promote”:
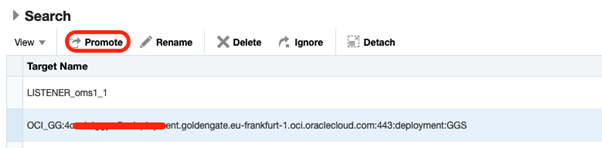
Click Yes and then Promote:

Navigate to Targets and select “GoldenGate”:
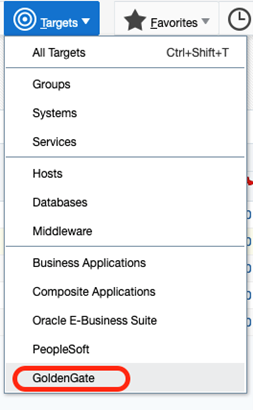
Your GoldenGate processes are listed, and you can start using the multiple features EM has for Goldengate.

Troubleshooting
You can refer to the following files if you encounter issues during the discovery process or while working with Enterprise Manager in general.:
- gcagent*.log
- ogg_so_logs*.log*
Conclusion
In this article, we have provided a comprehensive guide detailing the step-by-step process for configuring the EM plugin for OCI GoldenGate, enabling you to discover and monitor GoldenGate processes within your environment.
References
- https://docs.oracle.com/en/middleware/goldengate/emplugin/13.5.1/empug/discovering-oracle-goldengate-targets-ui.html#GUID-E40A95CC-FD59-4AAC-BE67-D1945BEE8633
- https://docs.oracle.com/en/middleware/goldengate/emplugin/13.5.1/empug/promoting-oracle-goldengate-targets.html#GUID-C4CD92BC-8BC1-4488-8FE6-5111CC16BB6E