Rotating credentials regularly is a security best practice and often a compliance requirement. This post shows how to automate credential rotation for an Oracle Cloud Infrastructure (OCI) GoldenGate connection to Snowflake using OCI Functions, OCI Vault, and Notifications.
In this example, the authentication type of the snowflake connection is key pair authentication, and therefore it requires a private key and a private key password. The term credential throughout this post, refers to both.
What You’ll Build
- An OCI Function that:
- Stops the replicat
- Reads the current credential from OCI Vault
- Connects to snowflake using current credentials and validates if field RSA_PUBLIC_KEY, which is the public key of the private key pair, matches
- This is important to validate if no manual change was made after implementing this automated process
- Backup RSA_PUBLIC_KEY to RSA_PUBLIC_KEY_2
- Generates new credentials
- Updates RSA_PUBLIC_KEY with the new public key
- Validates the connection to snowflake using the new private key, if it fails, rollback
- Rotates the secret by creating a new secret version, wait for the vault work request to complete, and then deletes the version that got deprecated
- This is important to keep a controlled number of secrets on the OCI Vault. Some tenancies might have limitations
- Triggers an OCI GoldenGate connection refresh so the deployment uses the new secrets versions
- Starts the replicat
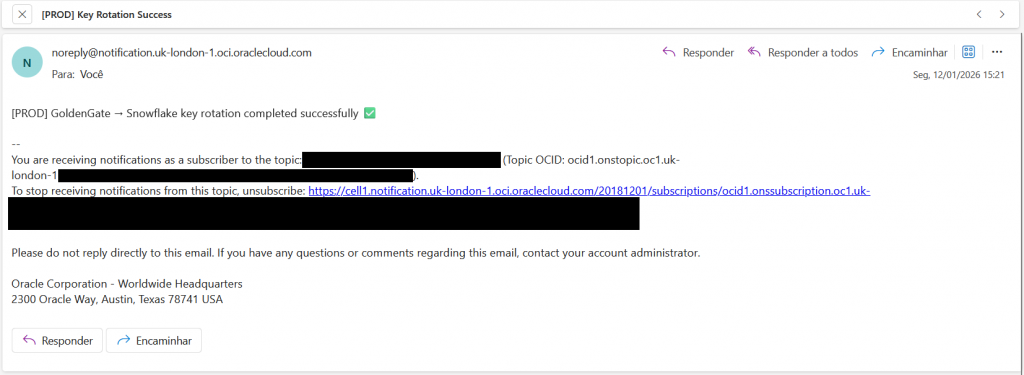
- Sends a status notification (email) via OCI Notifications
- Required IAM constructs (Dynamic Groups and Policies) for least-privilege access
- Optional schedule to run the rotation at a defined cadence
Architecture Overview
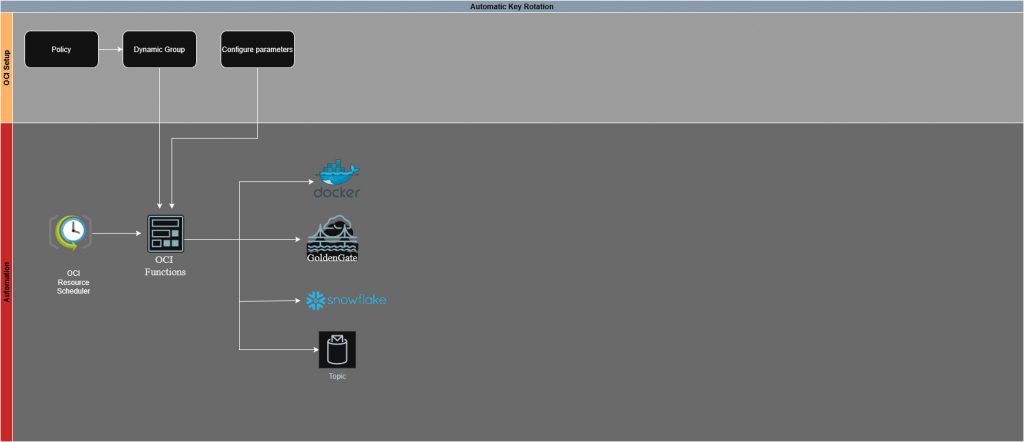
- Dynamic Group: Allow you to group resources as “principal” actors, it is how the function authenticates
- This has the advantage of not being associated with a specific user, which would bring more security constraints, and is easily managed
- Policies: Permits the dynamic group to access all the required services
- Functions: All the code logic to connect to the different services and perform the automatic rotation
- Function configuration: This way we can change variables values, without having to change the code every time
- Vault: Stores and versions sensitive credentials
- OCI GoldenGate: Consumes credentials from Vault; Connection refresh picks up the new secret version
- Snowflake: Target system
- Notifications: Sends rotation outcome to subscribed emails
- OCI Container Registry (OCIR): Stores the function image
- Optional OCI Scheduler: Invokes the function on a set schedule
Prerequisites
- Access required to create all the resources mentioned above in your tenancy
- A GoldenGate connection configured to read credentials from an OCI Vault secret. More details – here
- A Workstation ready to build and deploy the function
Step-by-Step Implementation
1. Workstation Setup
This can be a compute instance already present on the tenancy, or you can simply use cloud shell, or even your local machine. Having in mind that you will have to install and configure OCI CLI, FN CLI and Docker. Only cloud shell comes with everything pre-setup. The following commands work in either workstation you choose.
I won’t go over the details of how to install and configure each. You can find guidance here – oci cli, fn cli.
2. Create the GoldenGate user
This user is going to be used by the function to start and stop the replicat.
- Log in into your GoldenGate deployment. Go under “User Administration” and click on the “+” sign

- Create a user. The user must have at least the Operator role
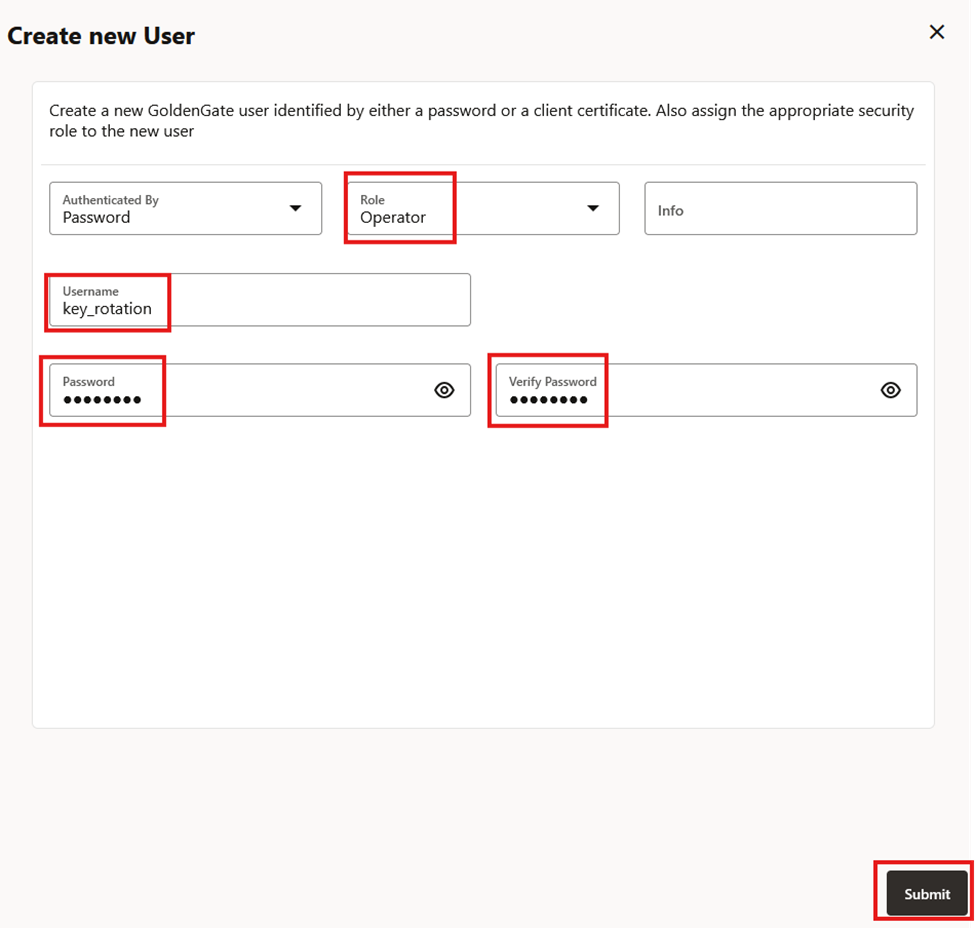
In this example we are going to use key_rotation but feel free to use any naming convention. Note the username and password for later.
3. Prepare Notifications
Notifications are going to be delivered via a OCI Topic. We then can subscribe to the topic, and choose several ways to be alerted. In this example, we are using emails.
Learn more about notifications.
- Create a topic:
- On OCI, go to “Developer Services”, then “Notifications”
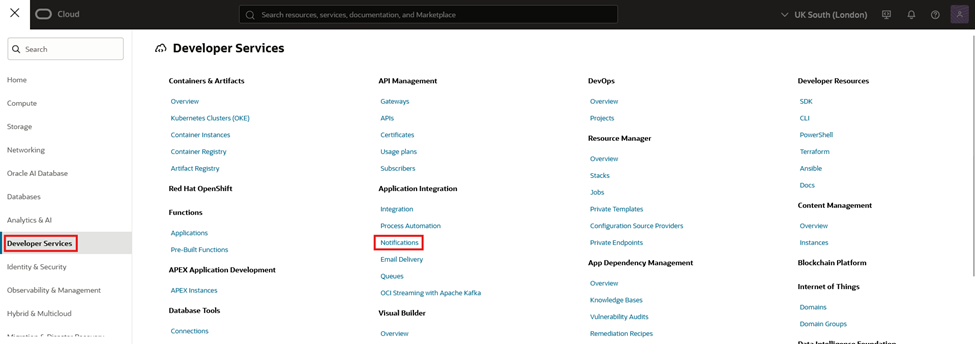
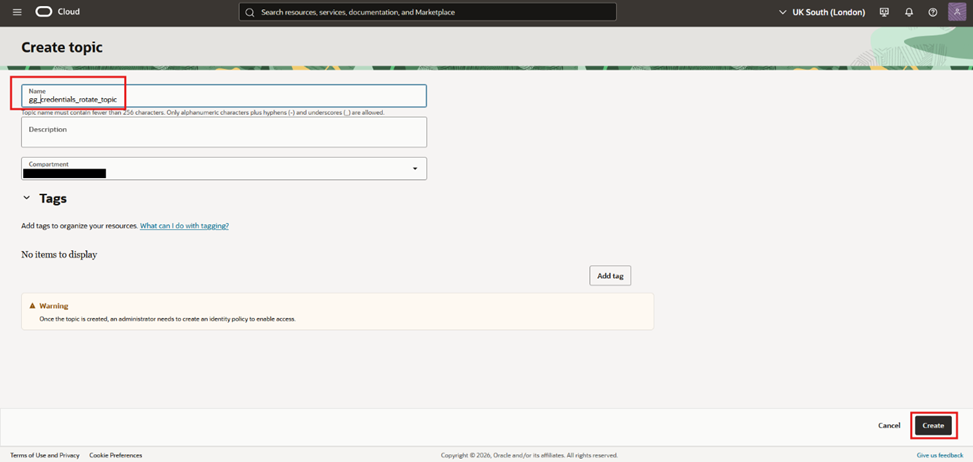
- On the left, make sure you have selected “Topics”. Navigate to your desired compartment, and click “Create topic”
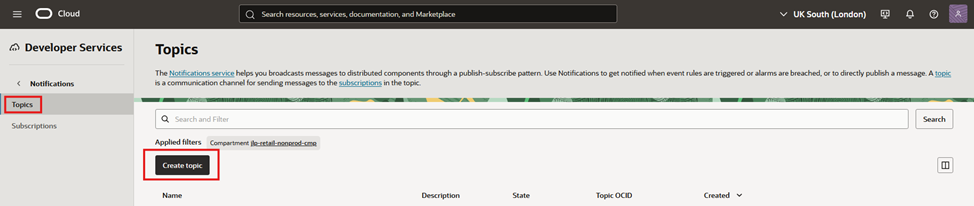
- Give it a name, a description and validate if your desired compartment is selected. Press “Create”

- Subscribe an email endpoint:
- Click on the created topic. Note the topic ocid, this will be needed later
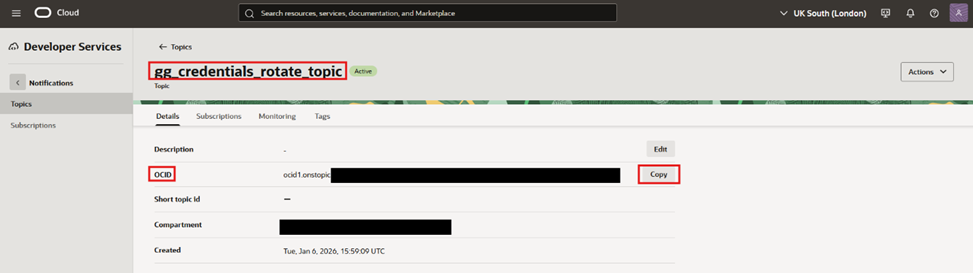
- Navigate to “Subscriptions” and click “Create subscription”
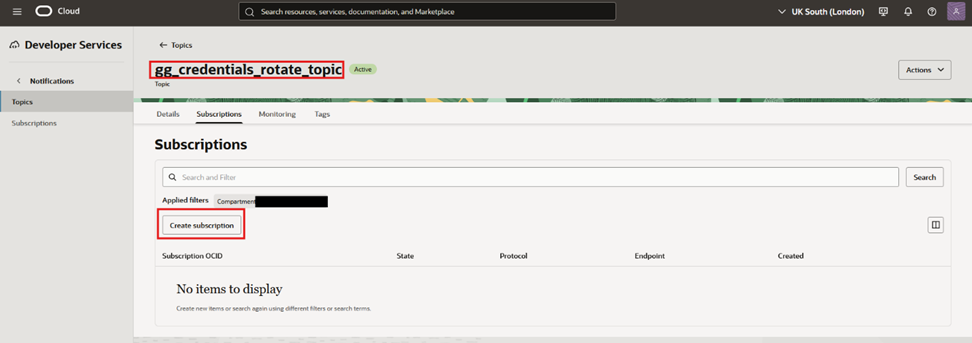
- Select Email as the protocol and insert the desired email to receive notifications then press “Create”
- Confirm the email subscription:
- You will receive an email with a hyper link, click on it to activate your subscription
4. Create and Identify Vault Resources
We will need to create a secret to hold the GoldenGate user password we have created above on chapter 2.
Learn more about Vault and Secrets.
If you have followed the pre-requisites and your GoldenGate connection is already using secrets as the connections details. You should already have a vault, and at least 2 secrets (one for the private key, the other for the private key password)
We can use that same vault:
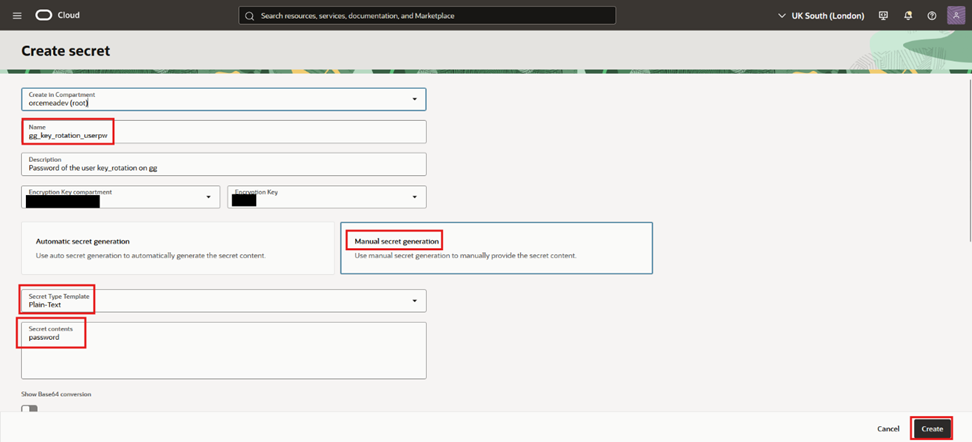
- Navigate into that Vault, then “Secrets” and press “Create Secret”
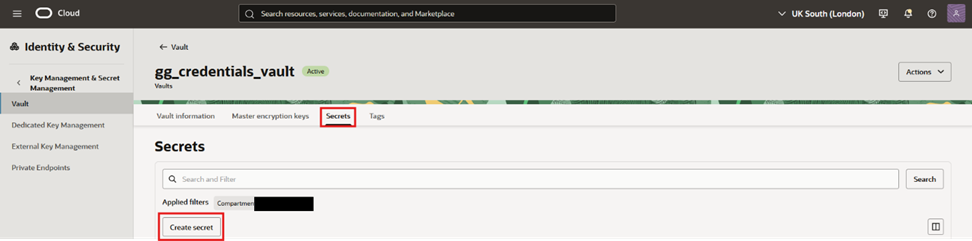
- Give it a name, a description, choose manual secret generation, plain-text and place the user password. Press “Create”
- Ideally you have a vault with at least 3 secrets, like the following
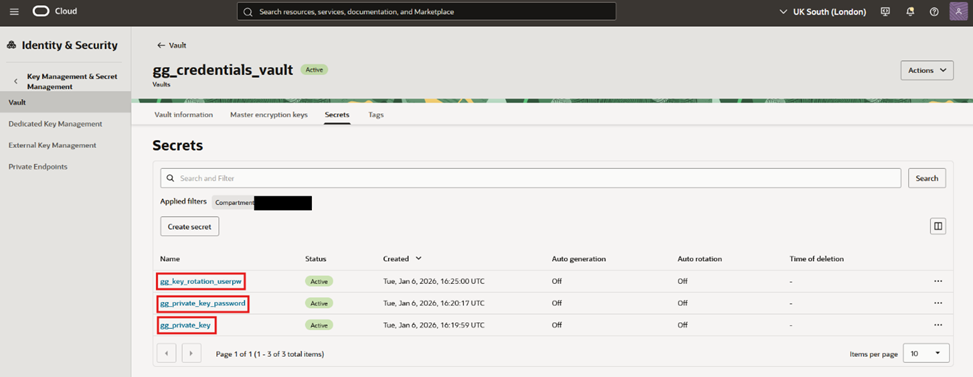
You can of course, have more secrets in that vault, but what matters are the 3 highlighted. For those 3, take note of each of their OCID, it will be needed later.
- You can get their OCID by clicking on the 3 dots on the right and then, “Copy OCID”
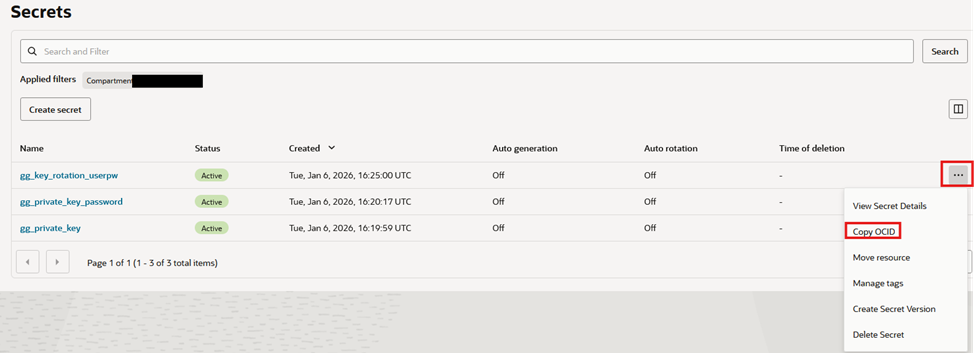
A secret OCID, looks like the following:
ocid1.vaultsecret.<region>.<hash>
5. Prepare OCIR and Fn Context
Learn more about Oracle Cloud Infrastructure Registry (OCIR) and Functions.
- Get your Object Storage Namespace:
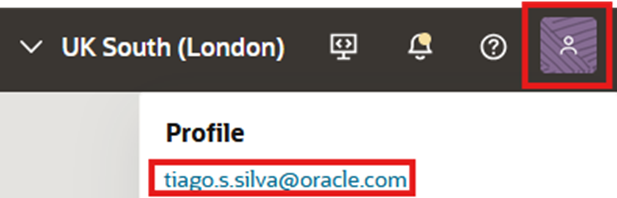
- If you have the appropriate permissions, you can get the namespace from OCI, by clicking on the top right corner on your profile, and click on the name of your tenancy
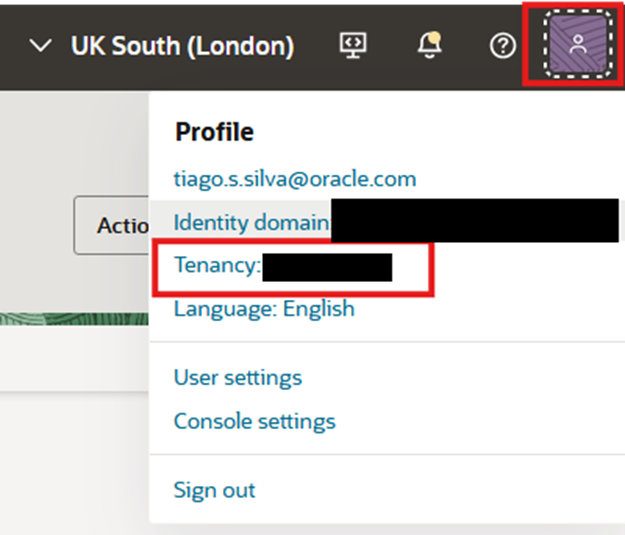
- And you will find a field called Object storage namespace as highlighted
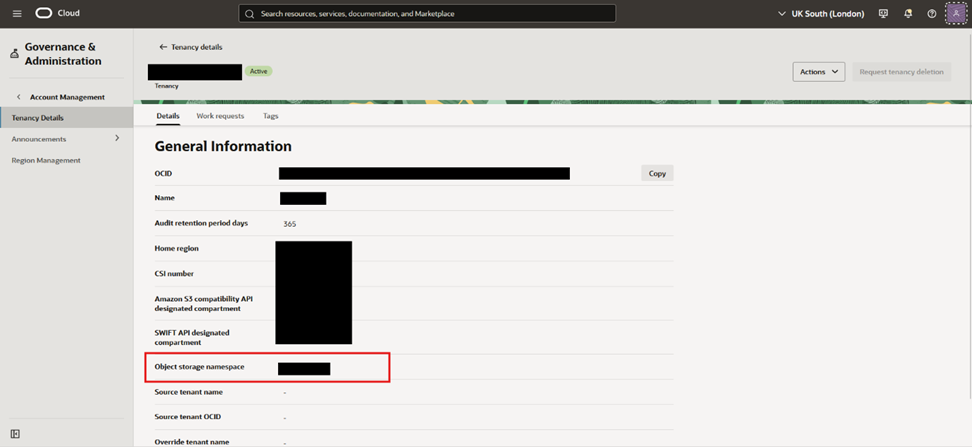
- If you do not have the required permissions, it will just show as a “-“, and the easiest way you can workaround that is using OCI CLI and perform:
oci os ns get

- Create OCIR Repository:
- Go into “Developer Services” and then “Container Registry”
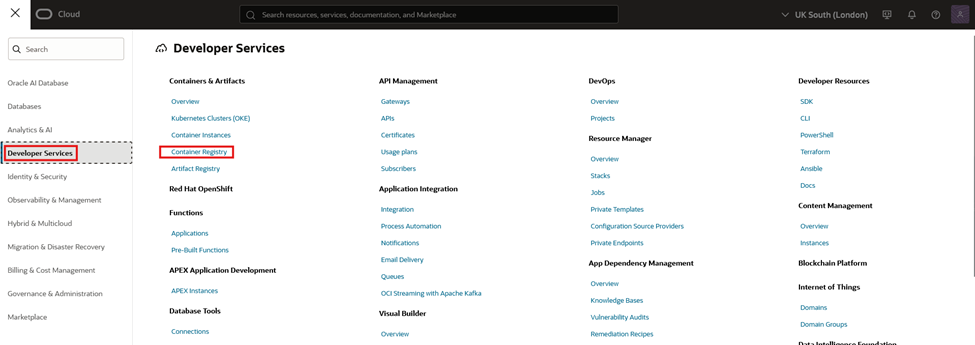
- Navigate to the desired compartment and click “Create repository”
 Give it a name, make sure its private, and press “Create”
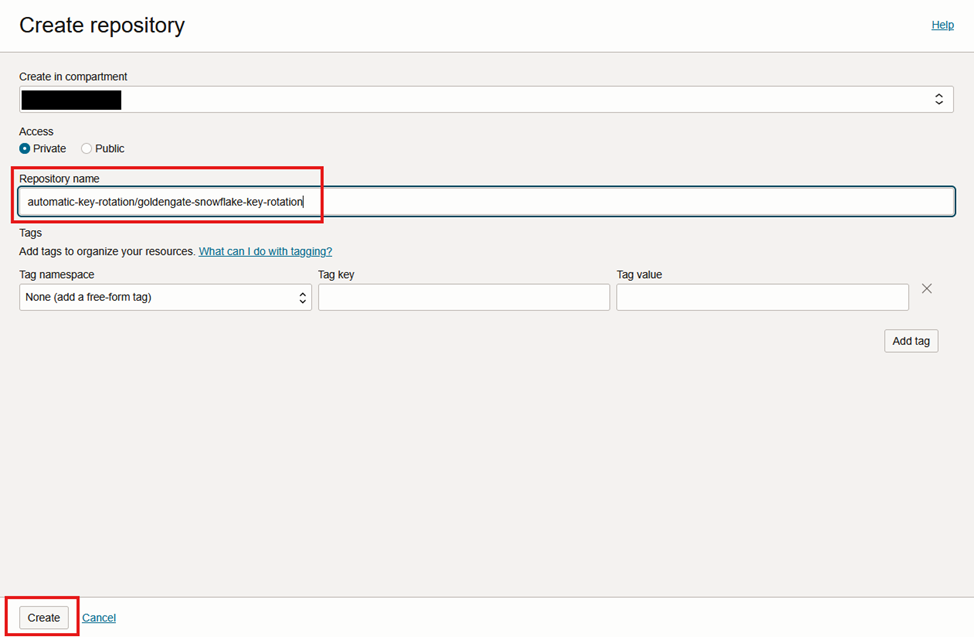
I’ve named it “automatic-key-rotation/goldengate-snowflake-key-rotation”, again, you can use your own naming convention, but note it, as it will impact the steps below.
- Create and use Fn context:
fn create context <context-name> --provider oracle

fn update context oracle.compartment-id <ocid1.compartment.oc1...>
#In this case I’m using the same compartment where I’ve created the registry.

fn update context api-url https://functions .<region-identifier>.oraclecloud.com
#This is specific to your home region, for this example it was London, therefore it is:
fn update context api-url https://functions.uk-london-1.oraclecloud.com

fn update context registry <region-key>.ocir.io/<tenancy-namespace>/<repo-namespace>/<repo-name>
#This is also specific to the home region and to your tenancy namespace that you have gotten above, for me, lets say my namespace was  lrbftest , so it would be:
fn update context registry lhr.ocir.io/lrbftest/automatic-key-rotation

fn use context <context-name>
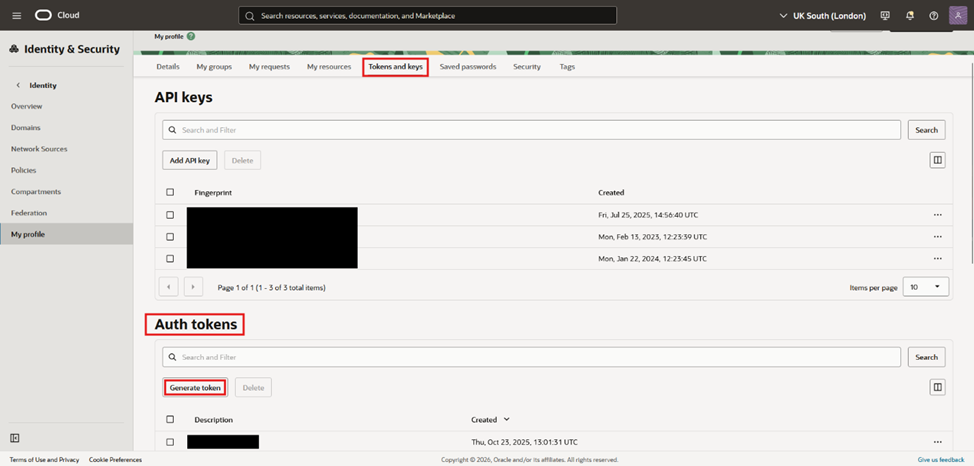
- Create an Auth Token (User -> Auth Tokens) and log in to OCIR:
- To create a Auth Token, click on your profile on the upper right corner
- Navigate to “Tokens and Keys” and under “Auth Tokens”, click “Generate token”. Note it
- Now you need to login into your created registry:
docker login -u '<namespace>/<domain>/<username>' <region-key>.ocir.io
So for example, lets say the IAM domain of my user is oracleidentitycloudservice
docker login -u lrbftest/oracleidentitycloudservice/username@oracle.com' lhr.ocir.io
6. Initialize the Function
- Create a Python function scaffold:
fn init –runtime python <function-folder-name> on my example:
fn init –runtime python automatic-key-rotation-func
- Copy the files to the folder that was created with the command above:
- Rename the files:
The files were appended a .txt format at the end only to be able to be downloaded, be sure to remove the .txt from the files. With the exception of the requirements file, that is suppose to be a .txt - Change the variables as needed:
func.yaml is the file that contains all the variables needed. They are required to be replaced to fit the values of your environment. These variables can also be changed post deploy, which will be further explained in chapter 11.
Below is a small description of each variable:
- log_level: “INFO” #Options: INFO, DEBUG, ERROR
- environment: “DEV” #Prefix that will show on the email notification to easily distinguish environments
- goldengate_url: “https://hash.deployment.goldengate.uk-london-1.oci.oraclecloud.com” #URL of GoldenGate AdminConsole
- goldengate_user: “key_rotation” #User created in step 2
- goldengate_password_secret_ocid: “ocid1.vaultsecret.oc1.uk-london-1.hash” #Secret OCID of goldengate_user, created in step 4
- goldengate_replicat_name: “REP_CDC” #Replicat name
- goldengate_connection_id: “ocid1.goldengateconnection.oc1.uk-london-1.hash” #GoldenGate to Snowflake connection OCID
- snowflake_account: “snowflake_account” #Snowflake connection details
- snowflake_user: “snowflake_user” #Snowflake connection details
- snowflake_warehouse: “snowflake_warehouse” #Snowflake connection details
- snowflake_database: “snowflake_database” #Snowflake connection details
- snowflake_schema: “snowflake_schema” #Snowflake connection details
- snowflake_role: “snowflake_role” #Snowflake connection details
- vault_private_key_secret_ocid: “ocid1.vaultsecret.oc1.uk-london-1.hash” #Private key secret OCID
- vault_key_password_secret_ocid: “ocid1.vaultsecret.oc1.uk-london-1.hash” #Private key password secret OCID
- notifications_topic_ocid: “ocid1.onstopic.oc1.uk-london-1.hash” #OCID of topic created in step 3
7. Create the Function Application and Deploy
- Create the Functions application with subnet annotation:
fn create app <app-name> –annotation oracle.com/oci/subnetIds='[“<ocid1.subnet.oc1…>”]’
In some cases, snowflake security whitelist IP addresses. In our example, we have GoldenGate deployed in a private subnet, with a NAT gateway. We had snowflake whitelist the NAT gateway IP address, so GoldenGate could reach snowflake. The functions in this scenario, needs to be deployed in that same subnet.
fn create app automatic-key-rotation-app –annotation oracle.com/oci/subnetIds='[“ocid1.subnet.oc1.uk-london-1.hash”]’
- Build and Push
fn -v deploy –app <app-name>
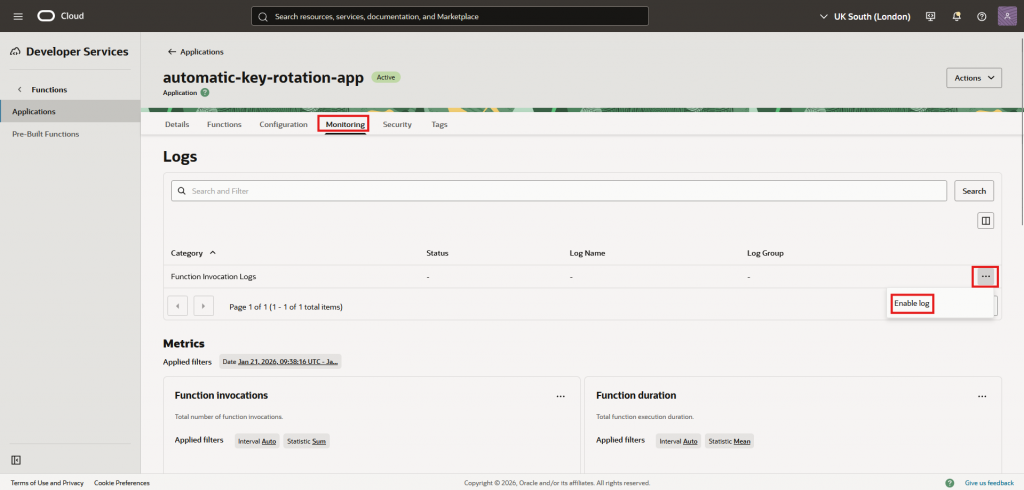
fn -v deploy –app automatic-key-rotation-app - Enable logging
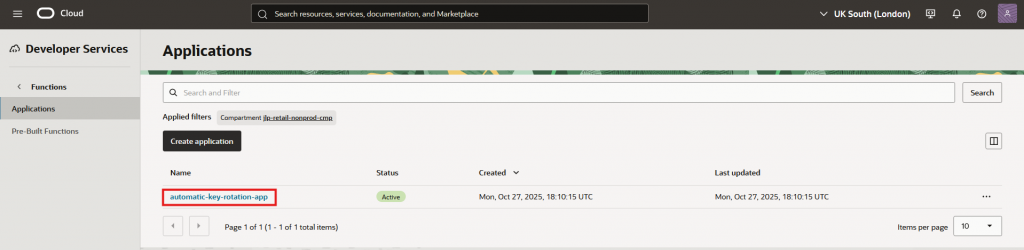
- Navigate to your deployed function by going to “Developer Services”, then “Applications”
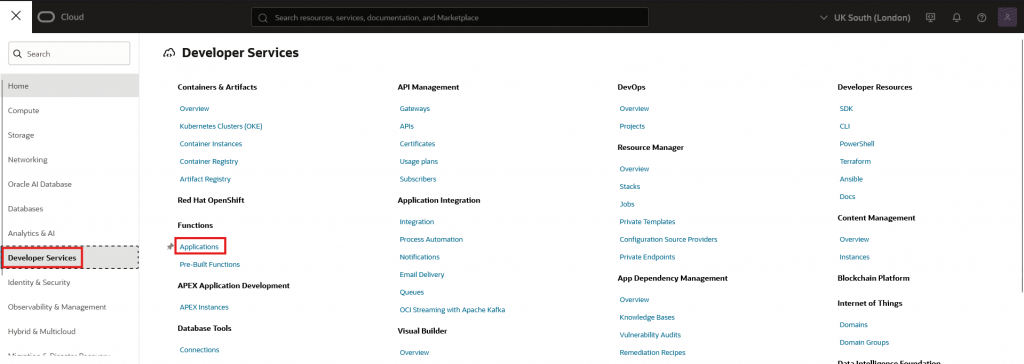
- Click on the application
- Go into “Monitoring” and then “Enable log”
8. IAM: Dynamic groups and Policies
Learn more about Dynamic groups and Policies.
- Create The Dynamic Group for the Function:
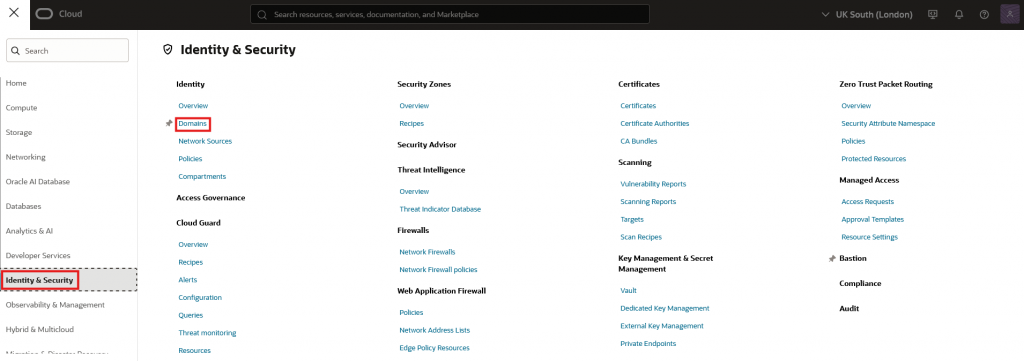
- Go into “Identity & Security” and then “Domains”
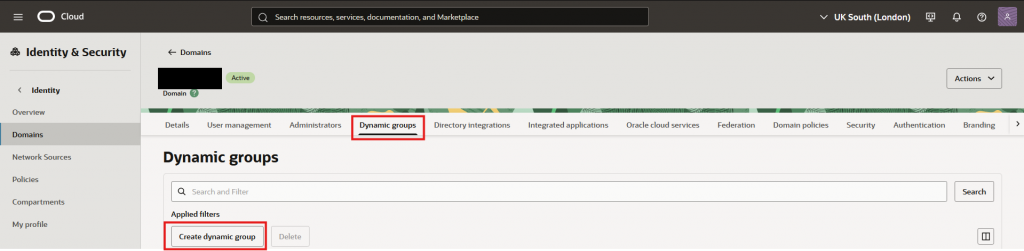
- Select your domain
- Navigate to “Dynamic groups” and press “Create dynamic group”
- Give it a name, a description, place the rule and press “Create”
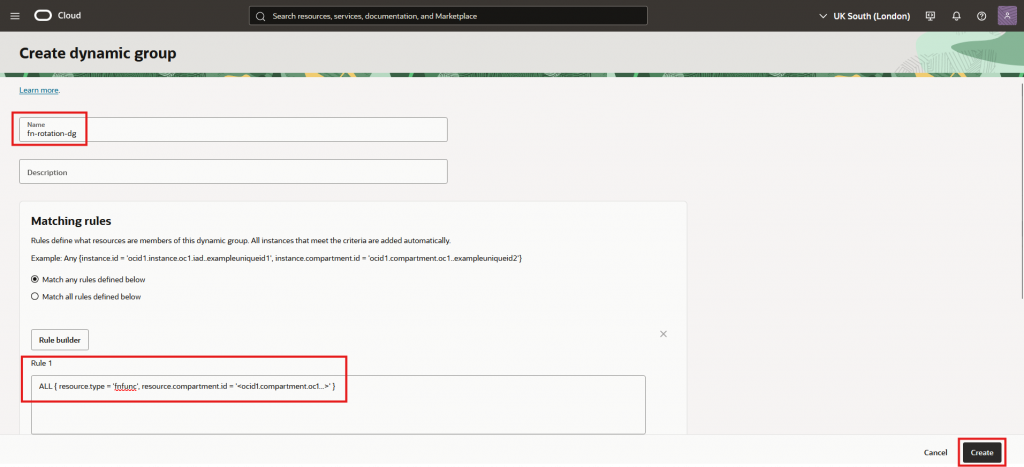 I’ve named it “fn-rotation-dg”, but you can have your own naming convention. Just take note to replace it on the policy below.
The rule is:
ALL { resource.type = ‘fnfunc’, resource.compartment.id = ‘<ocid1.compartment.oc1…>’ }
Where you must replace the comparment OCID by where you have deployed the function.
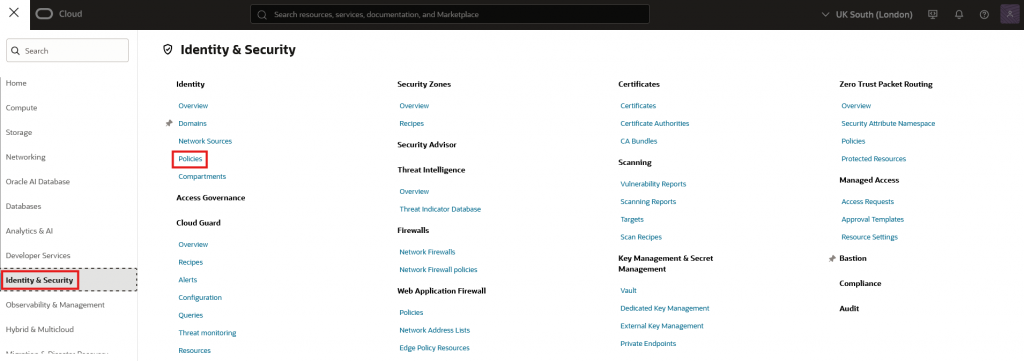
- Create the Policy in the target compartment:
- Go into “Identity & Security” and then “Policies”
- Navigate into your target compartment and then “Create Policy”
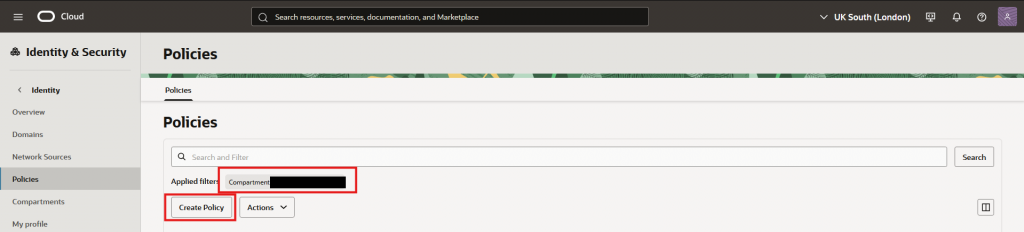
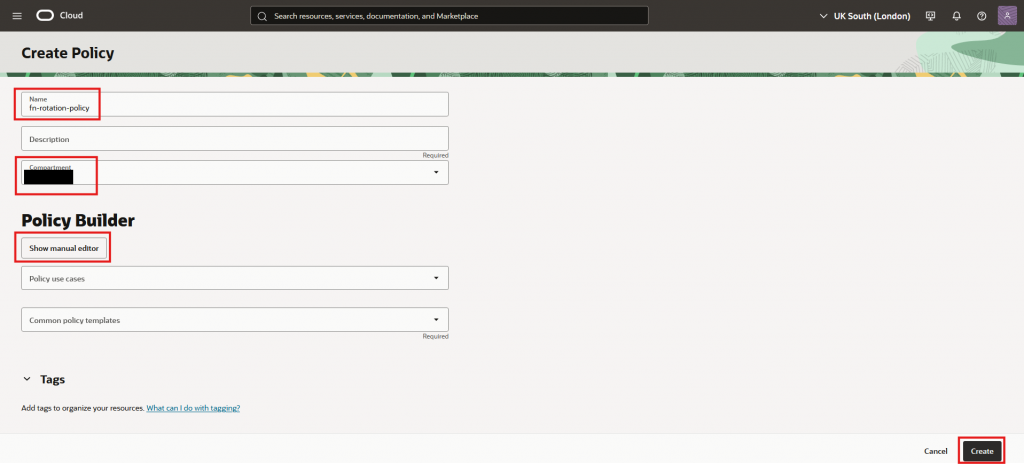
- Give it a name, description, be sure to be on the right compartment, click “Show manual editor”, and paste the policy rules below. Finally press “Create”
Allow dynamic-group '<domain-name>'/'fn-rotation-dg' to use vaults in compartment <compartment-name>
Allow dynamic-group '<domain-name>'/'fn-rotation-dg' to use keys in compartment <compartment-name>
Allow dynamic-group '<domain-name>'/'fn-rotation-dg' to read secret-bundles in compartment <compartment-name>
Allow dynamic-group '<domain-name>'/'fn-rotation-dg' to use secrets in compartment <compartment-name>
Allow dynamic-group '<domain-name>'/'fn-rotation-dg' to manage secret-version in compartment <compartment-name>
Allow dynamic-group '<domain-name>'/'fn-rotation-dg' to use ons-topics in compartment <compartment-name>
Allow dynamic-group '<domain-name>'/'fn-rotation-dg' to use goldengate-connections in compartment <compartment-name>
Allow dynamic-group '<domain-name>'/'fn-rotation-dg' to manage goldengate-deployments in compartment <compartment-name>
Allow dynamic-group '<domain-name>'/'fn-rotation-dg' to inspect subnets in compartment <compartment-name>
Be sure to replace <domain-name> with your domain, and <compartment-name> with your compartment.
Why each permission:
- use vaults: allows accessing Vault metadata required during operations.
- use keys: permits KEY_ENCRYPT during secret updates.
- read secret-bundles: read the latest or specific versions from Vault.
- use secrets: update secret metadata.
- manage secret-version: create and retire/delete versions.
- use ons-topics: publish rotation notifications.
- use goldengate-connections/manage goldengate-deployments: refresh connection and track work requests.
- inspect subnets: necessary for Functions networking.
9. Invoke and Validate
- Manual execution:
fn invoke <app-name> <function-name>
fn invoke automatic-key-rotation-app goldengate-snowflake-key-rotation
- Verify:
- Notifications email received
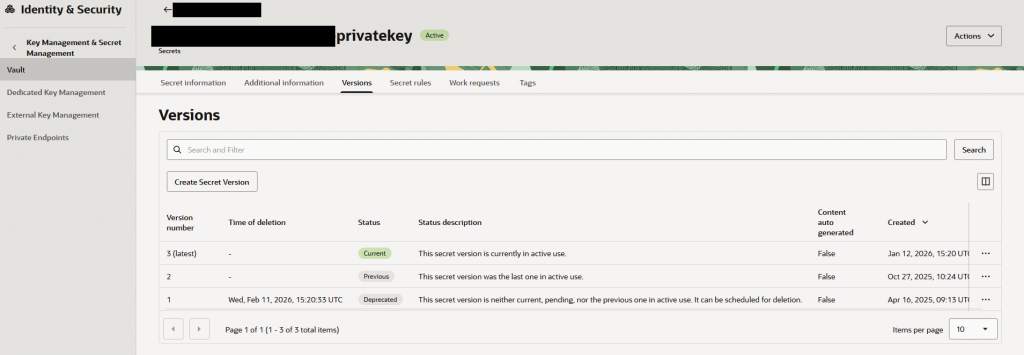
- Secret version incremented in Vault and old version got deprecated
- GoldenGate connection refreshed; deployment reflects the new credential
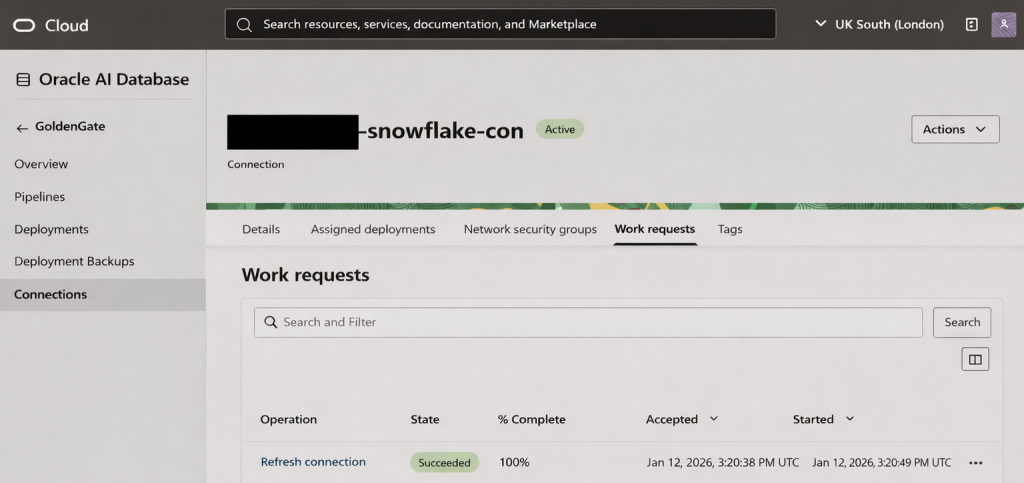
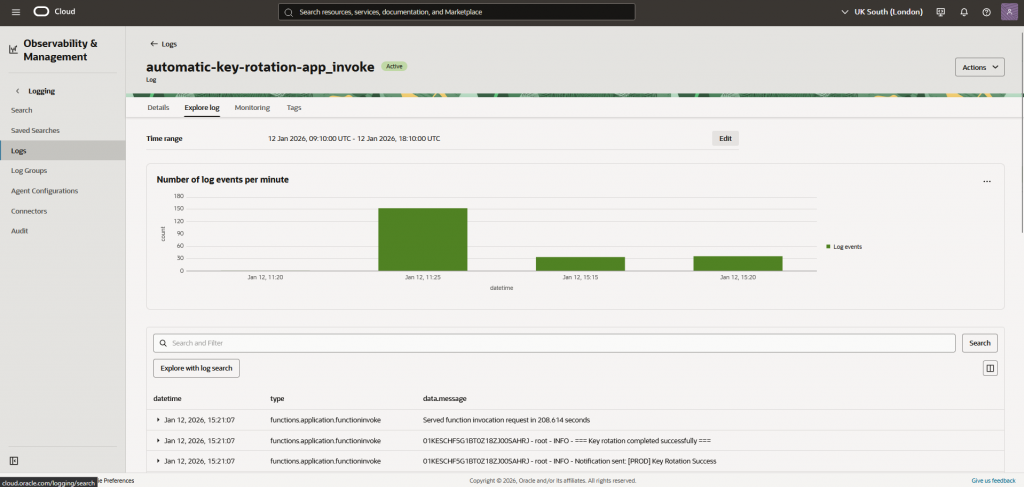
- Function logs in the designated log group
10. Schedule the rotation (Optional)
We can take advantage of OCI Scheduler, to automate the credential rotation.
- Create the Scheduler:
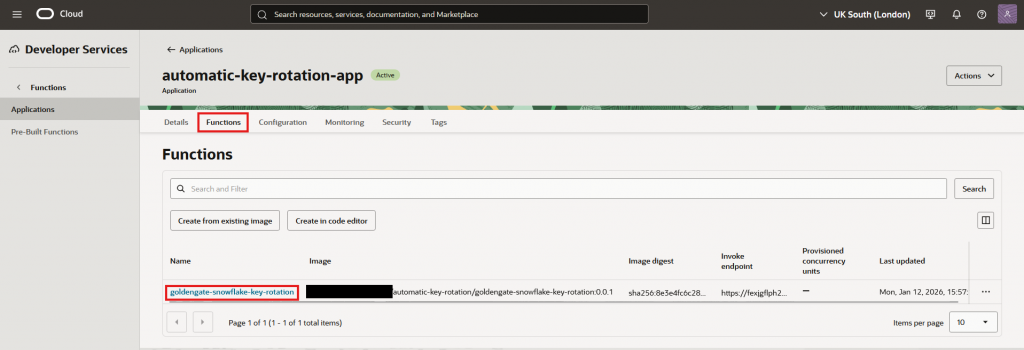
- Navigate to your deployed function by going to “Developer Services”, then “Applications”
- Click on the application
- Go into “Functions” and click on the function
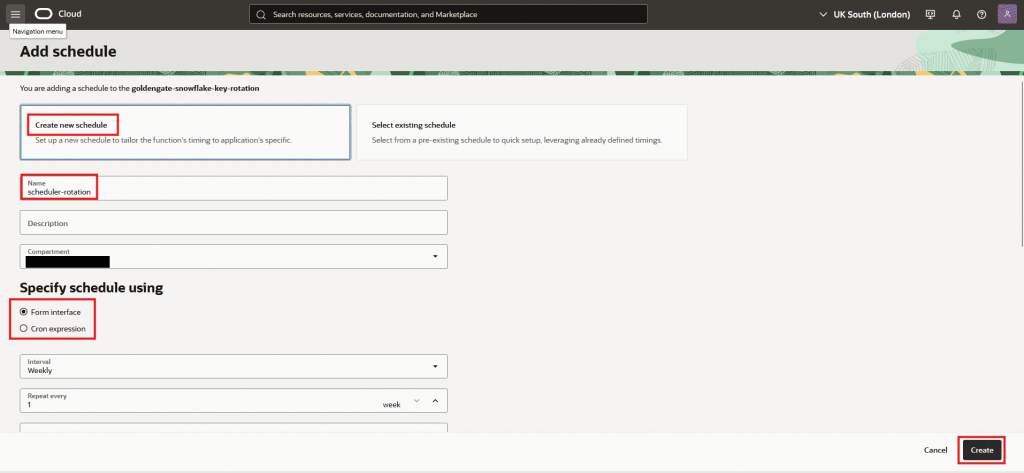
- Navigate to “Schedules” and press “Add schedule”
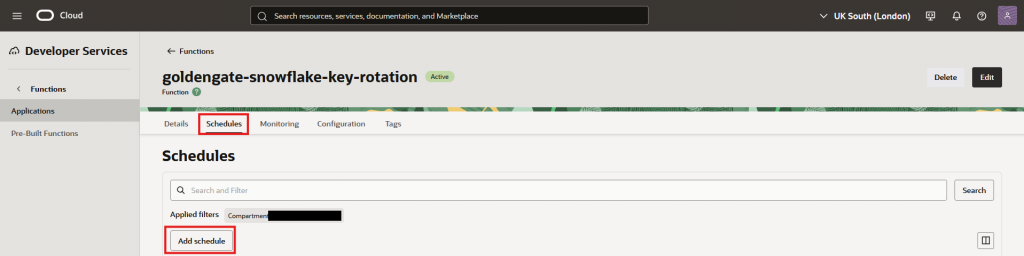
- Chose “Create new schedule”, give it a name and a description. Specify the recurrence to your liking and press “Create”
- Get the scheduler OCID, by clicking on it and location the OCID field
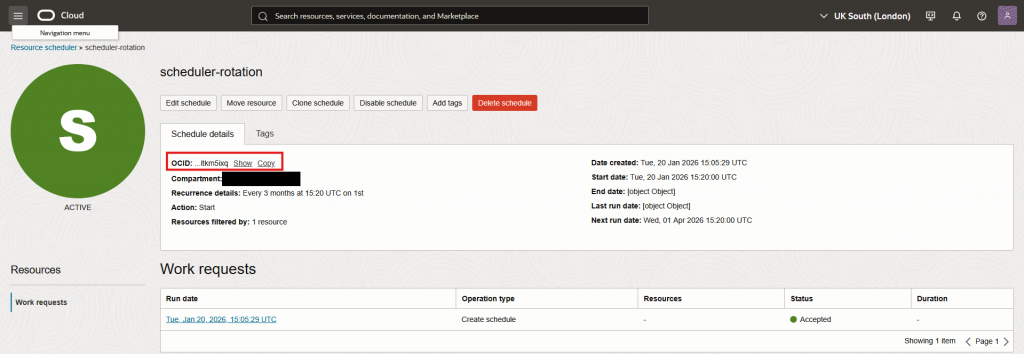
- Create the Dynamic Group for the Scheduler:
- Similar to chapter 8. Create a new dynamic group:
Name: scheduler-rotation-dg
Rule: ALL {resource.type=’resourceschedule’, resource.id=’ocid1.resourceschedule.oc1.uk-london-1.hash’}
where resource.id is the OCID of the scheduler, on step 1. - Create the Policy in the target compartment:
- Similar to chapter 8. Create a new dynamic group:
Name: scheduler-rotation-policy
Statment: Allow dynamic-group ‘<domain-name>’/scheduler-rotation-dg’ to manage functions-family in compartment <compartment-name>
11. Changing function variables
One crucial point about this architecture, is that it allows the variables to be changed on the fly, without having to change or recompile/deploy code.
- Going into the Configurations:
- Go to the function like we did to created the scheduler. But this time click on “Configuration”
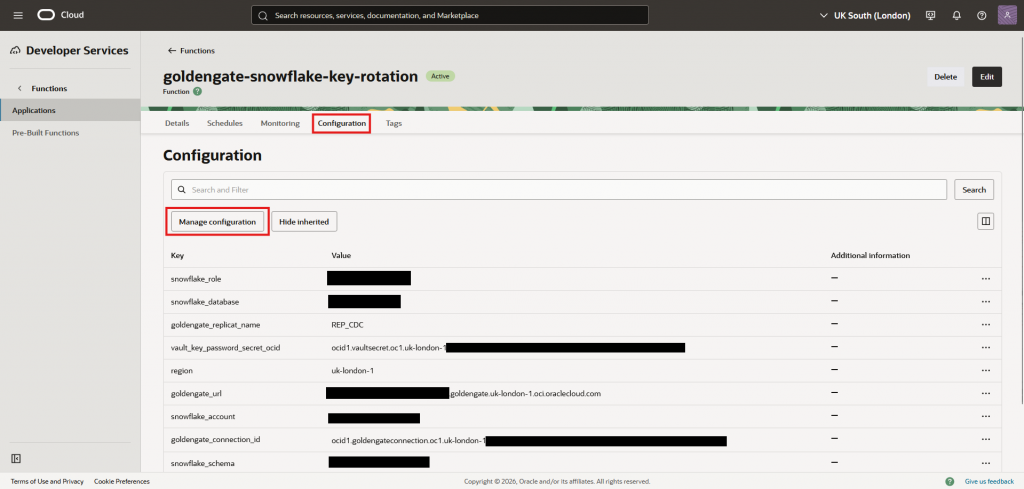
- Here we can click on “Manage configuration” and update any variable as needed
Notes
- Replace all example identifiers with your own: <ocid1.compartment.oc1…>, <topic-ocid>, <secret-ocid>, <connection-ocid>, <region-key>, <namespace>, <app-name>, <function-name>, <hash>.
- External services like Snowflake should be used in accordance with your organization’s security and compliance requirements. Validate this pattern with your security team before production use.