Introduction
Oracle Enterprise Data Quality provides a comprehensive data quality management environment, used to understand, improve, protect, and govern data quality. The software facilitates best practice Master Data Management, Data Governance, Data Integration, Business Intelligence, and data migration initiatives, as well as providing integrated data quality in CRM and other applications and cloud services.
OCI Code Repository is a private code repository in OCI which is like GitHub. Customers can use OCI Code Repository to securely host their code, documents, and data.
In this blog, we will learn how to integrate Oracle EDQ with OCI Code Repository.
Prerequisites
- Knowledge of OCI cloud services
- Knowledge of Oracle EDQ
- Knowledge in version control systems is desirable
Oracle EDQ
Oracle EDQ is available as a marketplace image in OCI and can be provisioned in OCI. Use the below links to explore Oracle EDQ.
Cloud Marketplace: https://cloudmarketplace.oracle.com/marketplace/en_US/homePage.jspx
EDQ Livelabs: https://apexapps.oracle.com/pls/apex/dbpm/r/livelabs/view-workshop?wid=612
OCI Code Repository
OCI Code Repository is available in DevOps projects which is part of Developer services in OCI.
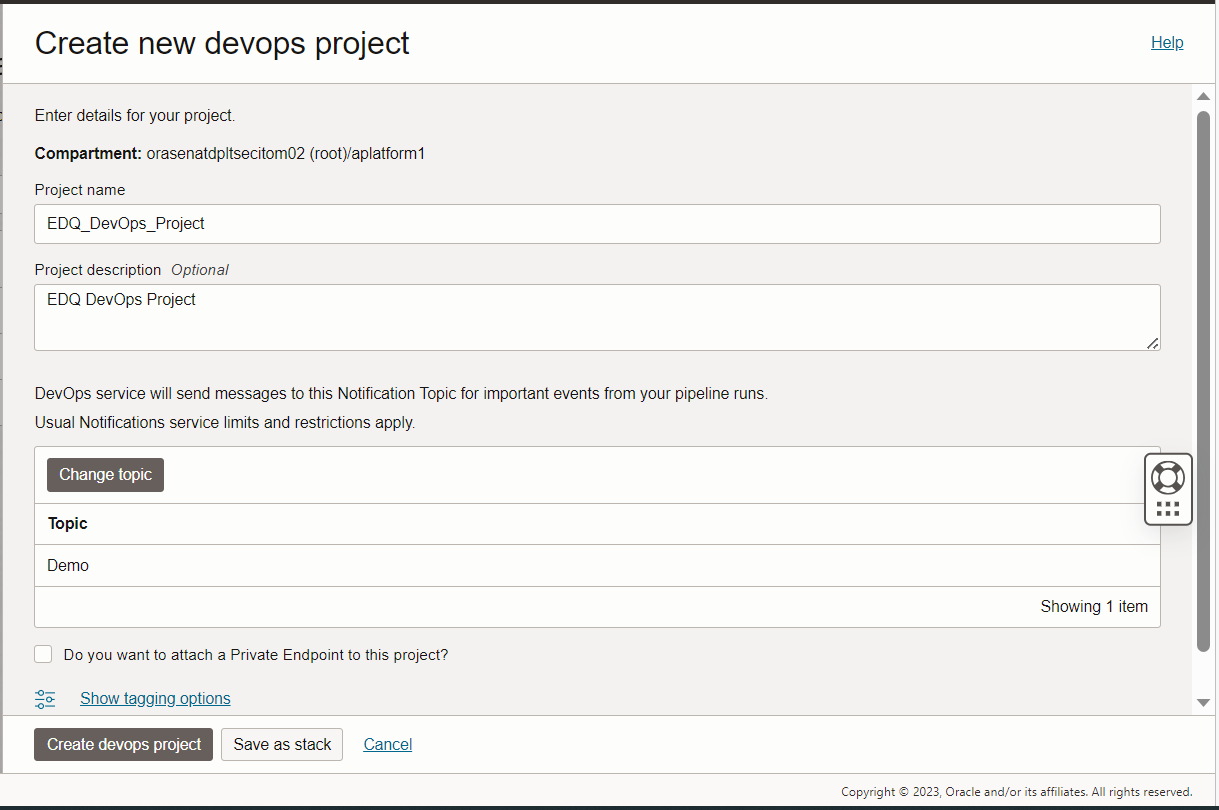
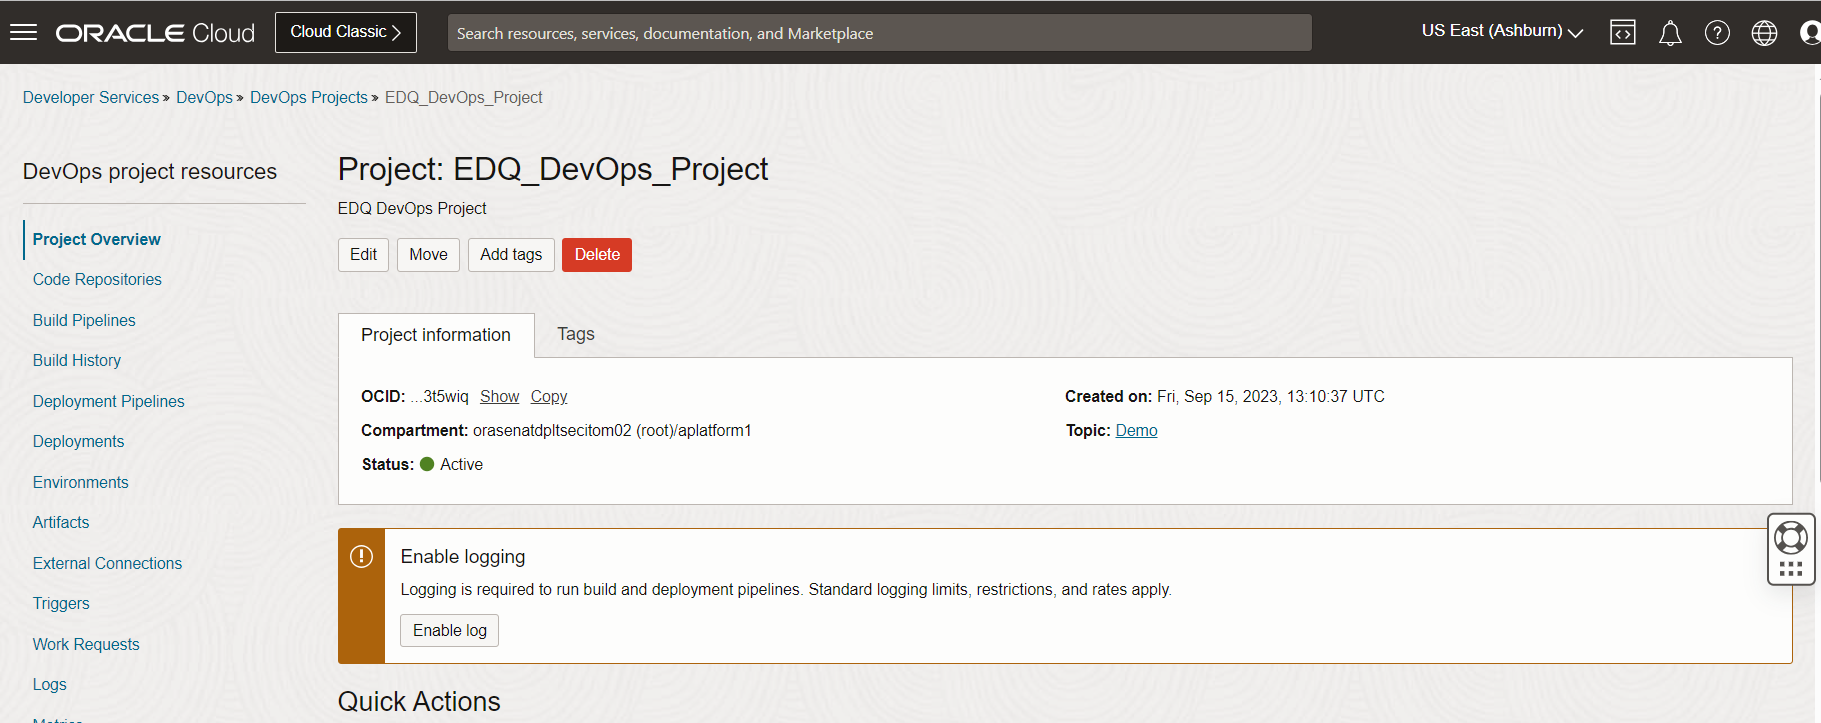
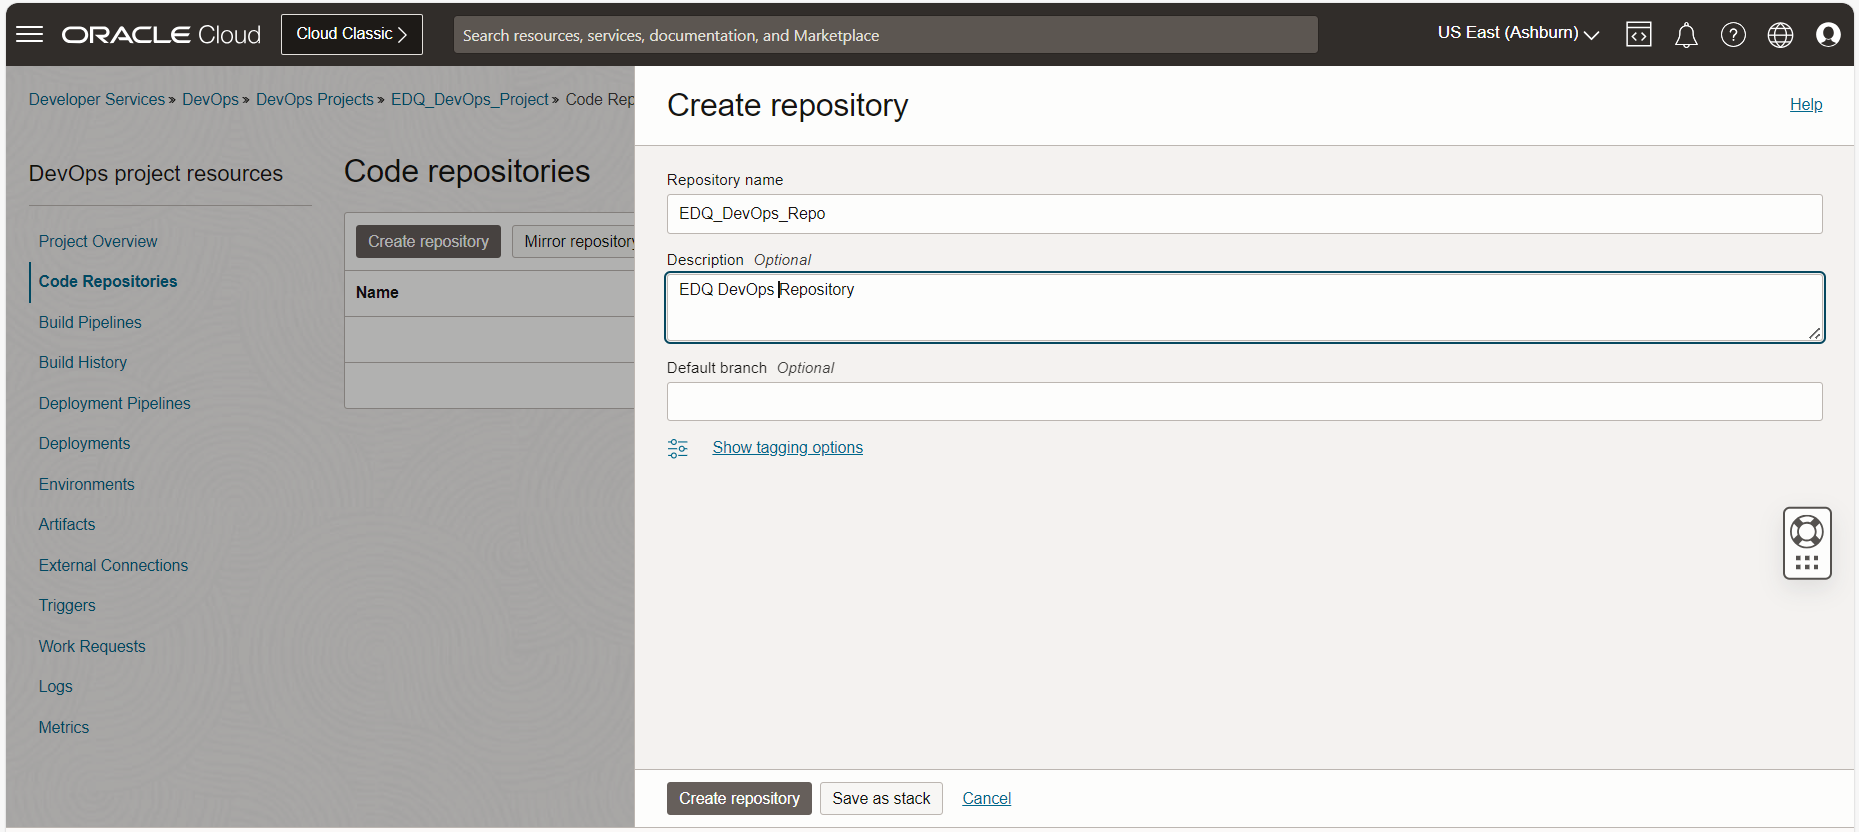
Code Repositories can be created on the code repository tab on the left side.
OCI Code Repository Client Setup
Code Repository must be integrated with a fresh installation of EDQ.
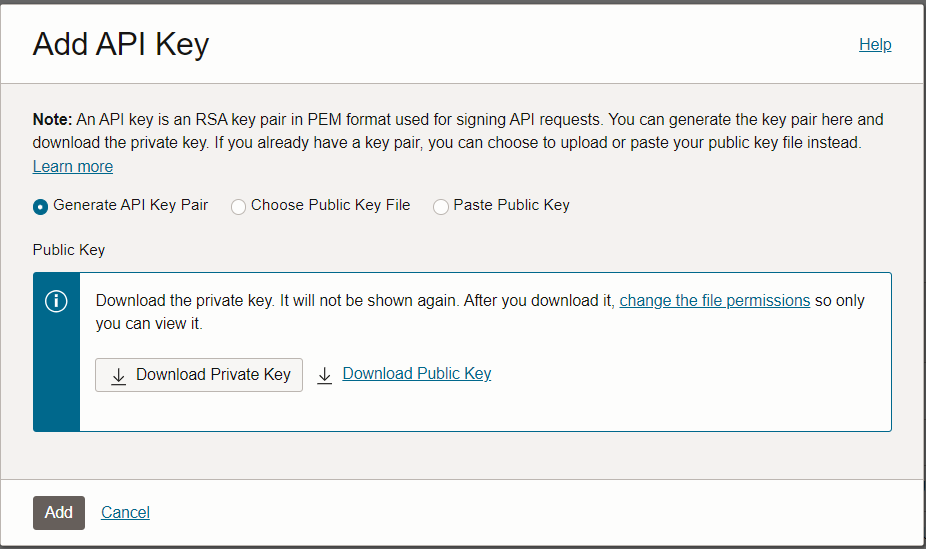
An OCI API key is required to connect from code repository client to Code Repository.
- Create the API Key for OCI User. Login to OCI console and navigate to users page.
Identity -> Domains -> Default Domain -> Users -> abc -> API keys.

- Click on add API key and download the private and public keys.
- Create a “.oci” folder in the EDQ instance and paste the private key in the “.oci” folder.
$ mkdir .oci
[tomcat@edq.oci]$ pwd
$ cd /opt/tomcat/.oci
- Install git client using below command.
$ sudo dnf install git
- Create a new folder named git
$ cd /opt
$ mkdir git
- Create a .ssh folder if not available and create a config file in .ssh folder.
$ mkdir -p ~/.ssh
$ vi ~/.ssh/config
- Add the below entries in the config file so that git client and connect to OCI Code Repository.
Host devops.scmservice.*.oci.oraclecloud.com
User xxxxx@<tenancy>
IdentityFile /opt/edq/.oci/oci_api_key.pem
Identify File is the private key file of user which has access to code repository.
- Navigate to /opt/git directory and initiate the git repository.
$ cd /opt/git
$ git init
- Now, add the remote origin using below command.
$ cd /opt/git
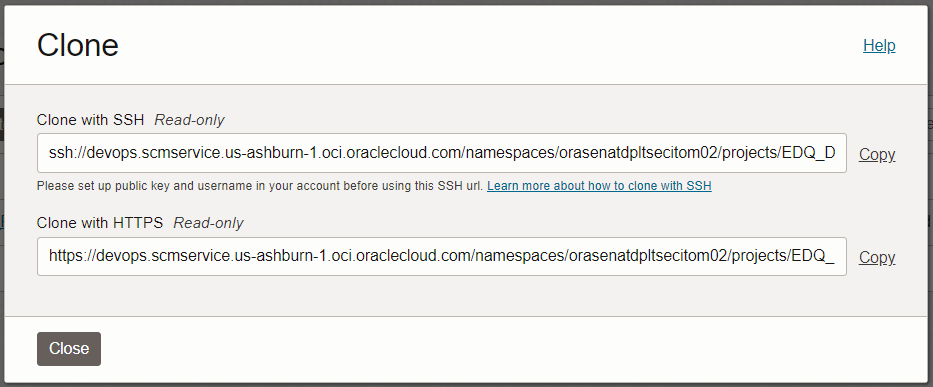
$ git remote add origin ssh://devops.scmservice.us-ashburn-1.oci.oraclecloud.com/namespaces/<tenancy>/projects/EDQ_DevOps_Project/repositories/EDQ_DevOps_Repo
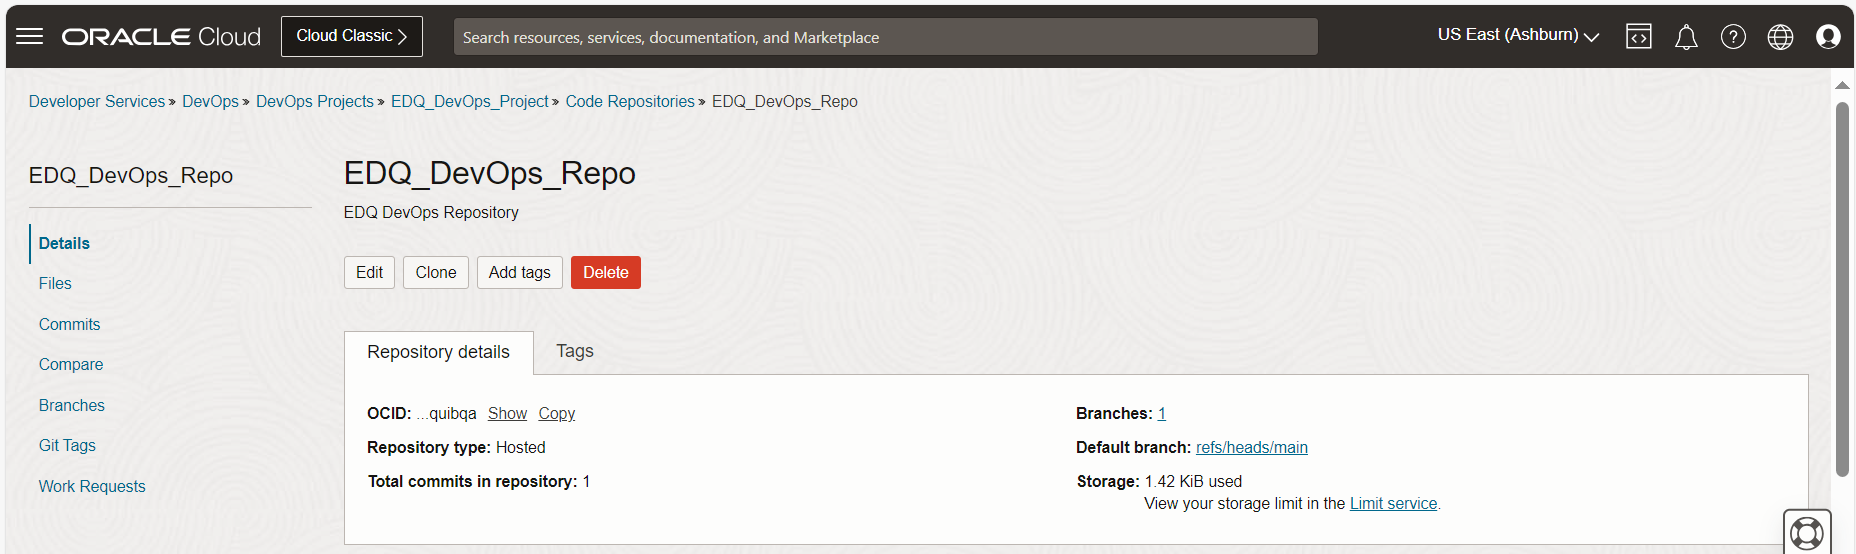
This ssh url can be obtained by selecting the clone option in OCI console code repository page.

- Run below scripts in /opt/git directory to create the EDQ folders in /opt/git.
$ cd /opt/git
rootdirs=”Data_Stores Hidden_Reference_Data Images Projects Published_Processors Reference_Data”
# Create root dirs
for i in $rootdirs
do x=$(echo $i | tr ‘_’ ‘ ‘)
mkdir “$x”
echo > “$x/.gitignore”
echo created $x
done
cat > .wsprops <<EOF
systemversion=12.1.3:base
EOF
- Add the directories into git staging using the below git add command, commit the changes and push the changes to code repository.
$ cd /opt/git
$ git add *
$ git commit -m ‘created EDQ folder’
$ git push origin master
- Verify the pushed code in OCI code repository.
Configuring EDQ Primary Instance with OCI Code Repository
- In the fresh EDQ installation, add below lines in director.properties to enable the version control system. The director.properties file is present in below path.
Director properties file location = /opt/edq/oedq.local.home
$ cd /opt/edq/oedq.local.home
sccs.workspace = /opt/edq
sccs.vcs.type = null
- Restart the EDQ services in tomcat using below commands.
$ sudo systemctl stop tomcat@edq.service
$ sudo systemctl start tomcat@edq.service
Note: This will enable the version control in EDQ. EDQ services will not start if any of the above steps are not properly configured.
- Create a new project in EDQ director and add the project to git staging
$ cd /opt/git/repo/dev
$ git add Projects/test1
$ git commit -m ‘Committing a project’
$ git push
Verify the changes in the code repository.
Configuring EDQ Secondary Instance with OCI Code Repository
Run the steps from 3 to 9 in “Git Client Setup on EDQ Instance”.
- Pull all the changes from OCI Code Repository into EDQ secondary instance using the git pull command.
$ cd /opt/git
$ git pull origin master
- Restart the EDQ server using below commands.
$ sudo systemctl stop tomcat@edq.service
$ sudo systemctl start tomcat@edq.service
- Run the below command in EDQ secondary instance to capture those changes in EDQ directory.
$ cd /opt/edq/edq/oracle.edq
$ java -jar jshell.jar scripts/sccs/scan.groovy -server localhost:8090 -user <edq_user_name> -pw <edq_password>
- Verify the project in secondary instance.
References
- https://docs.oracle.com/en//middleware/fusion-middleware/enterprise-data-quality/12.2.1.4/dqext/integrating-git.html
- https://docs.oracle.com/en-us/iaas/Content/devops/using/managing_coderepo.htm
Conclusion
The above blog provides steps to configure EDQ with OCI code repository. It includes the code repository setup, Git client installation, EDQ configuration with Git and capturing the Git changes in EDQ secondary instance.