Since Oracle Cloud Infrastructure (OCI) Database with PostgreSQL version 14.9 is available now, you can test migrating your data from onprem PostgreSQL to OCI Database with PostgreSQL which is a fully managed PostgreSQL-compatible service with intelligent sizing, tuning, and high durability.
For more information, see Overview of OCI Database with PostgreSQL.
This blog will show how you can do a zero-downtime migration from On-Premise PostgreSQL to OCI PostgreSQL using OCI Goldengate for PostgreSQL.
About Oracle Cloud Infrastructure GoldenGate
Learn about data replication concepts to help you start with Oracle Cloud Infrastructure GoldenGate.
Oracle Cloud Infrastructure GoldenGate is a fully managed, native cloud service that moves data in real-time, at scale. OCI GoldenGate processes data as it moves from one or more data management systems to target databases. You can also design, run, orchestrate, and monitor data replication, transform data, and analyze streaming data in real-time without allocating or managing any compute environments.
Watch a short overview video, or take an interactive service tour to learn more.
Architecture
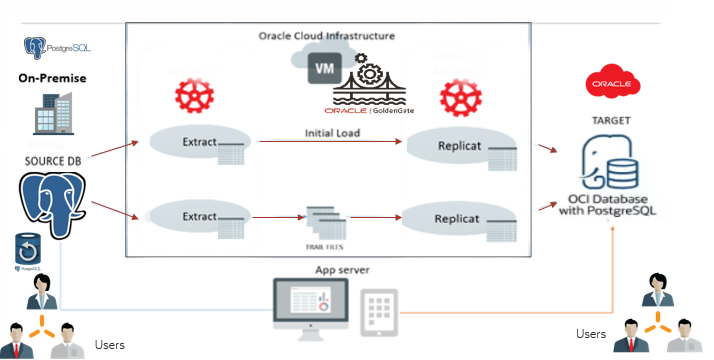
End-to-end migration to OCI Database with PostgreSQL
The end-to-end migration to OCI Database with PostgreSQL involves six key stages:
- Take backup for source metadata
- Import metadata file into OCI Database with PostgreSQLs
- Create an Initial Load Extract on source onprem and note the LSN number.
- Create an Initial Load Replicat on OCI Database with PostgreSQL target using the same trail file (initial load extract)
- Create a CDC Extract on source onprem and start from the LSN number captured.
- Create and run a CDC Replicat on OCI Database with PostgreSQL target using the same trail file (CDC extract)
Source Environment
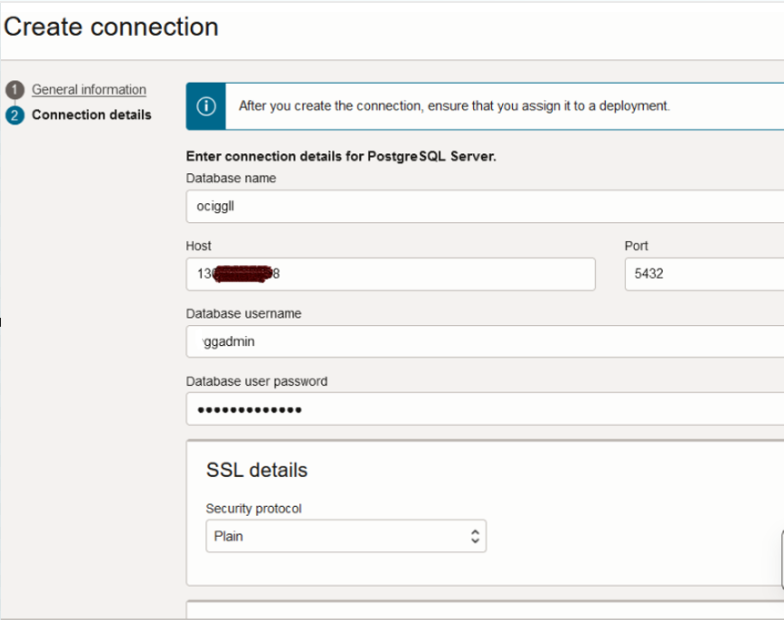
- Database Name: ociggll
- User: admin
- Schema: src_ociggll
- Version: PostgreSQL 14.10
Target Environment
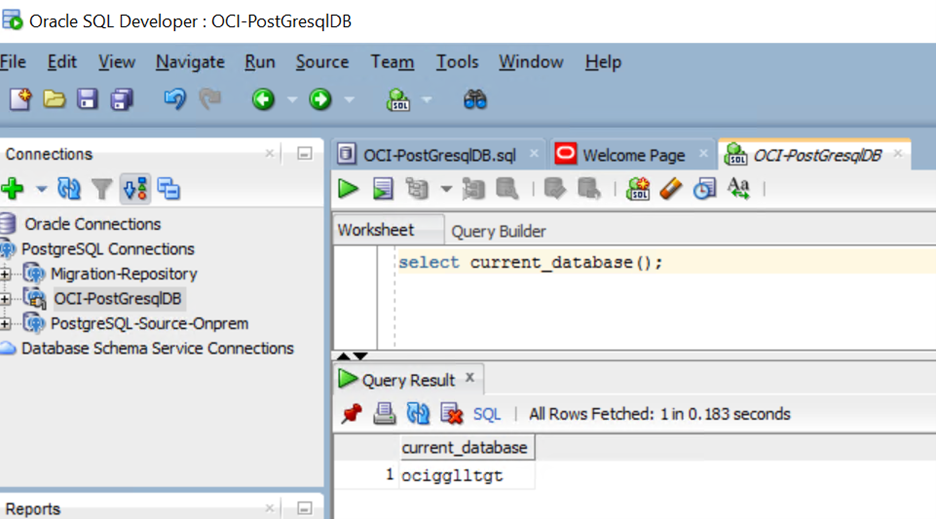
- Database Name: ociggllTgt
- User: postgres
- Schema: src_ociggll
- Version: PostgreSQL 14.9
Prerequisites
Before you get started, you will need an Oracle Cloud account.
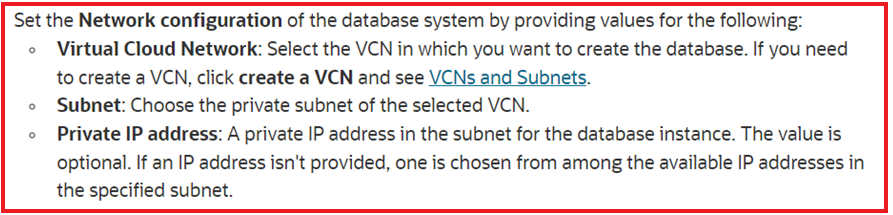
Create a VCN and subnet, a bastion (Compute image), and provision OCI PostgreSQL database instances.
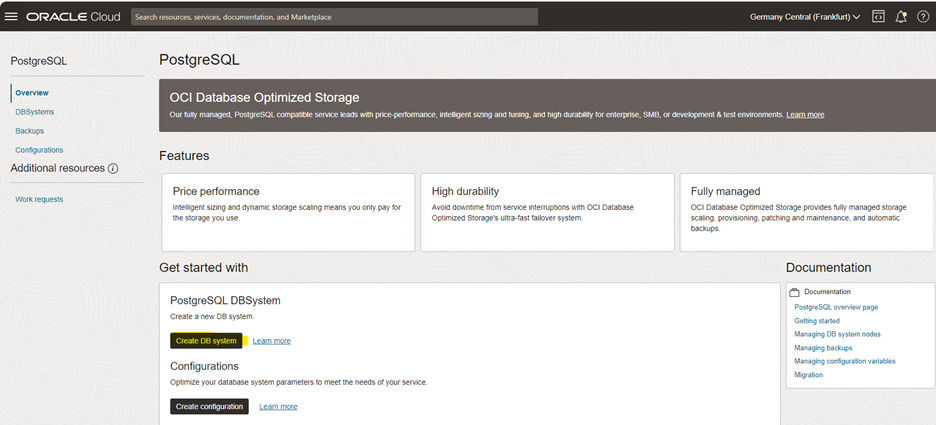
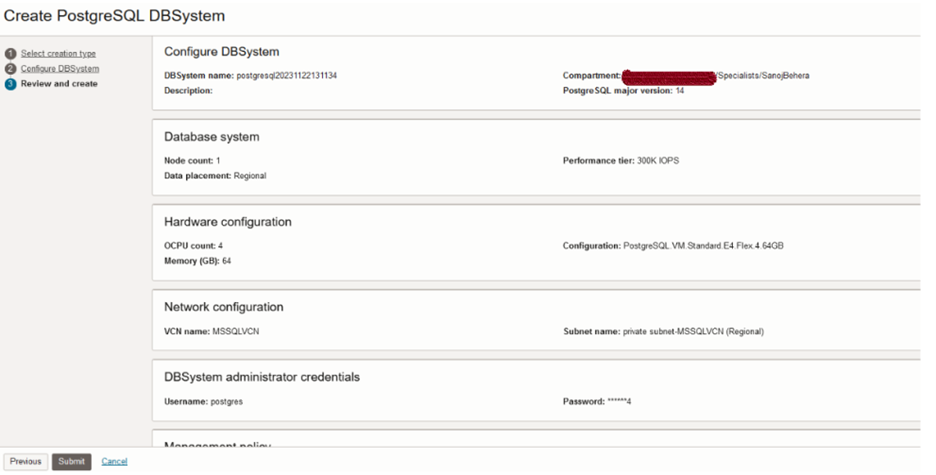
Navigate to Databases and then OCI PostgreSQL DB system.
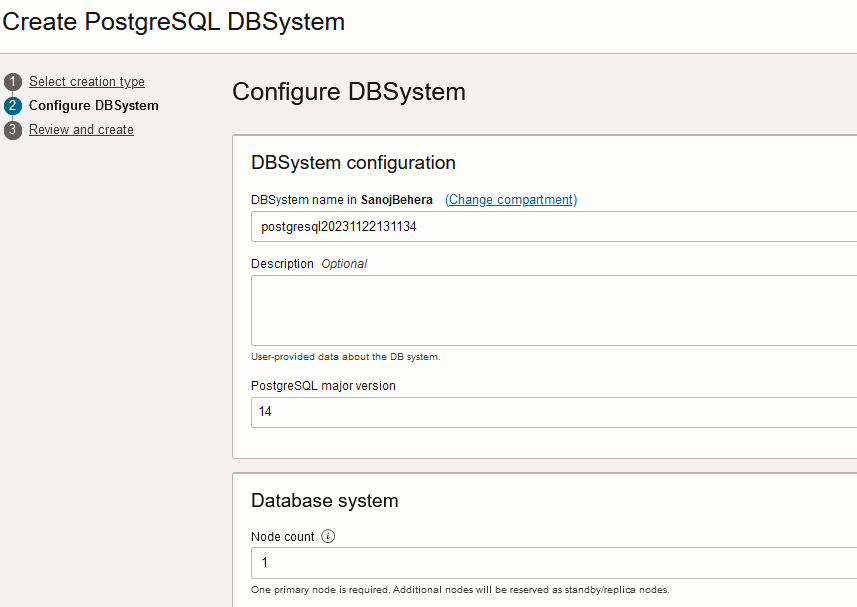
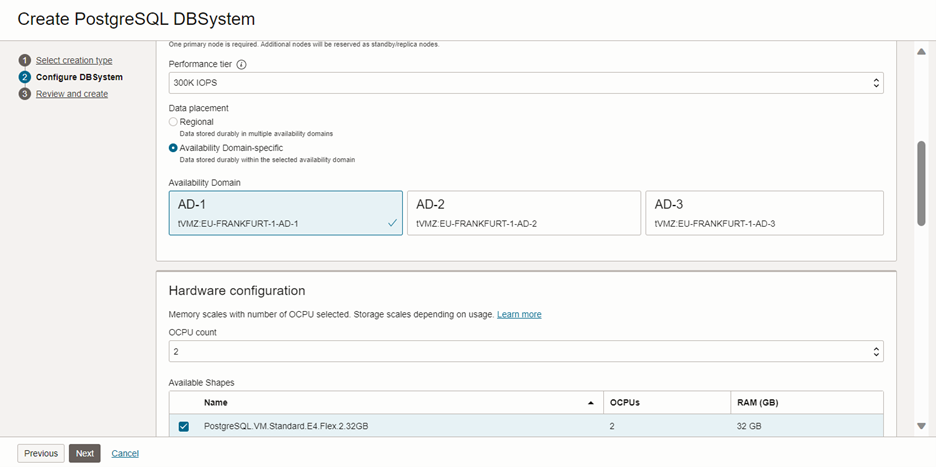
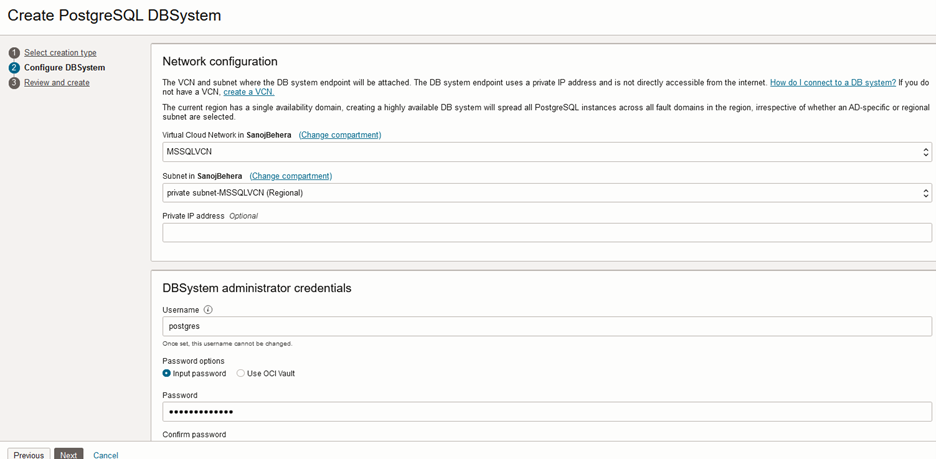
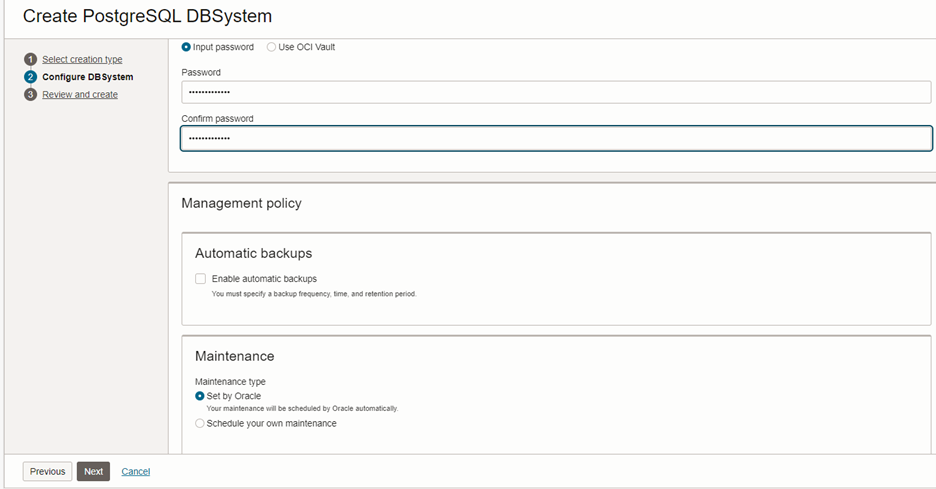

Click Submit.
You might get the below error.
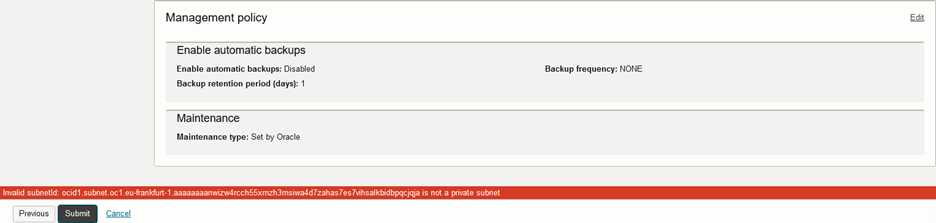
As per the documentation, we must use a private subnet: Creating a Database System (oracle.com)
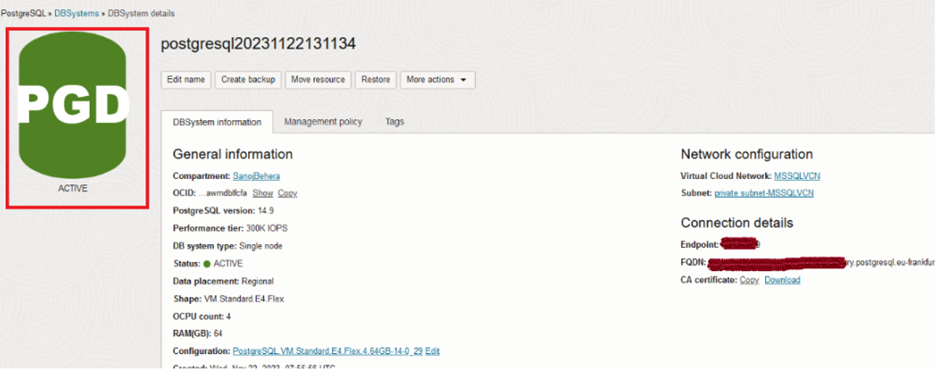
The database is created now and should show active.
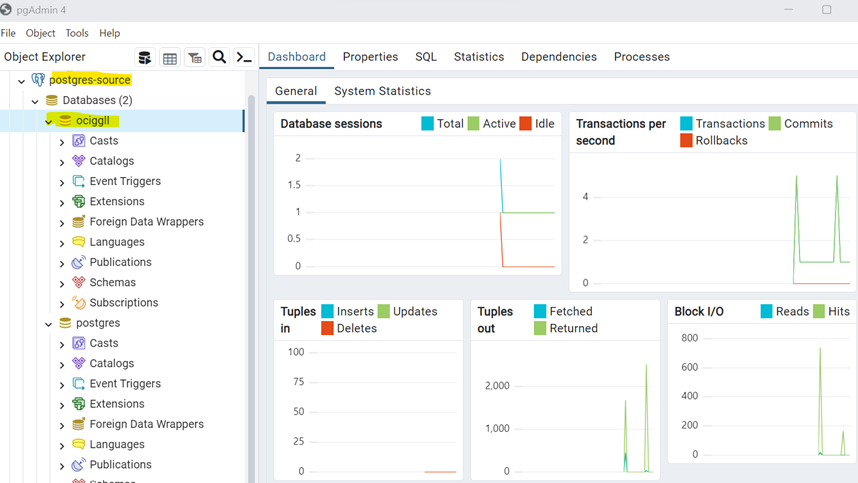
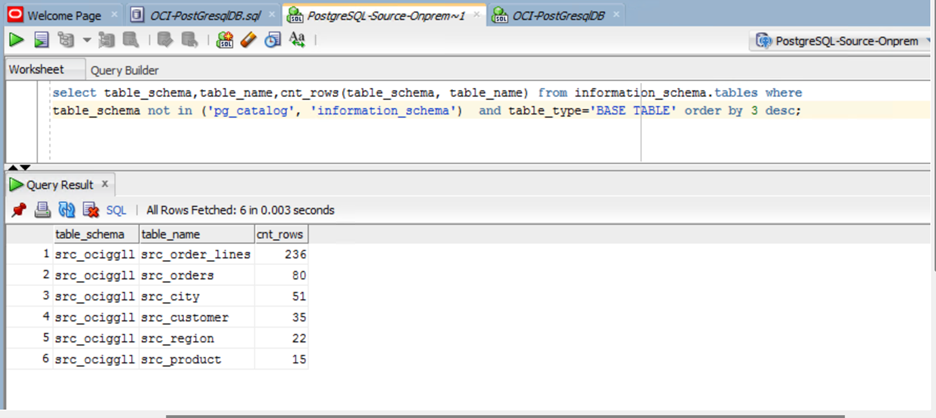
PostgreSQL Source on-prem Database (Monitoring using PGADMIN4)
Monitoring using SQL Developer
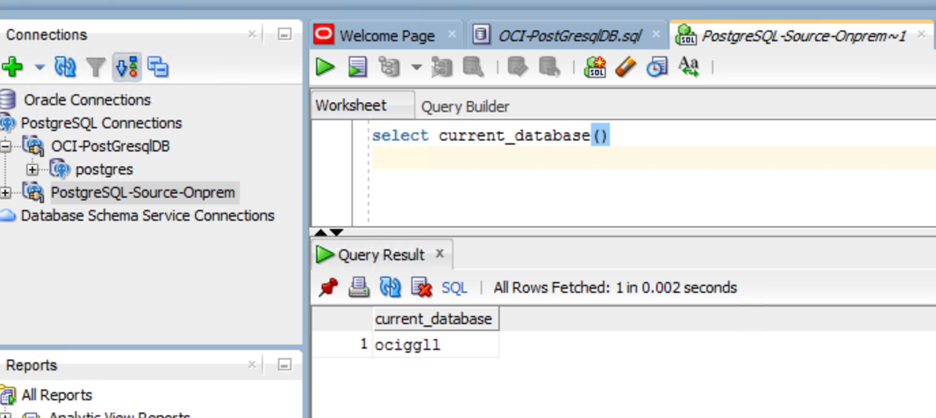
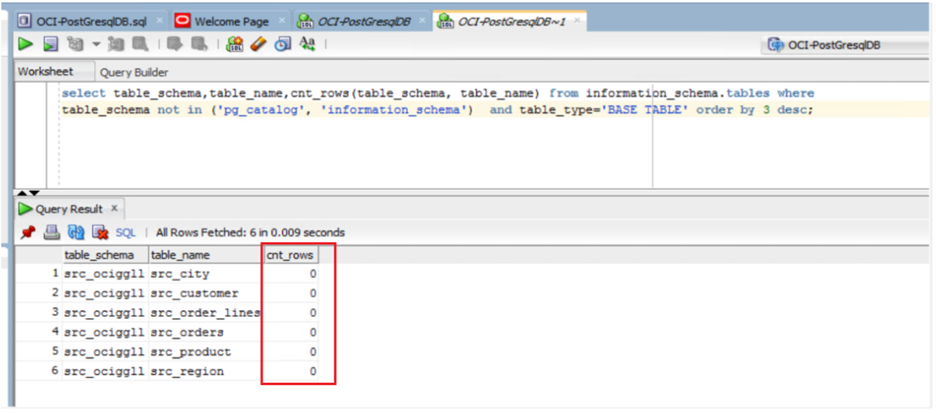
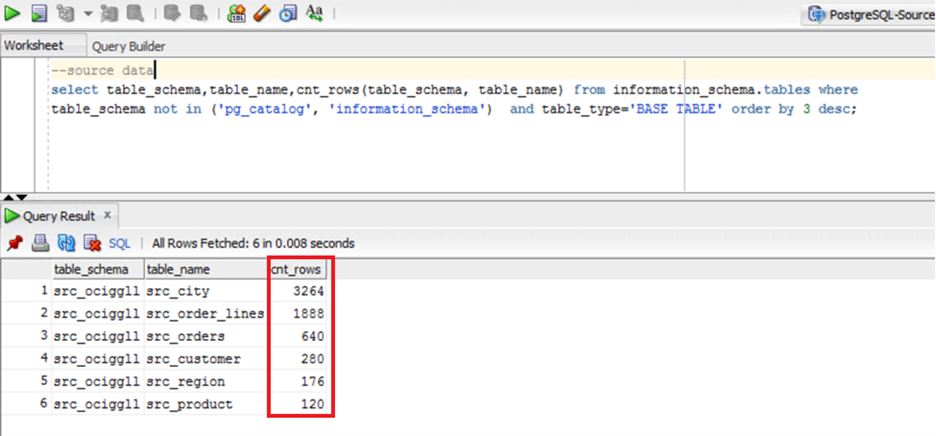
Check the Source Data.
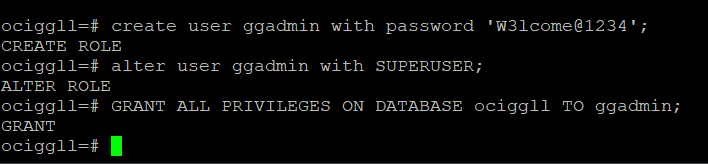
Run the following commands to set up the user (On the source database):
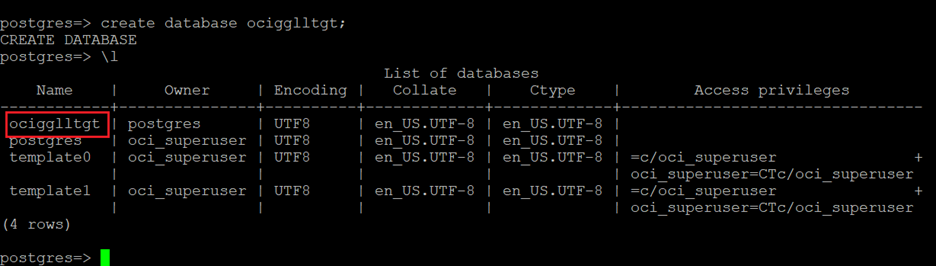
OCI Database with PostgreSQL (Target)
We have created a new database for restoring the onprem database. We will not use the default database postgres for this test.
To create the OCI Goldengate connection to the on-prem PostgreSQL database, follow this blog: https://blogs.oracle.com/dataintegration/post/using-oracle-cloud-infrastructure-oci-goldengate-with-postgresql-databases.
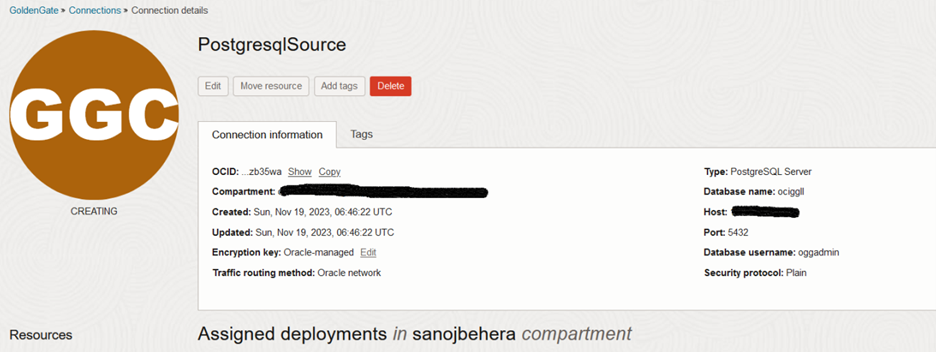
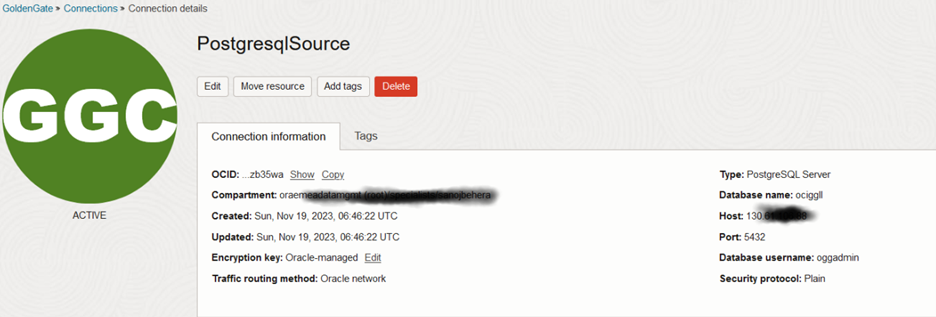
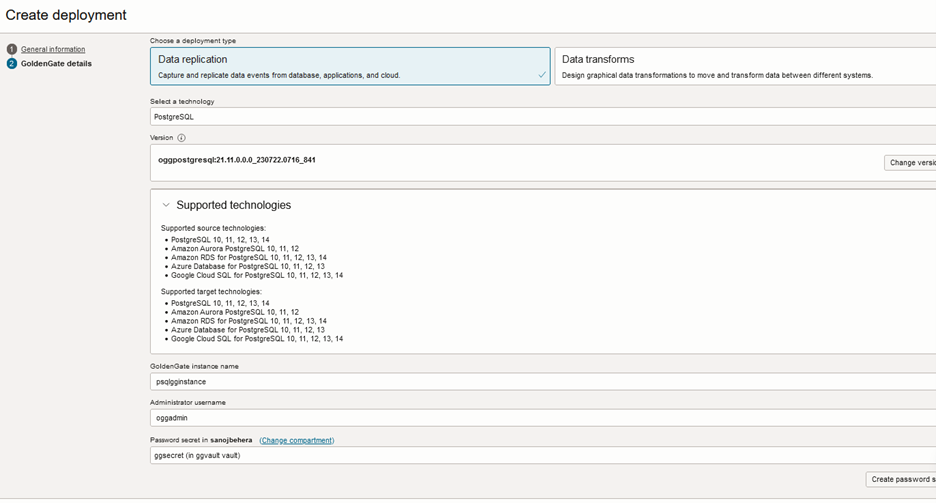
Creating OCI GoldenGate Deployment for PostgreSQL

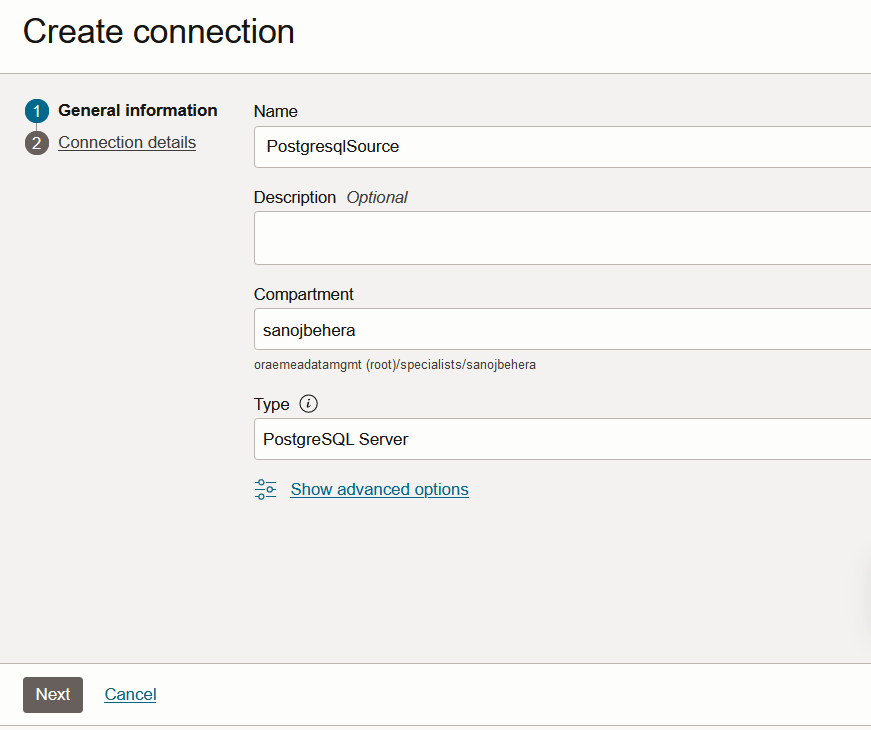
Create Target Connection
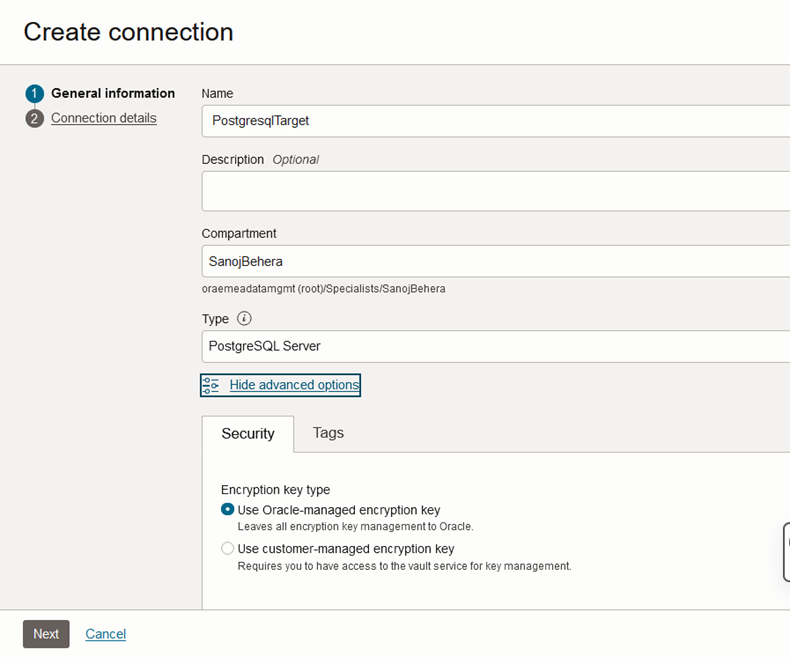
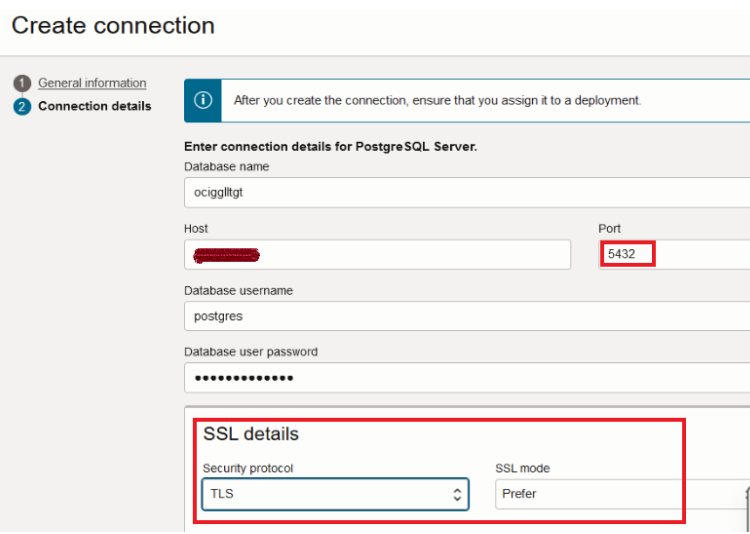
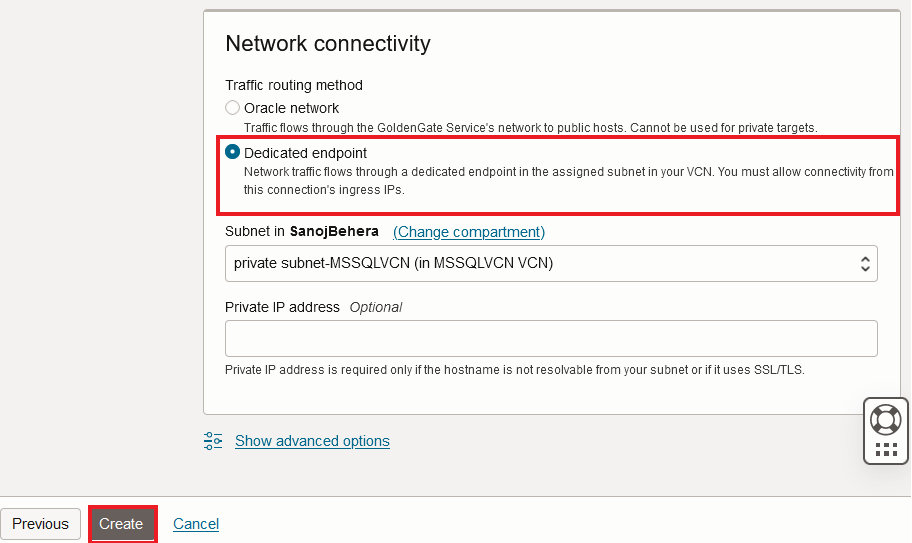
Note: For OCI PostgreSQL connection creation, please keep in mind the following:
- Use Dedicated endpoint as the Traffic routing method.
- Pick a private subnet so OCI-GG creates a Private Endpoint to access the OCI PostgreSQL private IP.
- Ensure port 5432 is open in selected subnet.
- SSL mode should be set to ‘Prefer’.
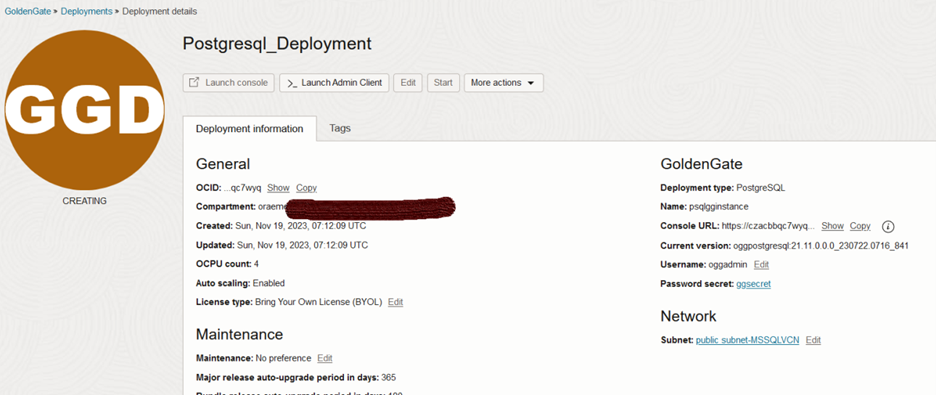
Once the OCI GoldenHate deployment has been created and the connections are assigned, go to the Deployment details page and launch the Console.

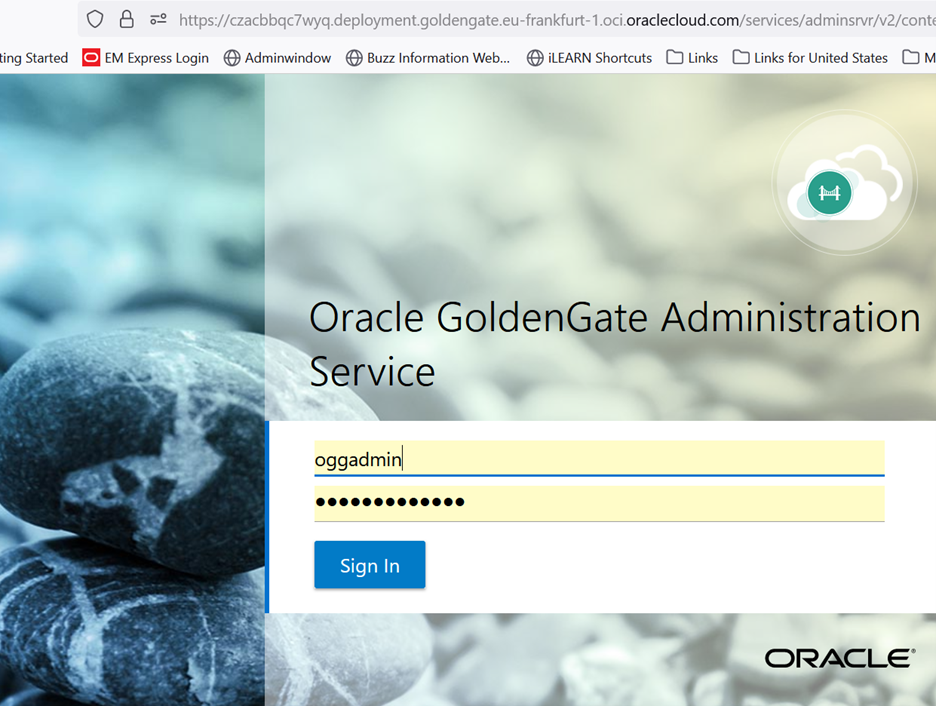
In Administration Service, go to Configuration to open up the Credentials. Click on the Connect button to verify connectivity.
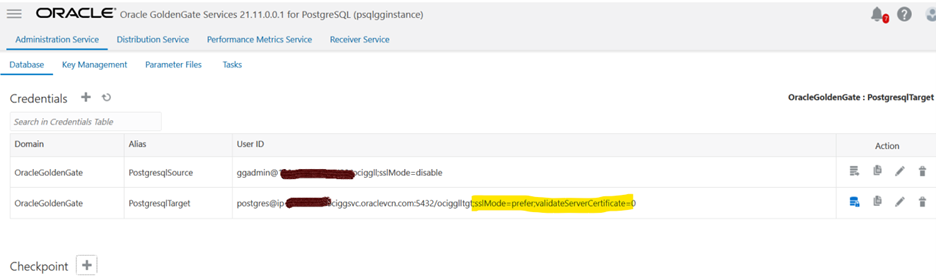
sslMode should be set to prefer for the target OCI PostgreSQL database.
You will get the following error message if you are not using the right SSL mode. See ‘OCI Database with PostgreSQL – PSQL Error: ‘FATAL: no pg_hba.conf entry for host, no encryption’ when trying to Connect to Server (Doc ID 2983992.1)’ for more information.
Take Export backup Using pg_dump
Now, let’s take a metadata backup from the source database and restore it into the target database.
pg_dump -h <source-host> -U admin -d ociggll -F c -v -s –file=sourceexport.dump
![]()
Pgdump documentation: https://www.postgresql.org/docs/14/app-pgdump.html
Import Metadata dump file into OCI PostgreSQL DB system using pg_restore
pg_restore -h <private endpoints> -U postgres -d ocigglltgt -v sourceexport.dump

After the restore operation has been completed successfully, we can verify that the tables exist in the database.
Now, we will do the initial load and CDC test for actual data using OCI Goldengate.
Initial Load
You need to create the Initial load extract and write down the LSN Number.
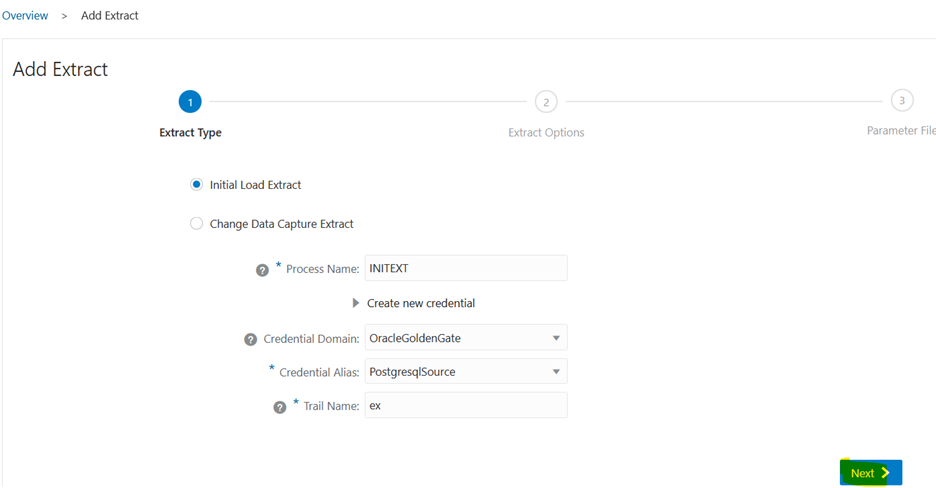

Refer to Configuring an Initial Synchronization for a PostgreSQL Source Database using Precise Instantiation.
Note: Verify these requirements if your Extract fails:
Additional requirements for PostgreSQL are:
- To capture from a PostgreSQL database, Oracle GoldenGate requires the test_decoding database plugin to be installed for the database, which may not have been installed by default.
- Ensure that the postgresqlversion#-contrib package is installed on the database server.
For example: sudo yum install postgresql13-contrib
It is recommended that the version of the client libraries should match the PostgreSQL database version. Client versions below 10 are not supported.
sudo yum install postgresql14-contrib (our database is version 14)
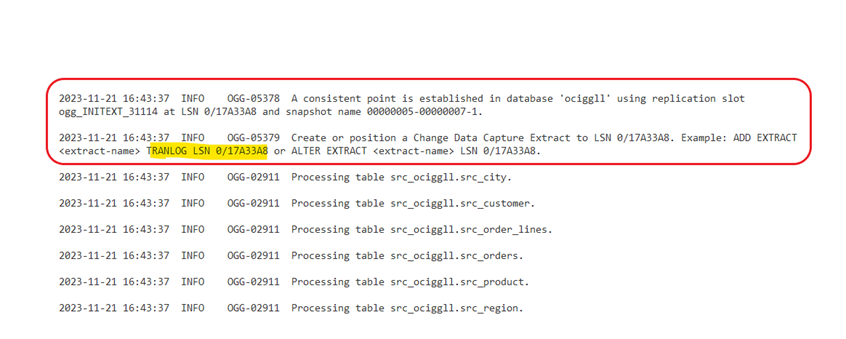
Once the initial load extract is stopped, verify the report files and note the LSN details.
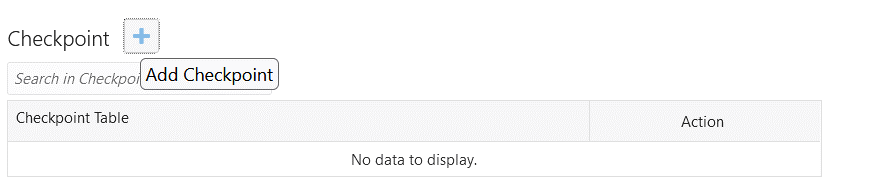
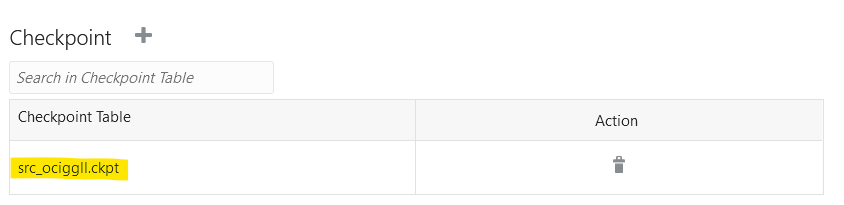
Create a Checkpoint table (src_ociggll.ckpt) for the target OCI PostgreSQL DB system:
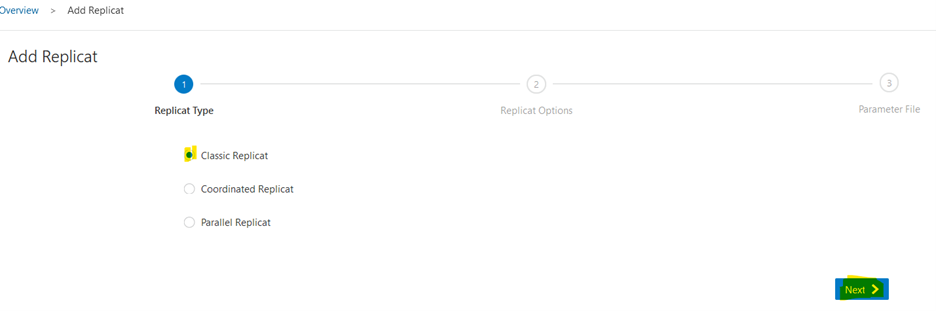
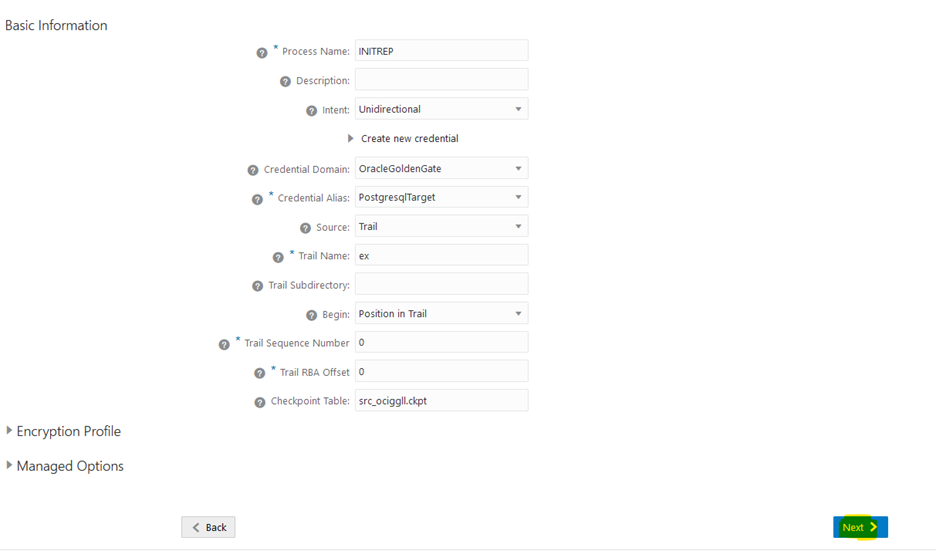
Create initial load Replicat for the target database
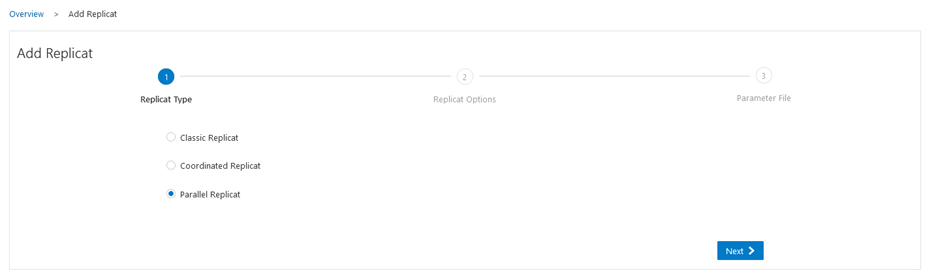
You can use any replicat type: Classic, Coordinated, or Parallel.
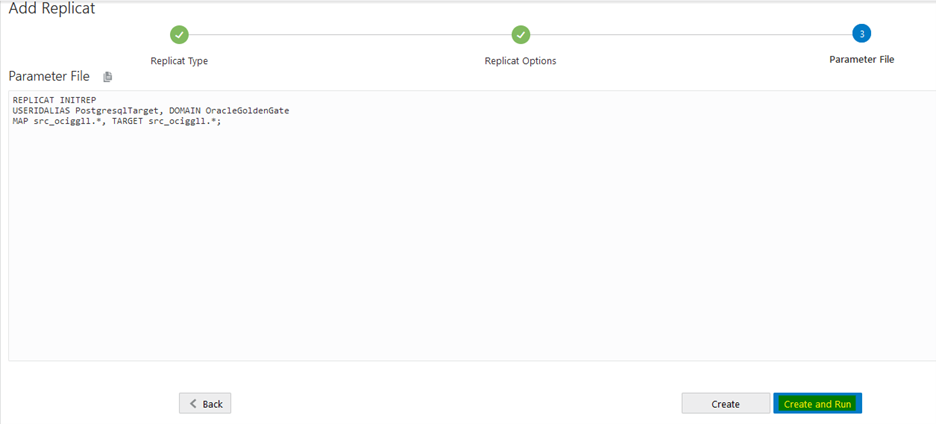
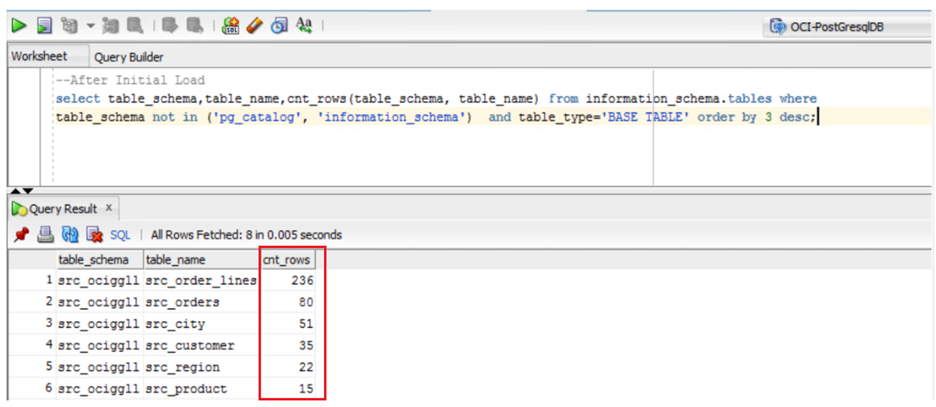
Once Replicat started successfully, we can verify the initial load data in the target database.
Next, create the CDC extract and start from the LSN value you previously wrote down.
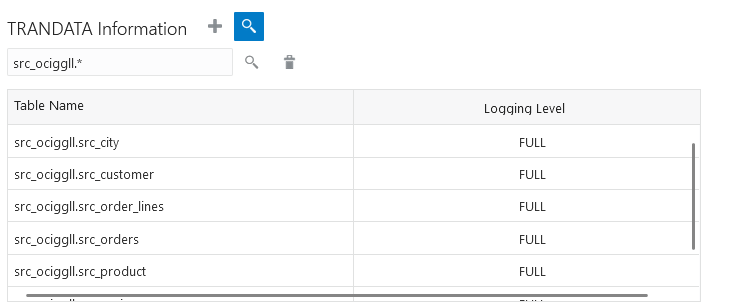
Before that, we will add trandata for the source schema. Go to Administration Service > Configuration, and Connect to your source database.
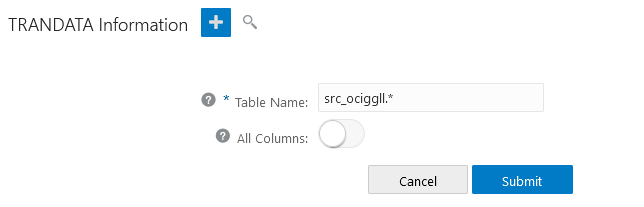
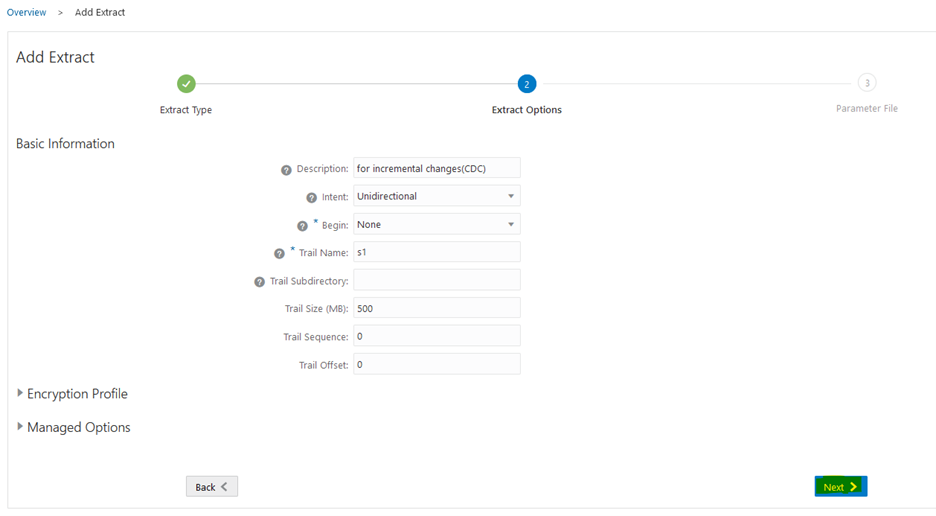
Now, add the CDC extract.
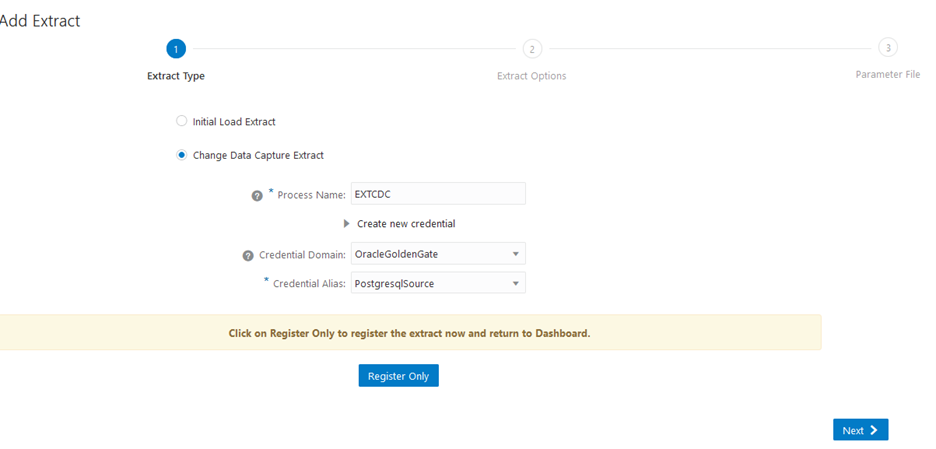
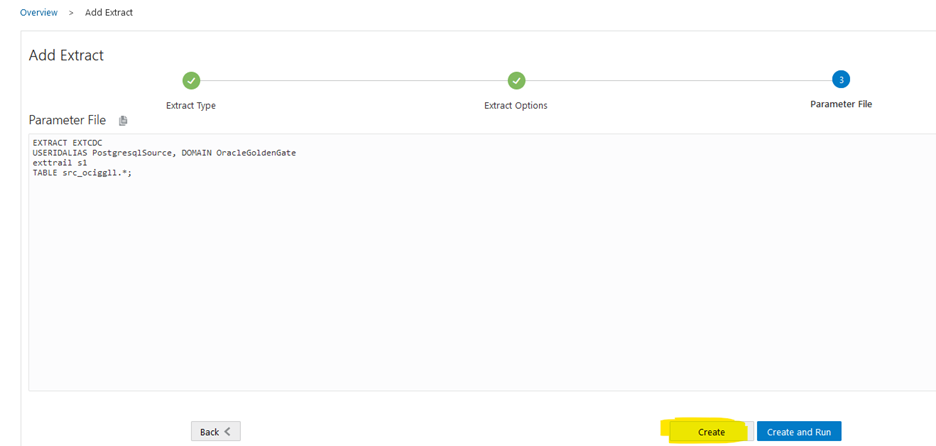
Once you have mentioned the schema name, click Create.
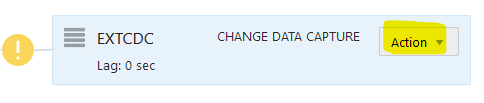
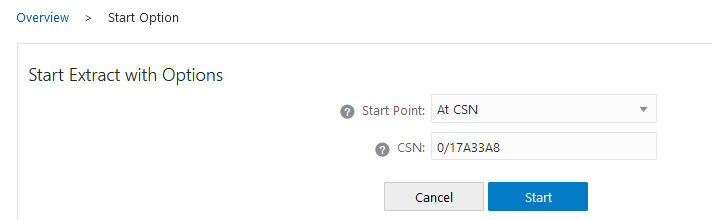
Once created, go to Actions -> Start with Options -> Enter the LSN -> click Start.

Now, we will generate some transactions in the source schema.
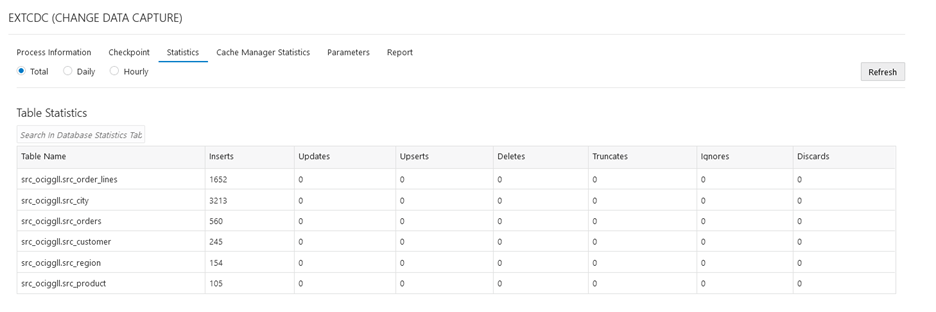
Review the Extract statistics.
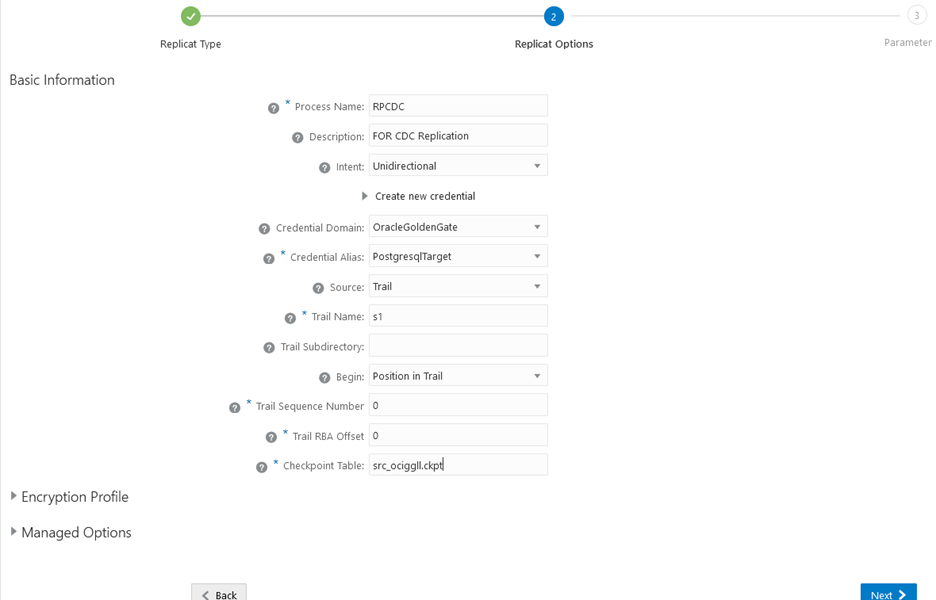
Finally, create the CDC Replicat.
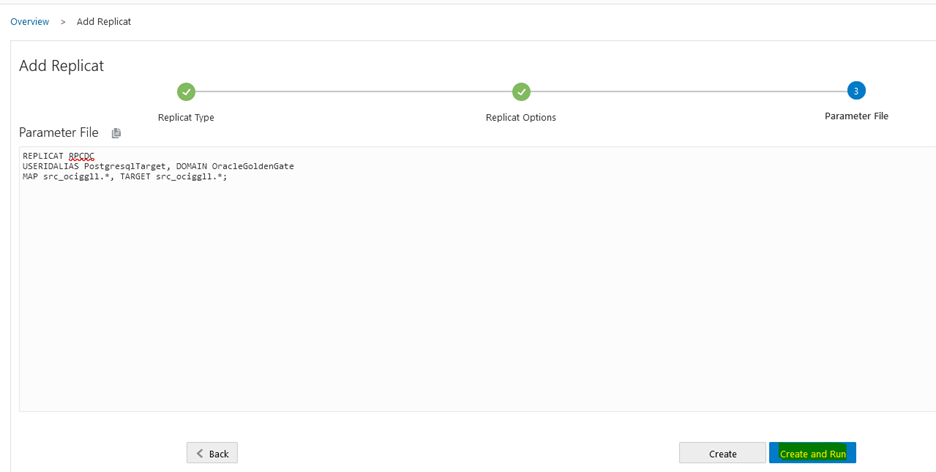
Once the Replicat successfully started, you can check its statistics.
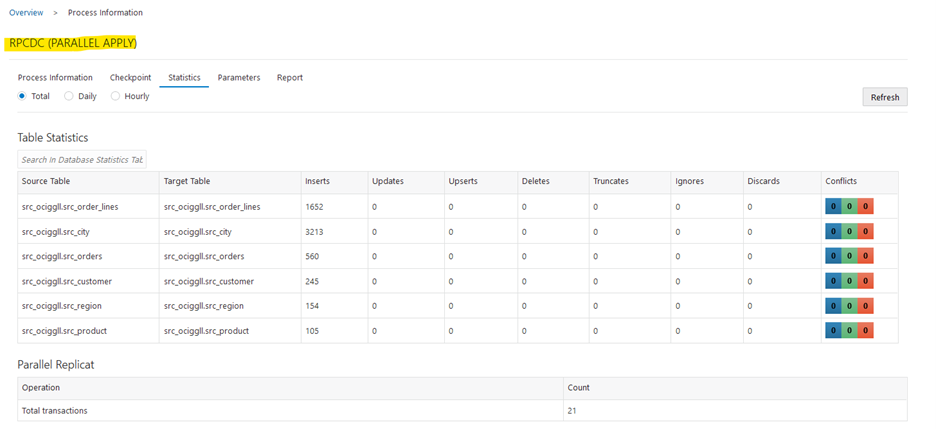
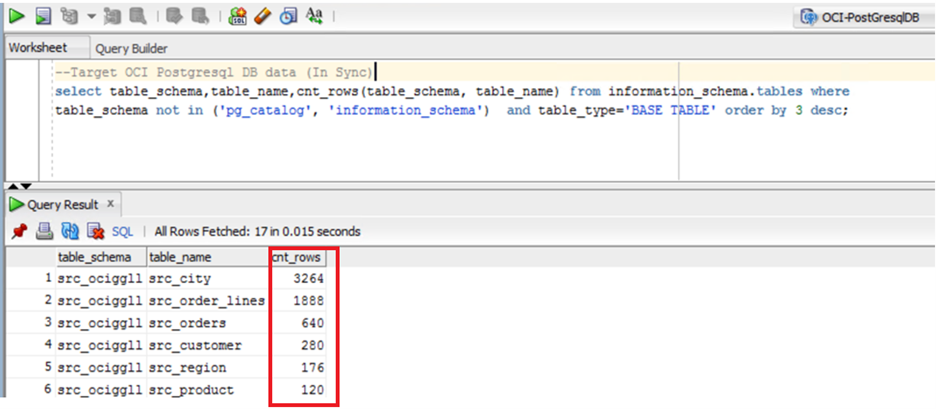
Now, you can compare the Source and Target data. They are in sync.
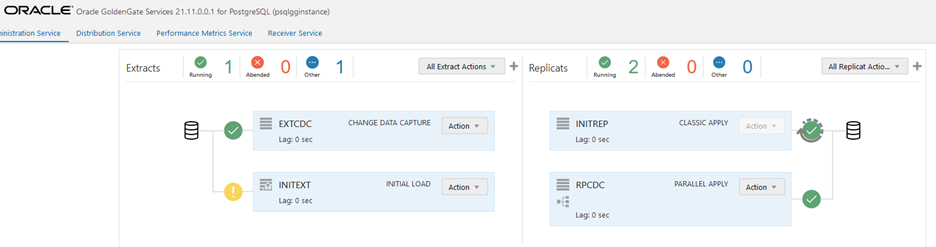
You can see the GoldenGate Console with all the processes running.
Validate the migration
Verify the transferred database objects and data on the target OCI PostgreSQL DB system to ensure that the migration was successful and there are no issues or discrepancies.
Summary
OCI Goldengate for PostgreSQL enables you to seamlessly migrate databases online from on-premises to OCI Database with PostgreSQL. By following these steps and leveraging the power of OCI GoldenGate, you can ensure a successful and efficient migration process.
Oracle’s innovative managed PostgreSQL service, OCI Database with PostgreSQL, combines cutting-edge open-source technology with the robustness and speed of Oracle Cloud Infrastructure (OCI).
Currently, all default databases (template0, template1 & postgres) are owned by oci_superuser. customer_admin_user (the very first user oci creates as part of create DB system) does not have the privilege to create new schemas in any of the default databases. As a workaround, you can create a database first (with name other than postgres) and then create schema(s) by connecting to that database. Stay tuned for more updates …
