Introduction
OCI GoldenGate recently added support for IBM Db2 for z/OS. Moving data in and out of Db2 for z is now simpler than ever.
OCI GoldenGate is a fully managed service providing a real-time data mesh platform, which uses replication to keep data highly available and enable real-time analysis. You can now create Db2 for z deployments and connections in OCI GoldenGate. Let me tell you how.
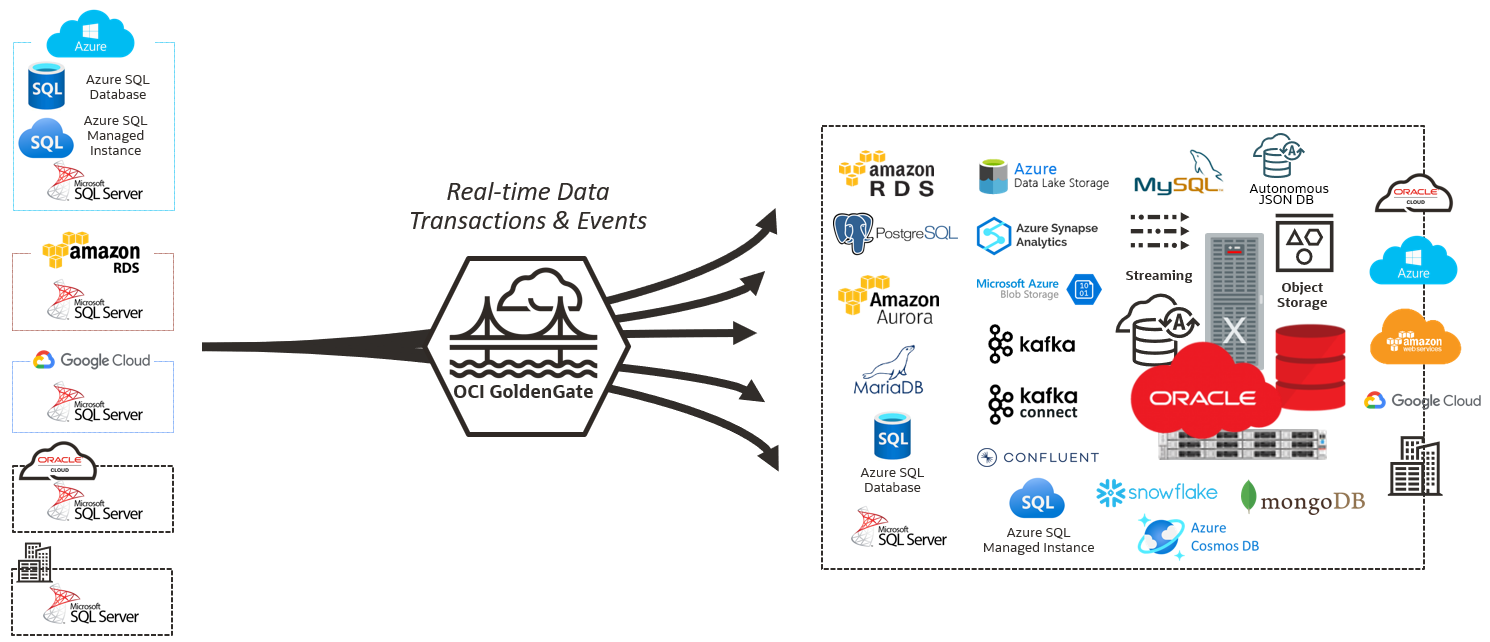
The OCI GoldenGate Db2 for z deployment supports remote capture and remote delivery from Db2 for z Database.
Creating a Db2 for z Deployment
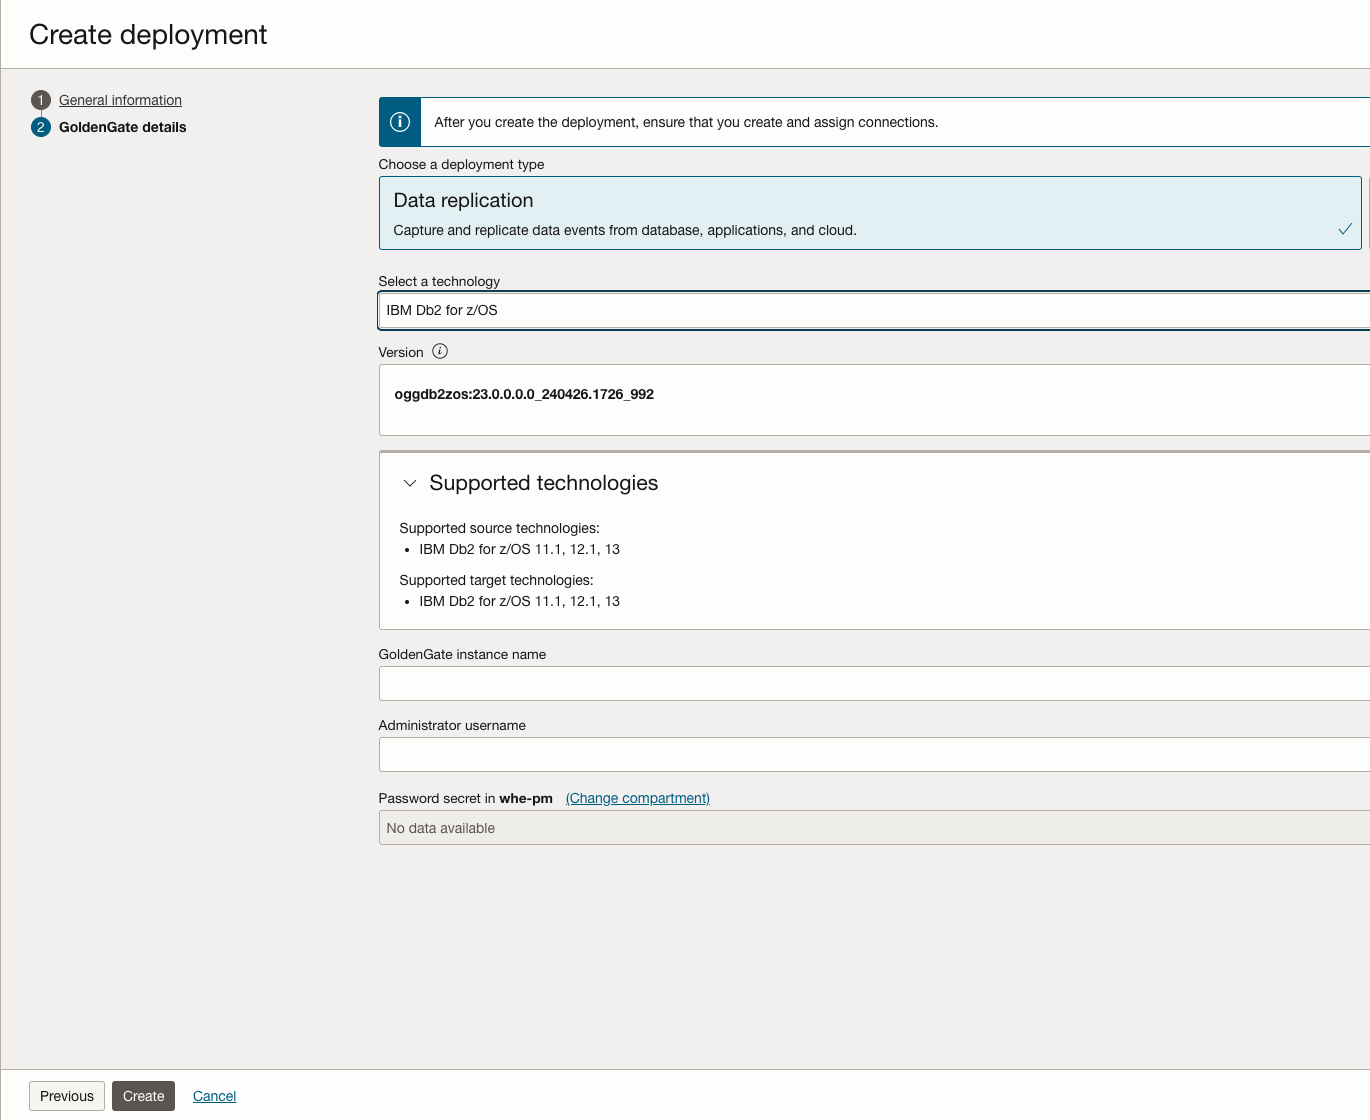
First, create a Db2 for z deployment using the Oracle Cloud console, CLI, or API. From the Oracle Cloud console menu, select Oracle Database, and then select GoldenGate. On the GoldenGate service Overview page, click Create deployment.

Go through the deployment creation screens, and ensure that you select IBM Db2 for z/OS when prompted for a technology. Finally, click Create to start the creation of the deployment.
Create a Connection to Db2 for z Databases
To create a Connection, go to the Overview or Connections page, and then click Create connection. Select Db2 for z as the Type, and then click Next.
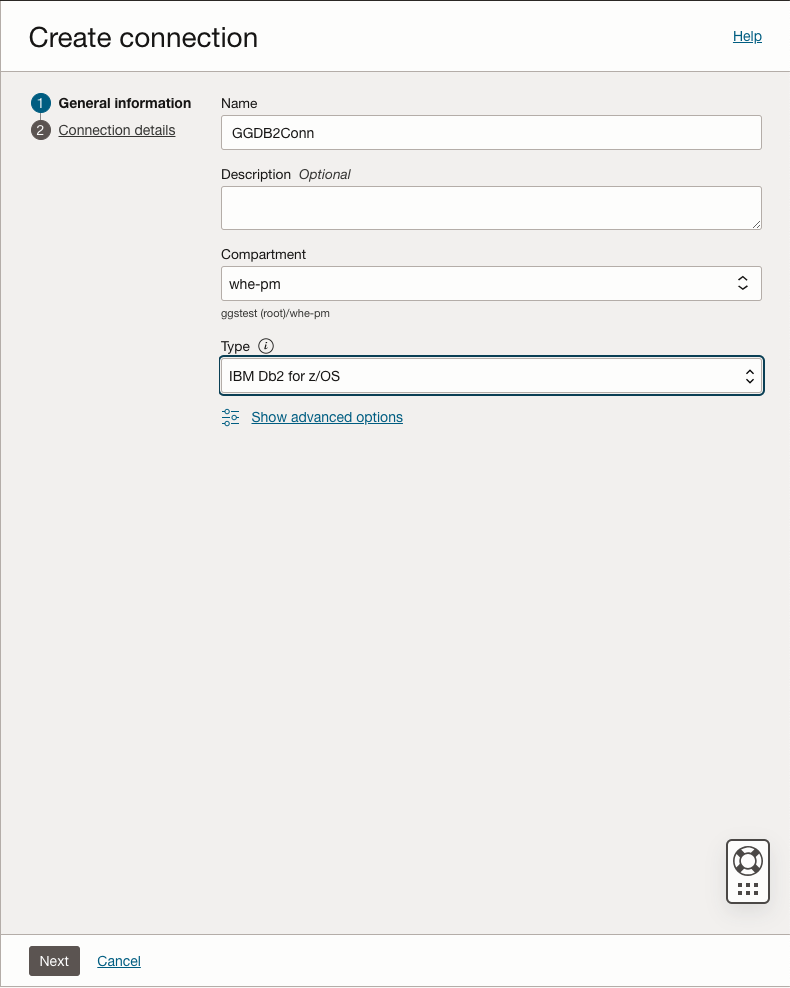
Enter the Db2 for z database Name, Host, and Port.
Then enter the Database Username and Database User Password.
Choose if you want your connection to have a shared or dedicated endpoint.
Click Create to proceed with the Connection creation.

Assign a Connection to a Deployment
A Connection must be assigned to a Deployment before it can be used. The assignment can be done from the Deployment or the Connection. You don’t need to wait for the Connection to be Active to assign it to a Deployment.
Open your Deployment, click Assigned connections, then click Assign connection.
Select your Connection in the list and click Assign connection to create the assignment.
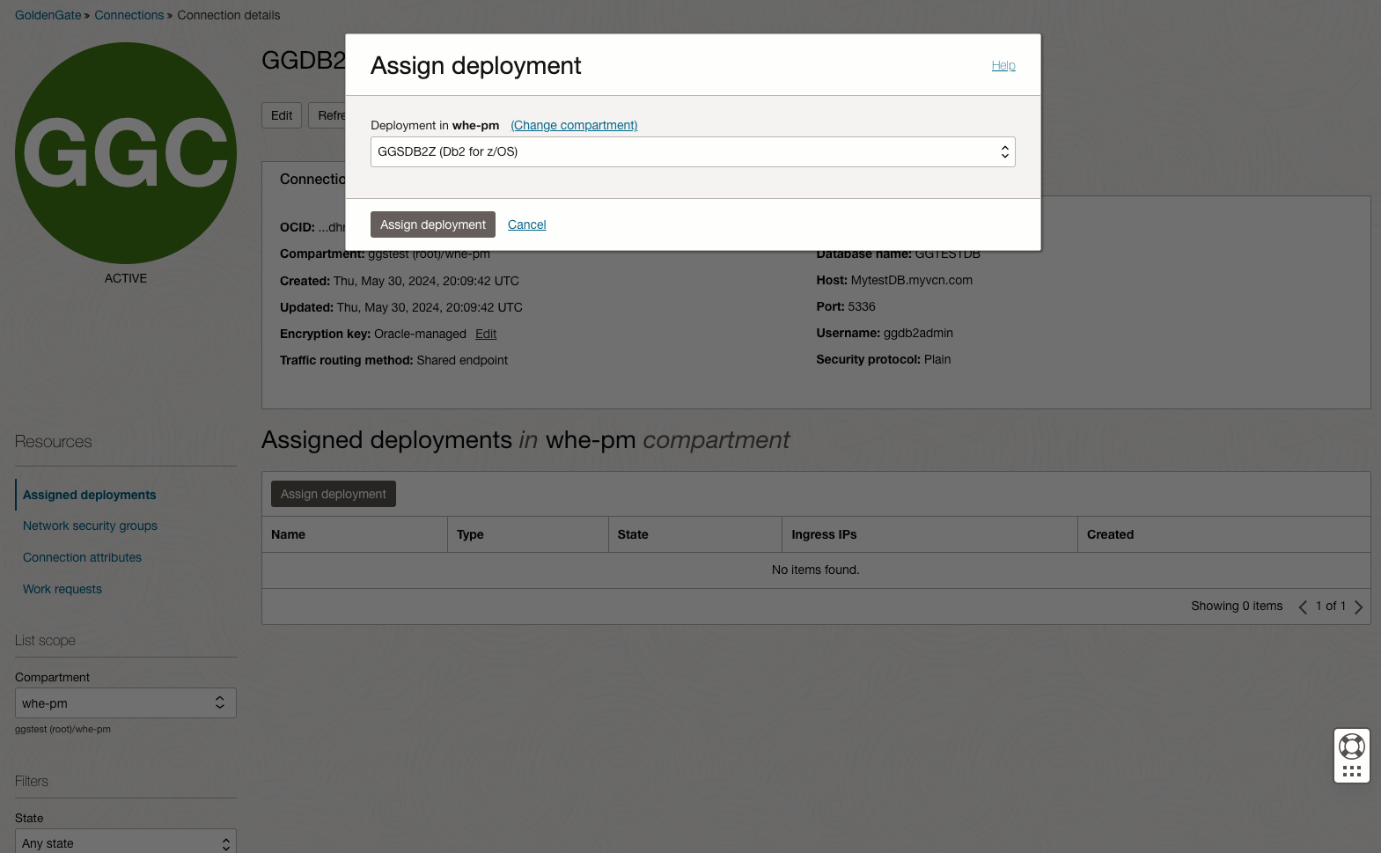
Note: Connection types are compatible with specific deployment types. For example, Db2 for z Connections can only be assigned to Db2 for z Deployments.
Once the connection is assigned to the deployment, you can test the connection to make sure it works.

Download the zOSutils.zip file to install on the source Db2 z
If this is your first time configuring an Extract on this particular Db2 for z/OS system, you must download and install the zOSutils.zip file onto the Db2 instance.
On the deployment details page, under the GoldenGate section of the Deployment information card, locate Current version, and then click the Download library link next to the build number. It will generate an Object Storage link which is good for 10 minutes. Ensure that you download it immediately.

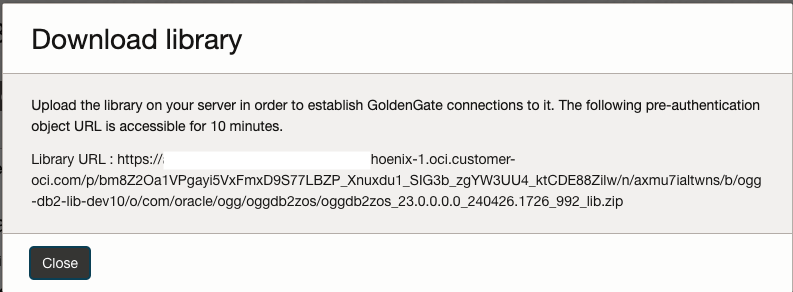
Once you download zOSutils.zip, please follow the user guide, chapter ‘Install Extract Components on Db2 z/OS’, to install and configure the programs on the Db2 instance.
Again, this is only needed if you are going to run Extract against this Db2 for z/OS. If you only run Replicat on the Db2 instance, you don’t need perform the above tasks.
Create data replication processes using Db2 for z Database
Before you start designing your Extract and Replicats, prepare Db2 for z/OS for GoldenGate. You can then start designing your Extracts and Replicats once you have assigned the required Connections to your Deployment(s).
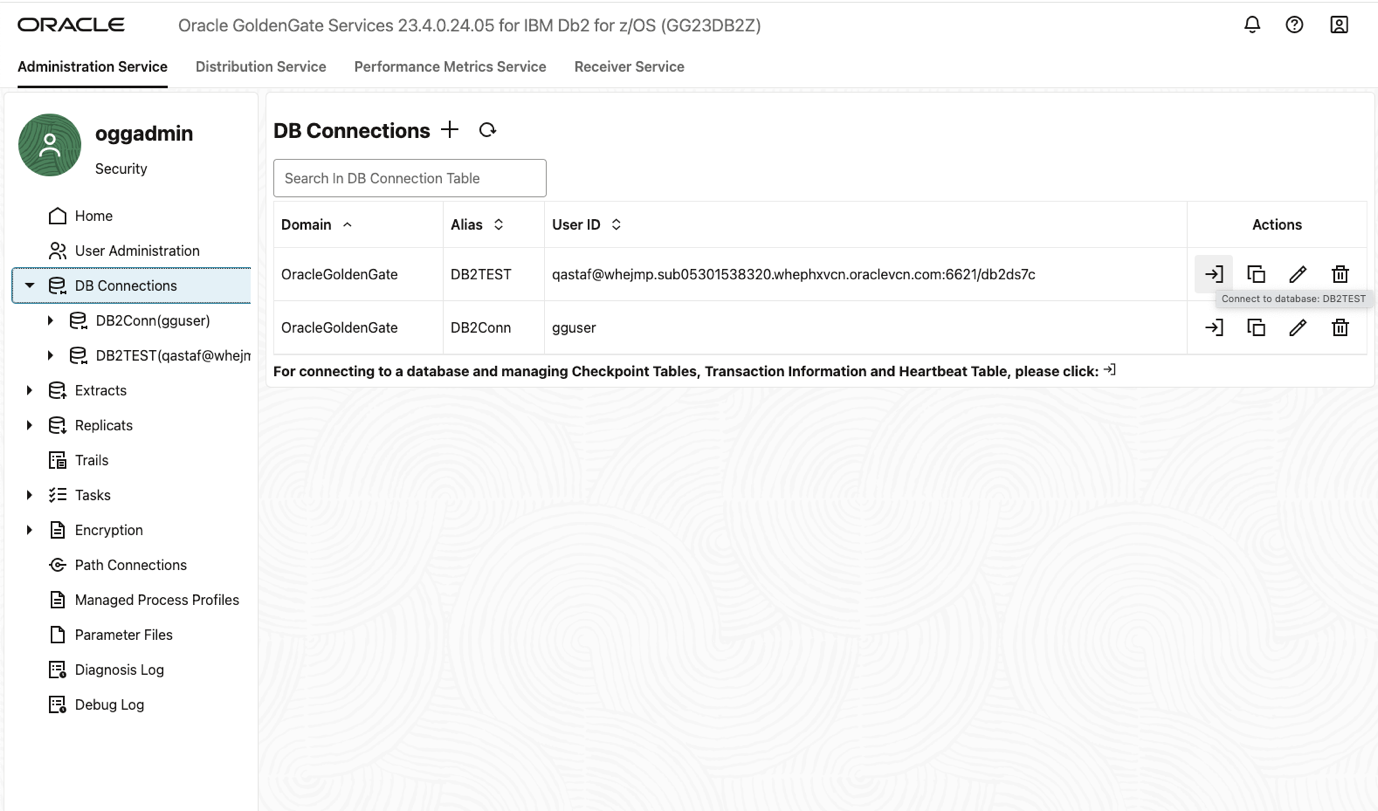
On the Deployment details page, click Launch console to open the OCI GoldenGate Console. In the menu, click DB Connections, review your Credentials, and then click Connect to test the connectivity to your sources and/or targets.
Once connected, you will be able to expand the Alias and click Trandata. On the TRANDATA information page, click Add TRANDATA (plus icon) to let GoldenGate acquire transaction information from the transaction records. Provide a table name.
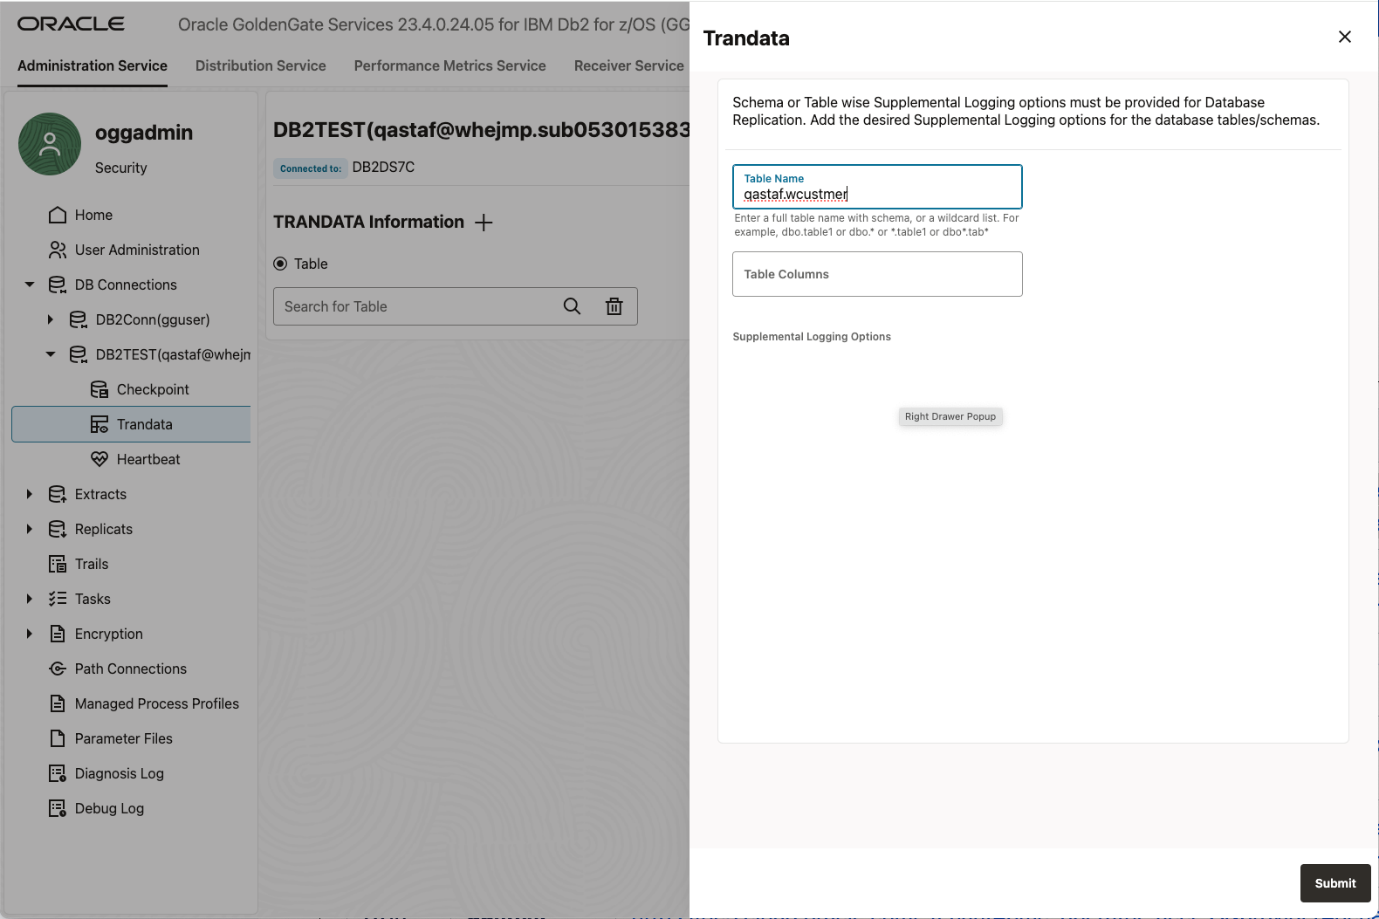
Click Submit.
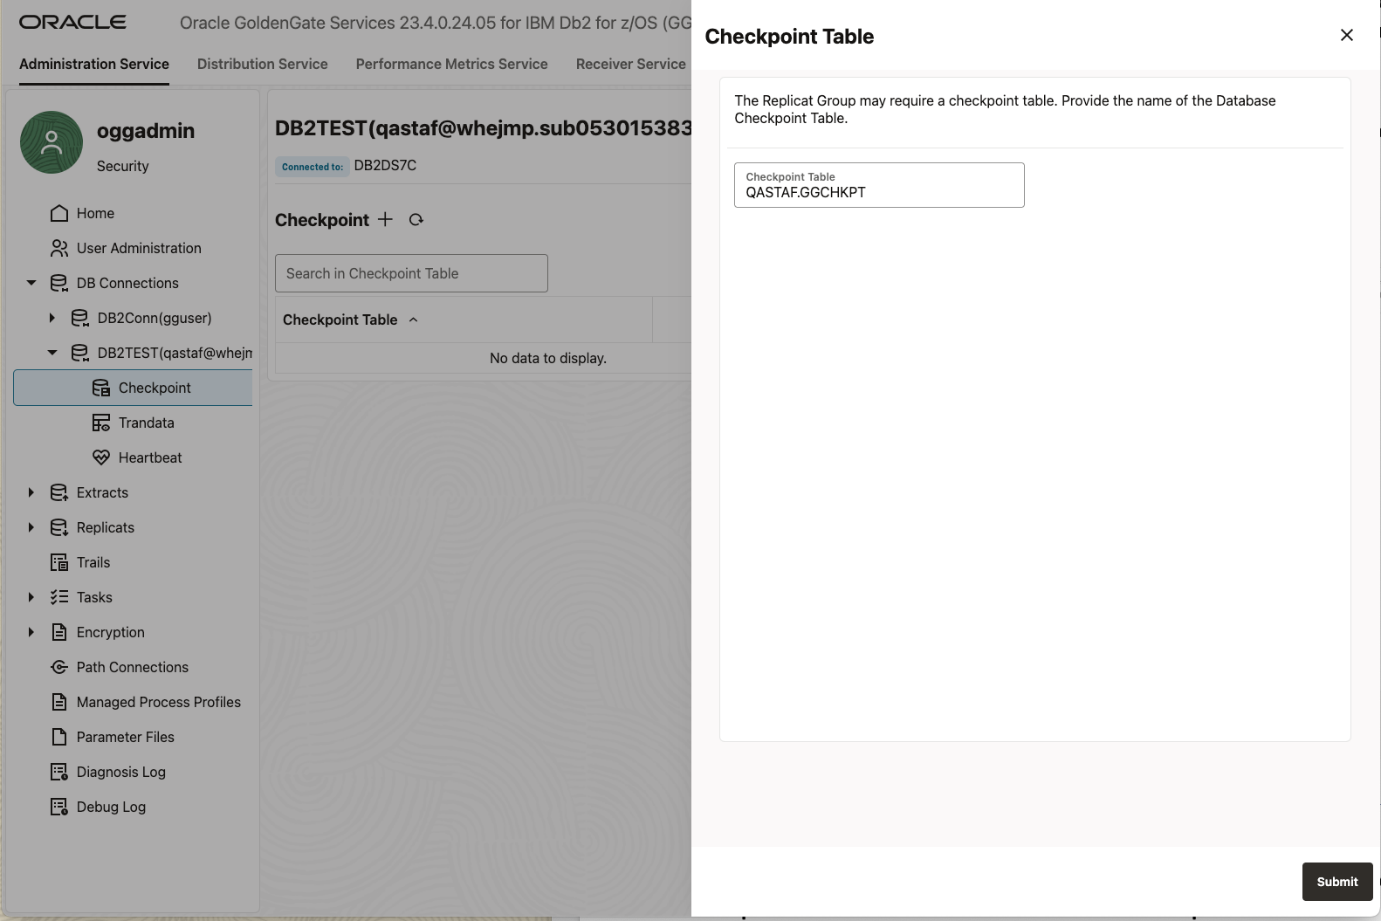
Click Checkpoint, and then on the Checkpoint page, click Add Checkpoint (plus icon) Enter your checkpoint table name in the format of owner.table_name, then click Submit. This creates the checkpoint table that will be used by the Replicat.
Now in the menu, click on Extract, then Add Extract (plus icon) on the Extracts page. Select Change Data Capture Extract. Enter a Process Name and the Description.
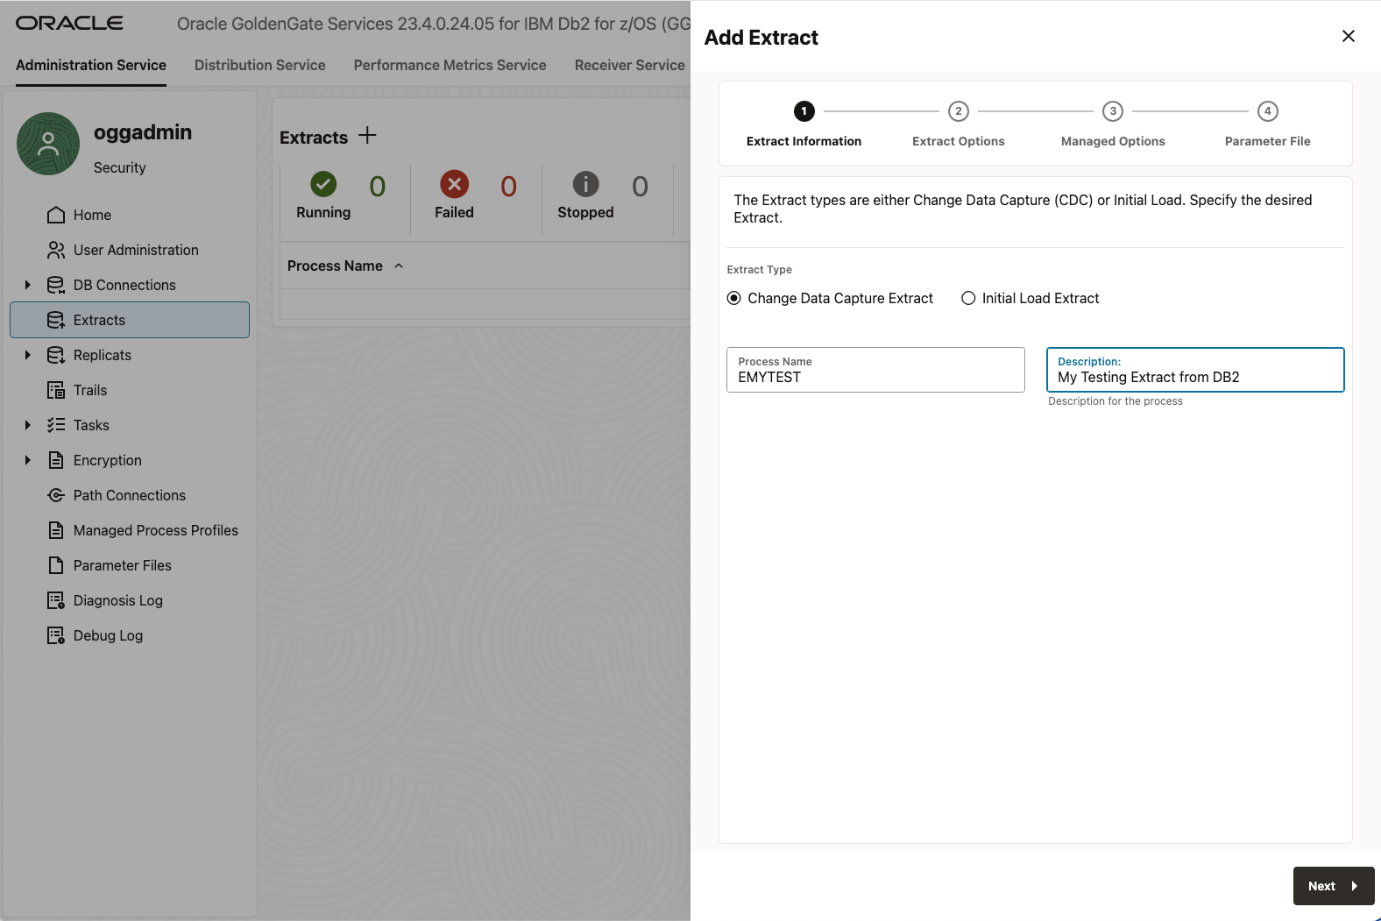
Click Next.
Fill in the required information in next screen, such as the begin time, trail file name. Then choose the Credential Domain and Alias.
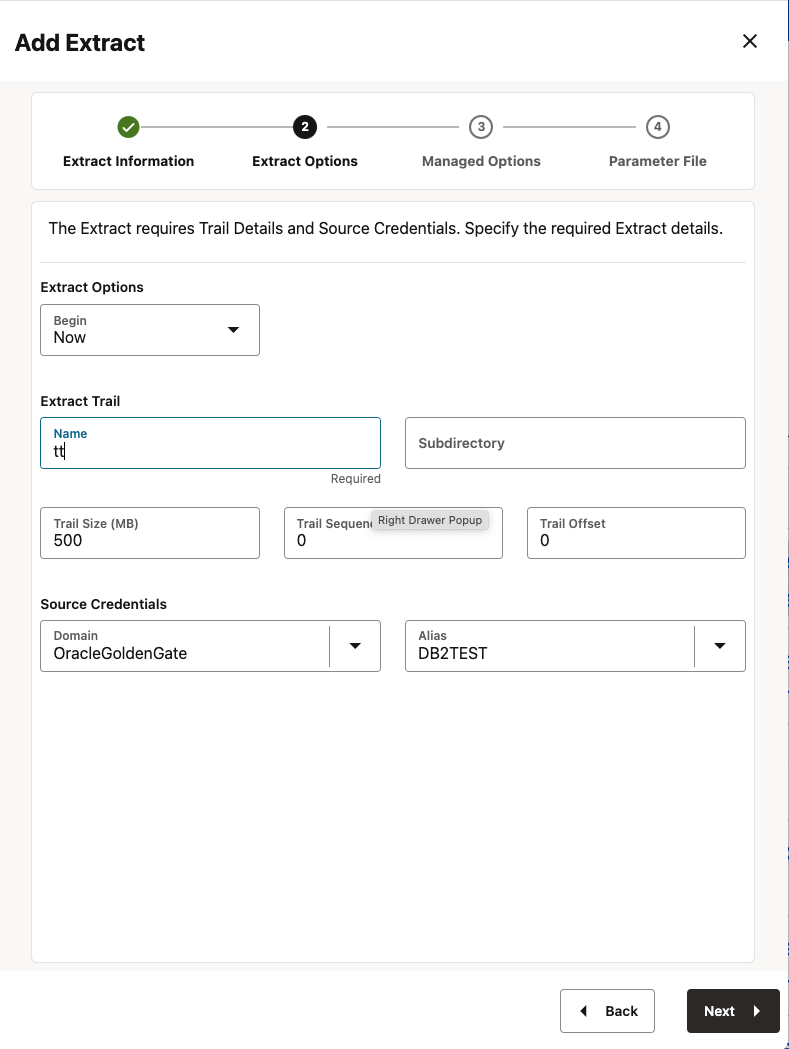
Click Next.
Pick a profile for this Extract if you have created one, otherwise, you can use the default.
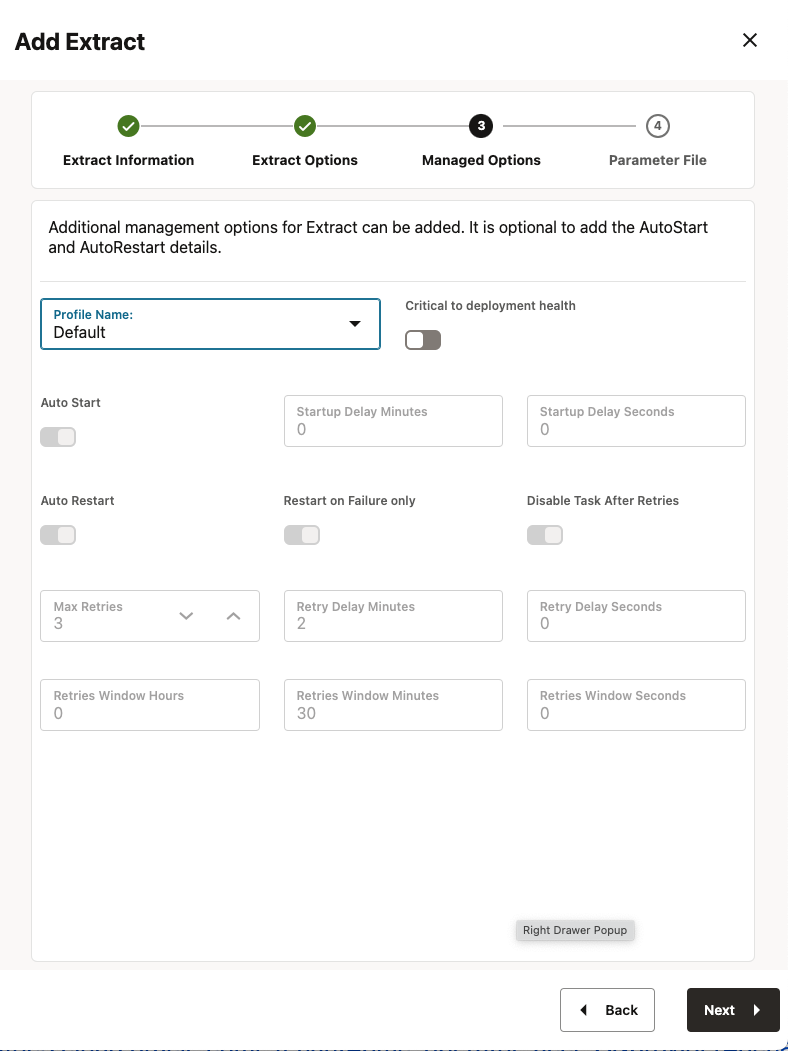
Click Next.
Fill out the Extract parameter file
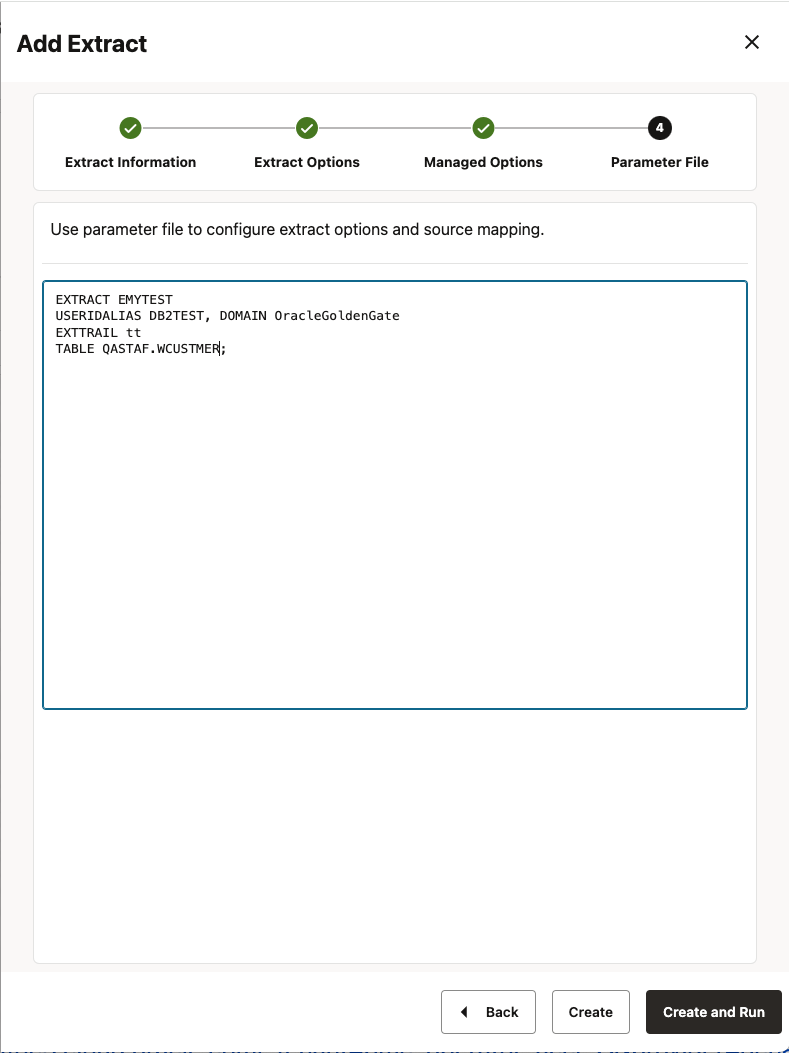
Click Create and Run
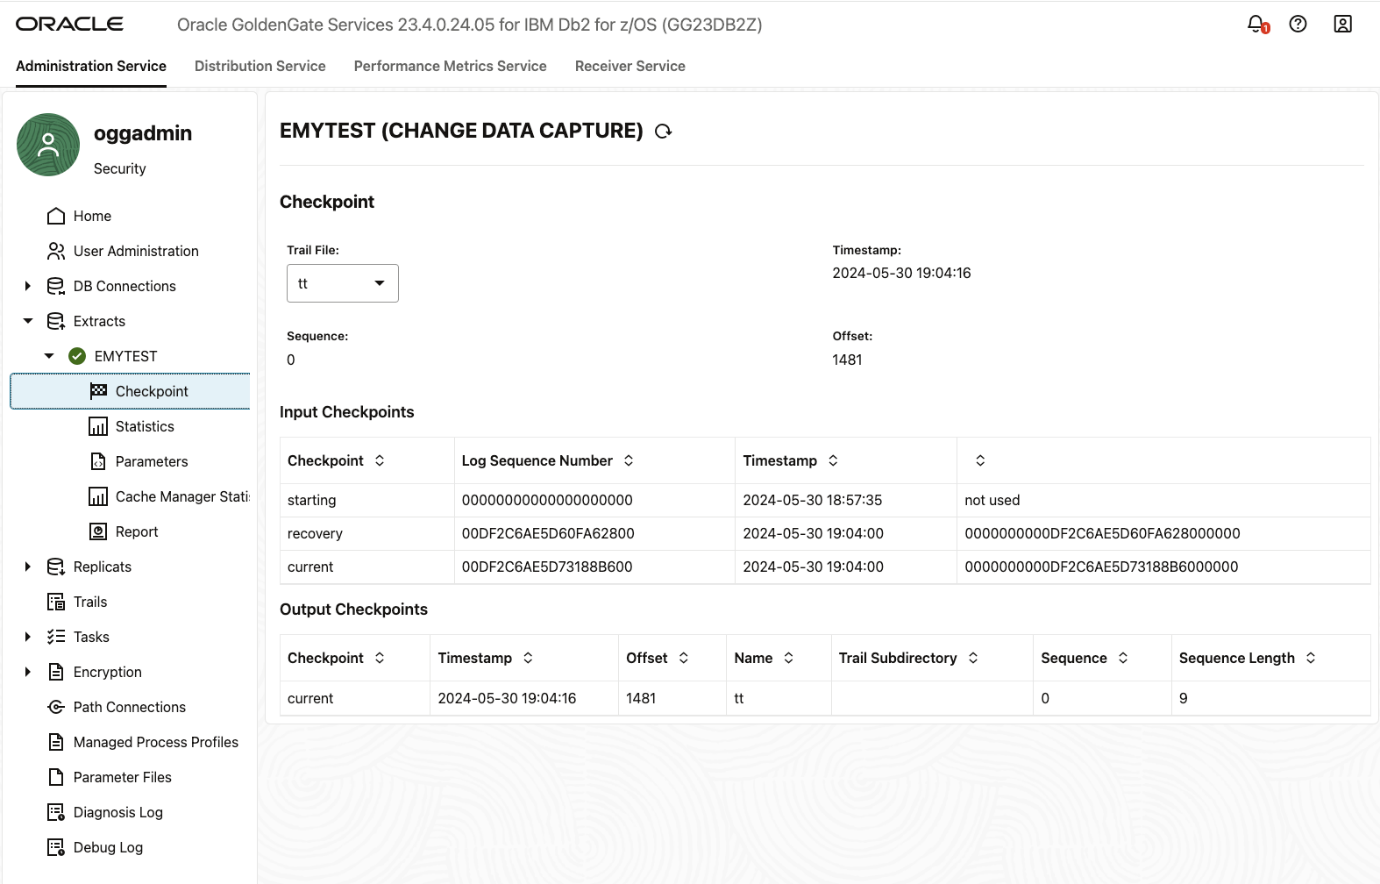
If the configuration info is correct, after couple minutes, you should be able to see the Extract up and running. In the left menu, Expand Extract, you should be able to see a green check mark on the left side of your Extract name. If you expand it, you can further check on its Checkpoint, Statistics, Parameters, Cache Manager Statistics and Report.
Creating a Replicat follows a similar process:
In the left menu, click Replicat, and then click Add Replicat (plus icon) on the Replicats page. Select a Replicat type: Classic, Coordinated, or Parallel. Learn about the different types of Replicats. We will select Classic in this example. Enter the Replicat Process Name and Description.

Then click Next.
Enter a Replicat Trail Name, select a Target Credential Domain and Alias, enter a Checkpoint Table name (previously created at the DB Connections > Checkpoint Table level).
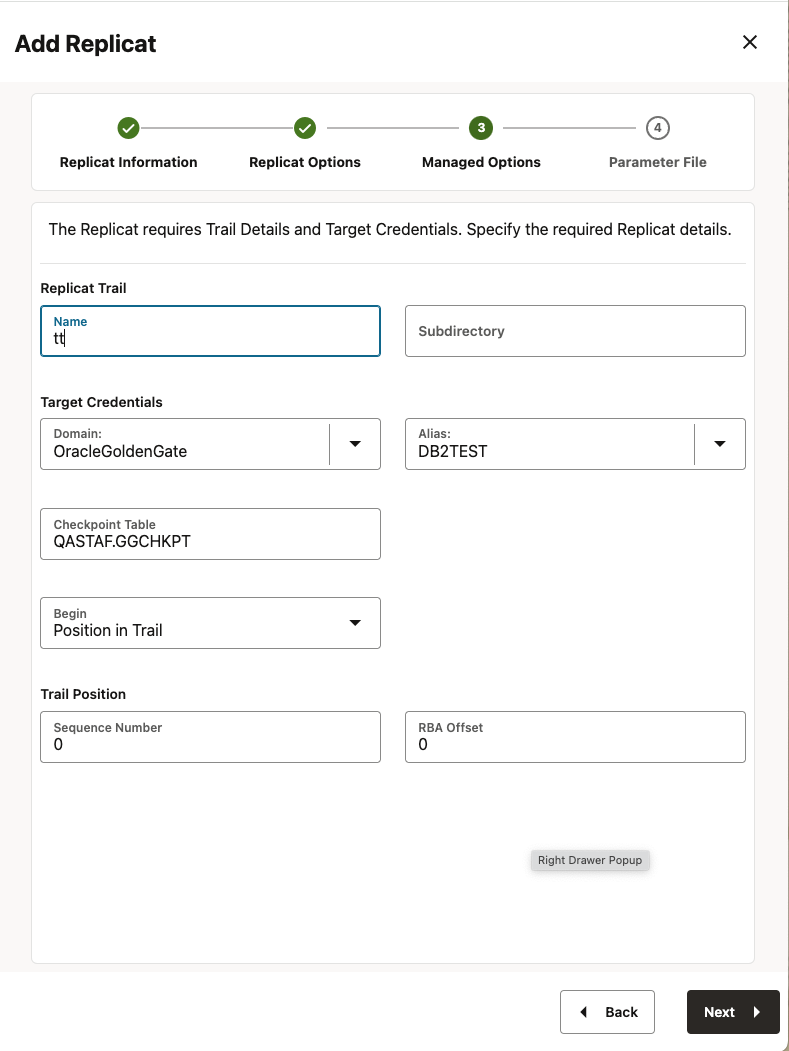
Click Next.
In the Replicat parameter file, specify how the source and target tables will be mapped by the Replicat.

Click Create and Run.
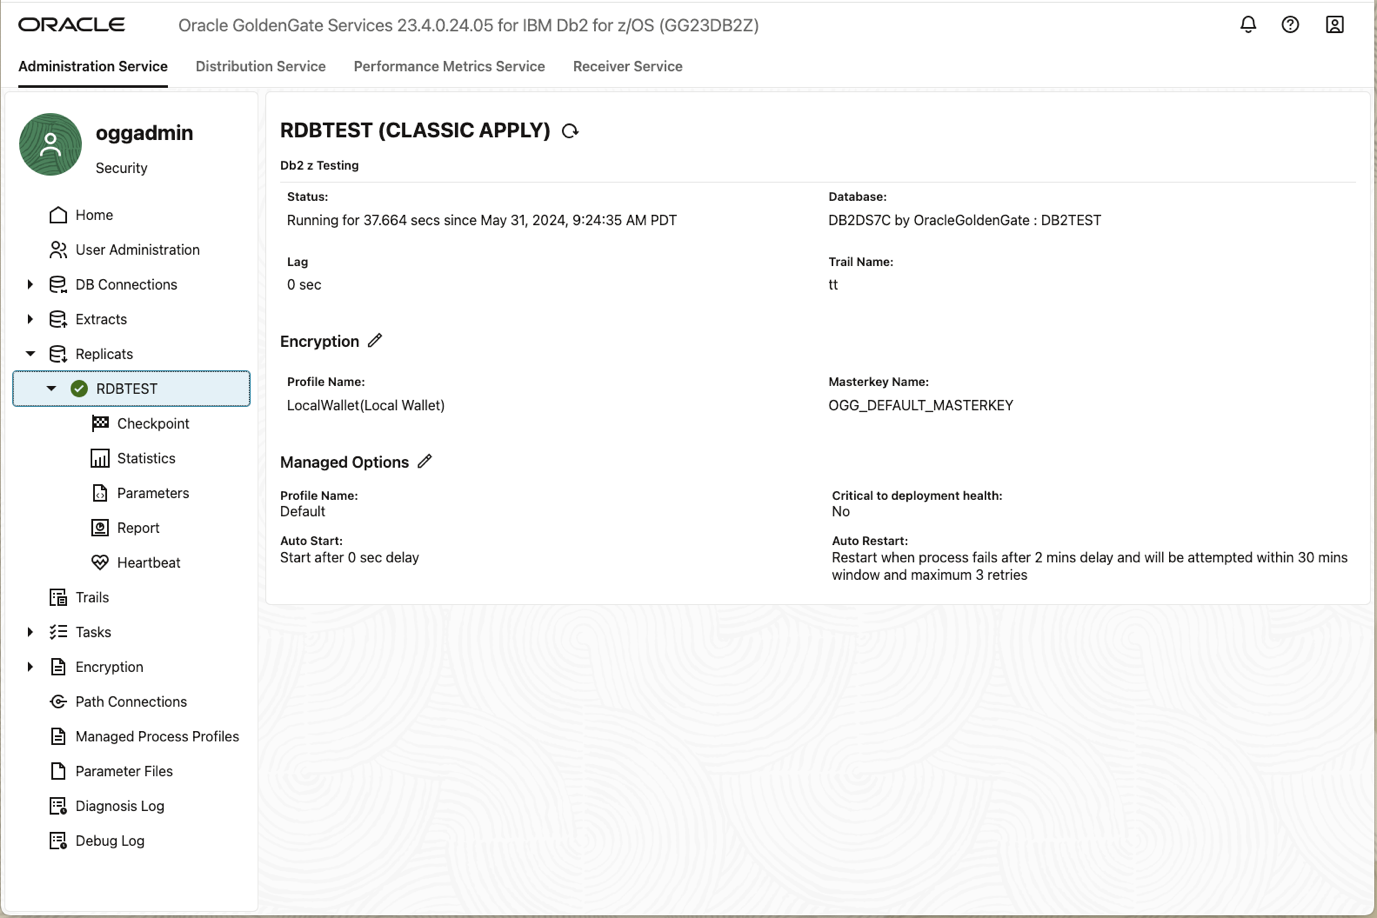
Once the Replicat is up and running, you can easily check the status the same way like Extract. Just click on the Replicat name in the left menu and expand it. You will be able to obtain the information on its Checkpoint, Statistics, Parameters, Report and so on.
Now you have successfully configured a remote extract and remote replicat for Db2 z.
For more information, please find below links
OCI GoldenGate Service Documentation
Using GoldenGate for Db2 for z/OS