Part 2(4) : GoldenGate Artifacts Creation : This section will provide instructions for creating OCI GoldenGate
1. Provision GoldenGate
Create the deployment for GoldenGate with a secret password. Refer to the vault and key created in the earlier steps.
Compartment : dev-app-som-cmp
Private Subnet : som-pvt-sn-dev-app
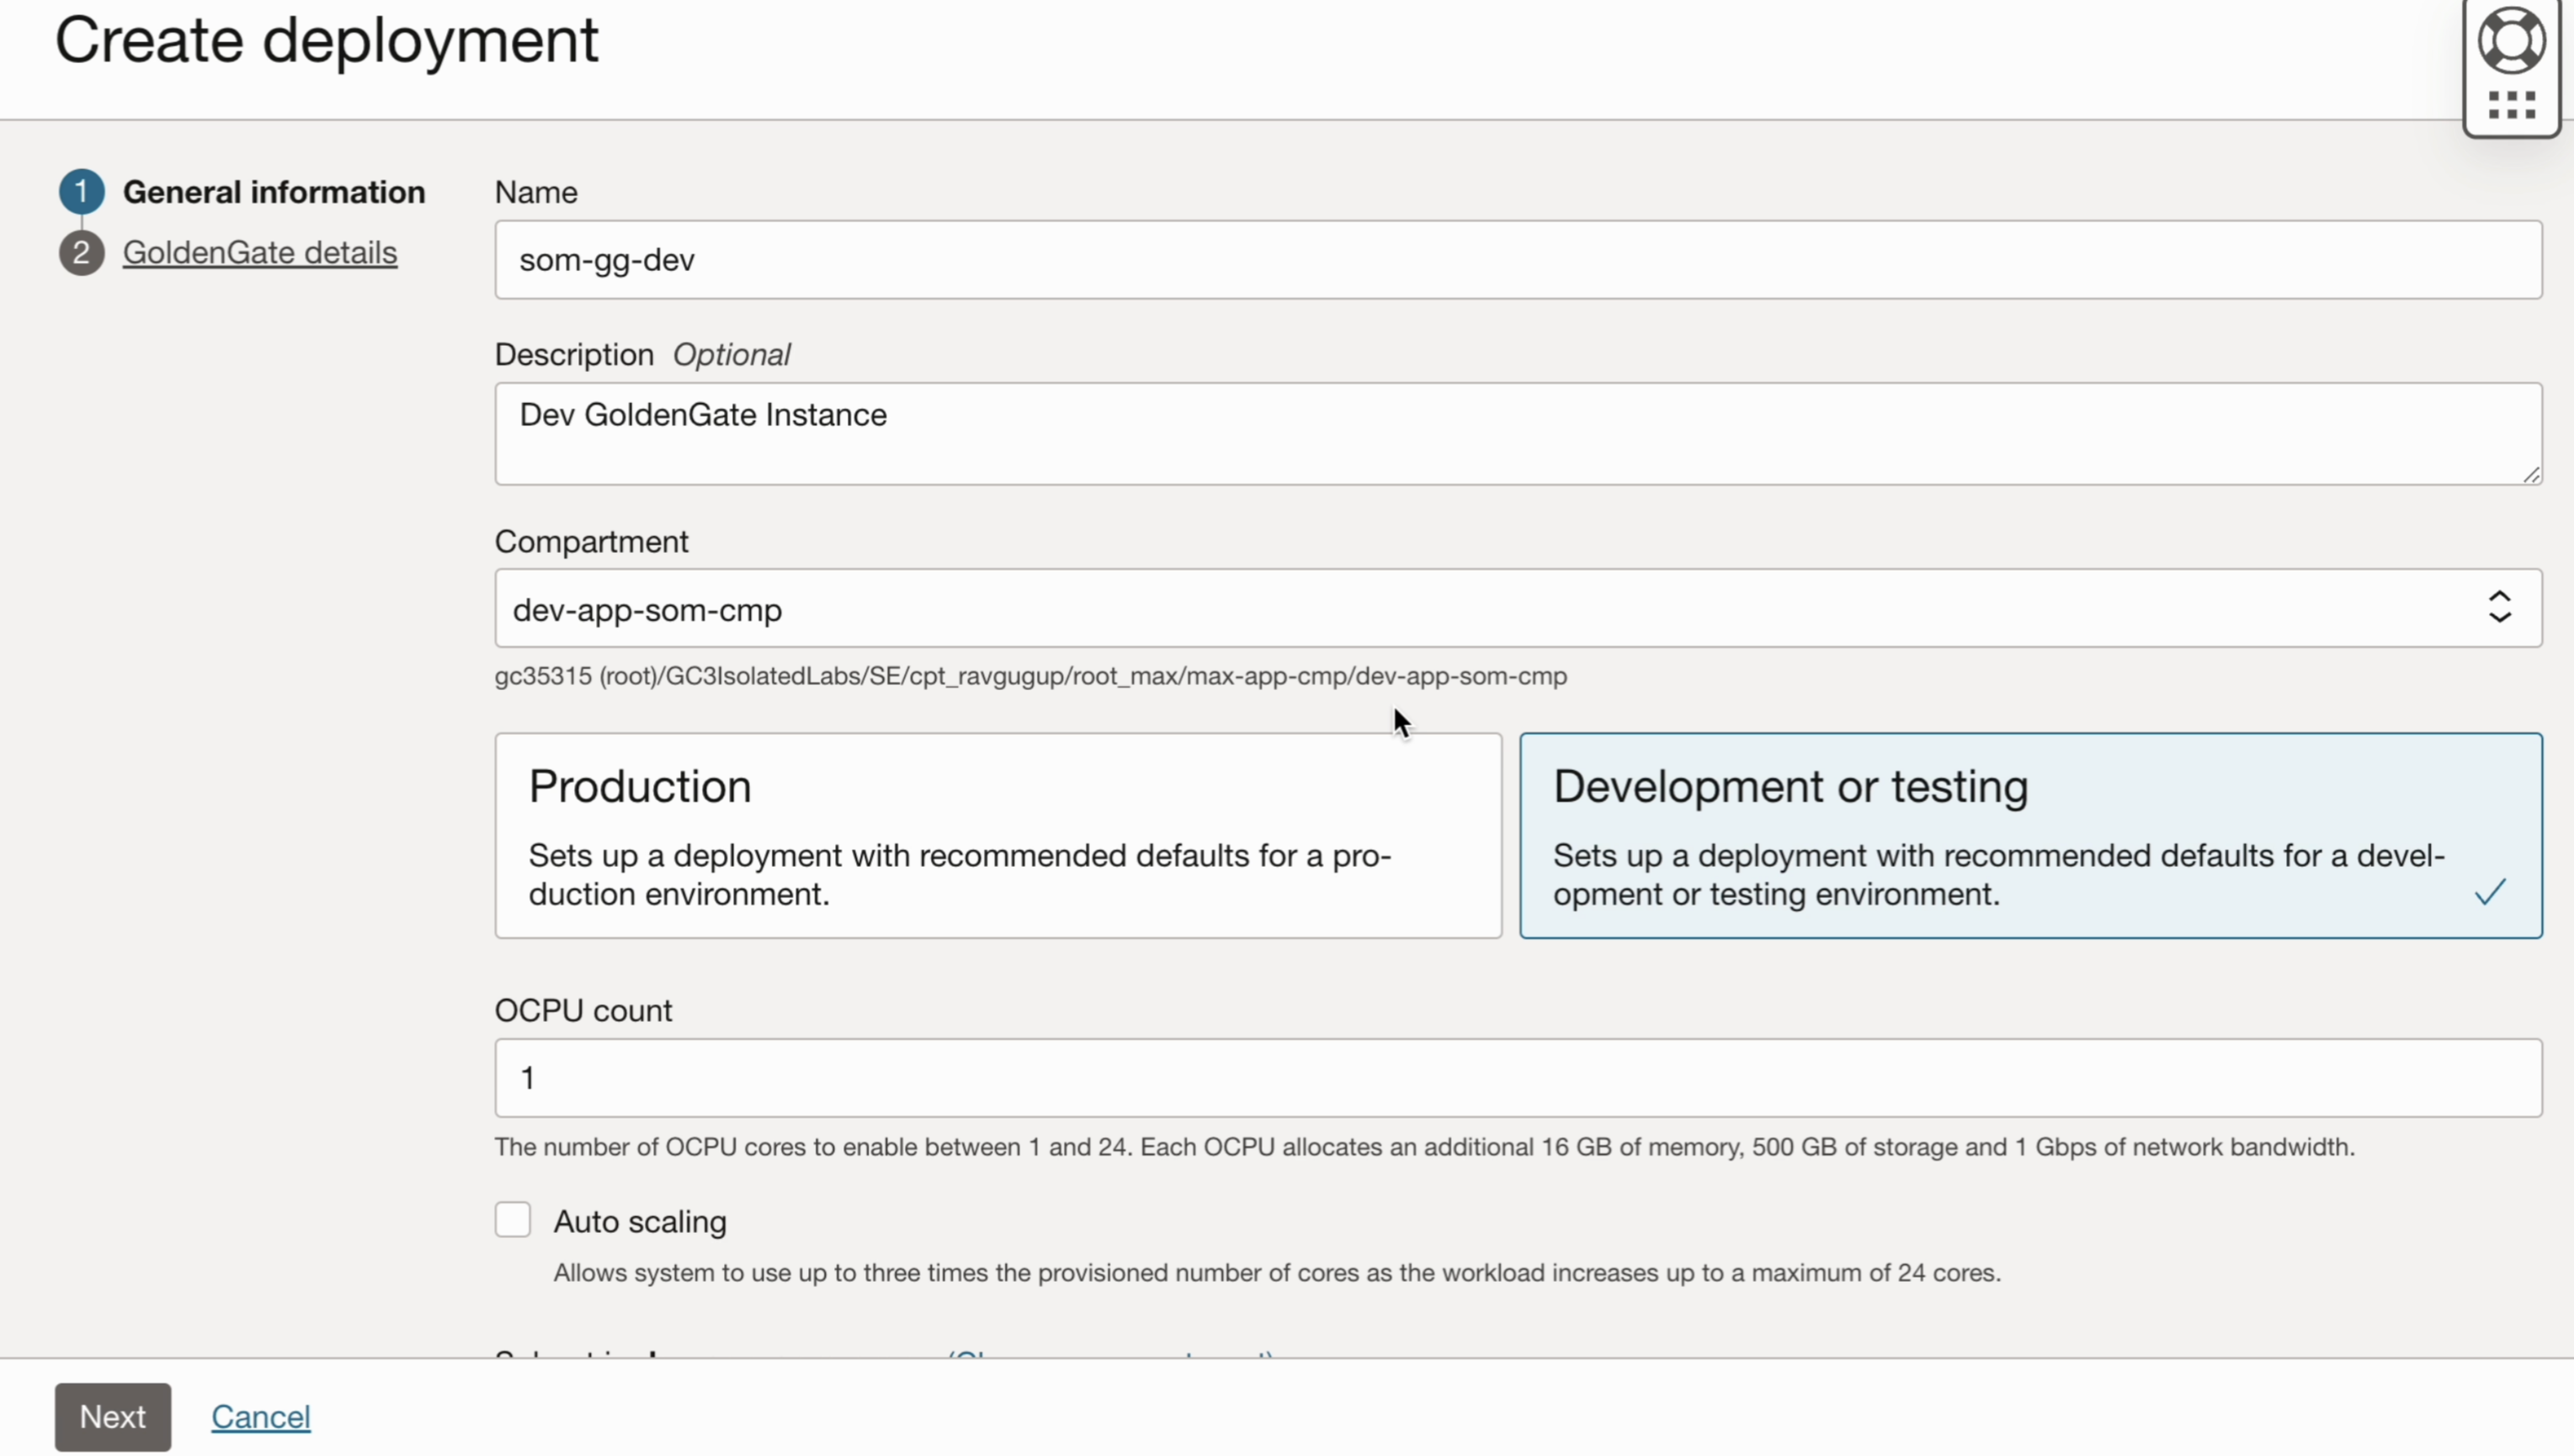
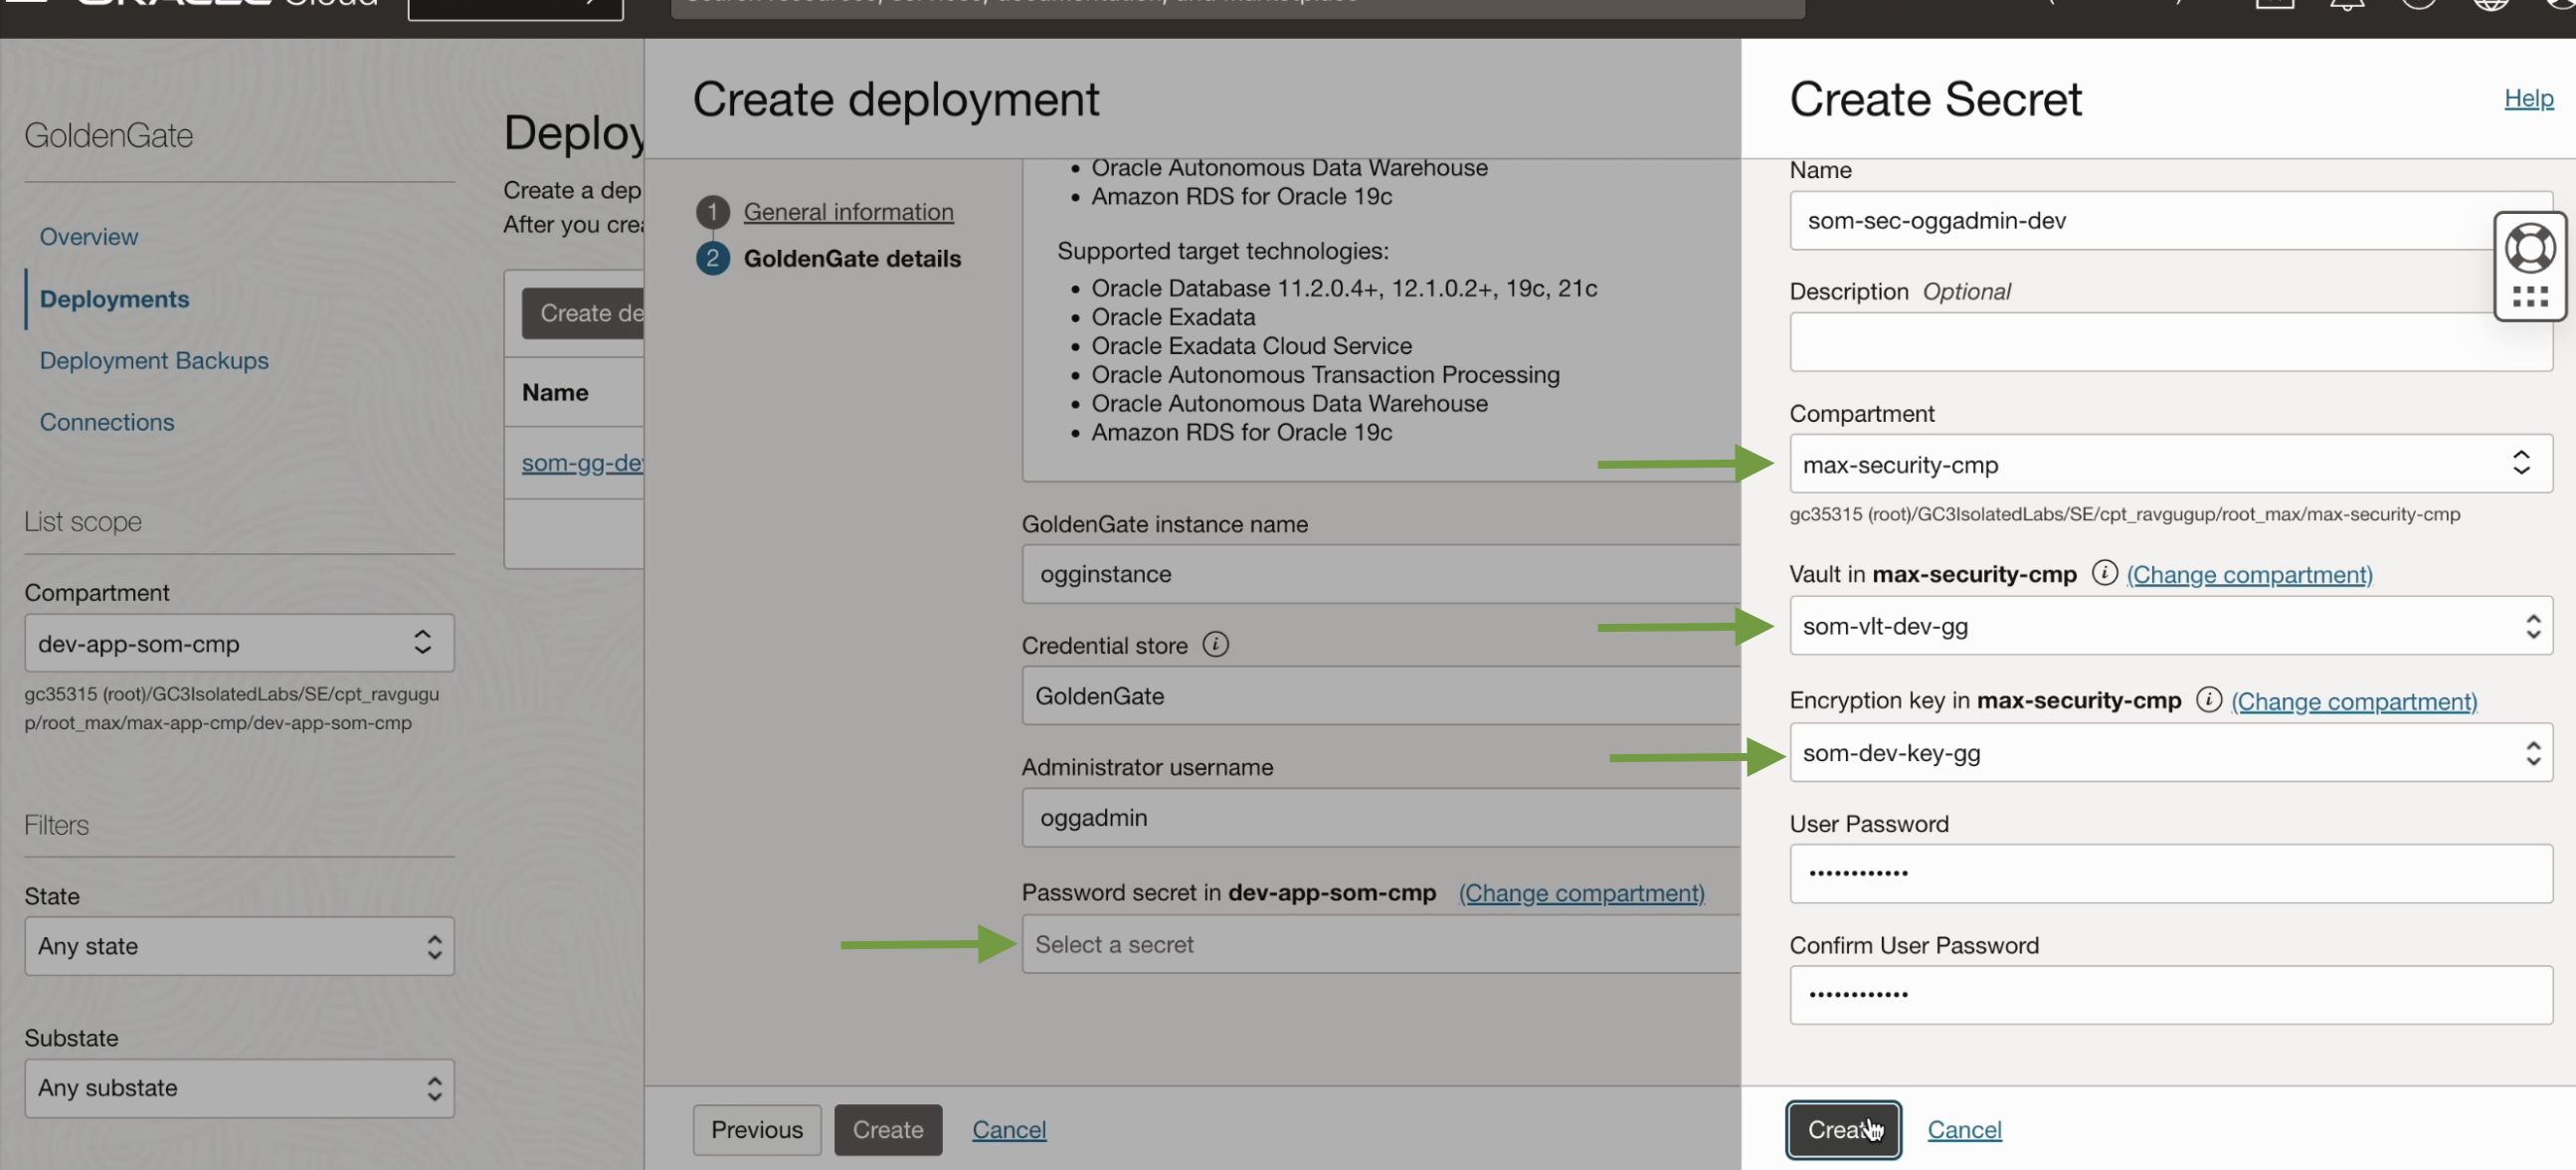
Create a secret password for the GoldenGate Webpage login, using ‘oggadmin’, by utilizing the vault ‘som-vlt-dev-gg’ and its key ‘som-dev-key-gg’.
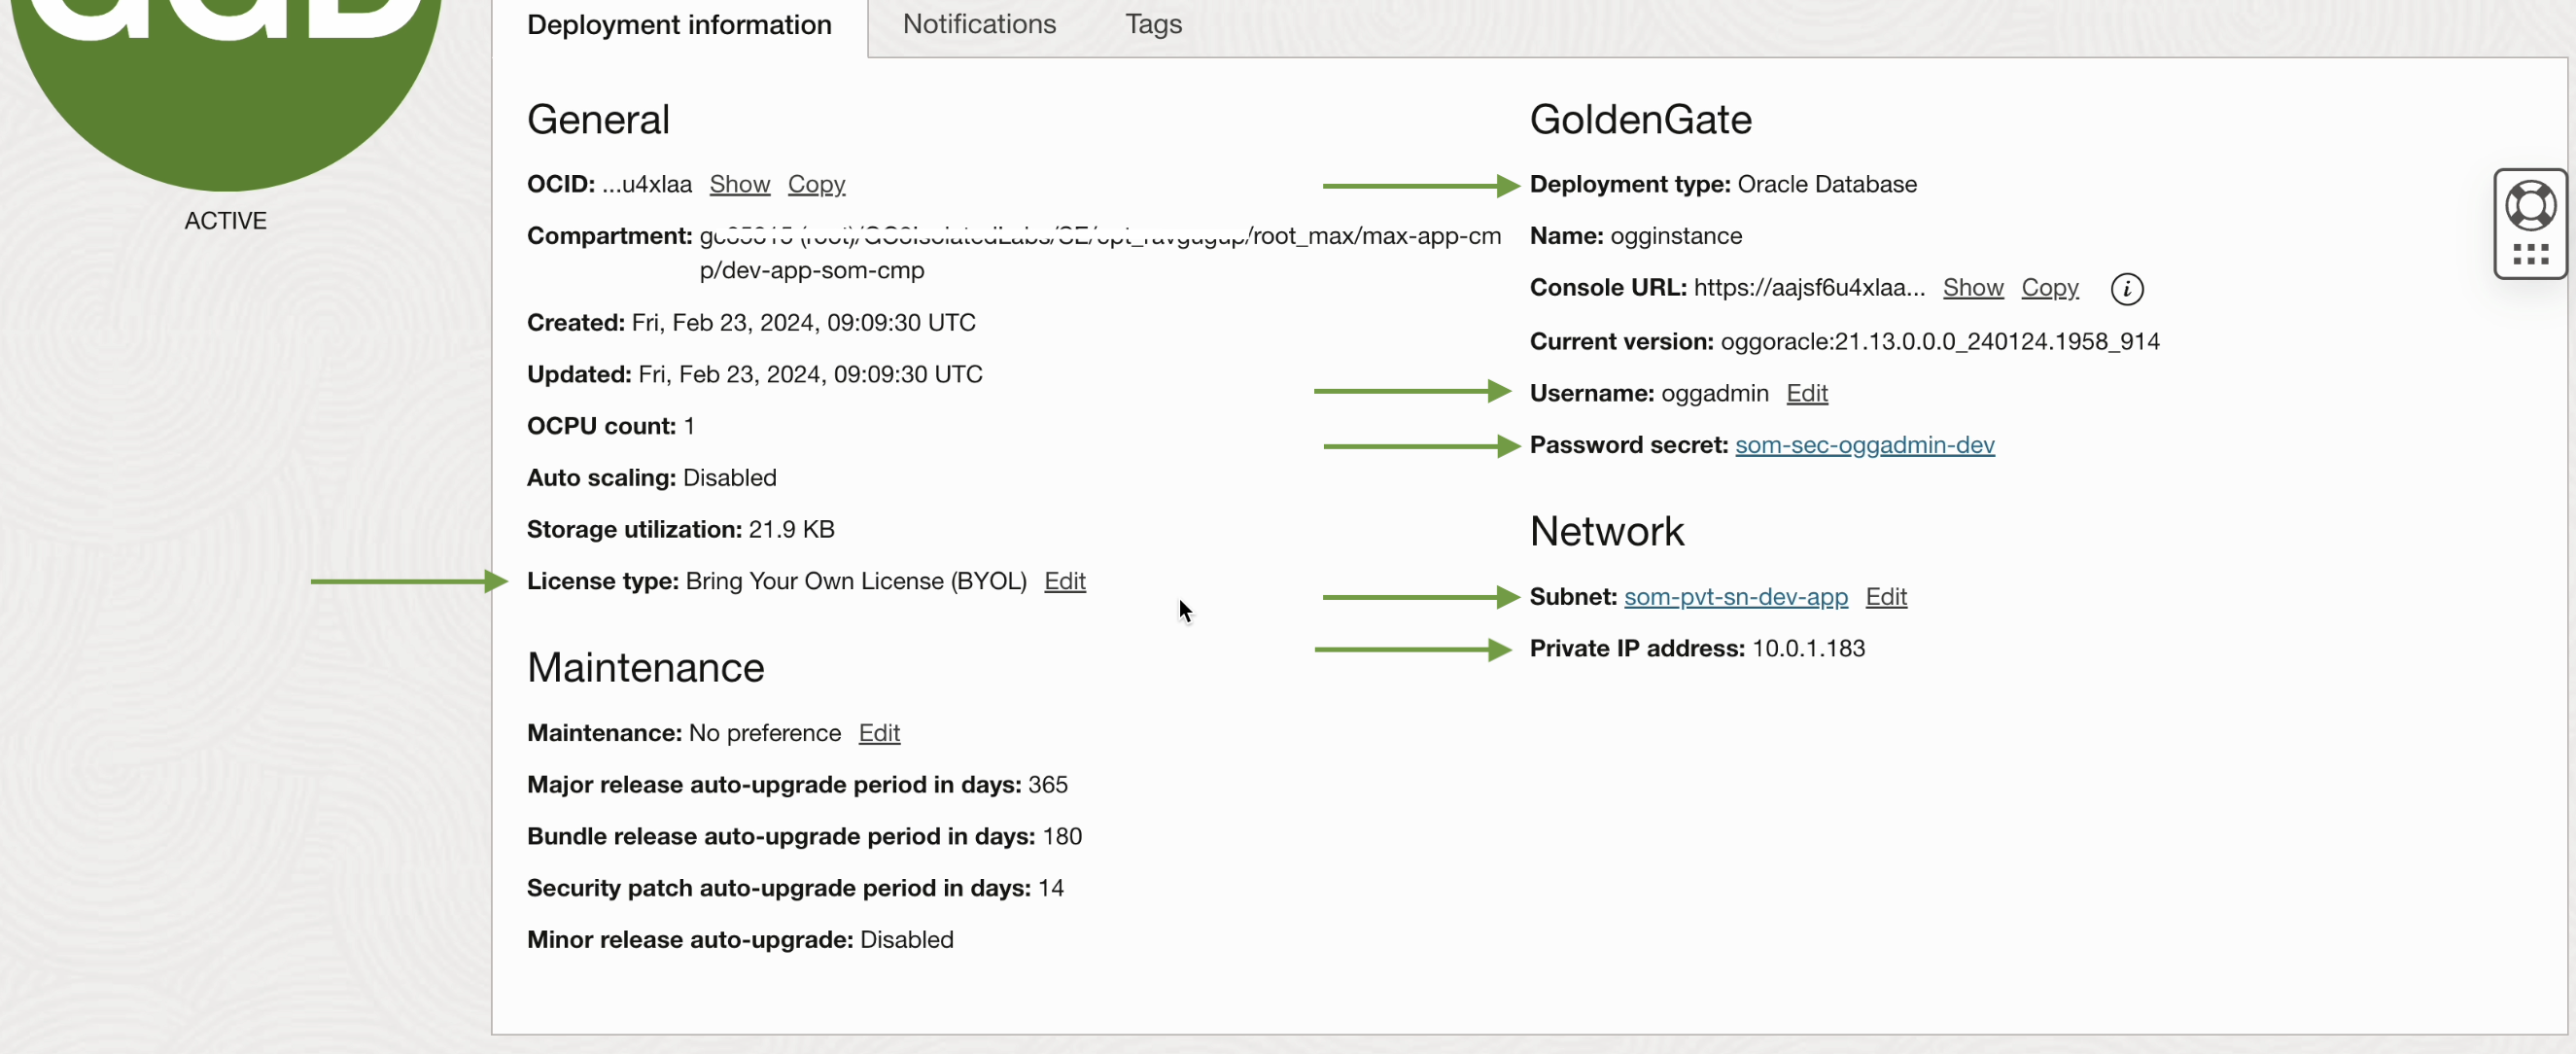
After the deployment is created, it will be assigned one private IP address
2. Access GoldenGate
To access GoldenGate, which is currently residing within a private subnet, it is imperative to establish both Ingress and Egress rules through NSG (Network Security Group) for GoldenGate, as well as Security List for the Bastion Service.
This approach ensures a high level of security by allowing access only to specific IP addresses for each resource, thereby mitigating the risk of unauthorized access from other resources.
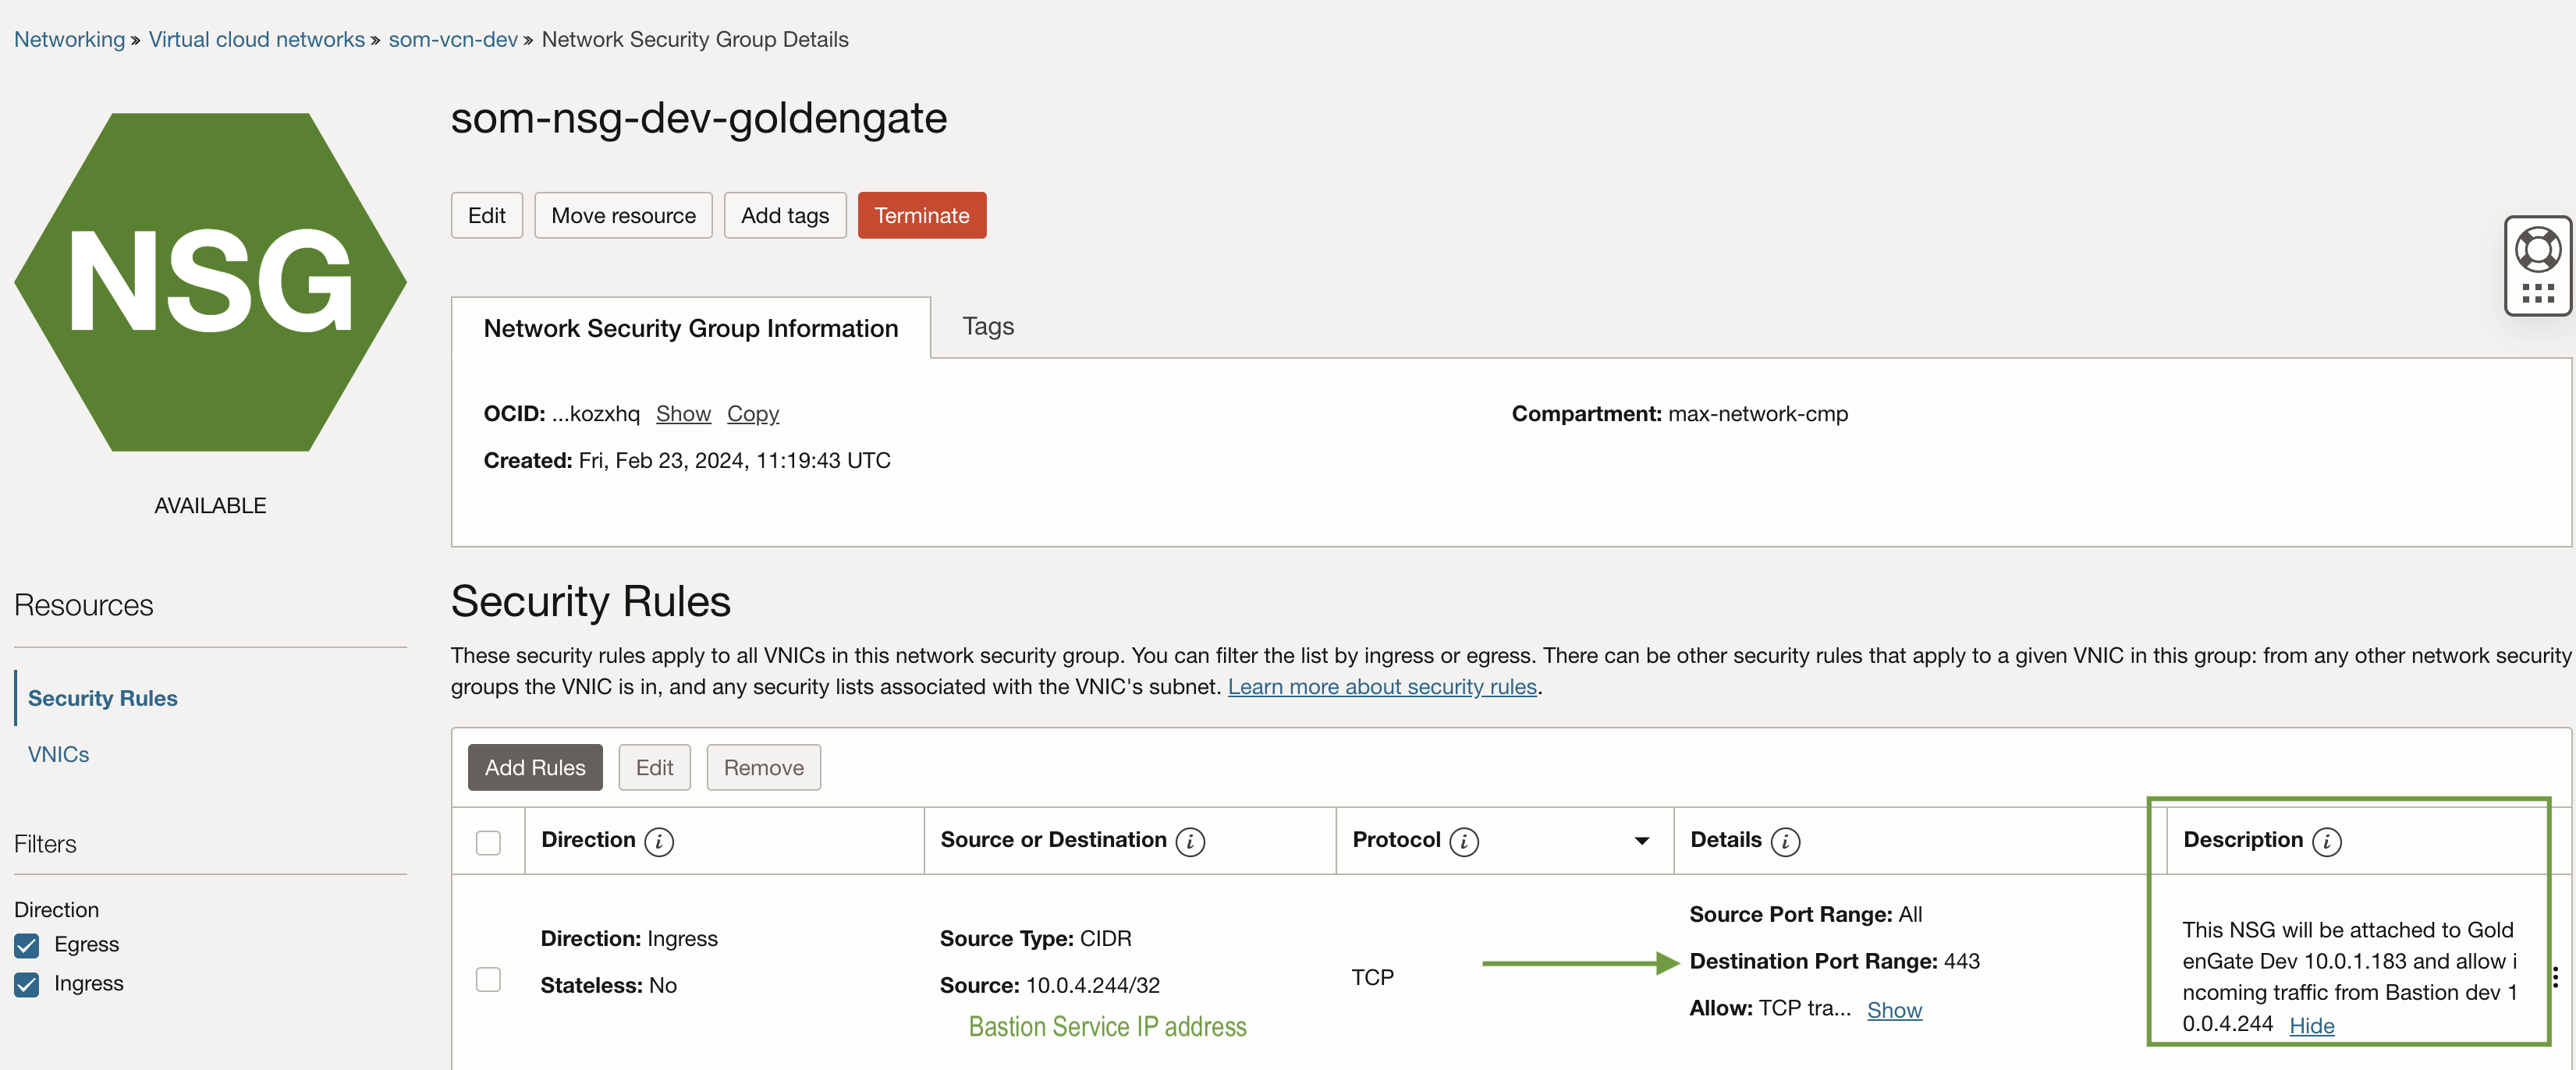
a) Ingress rule for GoldenGate
Create the NSG “som-nsg-dev-goldengate” and add an ingress rule to be linked with OCI GoldenGate. This rule will exclusively allow incoming traffic from the Bastion Service, ensuring that only requests originating from the Bastion Service’s exact IP address will be entertained by GoldenGate, thereby preventing any other incoming requests
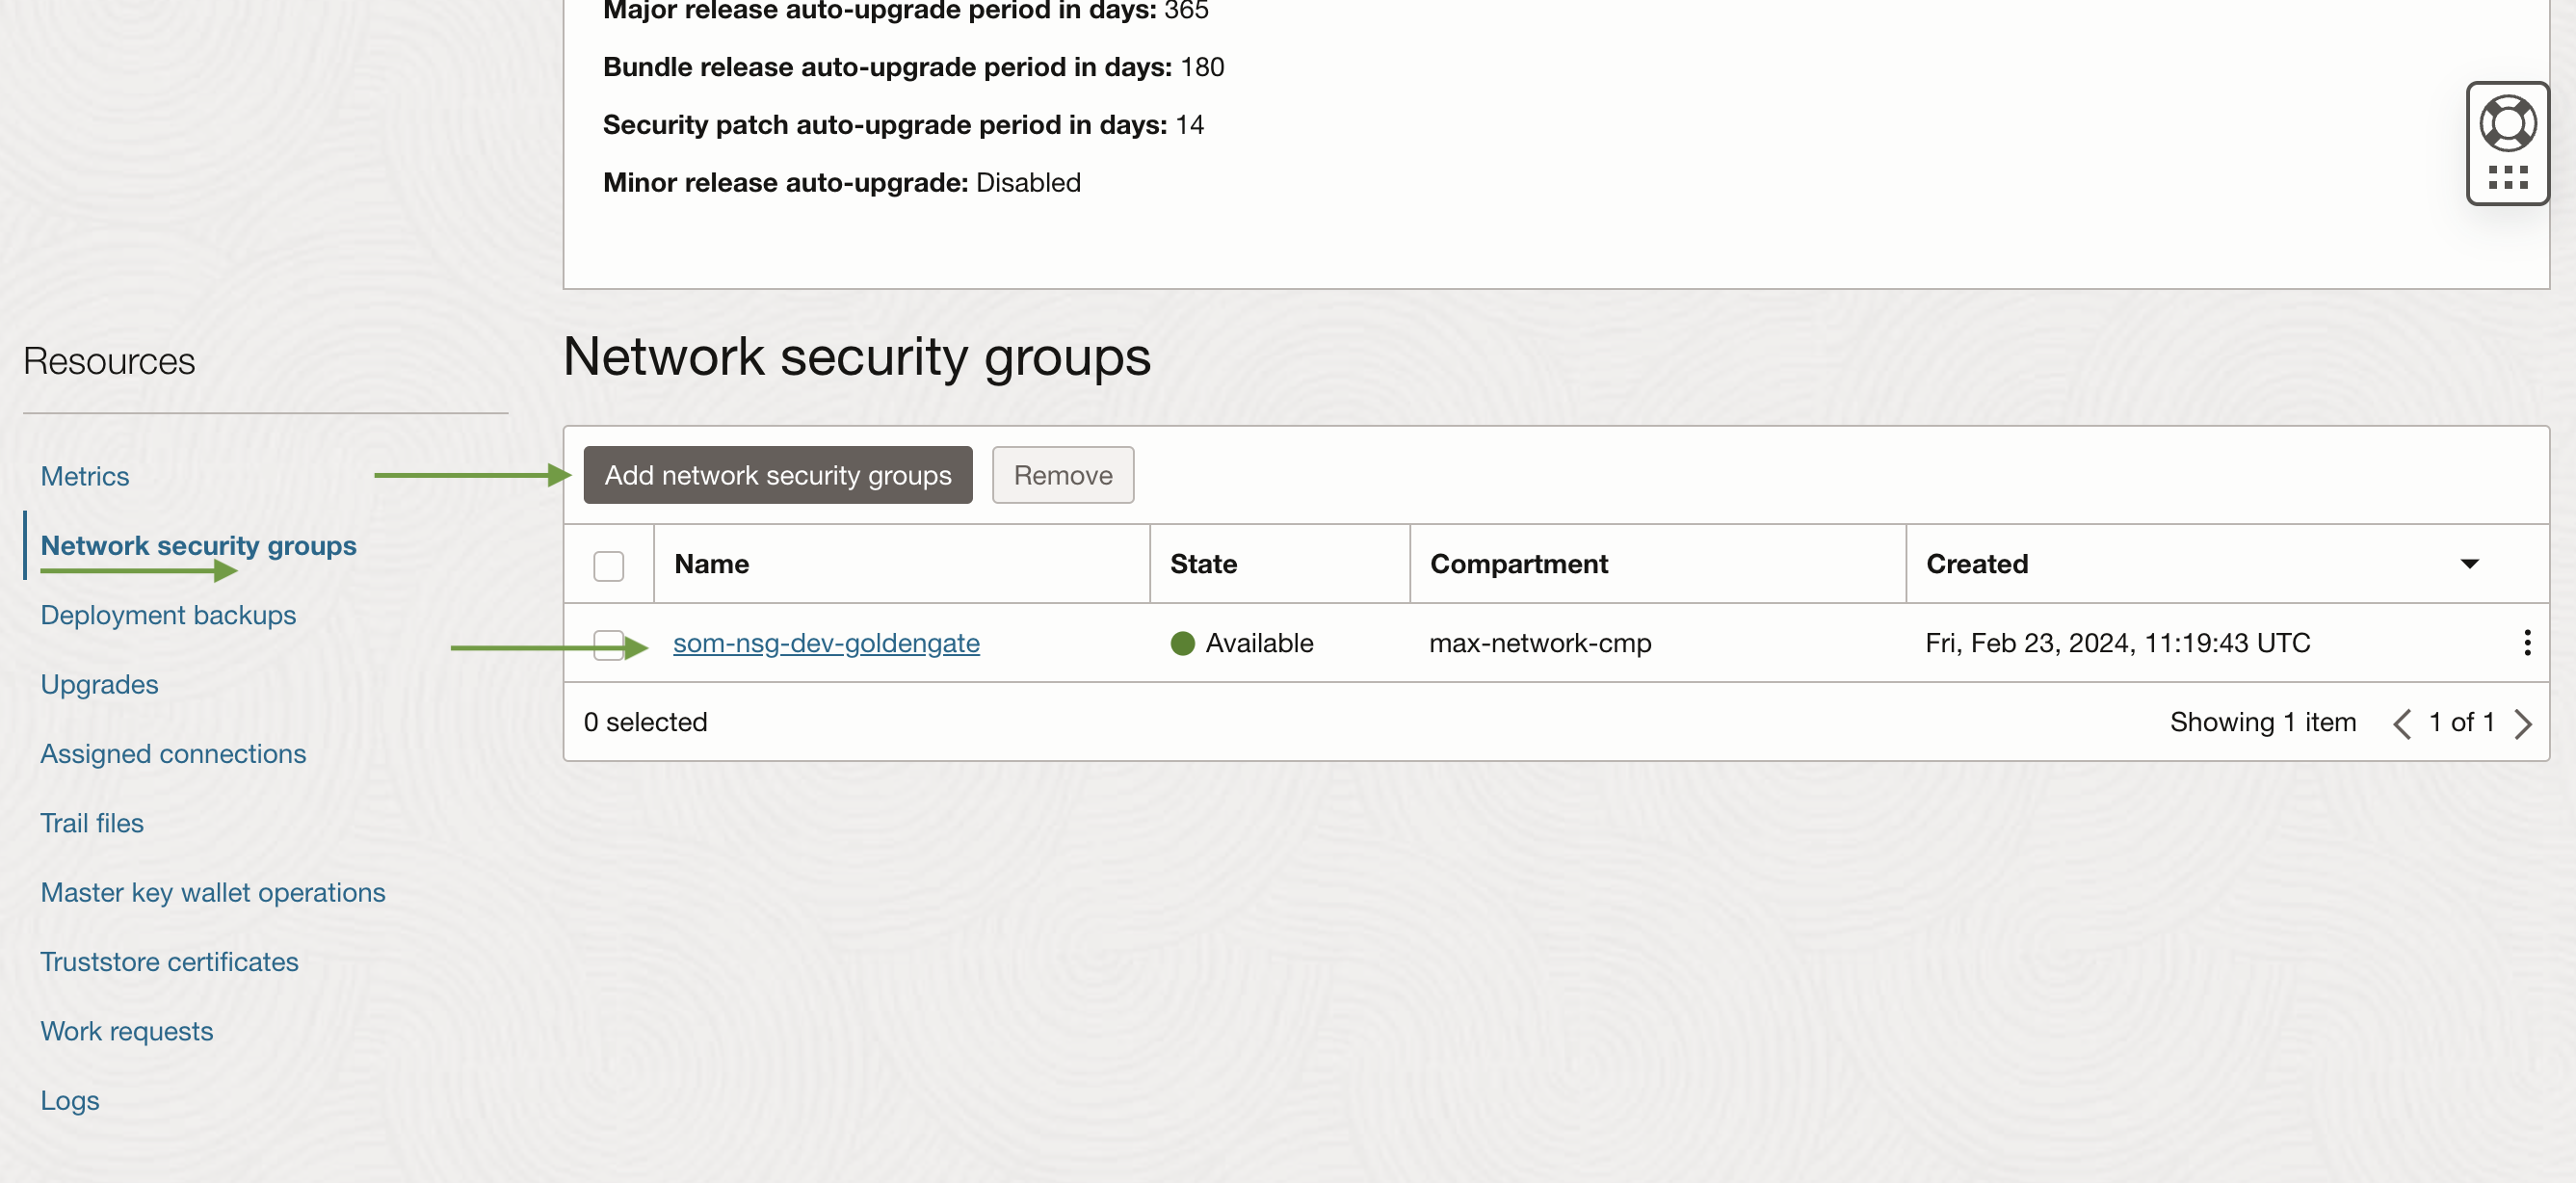
Now, add ‘som-nsg-dev-goldengate’ to the network security group of the GoldenGate deployment. You can locate ‘Network Security Groups’ under the ‘Resources’ section of the GoldenGate deployment page.
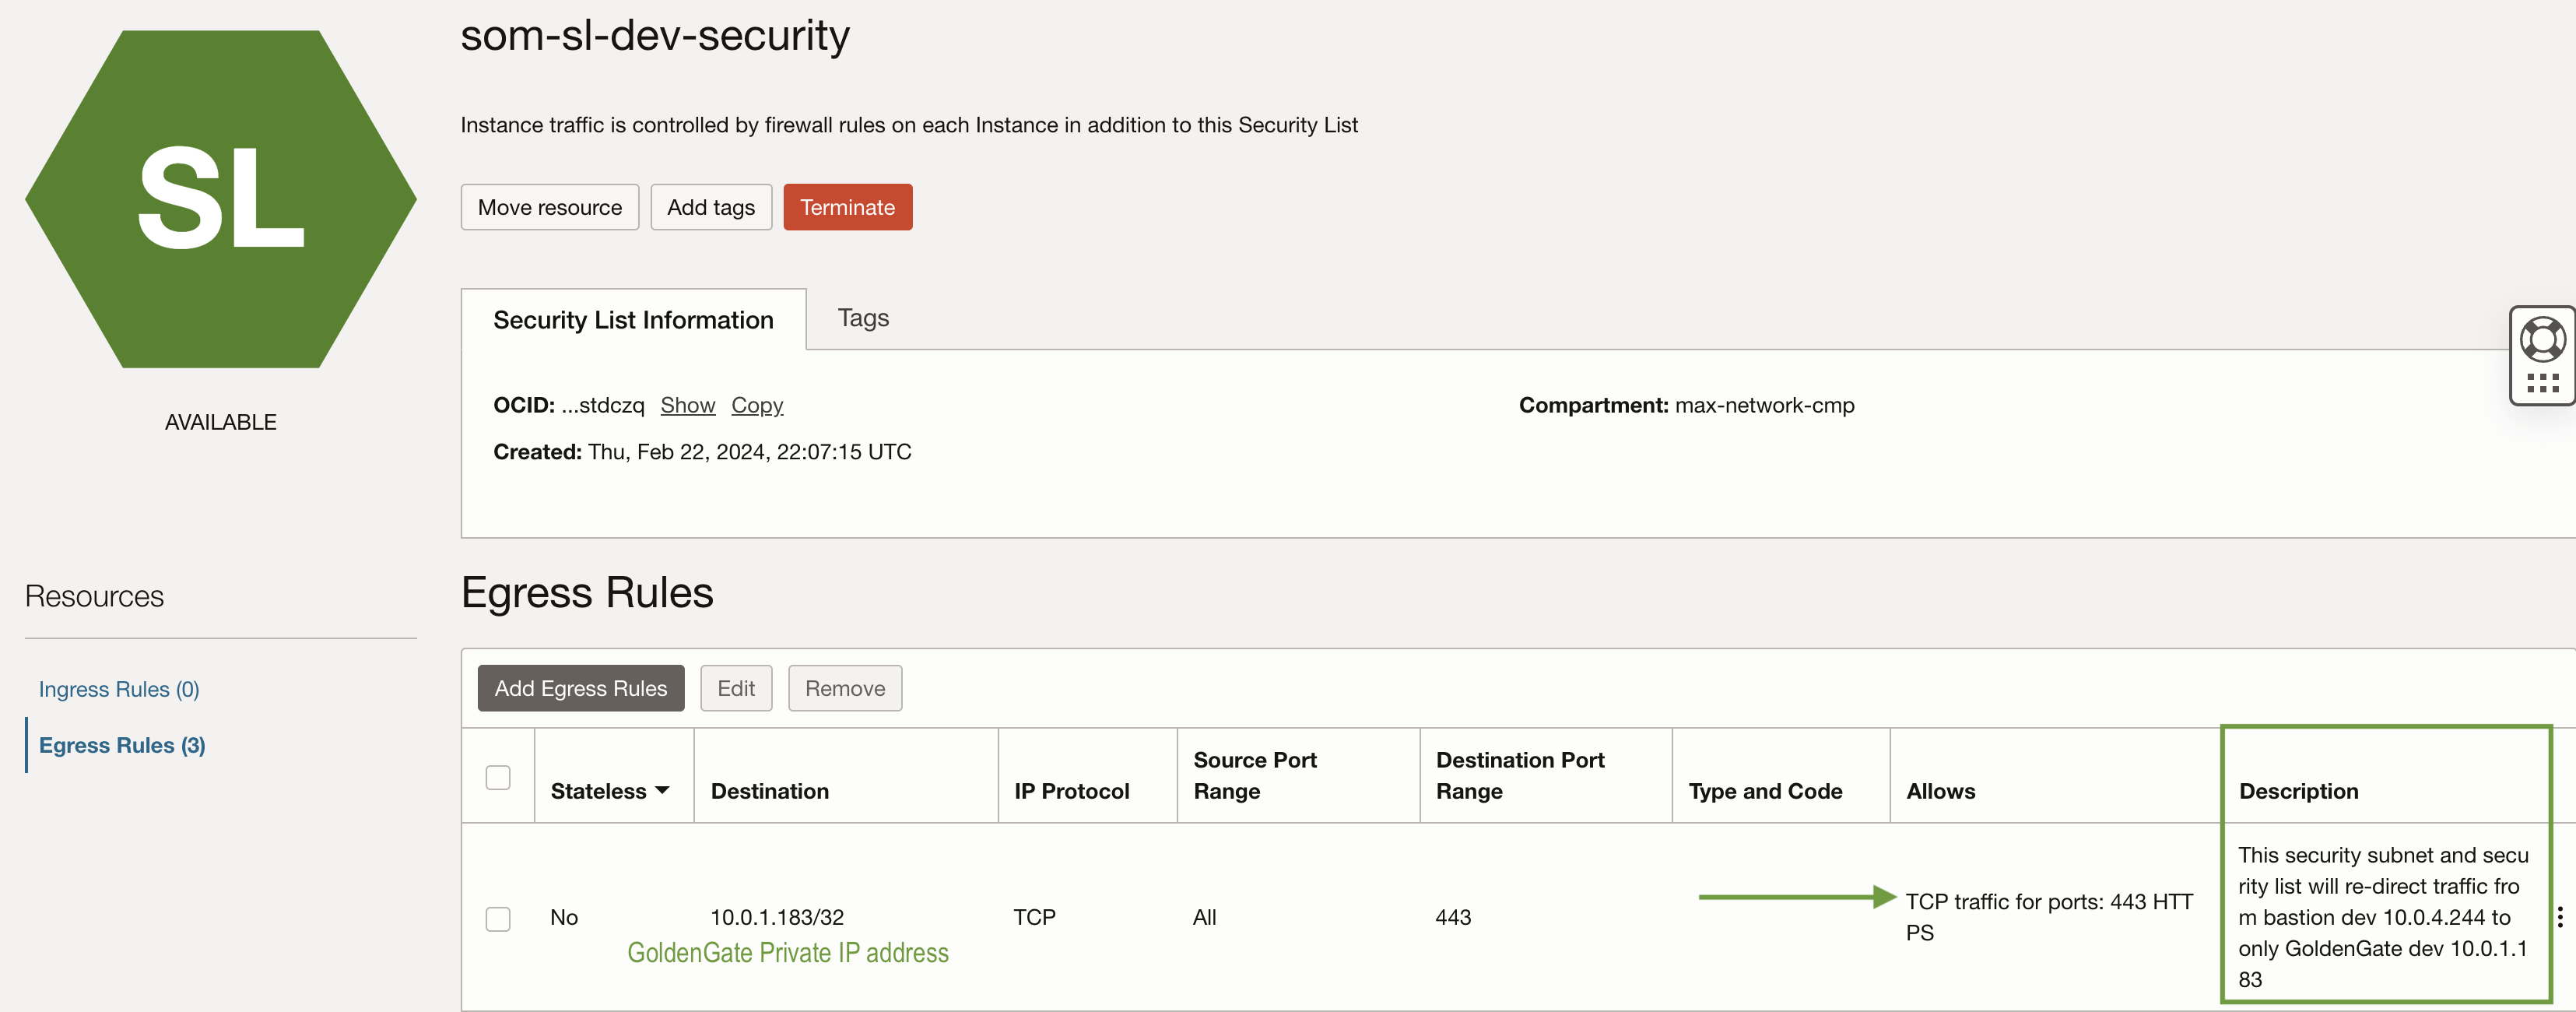
b) Egress rule for GoldenGate
Create an Egress rule in the Security List ‘som-sl-dev-security’ under the private subnet ‘som-pvt-sn-dev-security,’ where the Bastion service was provisioned earlier.
c) Access GoldenGate
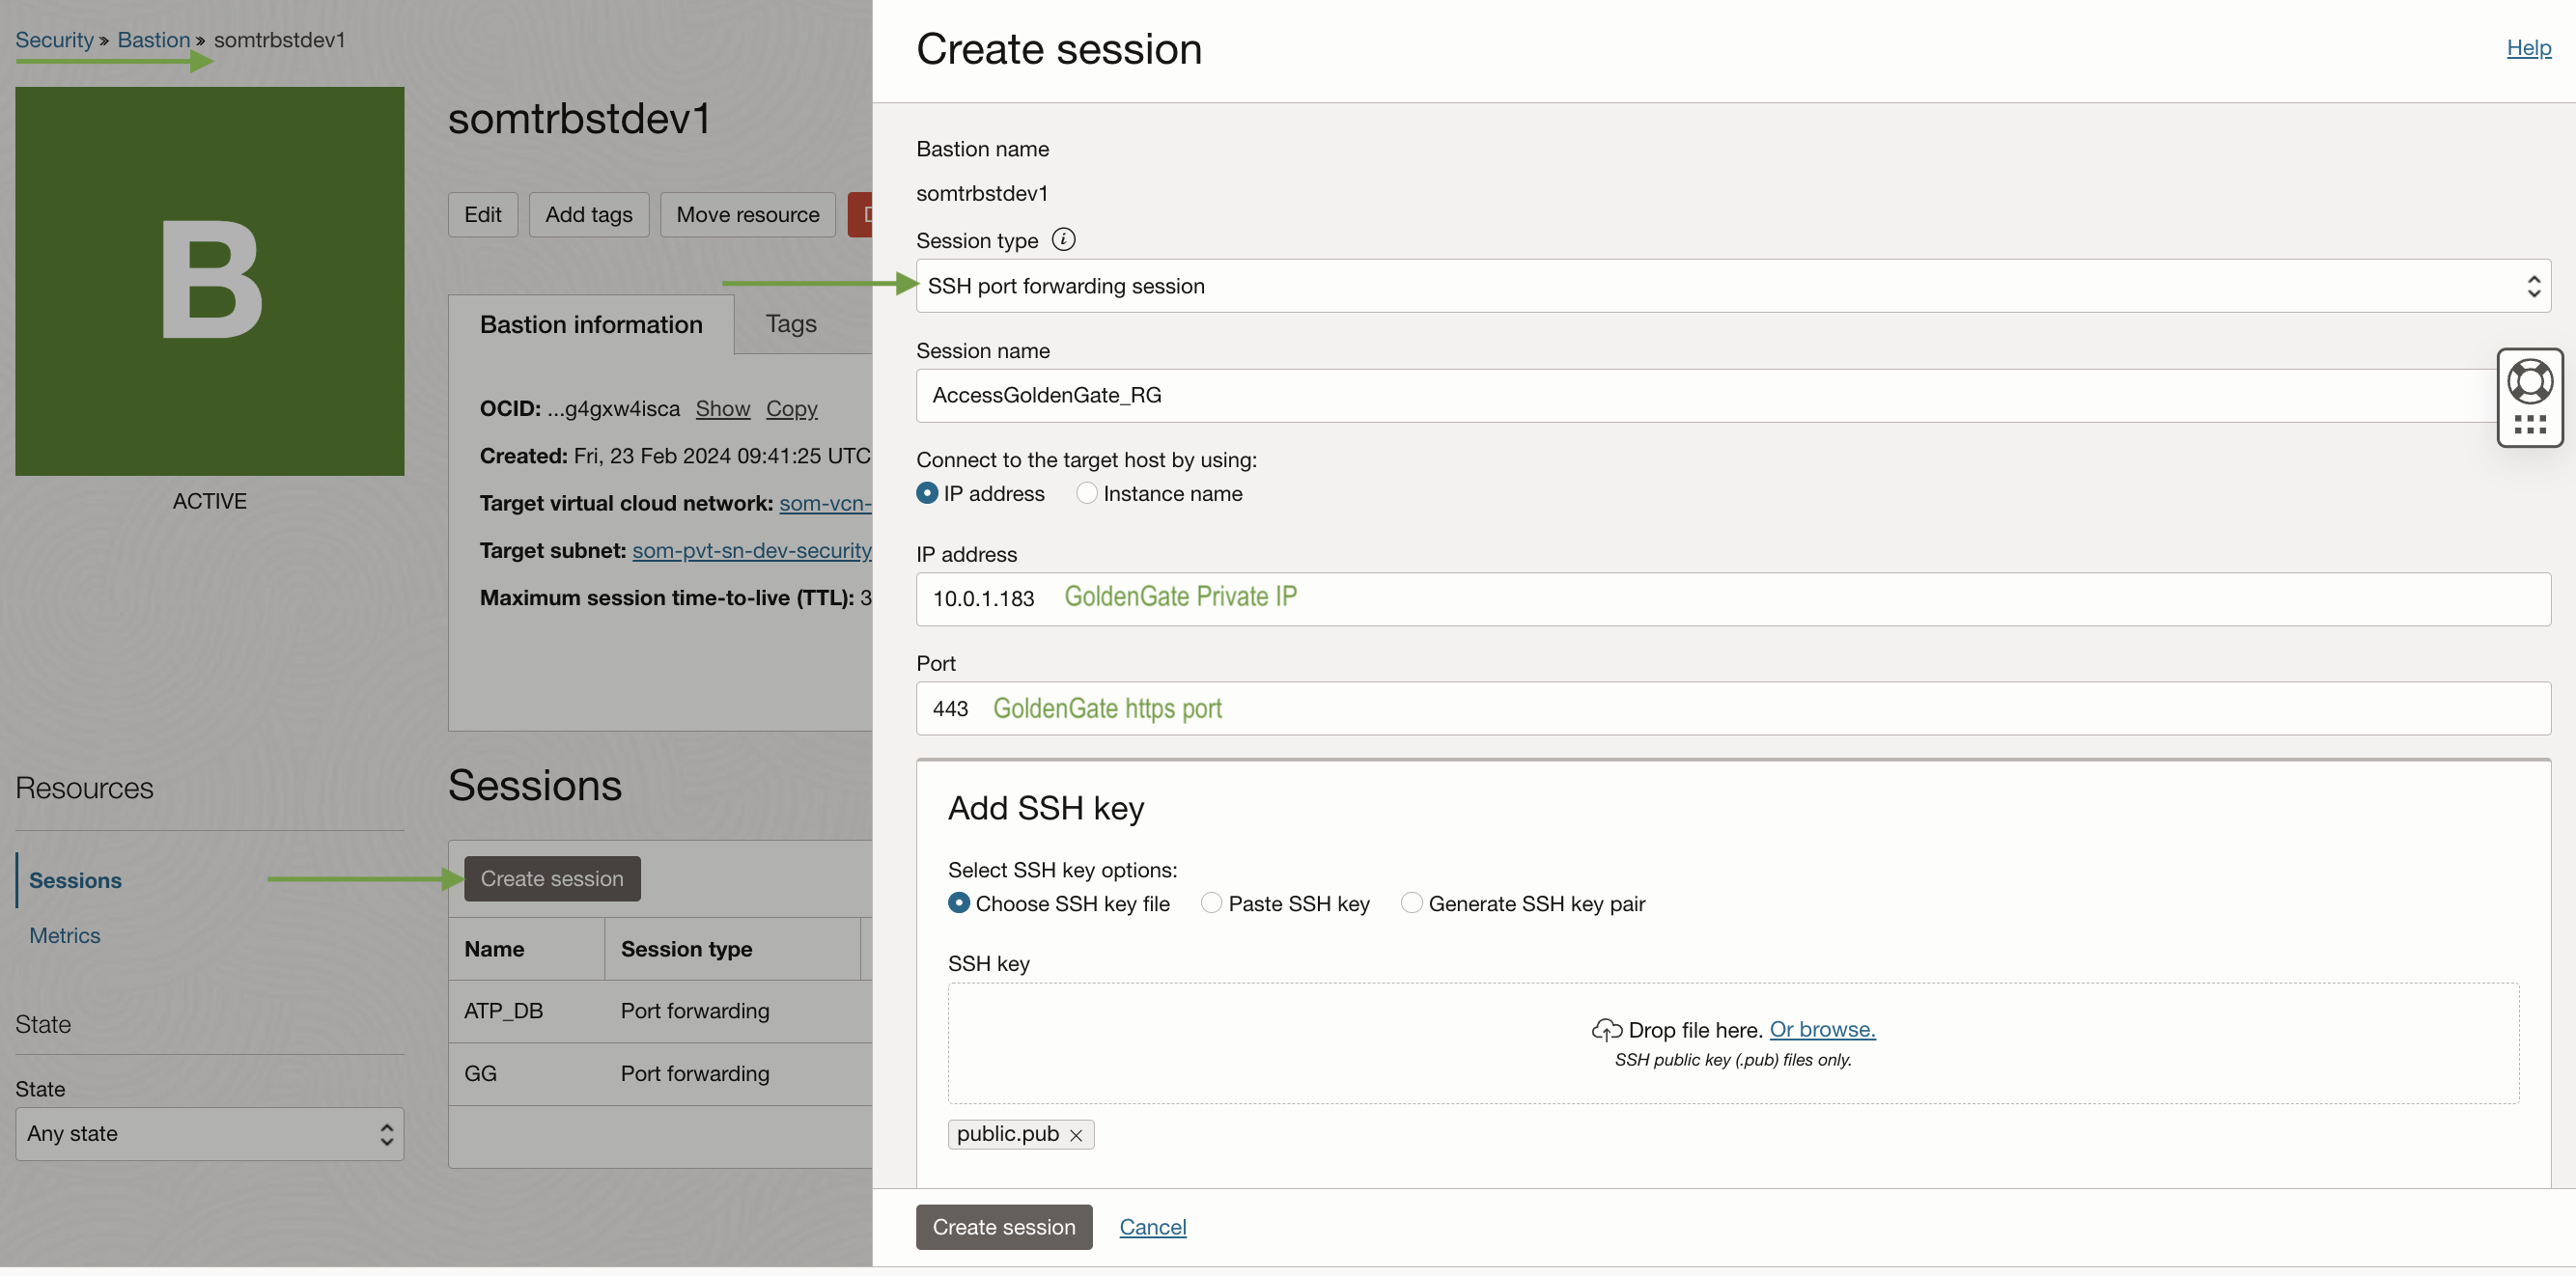
Establish a session in the Bastion service with GoldenGate details by providing the IP address and port of GoldenGate.
Once the session is created, click on the three dots located on the right-hand side and select “Copy SSH command.”
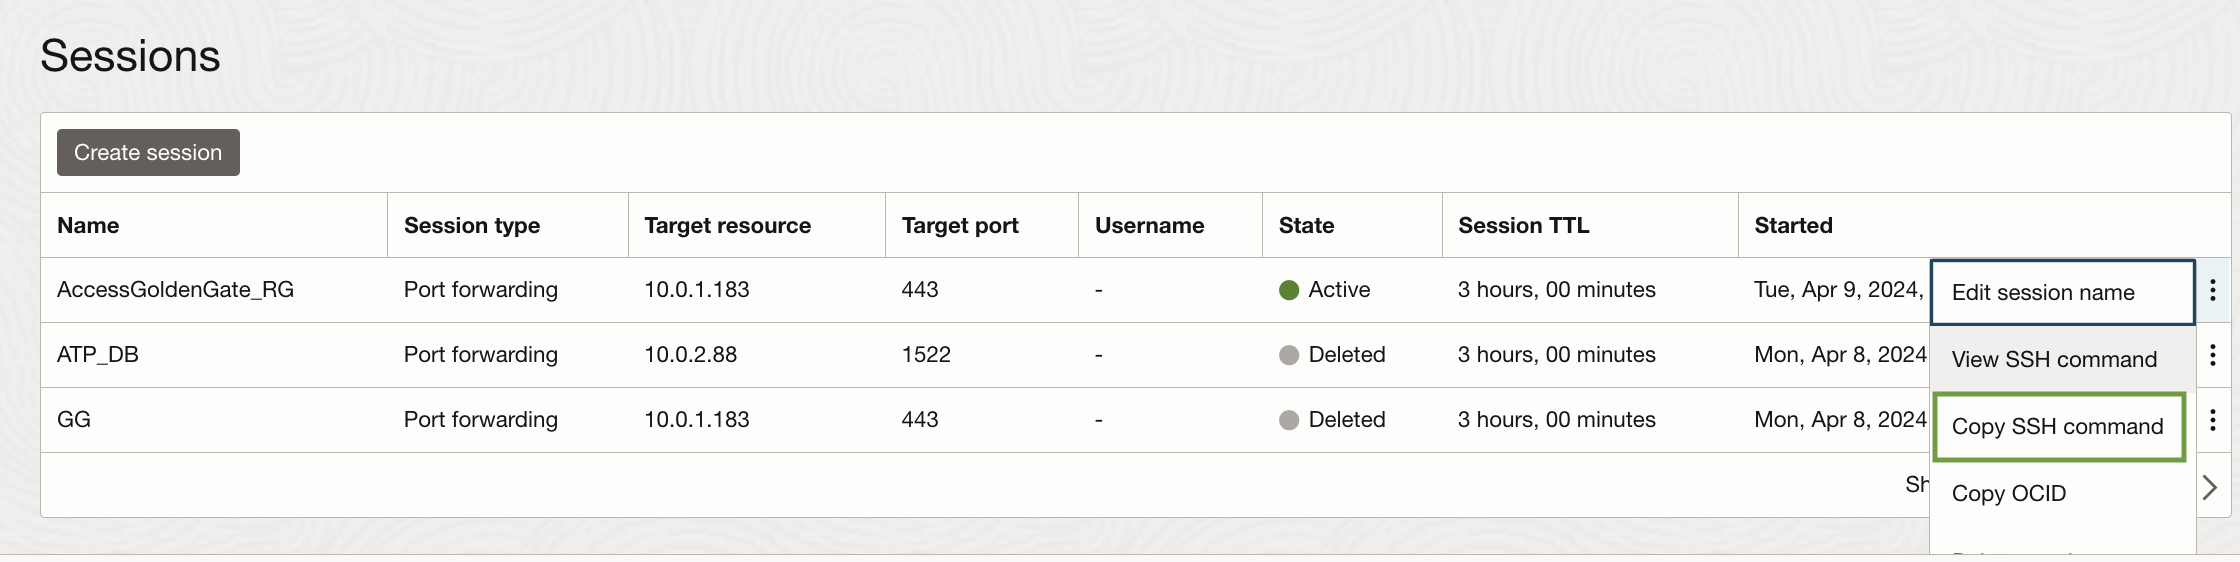
The SSH command would resemble the following, considering the provided, to be executed via the command line.
The SSH command you run will redirect traffic from port 1579 on your laptop to the GoldenGate deployment IP on port 443.

Note :
• Disconnect from any VPN , or use the proxy url in SSH command . e.g. -o “ProxyCommand=nc -X connect -x <yourProxy URL>:80 %h %p”
• If you create session with “Generate SSH key pair” then change the privateKey access permission “chmod 600 <privateKey FileName >” otherwise you will get following error.
@@@@@@@@@@@@@@@@@@@@@@@@@@@@@@@@@@@@@@@@@@@@@@@@@@@@@@@@@@@
@ WARNING: UNPROTECTED PRIVATE KEY FILE! @
@@@@@@@@@@@@@@@@@@@@@@@@@@@@@@@@@@@@@@@@@@@@@@@@@@@@@@@@@@@
Permissions 0644 for ‘pvt.key’ are too open.
It is required that your private key files are NOT accessible by others.
This private key will be ignored.
Load key “pvt.key”: bad permissions
d) Access GoldenGate webpage
GoldenGate webpage can be accessable through local port
https://localhost:1579/
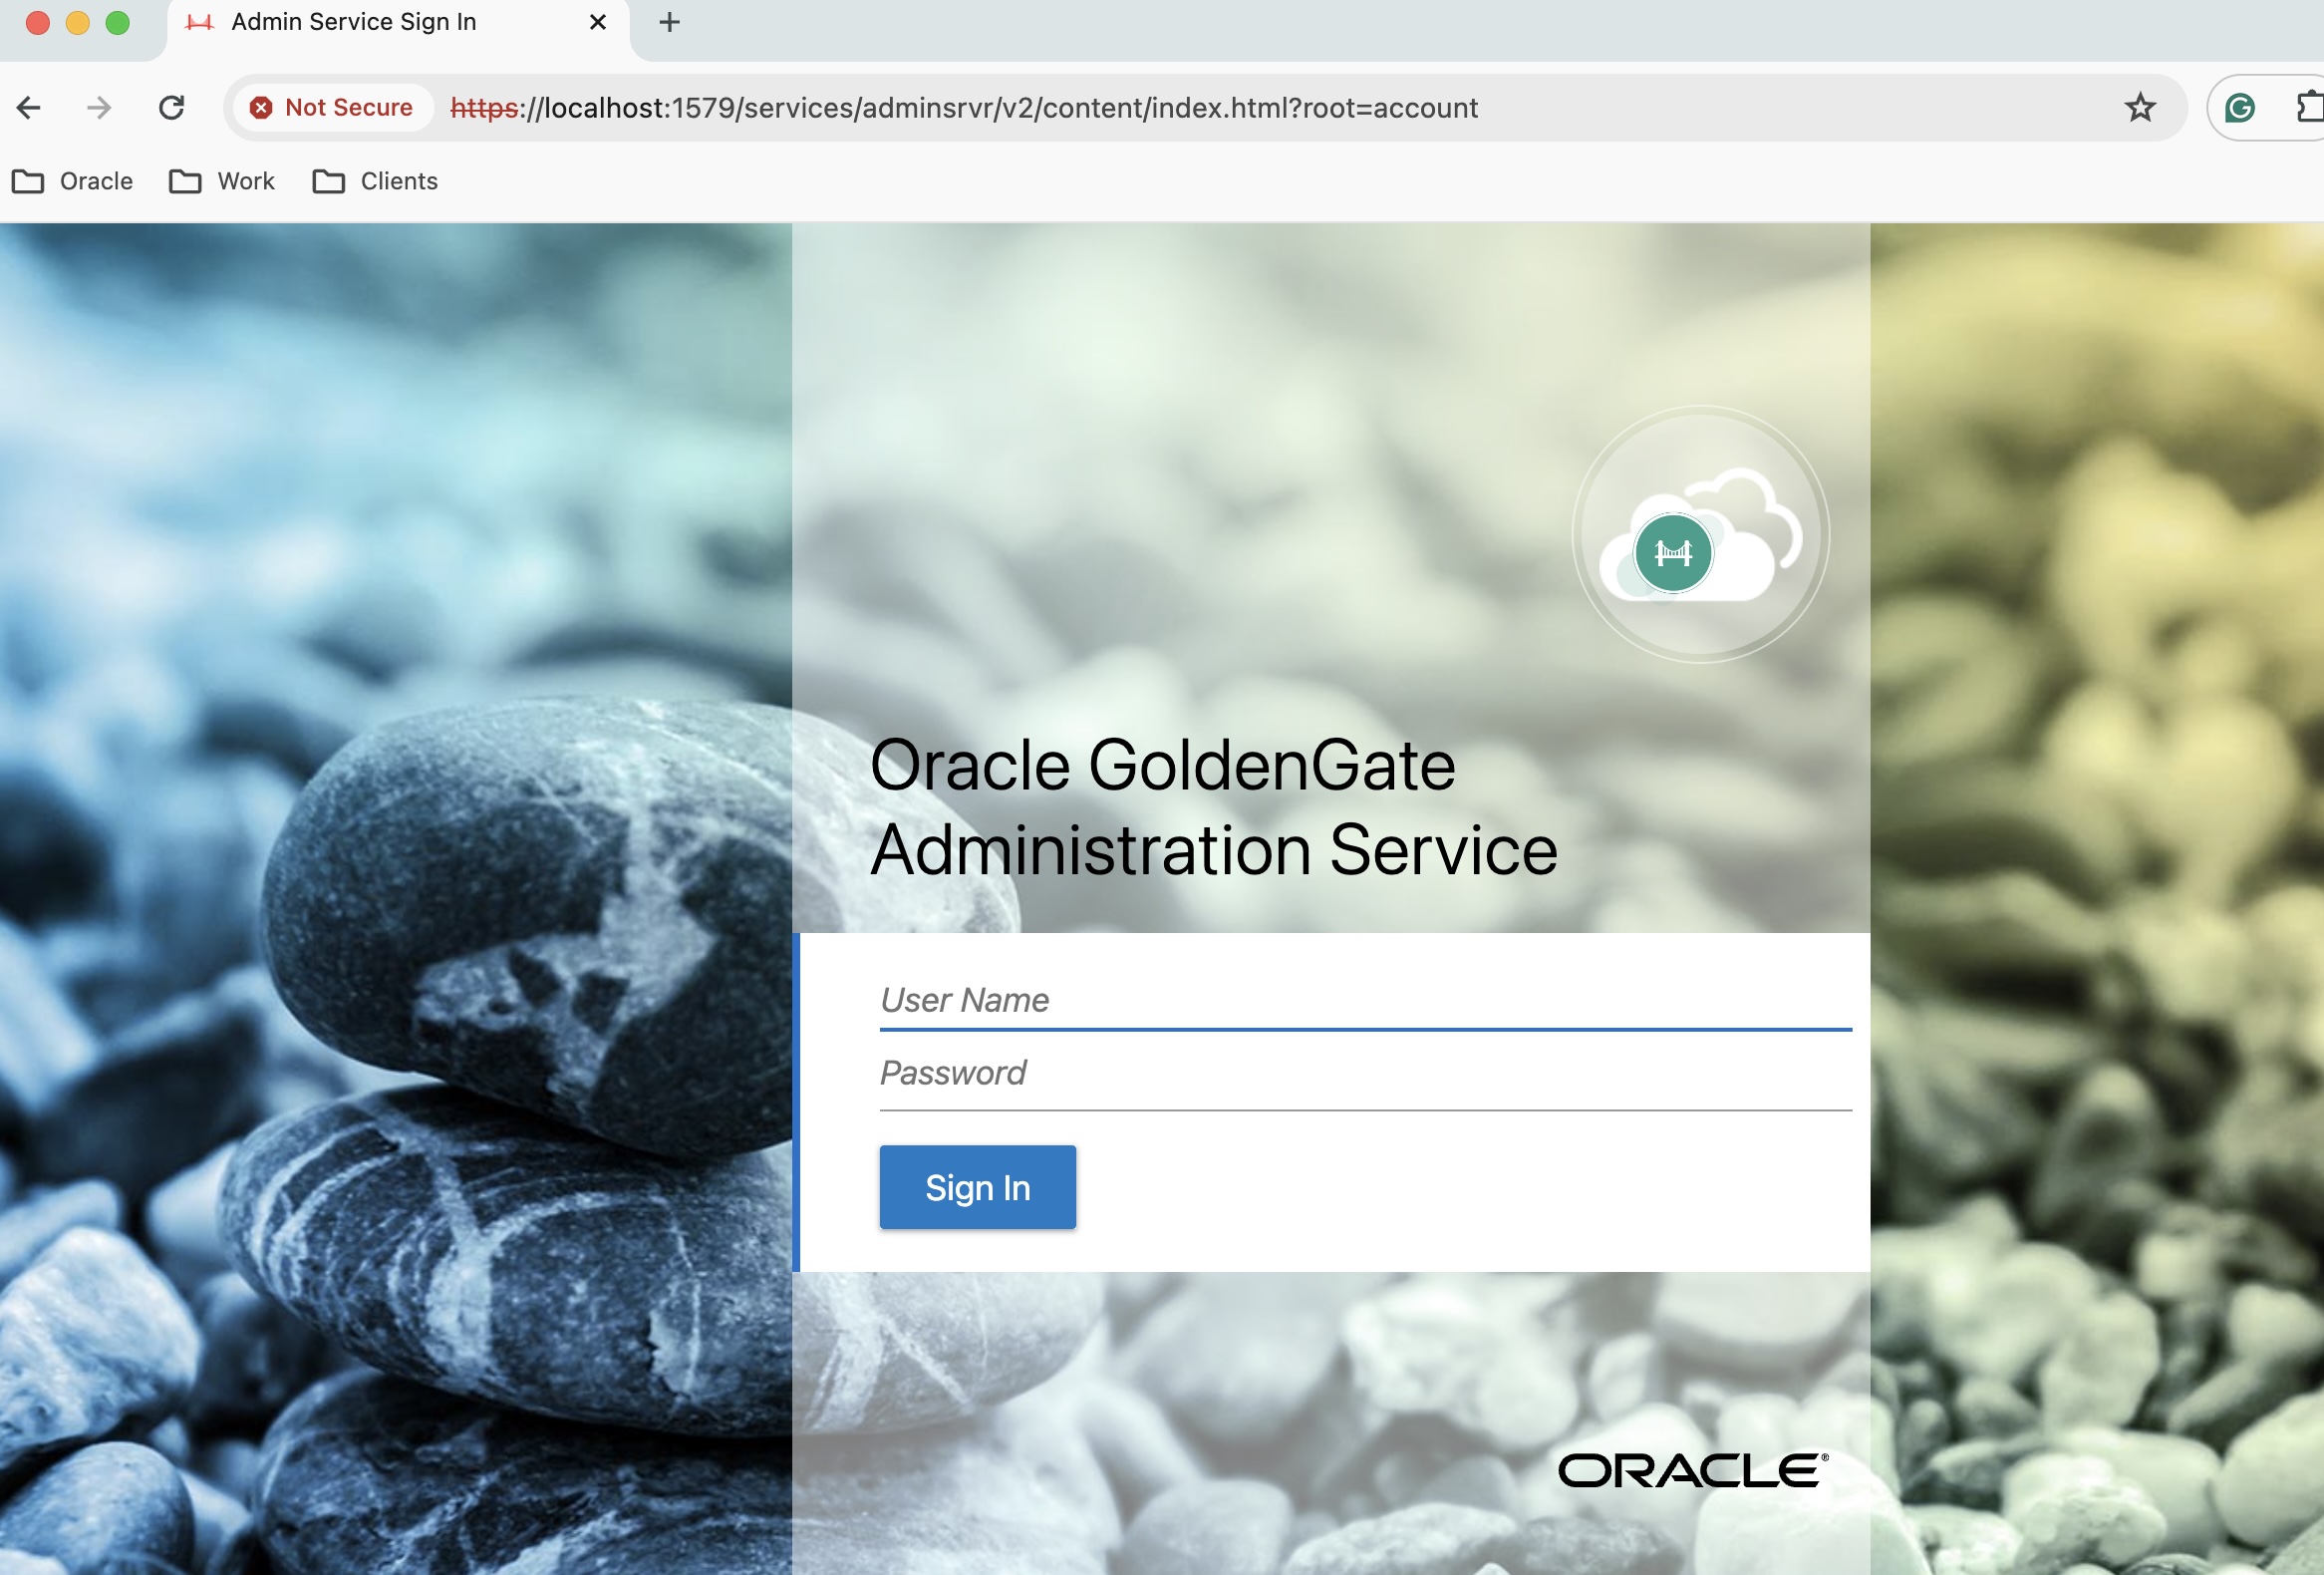
Home Page :
Part 2: GoldenGate Artifacts Creation
Part 3: GoldenGate AdminClient Artifacts Creation
Part 4: DataBase Artifacts Creation