Since OCI GoldenGate Big Data deployment type has been released, one of the most common questions asked is if OCI GoldenGate Big Data can be used for initial loads into supported targets and the answer is YES!
You can use OCI GoldenGate for configuring an initial load extract and initial load replicat. There will be different properties used for different big data targets; but, the way you configure the replicat will be more or less the same. For this blog, I used an Autonomous Database as the source and OCI Object Storage as the target.
Here are the steps that we’re going to follow:
- Create a change data capture extract
- Get SCN from the source database
- Create an initial load extract
- Create a distribution path for cdc extract
- Create a distribution path for initial load extract
- Create a replicat for the initial load
- Create a replcat for the change data capture replication
Let’s start!
Create a CDC Extract
We’re going to configure a cdc extract in the OCI GoldenGate Deployment. You can check Create Deployments document if you don’t have a deployment yet and Create Connections document if you don’t have a connection.
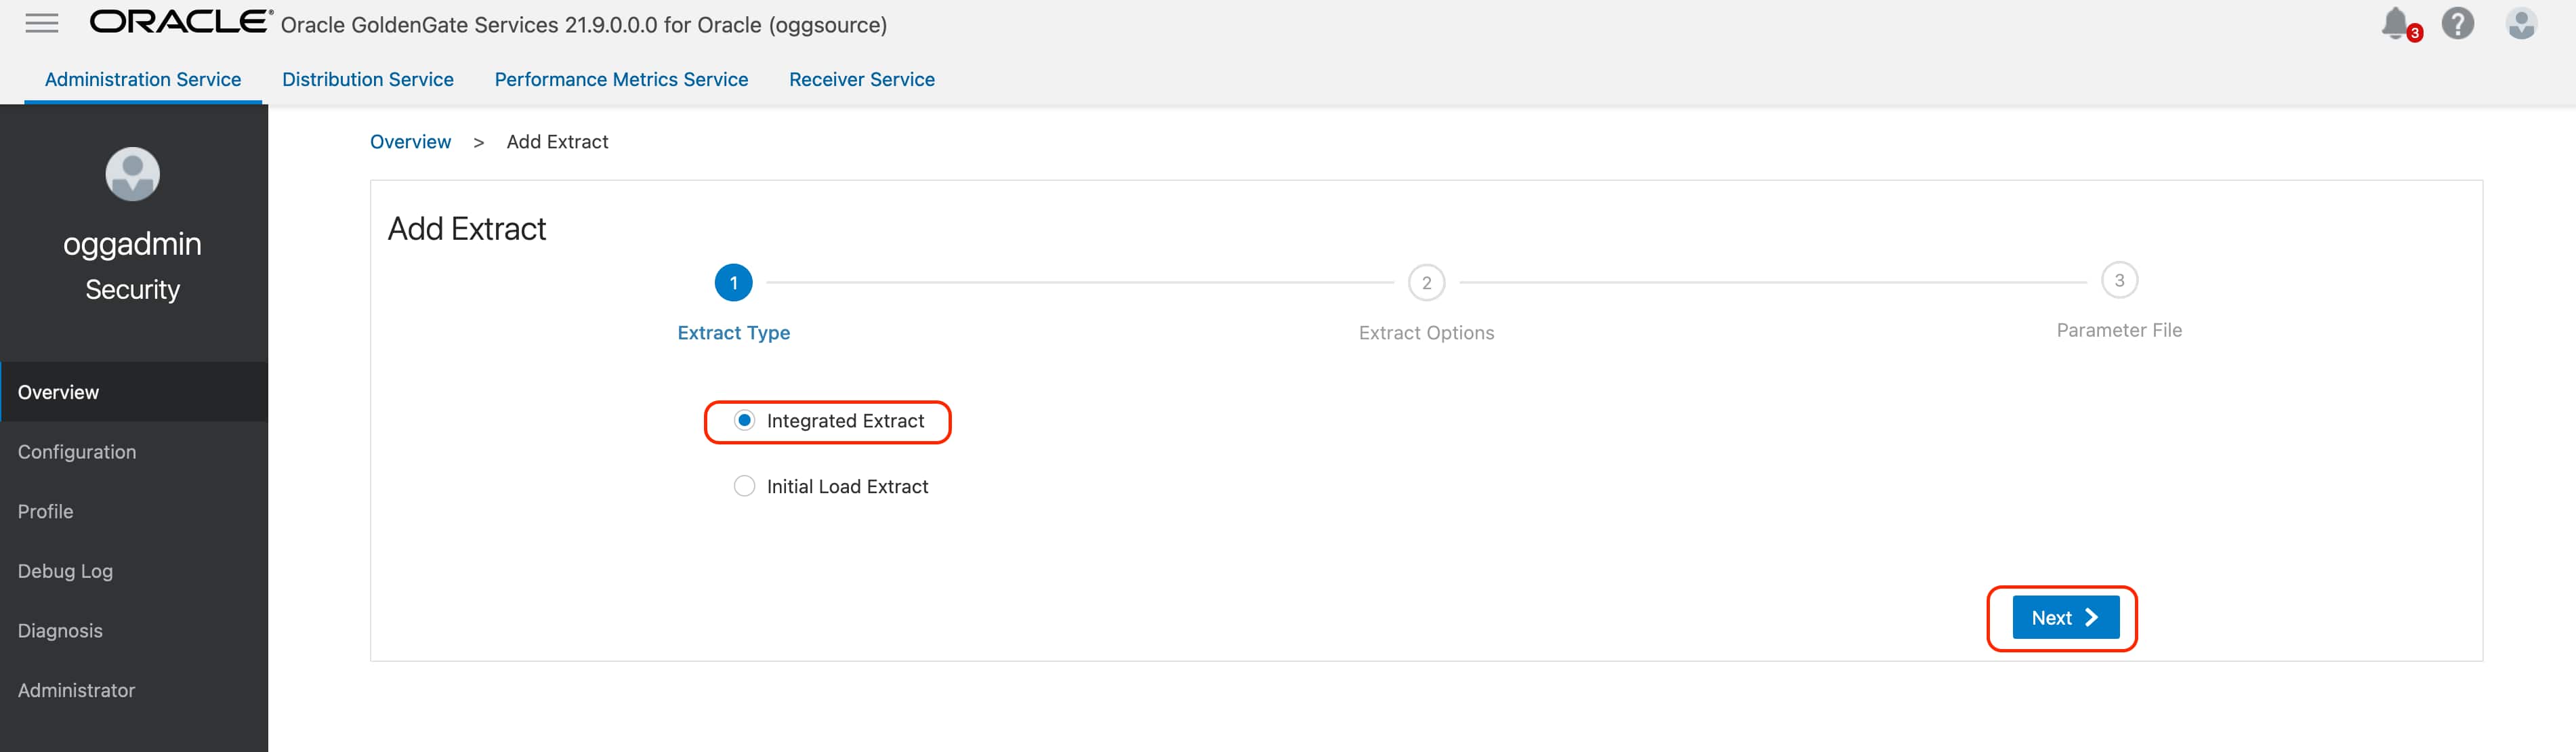
Click Add Extract and select Integrated Extract.

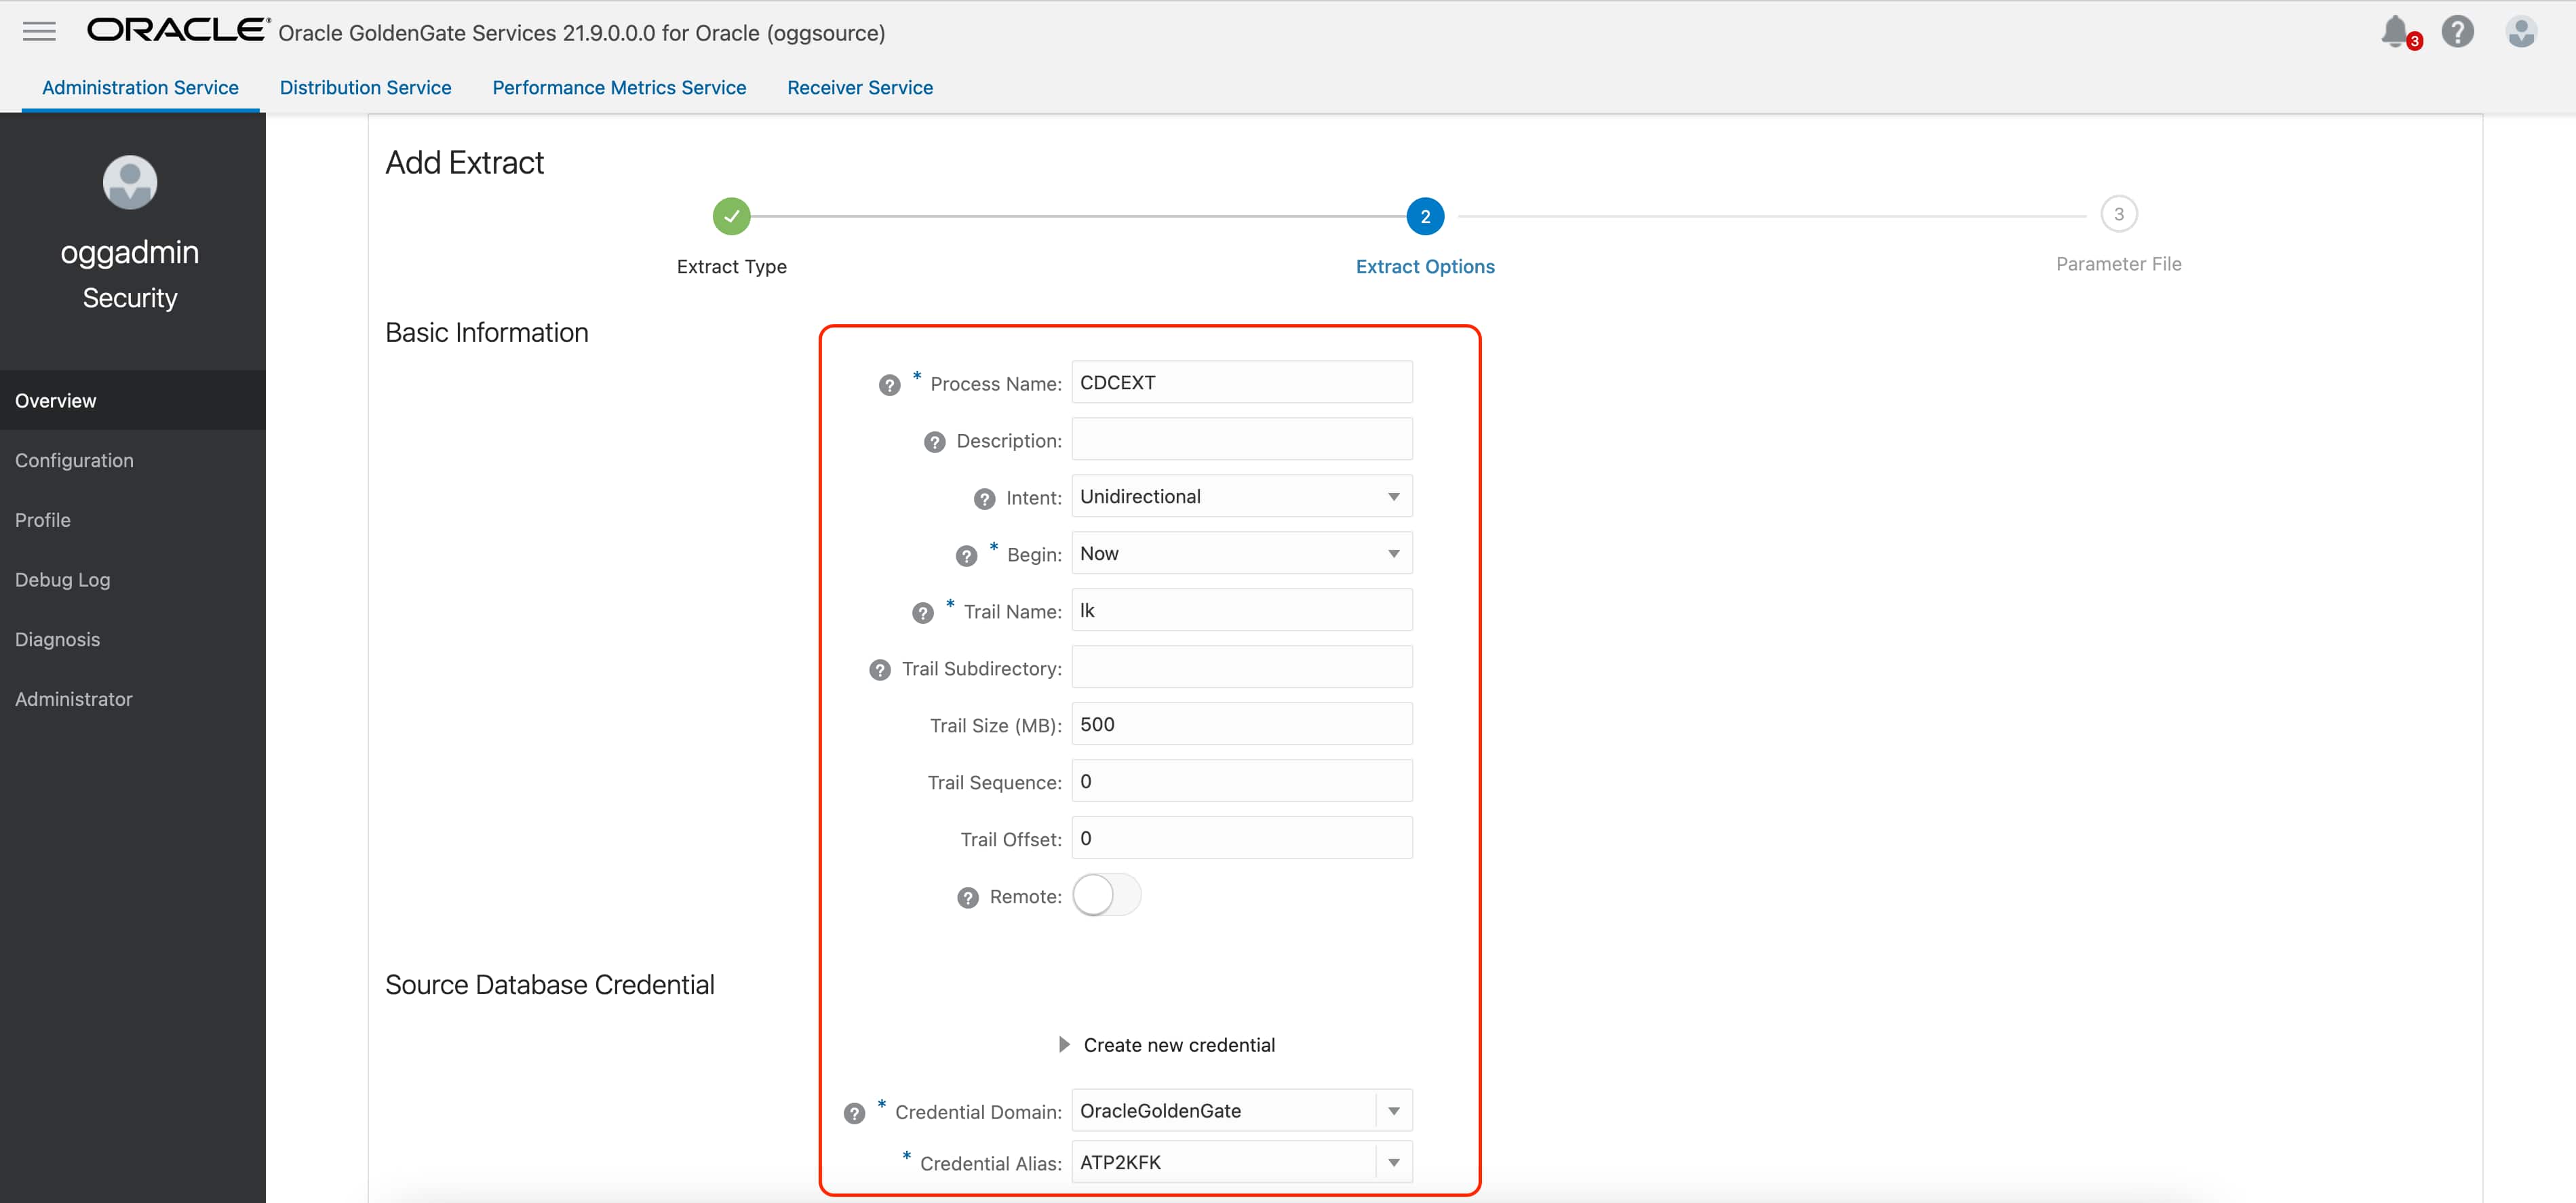
Provide the Extract Options
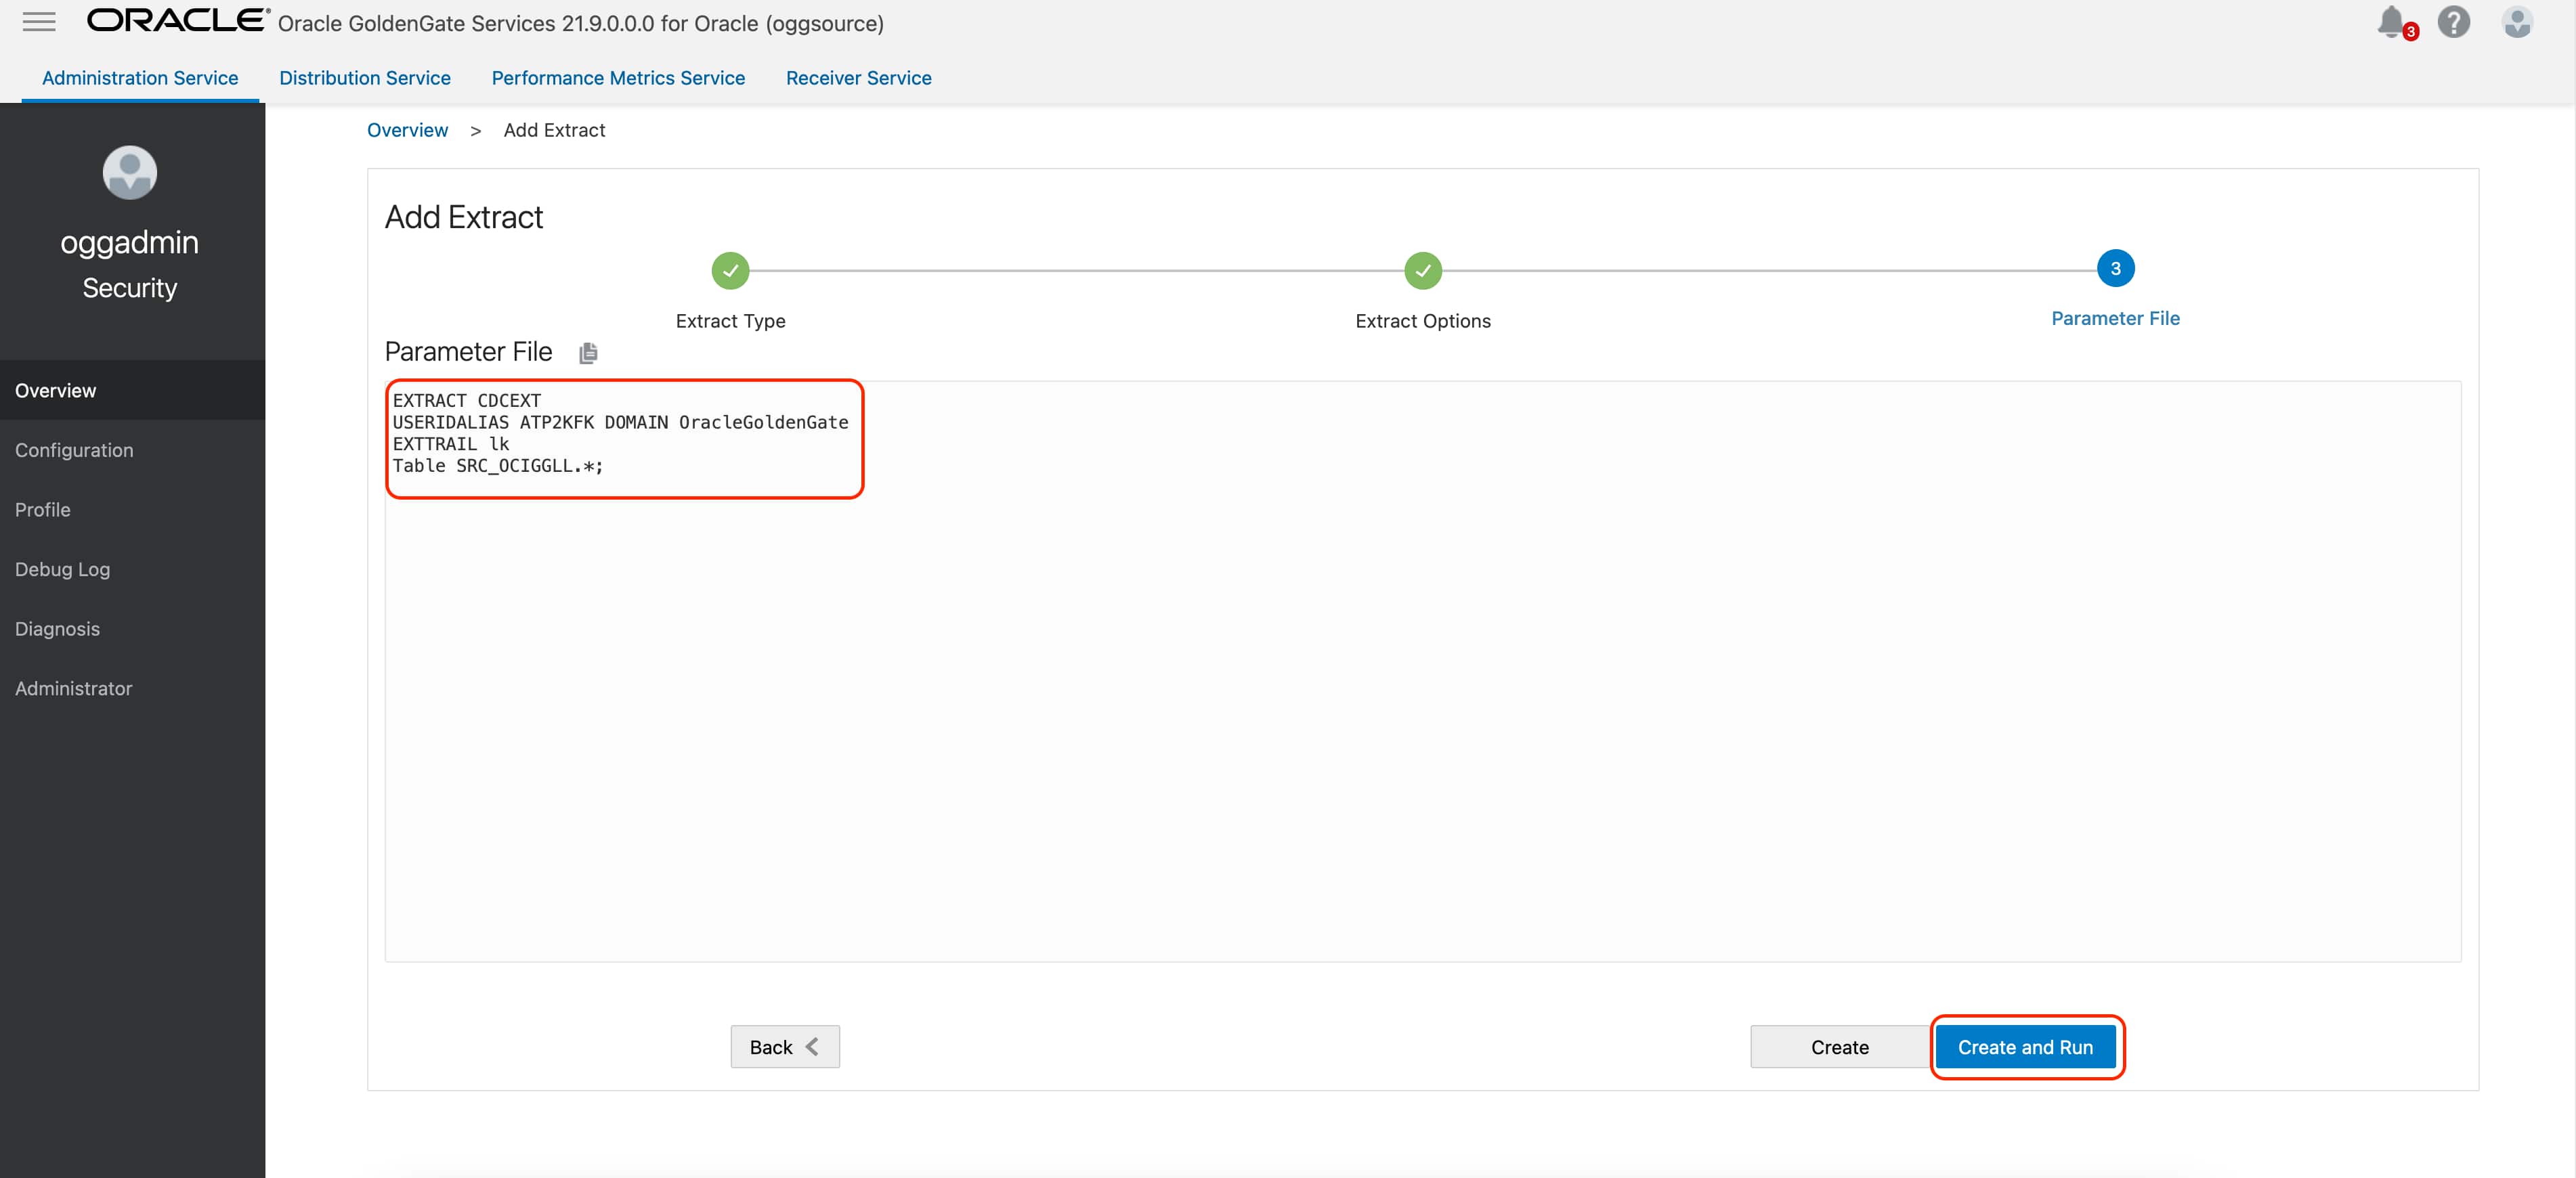
In the Parameter File provide source table selection with Table and click Create & Run
Get SCN
As explained in Alex Lima’s great blog post, we need to check for the SCN of the initial position of the open long transaction before creating the initial load extract. If no existing transaction exists, we use the CURRENT SCN. Log in to the source database and run the following SQL:
***
— Query for active transactions
—
Select T.START_SCN, T.STATUS TSTATUS, T.START_DATE,
S.SID, S.SERIAL#, S.INST_ID, S.USERNAME, S.OSUSER, S.STATUS SSTATUS, S.LOGON_TIME
From gv$transaction T
Inner
Join gv$session S
on S.SADDR = T.SES_ADDR
Union All
—
— Query for current status
—
Select current_scn, ‘CURRENT’, CURRENT_DATE,
NULL, NULL, NULL, ‘SYS’, NULL, NULL, NULL
from v$database
Order by 1;
***
Note: Capture the ACTIVE SCN from the TSTATUS column. If there is no ACTIVE SCN in the results, capture the CURRENT SCN from TSTATUS.
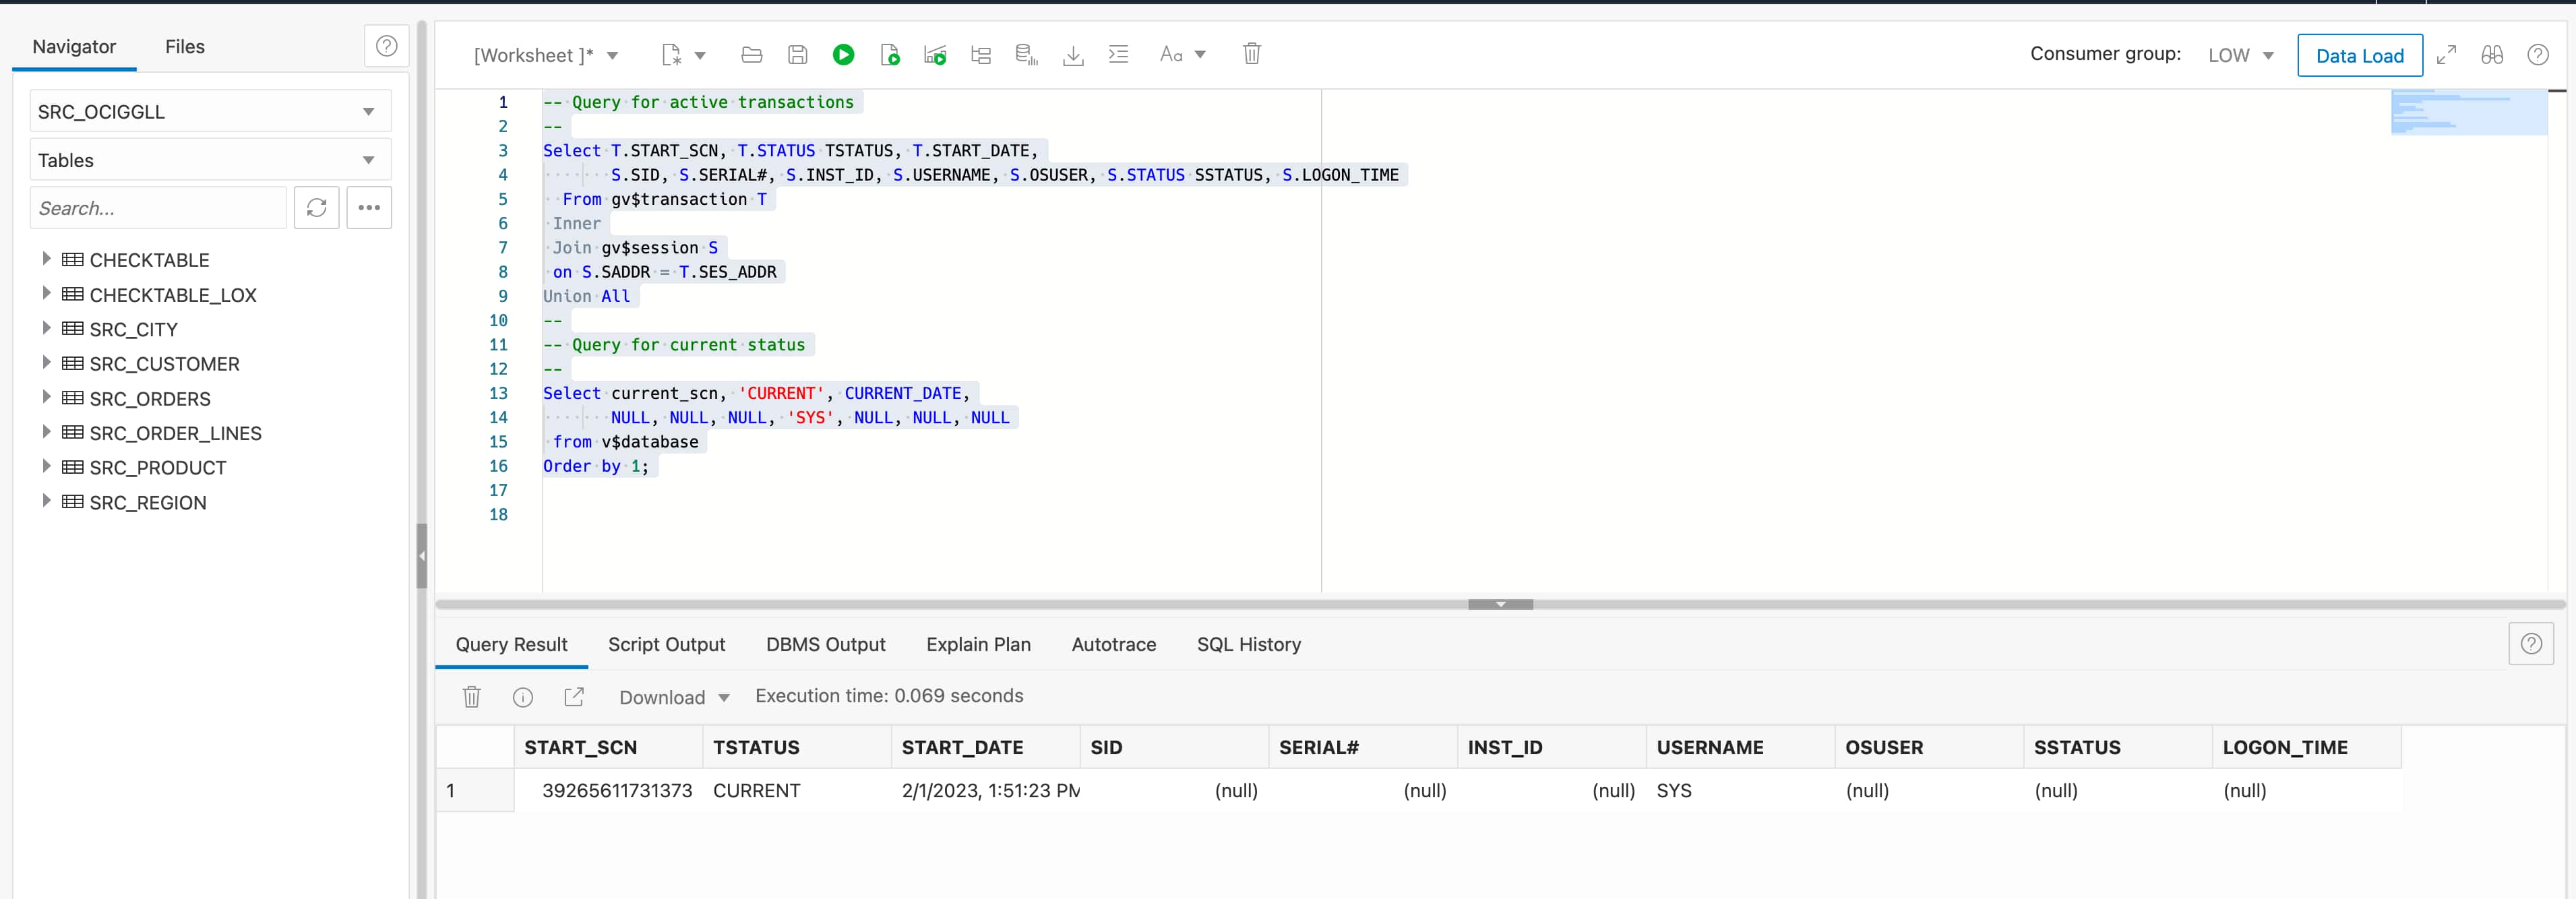
We will use the current CURRENT START SCN 39265611731373.
Create an Initial Load Extract as of SCN
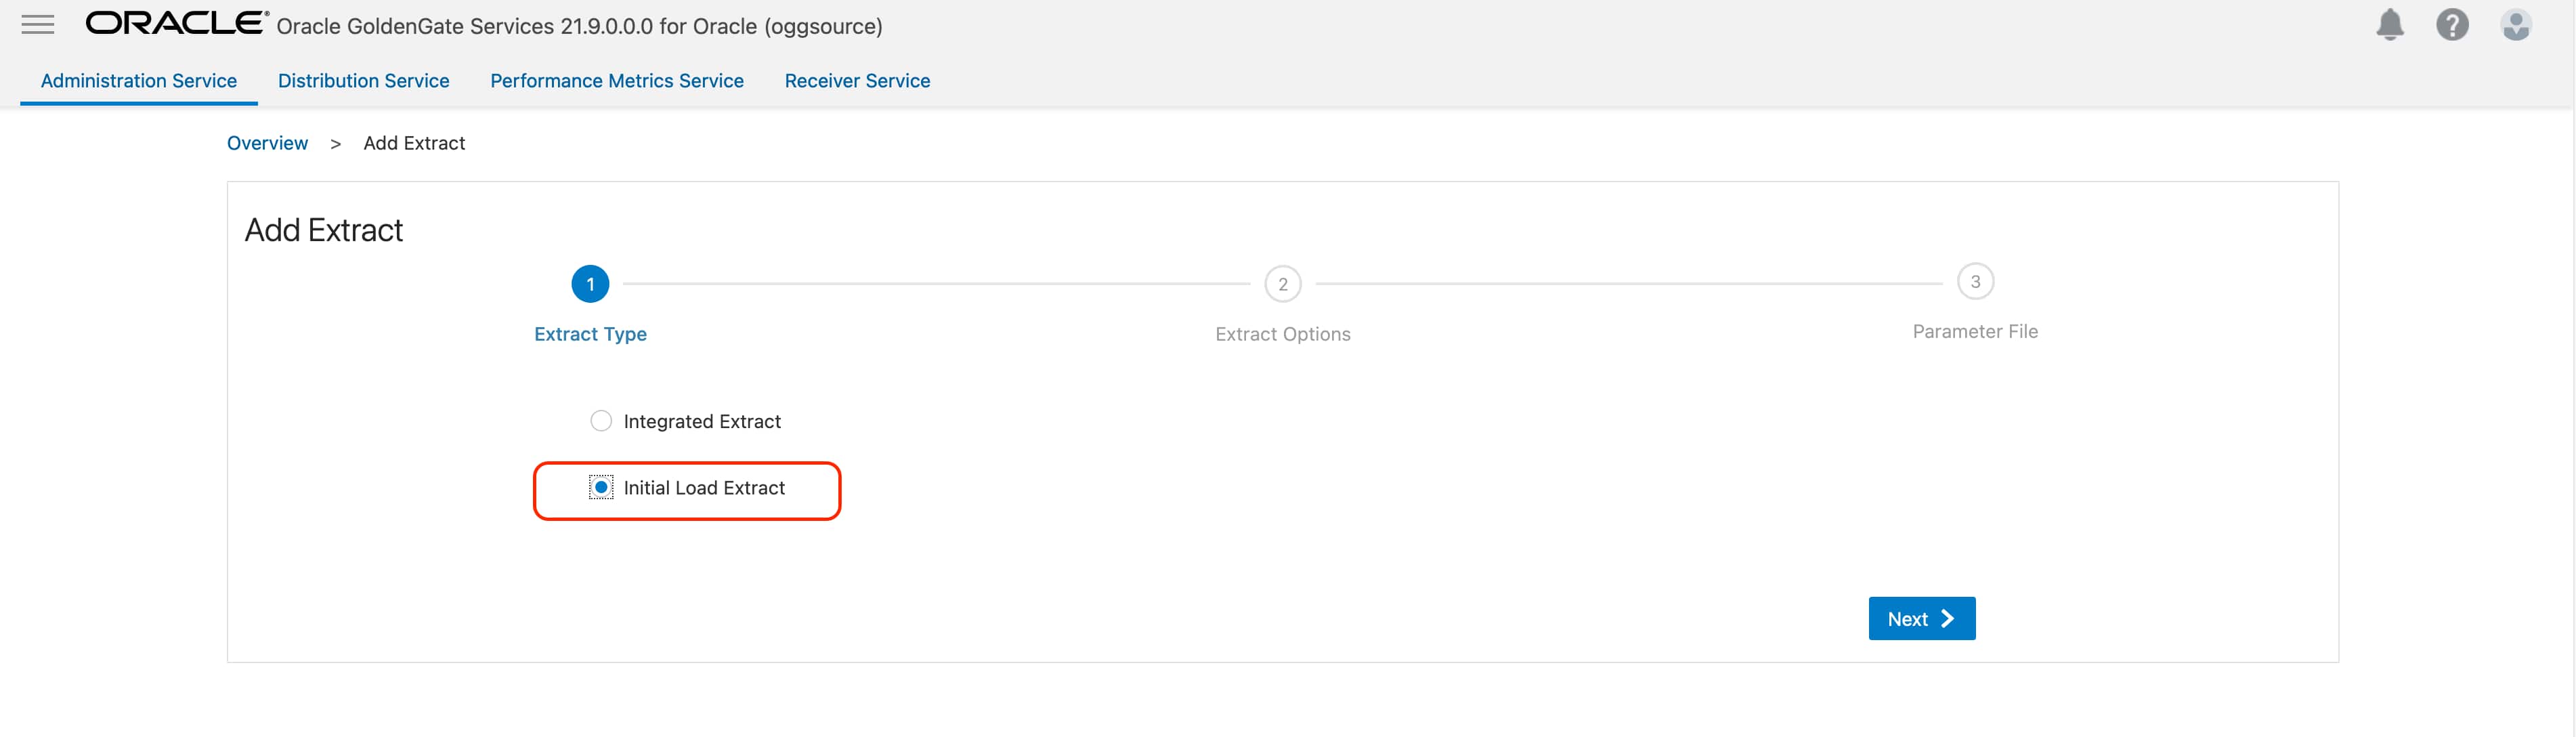
Click Add Extract and select Initial Load Extract.
Provide a name for the extract and click Next.

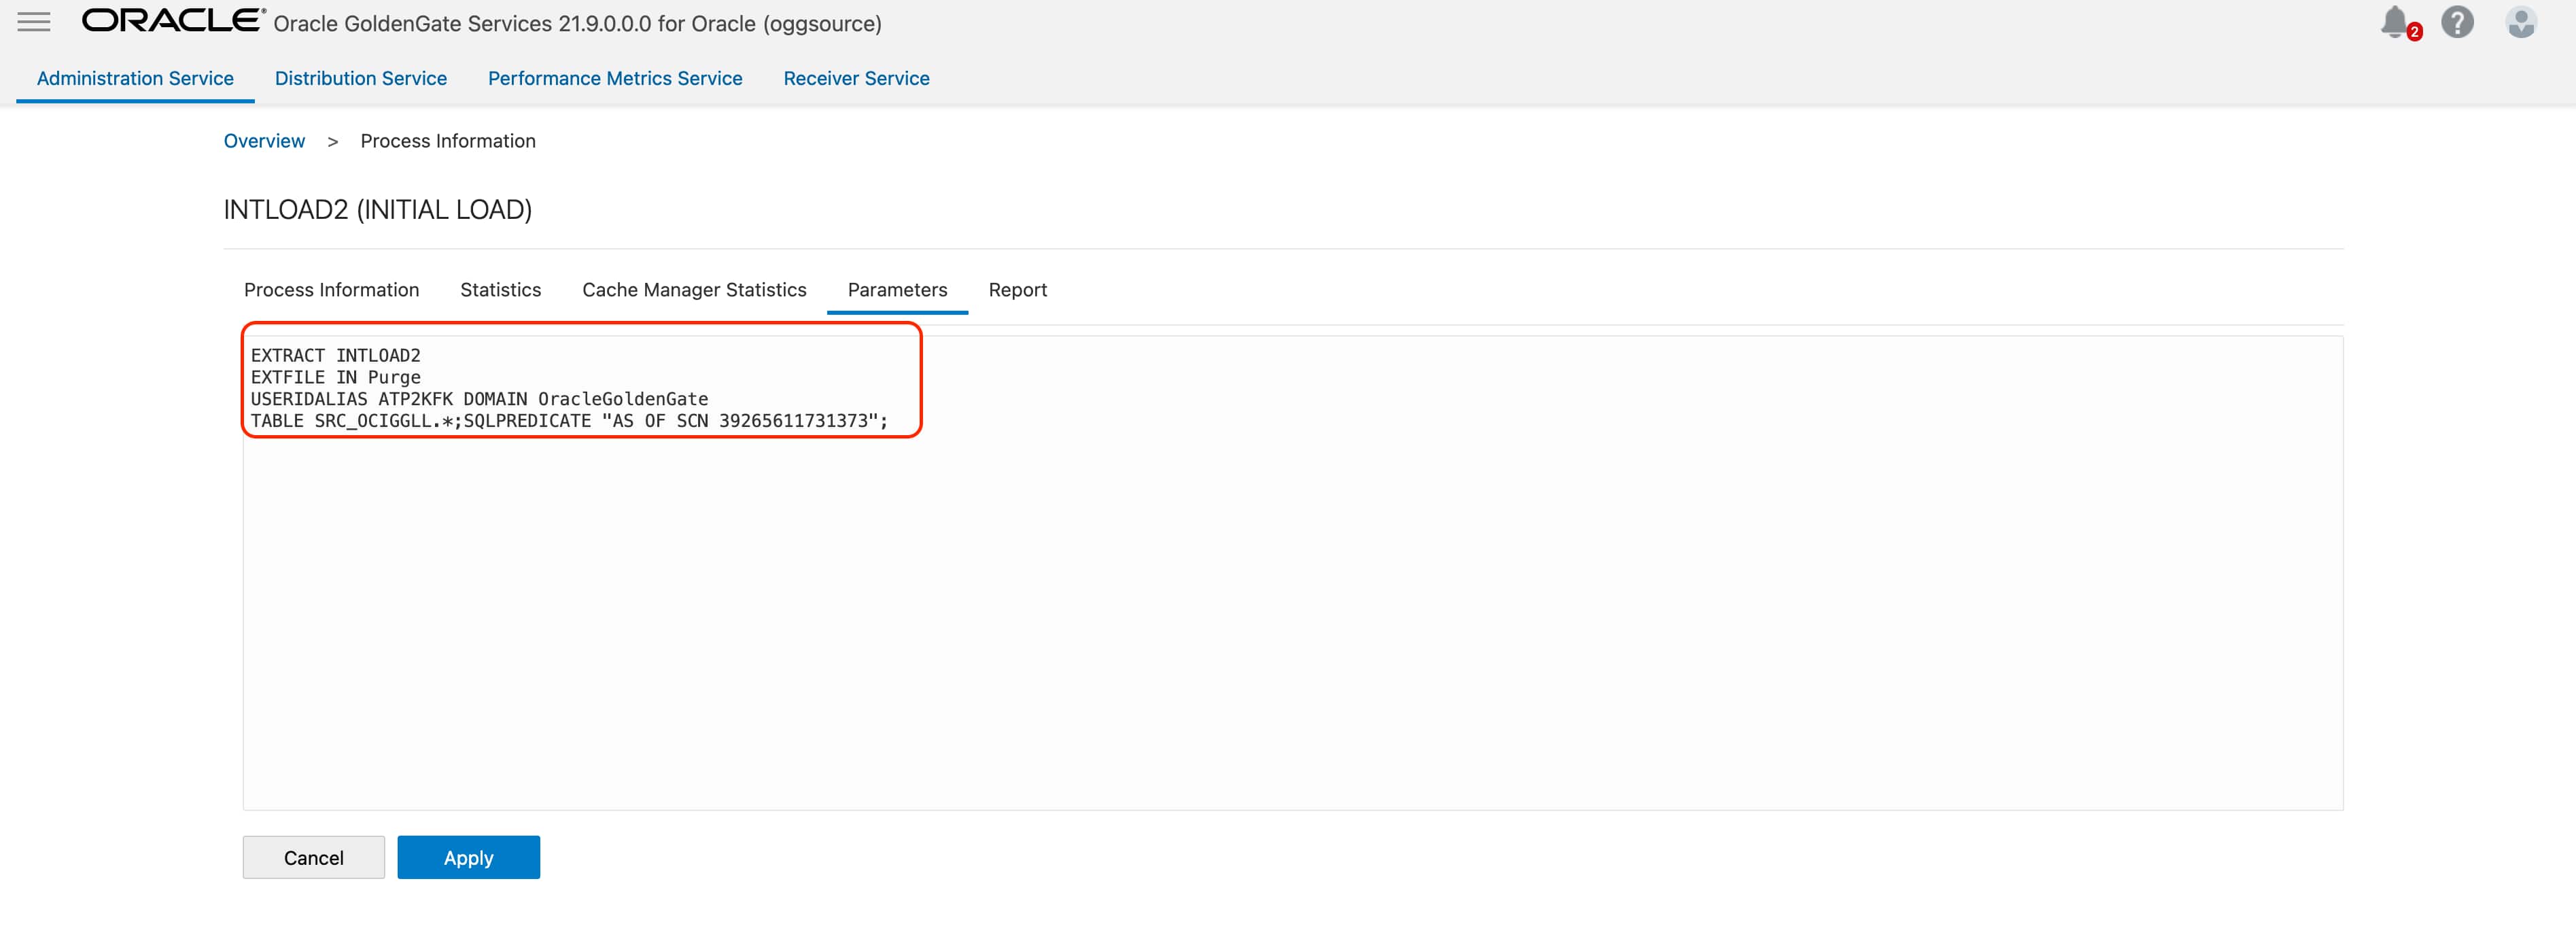
Provide the parameter file details and click Create & Run. You can get the useridalias & domain details from Configuration section.
Sample Parameter File:
EXTRACT InitLoad
EXTFILE IN
USERIDALIAS ATP2KFK DOMAIN OracleGoldenGate
TABLE SRC_OCIGGLL.*; SQLPREDICATE “AS OF SCN 39265611731373”;
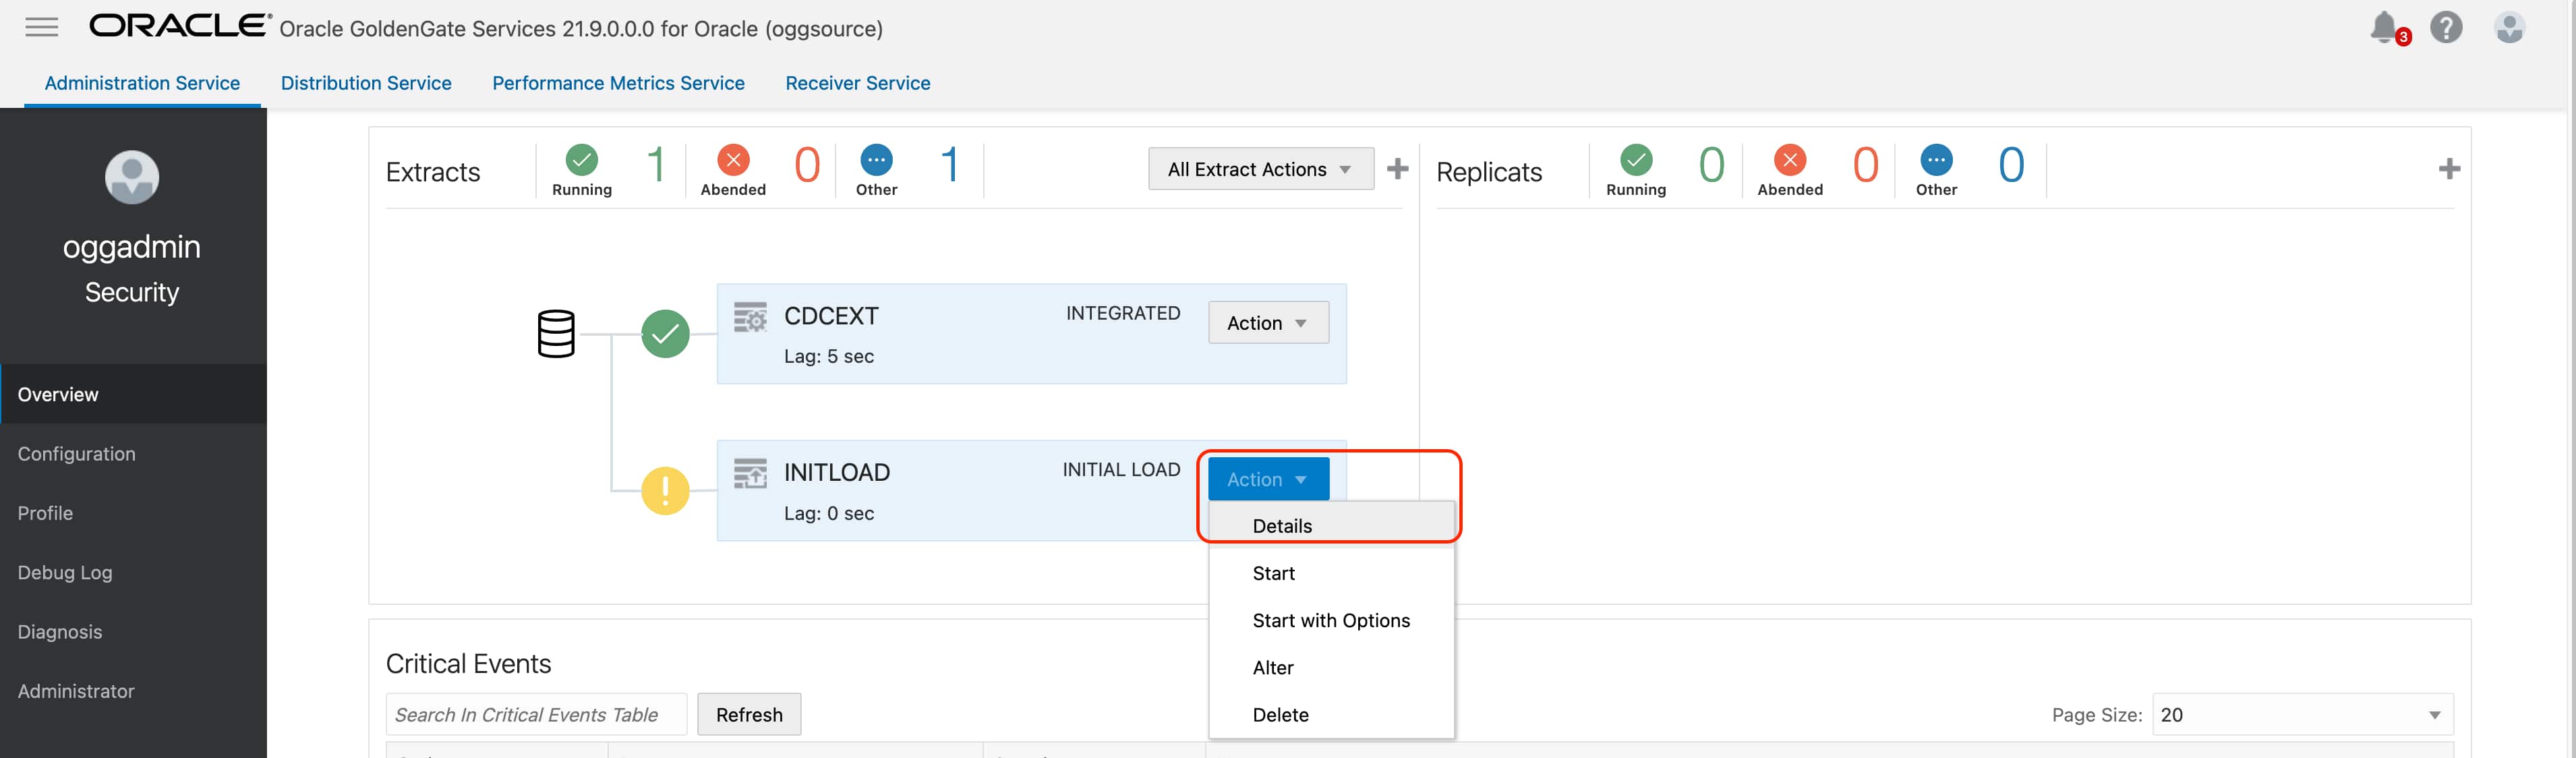
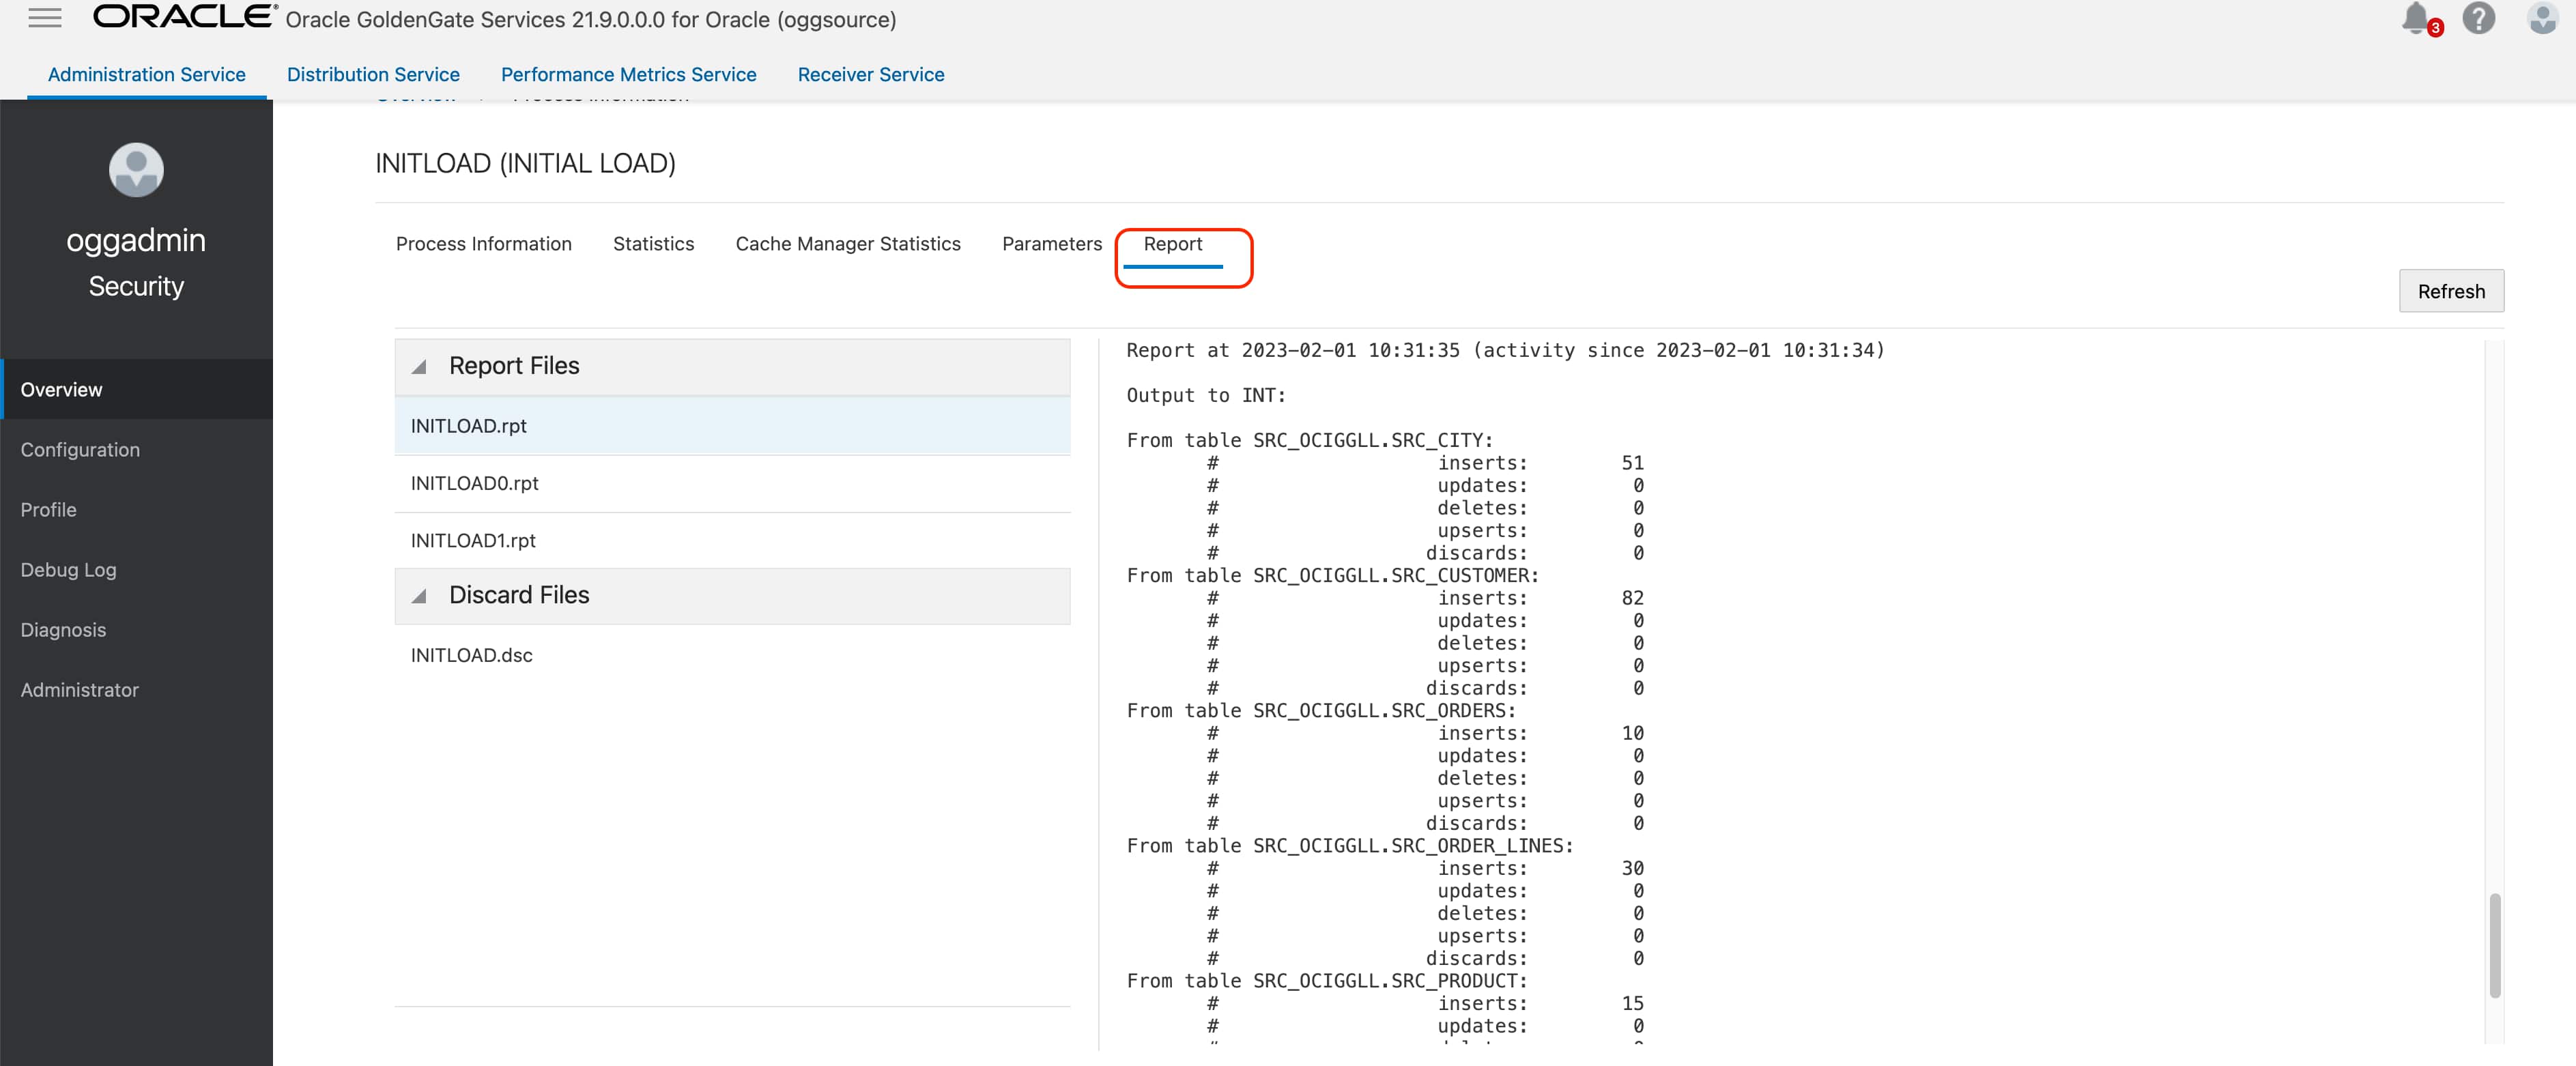
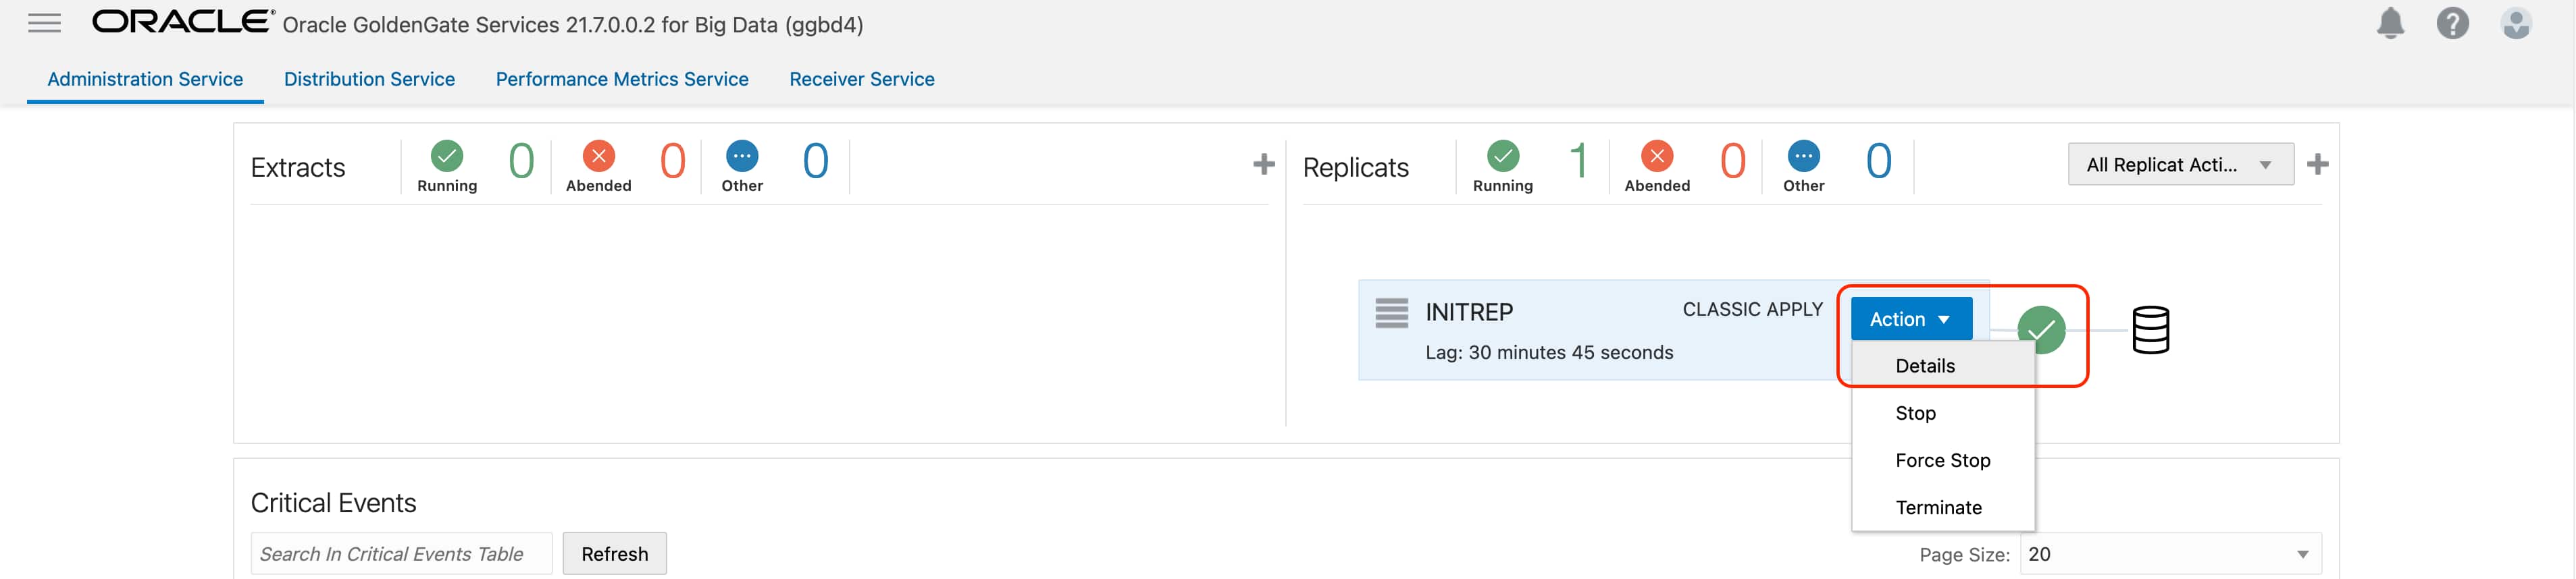
Click on Initial Load Extract Details and select report. You will the statistics of the initial load extract process.
Creating Distribution Paths
As we have two different extracts creating two different files, we need to create two different distribution paths to send these files into our target OCI GoldenGate Big Data Deployment. In Distribution Paths, we’re going to use WSS protocol which will create a secure communication channel. We need Domain and Alias to set up wss protocol.
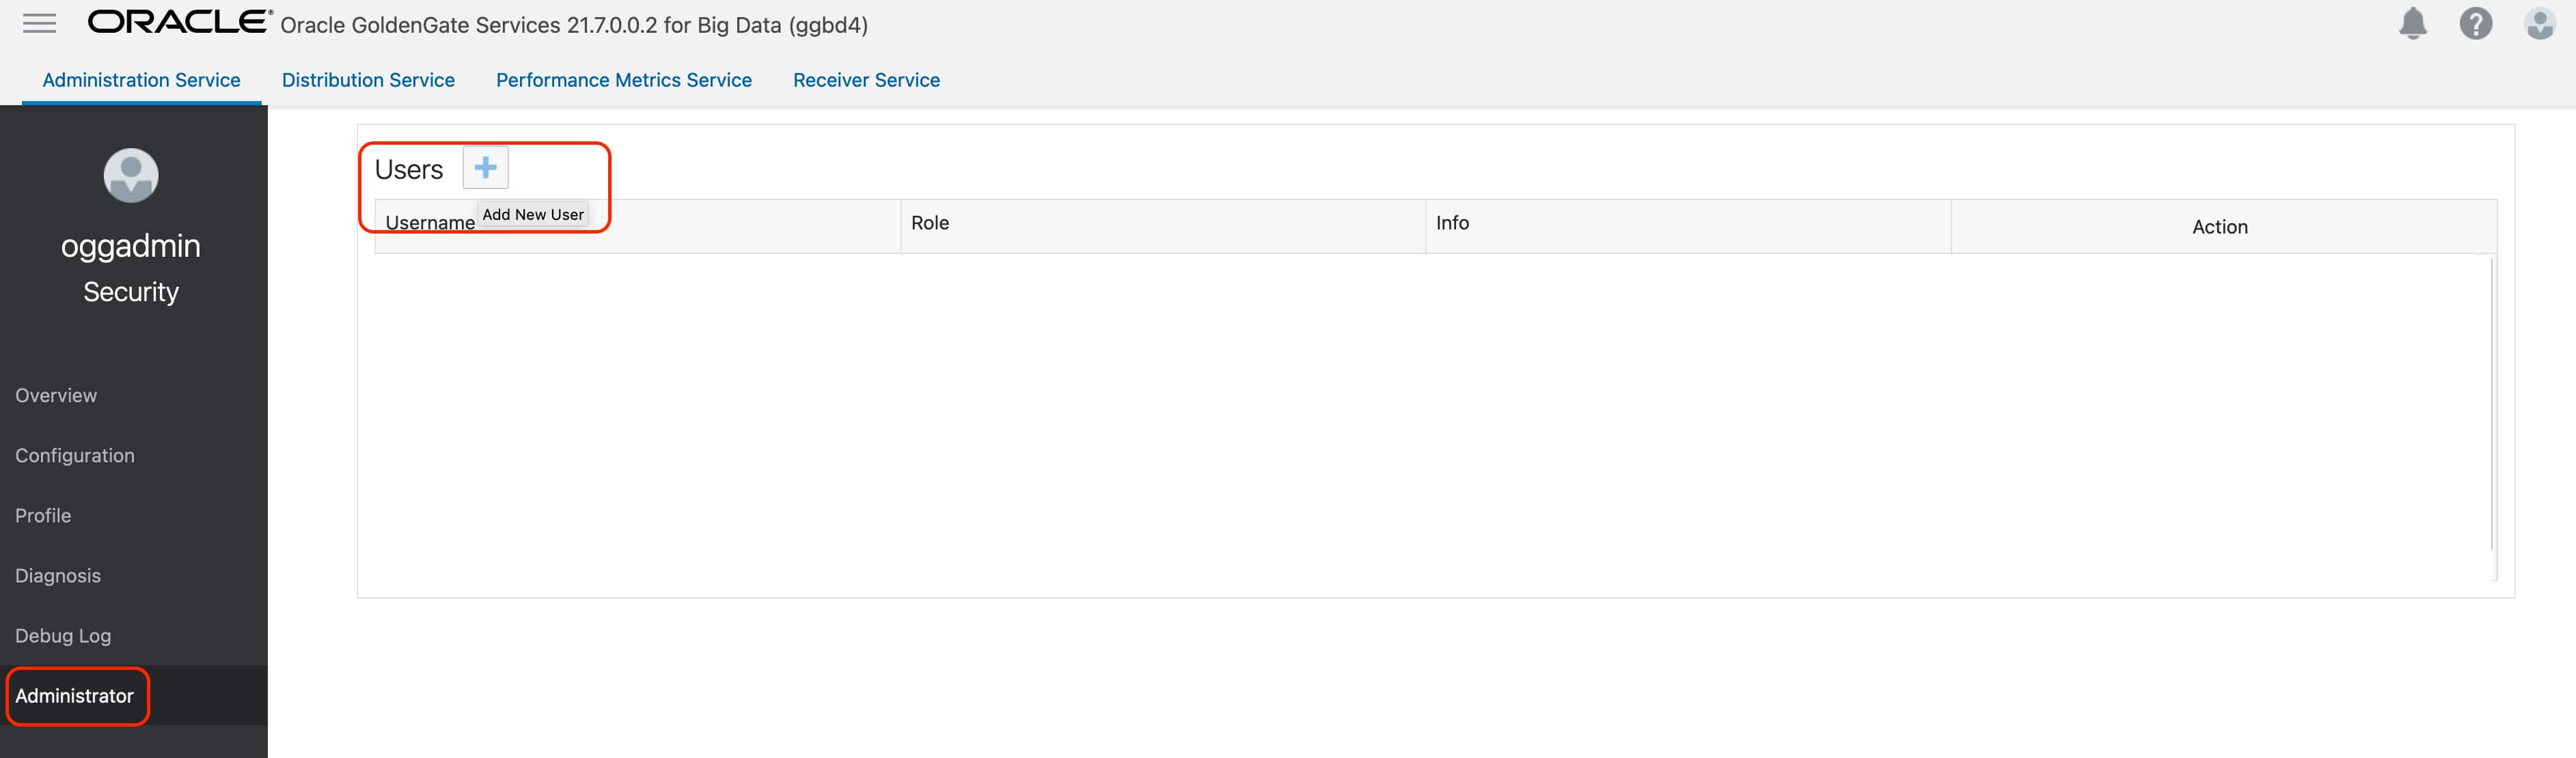
In your target GoldenGate for Big Data console, go to Administrator and click Add New User.
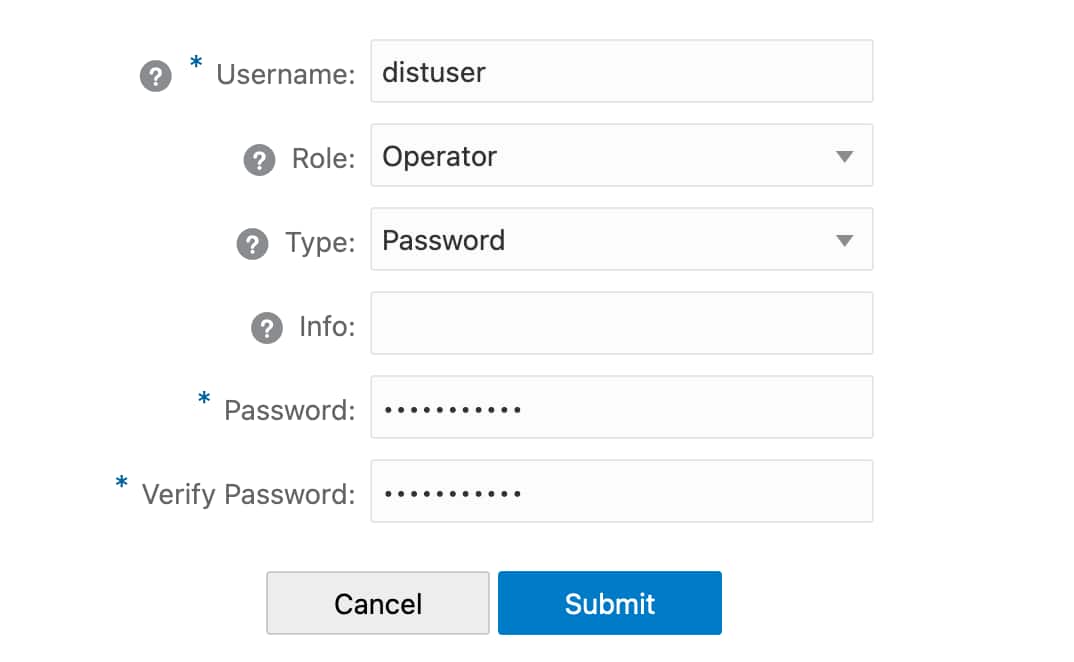
Provide Username, select Role as Operator, select Type as Password, provide your Password and click Submit.
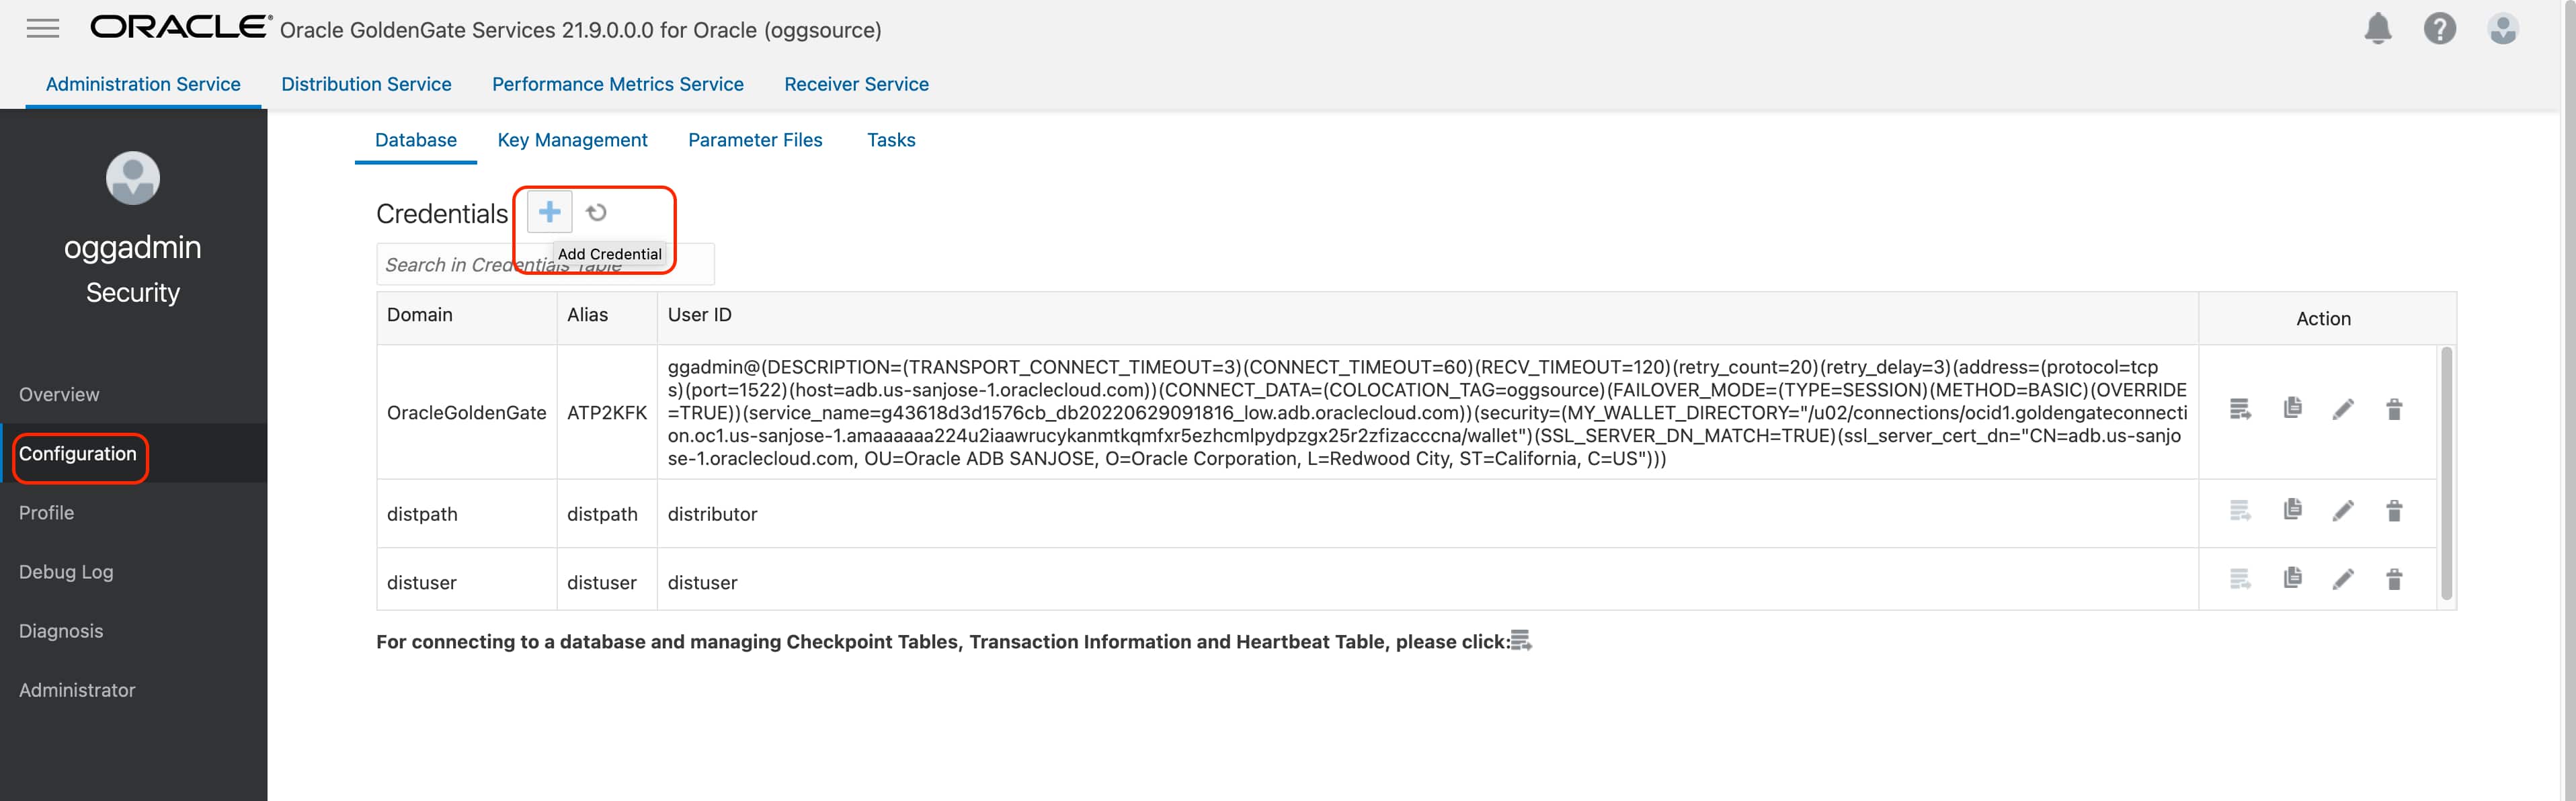
Now, go back to your source GoldenGate deployment. Go to Configuration and click Add Credential.
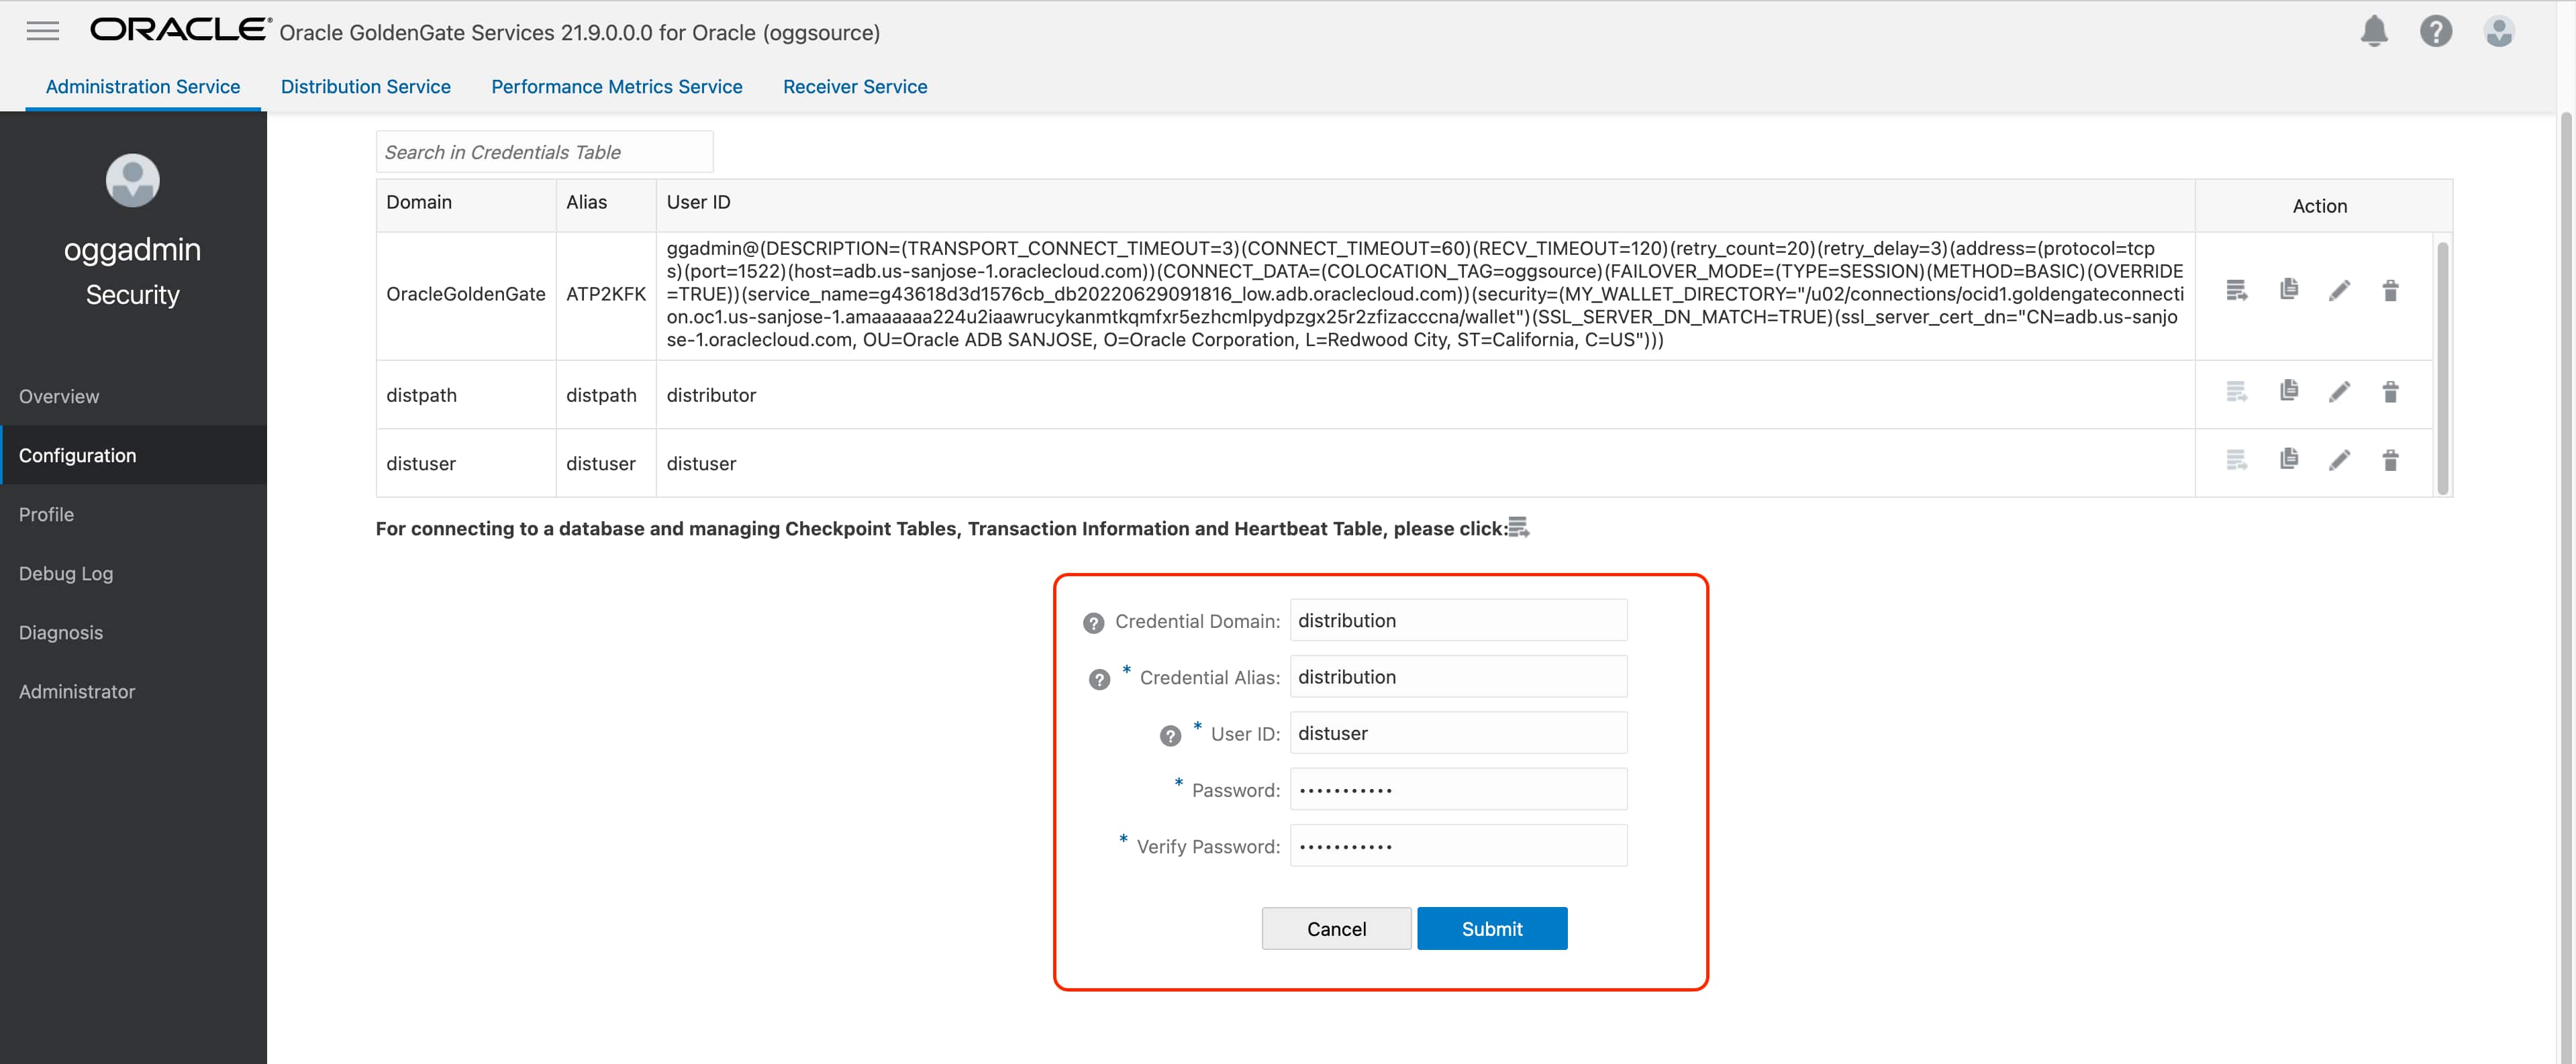
Provide Credential Domain and Credential Alias. For User ID & Password, provide the Username and Password that you defined in the previous step. Click Submit.
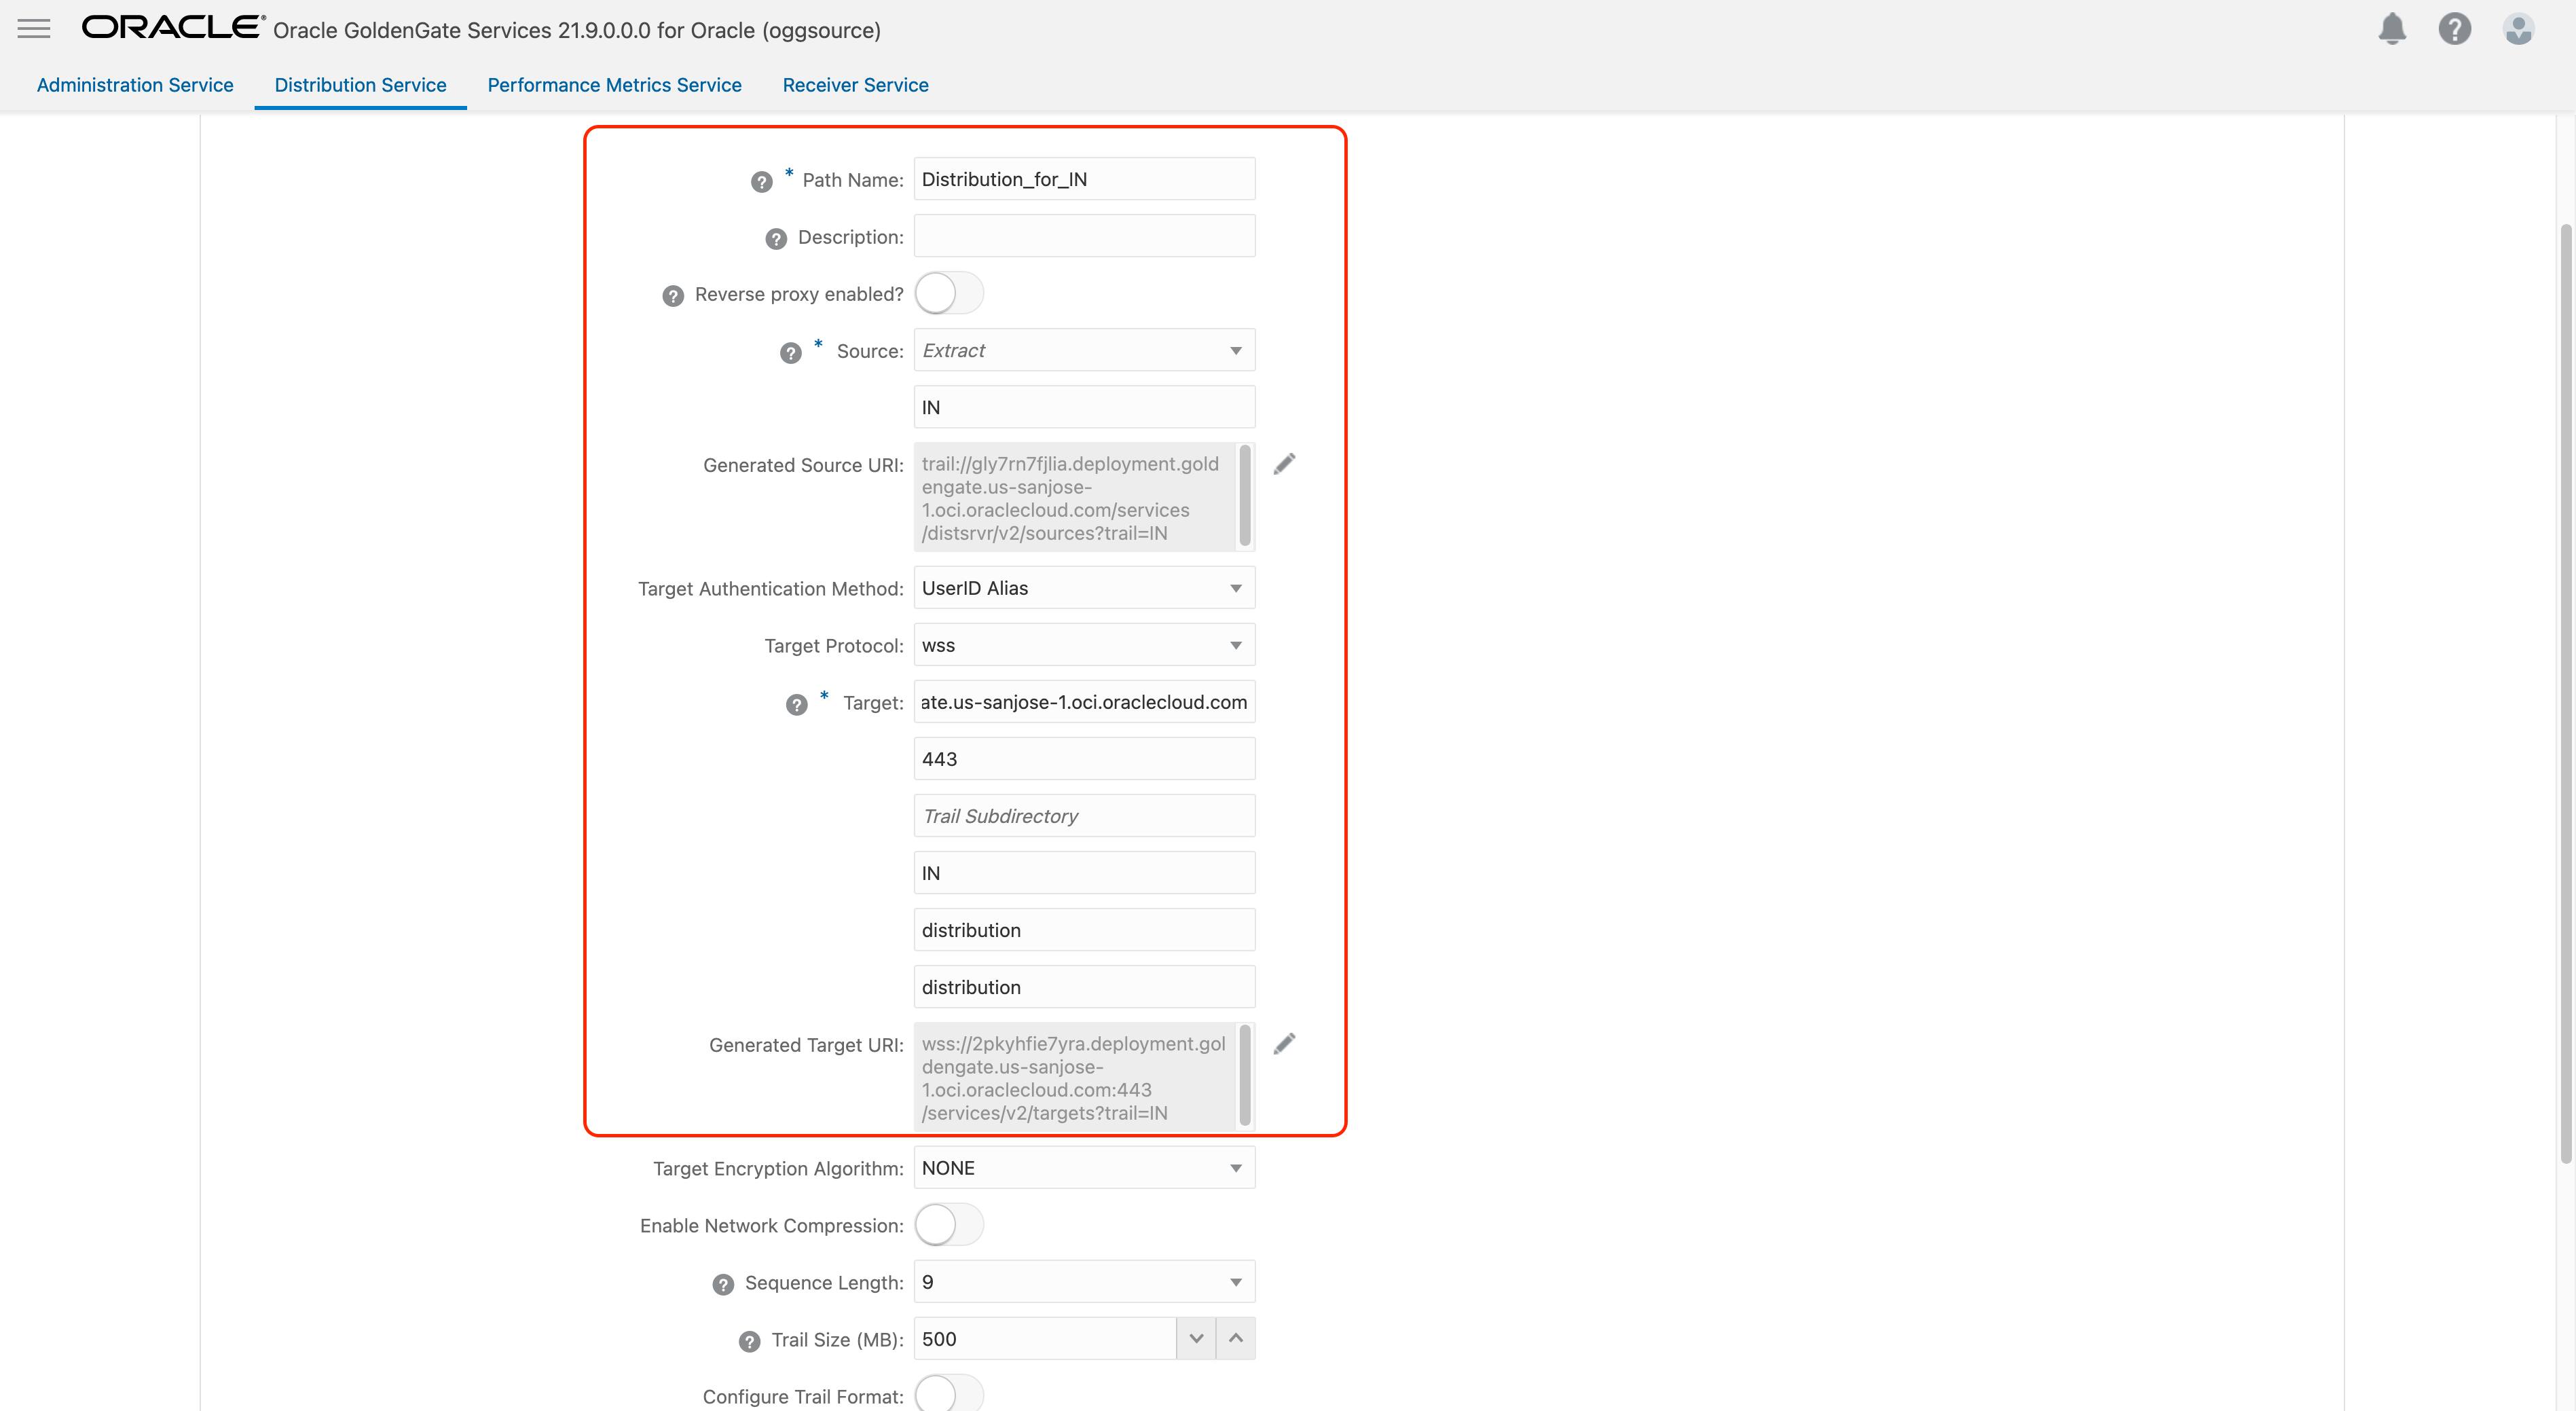
Still in the same OCI GoldenGate for Oracle deployment, click on Distribution Service and Add Path.

Provide a Path Name. In the Trail Name field, provide the EXTFILE name that you used in your initial load extract. IN for my case. This is good enough, you don’t need to select Source, please leave empty. Select Target Authentication Method as UserID Alias. Select Target Protocol as WSS. For Target, provide the Console URL of target OCI GoldenGate Big Data deployment without https. Port is 443. Trail Name is the name of the file that will be created in target deployment. I will provide as IN. Provide Domain & Alias that you configured in the previous step (distribution, distribution). Scroll down and click Create and Run.
When your Distribution Service starts successfully, it will be shown in a running state in the console.

Following the same steps, you can create a second distribution path for the file created by CDC extract.
Creating Initial Load Replicat
Navigate to your target OCI GoldenGate Big Data Deployment console and click Receiver Service. You’ll see both of the distribution processes that you created in the previous section. These files are in our target deployment now and we can use them for creating replicats.
In this blog, I’ll replicate into OCI Object Storage in CSV format; but, you can follow the same steps for other supported targets as well. You just need to make sure that pre-requisites are met.
For OCI Object Storage, I need to create an Object Storage Connection and assign to the OCI GoldenGate Big Data deployment. If you need to create a connection, you can follow the steps in this document.
Click Add Replicat, select Classic Replicat and click Next.
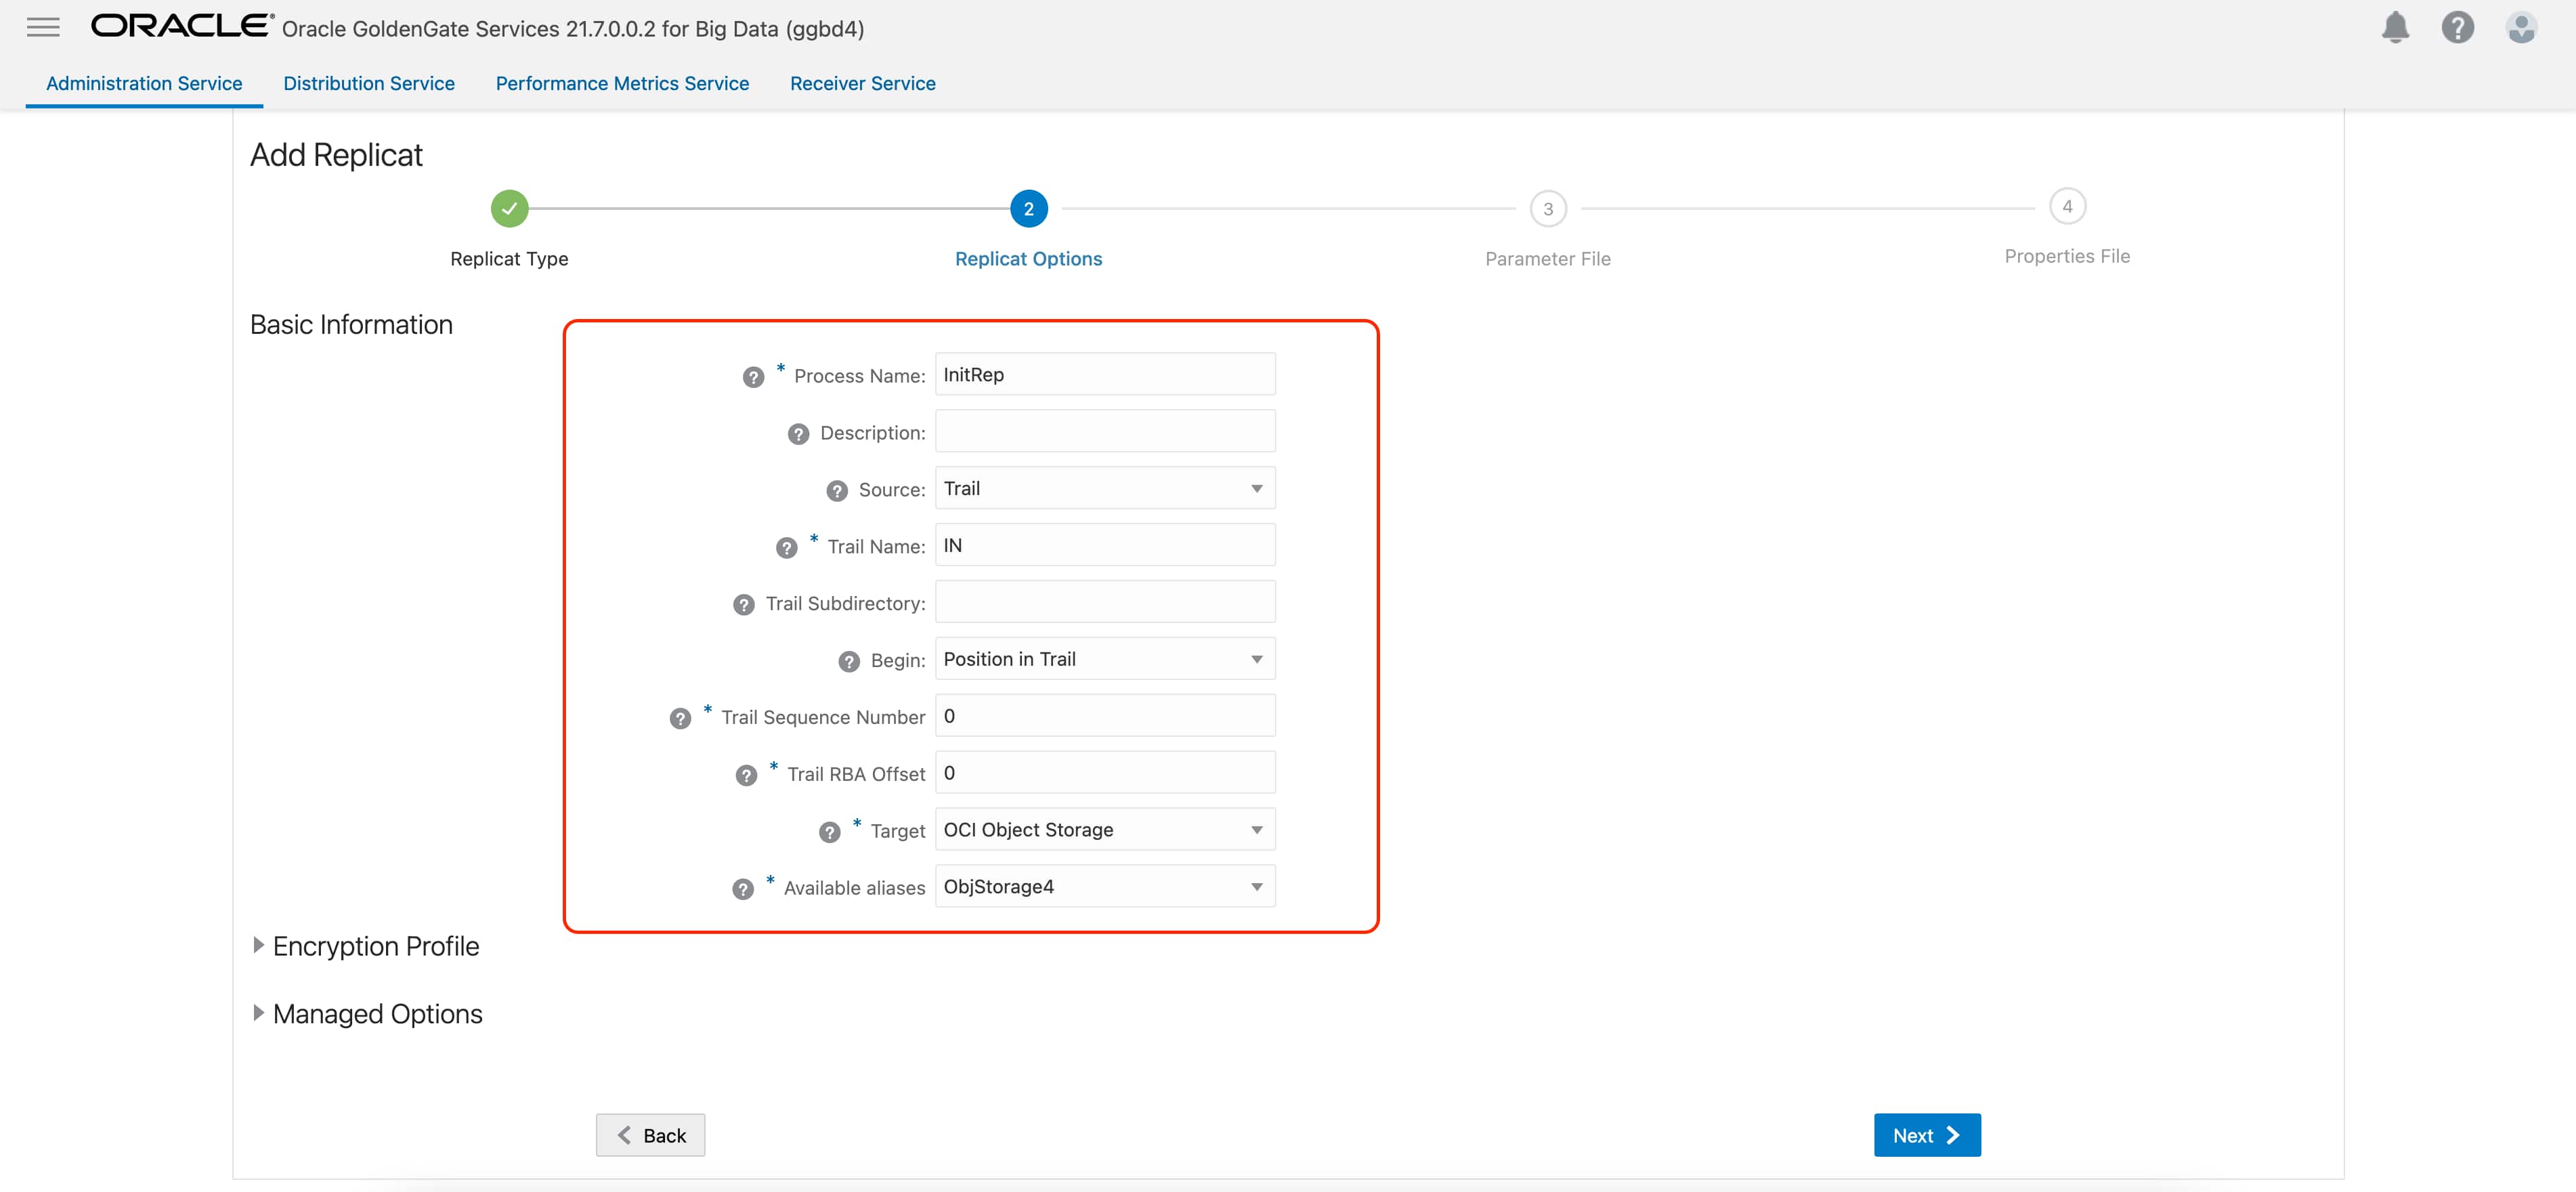
Next, provide Replicat Options. Trail Name is the name of the trail file that is used for replication. I will provide IN as the file I created with initial load extract. Also, you need to select Target as OCI Object Storage. Once selected, Available Aliases will be listed, and you will need to choose an alias. Once an alias is selected, the Replicat will be using the Credential details from the Connection that is selected.
In the Parameter File, you can either specify source to target mapping or leave it as-is with a wildcard selection.
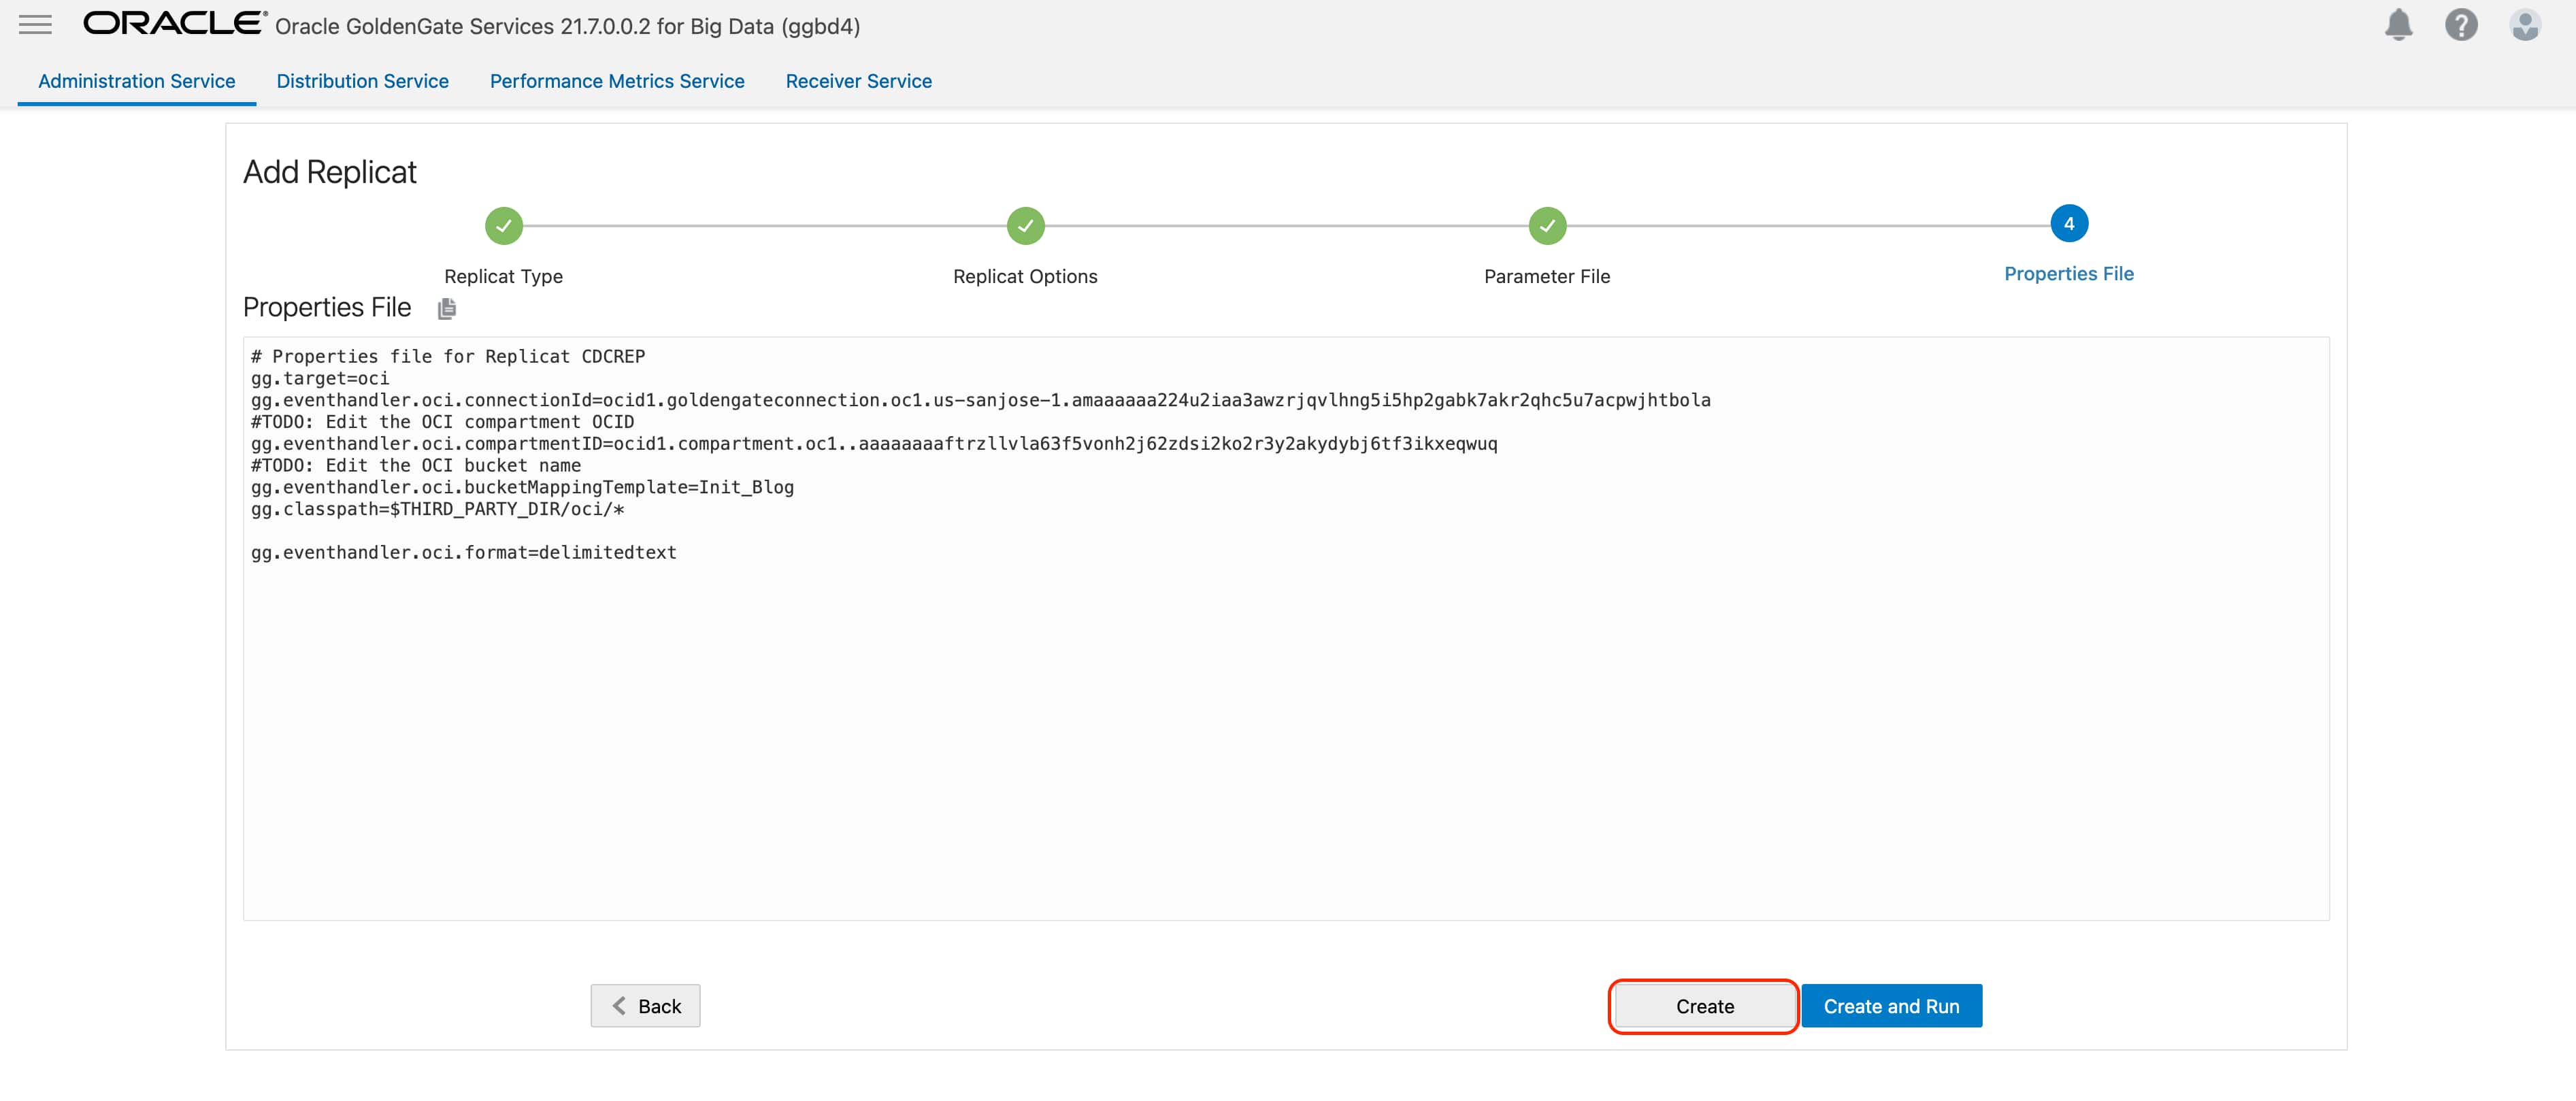
Last step is the Properties File configuration. In this screen, you will notice that some of the properties are pre-configured and populated. These are the basic and bare minimum properties needed for starting a replication into OCI Object Storage.
Please provide gg.eventhandler.oci.compartmentID as the target compartment’s OCID.To find Compartment OCID, refer to documentation.
Provide gg.eventhandler.oci.bucketMappingTemplate. This is the name of the OCI Object Storage Bucket that will be used. If the bucket already exists, OCI GoldenGate will load the files into that bucket. If the bucket does not exist, it will automatically be created by OCI GoldenGate depending on the configuration. For OCI Object Storage Bucket names, there are two possible options: using a static name or using a dynamic formatting which can be configured with Template Keywords.
Default file format is JSON. To change into DelimitedText, please add the below property. You can provide additional properties using the DelimitedText Pluggable Formatters.
gg.eventhandler.oci.format=delimitedtext
Click Create and Run.

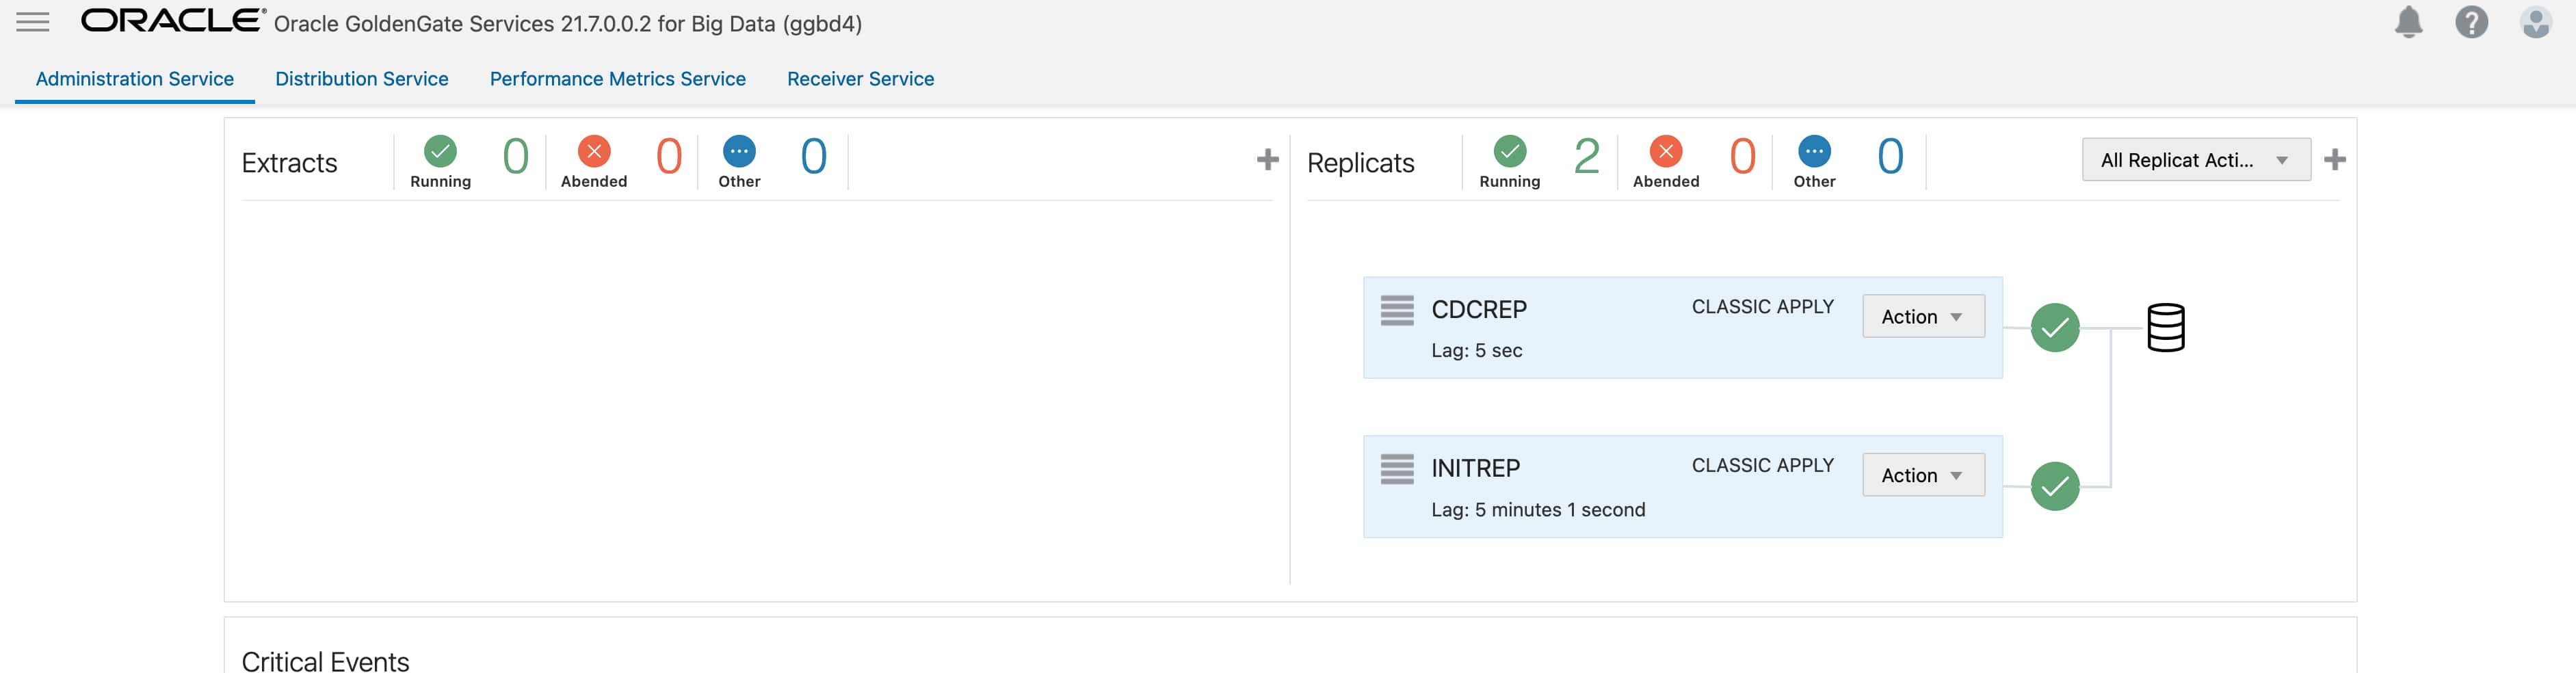
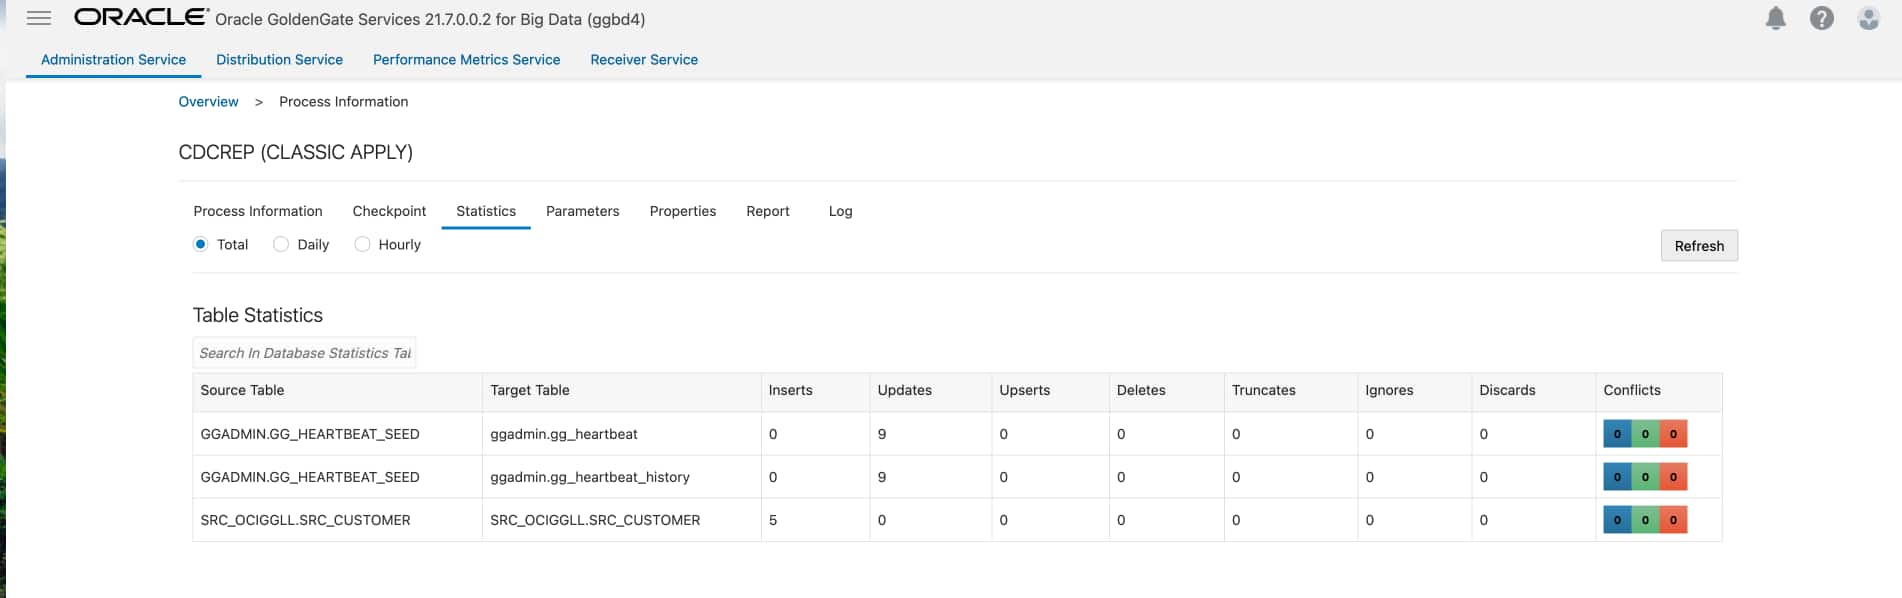
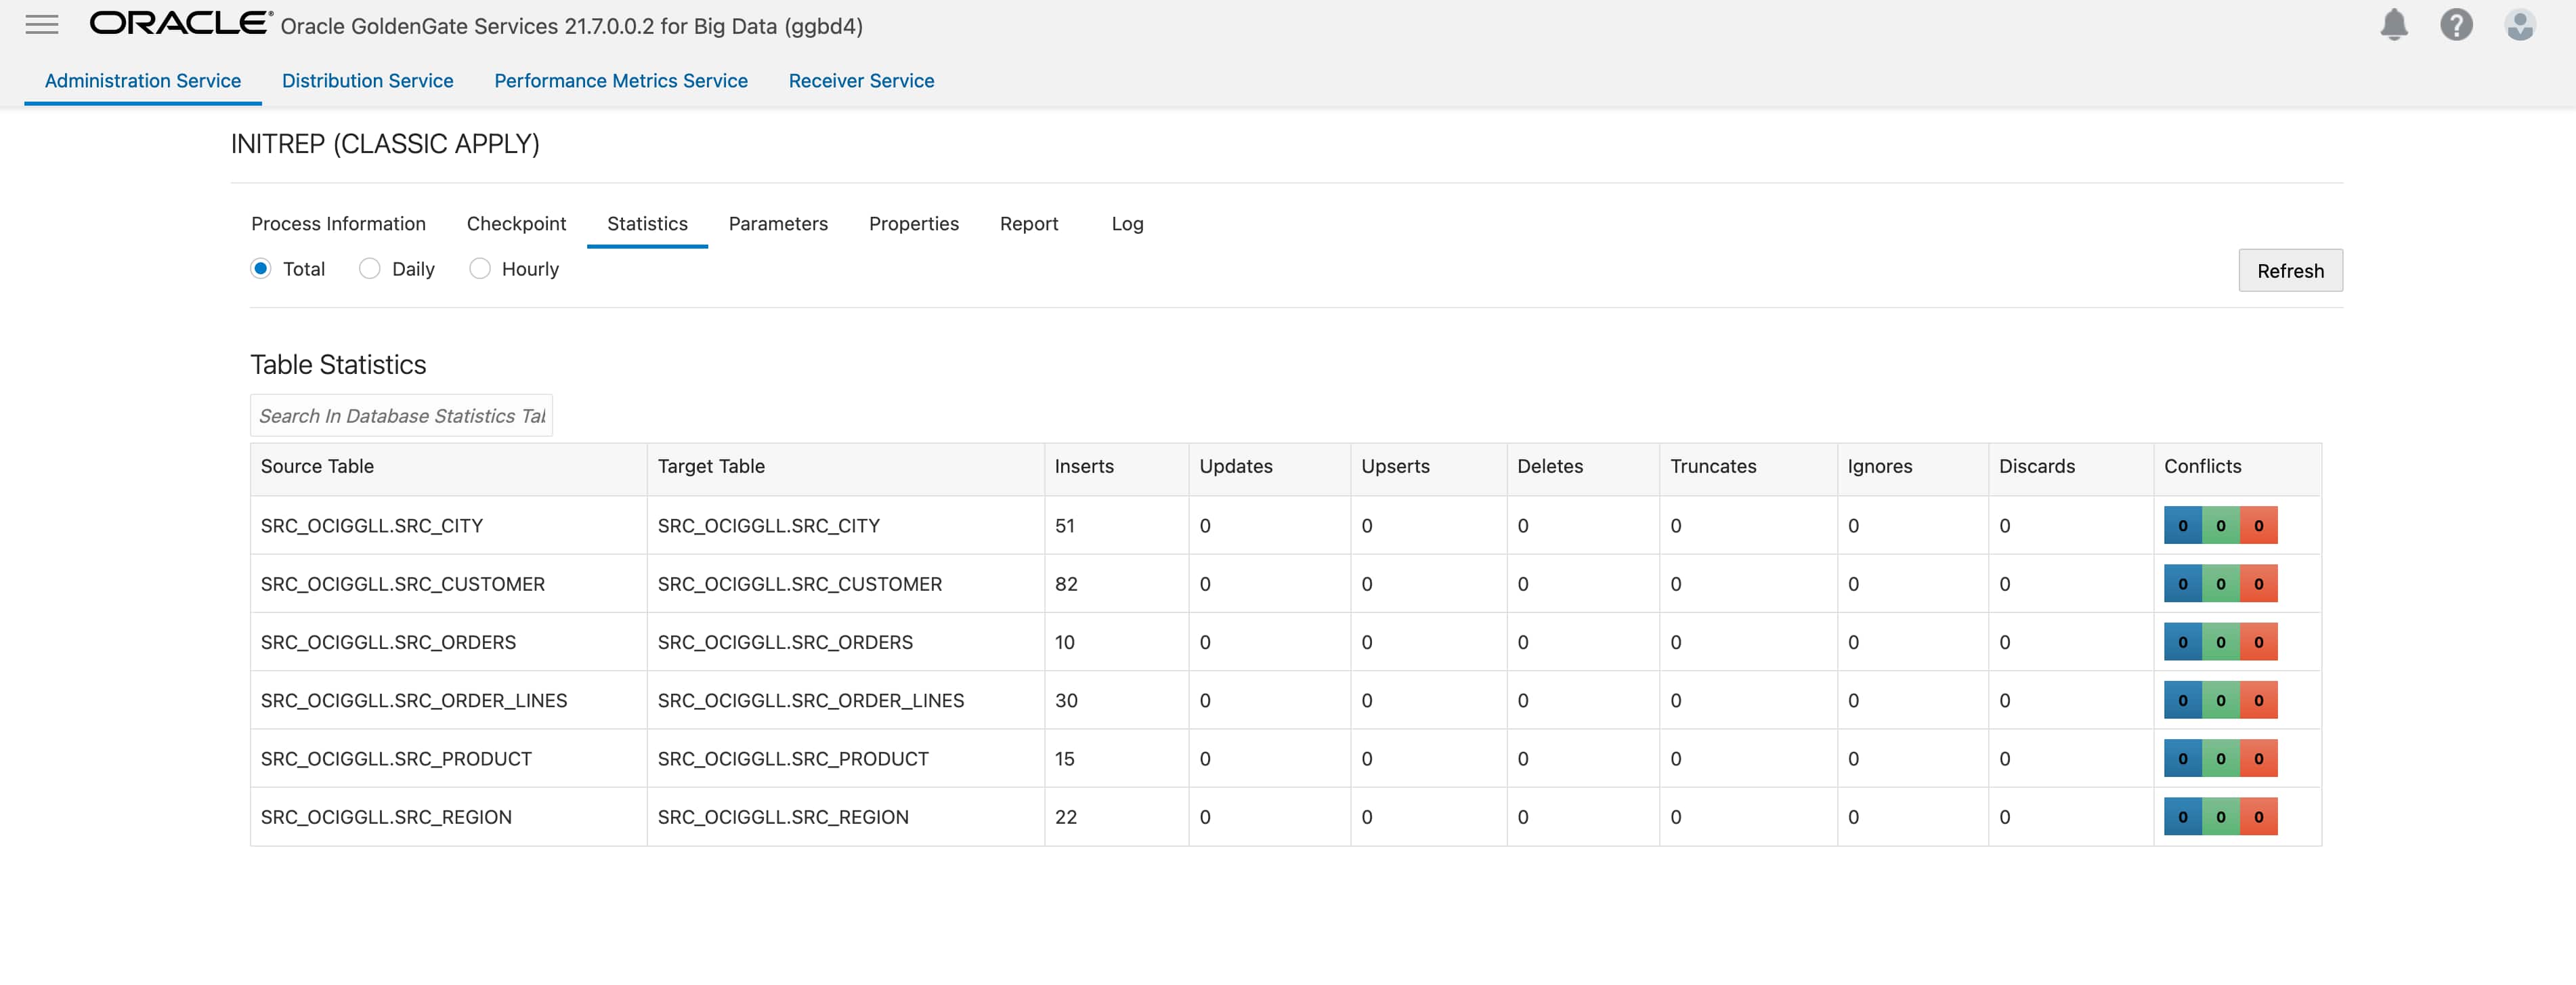
When replicat starts successfully, you’ll see it in a running state. If you go to replicat details/ statistics, you can see the replication statistics.
Creating CDC Replicat
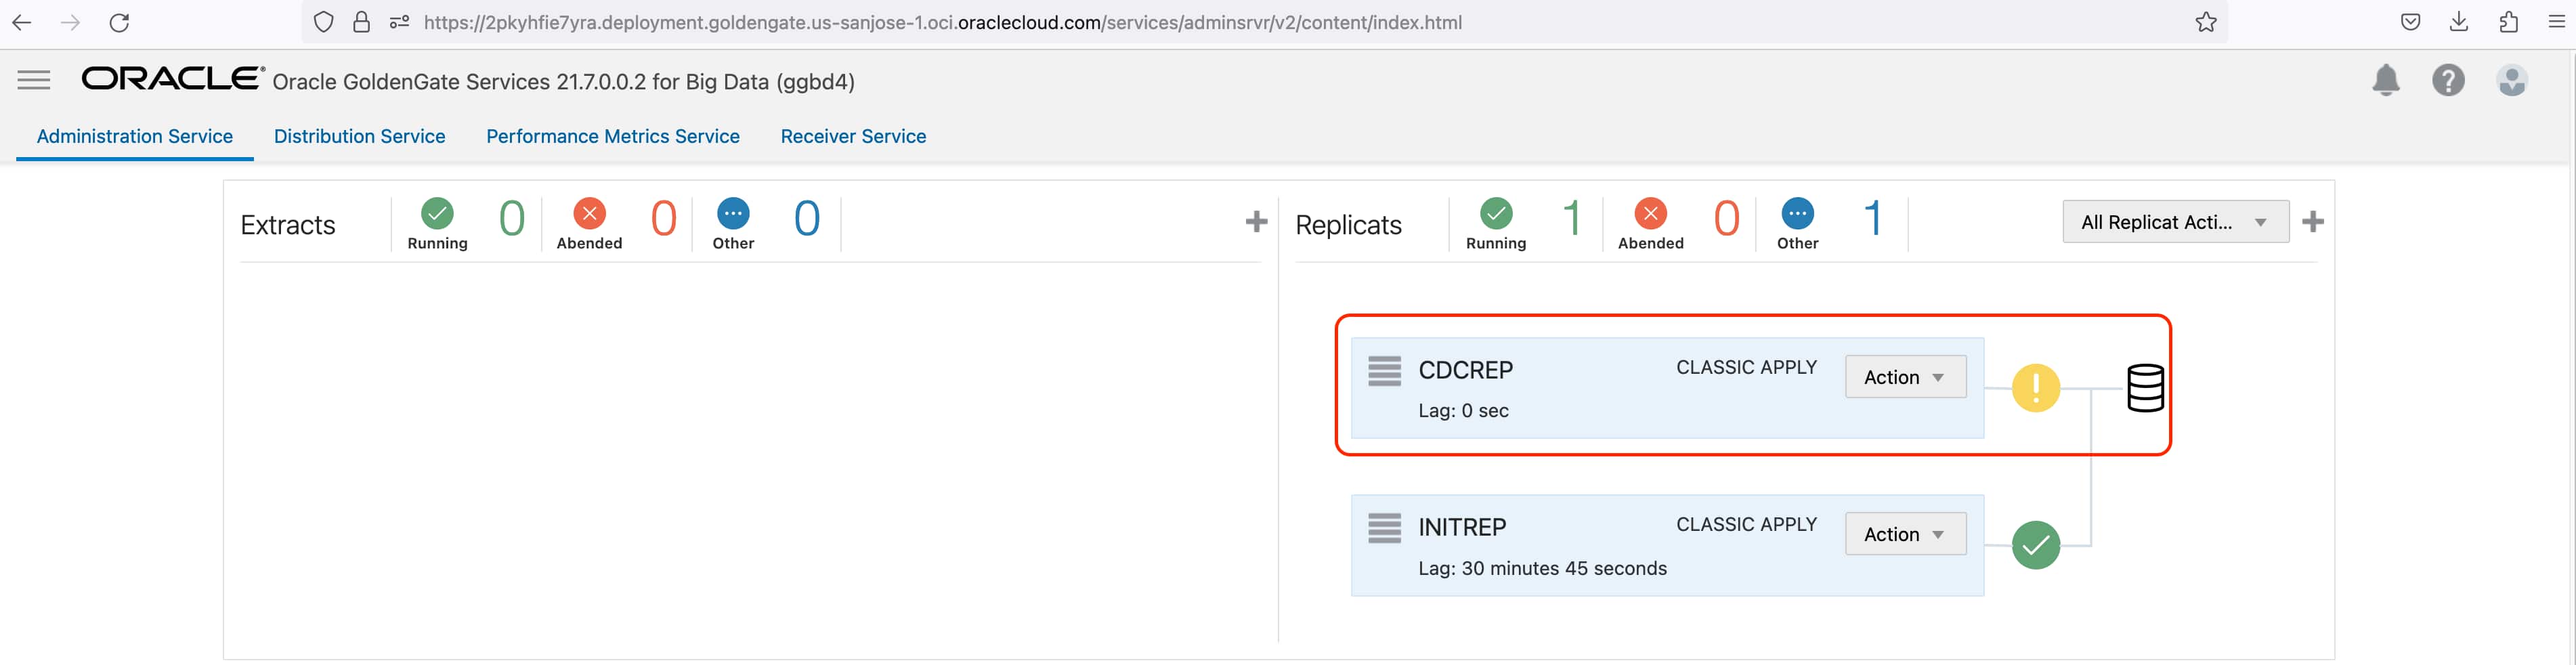
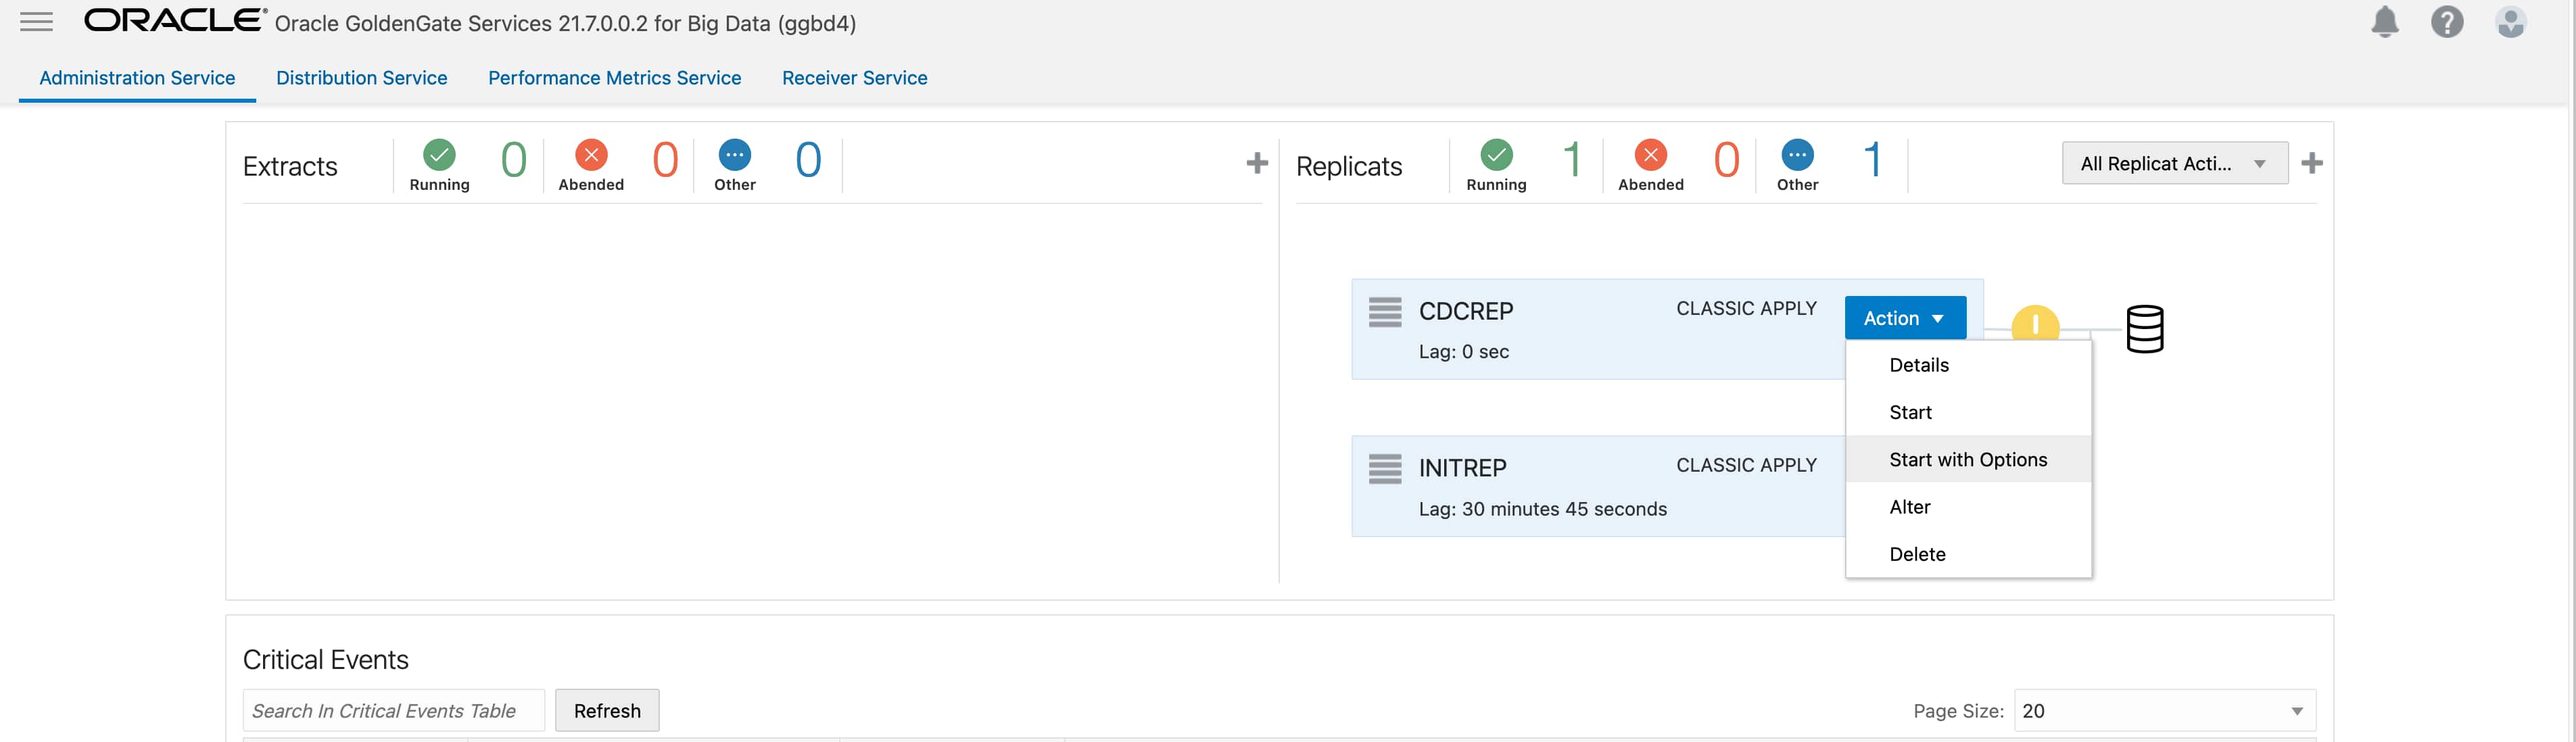
You can create the CDC replicat with the trail file that was generated by the CDC Extract that you created in the first step. For my case, it is “lk”. You can follow the same steps as above; but, just CREATE the replicat, please DO NOT RUN it.
On CDC replicat, click on Action and select Start with Options.
Select Start Point as After CSN and provide the SCN that you noted in Get SCN section. Click Start.
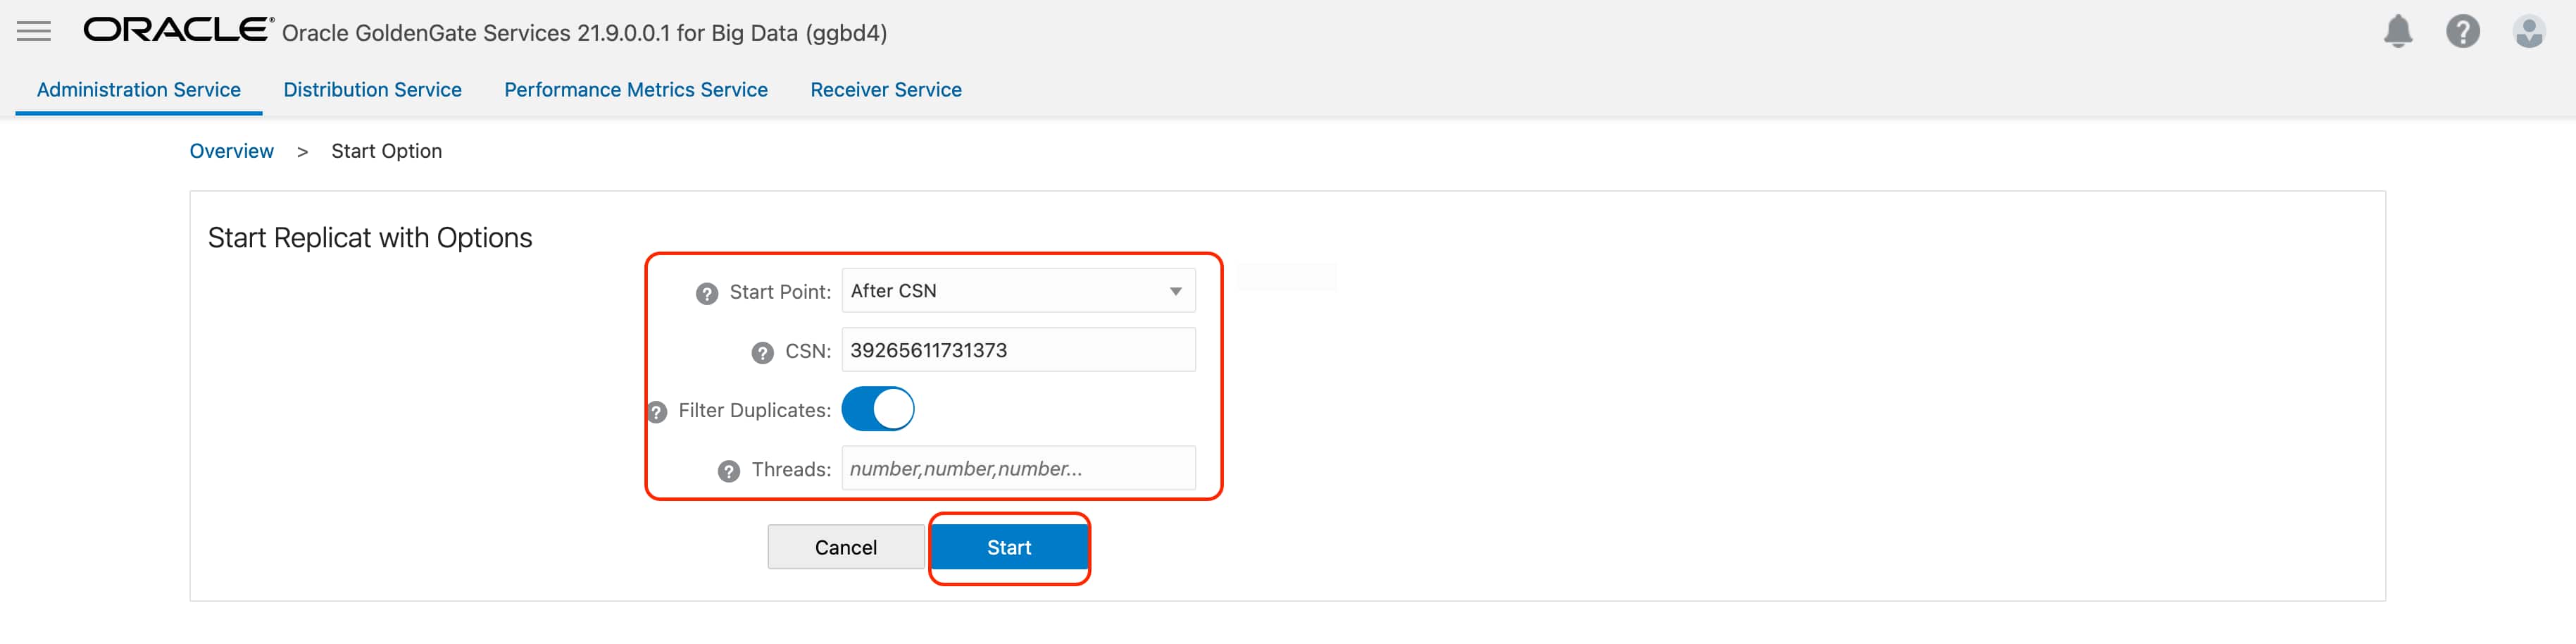
CDC Replicat is up & running now.