Step-by-Step Technical Guide: Configuring Bi-Directional (Active-Active) Replication with OCI GoldenGate
In this guide, we will walk through the precise configuration steps required to establish a bi-directional replication flow between US-Phoenix-1 and US-Ashburn-1 using the OCI GoldenGate Service. Our goal is to create an “Always-On” Active-Active architecture where both regions are live and data is synchronized instantaneously.
Prerequisites
Ensure the following components are ready before starting the configuration:
- Two Autonomous Databases (AJD or ATP): One running in Phoenix, the other in Ashburn.
- Networking: Proper VCN and subnet configurations for GoldenGate deployments. (Ensure security rules allow traffic if using private endpoints).
- IAM Policies: Ensure you have the necessary permissions to manage GoldenGate and Database services.
Phase 1: Creating High Availability GoldenGate Deployments
The first step is to provision the GoldenGate infrastructure in both regions.
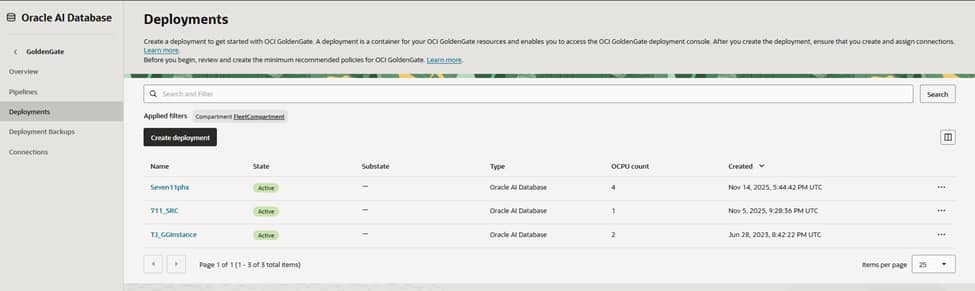
1. Phoenix (Region A) Deployment:
- In the OCI Console, navigate to Oracle Database > GoldenGate > Deployments.
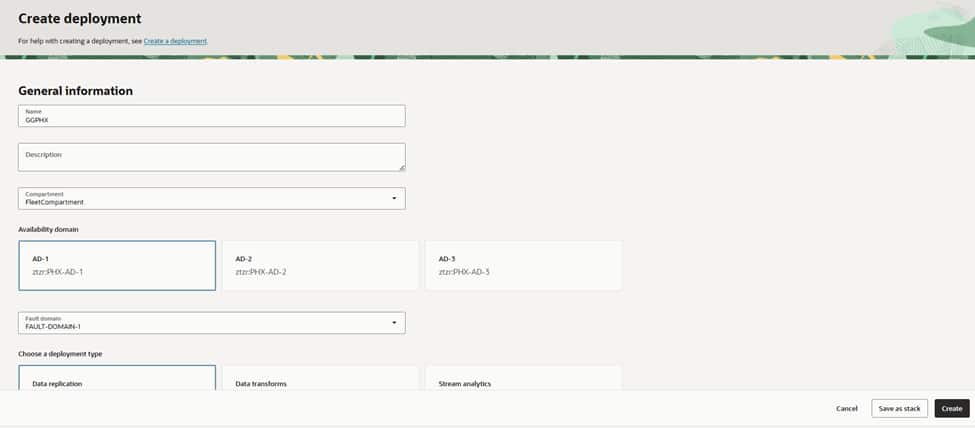
- Click Create Deployment.
- Name: Provide a clear name (e.g., GG-Deployment-PHX).
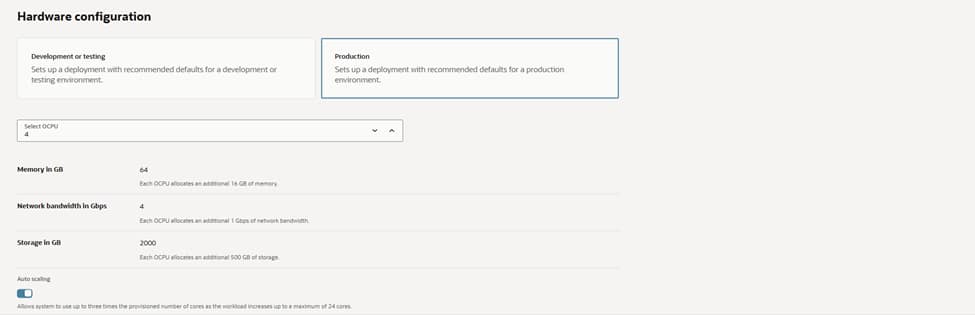
- OCPU Count: Enable Auto Scaling to optimize costs based on workload.
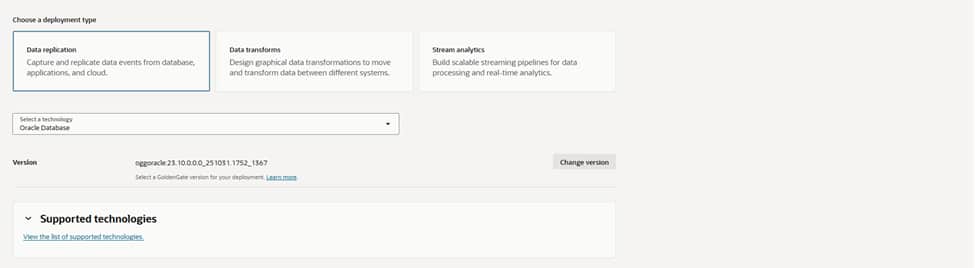
- Technology: Select Oracle Database.


2. Ashburn (Region B) Deployment:
- Switch your region to Ashburn.
- Repeat the steps above to create GG-Deployment-ASH.
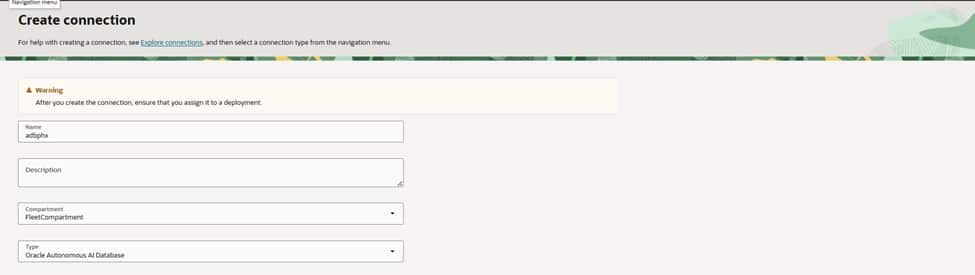
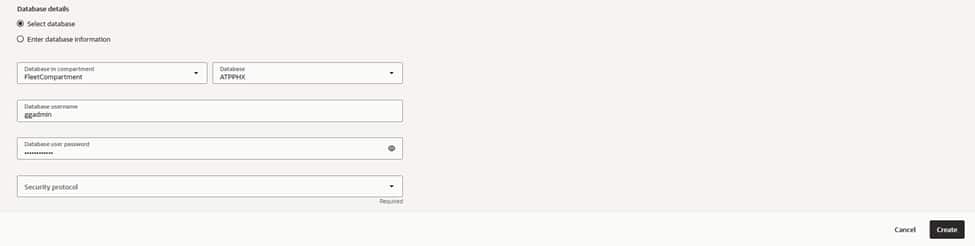
Phase 2: Registering and Assigning Database Connections
GoldenGate must be “introduced” to your databases to capture and apply data.
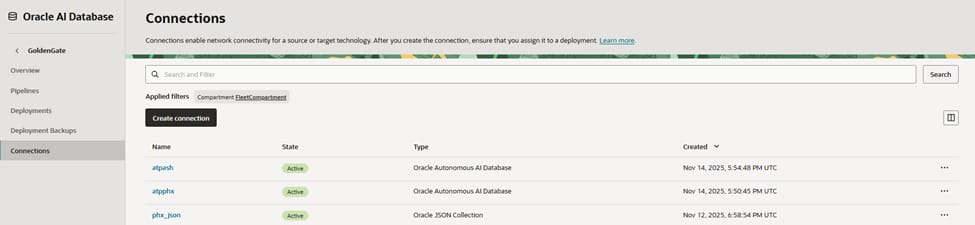
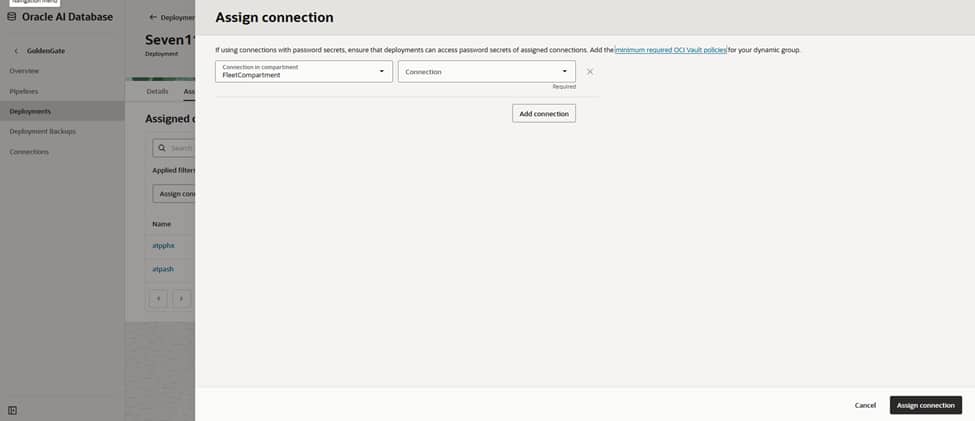
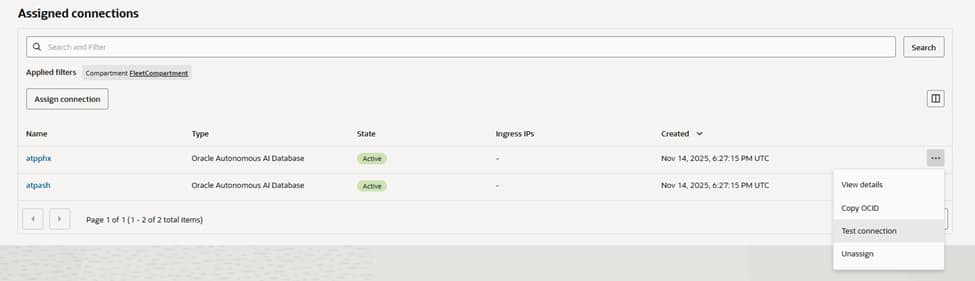
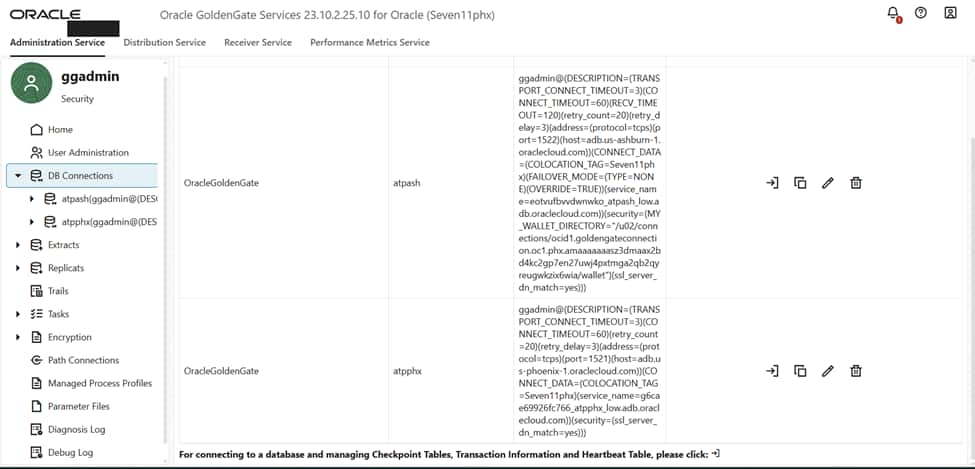
- Create Connections: Under the GoldenGate Connections tab, create a connection for both your Phoenix and Ashburn databases.
- Assign Connections:
- Go to the Phoenix Deployment details page.
- Under Assigned Connections, click Assign Connection and select the Phoenix DB.
- Repeat this in the Ashburn region for the Ashburn DB.

Phase 3: Setting Up Replication (Phoenix → Ashburn)
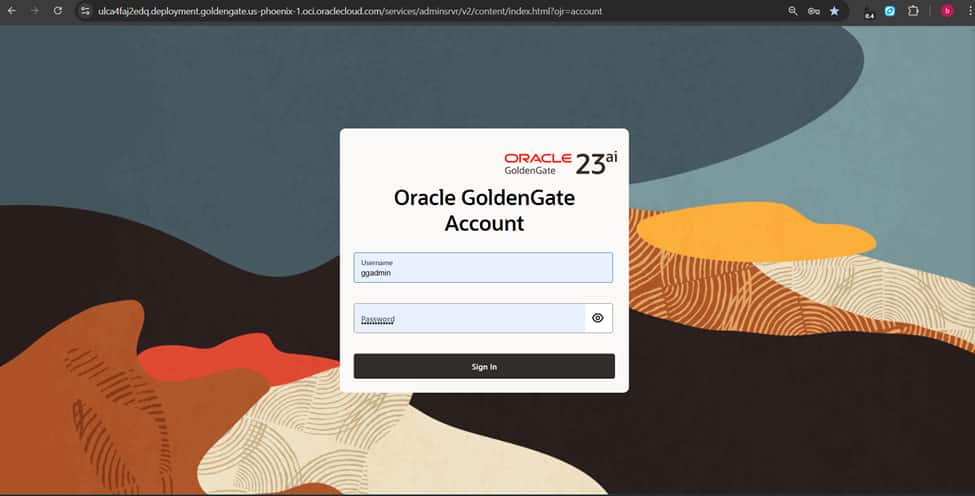
We will now enter the GoldenGate Administration Console to configure the data stream.
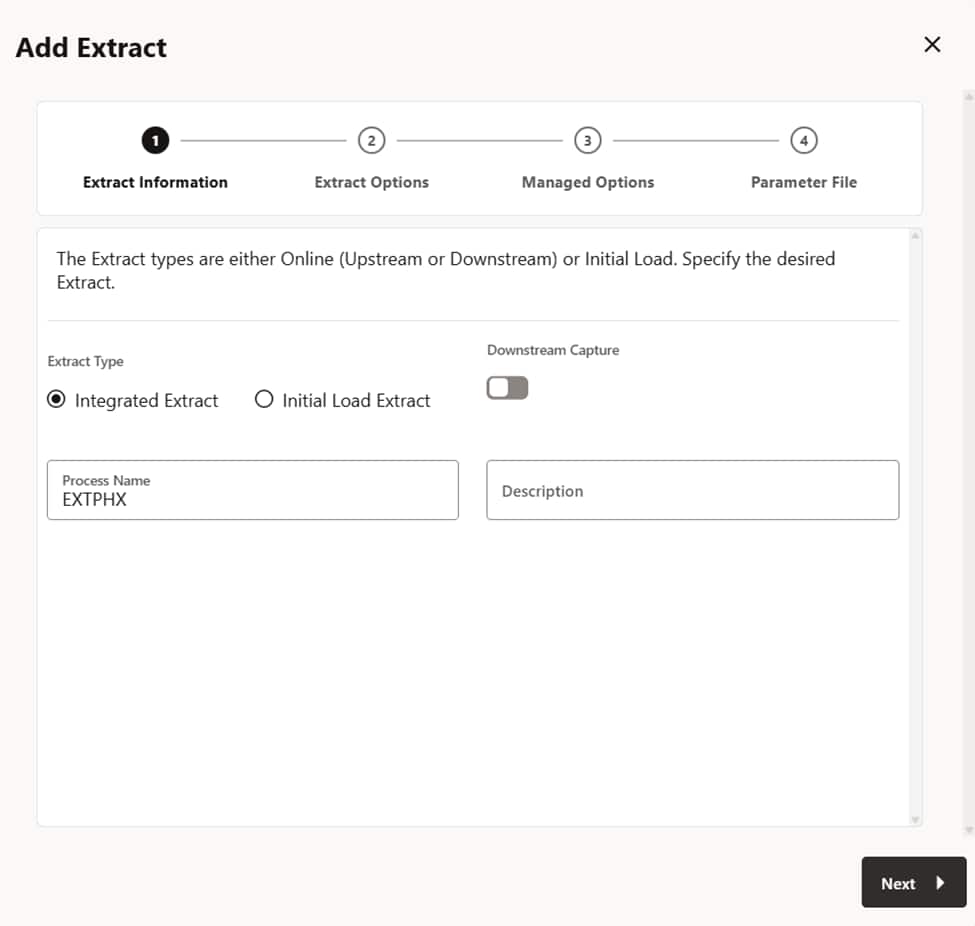
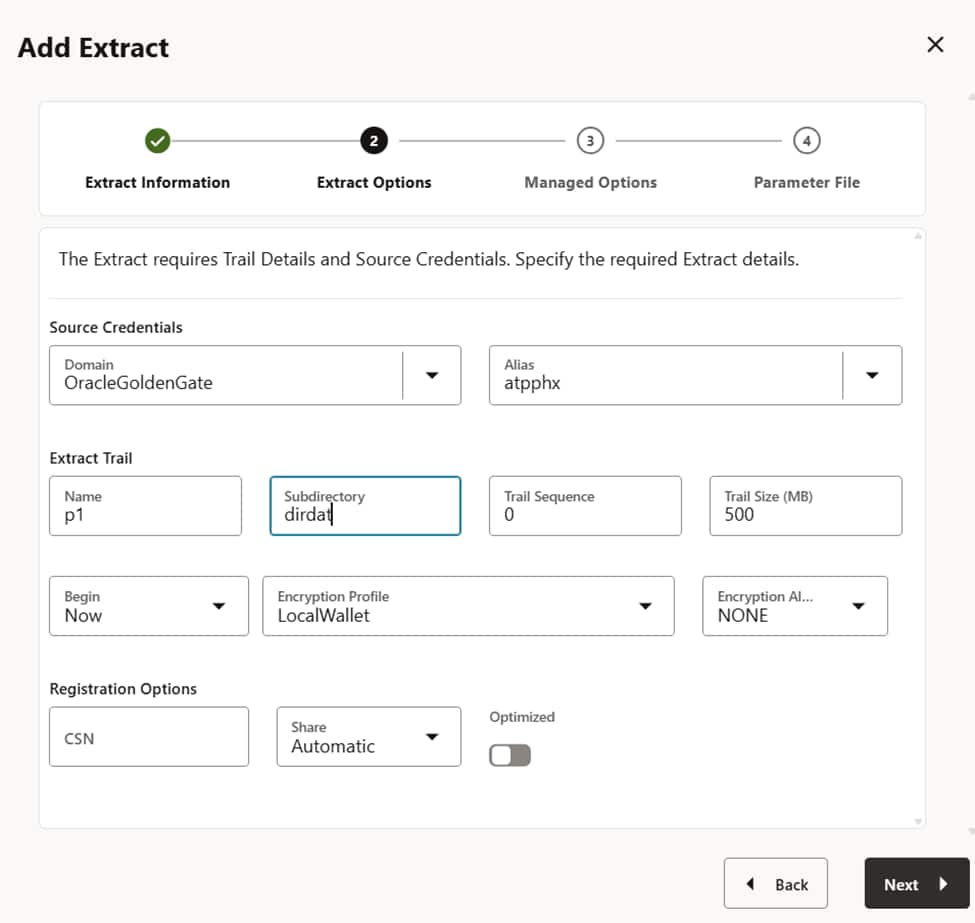
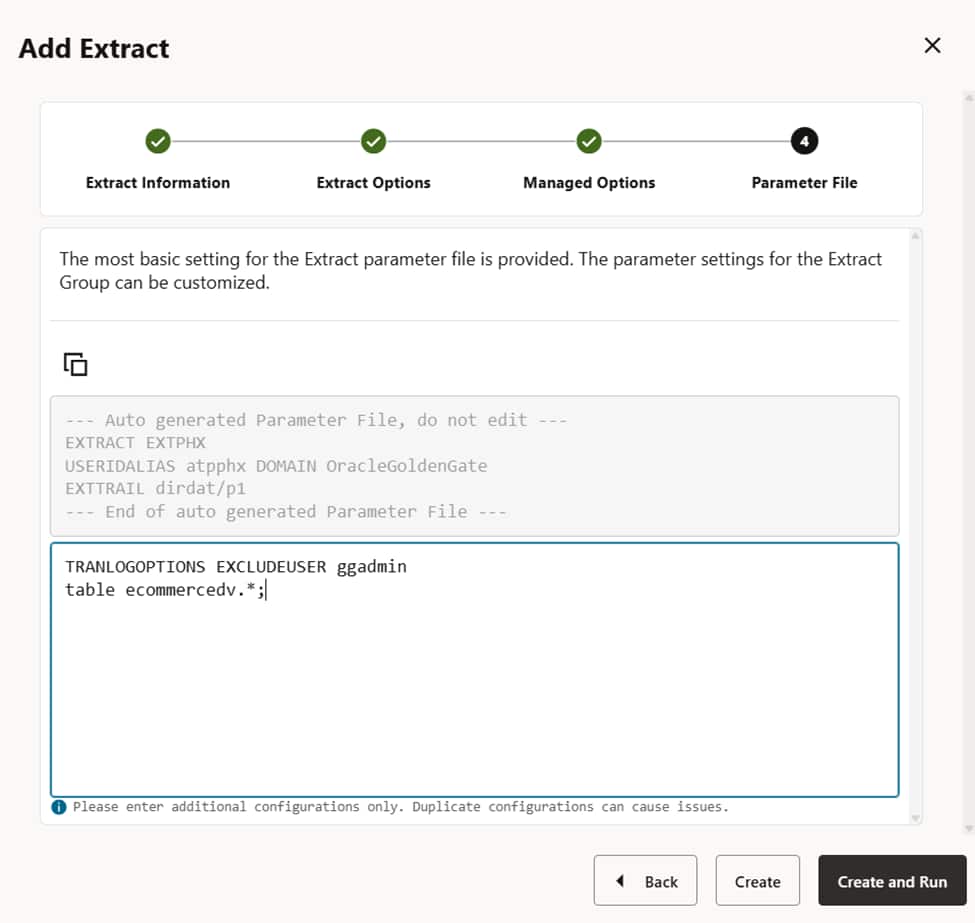
Step A: Adding the Extract (Phoenix)
The “Extract” process captures Change Data Capture (CDC) information from the source.
- In the Phoenix deployment, click Launch Console.
- Click Add Extract (plus icon).
- Type: Choose Integrated Extract.
- Process Name: e.g., EXT_PHX.
- Source: Select the Phoenix database credential alias.
- Register: Ensure “Register to PDB” is checked.

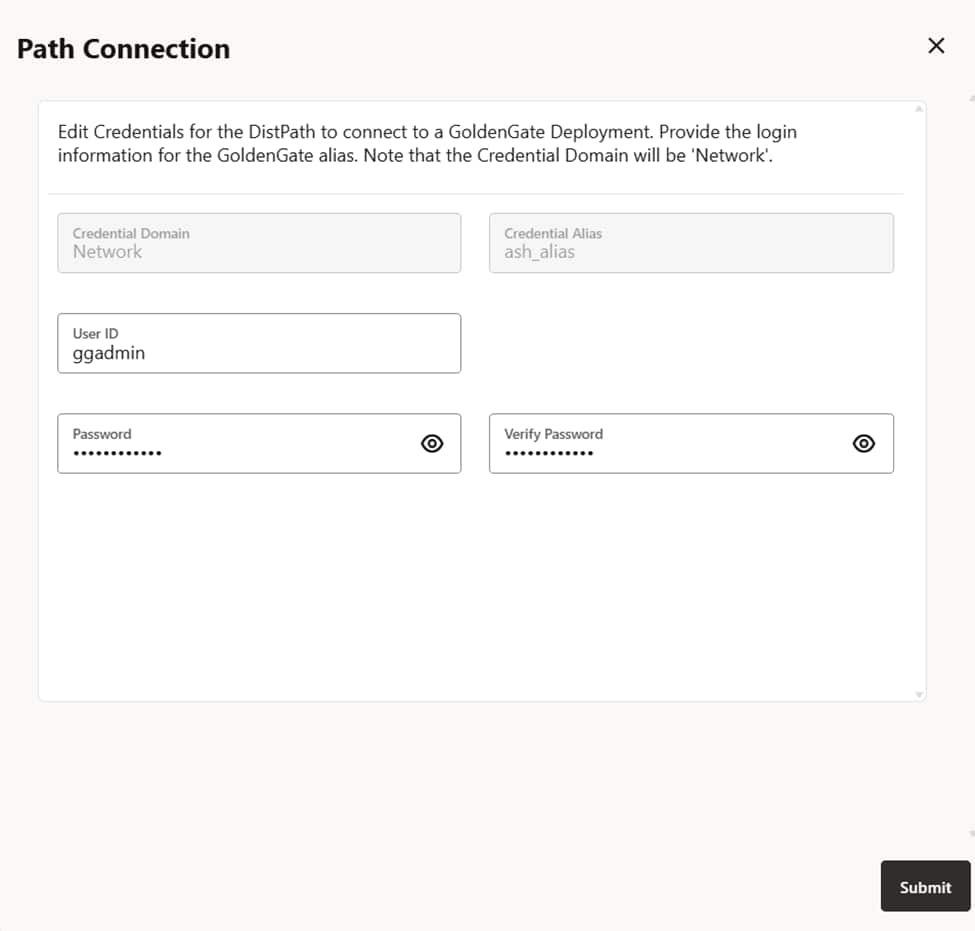
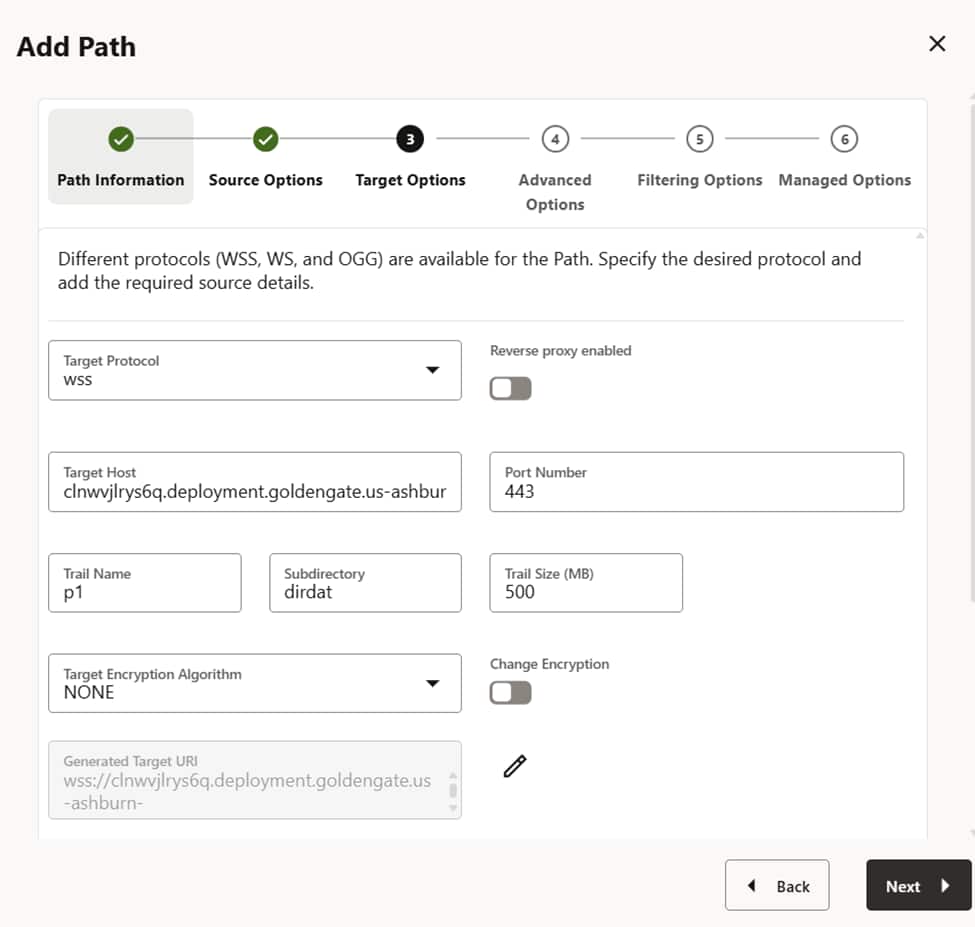
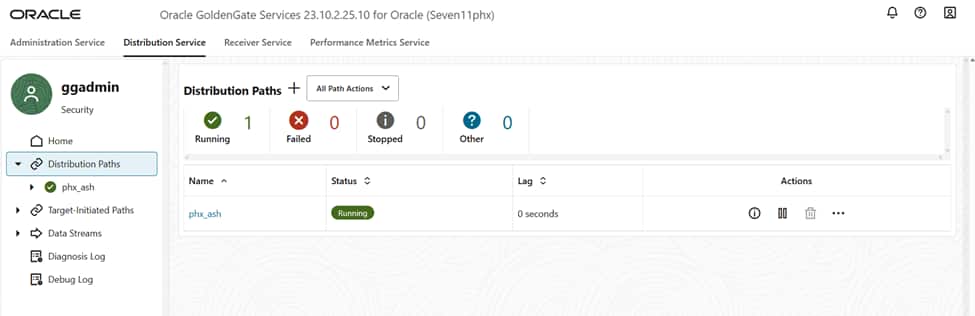
Step B: Adding the Distribution Path (Phoenix → Ashburn)
This creates the “bridge” that sends data from Phoenix to the Ashburn deployment.
- In the Phoenix Console, navigate to Distribution Service.
- Click Add Path (+).
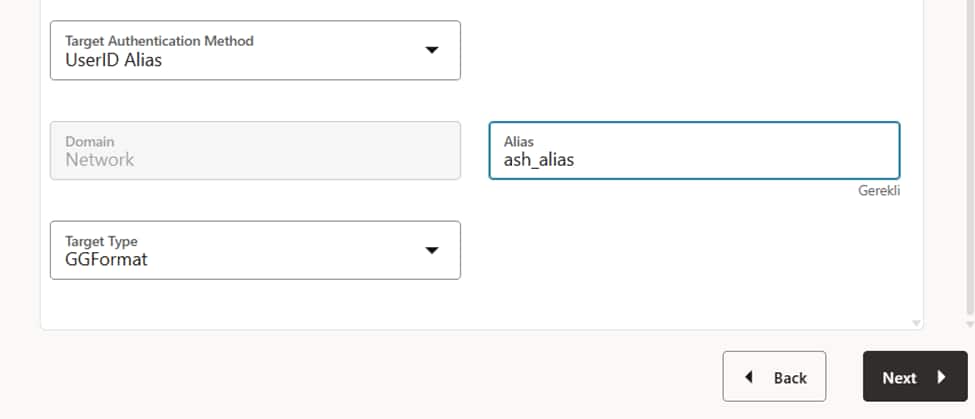
- Target Authentication Method: OGG.
- Target Host: Enter the Deployment URL of your Ashburn GoldenGate instance.
- Port: 443.


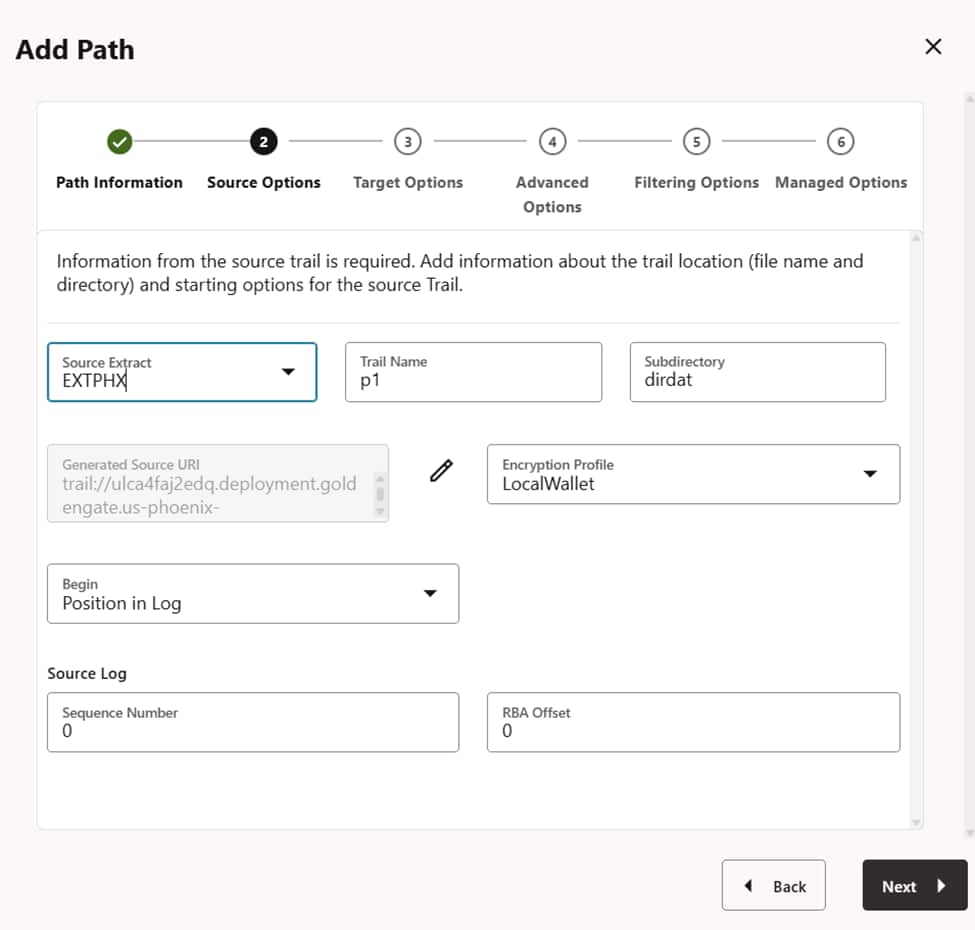
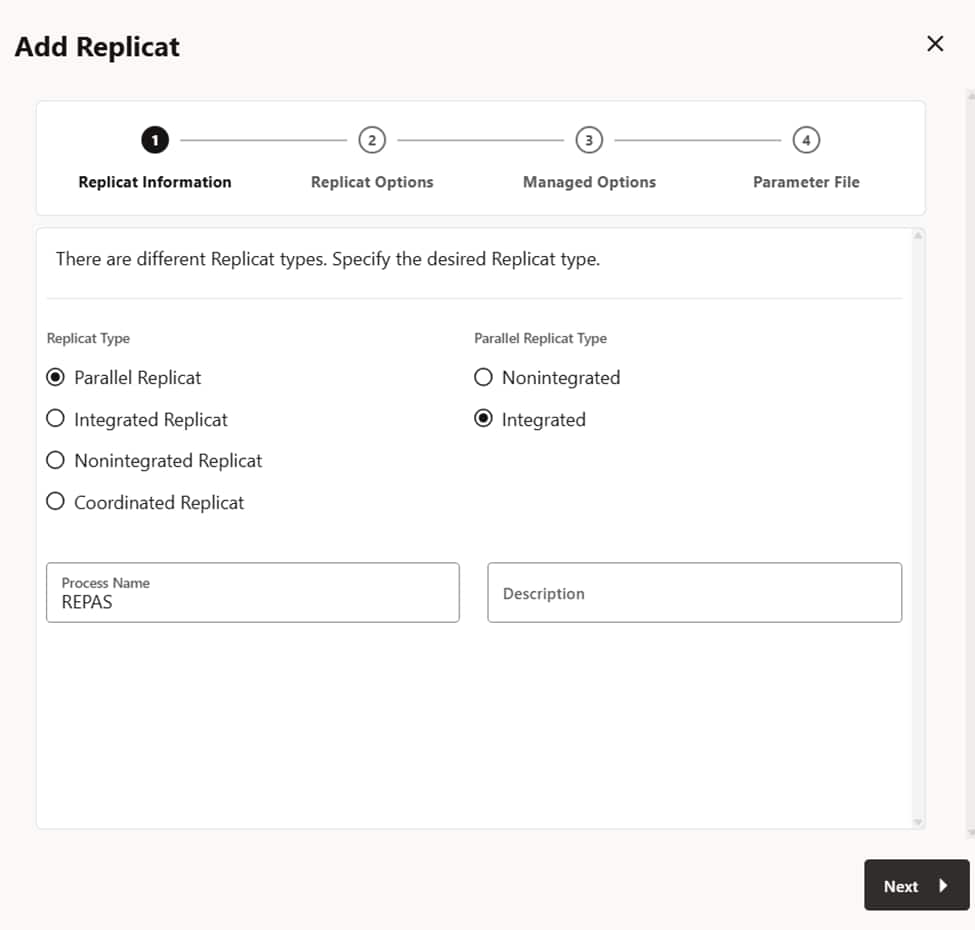
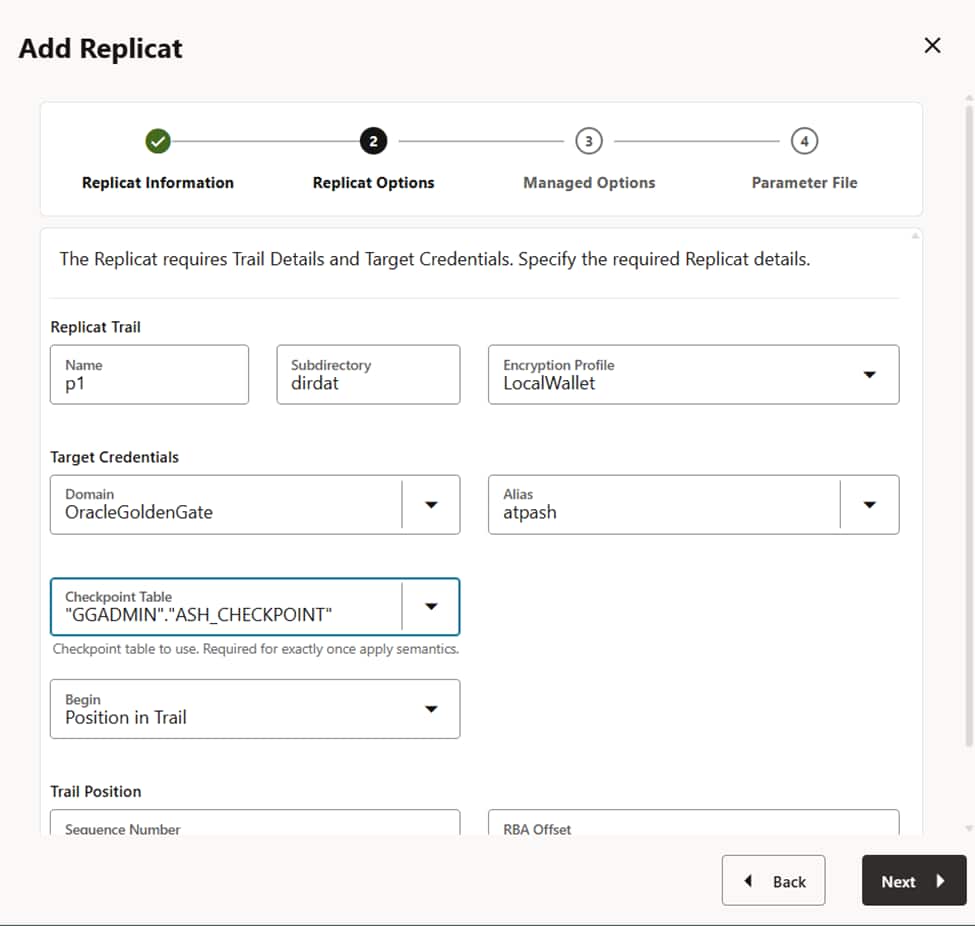
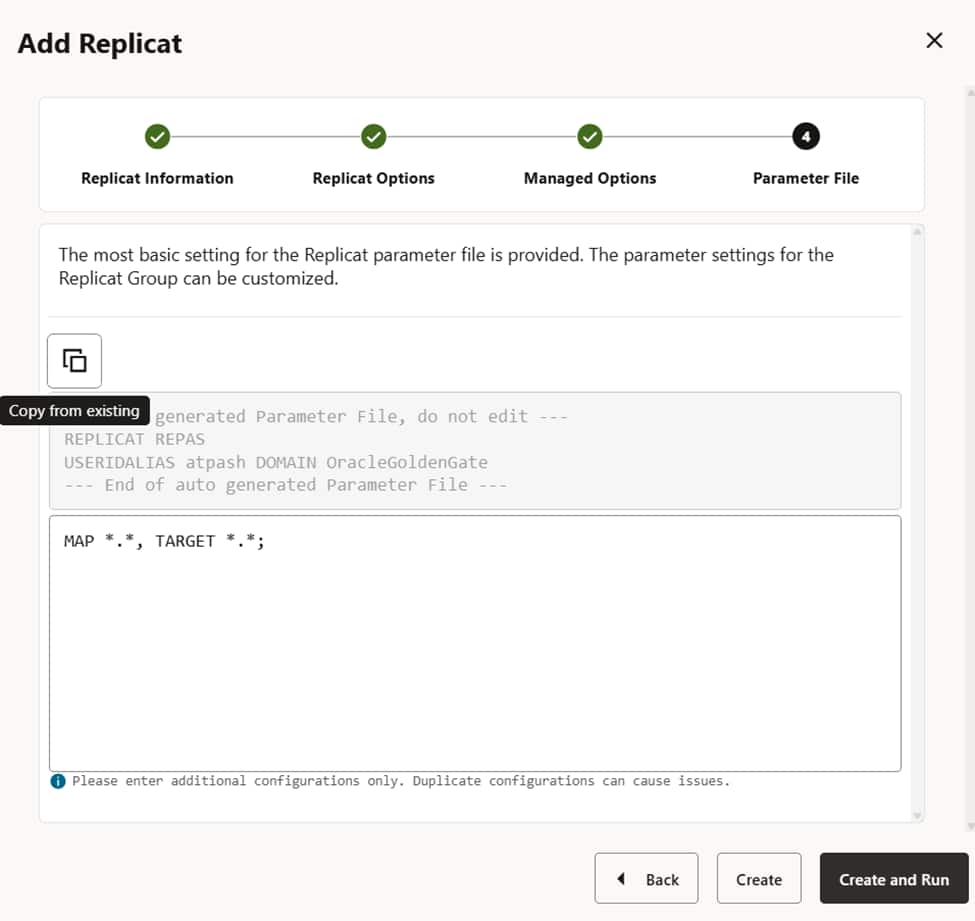
Step C: Adding the Replicat (Ashburn)
This process applies the incoming data to the Ashburn database.
- Open the Ashburn GoldenGate Console.
- Click Add Replicat.
- Source: Select the trail file arriving from Phoenix.
- Parameter File (Mapping): Enter the following mapping rule:

Phase 4: Closing the Loop (Ashburn → Phoenix)
To complete the Active-Active setup, you must mirror the steps in Phase 3 for the reverse direction:
- Extract (Ashburn): Create EXT_ASH in the Ashburn console.
- Distribution Path (Ashburn → Phoenix): Route data from Ashburn to the Phoenix Deployment URL.
- Replicat (Phoenix): Create REP_PHX in the Phoenix console with the same mapping rule.
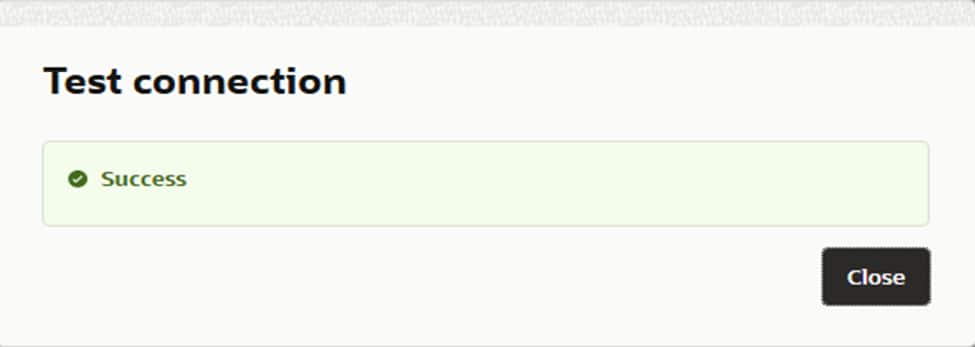
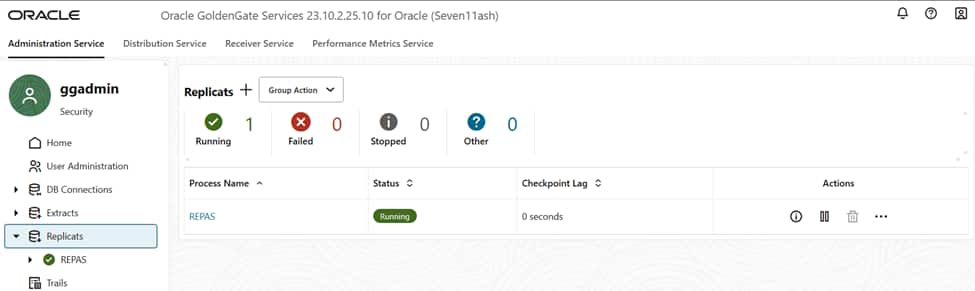
5. Validation and Testing
Once all processes (Extracts, Paths, Replicats) show a Running status in both regions, your system is live.

Testing Steps:
- Insert a record into the Phoenix database.
- Verify the record appears instantly in Ashburn.
- Insert a record in Ashburn and verify it appears in Phoenix.
Conclusion: You have successfully configured a robust, bi-directional replication pipeline. This setup ensures that your MongoDB API workloads remain synchronized across regions, providing a foundation for true disaster recovery and global load balancing.
Resources
