In today’s data-driven World, the ability to extend valuable insights from visual content has become a game-changer for businesses across industries. Artificial Intelligence (AI) has made significant strides in the field of computer vision, enabling machines to understand and interpret visual data with remarkable accuracy.
Oracle APEX is a low-code development platform that empowers organizations to build robust and scalable applications. OCI Vision is an AI service for performing deep-learning-based image analysis at scale. With pre-trained models available, developers can easily build image recognition and text recognition into their applications without machine learning (ML) expertise. For industry-specific use cases, developers can automatically train custom vision models with their own data as well. Using these prebuilt models, your apps can visually identify manufacturing defects, organize digital media assets, and tag items in images to count products or shipments.
In this blog, you see how OCI Vision can be used to enhance the Oracle APEX Social Media app for the classification of images. By integrating OCI Vision with Oracle APEX, businesses can tap into the power of visual intelligence, transforming their data analysis capabilities and revolutionizing user experiences. This blog post highlights the immense potential of integrating OCI Vision with Oracle APEX.
Before understanding how to integrate OCI Vision with Oracle APEX, let us take a look at how we can do AI Search on the Social Media application. In this Social Media app, you can upload new images using the Add Post Button and also LIKE other Images.
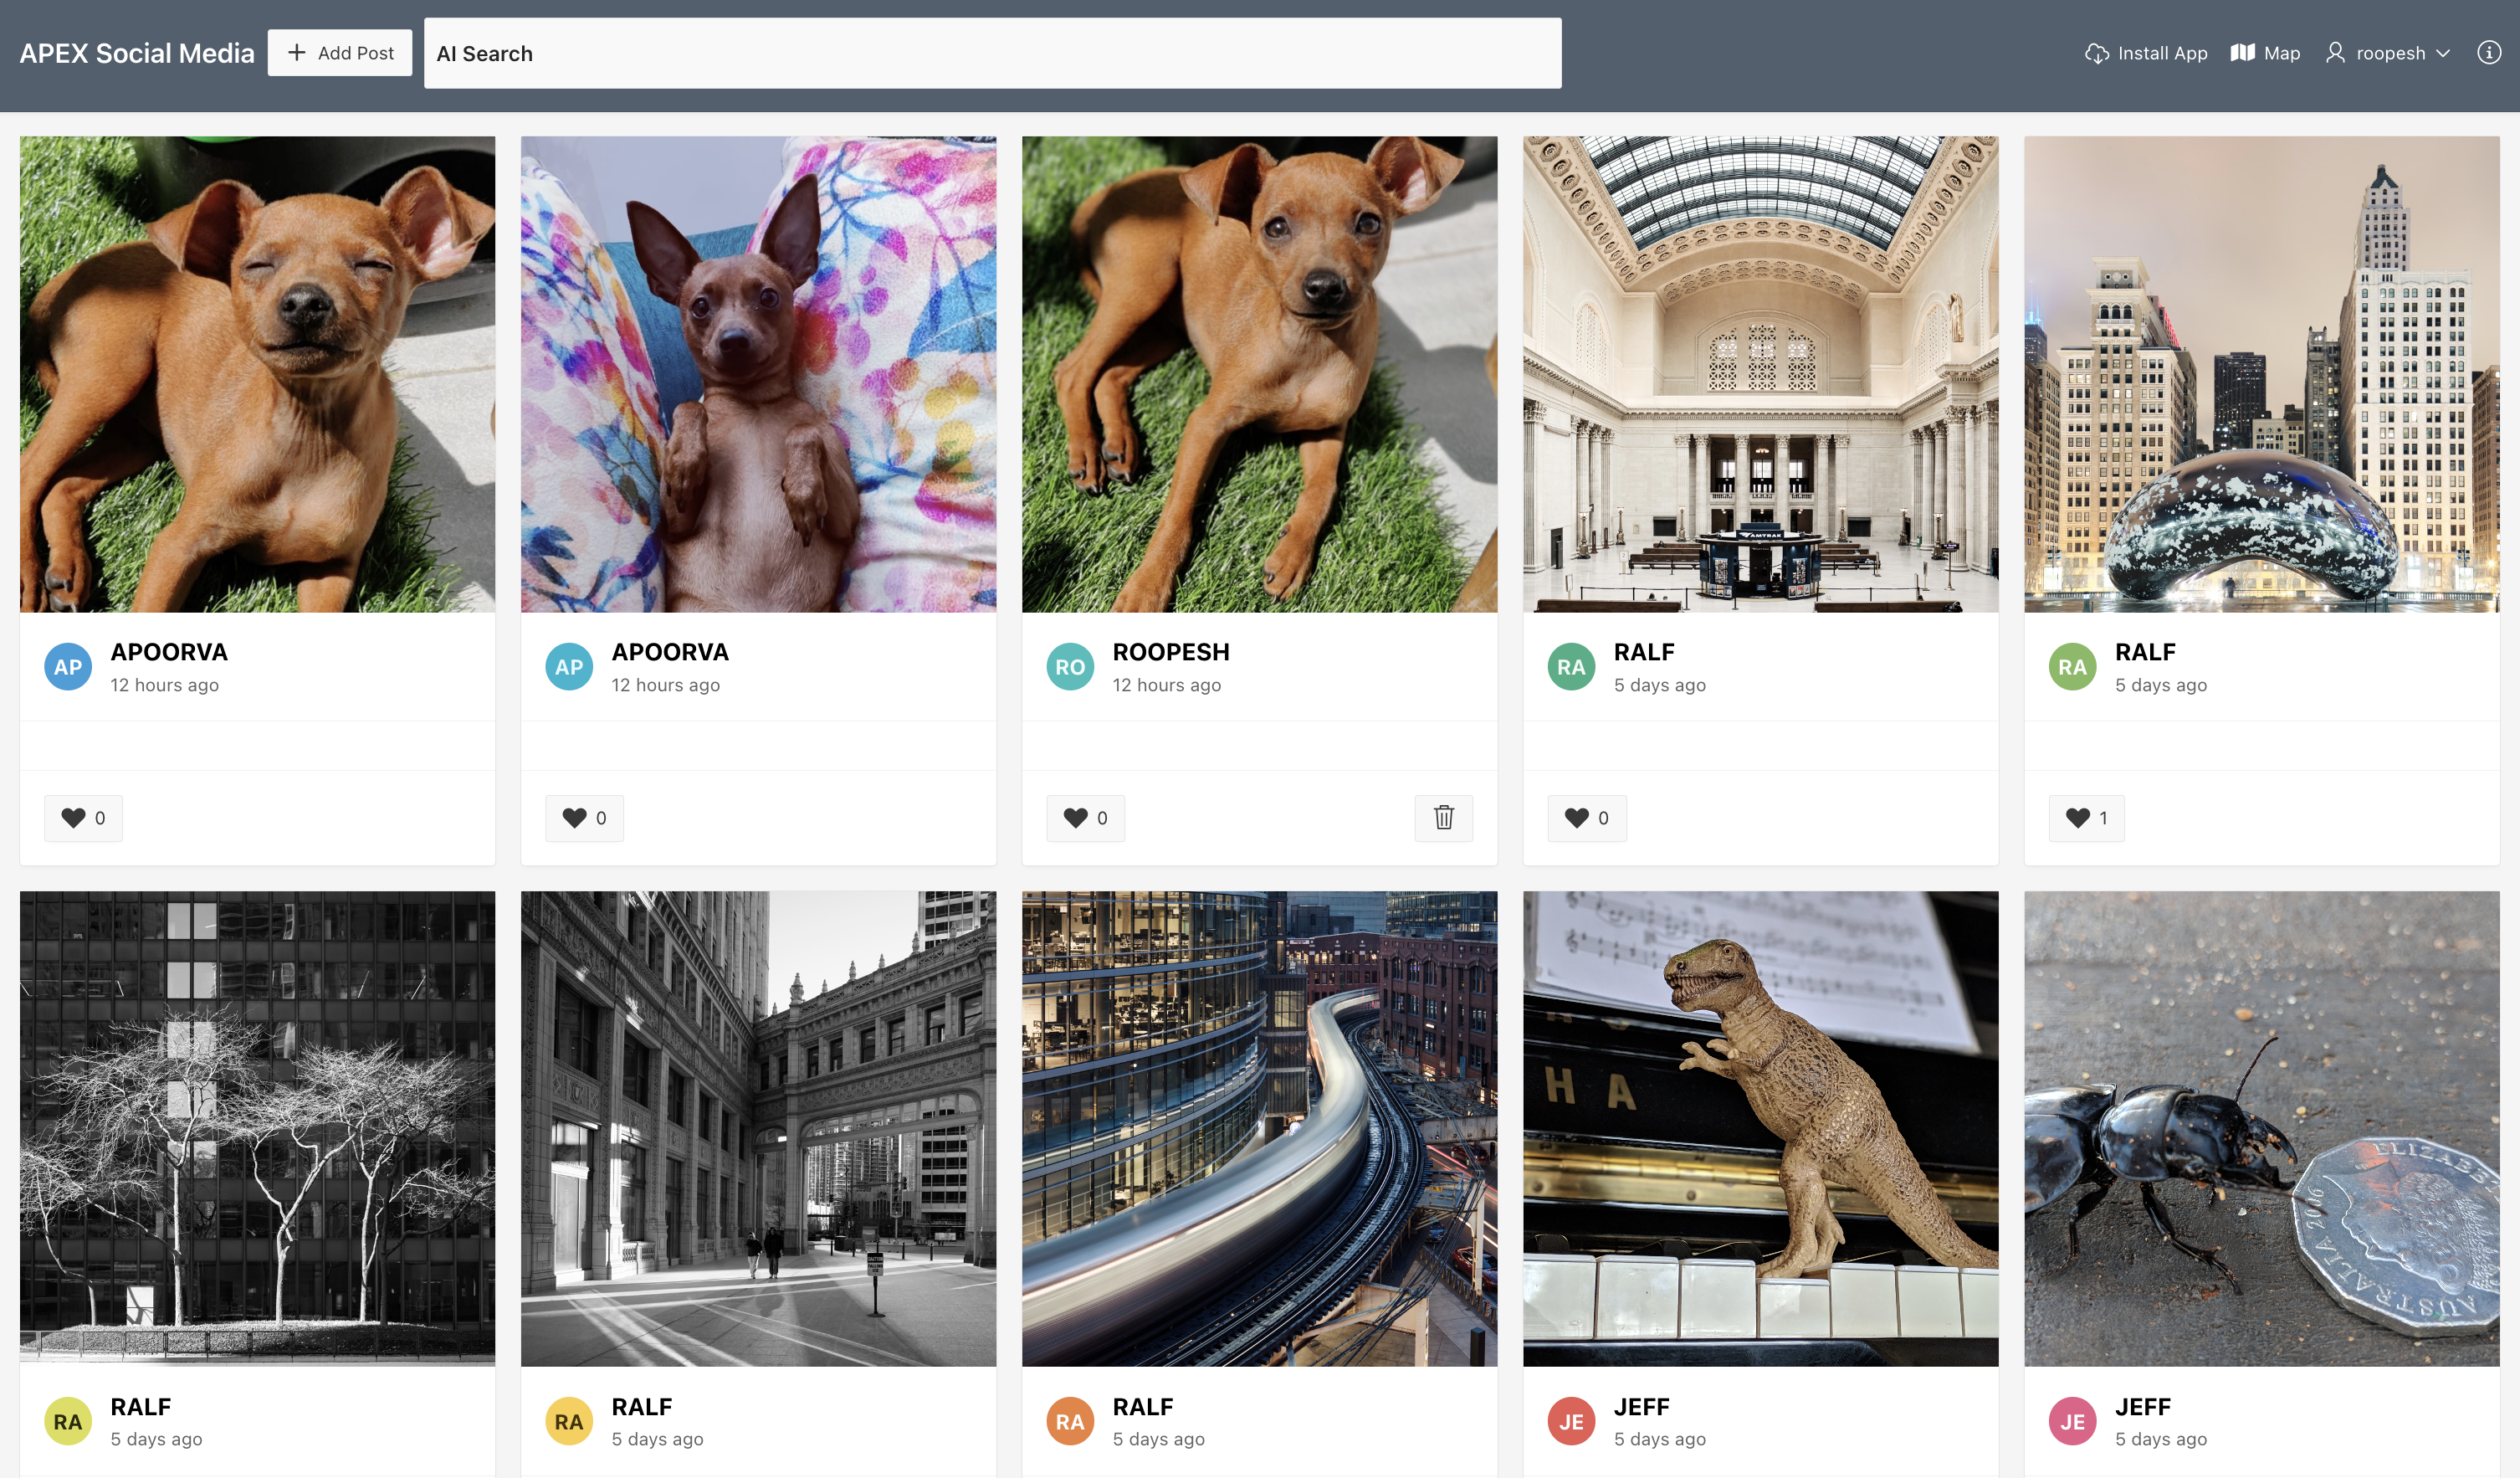
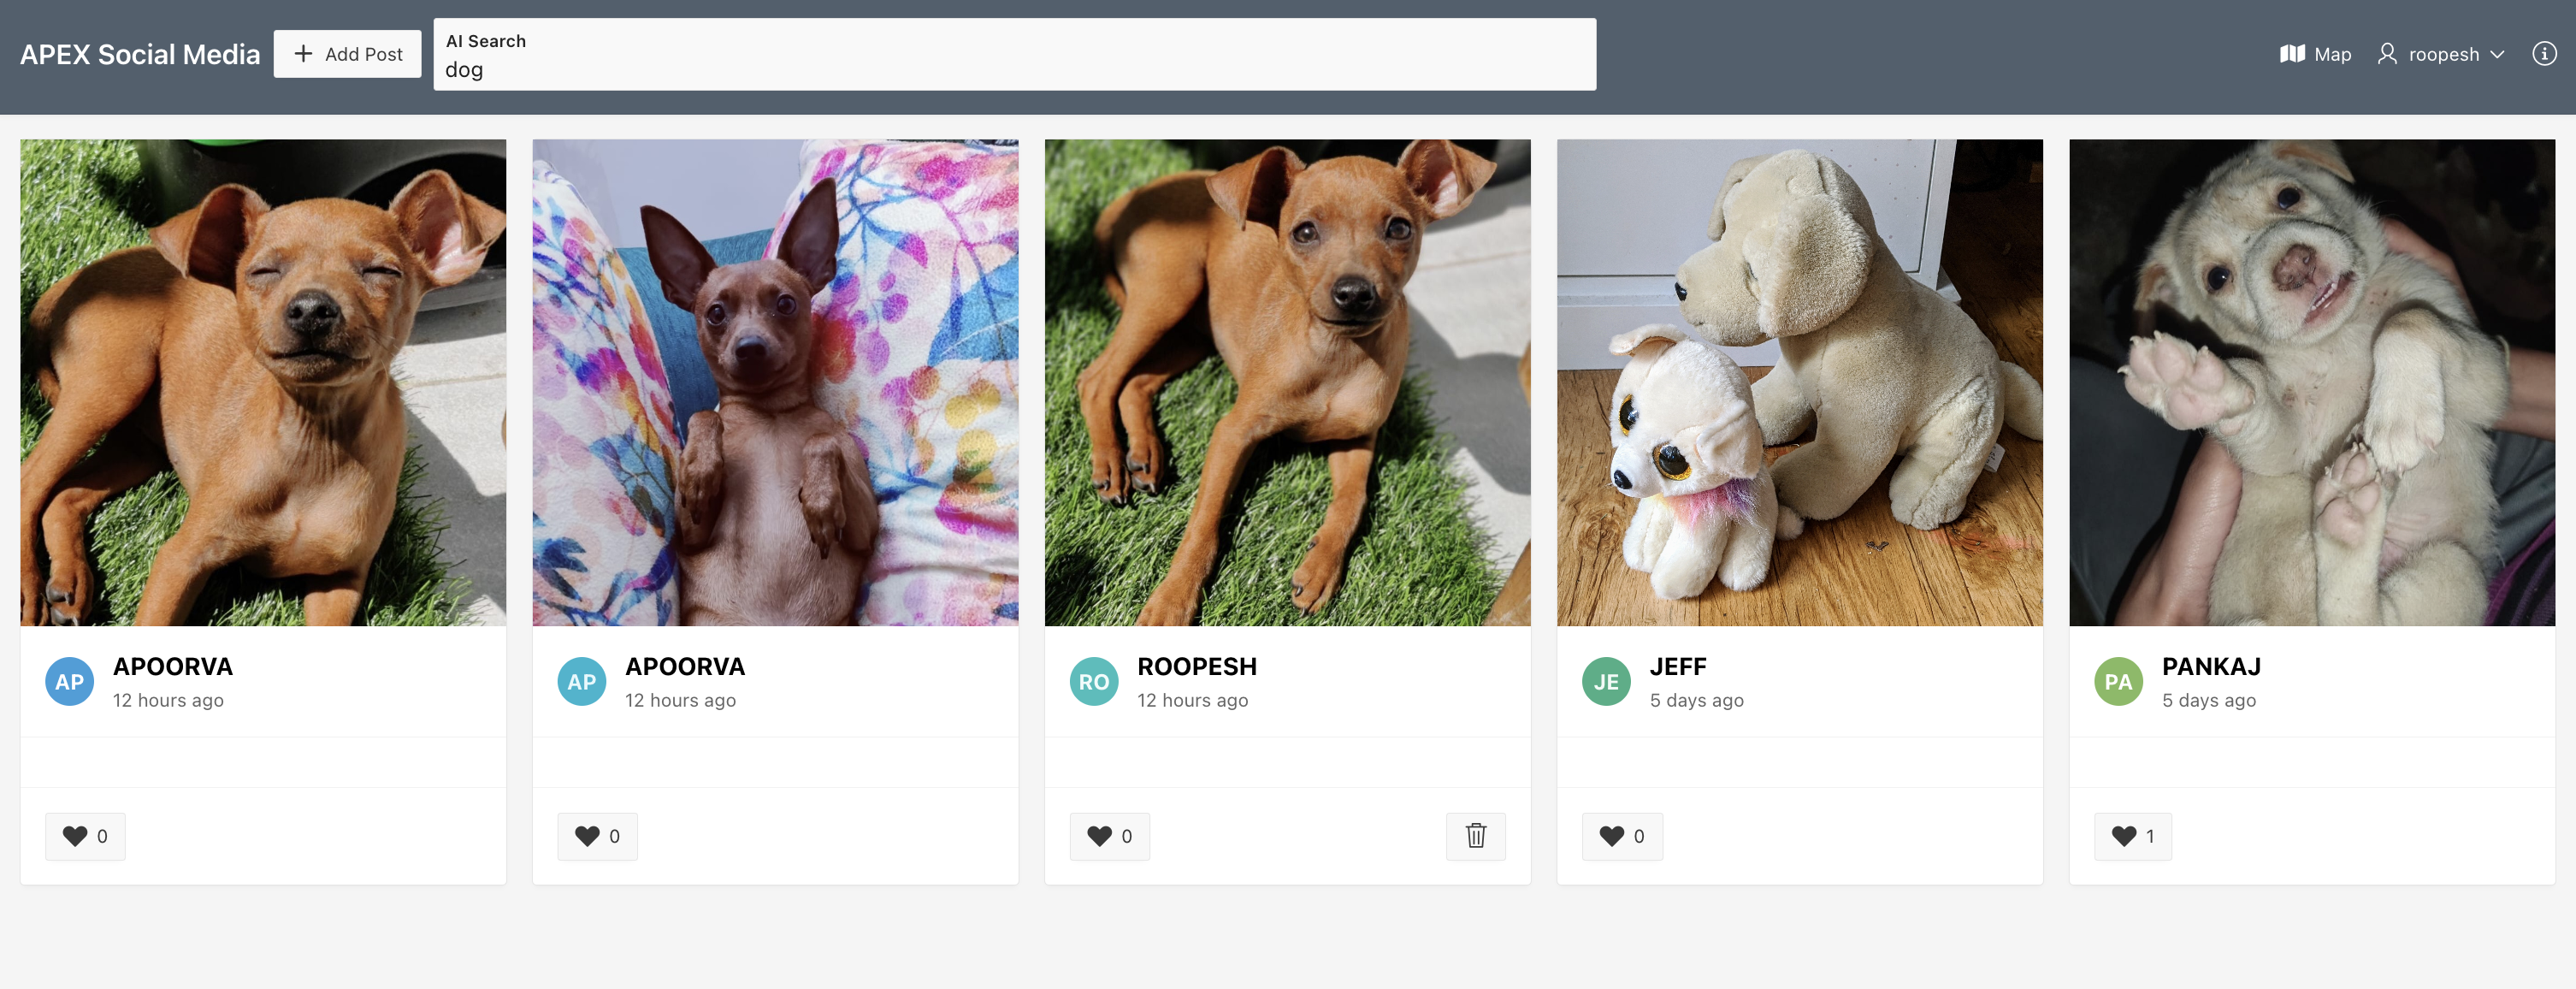
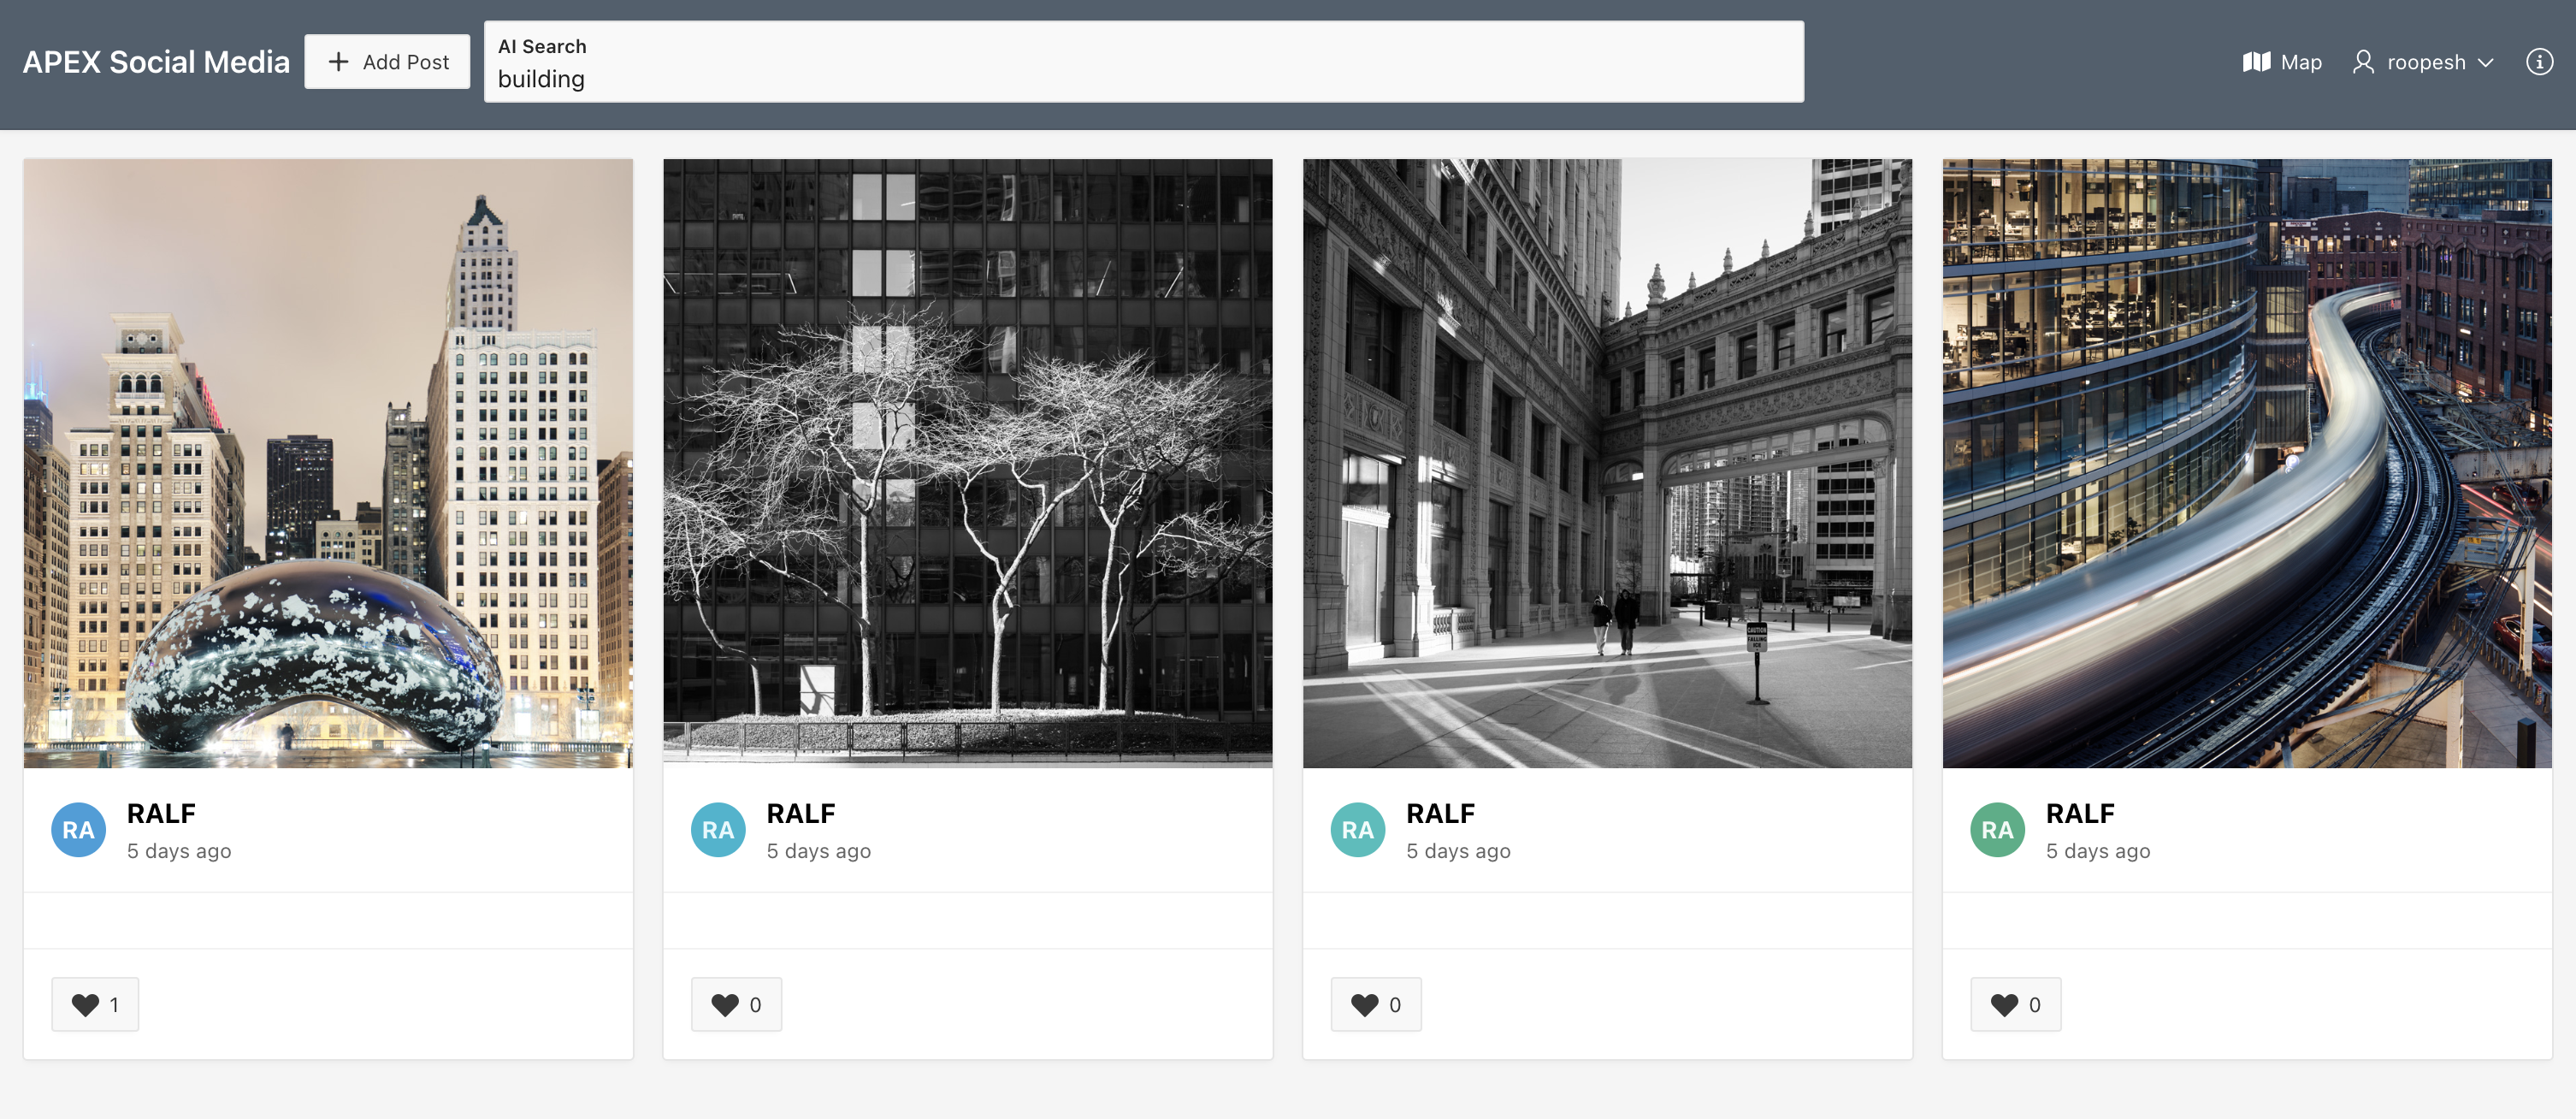
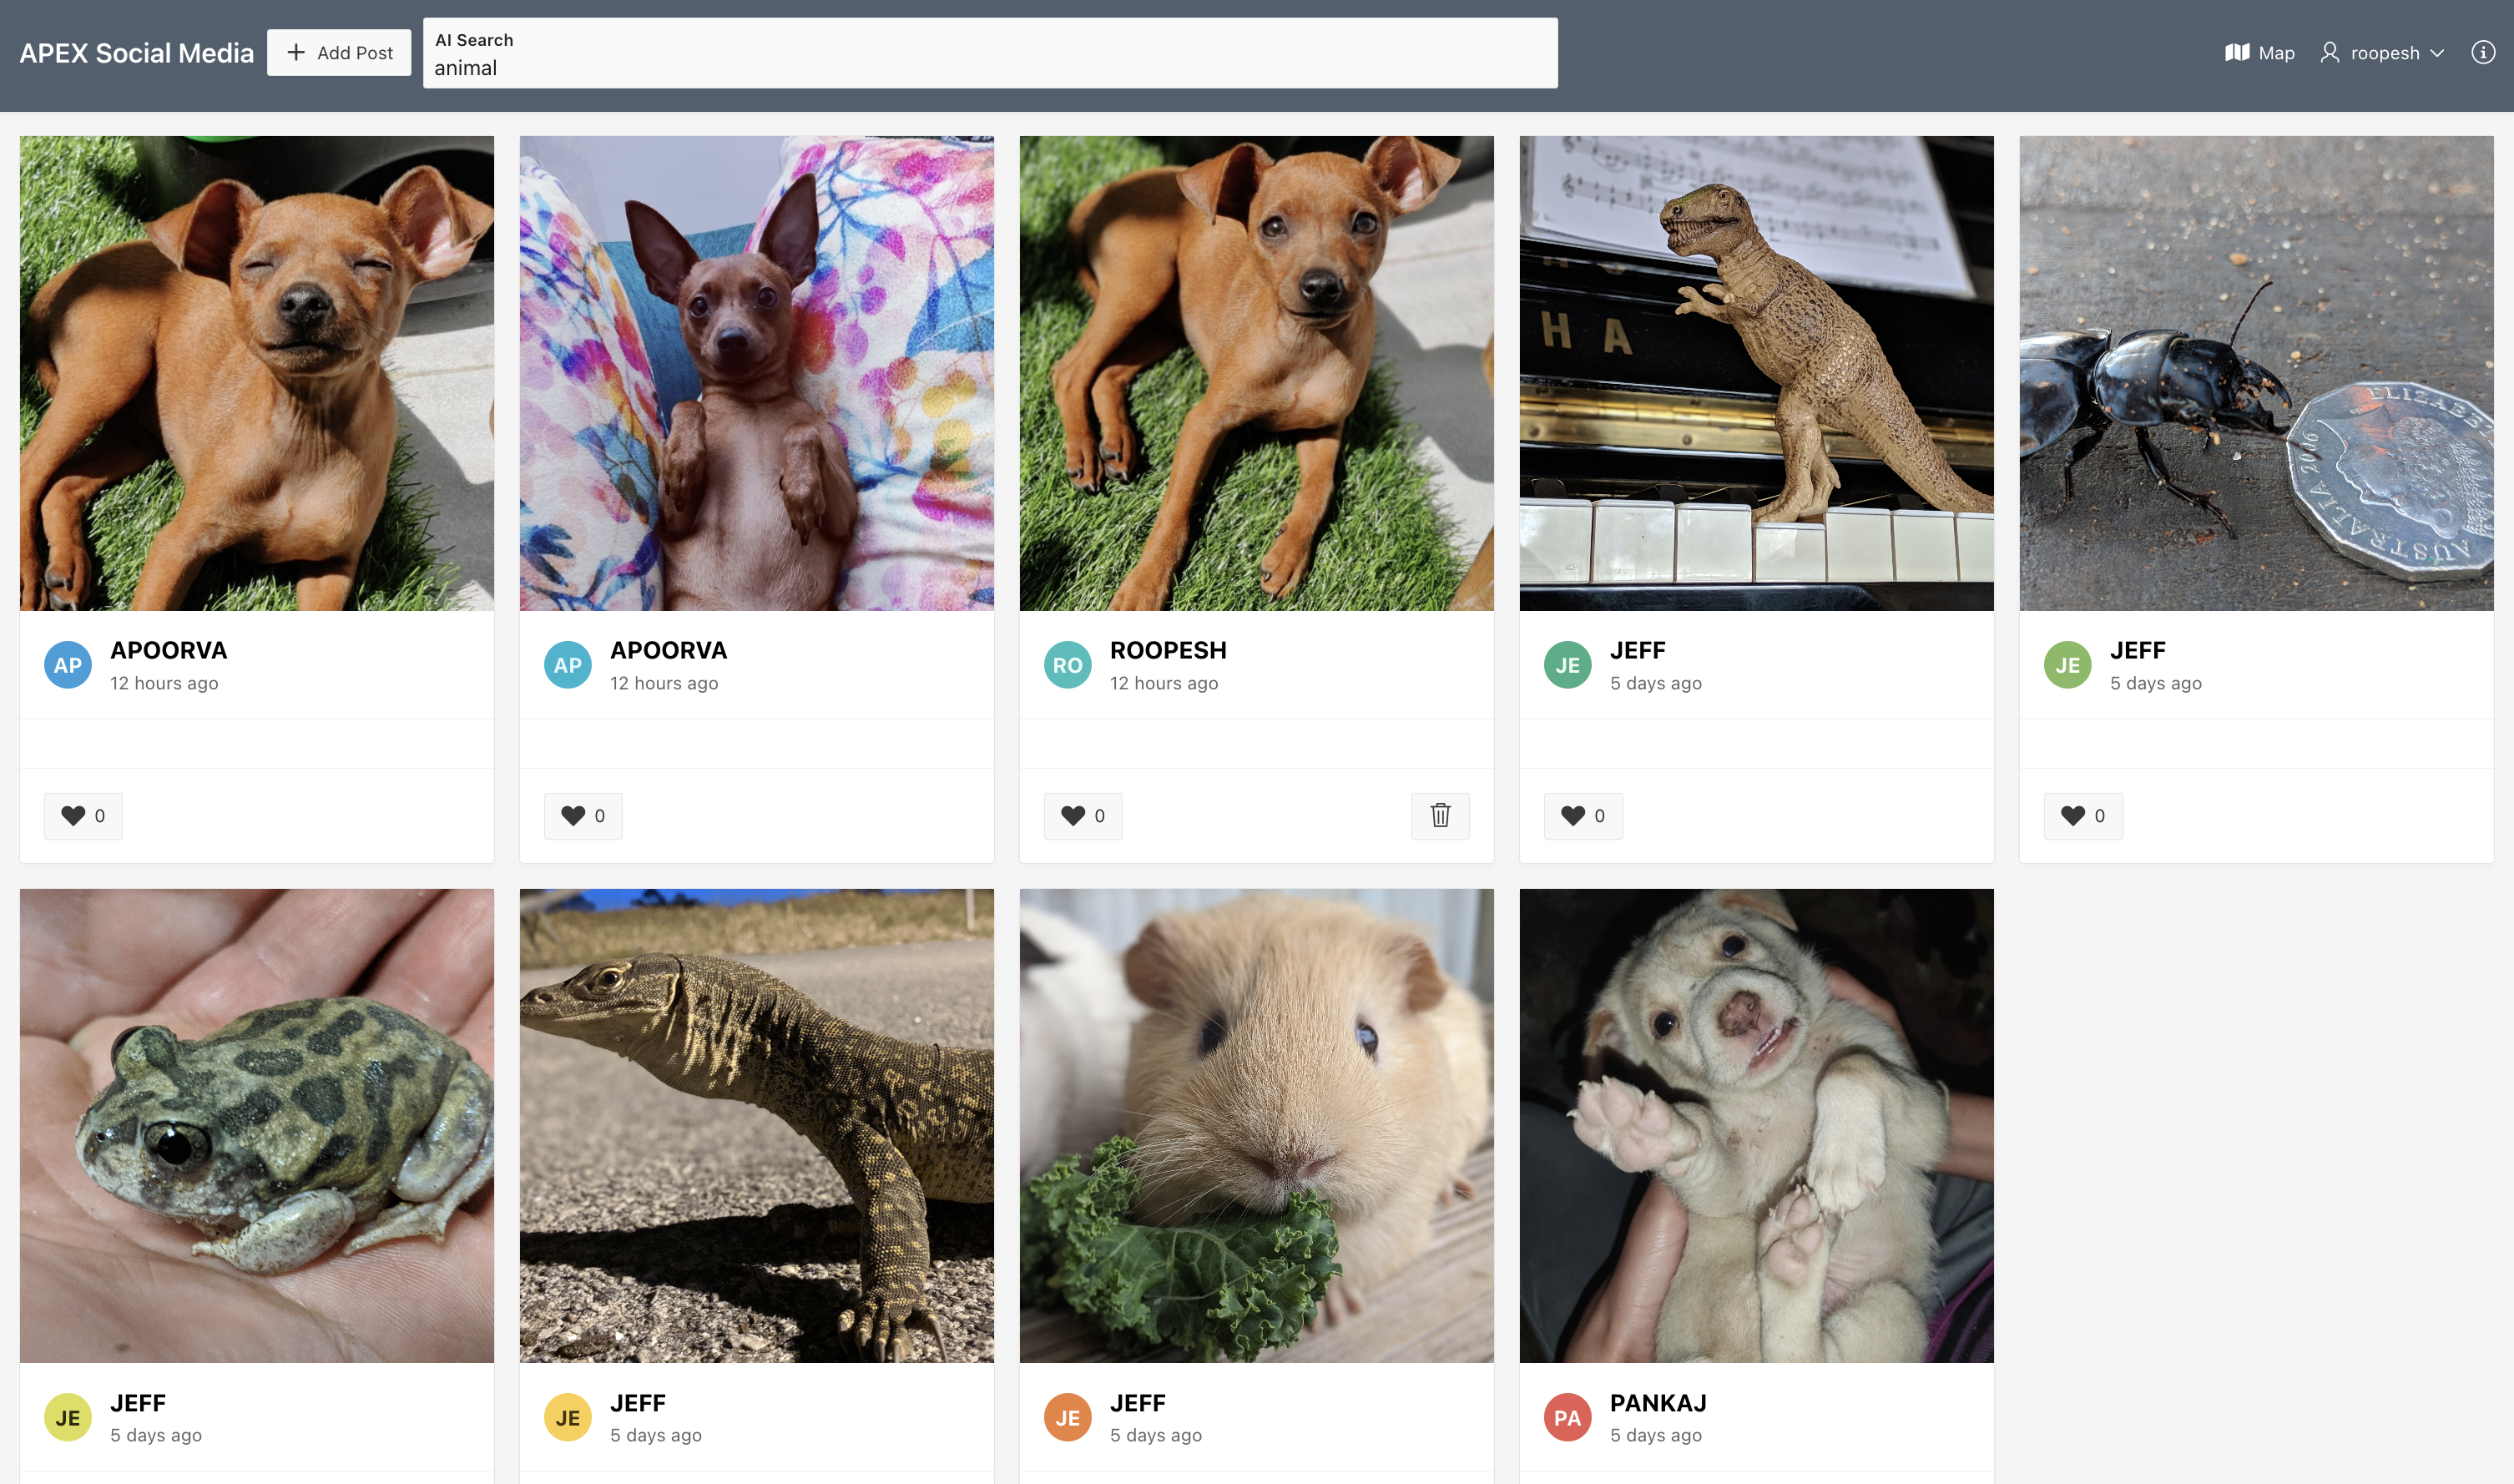
The app has an AI Search field available in the Navigation Bar where you can enter the Search Term. Once you click ENTER, the App searches for the images containing the Search Terms such as Dog, Building, and Animal.
Prerequisites for Building this App
- An Oracle Cloud Infrastructure account.
- An OCI compartment. You can use the pre-configured tenancy root compartment or create your own.
- The logged-in user should have the necessary privileges to create and manage Autonomous Database instances in this compartment. You can configure these privileges via an OCI IAM Policy
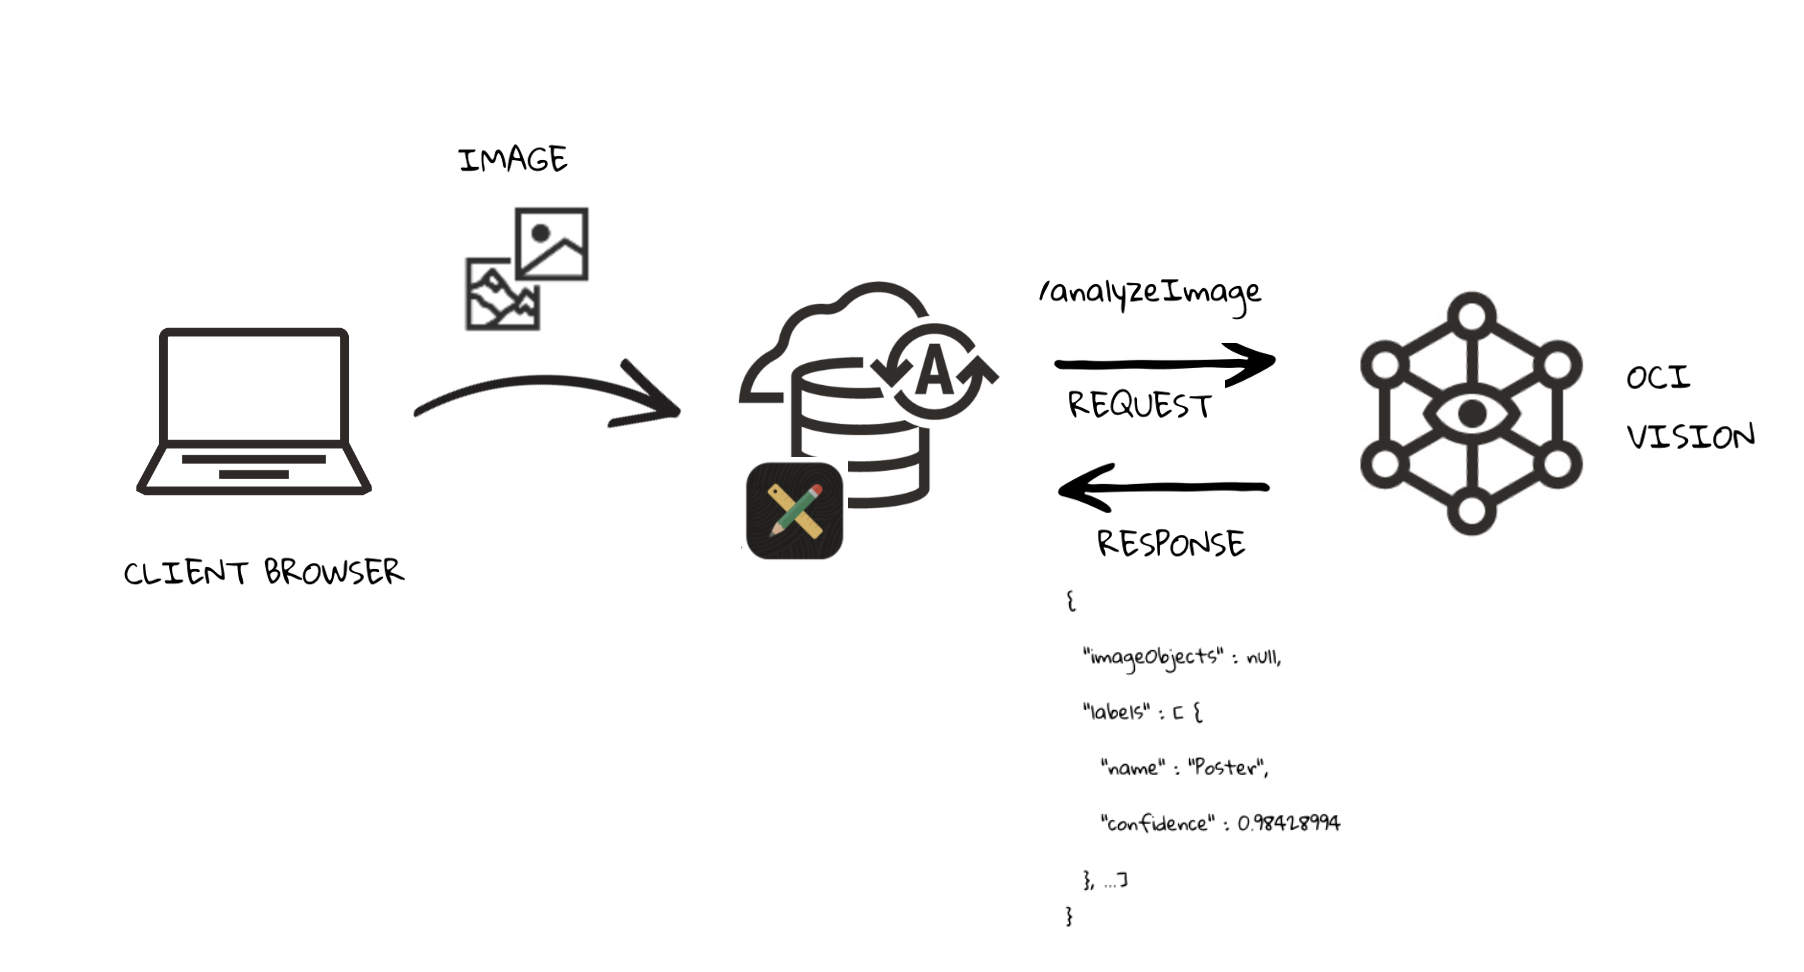
Architecture Diagram
Adding API Keys on OCI
In Oracle Cloud Infrastructure (OCI), API keys are used for secure authentication when accessing OCI resources through the API. OCI API keys consist of two parts: a public key and a private key.
You can use the Console to generate the private/public key pair for you. If you already have a key pair, you can choose to upload the public key. When you use the Console to add the key pair, the Console also generates a configuration file preview snippet for you.
The configuration file preview snippet is generated with the following information:
- user – the OCID of the user for whom the key pair is being added.
- fingerprint – the fingerprint of the key that was just added.
- tenancy – your tenancy’s OCID.
- region – the currently selected region in the Console.
- key_file – the path to your downloaded private key file. You must update this value to the path on your file system where you saved the private key file.
Click here to learn how To generate an API signing key pair.
Creating Web Credentials in Oracle APEX
To integrate OCI Vision with APEX, we create Web Credentials in APEX. Web Credentials securely store and encrypt authentication credentials for connecting to external REST services or REST Enabled SQL services.
These credentials are stored at the workspace level, making them accessible to all applications. We use these credentials to interact with OCI Vision APIs.
Learn how to Create Web Credentials by clicking here.
This blog post will explore the seamless integration of OCI Vision services with the Social Media Application. To get started, you can download the Social Media Application using this Link and import it into your APEX Workspace.
Understanding the OCI Vision REST API
OCI Vision offers a wide range of capabilities, such as classifying images into various categories, identifying and localizing objects in images, and processing images in batches using asynchronous API endpoints. For this blog post, we focus on using the pre-trained models of OCI Vision services.
Using OCI Vision, you can upload images to detect and classify objects in them. If you have lots of images, you can process them in batches using asynchronous API endpoints. Vision’s features are thematically split between Document AI for document-centric images and Image Analysis for object and scene-based images. It supports both pre-trained and custom models.
The Oracle Cloud Infrastructure APIs are typical REST APIs that use HTTPS requests and responses. You can read more about it in the OCI Documentation
To perform ImageAnalysis, you must prepare the API Endpoint with appropriate Oracle Cloud Infrastructure APIs. In this blog post, We use OCI hosted in the Ashburn region, and the API endpoint will be:
https://vision.aiservice.us-ashburn-1.oci.oraclecloud.com/20220125/actions/analyzeImage
Check out the documentation for more details on how to prepare API Endpoints for various OCI Services.
For Analysing the Image, we must send the Request Parameters in the JSON format as shown below.
{
   "compartmentId": "your compartment OCID",
   "image": {
      "source": "INLINE",
      "data": "'Your Data'"
   },
   "features": [
      {
         "featureType": "IMAGE_CLASSIFICATION",
         "maxResults": 5
      }
   ]
}
Where CompartmentId is the OCID of your Compartment, the features section contains the type of image analysis requested, and the Image section contains the Details of an Image to Analyze.
Configuring the OCI Vision REST API as REST Data Source
Now that we understand how the OCI Vision REST API works, we can proceed to create a REST Data Source in Oracle APEX that connects to the OCI Vision API endpoint.
The REST Data Source will be set up with the following parameters:
Rest Data Source Type: Oracle Cloud Infrastructure (OCI)
URL Endpoint: https://vision.aiservice.us-ashburn-1.oci.oraclecloud.com/20220125/actions/analyzeImage
Authentication: We use the web credentials created above.
The request to the OCI Vision service analyzeImage is an HTTP POST request. So, update the POST operation with the below settings:
- Compose the Request Body Template with appropriate substitution Tags.
{
   "compartmentId": "#COMPARTMENT_ID#",
   "image": {
      "source": "INLINE",
      "data": "#FILE_DATA#"
   },
   "features": [
      {
         "featureType": "#FEATURE_TYPE#",
         "maxResults": 5
      }
   ]
}
- For the Operation parameters, use the Synchronize with Body button to get all the substitutions defined in the Request Body Template as parameters
- Additionally, Create two Operation parameters:
- RESPONSE (Response Body) – to hold the JSON response from the POST request
- Content-Type (HTTP header) – It can be a static value defaulted to application/json
With the REST Data Source successfully configured, it’s time to invoke it from the page process when an image is uploaded.
Invoking the OCI Vision REST Data Source through a Page Process
To send the uploaded image to the OCI Vision service, we will utilize the OCI Vision REST Data Source that was created earlier. To achieve this, we can make use of the Invoke API process type. This will enable us to call the OCI Vision service and process the image as required.
- Immediately following the process that saves the image to the database, create an “Execution Chain” process type. To prevent the end user from waiting for the image to be indexed, enable the “Execute in Background” option for this process.
The execution chain should include two child processes:
- Invoke REST Data Source
- Parse the Response
- Create the first child process called “Invoke REST Data Source” with the following attributes:
- Process Type: Invoke API
- Settings > Type: REST Source
- Rest Source: OCI Vision (Select the REST Data Source created above).
- Operation: Post. All the Operation parameters defined for this REST Data Source are displayed in the left pane under the process. Select each parameter and assign a value
- COMPARTMENT_ID: Fill in the compartment OCID or tenancy OCID (Root Compartment) as a static value.
- FEATURE_TYPE: Enter in Plain text the name of the pre-trained model you want to use to analyze the image. For this demo, we will use IMAGE_CLASSIFICATION
- FILE_DATA: This parameter will be utilized to send the user-uploaded image file. The image file will be read from the database table and converted to a CLOB (Base64) using the apex_web_service.blob2clobbase64 function. You can construct the base64 string of the image file using the following SQL Query.
SELECT
    REPLACE(REPLACE(APEX_WEB_SERVICE.BLOB2CLOBBASE64(FILE_BLOB),
                    CHR(10),
                    ''),
            CHR(13),
            '')
FROM
    SM_POSTS
WHERE
    ID = :P1_ID;
-
-
- RESPONSE: The OCI Vision REST, Data Source call, will return a JSON response, which can be captured using an OUT parameter. To achieve this, you should disable the “Ignore Output” attribute. By doing so, you can store the output into a page Item, for example, P1_RESPONSE, and access the response for further processing.
-
- The second child Process, Parse the Response, can now parse the response stored in the page Item P1_RESPONSE and update the database table with the tags returned from the OCI AI Vision Service.
UPDATE SM_POSTS
SET
    AI_OUTPUT = (
        SELECT
            LISTAGG(OBJ_NAME, ',') WITHIN GROUP(
            ORDER BY
                OBJ_NAME
            )
        FROM
            JSON_TABLE ( :P1_RESPONSE, '$.labels[*]'
                COLUMNS
                    OBJ_NAME VARCHAR2 ( 100 ) PATH '$.name[*]'
            )
    )
WHERE
    ID = :P1_ID;
Customize the Posts Feed Page to include AI Search
To enable AI Search functionality in the Social Media app, we’ll create a new Page Item called “PX_AI_SEARCH” (replace “PX” with your Page Number). This text field will serve as the search input for users.
We’ll also update the SQL query used in the Timeline Region available in the rendering Tab to filter posts based on the AI search input. The modified query will retrieve posts where the AI analysis output contains the specified search term.
SELECT
    P.ID,
    P.CREATED_BY                   AS USER_NAME,
    P.POST_COMMENT                 AS COMMENT_TEXT,
    P.FILE_BLOB,
    P.FILE_MIME,
    APEX_UTIL.GET_SINCE(P.CREATED) POST_DATE,
    (
        SELECT
            COUNT(*)
        FROM
            SM_REACTIONS SMR
        WHERE
            SMR.POST_ID = P.ID
    )                              AS REACTIONS,
    (
        SELECT
            'user-has-liked'
        FROM
            SM_REACTIONS SMR
        WHERE
                SMR.POST_ID = P.ID
            AND CREATED_BY = :APP_USER
    )                              USER_REACTION_CSS
FROM
    SM_POSTS P
WHERE
    UPPER(AI_OUTPUT) LIKE UPPER(NVL('%'
                                    || :P1_AI_SEARCH
                                    || '%', AI_OUTPUT))
ORDER BY
    P.CREATED DESC;
Learning Resources
Build the app all by yourself by following the step-by-step instructions in the following workshop.
https://apex.oracle.com/go/oci-vision-lab
Do you like to consume this content in the form of a video? No Problem! We have got you covered:
https://www.youtube.com/watch?v=0XlJC3HxA1Y
You can see the AI-Powered Image Search in action through the demonstration application below:
https://apex.oracle.com/go/oci-vision-demo
Summary
The integration of Oracle APEX with Oracle Cloud Infrastructure (OCI) Vision Services represents a groundbreaking advancement in data processing capabilities. By combining the power of APEX’s low-code development platform with OCI Vision Services’ AI-driven image recognition and text extraction tools, businesses gain access to streamlined image analysis, automated data extraction, enhanced user experiences, and advanced insights and analytics. This fusion allows organizations to optimize data-driven operations, make better decisions, and stay ahead in today’s competitive landscape. The blog post provides a step-by-step guide on implementing the integration, making it accessible to developers and non-technical users.