This blog was originally published on Sept 11, 2021.
Starting in September 2021, customers of Oracle Autonomous Database on Shared Infrastructure (ADB) can set up their own custom domain name for APEX, Database Actions, and REST Data Services APIs. This new capability, known as a “Vanity URL” or “Vanity Domain”, enables customers to more easily promote ADB-based applications at a URL that is easy to remember and expresses their own brand identity. Vanity URLs are supported with all ADB workload types including APEX Application Development (APEX Service) and Autonomous JSON Database.
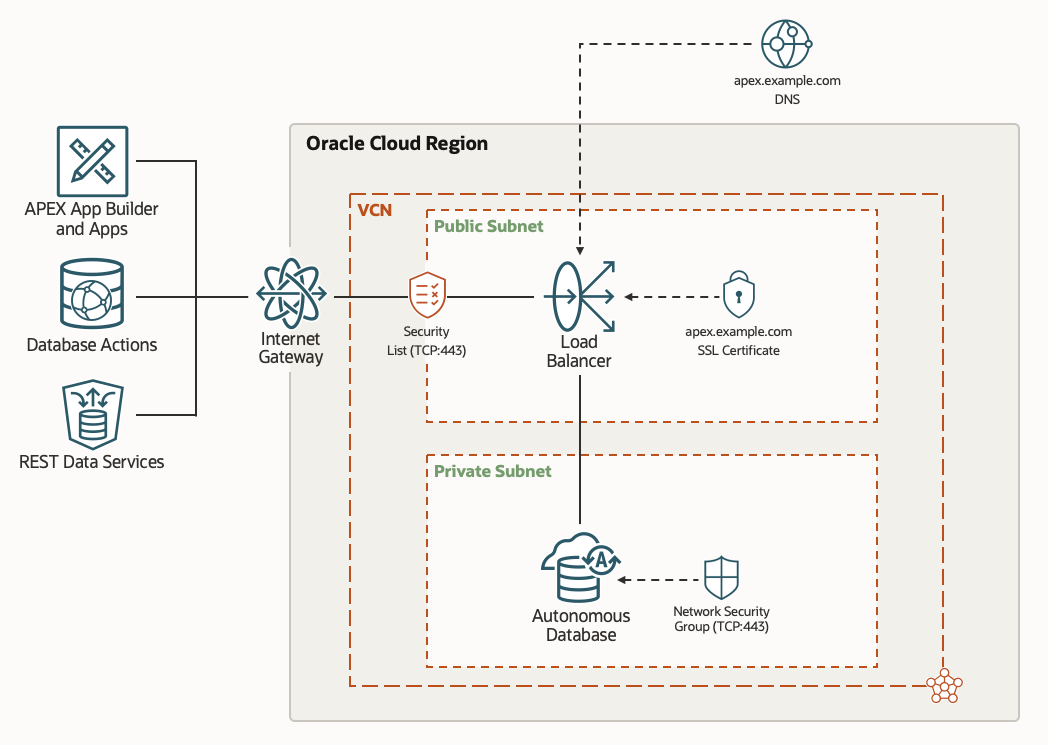
The Vanity URL architecture leverages standard building blocks in Oracle Cloud Infrastructure (OCI) such as Virtual Cloud Network (VCN), Load Balancer, and ADB configured with a Private Endpoint. It places a Load Balancer in front of ADB to act as an HTTPS reverse proxy serving your domain name. All of the OCI resources used in this architecture are Oracle-managed, so activities such as software patching and upgrades are taken care of for you. In addition, OCI provides a small Always Free allocation of Load Balancer, enabling ADB customers to set up a Vanity URL at no extra cost.
Below is an overview of the steps to configure a Vanity URL on ADB for access to end-user applications and developer tools. The step to create a Load Balancer, which may be new to many ADB customers, contains detailed instructions and screenshots.
Prerequisites
You must have a few things in place before proceeding with Vanity URL configuration. If you are new to ADB, Load Balancer, or OCI Networking, we recommend that you become familiar with these topics first. You must have a tenancy in the OCI region where you plan to run ADB and an account with privileges to create database and networking resources in your target compartment. Also, you must own a domain name with the ability to create DNS records for it and have a matching SSL/TLS certificate. You can obtain the domain name and certificate from any vendor providing these services.
In this blog post, we will configure a Vanity URL using the sample apex.example.com domain.
Architecture Diagram
The diagram below illustrates our desired end state. It shows SSL/TLS communications from clients to Load Balancer to ADB. You can refer to this diagram while configuring a Vanity URL.
Configuration Steps
Step 1 – Set Up ADB with a Private Endpoint
Follow the steps described in Configuring ADB Network Access with Private Endpoints to set up ADB with a Private Endpoint in your target OCI region, tenancy, and compartment.
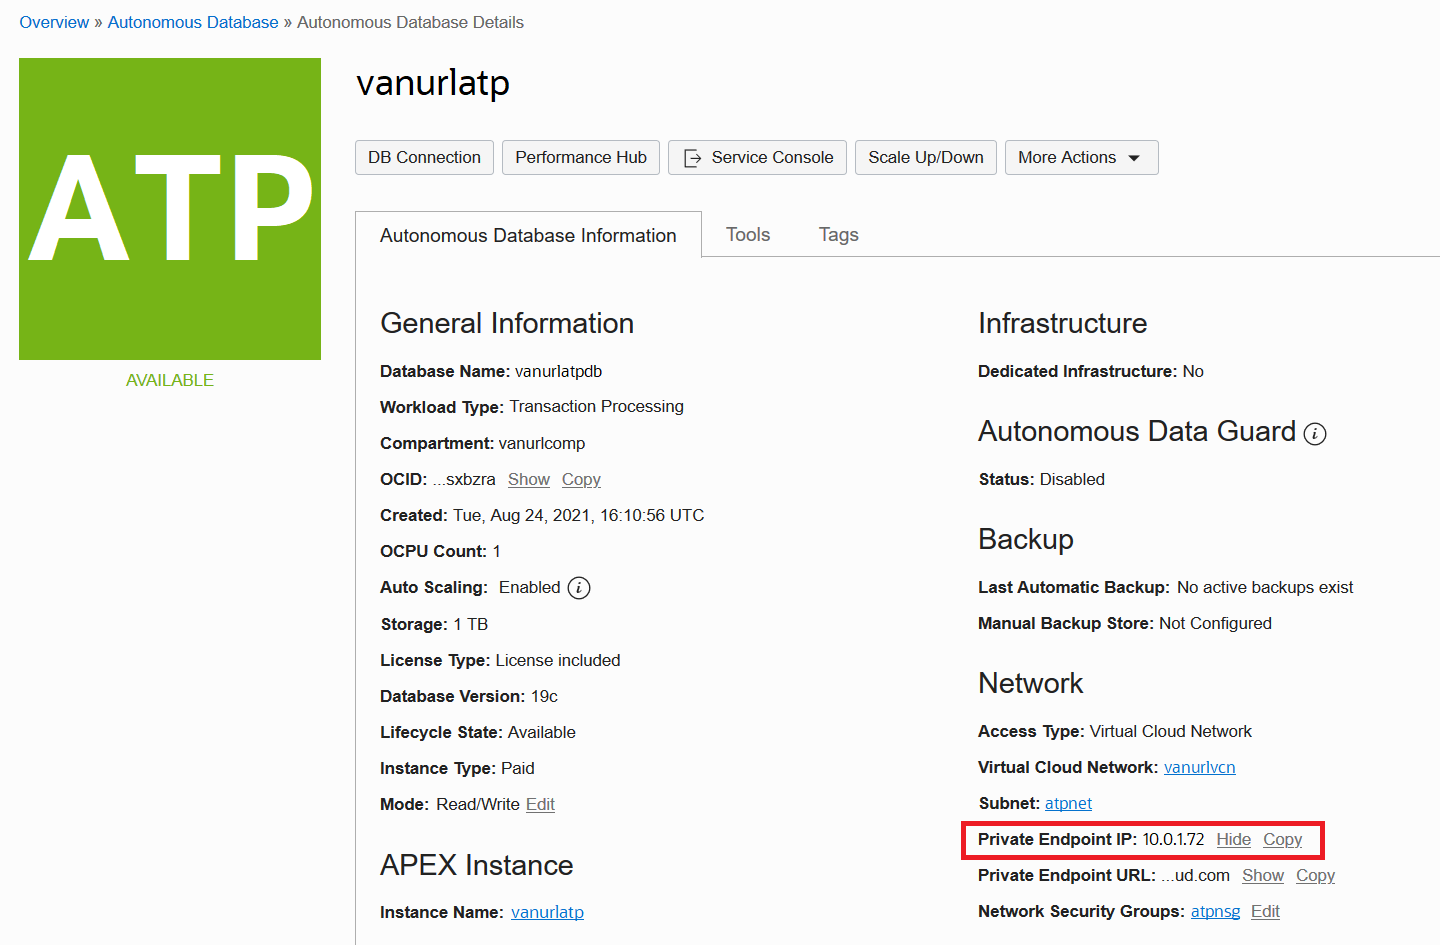
Upon completion, you should have a running ADB that is accessible at a private IP address. Make note of this address because it will be needed later. This blog post will use the sample address 10.0.1.72. You should also have a VCN, Private Subnet, and Network Security Group (NSG) surrounding ADB. Ensure that your NSG includes ingress rules allowing traffic to flow to ADB from the VCN on TCP port 443.
Verify that ADB is accessible in the VCN before proceeding. You can create authorized connections to ADB in your VCN using OCI FastConnect, Bastion, VPN, or similar. See Connecting from Your Data Center to ADB and OCI Bastion Overview for details.
Step 2 – Configure OCI Networking for Load Balancer
Next, create additional resources in your VCN that will be needed by Load Balancer including an Internet Gateway, Route Table, Public Regional Subnet, and Security List. You can refer to OCI Networking Scenario A: Public Subnet for an example of how to set these up. Remember to permit ingress to your Public Regional Subnet on TCP port 443. You can allow ingress from the entire internet (CIDR Block: 0.0.0.0/0) or restrict to specific address ranges of your end users.
Step 3 – Create and Configure Load Balancer
Here you will provision a new Load Balancer within your VCN using the OCI Networking resources from Step #2. You will set up this Load Balancer as described in Load Balancer Management and related documents covering Backend Set, Health Check, Backend, and Listener.
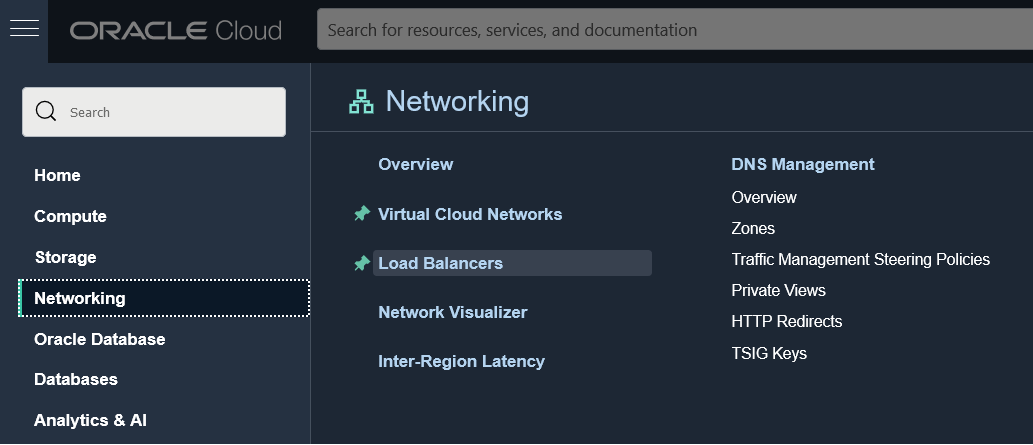
Begin by opening the Services Menu in OCI Console and navigating to Networking > Load Balancers.
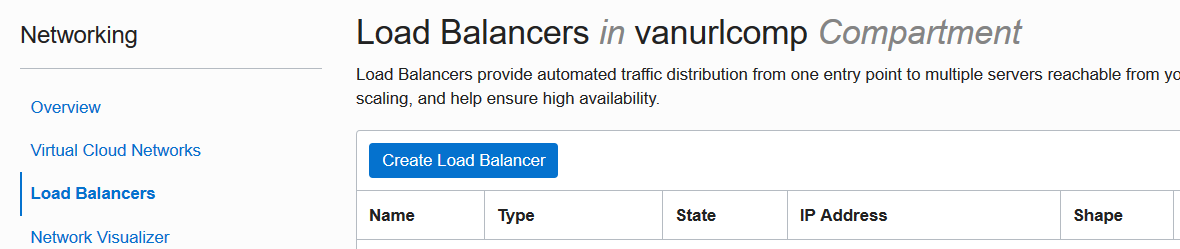
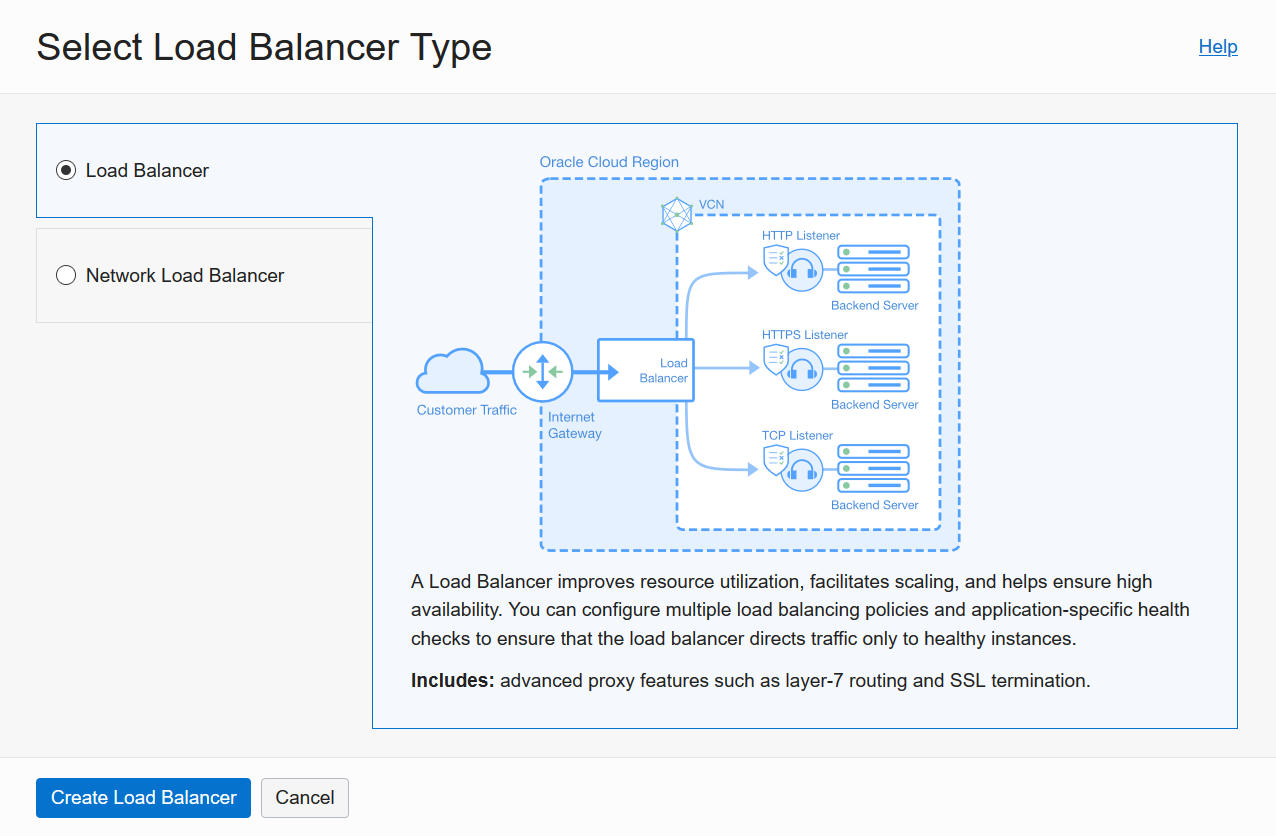
Click Create Load Balancer.
Select the Load Balancer option, which is specifically for creating an HTTP load balancer.
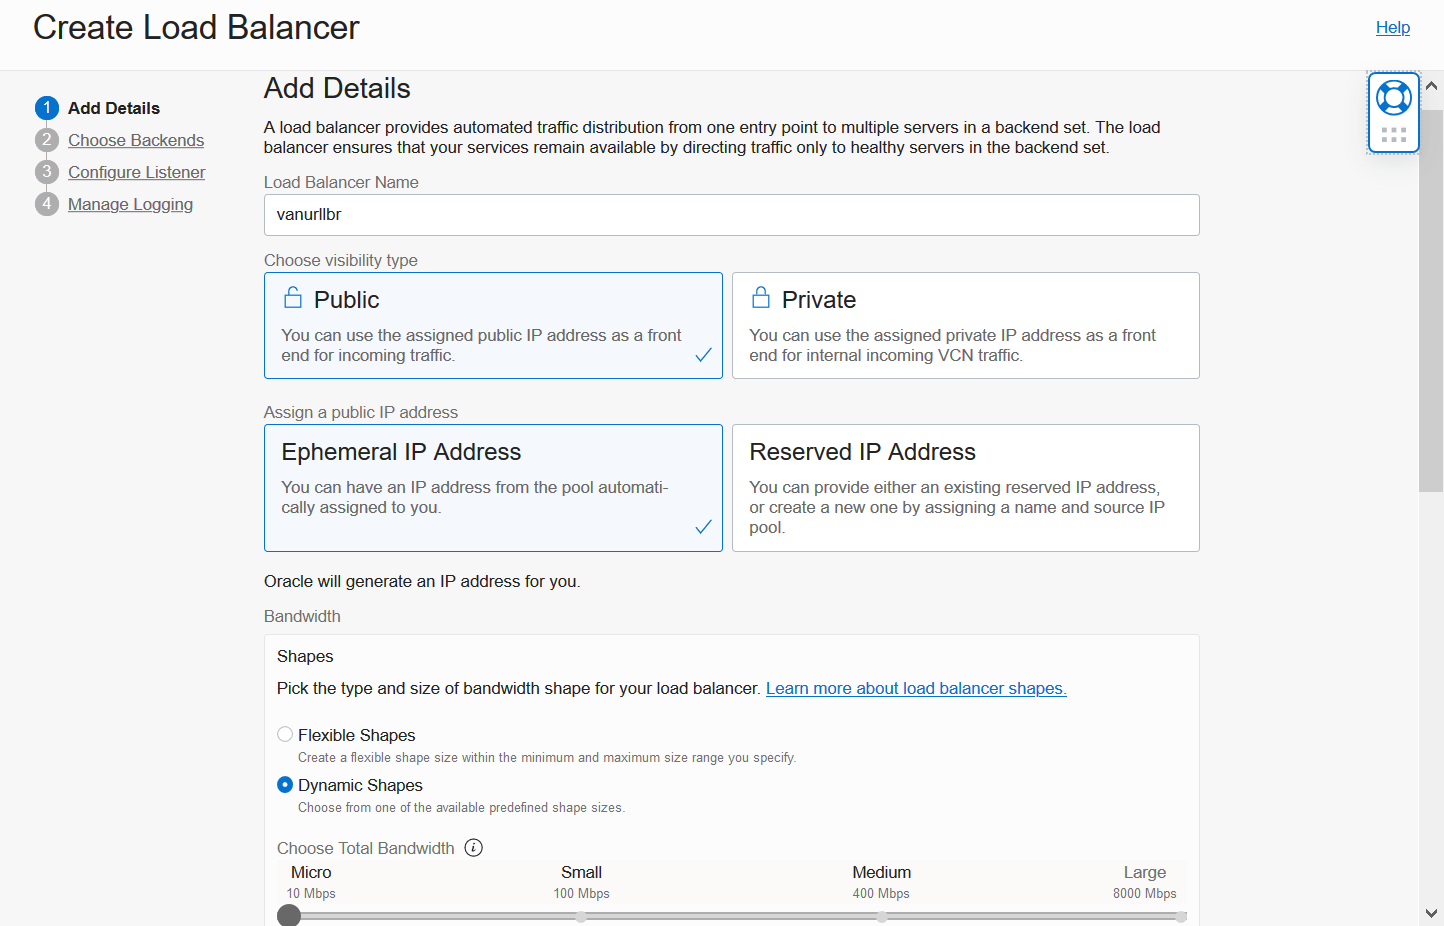
On the Add Details screen, enter a name for your Load Balancer. Select Public visibility and Ephemeral IP Address. Choose your desired Load Balancer shape. Note that you can start with a small Always Free shape as described here.
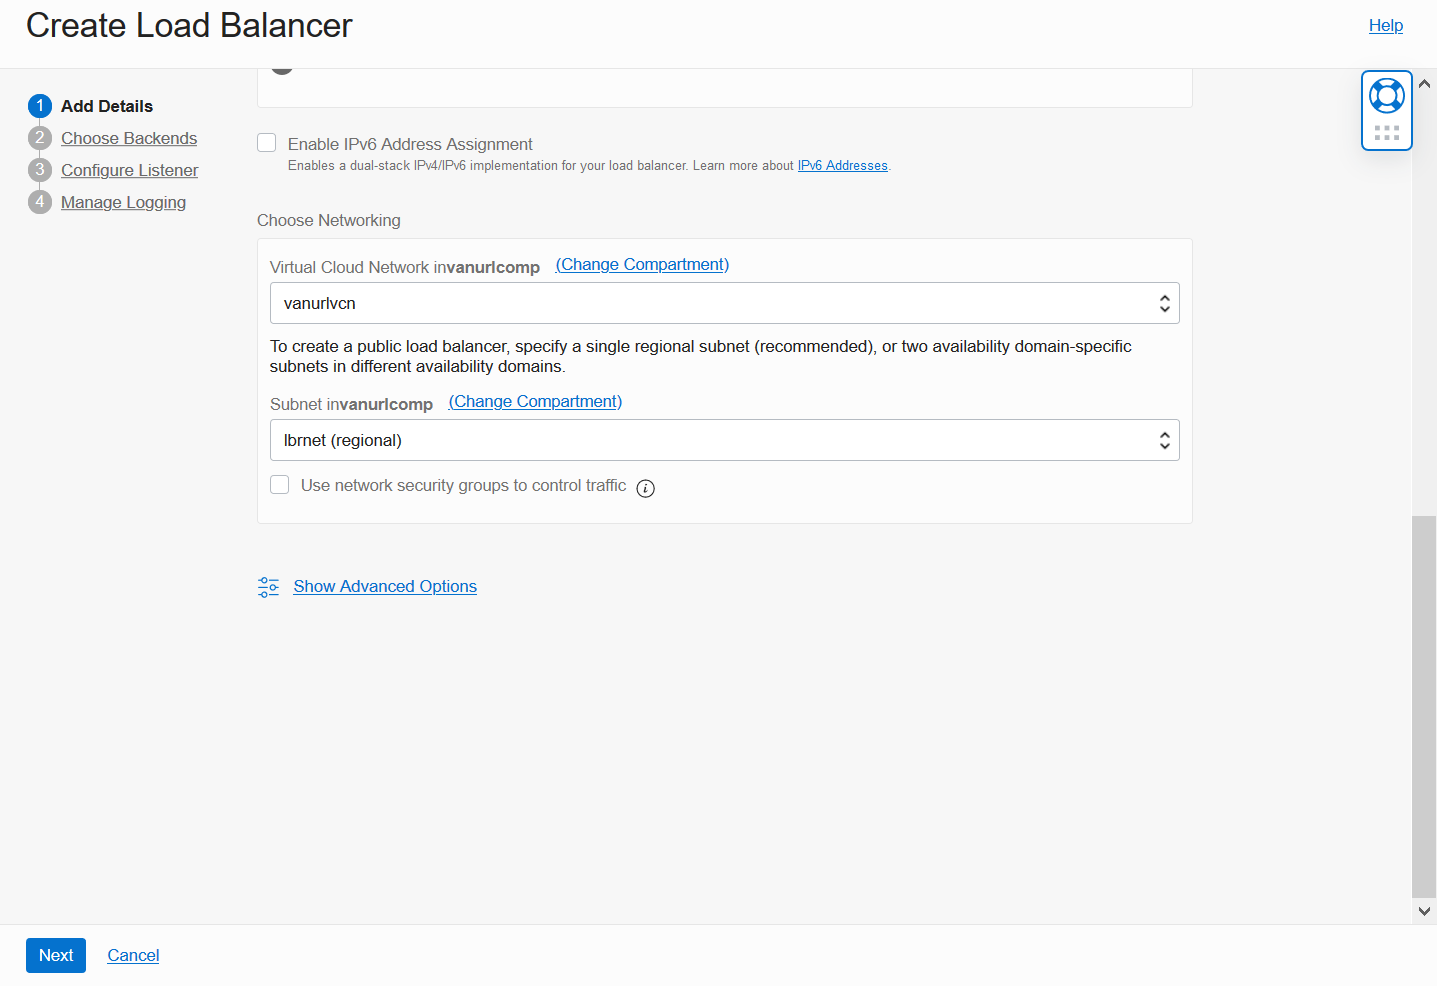
Finish the Add Details screen by selecting your VCN and Public Regional Subnet from Step #2. Click Next to continue.
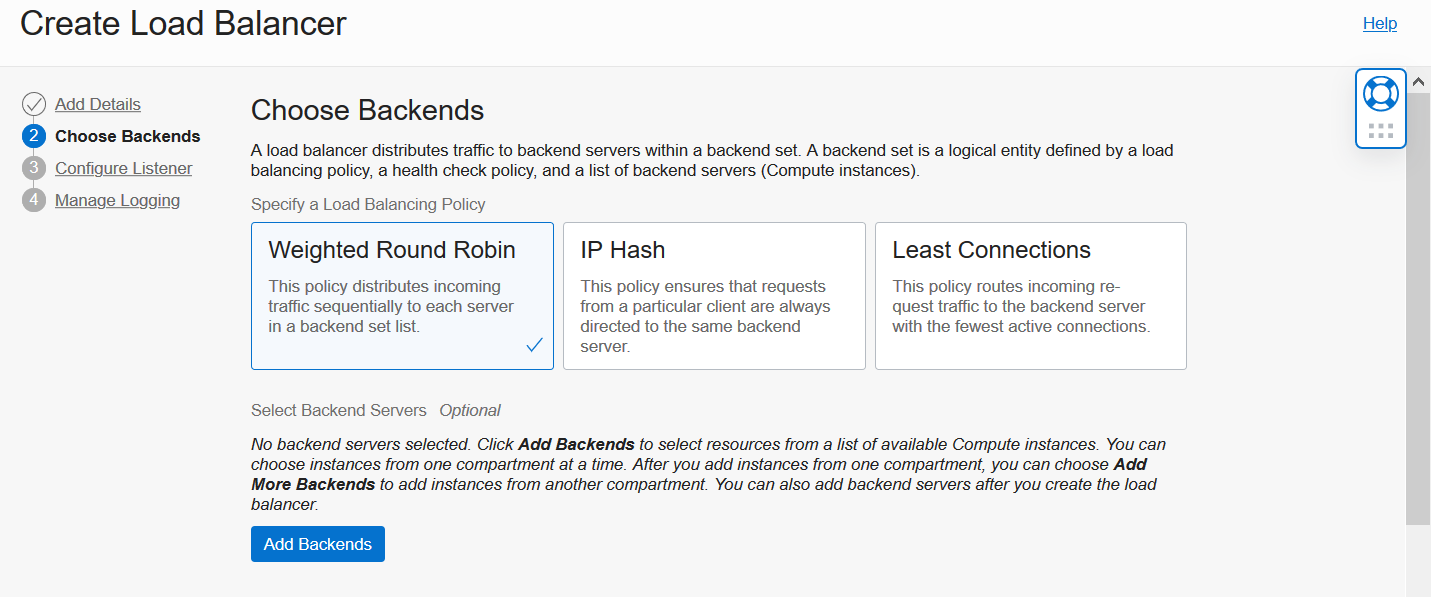
On the Choose Backends screen, accept the default Weighted Round Robin policy, and skip the Select Backend Servers section for now.
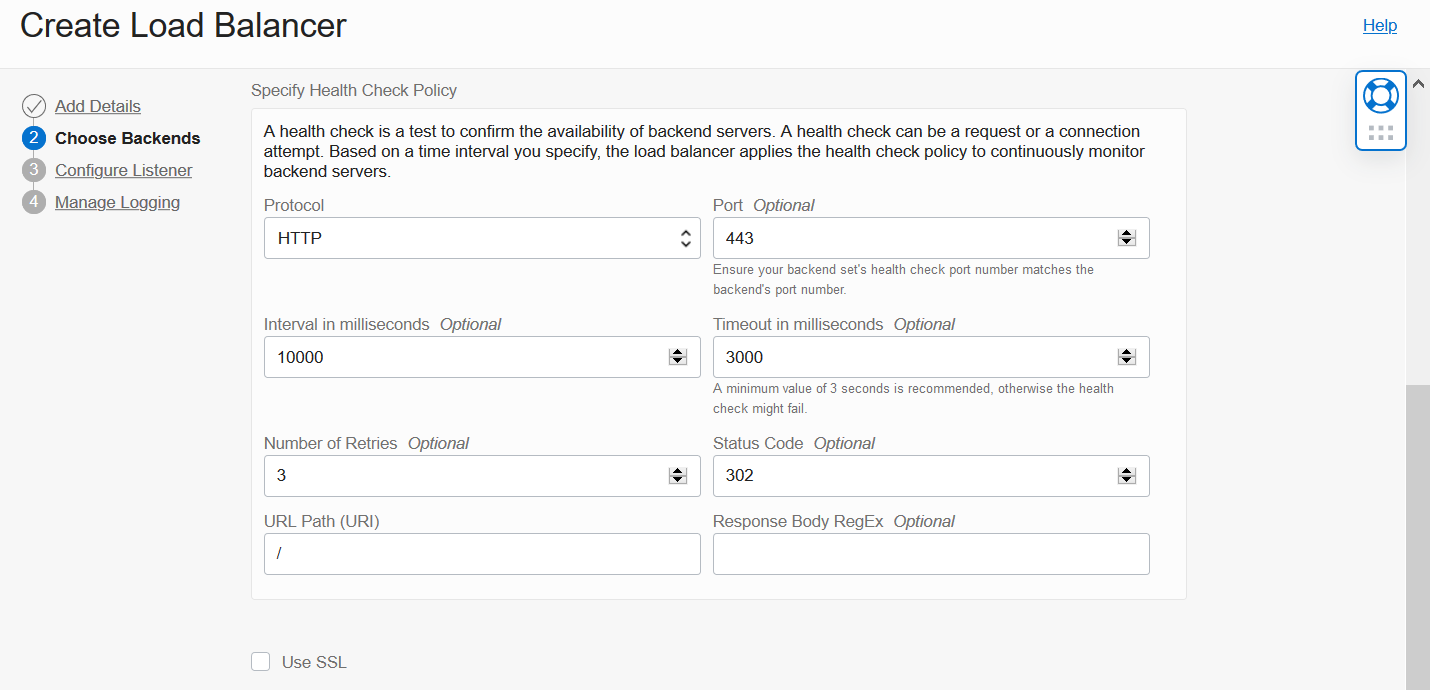
Scroll down in this page to Specify Health Check Policy. Update the default Port to 443 and default Status Code to 302. Skip the Use SSL checkbox for now.
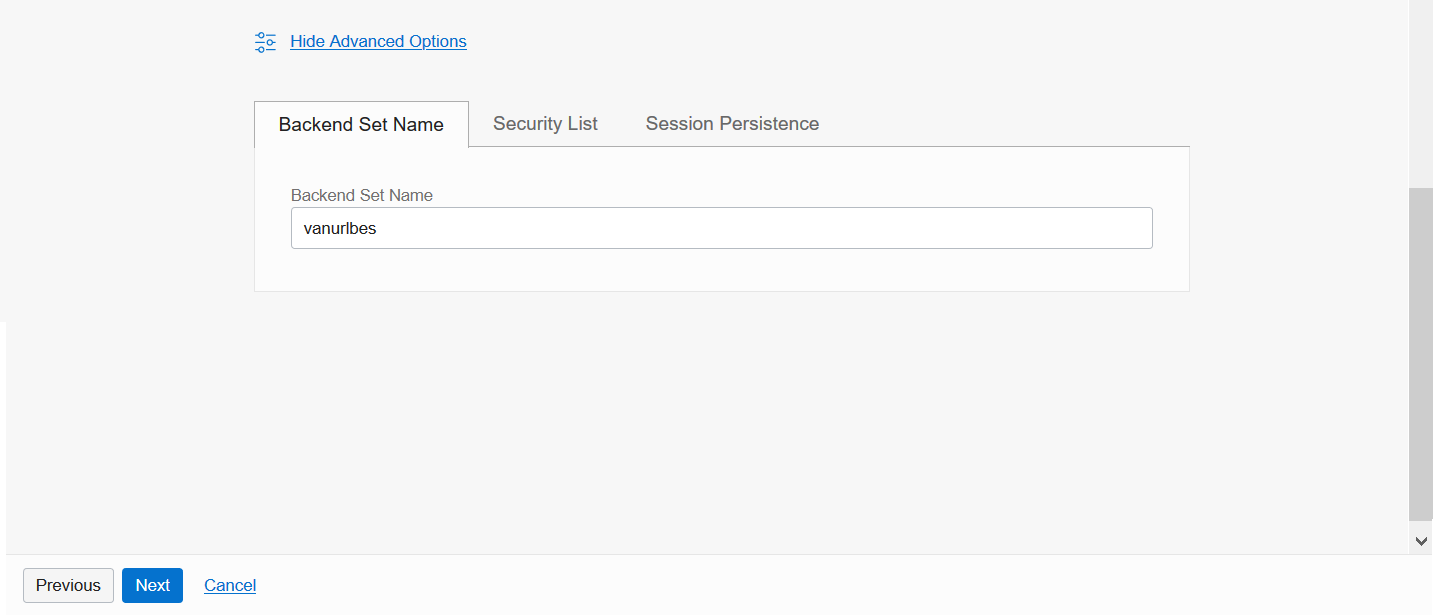
At the bottom of Choose Backends, click Show Advanced Options and enter a Backend Set Name. This creates an empty Backend Set with a name you can easily recognize later. Click Next to continue.
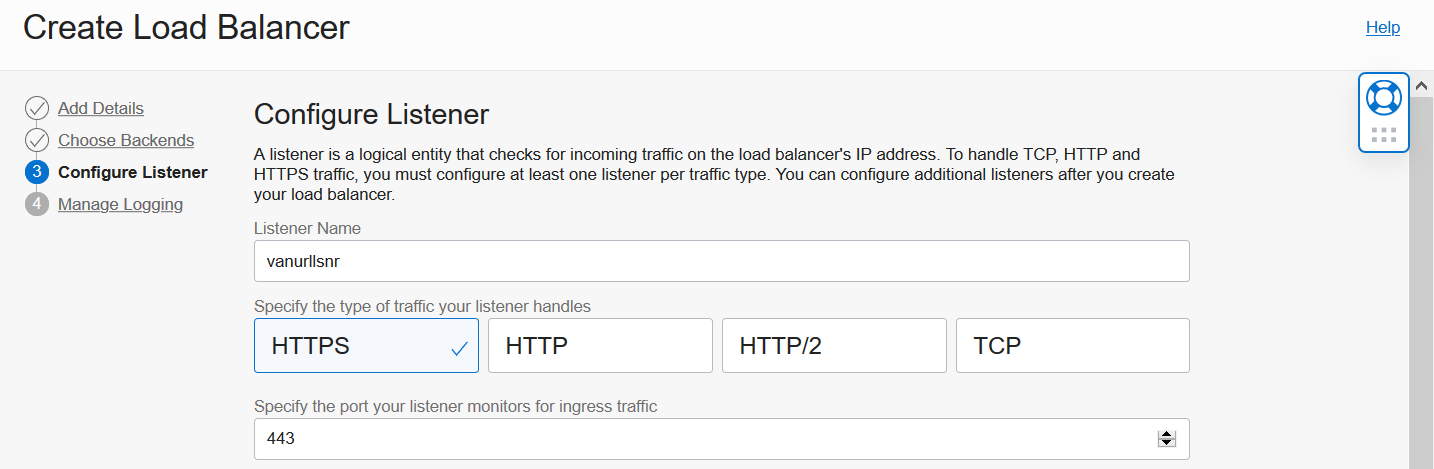
On the Configure Listener screen, enter a name for your Listener, select the HTTPS option, and make sure the Port is set to 443.
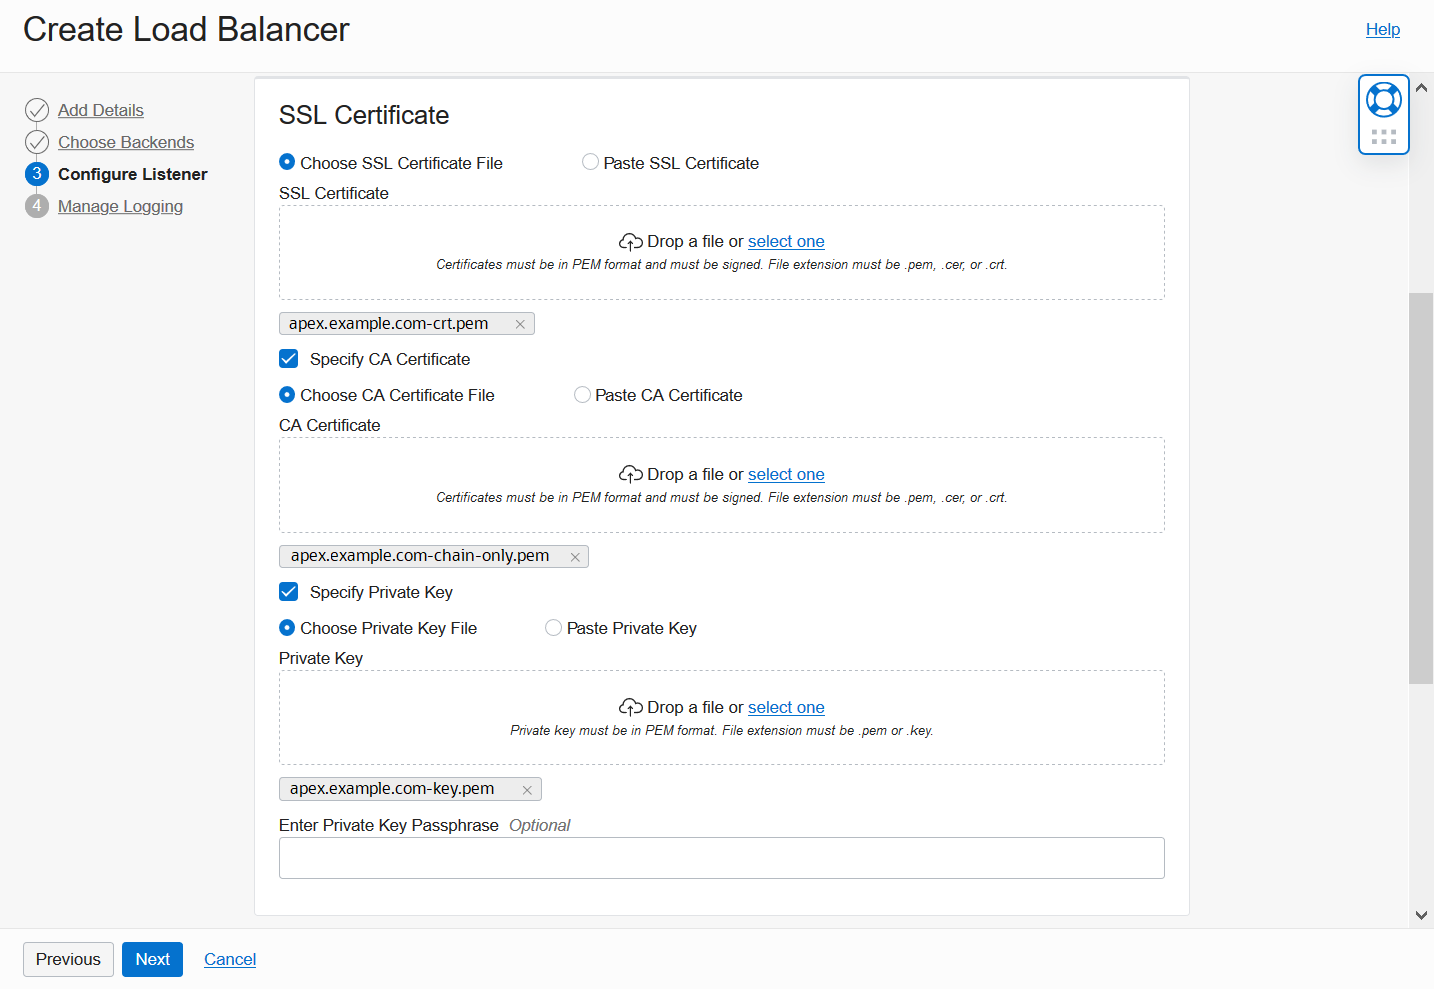
Scroll down in this page to SSL Certificate. Here you will upload a certificate bundle for your vanity domain provided by your Certificate Issuer. Bundles typically include server or leaf SSL Certificate; intermediate or CA Certificate; and Private Key. Click Next after uploading these items.
On the Manage Logging screen, to simplify this demonstration, select to disable Error Logs. Click Submit to continue.

It will take a few minutes for your Load Balancer to provision. Upon completion, you will see a Load Balancer Details screen similar to the one shown below that indicates Load Balancer is running. Make note of your Load Balancer’s public IP address, which in our example is 203.0.113.15. Notice that Backend Sets Health and Overall Health initially are displayed as Incomplete – this is expected.
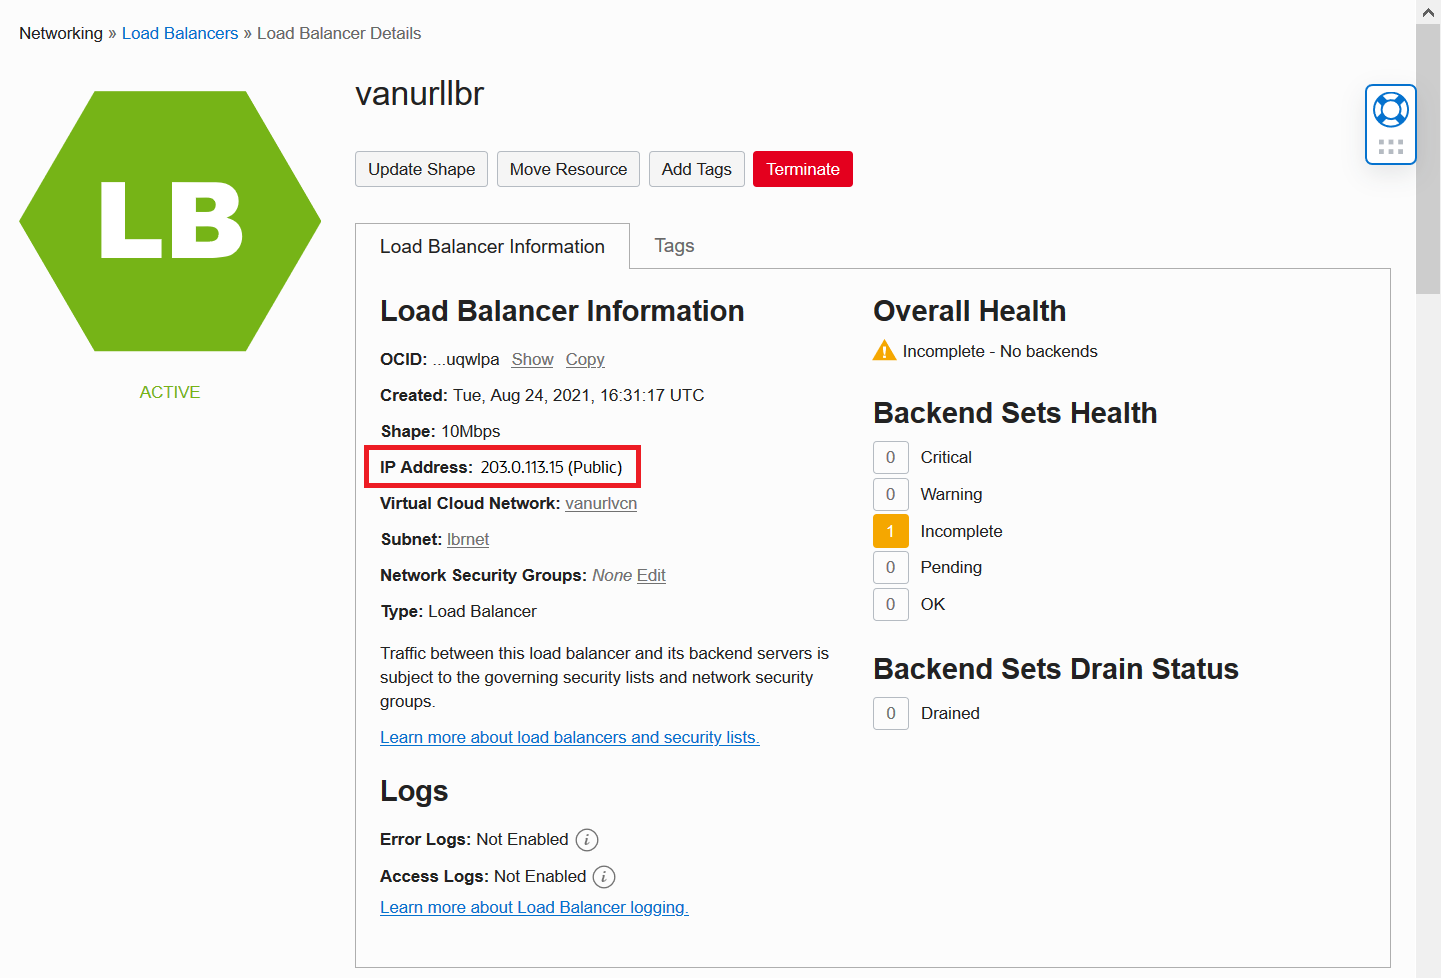
Scroll down in this page to Resources. Click the Backend Sets link and drill into your empty Backend Set.
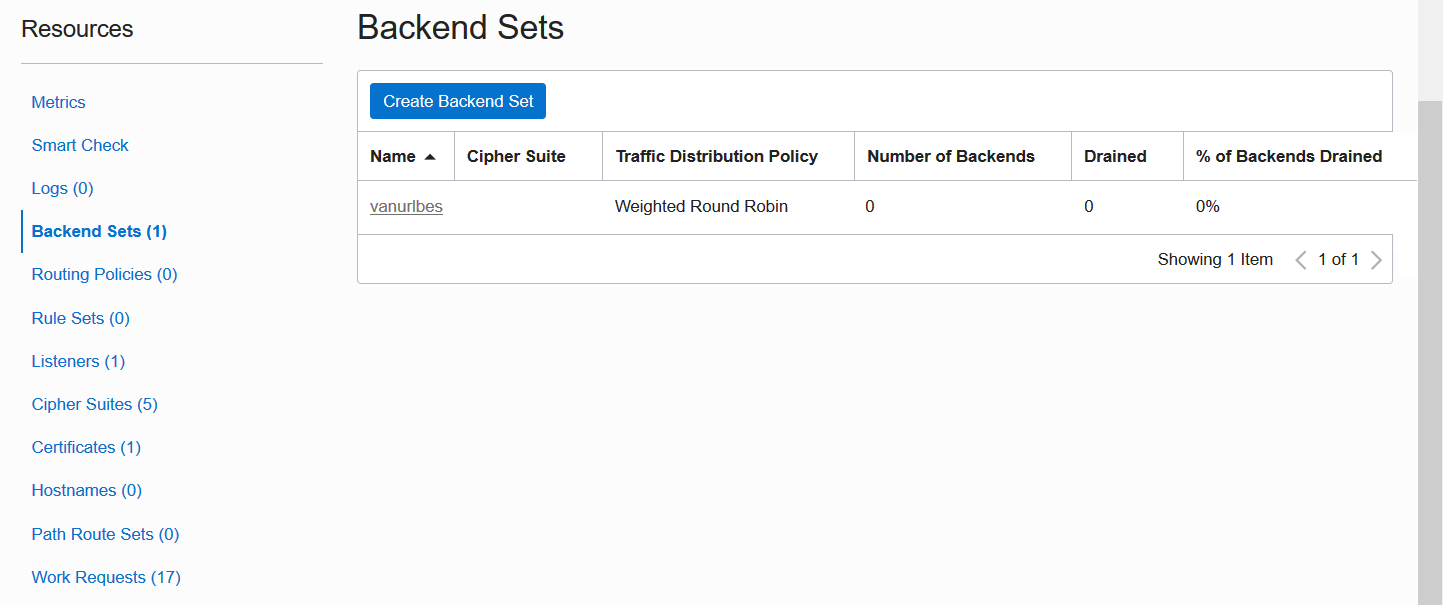
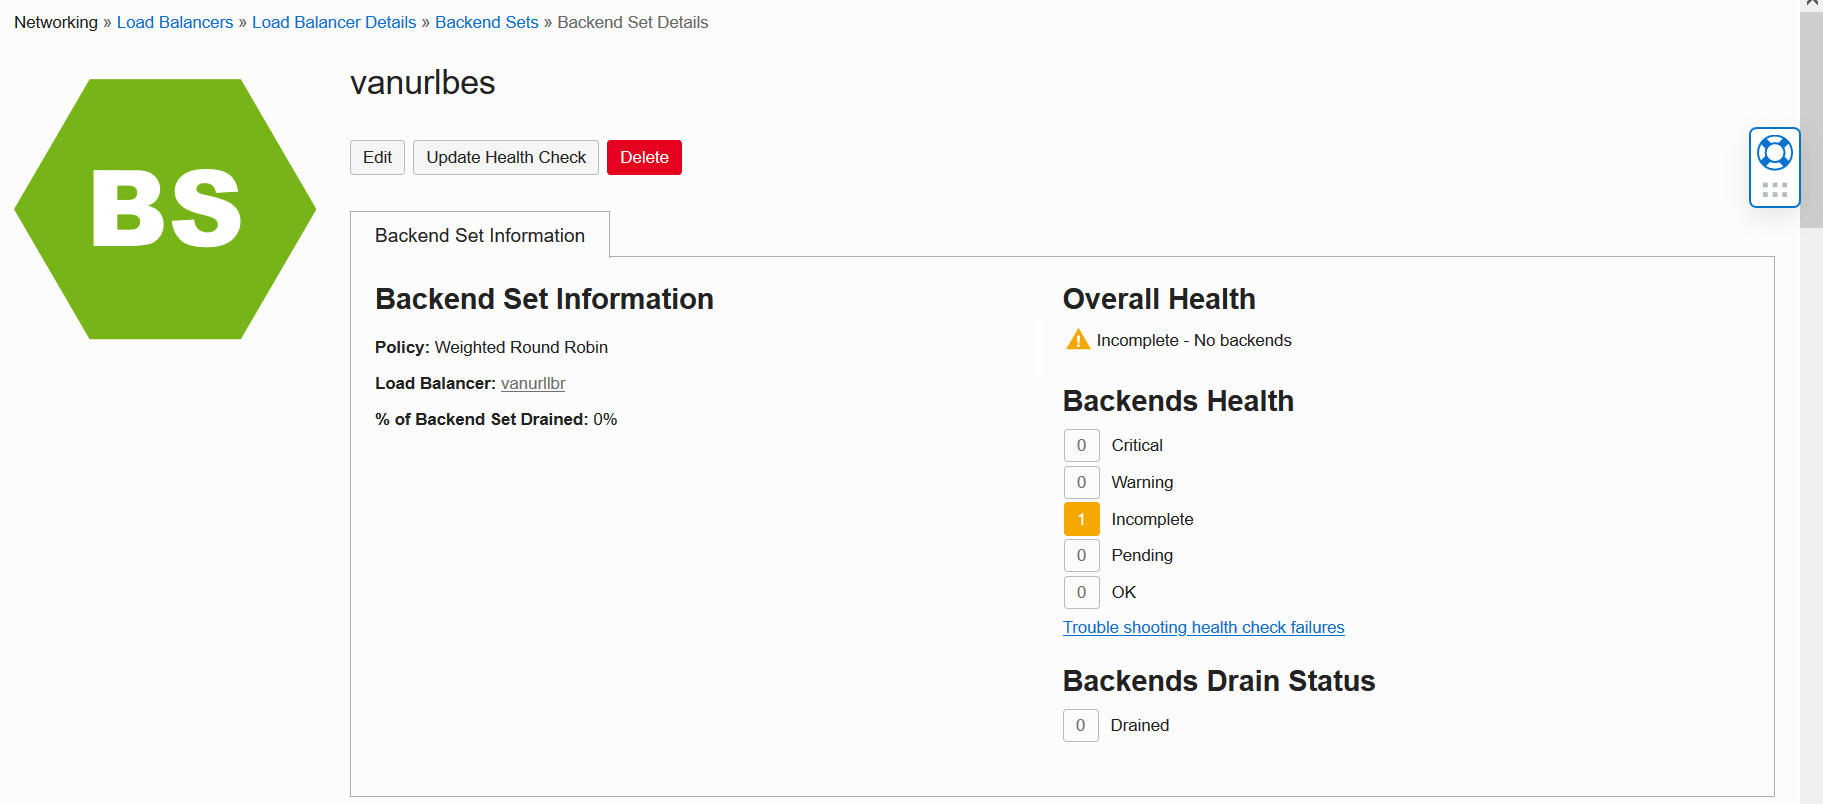
On the Backend Set Details screen, locate Edit near the top. Click this button to continue.
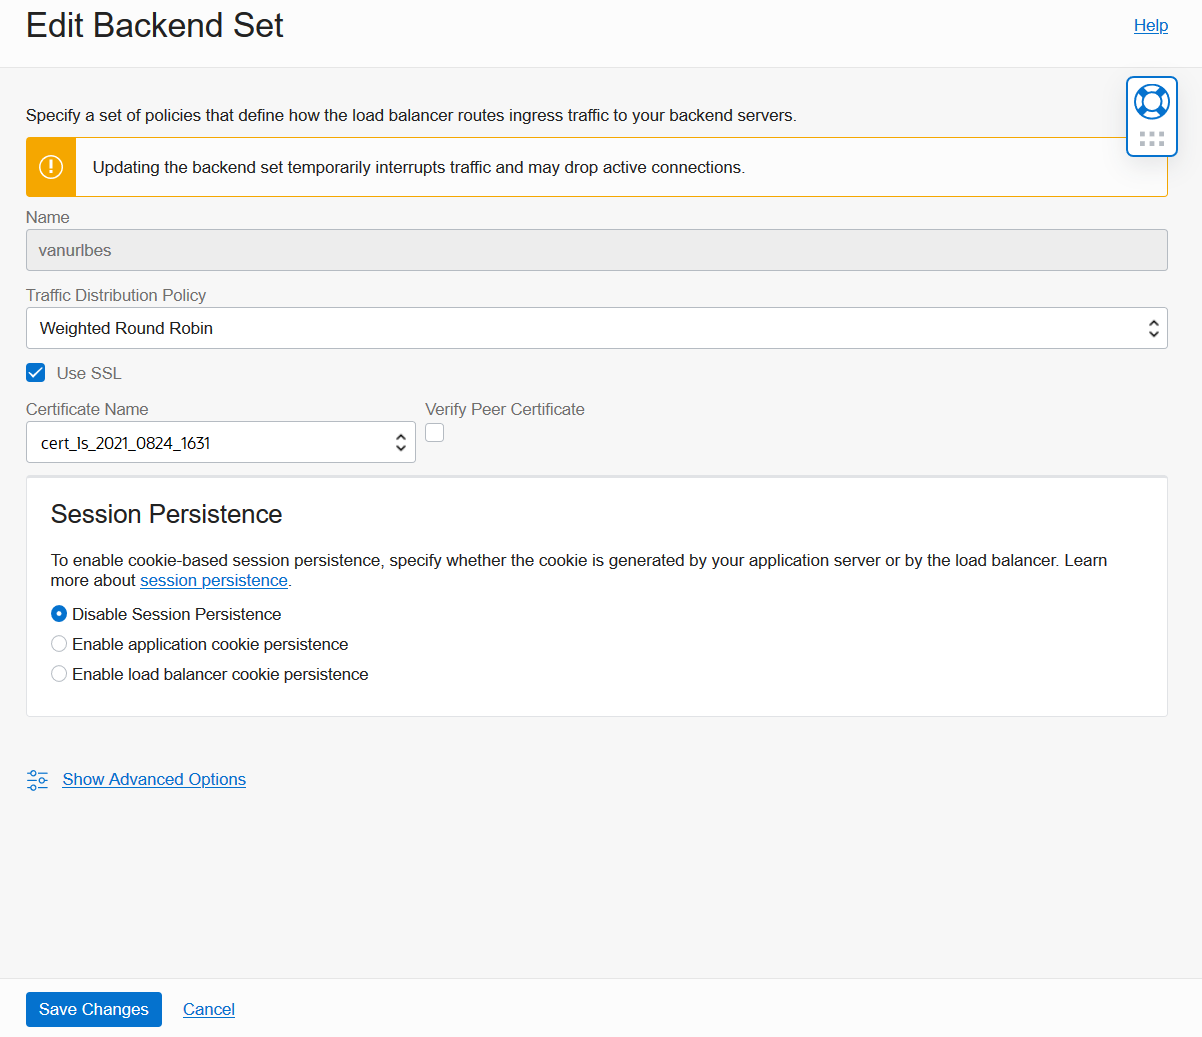
Here we will set up SSL for the Backend Set. Start by checking the box Use SSL to ensure that communications between your Load Balancer and ADB are encrypted. Under Certificate Name, you can select the same certificate bundle used for your Listener. This is because Load Balancer will implicitly trust the server certificate presented by ADB. Click Save Changes when done.
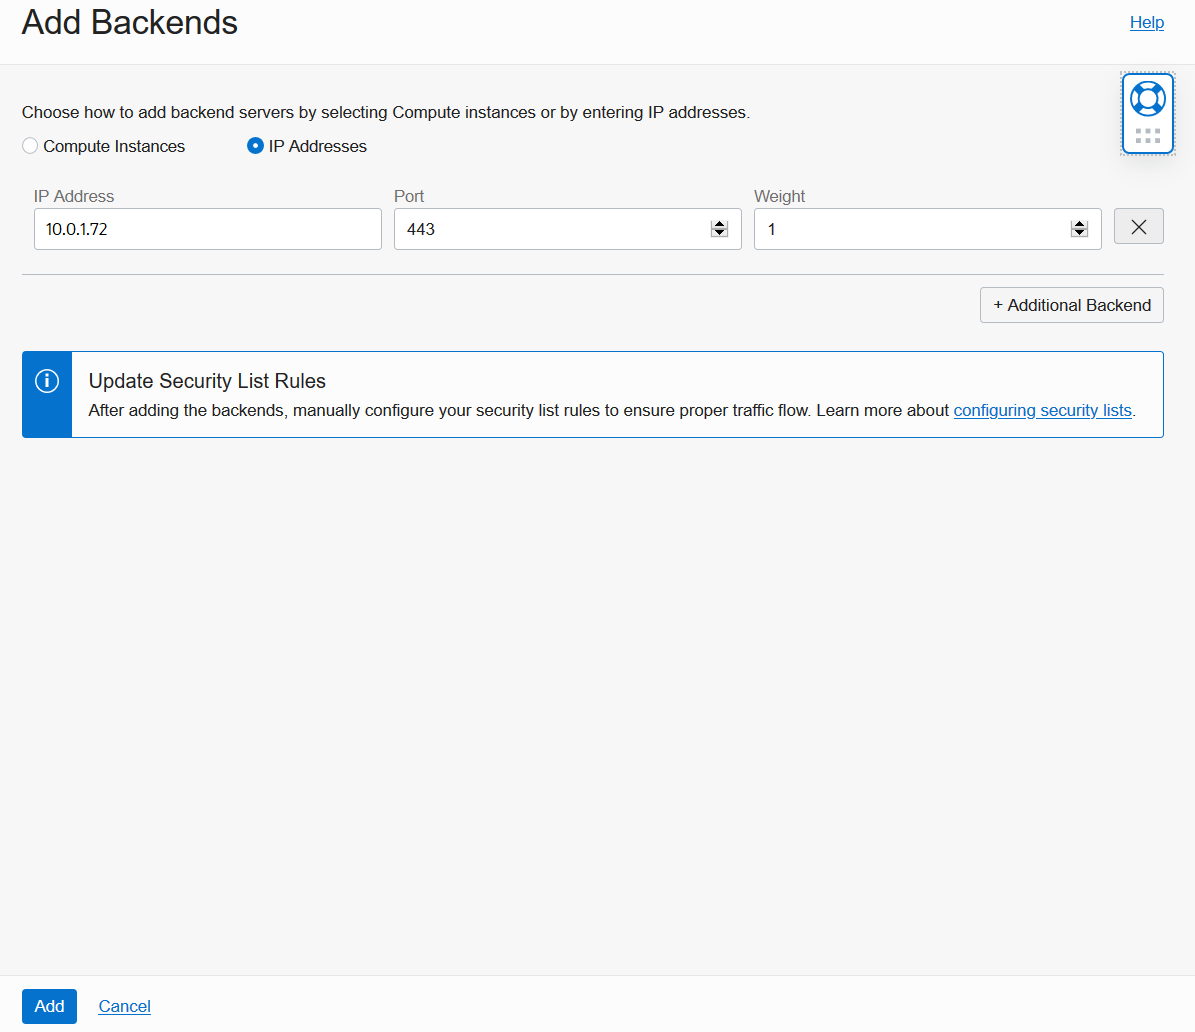
Back on the Backend Set Details screen, scroll down to Resources. Click the Backends link. Notice that that no Backends have been added to your Backend Set yet. Click Add Backends.

On the Add Backends screen, select the IP Addresses option. Enter the private IP address of your ADB. In our example, we enter the address 10.0.1.72 from Step #1. Update the Port to 443, then click Add to finish. You are done creating and configuring a Load Balancer.
Lastly, back on the Backend Set Details screen, verify that Backends Health and Overall Health soon turn to OK. This indicates that Load Balancer is successfully communicating with your backend ADB. Once you see green text saying OK, proceed to the next step.
Step 4 – Configure DNS for Vanity URL
Go to your preferred DNS provider and create an “A” record to map your custom domain name to your Load Balancer’s public IP address. In our example, we create an A record that maps the name apex.example.com to the public IP address 203.0.113.15 from Step #3.
Step 5 – Verify New Vanity URL
On your PC, open a web browser and navigate to the Vanity URL using HTTPS protocol. In our example, we open https://apex.example.com. Verify that APEX is reachable at this address. You should see the APEX Create Workspace page on first use.
Congratulations, you now have a working Vanity URL for APEX and ORDS on Oracle Autonomous Database! After creating an APEX Workspace, you will be able to access end-user applications and developer tools such as APEX App Builder using your custom domain name. You also will be able to access Database Actions at this domain.
Conclusion
A Vanity URL or custom domain name makes your application location more memorable and promotes your brand identity. It is now possible to configure a Vanity URL for APEX and ORDS on Oracle Autonomous Database using standard Oracle-managed OCI services. Once you have a domain name and matching SSL/TLS certificate, all you need to do is set up ADB with a Private Endpoint, configure OCI Networking settings, create a Load Balancer, and point the domain to your new public IP address.
Although this blog post shows one specific Vanity URL configuration, there are many ways this configuration can be adapted and extended. For example, you can optionally restrict access to APEX developer and administrator tools at your Vanity URL. To learn more about that, proceed to the next article in this blog series here.
* * * * * * * * * * * * *
For a live demonstration of configuring a Vanity URL on ADB, see this APEX Office Hours recording on YouTube:
Navigation Links for This Blog Series
Introducing Vanity URLs for APEX and ORDS on Oracle Autonomous Database
ADB Vanity URLs Part 2: Blocking APEX Developer and Administrator Tools
ADB Vanity URLs Part 3: Blocking ORDS-Provided Developer and Administrator Tools
ADB Vanity URLs Part 4: Multiple Domain Names