Oracle APEX makes it easy to integrate with any enterprise Identity Provider (IdP) using OpenID Connect (OIDC) for Single Sign-on. After users can sign in successfully, the next common requirement is authorization – using the user’s IdP group or role membership to determine what they should access inside the APEX application.
This blog shows how to:
- Configure Okta authentication for Oracle APEX (OIDC via Social Sign-In)
- Retrieve Okta groups during login
- Map those role memberships to APEX dynamic groups
- Use those dynamic groups in authorization schemes
What you will build
- An Okta OIDC App Integration for your APEX application
- An APEX Social Sign-In authentication scheme (OIDC discovery-based)
- A post-authentication procedure in APEX to enable dynamic groups
- Authorization schemes based on Okta groups to secure APEX functionality
Prerequisites
- Oracle APEX application (APEX 21.x+ recommended; works with newer versions)
- Okta tenant with admin access and ability to create:
- Okta OIDC application
- Okta groups and user assignments
Step 1: Okta tenant setup (users + groups)
- Sign in to the Okta Admin Console.
- Add or verify users:
- Navigate to Directory → People
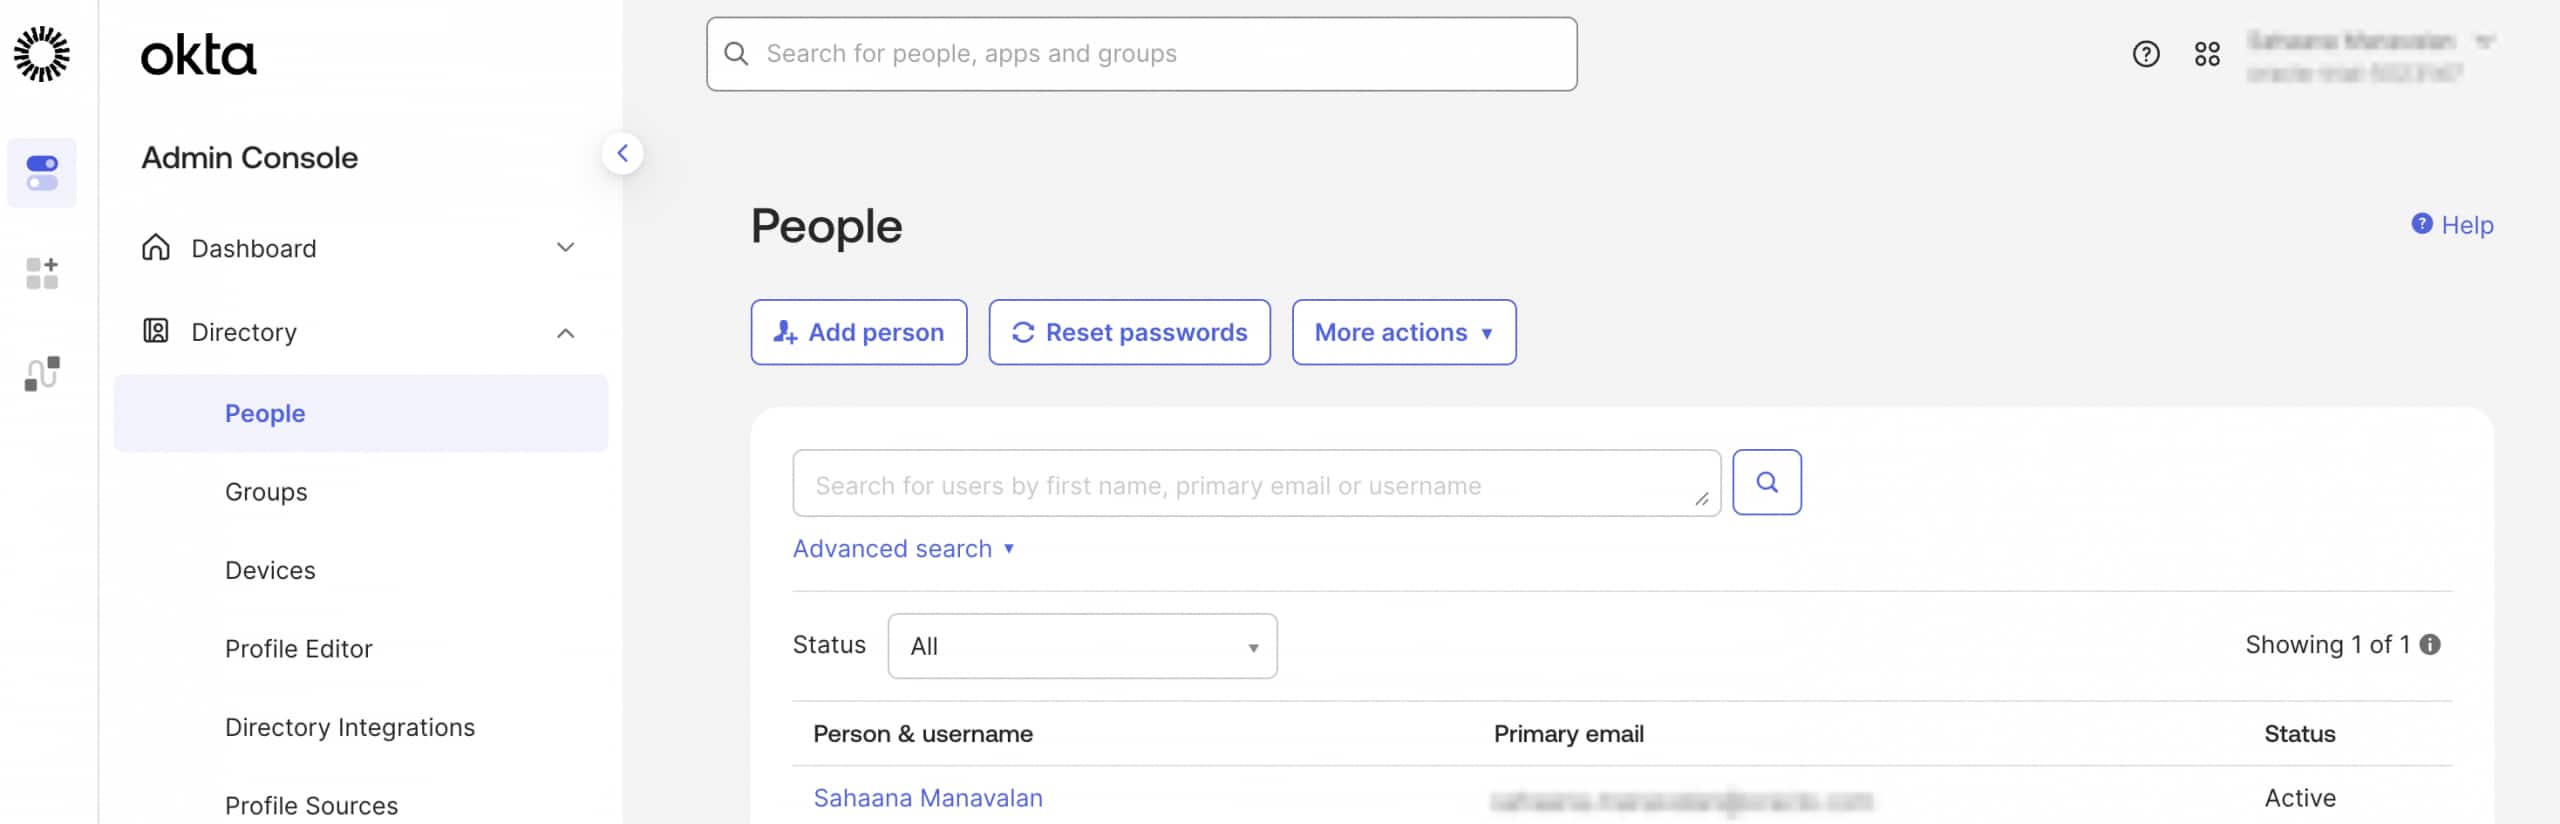

- Navigate to Directory → People
- Create or reuse groups:
- Navigate to Directory → Groups → Add Group
- Example groups:
Managers,Employees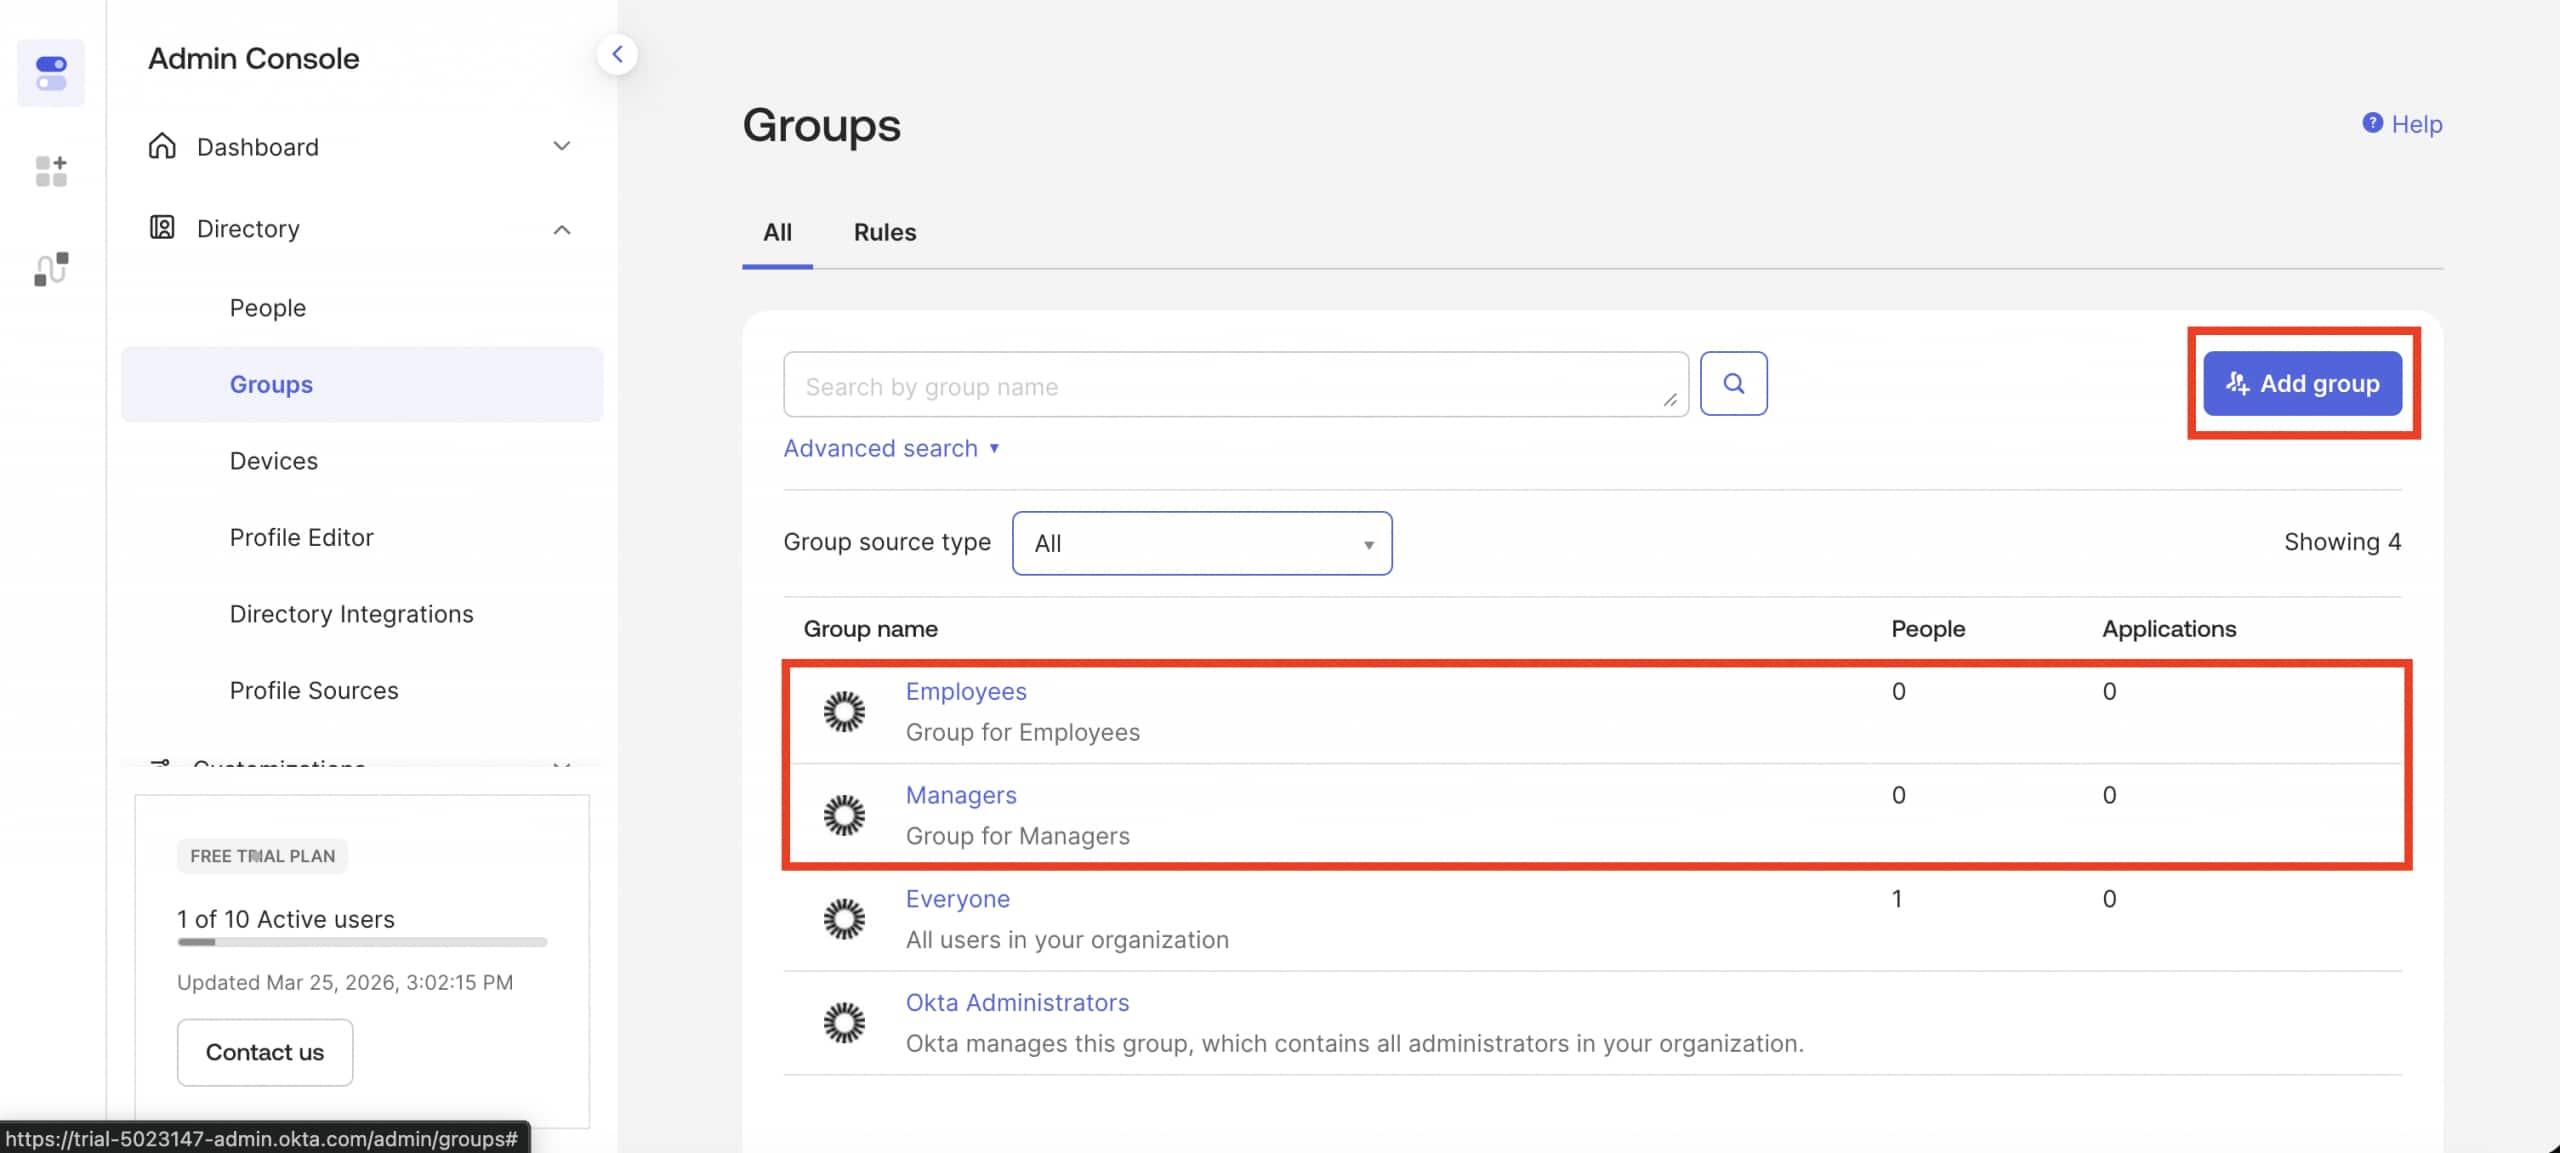
- Assign users to groups:
- Open the group (for example,
Managers) - Click on Assign People → select users → Assign
- Repeat these steps for the
Employees
- Open the group (for example,

Step 2: Create an Okta OIDC App Integration
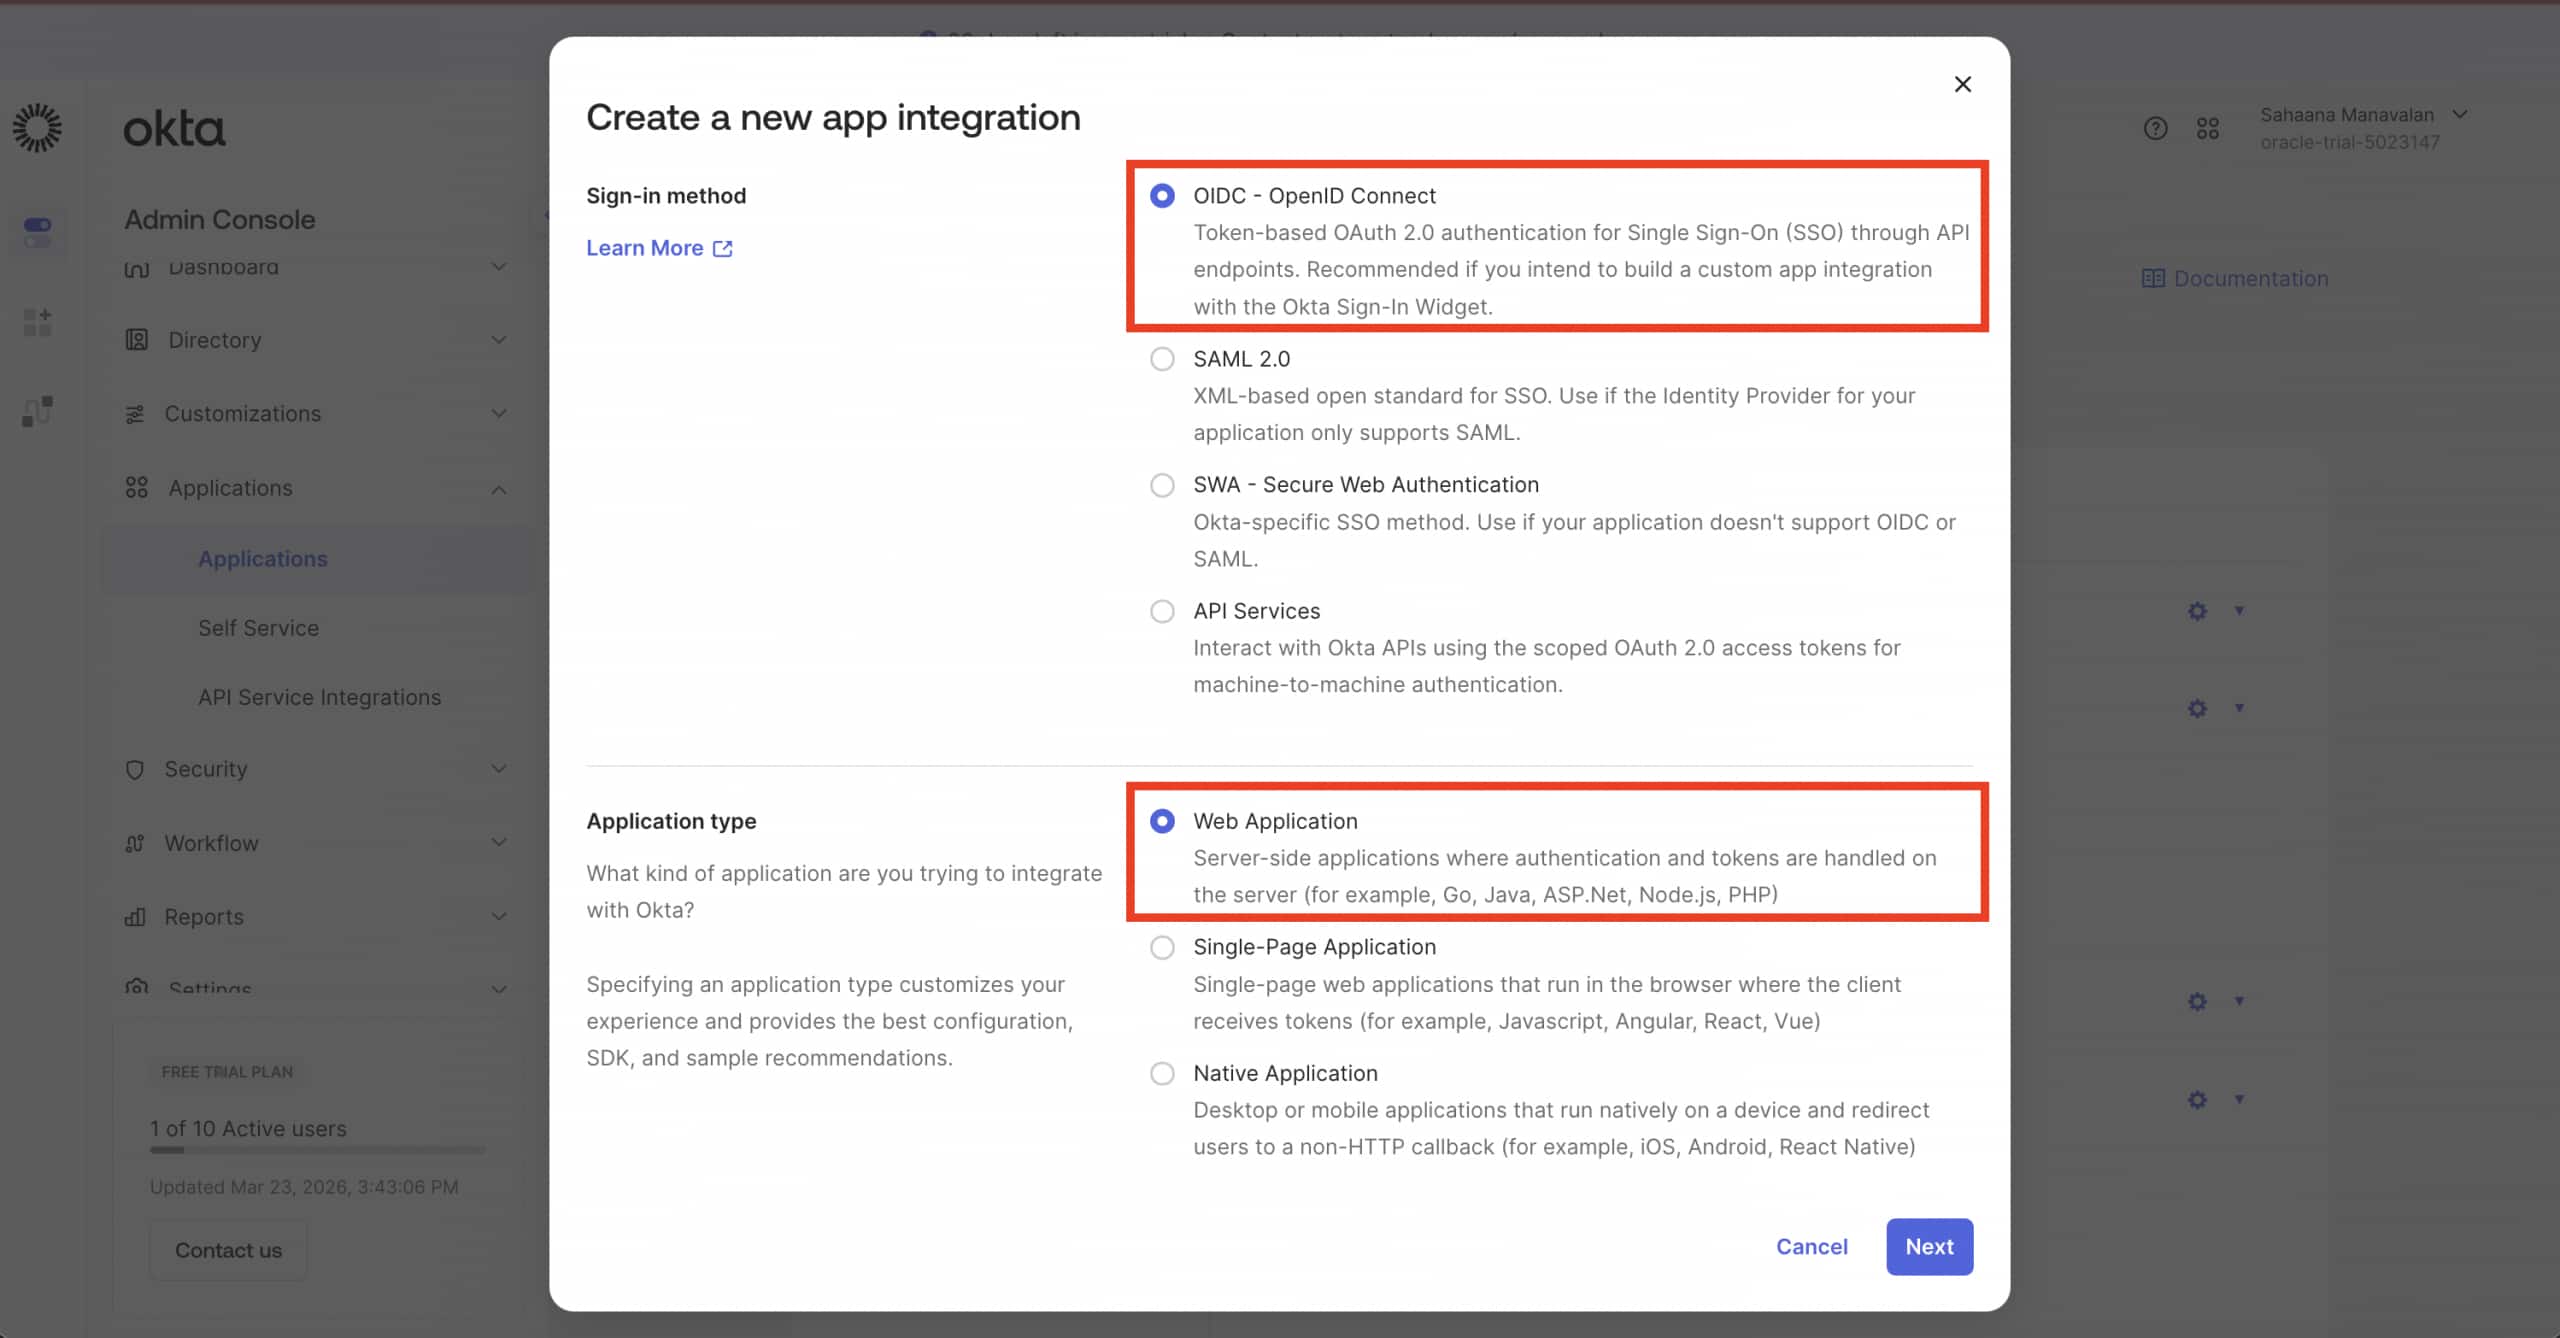
- Go to Applications → Applications → Create App Integration
- Choose:
- Sign-in Method: OIDC – OpenID Connect
- Application Type: Web Application
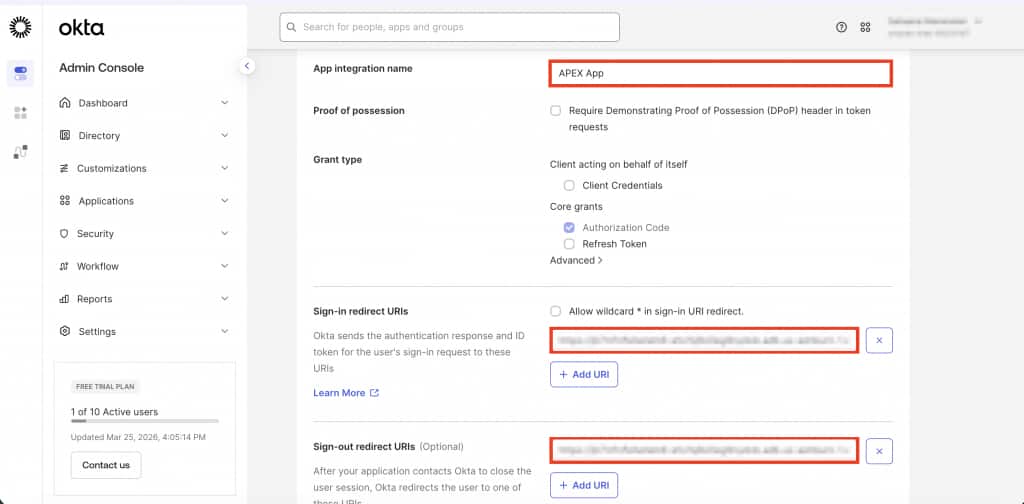
- Set:
- App Integration Name:
APEX App - Click Next
- App Integration Name:
2.1 Configure redirect URIs
The redirect URI tells Okta where to send users after a successful sign-in. This must point to your APEX callback URL.
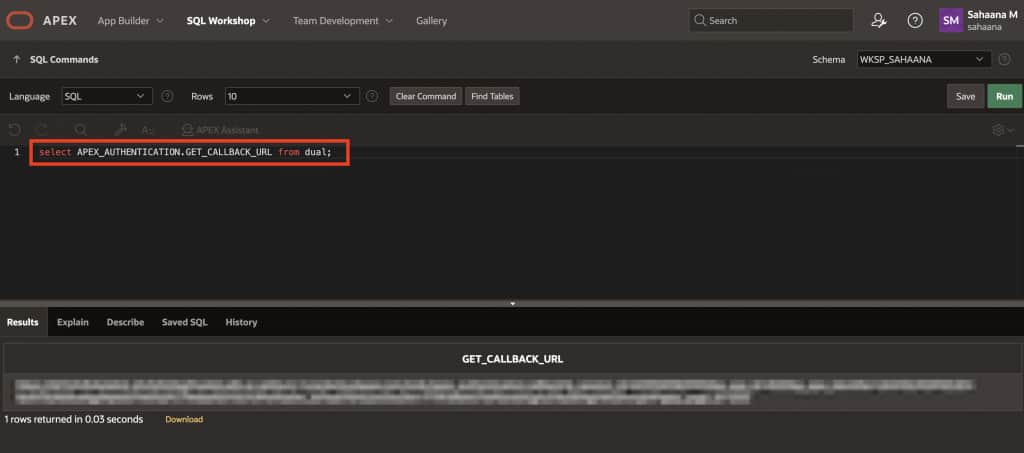
To retrieve it, run the following in APEX → SQL Workshop:
select APEX_AUTHENTICATION.GET_CALLBACK_URL from dual;Copy the returned URL up to the callback path, for example:
https://yourdomain.example.com/ords/apex_authentication.callback
Add it to Okta:
- Sign-in redirect URIs: paste the callback URL
2.2 Configure logout redirect URI
This is where Okta sends users after they sign out. It can be any URL registered in your Okta app – but for a seamless experience, for now point it back to your APEX application’s home.
Example format:
https://hostname/ords/r/<path_prefix>/<app_alias>/<page_alias>
Example:
https://example.adb.oraclecloud.com/ords/r/hr/hr-app/home
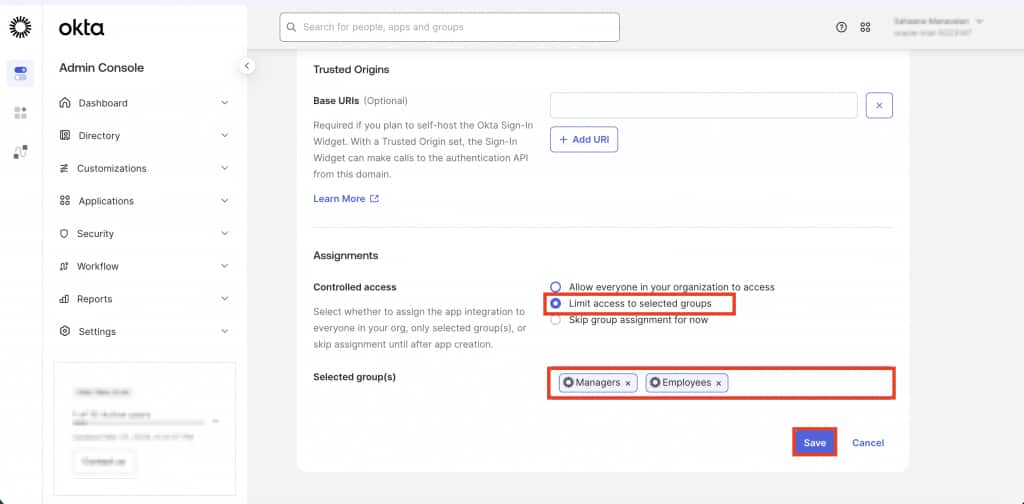
2.3 Restrict access to selected groups
- Controlled access: Limit access to selected groups
- Select:
Managers,Employees(or your required groups) - Click Save.
- Select:
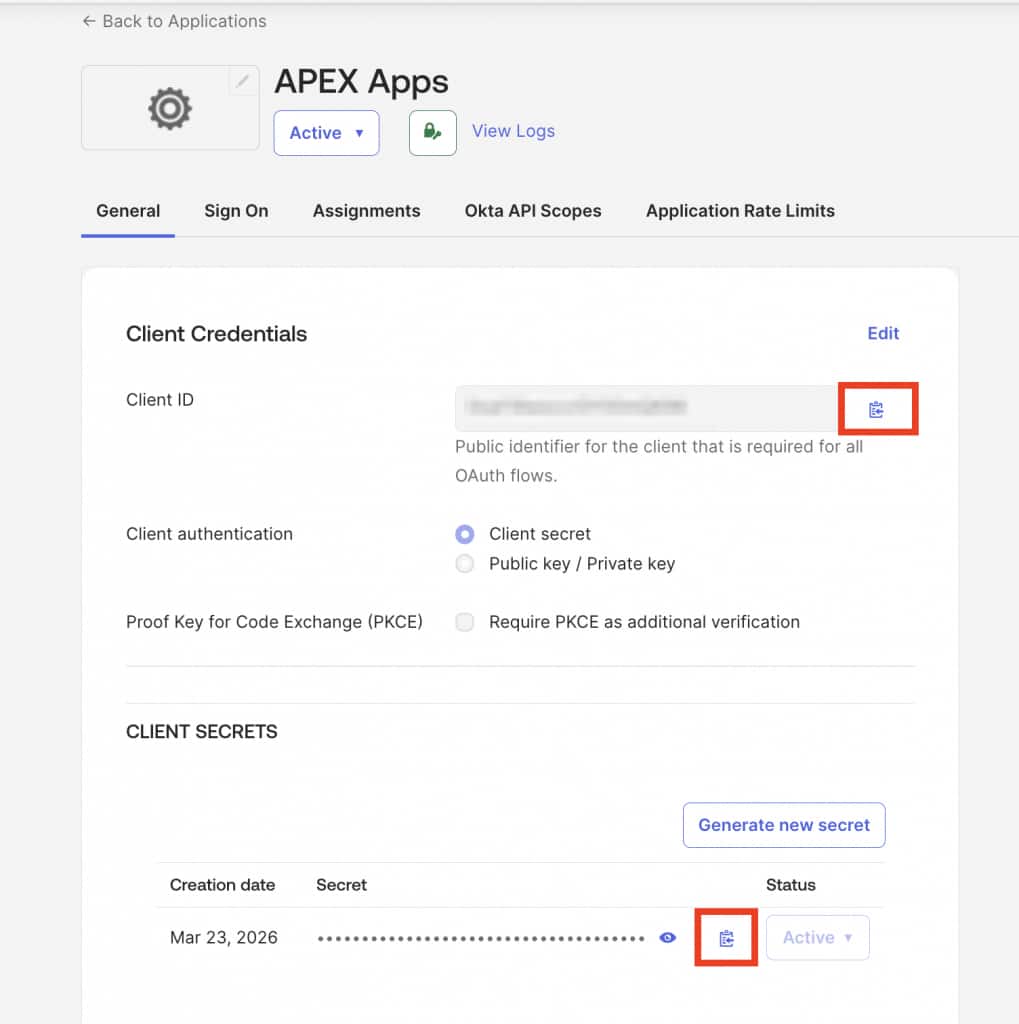
2.4 Capture client credentials
Save the generated:
- Client ID
- Client Secret
Step 3: Add an Okta user attribute to return group membership
By default, Okta doesn’t include group membership in the user profile returned to your app. This step creates a custom attribute to hold the user’s group names and maps it so APEX can read it during login.
- Go to Directory → Profile Editor
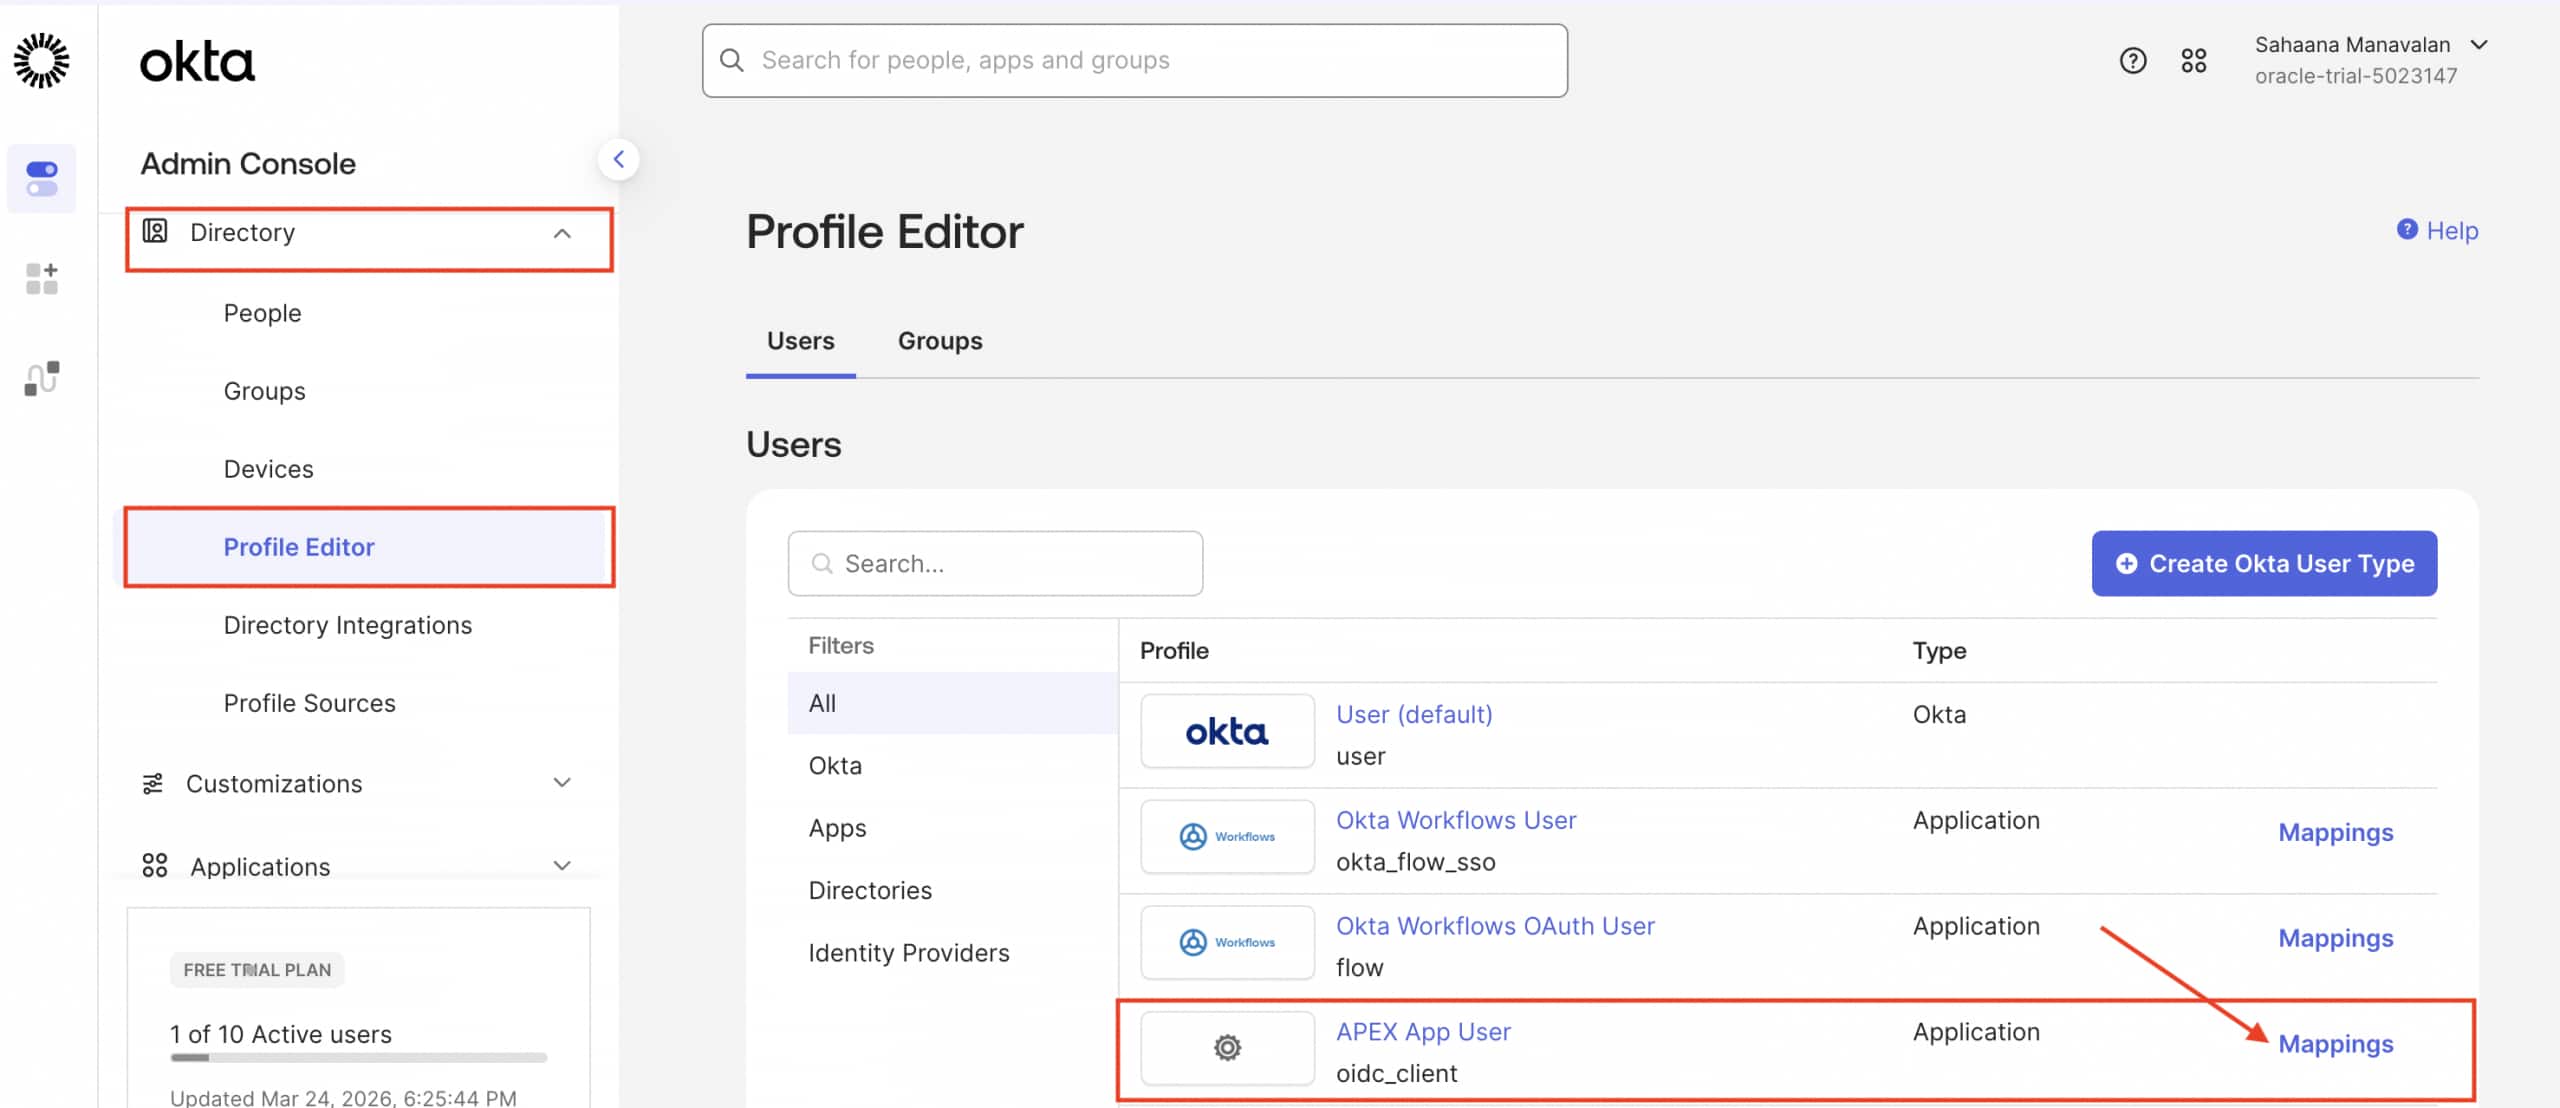
- Select the profile used for your app (for example: APEX App User) and click Add Attribute.
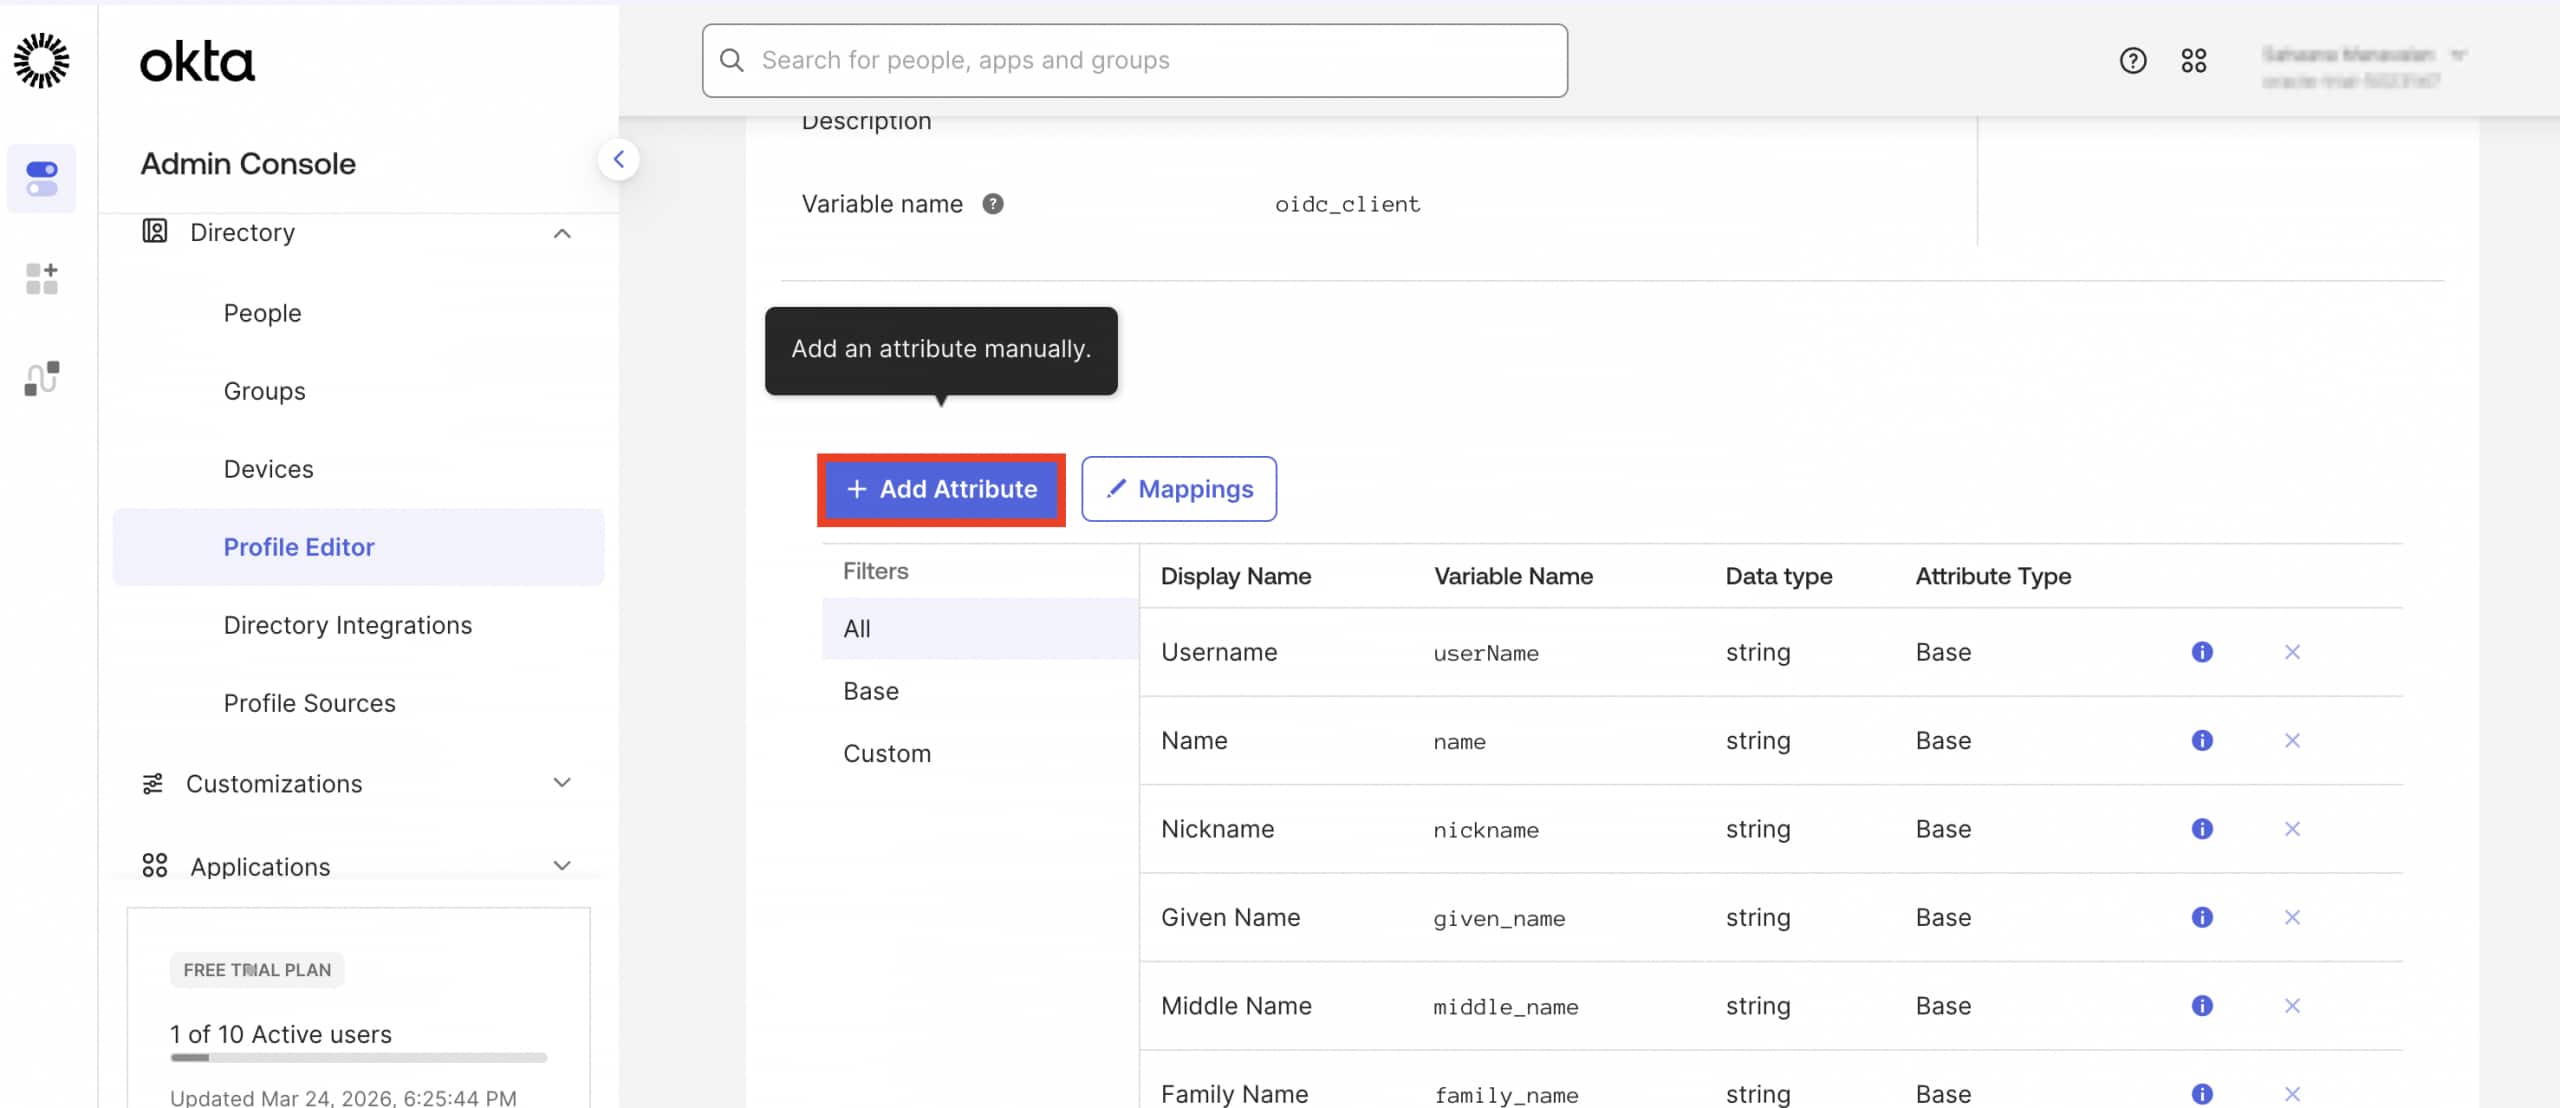
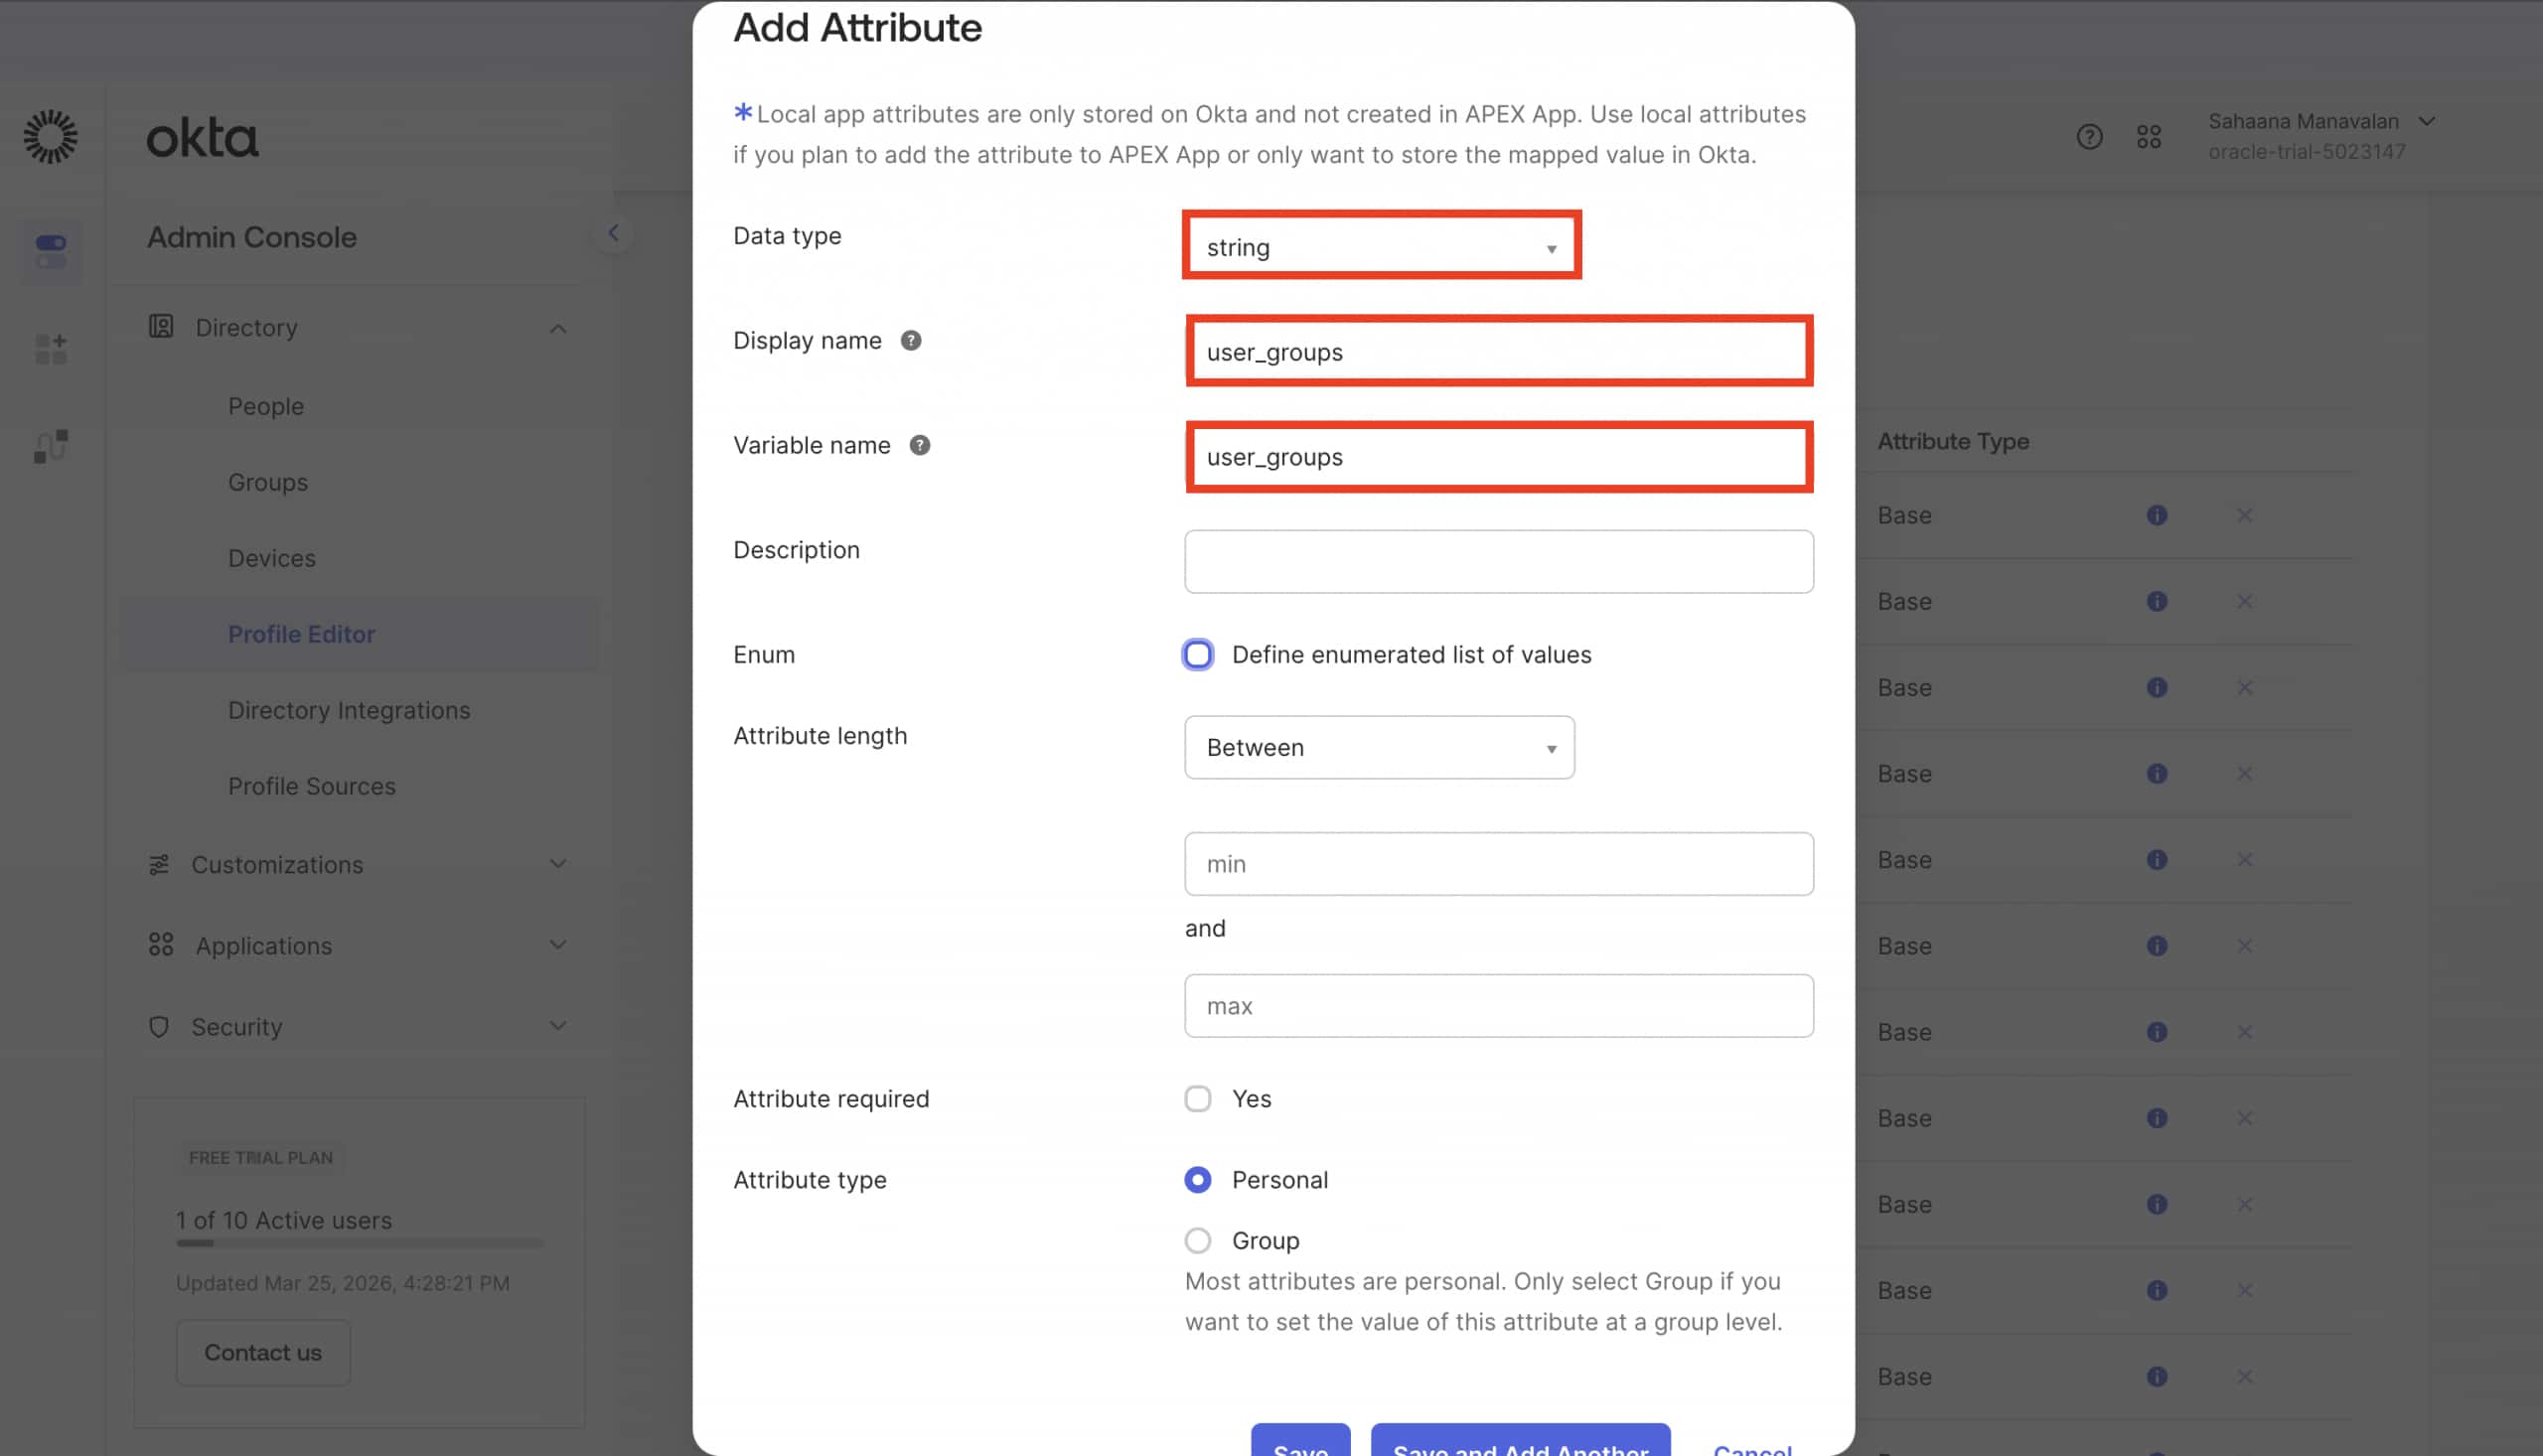
- In the Add Attribute window, enter the following
- Data Type: string
- Display Name:
user_groups - Variable Name:
user_groups - Click Save.
- Click Mappings
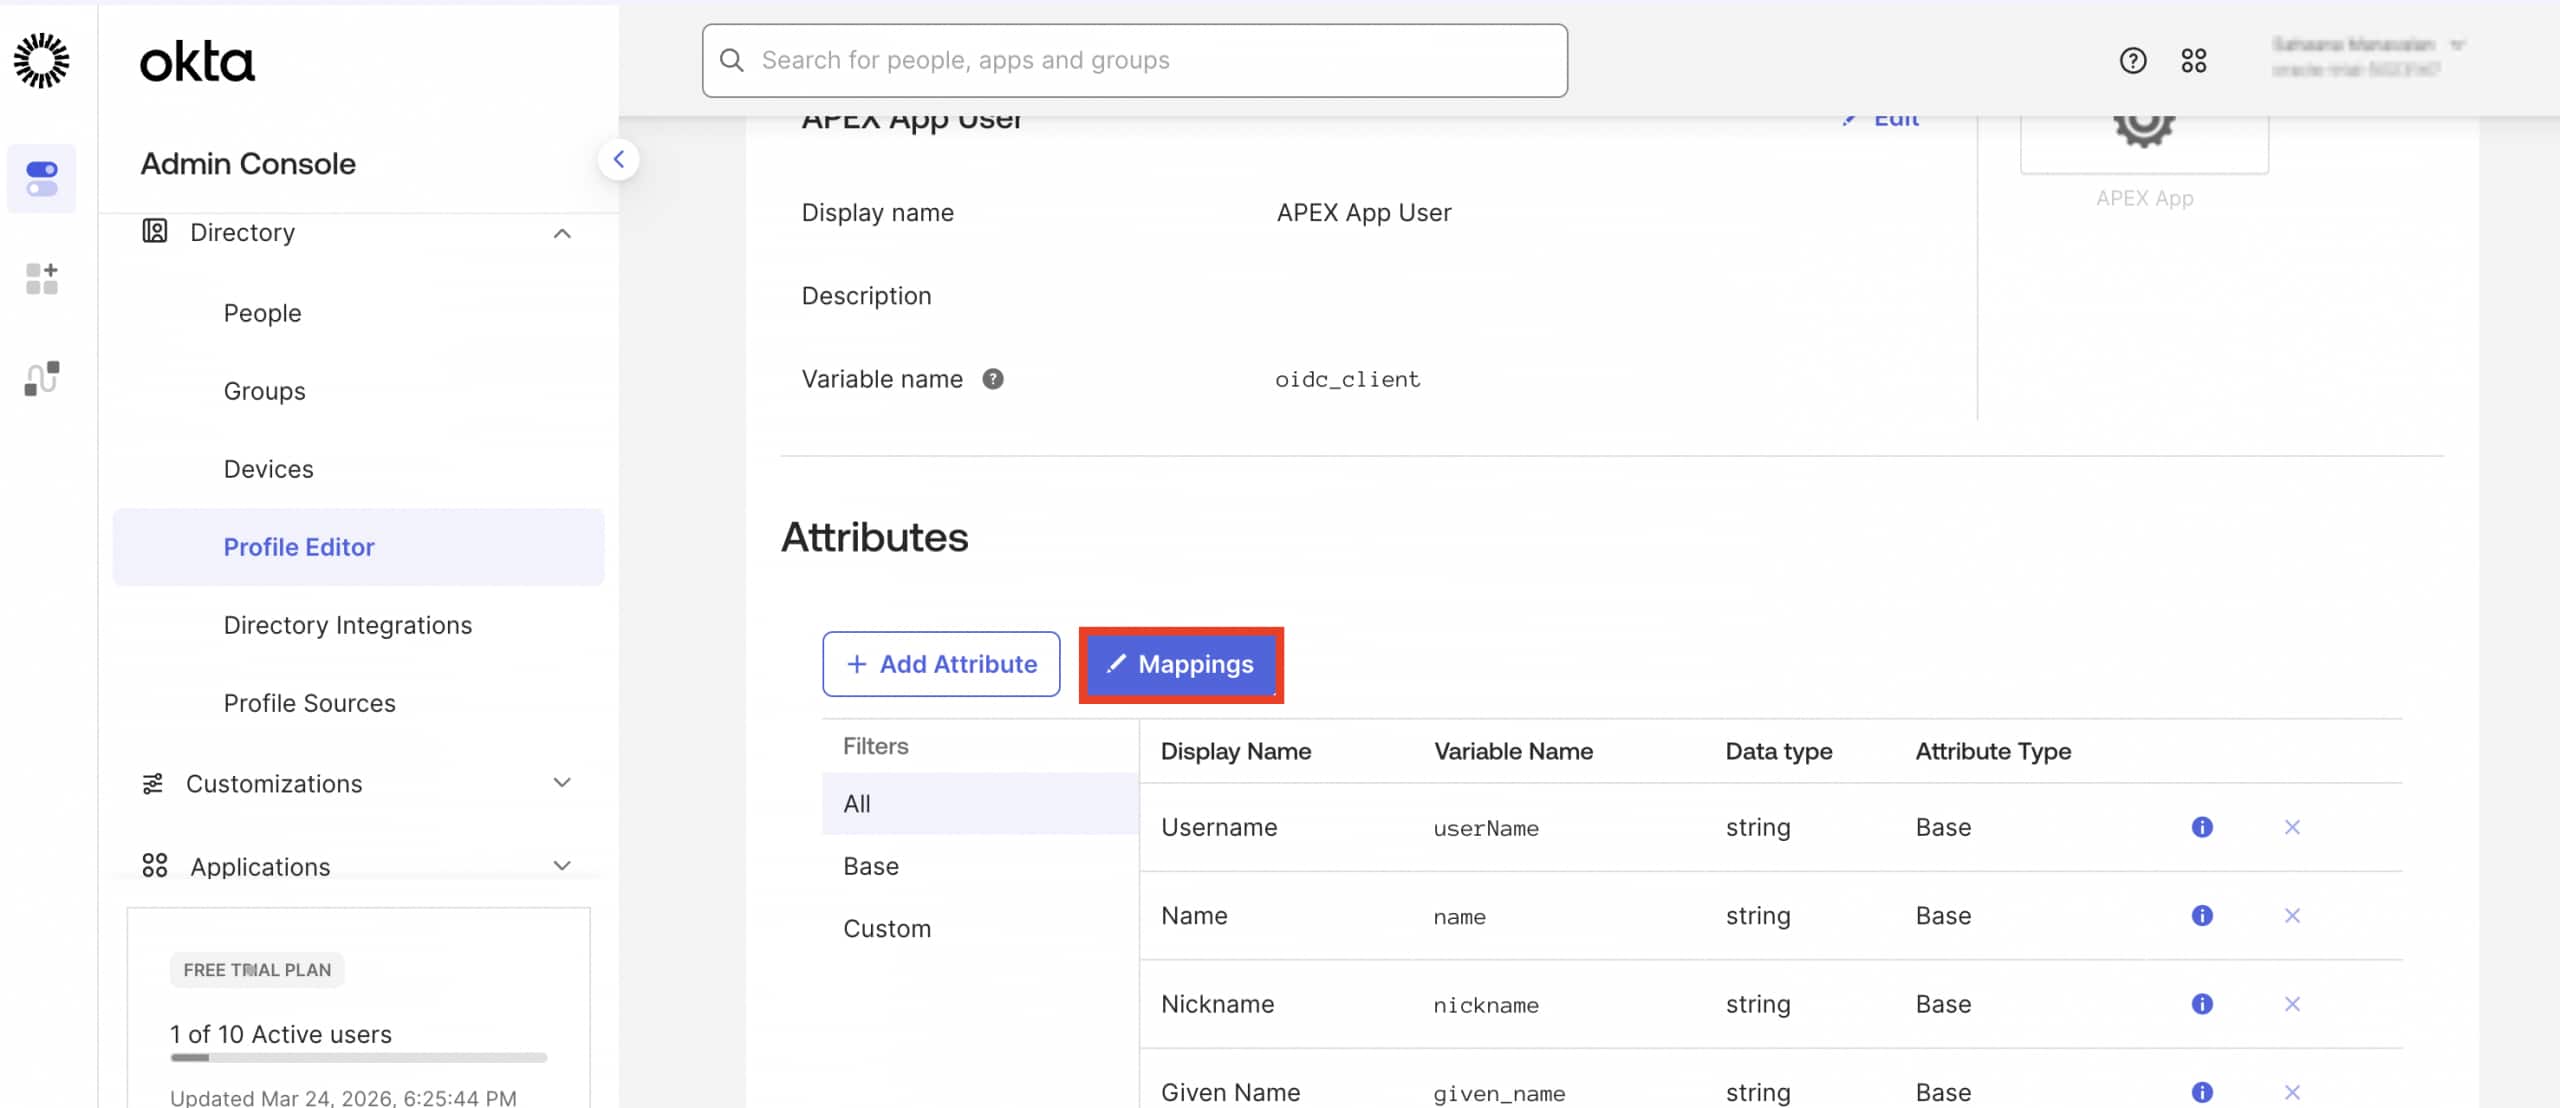
- Map
user_groupsusing:
user.getGroups({'group.type': {'OKTA_GROUP'}}).![name] + ""Note: This expression retrieves all Okta group names the user belongs to and concatenates them into a comma-separated string
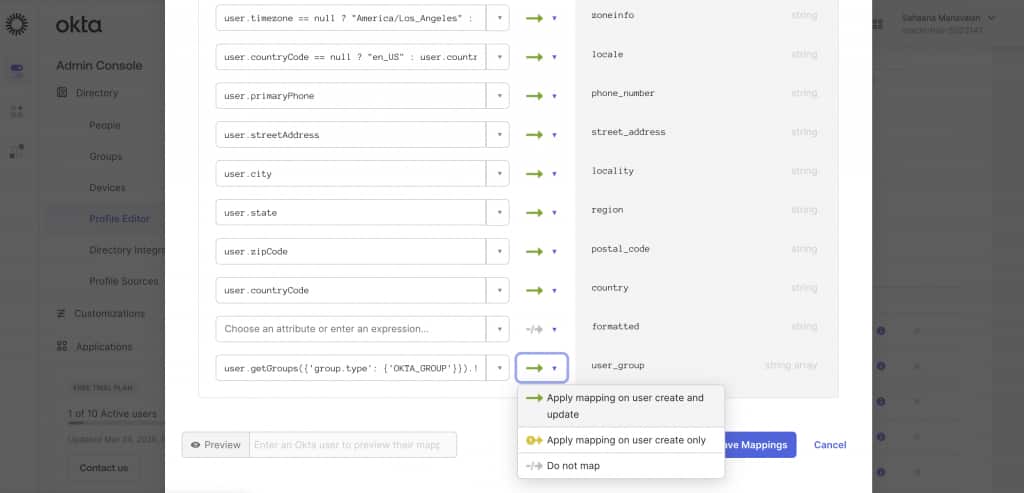
6. Click “Apply Mapping on user create and update” and Save mapping.
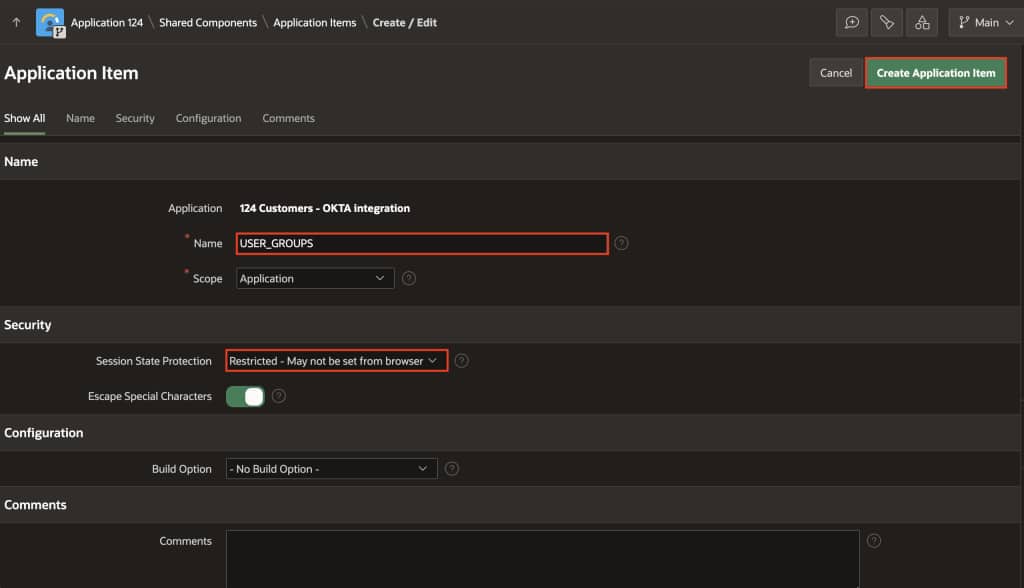
Step 4: Create an APEX Application Item
Create an application item to store the group membership value returned by Okta. This makes it available throughout your APEX session after login.
In your APEX application:
- Navigate to Shared Components → Application Items → Click Create
- Name:
USER_GROUPS Security → Session State Protection : Restricted - May not be set from browser
- Name:
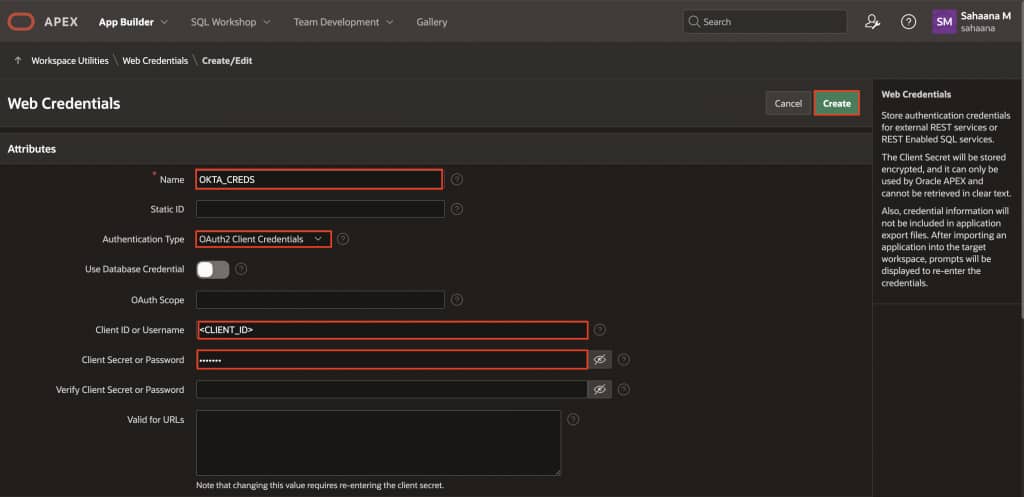
Step 5: Create Web Credentials in APEX (Okta client)
In APEX:
- App Builder → Workspace Utilities → Web Credentials → Create
Set the following:
| Name | OKTA_CREDS |
| Type | OAuth2 Client Credentials |
| Client ID or Username | (Okta Client ID) |
| Client Secret or Password | (Okta Client Secret) |
Click Create.
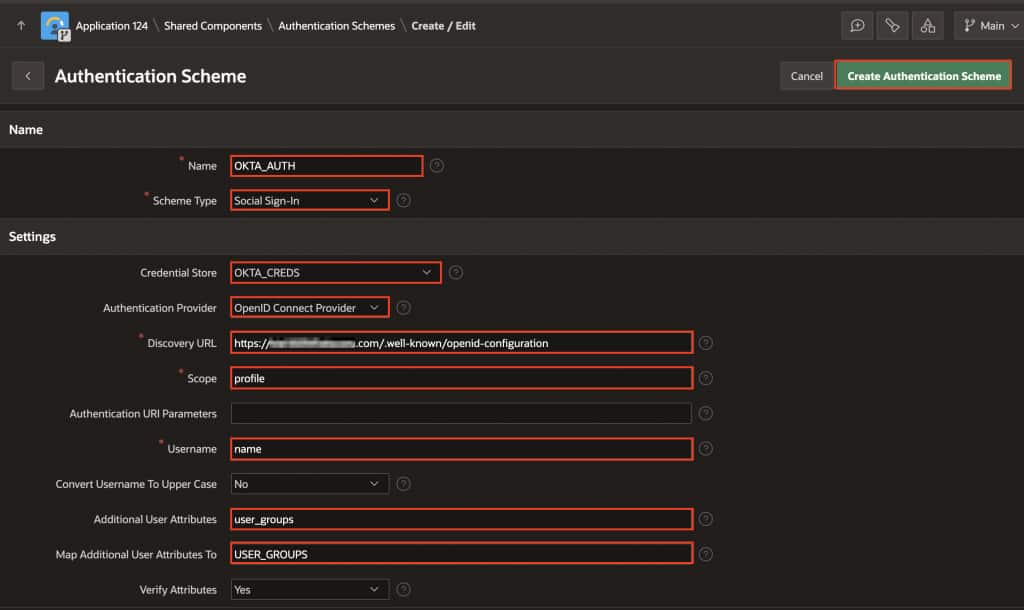
Step 6: Create the APEX Authentication Scheme (Social Sign-In)
In APEX:
- Shared Components → Authentication Schemes → Create
- Choose Based on a pre-configured scheme from the gallery
- Configure:
| Name | OKTA_AUTH |
| Scheme Type | Social Sign-In |
| Credential Store | OKTA_CREDS |
| Discovery URL | https://{yourOktaOrg}.okta.com/.well-known/openid-configuration |
| Scope | profile |
| Username | name |
| Additional User Attributes | user_groups |
| Map Additional User Attributes To | USER_GROUPS |
Click Create Authentication scheme.
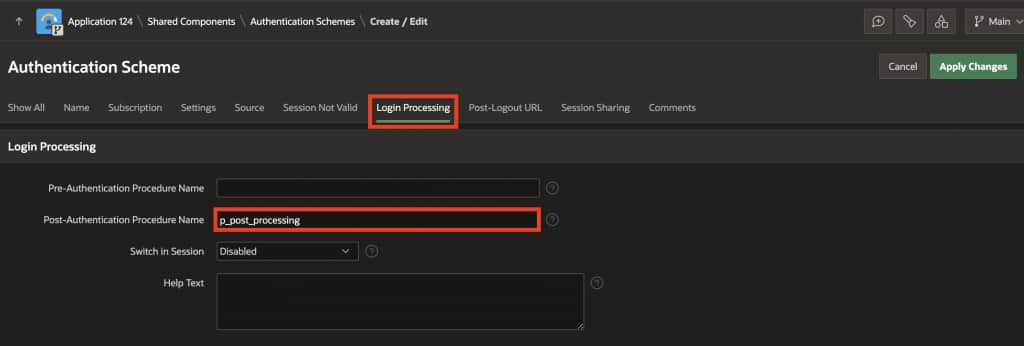
Step 7: Enable APEX dynamic groups (post-authentication)
Edit the OKTA_AUTH authentication scheme:
- Login Processing
- Post-Authentication Procedure Name:
p_post_processing
- Post-Authentication Procedure Name:
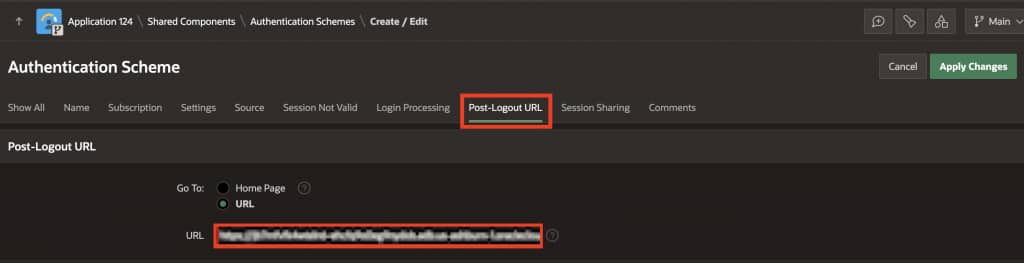
- Post-Logout URL
- Set to the same logout landing URL you configured in Okta (eg: https://example.adb.oraclecloud.com/ords/r/hr/hr-app/home)
Then copy paste the following procedure in the Authentication Scheme Source → PL/SQL Code :
Post processing Procedure:
PROCEDURE p_post_processing
IS
    l_groups apex_t_varchar2;
BEGIN
    -- IMPORTANT: specify delimiter
    l_groups := apex_string.split(:USER_GROUPS, ',');

    apex_authorization.enable_dynamic_groups(
        p_group_names => l_groups
    );

END;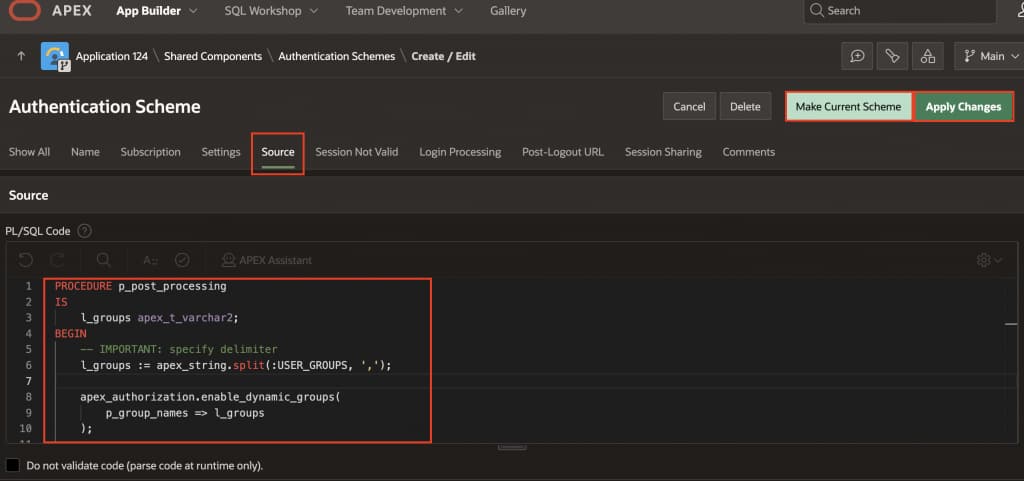
Click Apply Changes and go back to the OKTA_AUTH and select Make Current Scheme.
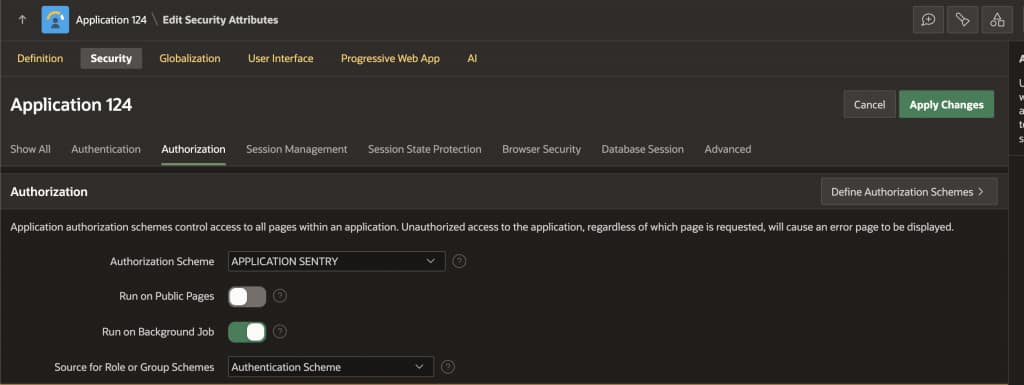
Step 8: Update Security Attributes (if Access Control List is enabled) ( Optional)
If your application was created with Access Control (ACL) enabled:
- Shared Components → Security → Security Attributes
- Open the Authorization tab
- Set Source for Role or Group Schemes to Authentication Scheme
This ensures group/role evaluation is driven by the authentication scheme (dynamic groups), not the ACL feature definition.
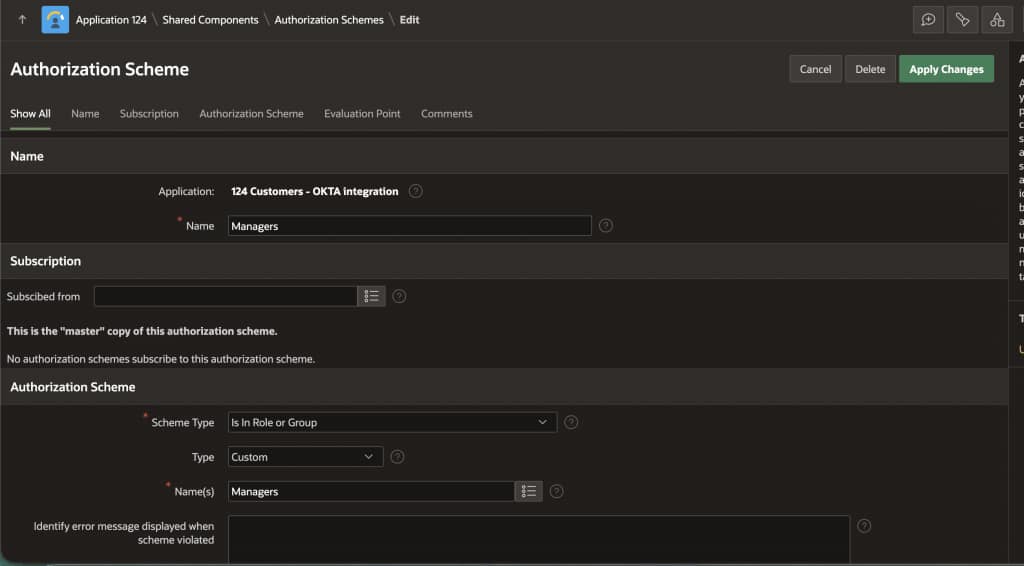
Step 9: Create Authorization Schemes based on Okta groups
Create authorization schemes under:
- Shared Components → Authorization Schemes → Create
Enter the following:
- Name: Employees
- Scheme Type: Is In Role or Group
- Type: Custom
- Name(s): Employees ( ⚠️ The group name must exactly match the group name in Okta, including capitalization.)
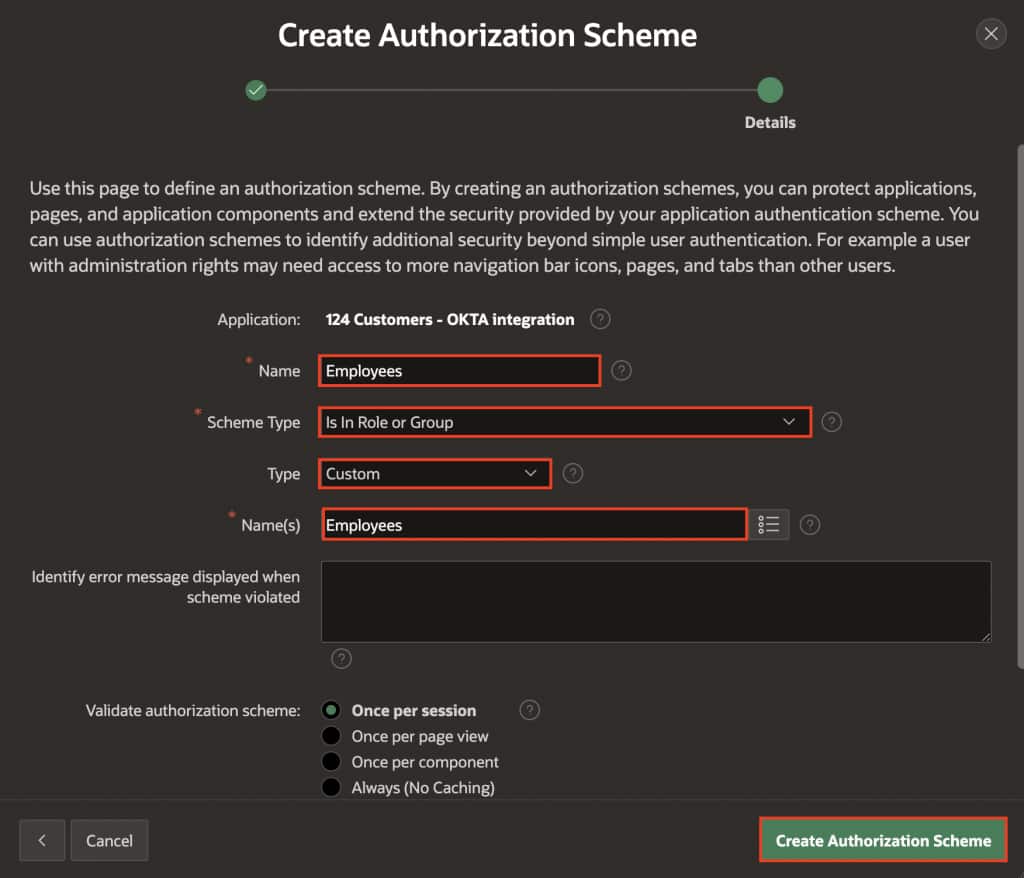
Similarly create one for Managers.
Then apply these schemes to ( for example):
- Pages (Page → Security → Authorization Scheme)
- Navigation menu entries
- Regions, buttons, items (Component → Security)
Step 10: Test end-to-end
- Login as a user in
Managersand validate manager-only pages/components are visible. - Login as a user in
Employeesand validate employee-only access. - Confirm the group list is being populated (for example, temporarily display
USER_GROUPSin a debug region during testing, then remove it).