

The rise of AI-assisted development is transforming how applications are built, and Oracle APEX 26.1 takes a significant step in that direction with the introduction of APEXlang – an open application definition language designed specifically for Oracle APEX. APEXlang provides a structured, human-readable way to define Oracle APEX applications, making it easier for developers and AI coding agents to generate, review, validate, and evolve applications using source-controlled files.
Combined with modern AI coding agents such as Codex and Claude Code, APEXlang enables a new development workflow where natural language prompts can be translated into application features, pages, and enhancements with greater speed and consistency. Developers can work directly from familiar tools like Visual Studio Code while maintaining full visibility and control over their application definitions.
In this first article of our two-part APEXlang GenDev series, you’ll learn how to set up Visual Studio Code, connect to Oracle Database, configure AI coding agents, install APEXlang skills, and generate your first Oracle APEX application project. By the end, you’ll have a complete development environment ready for AI-assisted Oracle APEX development and be prepared to build and enhance applications using APEXlang.
APEXlang GenDev Series
- Part 1: Getting Started with Oracle APEX Development in VS Code ← You are here
- Part 2: From Idea to Application: Creating and Enhancing Oracle APEX Apps with APEXlang Skills
Prerequisites
Before starting, make sure you have:
- Oracle APEX 26.1
- VS Code
- OpenAI account or API key (if you are using Codex)
- Claude AI subscription (if you are using Claude Code)
Step 1: Setup the IDE – VS Code
Install VS Code
Download and install Visual Studio Code for your operating system from the official VS Code website.
Create a Project Workspace
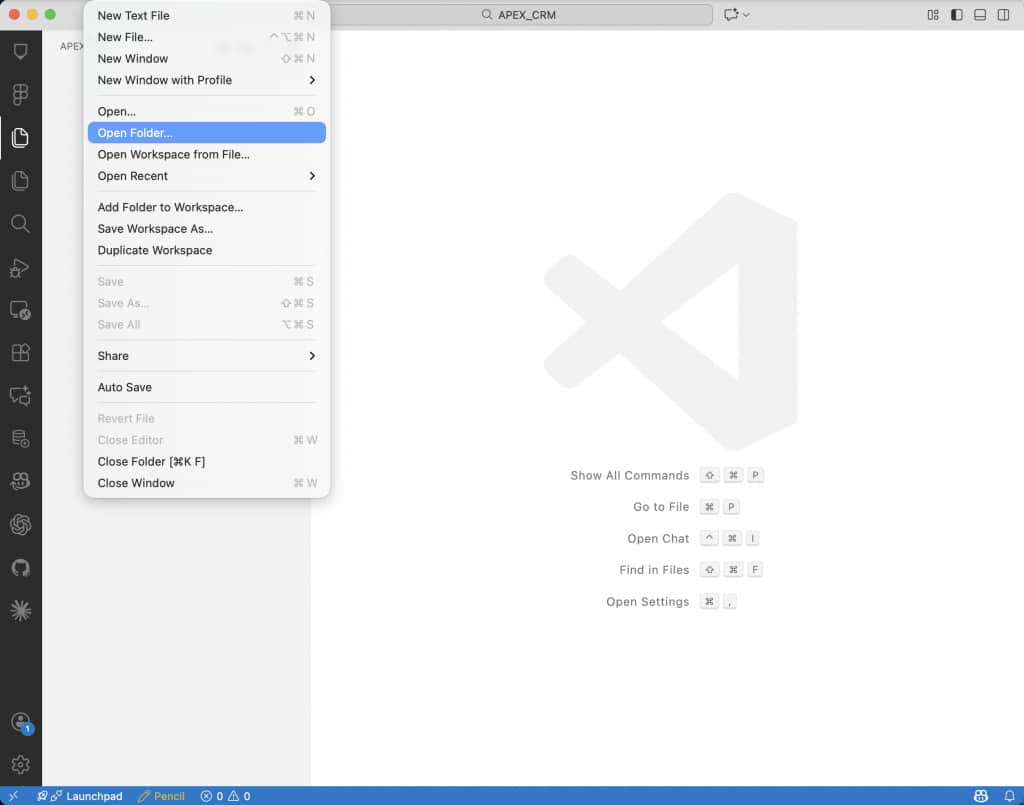
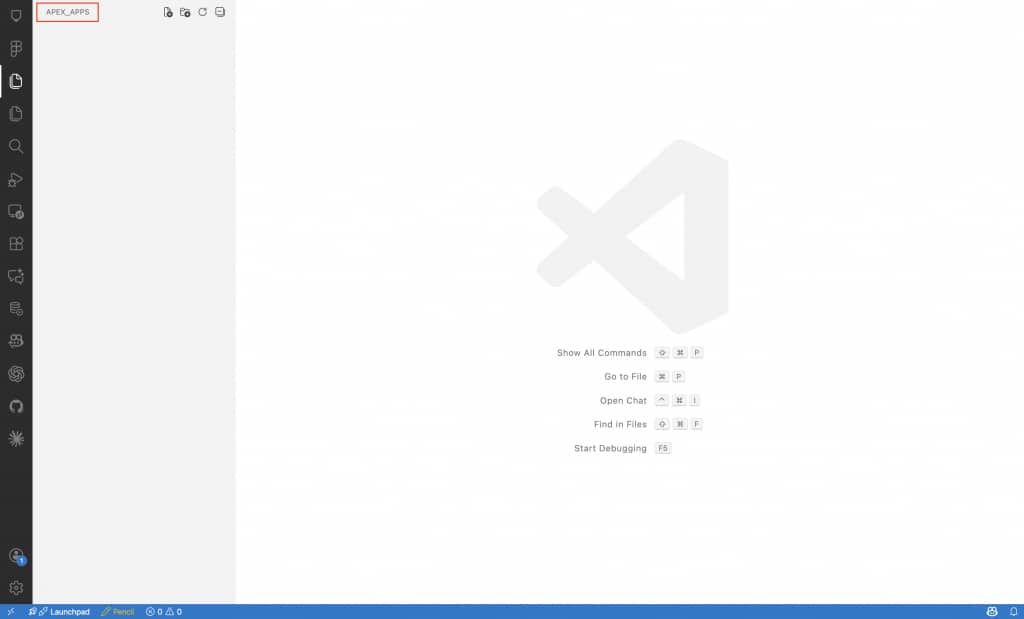
Create a project folder (for example,APEX_APPS) and open it in VS Code using File → Open Folder. This workspace will store your APEXlang source files, application exports, and project assets.
Step 2: Connect to Oracle Database
Next, install the Oracle SQL Developer Extension and create a database connection.
Install Oracle SQL Developer Extension
In VS Code:
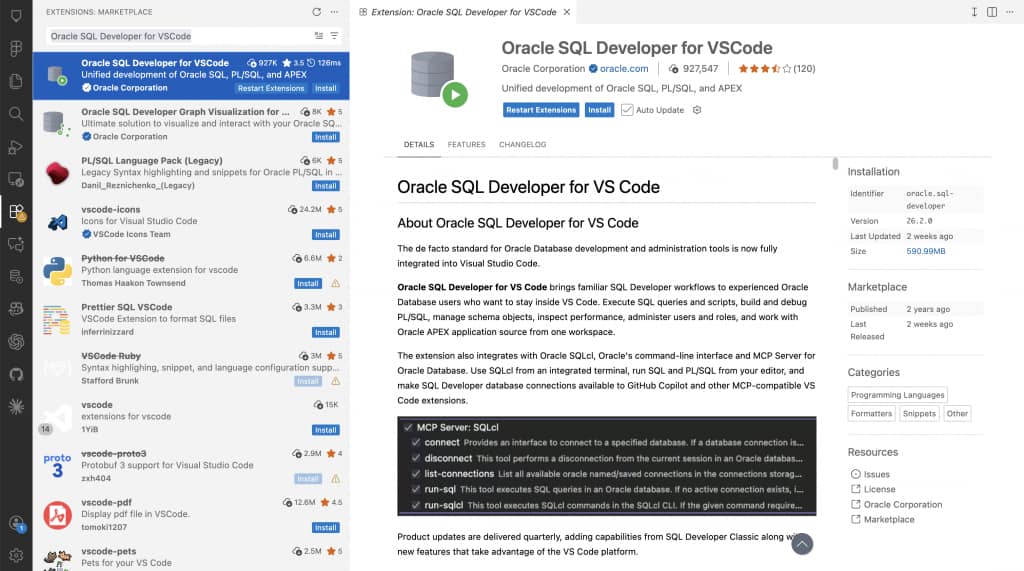
- Open the Extensions view.
- Search for Oracle SQL Developer for VSCode
- Click Install.
The extension provides database connectivity, schema browsing, SQL execution, and APEX application import/export capabilities.
Note: We recommend enabling Auto Update for the SQL Developer extension in VS Code to ensure you automatically receive the latest features, enhancements, bug fixes, and compatibility updates.
Create a Database Connection
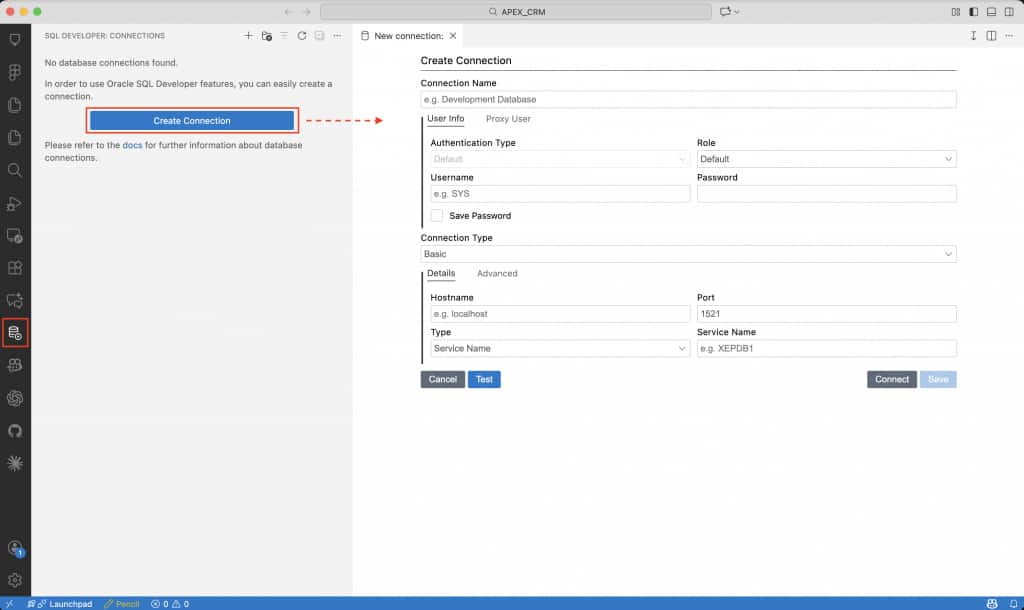
Open the SQL Developer panel and create a new connection to an Oracle Database with Oracle APEX 26.1 installed.
Enter your connection details (Name, Username, Password, Host, Port, and Service Name/SID), then click Test and Connect to verify and save the connection. For detailed setup instructions, refer to the documentation.
Database connection setup screen Step 3: Setup AI Coding Agent
Choose the AI coding agent you want to use with Oracle APEX and VS Code.
Note: We use Codex and Claude Code in this blog for illustration, but you can use any AI coding agent approved by your organization. AI coding agents and their underlying LLMs require separate setup and may incur additional costs; they are not included with Oracle APEX.
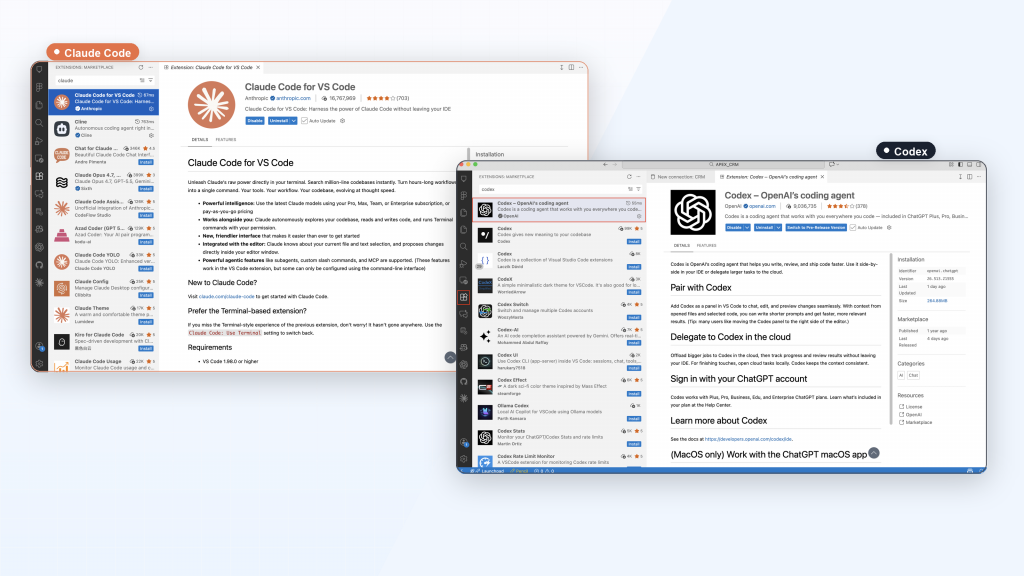
Option A: Install Codex
- Open the Extensions panel in VS Code.
- Search for Codex – OpenAI’s coding agent and click Install.
- Open the Codex panel and sign in using either your ChatGPT account (recommended) or an OpenAI API key.
Configure the Model
Select the most capable GPT model available and set the reasoning level to Medium or High.
Option B: Install Claude Code
- Open the Extensions panel in VS Code.
- Search for Claude Code and click Install.
- Open the Claude Code panel, click Sign In, complete the authentication process in your browser, and return to VS Code once sign-in is complete.
Configure the Model
Select the most capable Claude model available in your account. Claude Code also supports configurable effort levels for supported models.
Tip: Use a higher reasoning level for more complex APEX development tasks, such as schema-aware modifications, application analysis, and AI-assisted application enhancements.
Step 4: Setup APEXlang Skills & SQLcl access
The APEXlang Skills repository includes reusable prompts, workflows, and AI-assisted development patterns designed for Oracle APEXlang. These skills help AI agents better understand application structure, business logic, and development best practices.
Install the APEXlang skills in your preferred AI coding agent’s local skills folder. Depending on your setup, this may be under folders such as .codex or .claude
Install APEXlang Skills
To install the required Oracle APEX and database skills:
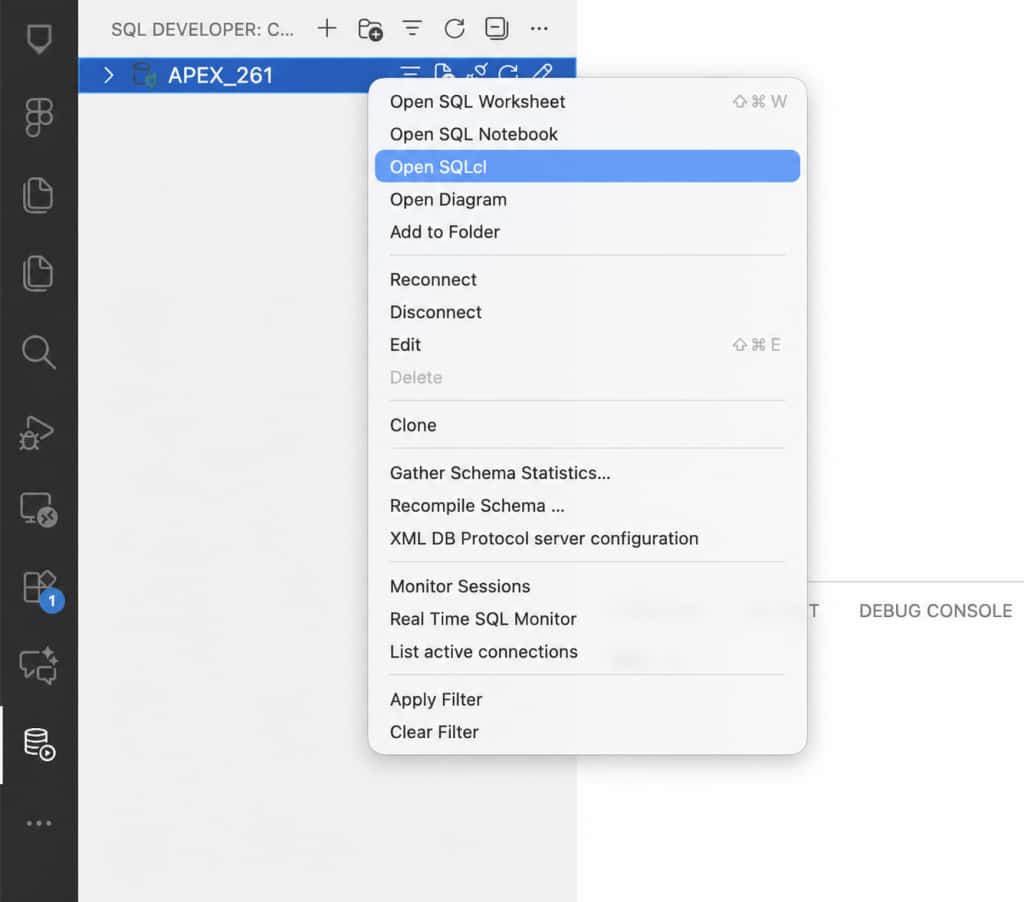
- Open SQL Developer.
- Right-click your database connection and select Open SQLcl.
- Run the following command:
skills sync -skill-name apex,dbThis installs the Oracle APEX and database skills required for APEXlang workflows.
To verify that the skills were installed successfully, run:
skills listThe installed APEXlang skills should now be listed and available to your AI coding agent.
If you prefer to install the skills manually, you can clone or download them from the Oracle Skills Repository and copy the required skill folders into your coding agent’s local skills directory (for example, .codex/skills or .claude/skills).

The Skills repository may be updated over time. To receive the latest skill updates, rerun the skills sync command at any time.
Configuring SQLcl for AI Coding Agents
AI coding agents support instruction files that help them understand your preferred development workflow, tools, and coding practices. In this step, we’ll update the agent instructions to make the coding agent aware of your local SQLcl installation.
- Locate the Instruction File
- Add SQLcl Instructions
| Coding Agents | macOS/Linux | Windows | Documentation |
| Codex | ~/.codex/AGENTS.md | C:\Users\<user-id>\.codex\AGENTS.md | OpenAI AGENTS.md Guide |
| Claude Code | ~/.claude/CLAUDE.md | C:\Users\<user-id>\.claude\CLAUDE.md | CLAUDE.md Guide |
These files allow you to define agent-specific instructions that are automatically applied across your APEXlang development projects.
Open the instruction file and add guidance that tells the coding agent where SQLcl is installed and when it should be used for database-related tasks.
Example:
## Database Tooling
Use Local SQLcl CLI for Oracle Database-related tasks.
SQLcl executable: <path-to-sqlcl> Before performing database-related tasks:
- Verify that SQLcl is available.
- Use SQLcl for schema inspection, SQL execution, metadata generation, and APEX development workflows.
- Do not store passwords or connection credentials in project files.
Note: SQLcl is included with the Oracle SQL Developer Extension for VS Code. Typical installation locations are:
macOS/Linux
~/.vscode/extensions/oracle.sql-developer-<version>/dbtools/sqlcl/bin/sql
Windows
C:\Users\<user-id>\.vscode\extensions\oracle.sql-developer-<version>\dbtools\sqlcl\bin\sql.exe
Update the path in your coding agent instructions to match your local environment.
Note: As an alternative approach, you can configure SQLcl as an MCP server for AI-assisted database development. This enables coding agents such as Codex or Claude Code to inspect schema metadata and assist with SQL/PL/SQL development through the agent interface.
For Codex, add a new MCP server with the SQLcl executable as the command and ‘-mcp’ as the argument.
For Claude Code, run the below command in VS Code terminal to add SQLcl as an MCP server.
claude mcp add –transport stdio –scope user sqlcl — <path-to-sqlcl>/bin/sql -mcp
On Windows, use sql.exe. If SQLcl is installed through the Oracle SQL Developer VS Code extension, it is typically located under the extension’s dbtools/sqlcl/bin directory. Restart VS Code or the agent if required.
For more details, refer to SQLcl MCP introduction.
Step 5: Generate & Enhance an APEX App with AI
With the environment ready, let’s generate a new starter application and enhance it using APEXlang. In this step, we’ll create an Employee Portal application using the SQL Developer Extension for VS Code and save it to our local project directory. This application will serve as the foundation for demonstrating how AI coding agents can use APEXlang to build, enhance, and extend Oracle APEX applications.
Prerequisite: Install the EMP/DEPT sample dataset from SQL Workshop → Utilities → Sample Datasets in your APEX workspace. The generated Employee Portal application uses the EMP and DEPT tables from this dataset.
Create a Starter APEXlang Project
With the EMP/DEPT sample dataset installed, you can quickly generate a starter Employee Portal application project directly from VS Code without switching to APEX Builder.
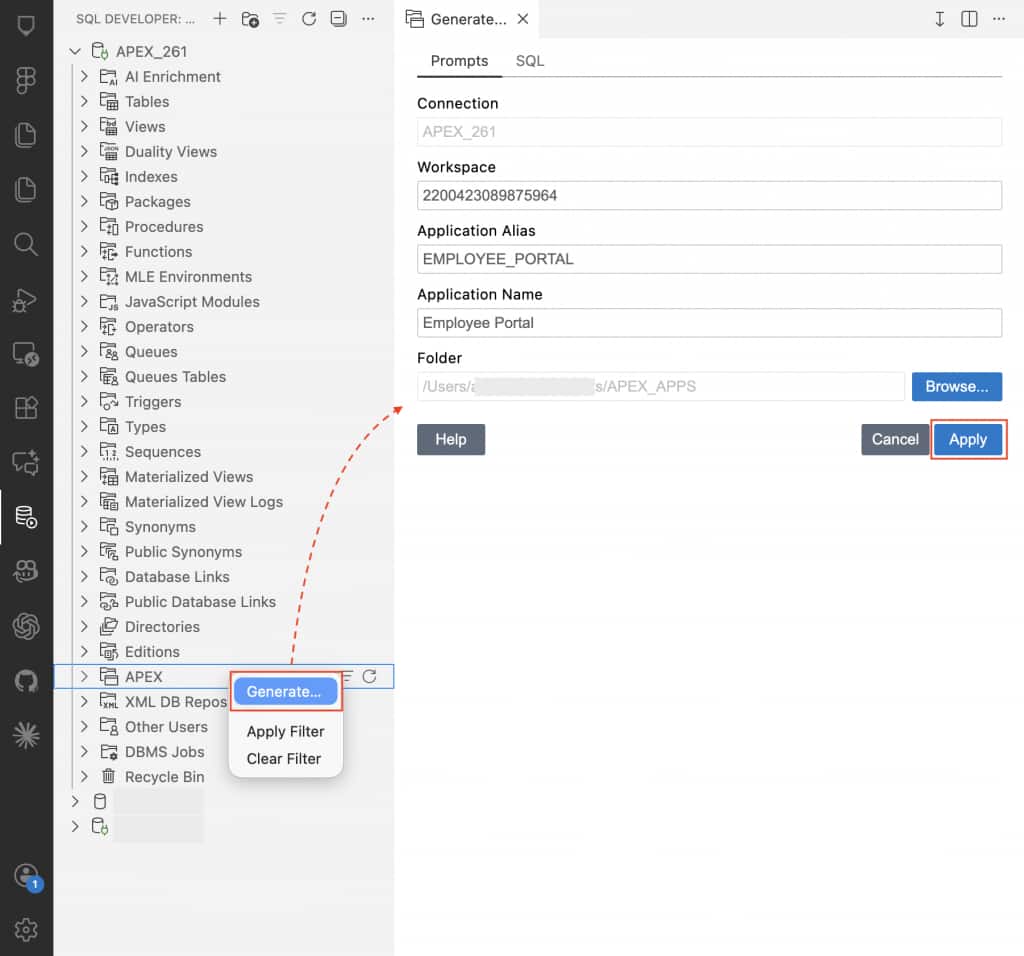
- Connect to your APEX workspace schema in SQL Developer extension for VS Code.
- Navigate to the APEX folder.
- Right-click and select Generate.
- Enter the application details:
- Application Name: Employee Portal
- Application Alias: EMPLOYEE_PORTAL
- Target Path: Your local project directory
- Click Apply to generate the project.
The generated Employee Portal project will be saved to your local directory and serve as the foundation for demonstrating how AI coding agents can use APEXlang to build and extend Oracle APEX applications.
Import and Verify the Starter Application
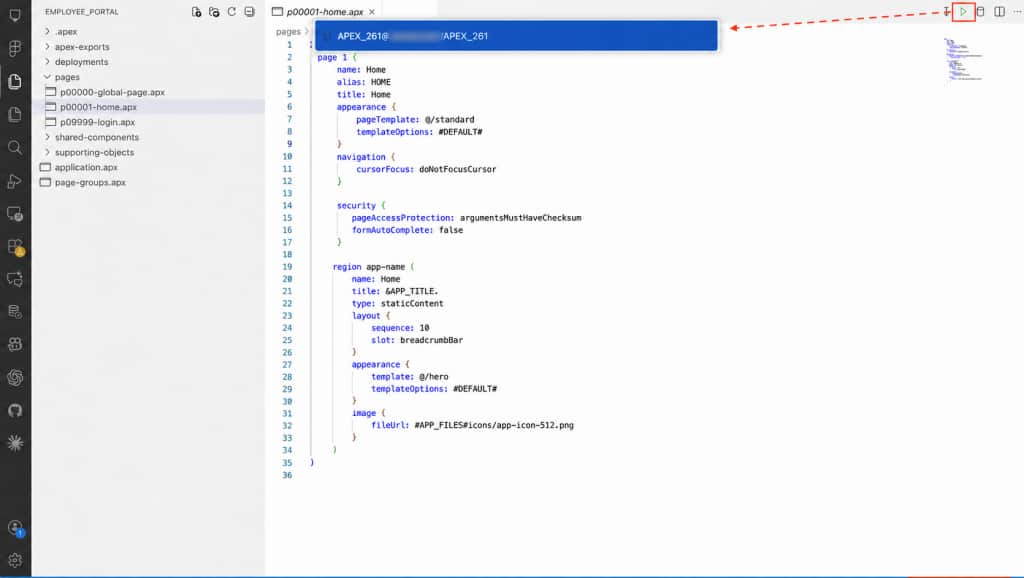
Before enhancing the application with AI, import and run the generated Employee Portal application using SQL Developer Extension
To import an application:
- Open the EMPLOYEE_PORTAL folder in VS Code
- Open any file
- Click the Import Application button at the top-right of the editor tab.
Enhance the Application using AI
Open the Codex or Claude extension in VS Code and enter the prompt below to create an Employee Directory page. The AI coding agent will use the installed APEXlang skills to identify the appropriate application components, add faceted search based on employee and department attributes, and display the results in a Content Row layout with an avatar and a badge. Review the generated changes and accept them once complete.
Create an Employee Directory page with Faceted Search and Content Row results showing department as overline, employee name as title, and only location plus hire date in the description with those labels emphasised. Use an extra-small avatar icon and place a medium, rounded, subtle Job badge on the right.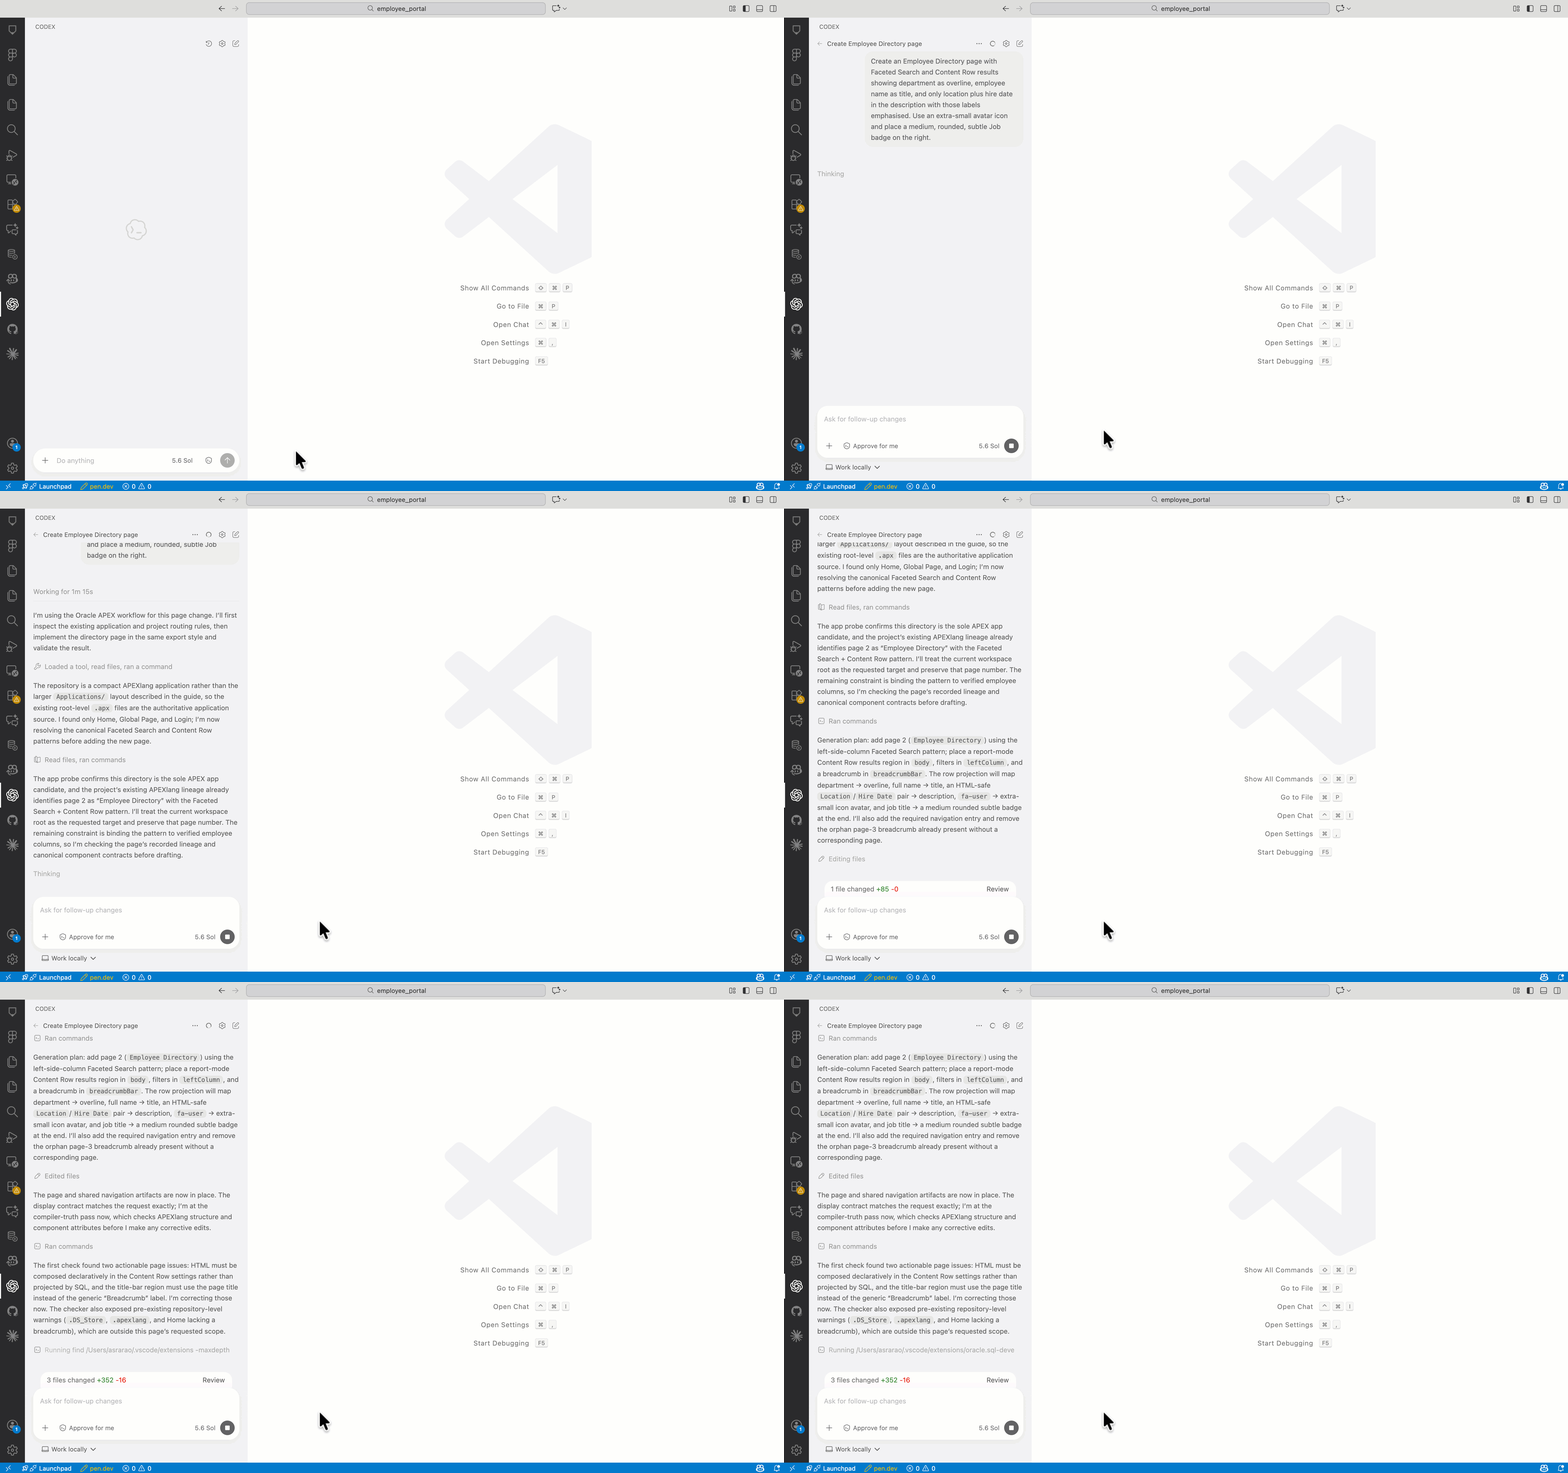
Import and Run
After reviewing and accepting the AI-generated changes, import the updated application by repeating the same steps described in Import and Verify the Starter Application.
Once the import completes successfully, run the application to verify that the new Employee Directory page has been added and that the enhancements are working as expected.
If import errors occur, open the Problems panel in VS Code and either fix the issue manually or provide the error message back to the coding agent for correction.
Troubleshooting Import Errors
If an error occurs during import, open the Problems panel in VS Code:
- Windows:
Ctrl + Shift + M - macOS/Linux:
Command + Shift + M
Review the error details and either:
- Fix the issue manually, or
- Provide the error message to your AI coding agent and ask it to resolve the problem.
Example Prompt:
The following error occurred during import: <PASTE ERROR HERE> Analyze the issue and fix only the failing APEXlang source or related file. Do not modify unrelated components.This iterative approach helps quickly identify and resolve issues in AI-generated APEX applications.
Run the Application
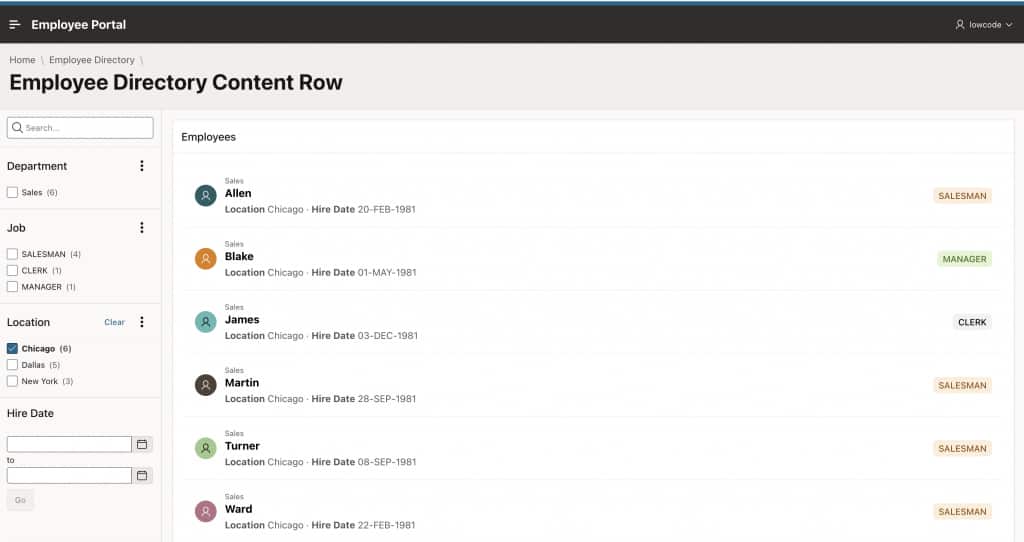
After importing the application, the Employee Portal application should display:
- A new Employee Directory page in the application’s navigation menu.
- Faceted Search filters based on employee and department attributes.
- Employee records displayed in a Content Row layout.
- An avatar for each employee.
- A badge highlighting a key employee attribute, such as Job.
This demonstrates how AI coding agents can use APEXlang skills to generate new application features and user interfaces from natural language prompts.
Note: The enhancement is applied by an AI coding agent using APEXlang skills. Depending on the coding agent, model version, and application state, the generated changes may vary slightly between users. If the requested update is not implemented exactly as expected or introduces validation errors, refine the prompt, provide additional guidance, or use the error messages to iteratively correct and improve the implementation.
Conclusion
With APEXlang in Oracle APEX 26.1 and AI coding agents, it is now significantly easier to generate, review, and evolve Oracle APEX applications using modern AI-assisted development workflows.
By combining tools such as VS Code, Codex/Claude, SQLcl, and APEXlang skills, developers can generate or enhance fully functional Oracle APEX applications directly from connected database schemas while keeping the application source readable, maintainable, and version-friendly.
Using APEXlang together with AI-powered coding agents enables developers to accelerate application delivery, reduce repetitive development tasks, and modernize Oracle APEX development with a more intuitive and scalable workflow.
This is Part 1 of a two-part series on APEXlang GenDev. Now that we’ve explored the initial setup for APEX development with APEXlang in Visual Studio Code, stay tuned for Part 2, where we’ll walk through creating and enhancing an application using APEXlang skills.
To learn more about APEXlang and the overall development lifecycle, refer to this two-part blog series: