In today’s digital age, seamless integration and automation have become a priority for organizations looking to streamline their operations and enhance customer experience. Oracle APEX and Oracle Digital Assistant are two powerful tools that can be combined to create intelligent and user-friendly applications. This technical blog post will walk you through the process of integrating Oracle APEX with Oracle Digital Assistant to create conversational AI-powered applications.
Why Integrate Oracle APEX with Oracle Digital Assistant?
Oracle APEX is a low-code development platform that enables you to create web applications quickly and easily. On the other hand, Oracle Digital Assistant is a conversational AI platform that allows you to build chatbots and digital assistants to engage with users naturally. Integrating these two technologies offers several benefits:
- Enhanced User Experience: By integrating chatbots with APEX applications, you can provide users with a conversational interface to interact with your applications, making the user experience more engaging and efficient.
- Efficient Data Retrieval: Oracle Digital Assistant can fetch data from APEX applications and databases, enabling users to access and manipulate data without navigating through complex interfaces.
- Task Automation: Chatbots can automate routine tasks, such as data retrieval and entry, which can significantly reduce manual effort and errors.
- Real-Time Insights: Users can get real-time information from APEX applications through chatbots, making decisions based on the latest data.
- Cross-Platform Accessibility: Users can access APEX applications and chatbots on various devices and platforms, making your services more accessible.
Prerequisites:
- An Oracle Cloud Infrastructure account.
- An OCI compartment. You can use the pre-configured tenancy root compartment or create your own.
- The logged-in user should have the necessary privileges to create and manage Autonomous Database instances in this compartment. You can configure these privileges via an OCI IAM Policy.
Now, let’s dive into the technical details of integrating Oracle APEX with Oracle Digital Assistant.
Set Up Oracle APEX App:
Before you integrate Oracle APEX with Oracle Digital Assistant, you need to have an APEX application ready. If you don’t have one yet, you can download the Quick Projects Application using this Link and import it into your APEX Workspace.
Create and Setup Oracle Digital Assistant
If you haven’t already set up Oracle Digital Assistant, here’s how to get started:
- Access Oracle Digital Assistant: Log in to Oracle Cloud and access Oracle Digital Assistant from the console.
- Create Skill and Intents: Click on Skills in the menu. Select New Skill and provide a name, description and then define the skill’s language.
- Intent Definition: Within the skill, go to Intents and click Add Intent. Provide a name for the Intent. Define the Answer and then add Utterances. Add as many Utterances as possible.
- Digital Assistant Setup: Navigate to Digital Assistants in the menu. Click New Digital Assistant and provide a name and description. Select the skill(s) you want to include in the digital assistant. Configure channels (e.g., Oracle Web, Slack) for the assistant.
- Channel Configuration: For the selected channel, configure the necessary settings. This may involve setting up Channel Type, allowed Domains, and integration details. Copy the Channel ID and paste it into your Notepad. Test the channel to ensure it works as expected.
- Publish: Once you’re satisfied with the performance, publish the digital assistant to make it accessible to users.
To learn more about how to create a Skill and add Intents refer, check here. Additionally, to kickstart your journey with Oracle Digital Assistant, don’t forget to explore this informative video.
Integrate Oracle APEX with Oracle Digital Assistant:
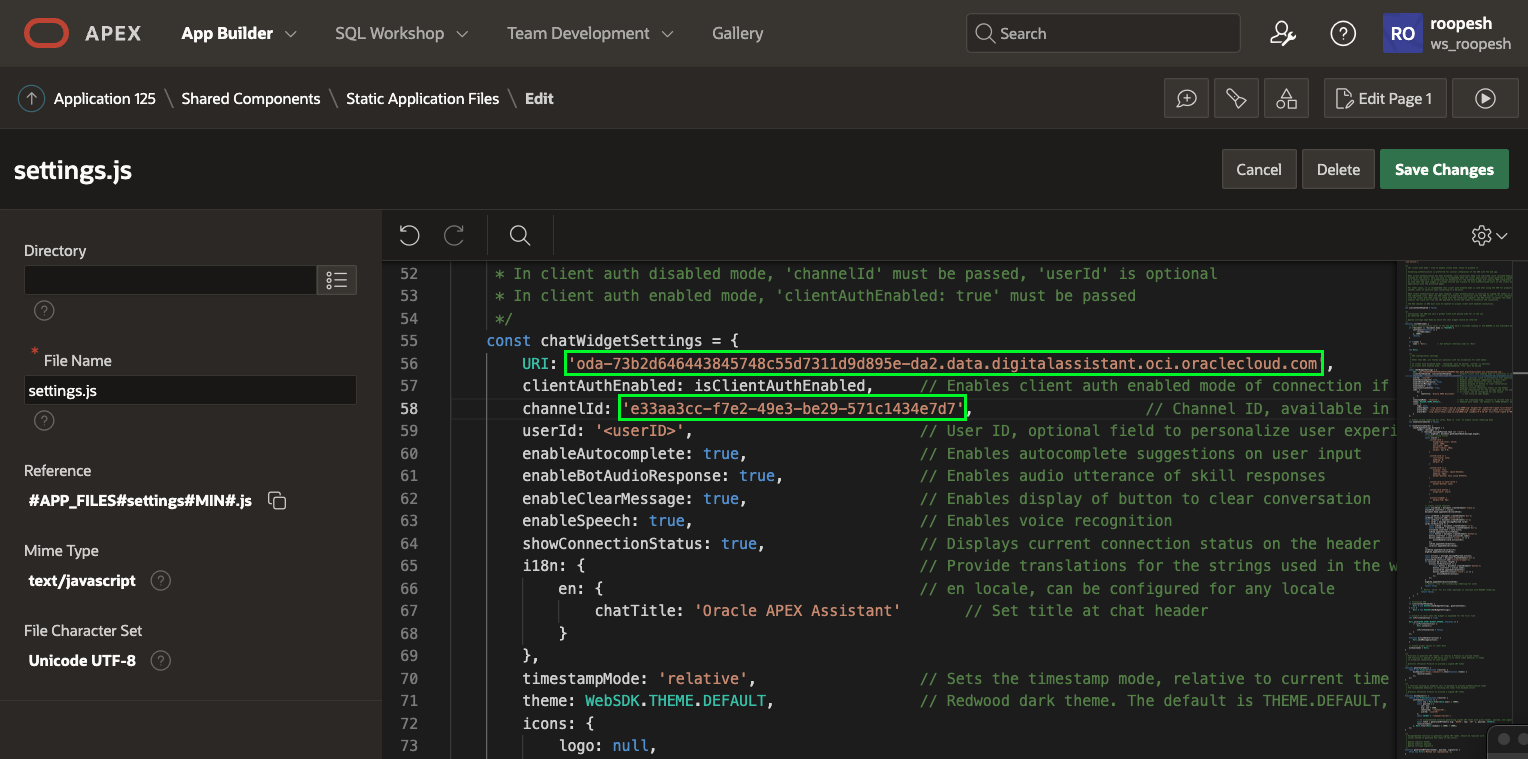
Configure settings.js:
- Before we begin, ensure that you’ve successfully downloaded the Oracle Web SDK. If you haven’t done so yet, you can find the download link on this page.
- While the ODA widget offers extensive customization options (see here for details), In this blog, we will focus solely on updating the fundamental fields, namely, the URI and Channel ID sourced from the settings.js file.
- Open the settings.js file and change the URI and Channel ID under initSdk(name) -> chatWidgetSettings. Replace the <URI> with the hostname of the Oracle Digital Assistant instance, and replace <Channel ID> with the channel ID of the Web Channel to which you want to connect. You have already copied the Channel ID in Step 2 of this Blog.
Accessing Your APEX Application:
- Begin by launching your Oracle APEX environment and logging in with your credentials.
- Once you’re logged in, locate and open the APEX application in which you intend to integrate Oracle Digital Assistant. If you’ve previously imported the Quick projects app for this purpose, this is the ideal application to work with.
Add settings.js and web-sdk.js as Shared Components in your APEX Application:
To make the Oracle Digital Assistant integration seamless, follow these steps to add settings.js and web-sdk.js as shared components in your APEX application:
- Navigate to Shared Components in your APEX application
- Once you’re in the Shared Components section, locate and click on Static Application Files.
- Use the upload option to add both the settings.js and web-sdk.js files from your local machine.
- As you upload these files, it’s important to note their respective references. These references will be required for further configurations:
- settings.js will reference #APP_FILES#settings.js
- web-sdk.js will reference #APP_FILES#web-sdk.js
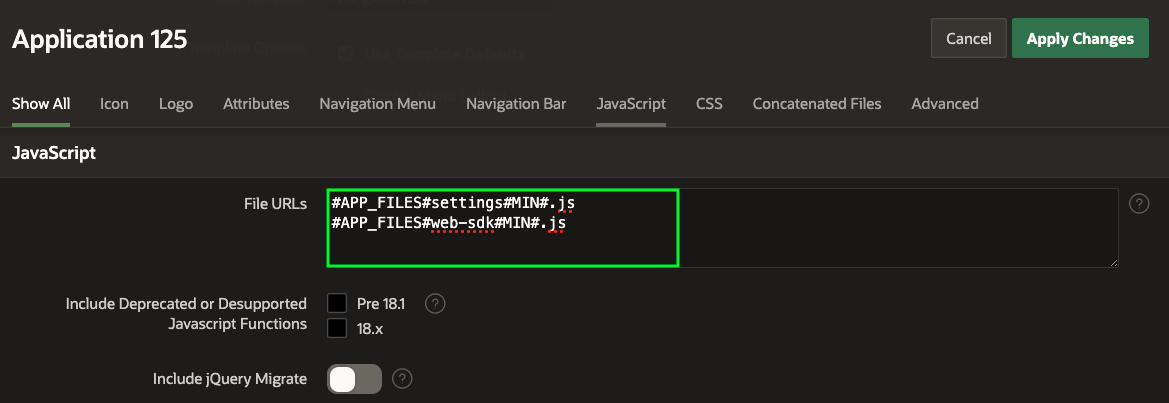
- Navigate to the Shared Components of your APEX application. From there, proceed to User Interface Attributes. Within this section, focus on the “JavaScript” subsection. Here, paste the Reference URLs for both settings.js and web-sdk.js to enable seamless file access.
Configuring Oracle Digital Assistant Integration:
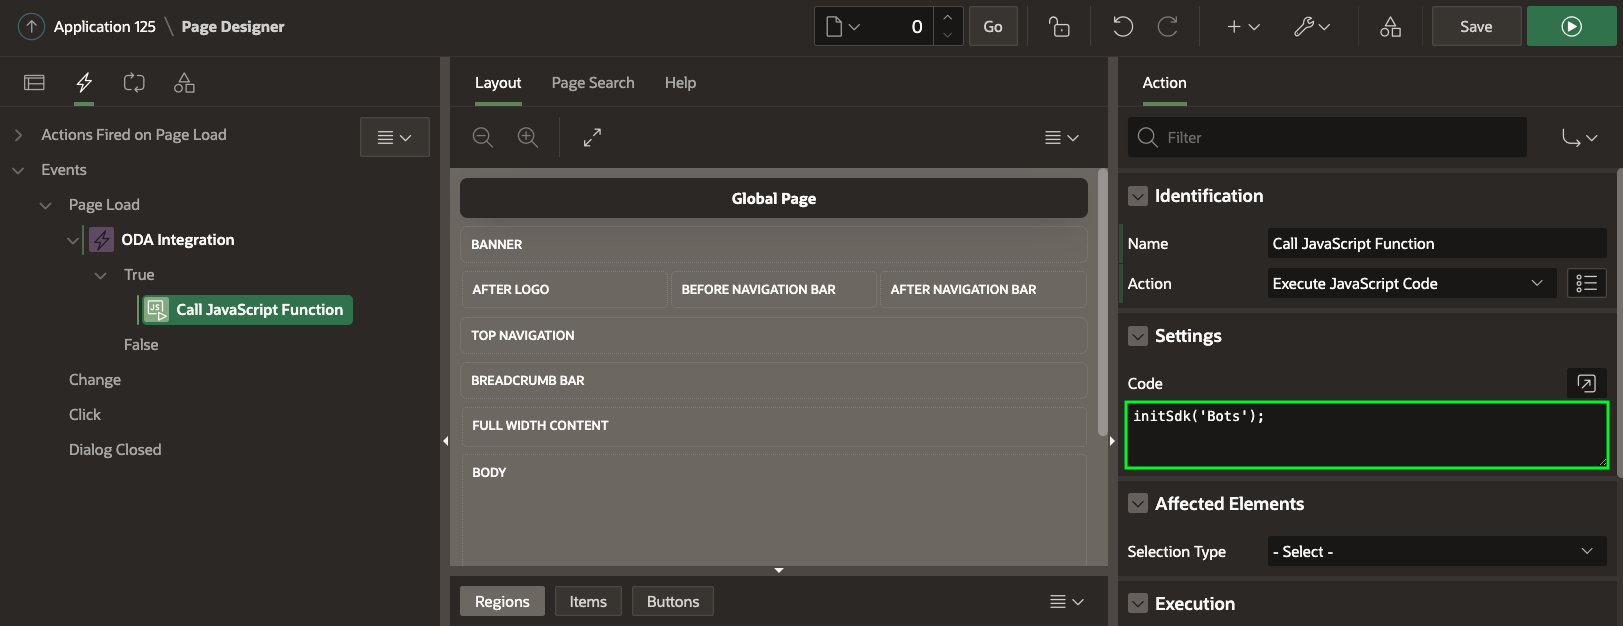
- In your Oracle APEX application, head to “Page Zero” to kick off the customization process. Then, navigate to the “Dynamic Action” tab within the rendering section.
- Create a dynamic action to trigger on page load, and within the “True” section, choose the action type “Execute JavaScript Code.”
- Under settings, In the code section, enter initSdk(‘Bots’) to initiate the necessary setup for your Oracle Digital Assistant integration.
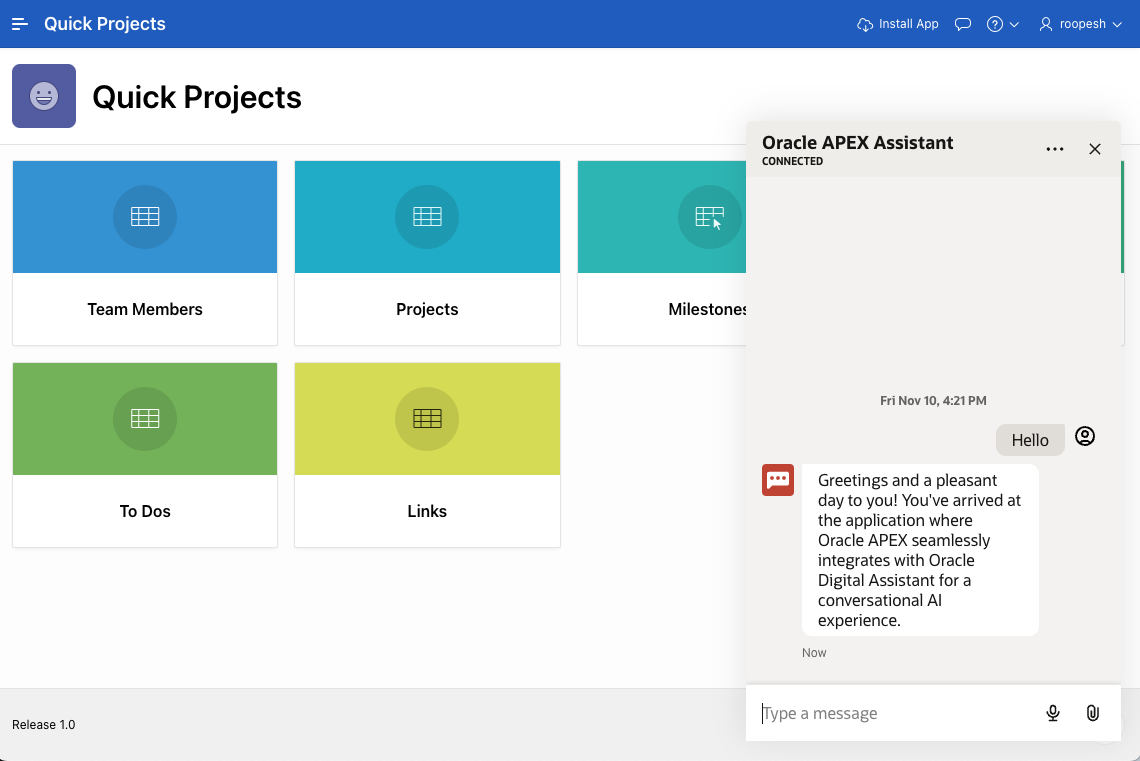
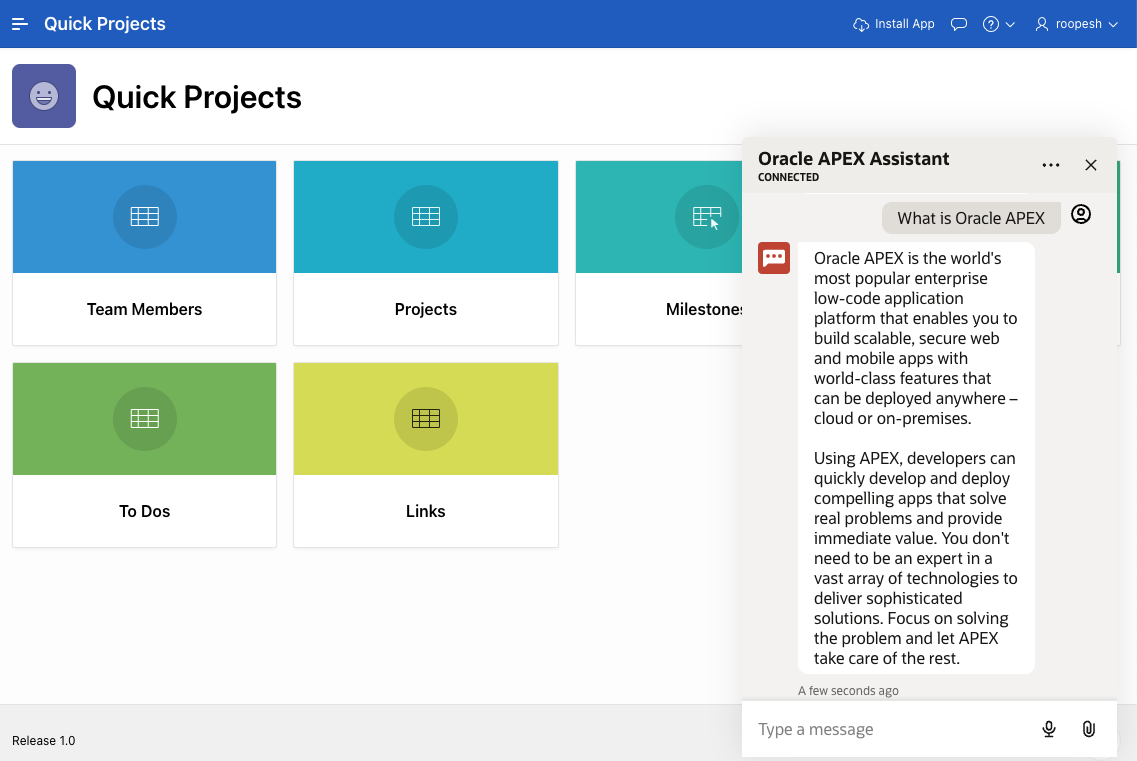
Save and run the page to see the chatbot in action. In the chat box, enter a query such as ‘hello’ or ‘what is APEX’ and see what the responses are. This is just a basic setup to show the unlimited possibilities you can configure for your business.
Conclusion:
Integrating Oracle APEX with Oracle Digital Assistant can empower your organization to create intelligent applications that provide a seamless and engaging experience for users. By following the steps outlined in this technical guide, you can harness the capabilities of both platforms to streamline processes, automate tasks, and provide real-time insights, ultimately driving efficiency and improving user satisfaction.