Select AI, a new feature of Autonomous Database, enables users to perform queries on their data using natural language processing. This feature harnesses the power of generative AI and Large Language Models (LLMs) to translate user input text into Oracle SQL queries. By integrating advanced language processing capabilities, users can interact with the database in a more intuitive and user-friendly manner.
Select AI acts as the conduit through which the AI services provided by OpenAI, Cohere or Azure OpenAI are integrated, leveraging the capabilities offered by Large Language Models (LLMs) available in the market today.
The Autonomous Database can now understand and respond to human language !!!
How Select AI functions behind the scenes
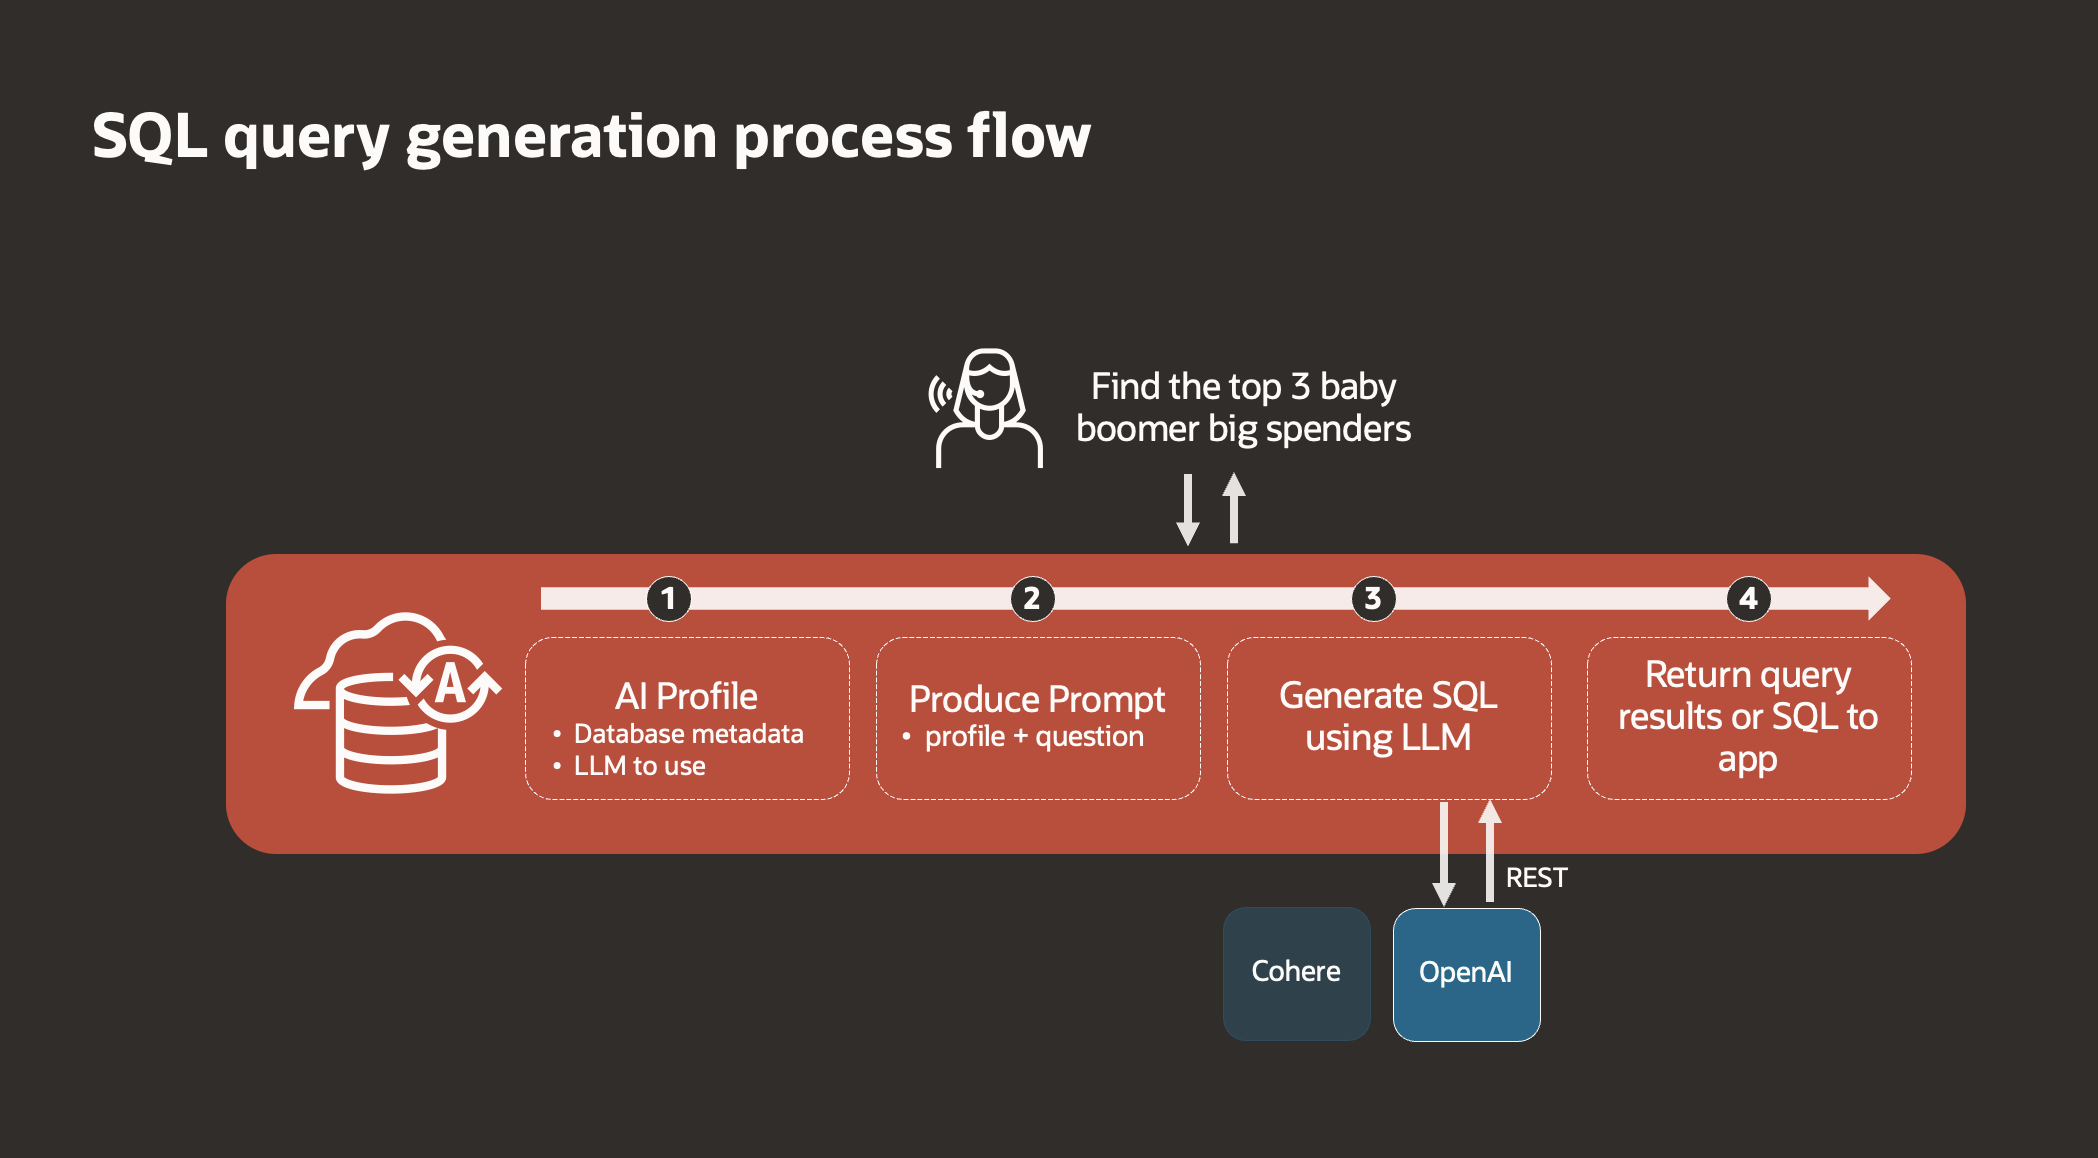
- AI Configuration: Set up metadata and choose the desired Large Language Model (LLM), such as OpenAI or Cohere.
- User Input: Users provide plain text instructions or questions through the product prompt.
- SQL Generation: The provided text is transformed into an SQL query using the selected LLM.
- Result Delivery: The generated SQL query yields results that are then displayed in the application.
Why integrate Select AI with APEX?
Application users typically interact with applications, not databases, directly. To make the most of generative AI, it’s not enough to have it just in the database. We need to let users access these AI features through the application they use. Oracle APEX helps with this. It acts as a bridge, allowing users to easily tap into the powerful capabilities of the Oracle Autonomous Database (ADB). This makes the whole process smooth and dramatically improves how users interact with the system.
With Select AI, querying databases in APEX becomes a breeze – no need for complicated SQL writing anymore. Imagine having conversations with your APEX applications! Select AI makes it happen, making your interactions smooth and intuitive. It’s like having a friendly assistant guiding you. Plus, it speeds up development by letting developers focus on what really matters. These innovative features give your organisation a unique edge, making data querying effortless and insightful.
How to configure Select AI
Prerequisites
- Autonomous Database of any workload type (ATP, ADW, JSON or APEX). You can also do this configuration on an Always Free Autonomous Database.
- An APEX Workspace. An APEX instance comes pre-provisioned with an Autonomous Database. You can sign in to the Administrative Services and create an APEX workspace.
- A Schema with tables to generate queries using Select AI.
In this blog, you will see how to configure Select AI to ask questions in Human language and generate SQL queries on top of the Projects and Tasks dataset.
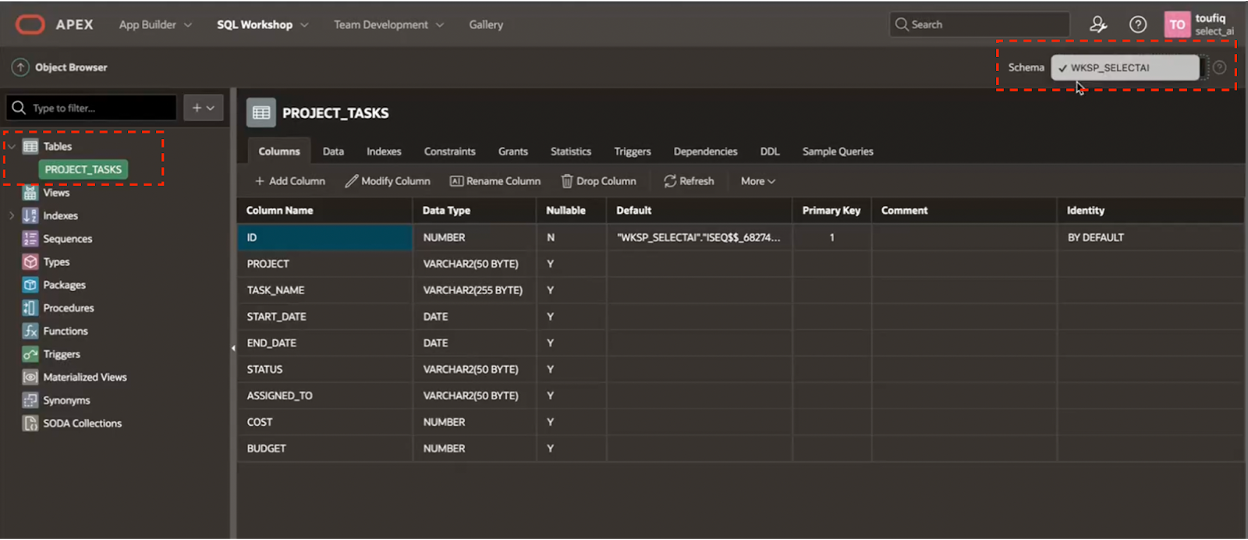
In the Object Browser under SQL Workshop, you can verify the tables and the corresponding Schema these tables belong to. In this blog post, the PROJECT_TASKS table in the WKSP_SELECTAI business schema is being used.
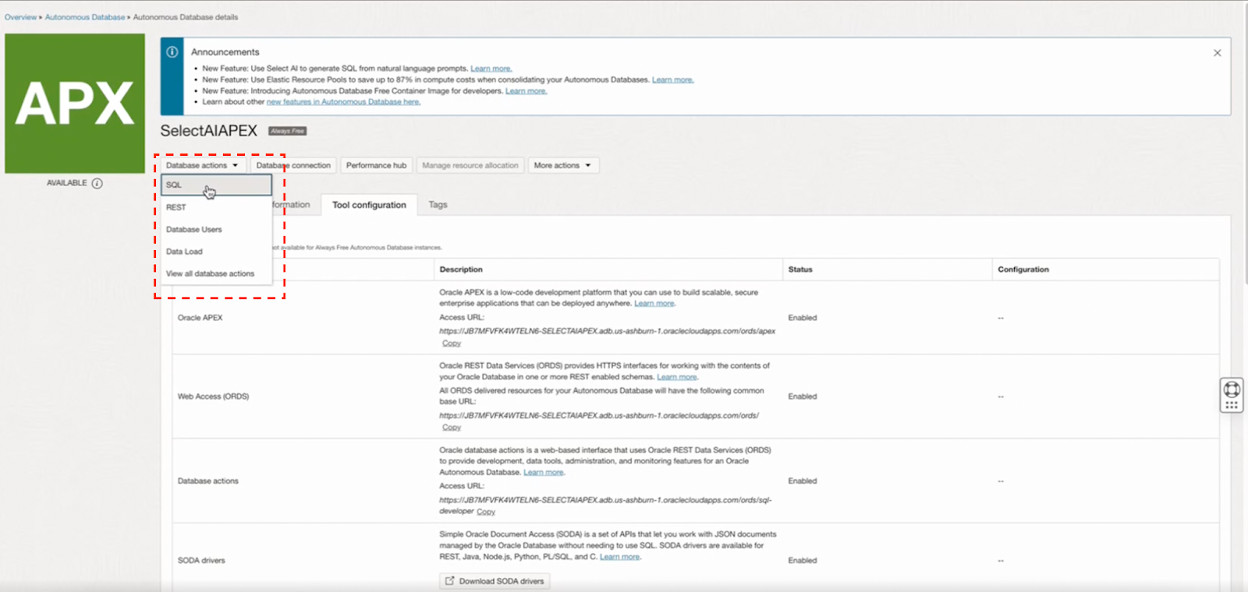
Now, navigate to the Autonomous Database Details page of your Autonomous Database instance and Click SQL from under the Database Actions drop-down.
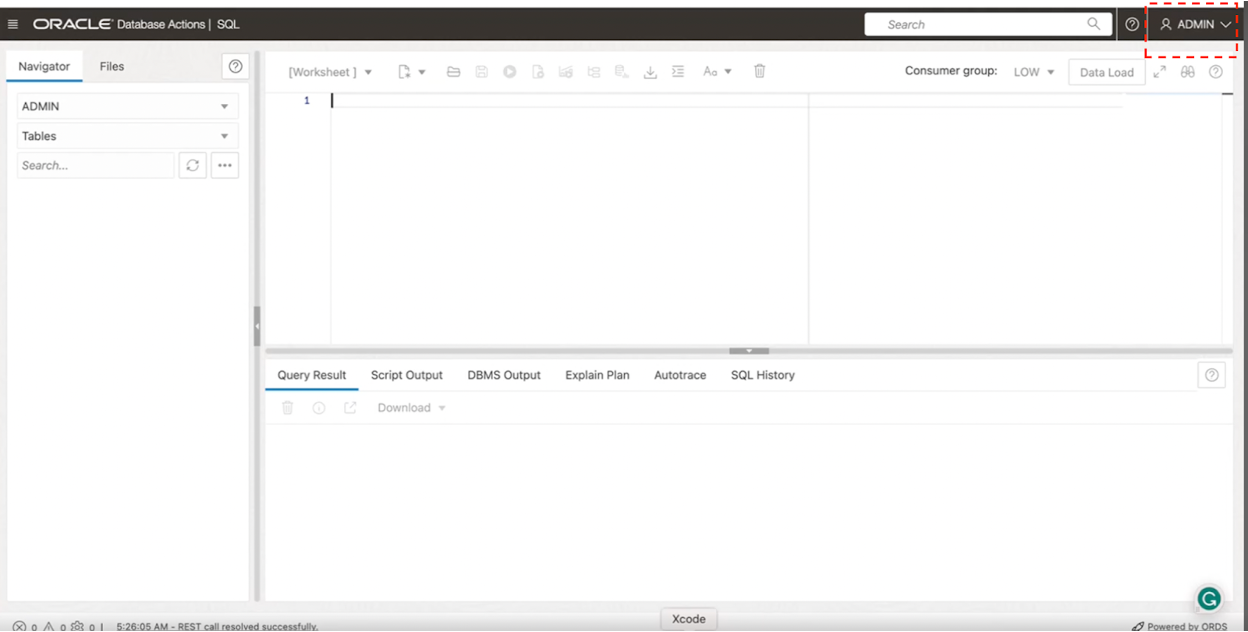
This opens the SQL Worksheet in Database Actions. Verify that you’re logged in as ADMIN.
As an ADMIN user, grant execute privileges on DBMS_CLOUD and DBMS_CLOUD_AI packages to the business schema.
grant execute on DBMS_CLOUD to your_schema_name;

grant execute on DBMS_CLOUD_AI to your_schema_name;
As discussed above, Select AI reaches out to OpenAI or Cohere LLMs via REST. To allow this outbound REST call from the database, you need to configure the Access Control List (ACL)
For example, ACL for OpenAI can be done using the below snippet:
BEGIN
    DBMS_NETWORK_ACL_ADMIN.APPEND_HOST_ACE(
          HOST => 'api.openai.com',
          ACE => XS$ACE_TYPE(PRIVILEGE_LIST => XS$NAME_LIST('http'),
                             PRINCIPAL_NAME => 'your_schema_name',
                             PRINCIPAL_TYPE => XS_ACL.PTYPE_DB)
);
END;
Note: For Cohere you need to pass 'api.cohere.ai' for the HOST parameter.
After configuring the required privileges and ACL using the ADMIN user, the next step is to create Credentials and an AI profile. This should be done by logging in to the business schema or directly from SQL Commands in your APEX Workspace.
Go to APEX App Builder, navigate to SQL Commands, and use the below code snippet to create credentials to enable access to OpenAI.
BEGIN
    DBMS_CLOUD.create_credential('OPENAI_CRED', 'OPENAI', 'your_api_token');
END;
Here, OPENAI_CRED is the name of the credential, OPENAI is the username, and the third parameter is the API Token obtained from your OpenAI account.
Alternatively, if you wish to use Cohere as the AI Provider, the CREATE_CREDENTIAL call looks like this:
BEGIN
    DBMS_CLOUD.create_credential('COHERE_CRED', 'COHERE', 'your_api_token');
END;
The next step is to create an AI Profile using the DBMS_CLOUD_AI.CREATE_PROFILE PL/SQL API.
BEGIN
    DBMS_CLOUD_AI.CREATE_PROFILE(
        profile_name => 'OPENAI_GPT',
        attributes => '{ "provider": "openai",
                         "credential_name": "OPENAI_CRED",
                         "object_list": [{"owner": "your_schema_name", "name": "PROJECT_TASKS"}]
                       }',
        description => 'AI profile to use OpenAI for SQL translation'
    );
END;
The “attributes” parameter is used to specify which AI provider the profile should use as well as the associated credential. The “object_list” attribute is an array and can be used to configure the tables to be included in this AI Profile. If you have multiple tables that you want to include in the profile, each table can be added as an object to this array.
This completes the configuration of Select AI in your APEX workspace. Now, let’s put this to use.
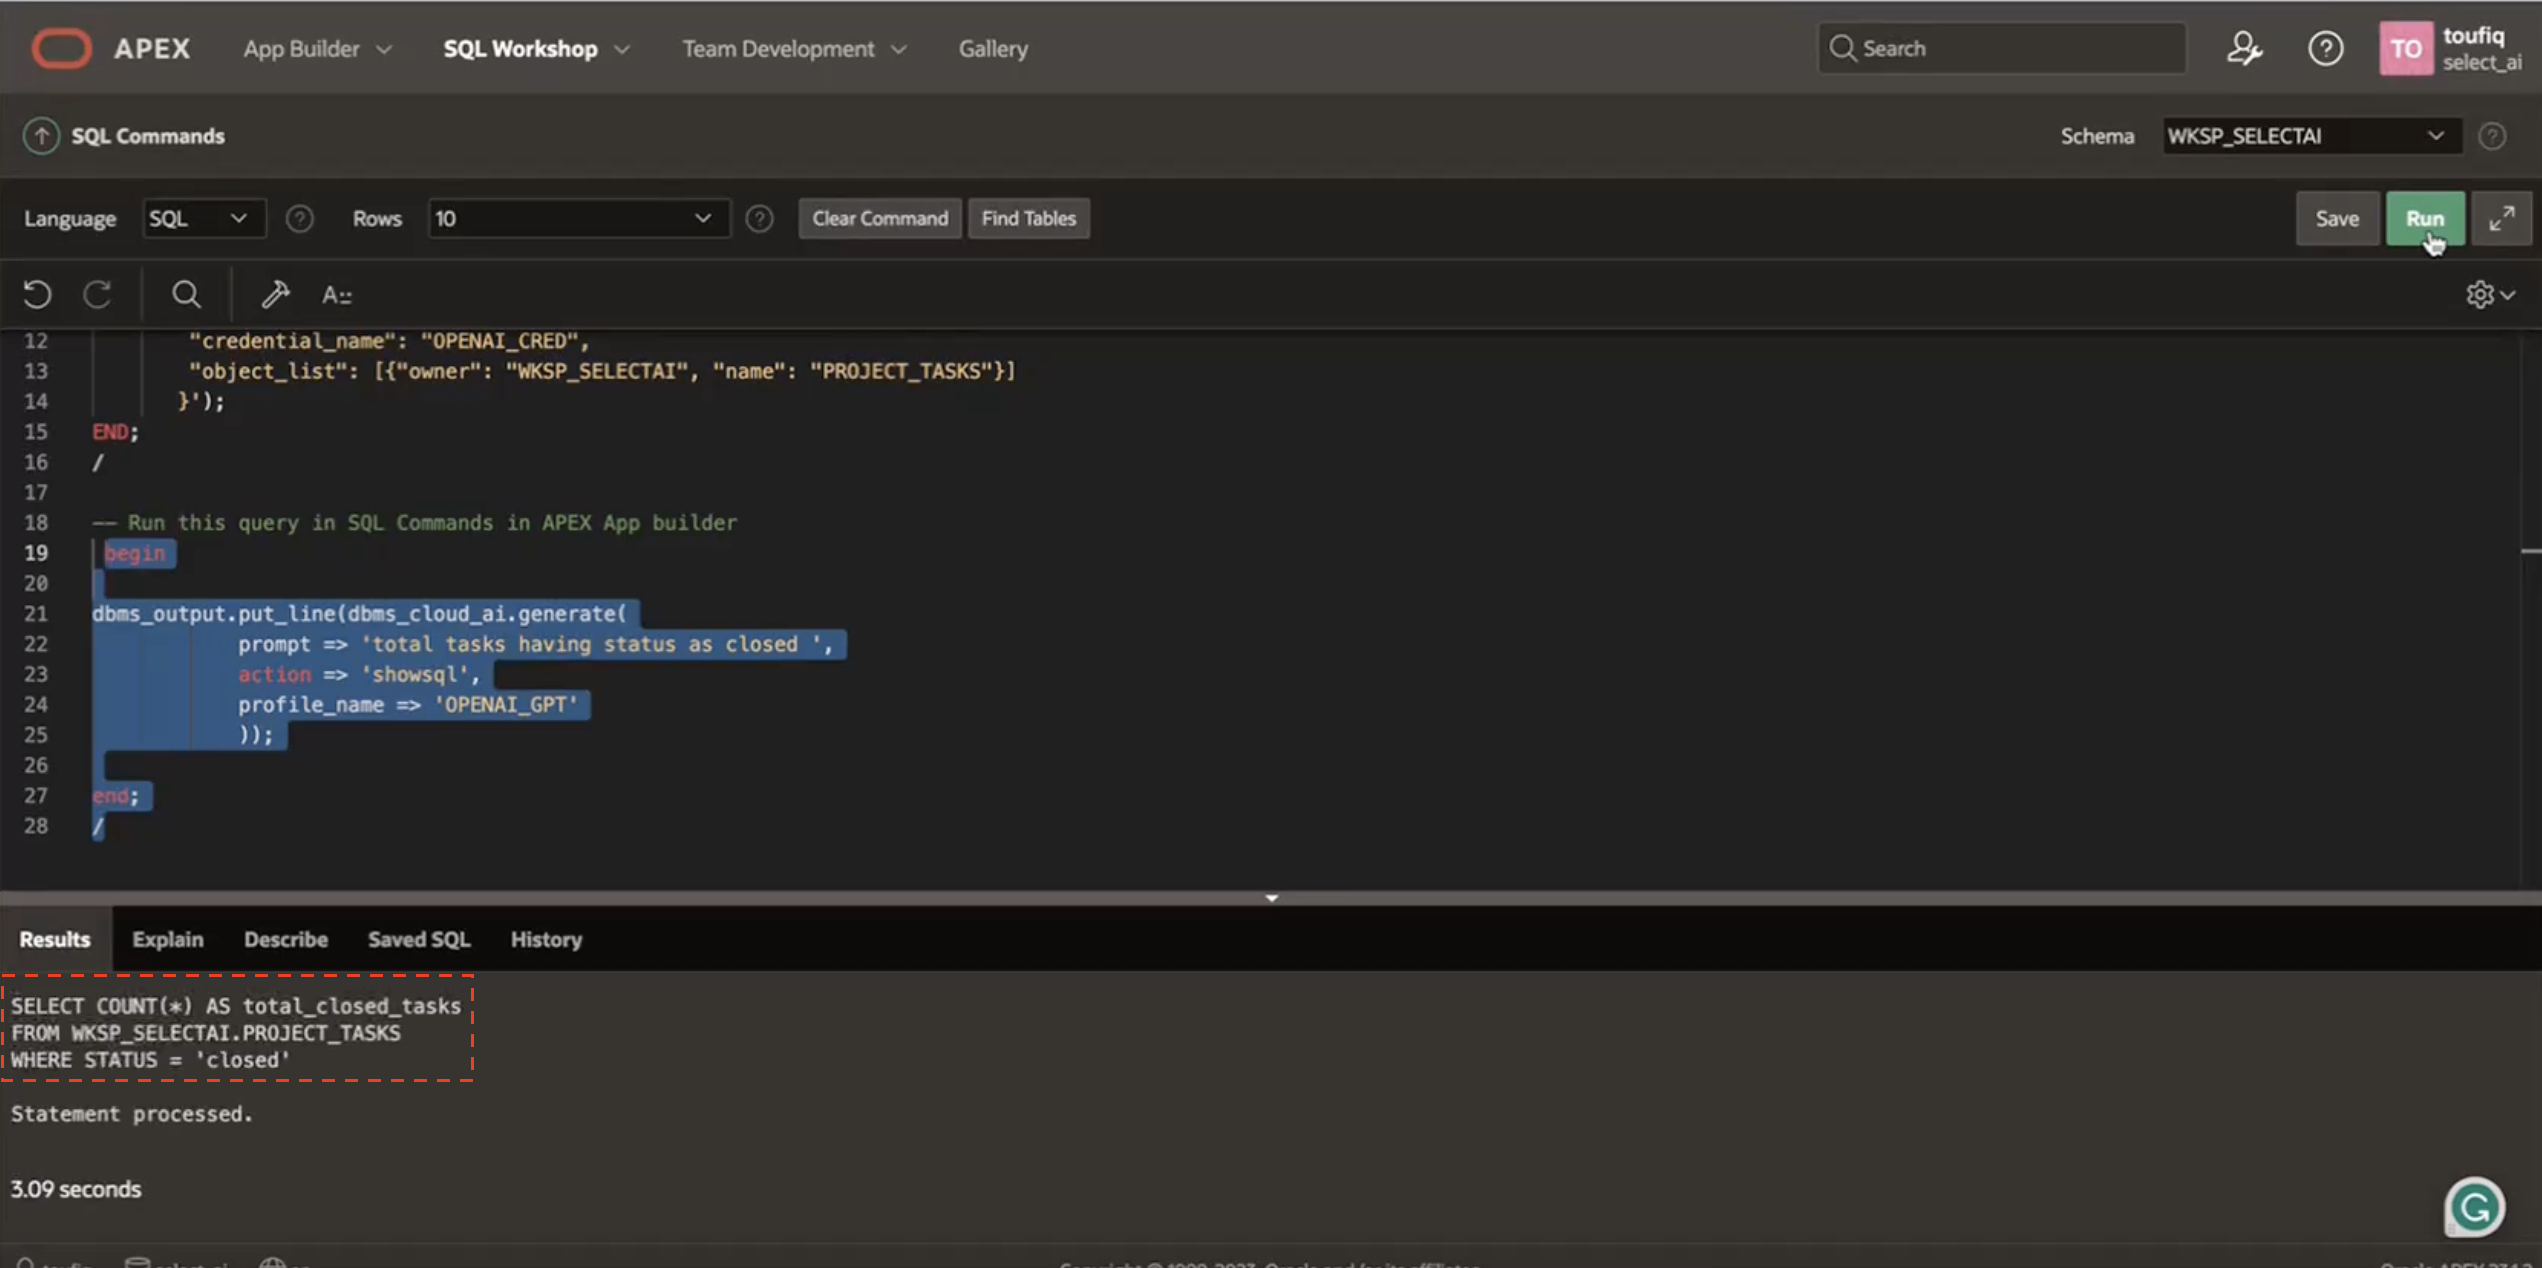
You can use the DBMS_CLOUD_AI.GENERATE PL/SQL API to generate and run queries with a natural language input.
For example, if you want to find out the total number of tasks having status as closed, there is no need to write an SQL query. Just ask!
BEGIN
    dbms_output.put_line(
        dbms_cloud_ai.generate(
                                prompt => 'total tasks having status as closed ',
                                action => 'showsql',
                                profile_name => 'OPENAI_GPT'
                               )
      );
END;
The “action” parameter tells Select AI to return the SQL statement instead of executing it. The output will be a syntactically correct SQL Statement.
Conclusion
Once the SQL is generated, you can integrate this into your APEX applications in endless ways. Here are a few ideas to consider:
- The returned SQL Query can be passed to an Interactive Report or an Interactive Grid to display the results in a report format and leverage the rich capabilities these components provide out of the box.
- The prompt provided by the user can be engineered so that the LLM returns an SQL statement selecting only the primary key columns. Such a SQL statement can then be included in the WHERE clause of a Cards region, making way for advanced search capabilities.
Here’s a glimpse of Select AI in action. This APEX application, ChatDB, uses Select AI behind the scenes to provide Conversation chat style UI to talk to the database and get your queries answered.
You can download the app export of the above demo application from here : chat-db.sql
Stay tuned for more upcoming blog posts and demos on integrating Select AI into Oracle APEX applications.
Useful Resources
- Learn more about AI Infrastructure, AI-Powered Apps and customers using AI with Oracle APEX on the APEX + AI = Awesome! Web Page.
- Read detailed blog posts on AI integrations with Oracle APEX – Embracing the Future: Unleashing AI’s Power with Oracle APEX