Oracle APEX is a powerful low-code development platform for building scalable and secure enterprise applications. It continually enhances the developer experience by integrating an increasing number of low-code features that simplify application development.
With the release of Oracle APEX 24.2, the introduction of JSON Sources allows users to create APEX applications or components that can directly interact with JSON data through the new JSON Sources Shared Components. Previously, to develop an APEX application utilizing JSON data, it was necessary to store the data in a temporary table or collection and subsequently parse it within the APEX applications. The new feature enables customers to construct their APEX applications to directly handle JSON data, eliminating the requirement to store it in a temporary table or collection for parsing and display.
With this feature, users can now develop Oracle APEX components, pages, and applications that utilize JSON data sourced from tables with JSON columns or from JSON collections. In this blog, we will explore the method of creating and loading JSON data using the ‘Table with JSON columns’ approach, as we are already familiar with the process of creating and loading JSON data into a Collection.
JSON Sources:
- When opting for the “Table with JSON Columns” option, a table containing JSON columns must exist either in the same database as APEX or be accessible via the REST Enabled SQL Service.
- If you choose the “JSON Collection Table” option, a collection must be created in the same database as APEX or be accessible through the REST Enabled SQL Service.
- If the collection is created in the Local Database, it will be listed under SODA Collections in your Object Browser.
- For the “JSON Collection Table” option, developers can provide a JSON schema file, and that APEX infers the schema from the data if they don’t.
NOTE: You need Oracle Database 23ai if you want to use JSON Sources with “JSON Collection Table” option. For “Table with JSON Columns” option you can use Oracle database 19c as well with Oracle APEX 24.2.
In this blog, we will employ the “Table with JSON Columns” feature, allowing us to construct a straightforward table that includes a CLOB column intended for the storage of JSON data, specifically related to PurchaseOrder-LineItems.
Pre-requisites
There are several prerequisites outlined below that must be met before configuring JSON Sources in Oracle APEX:
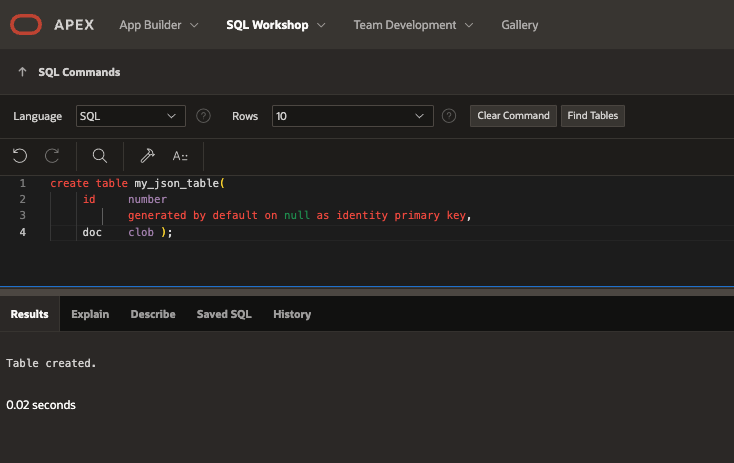
Execute the following SQL command to create a table with CLOB datatype in your Oracle Database. This table will be utilised for importing JSON data into the CLOB field.
create table my_json_table(
id number
   generated by default on null as identity primary key,
doc CLOB);
The method for creating a table with JSON columns and loading data into it remains consistent across different versions of Oracle Database, whether you are utilising Oracle Database 19c or 23ai. It is important to note that Oracle APEX 24.2 necessitates at least Oracle Database version 19c.
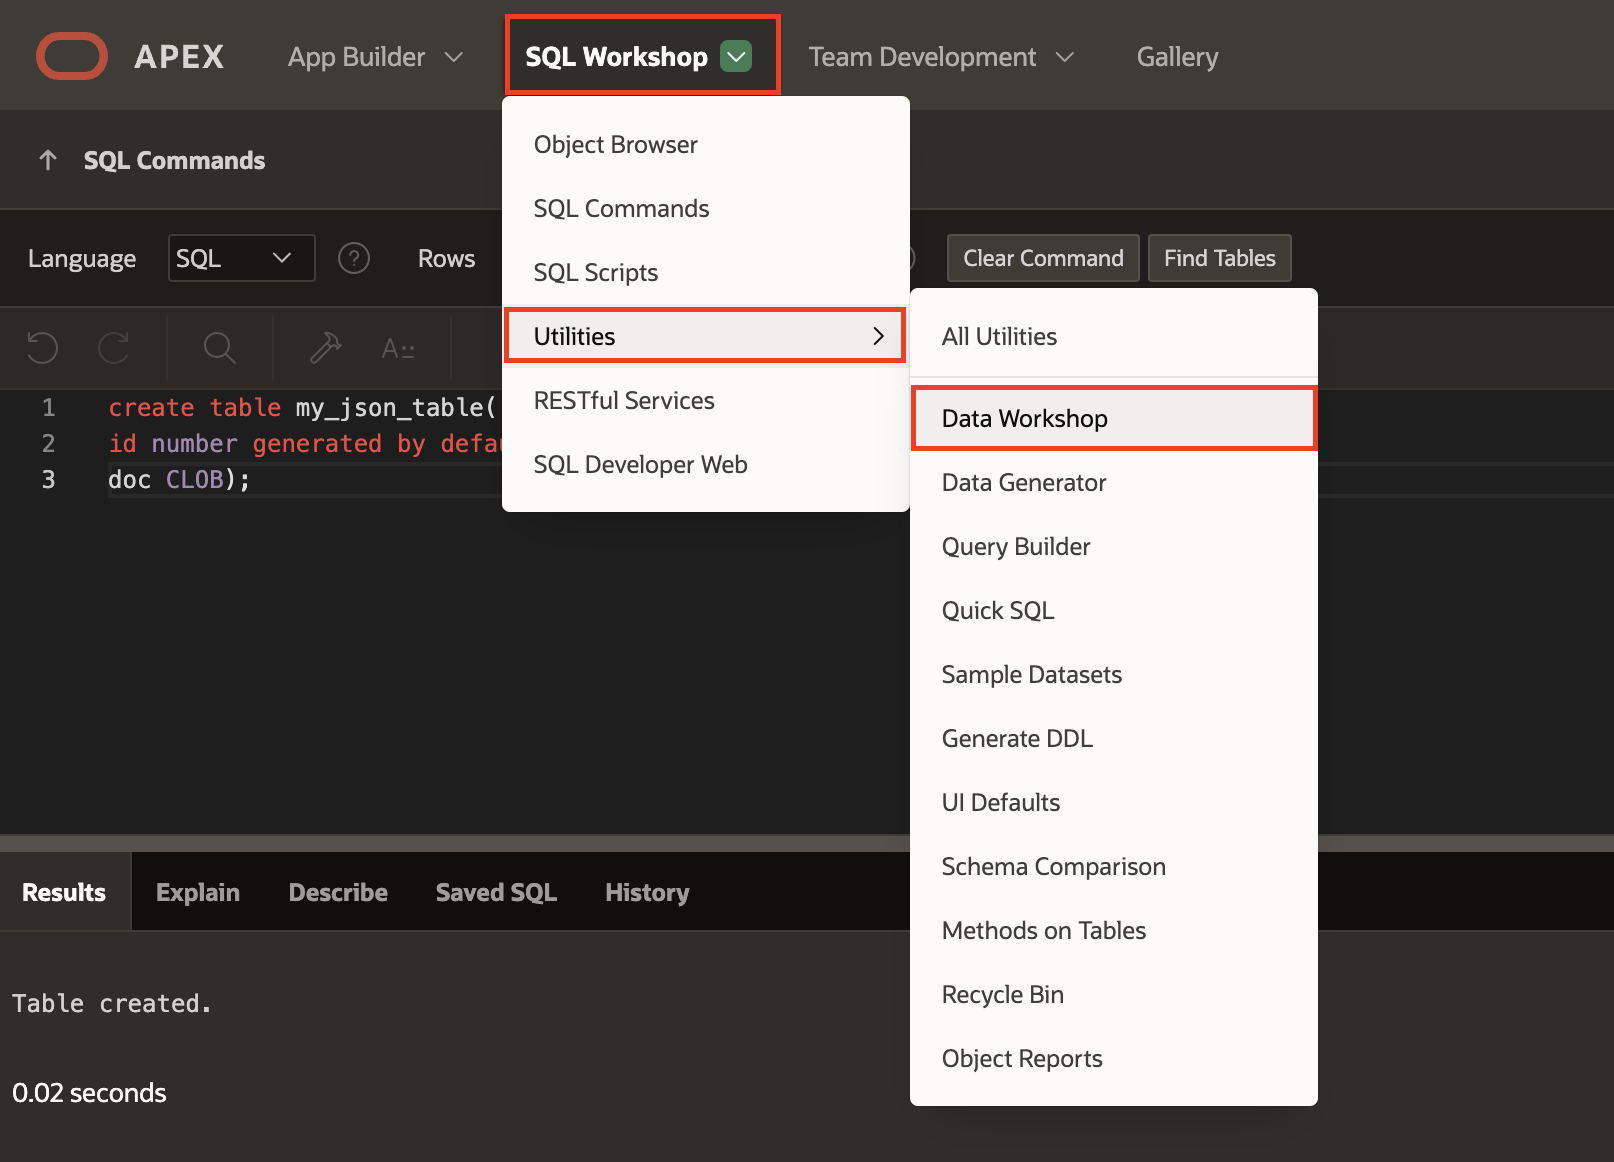
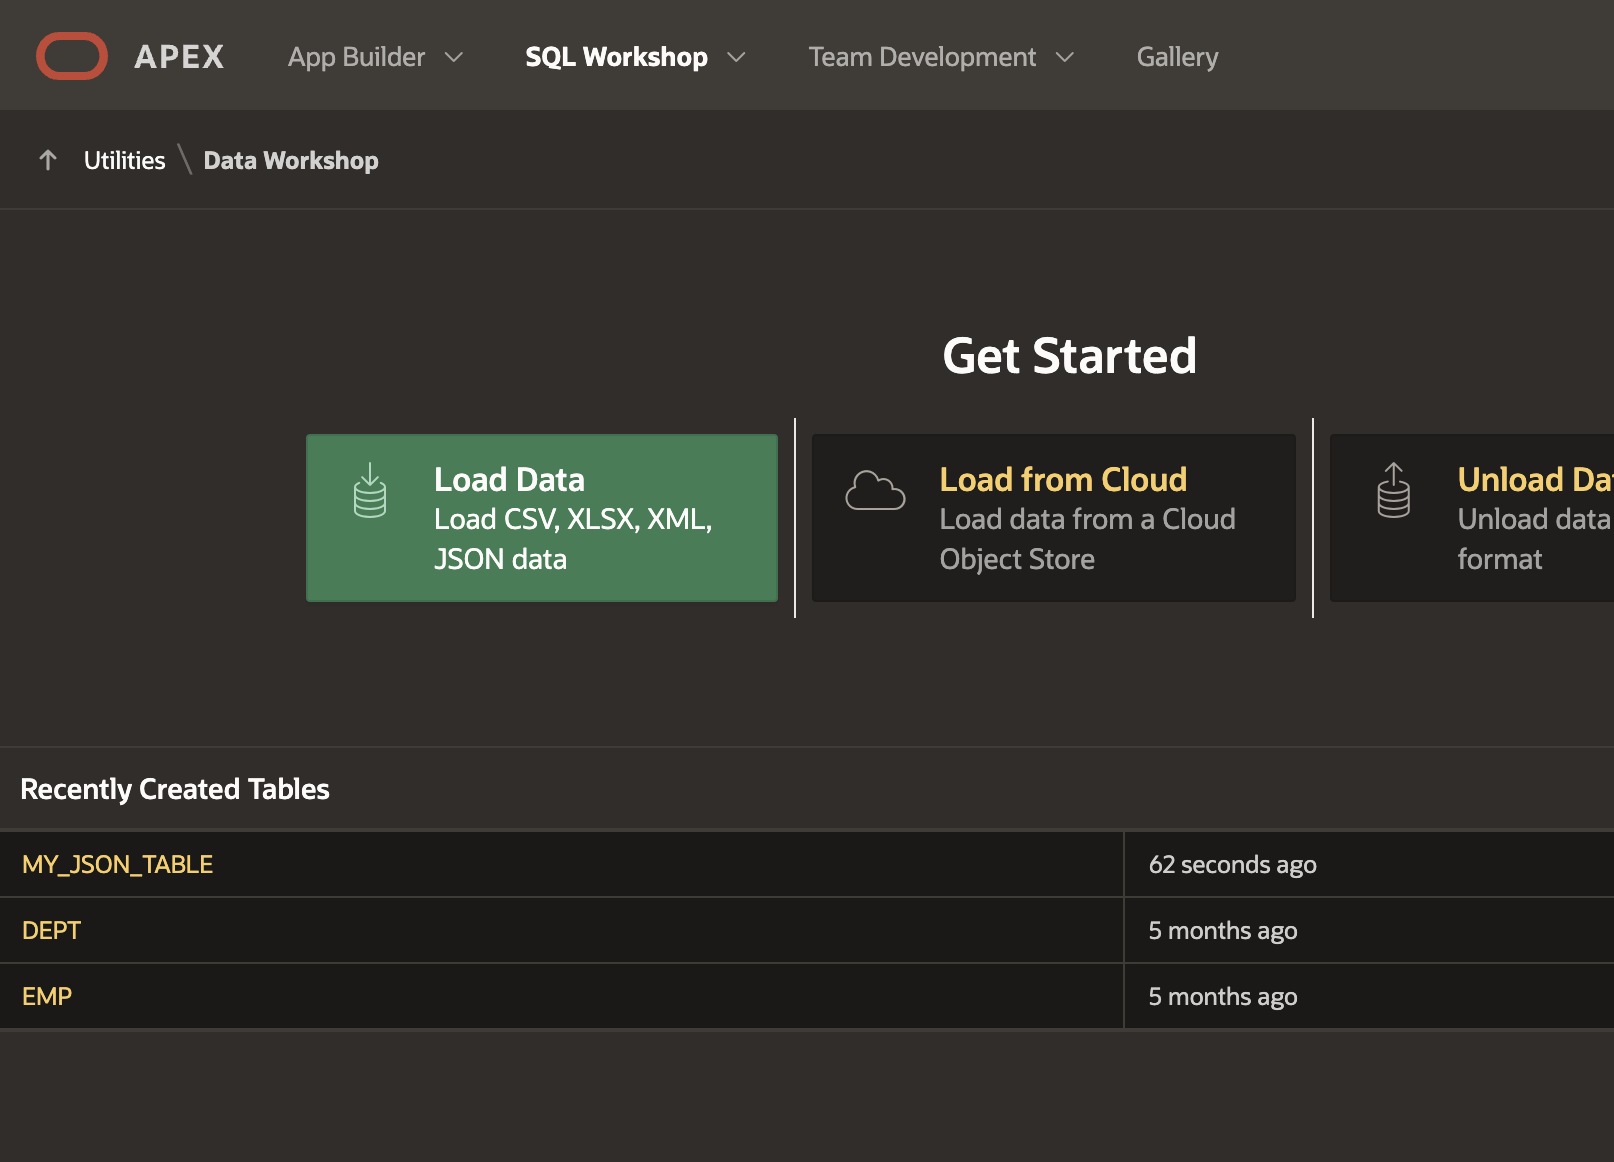
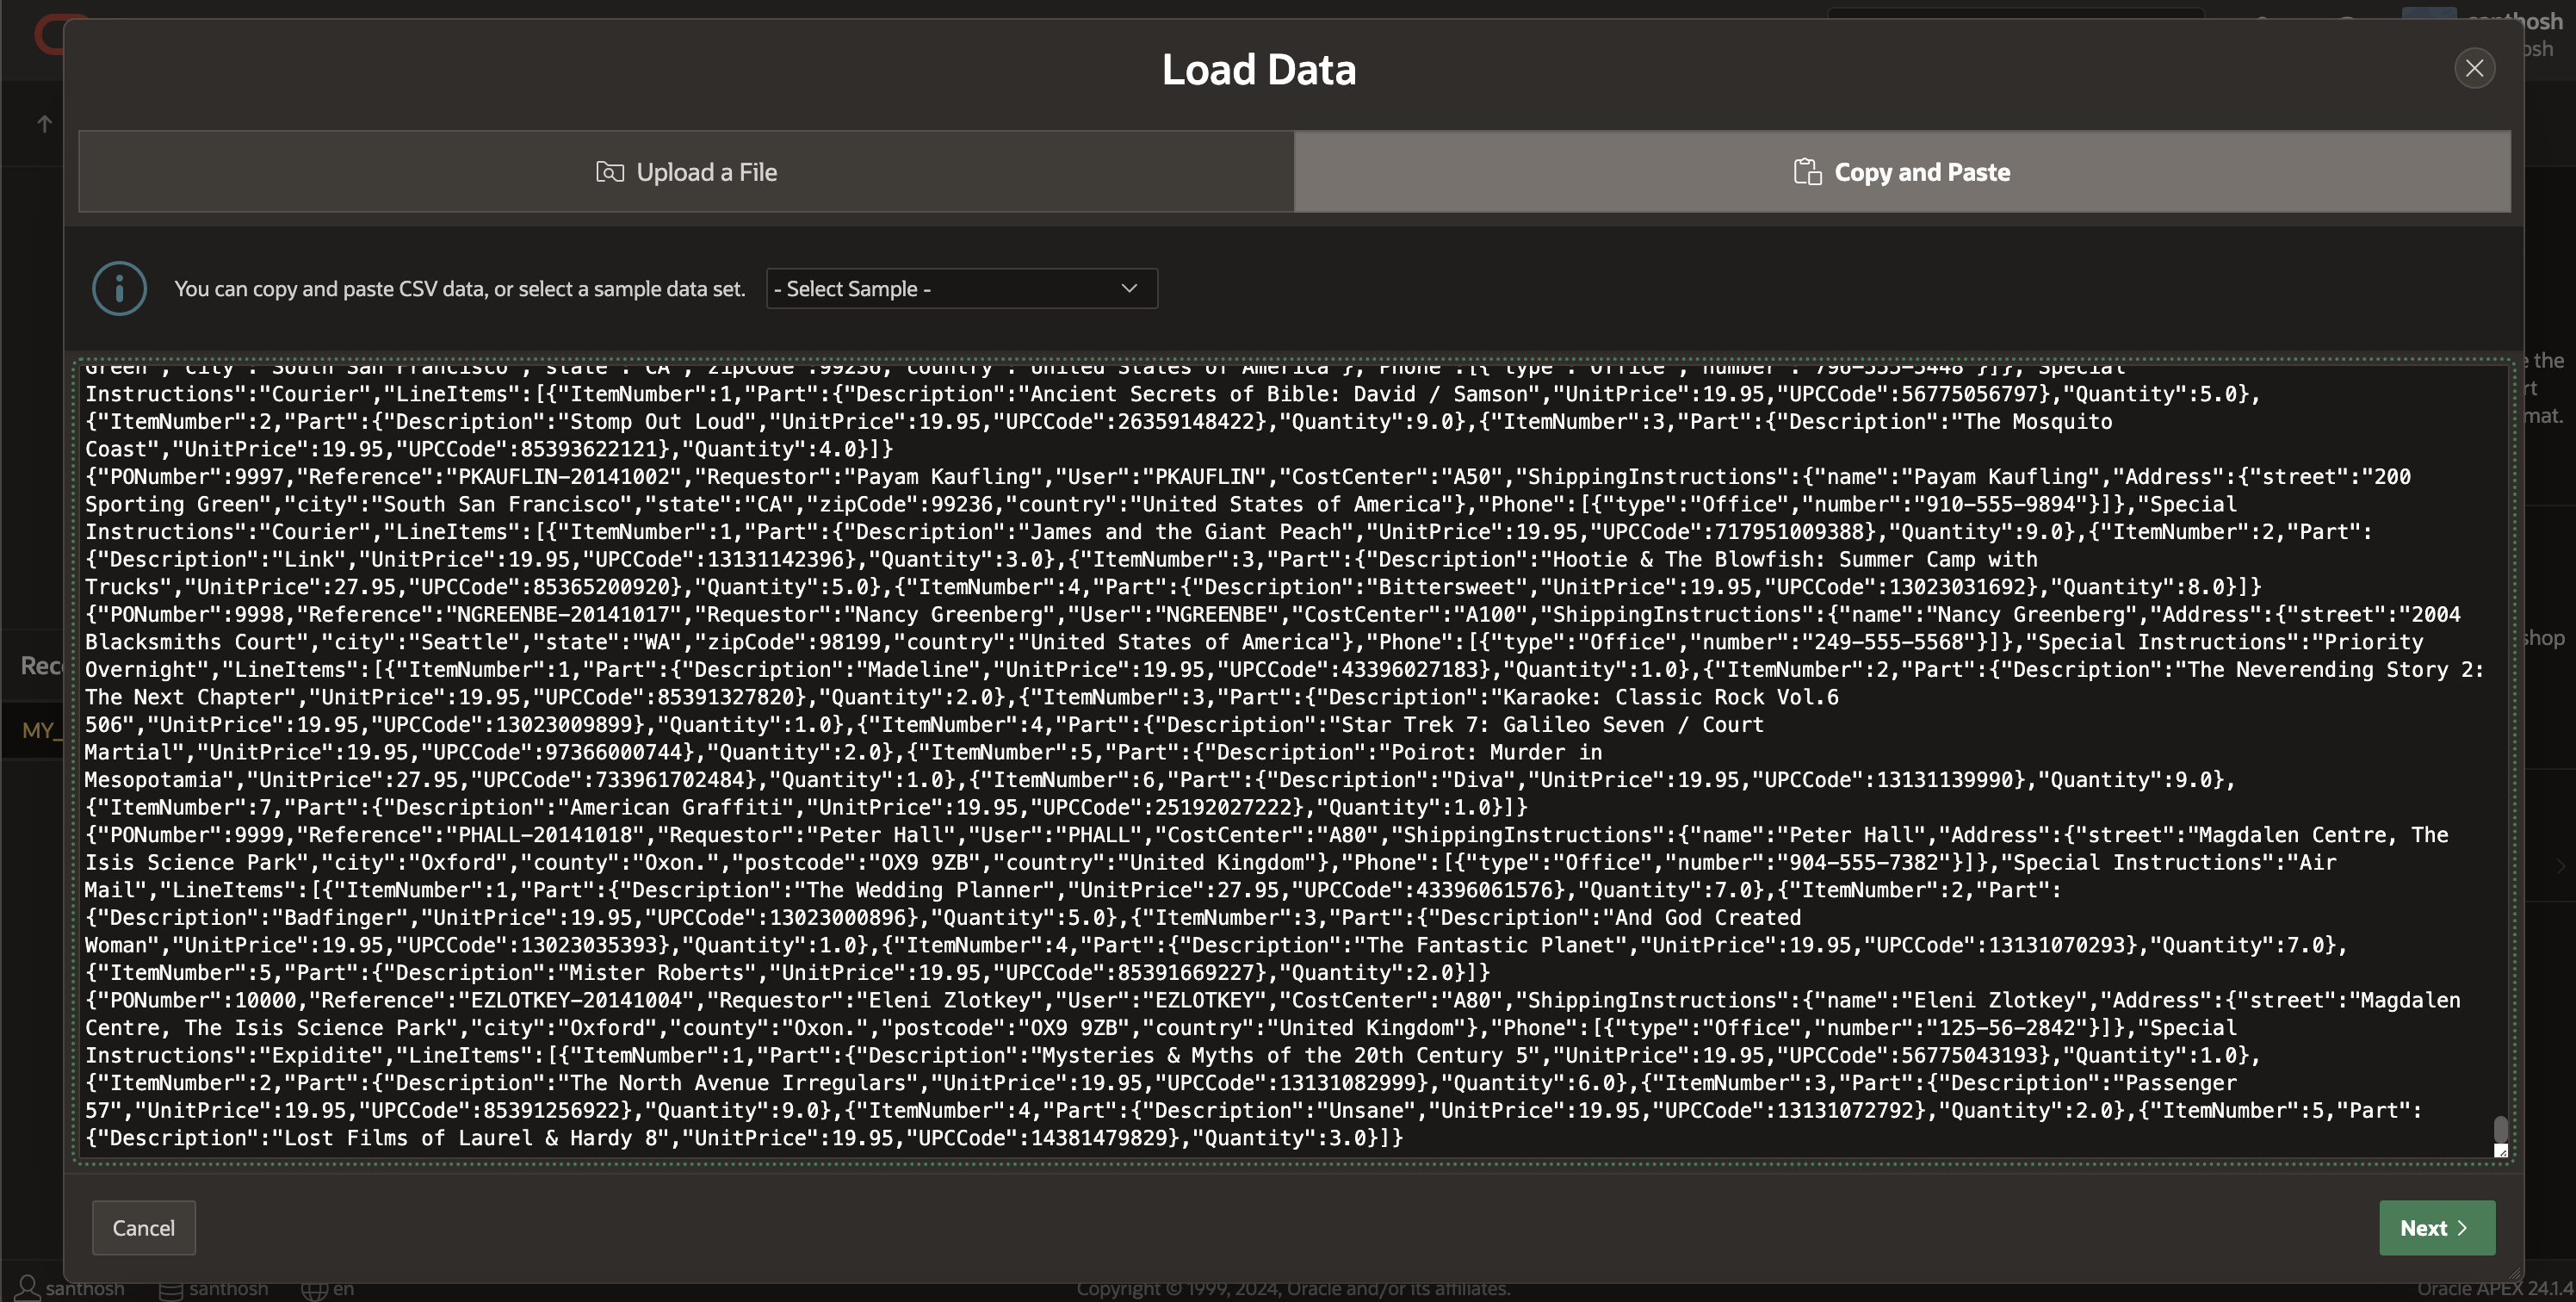
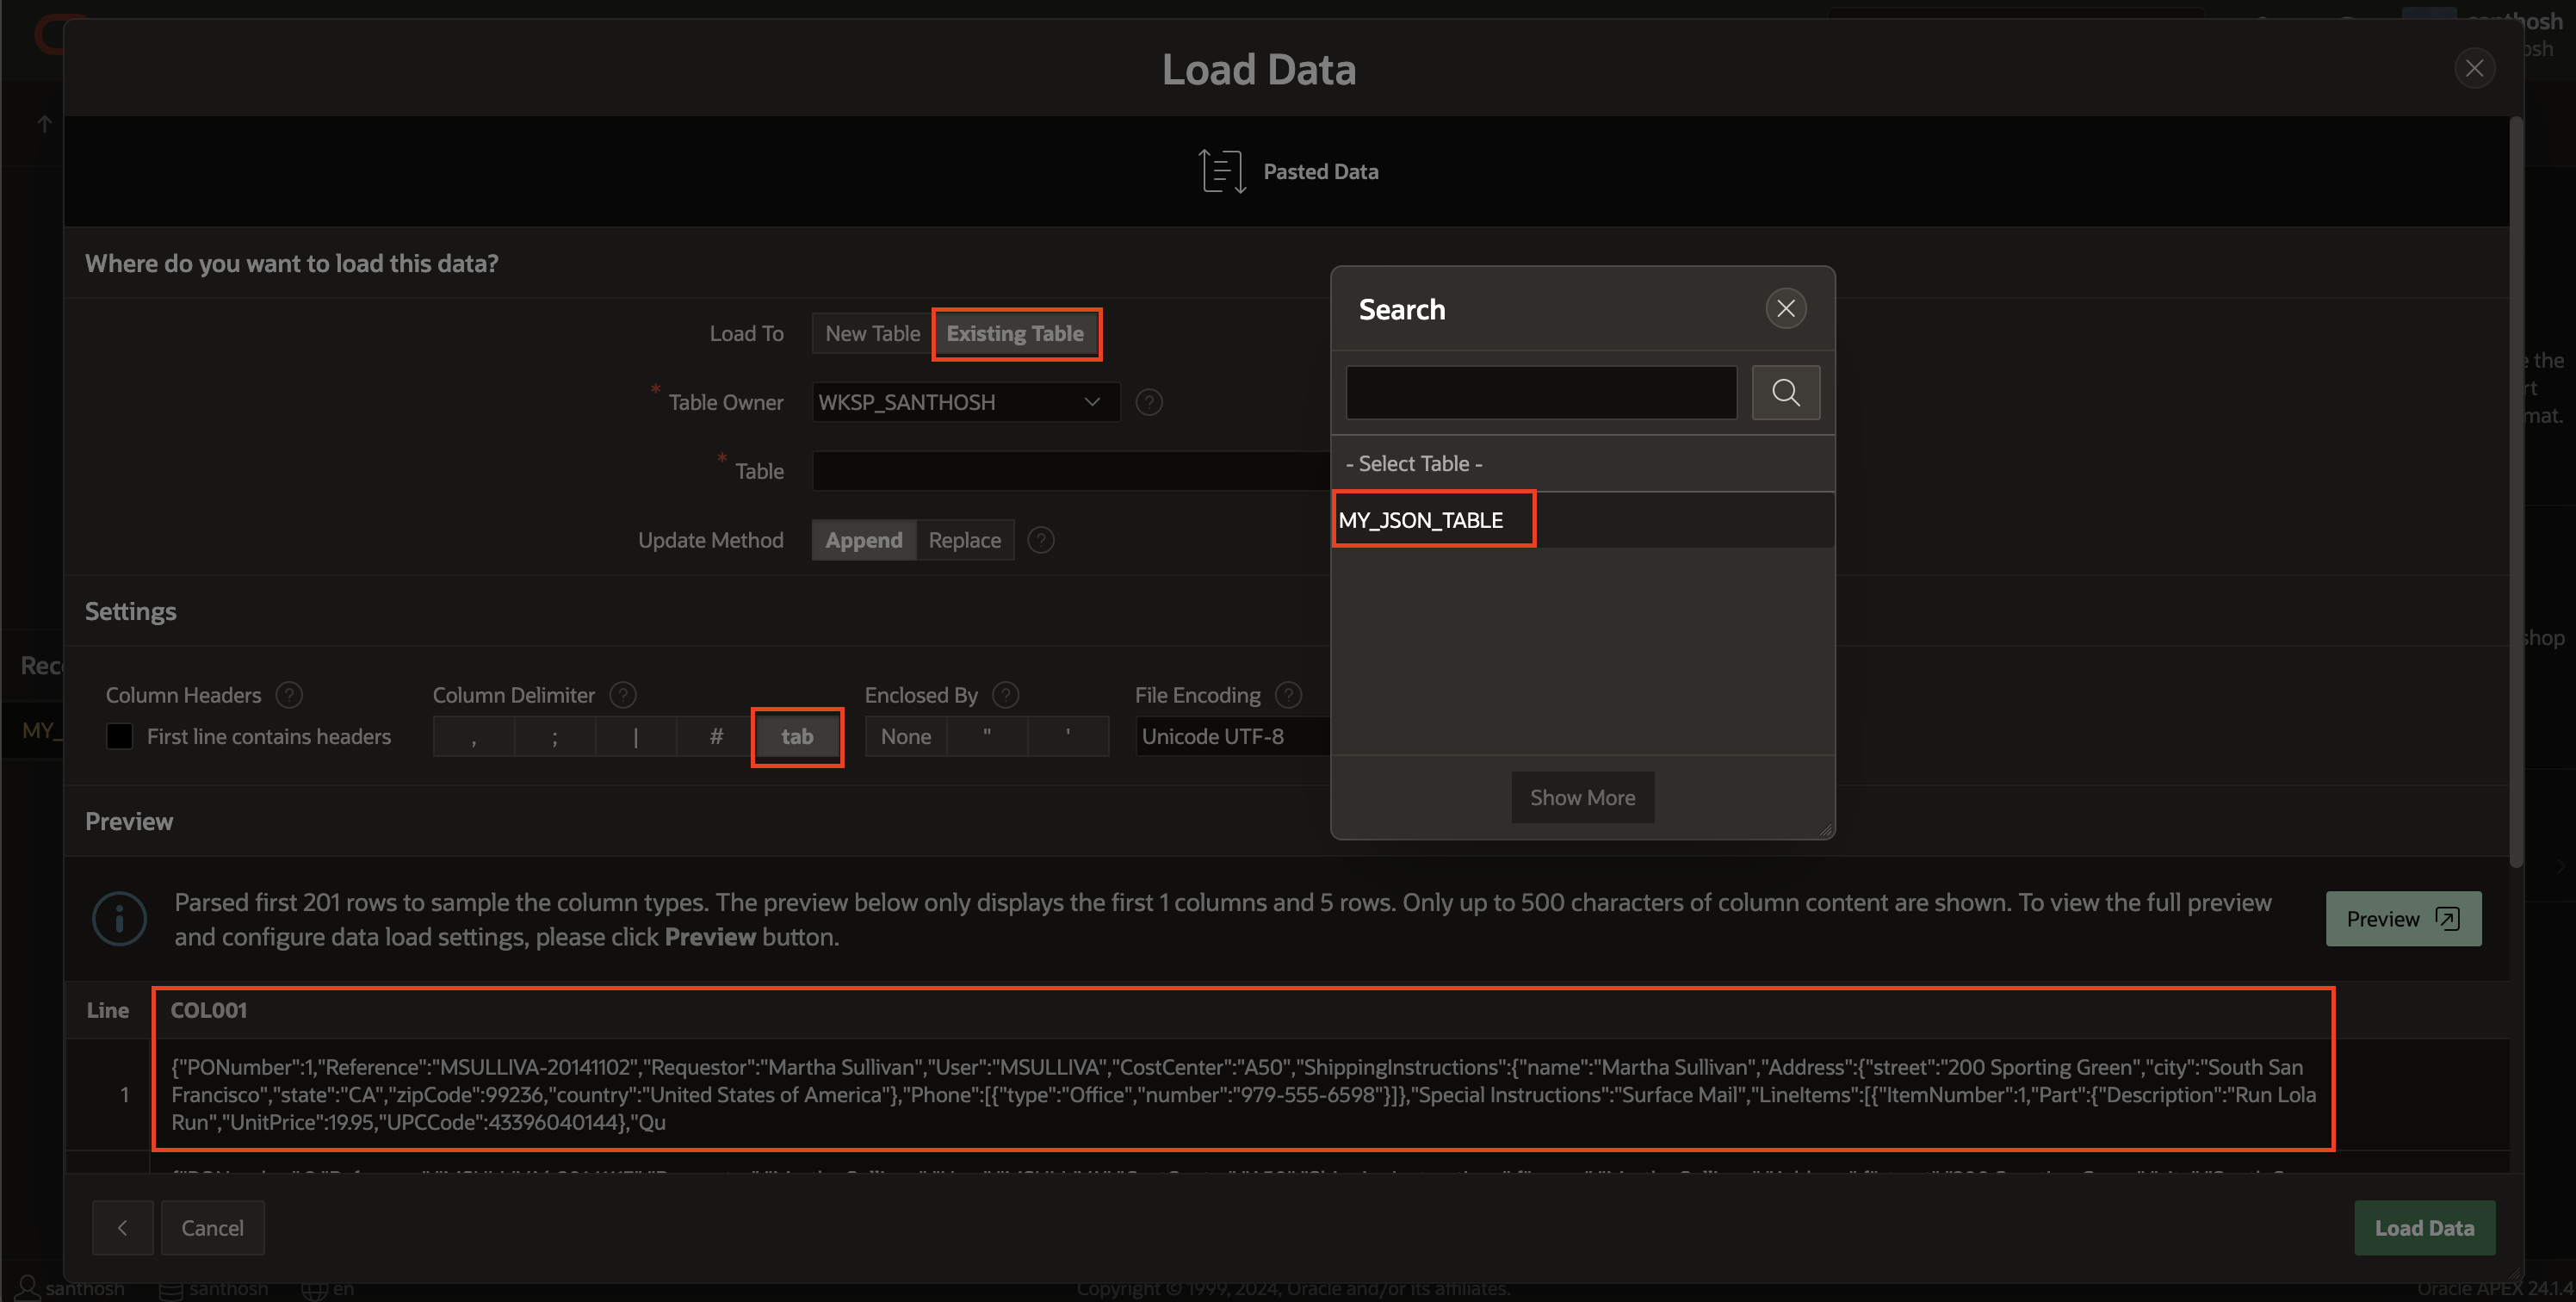
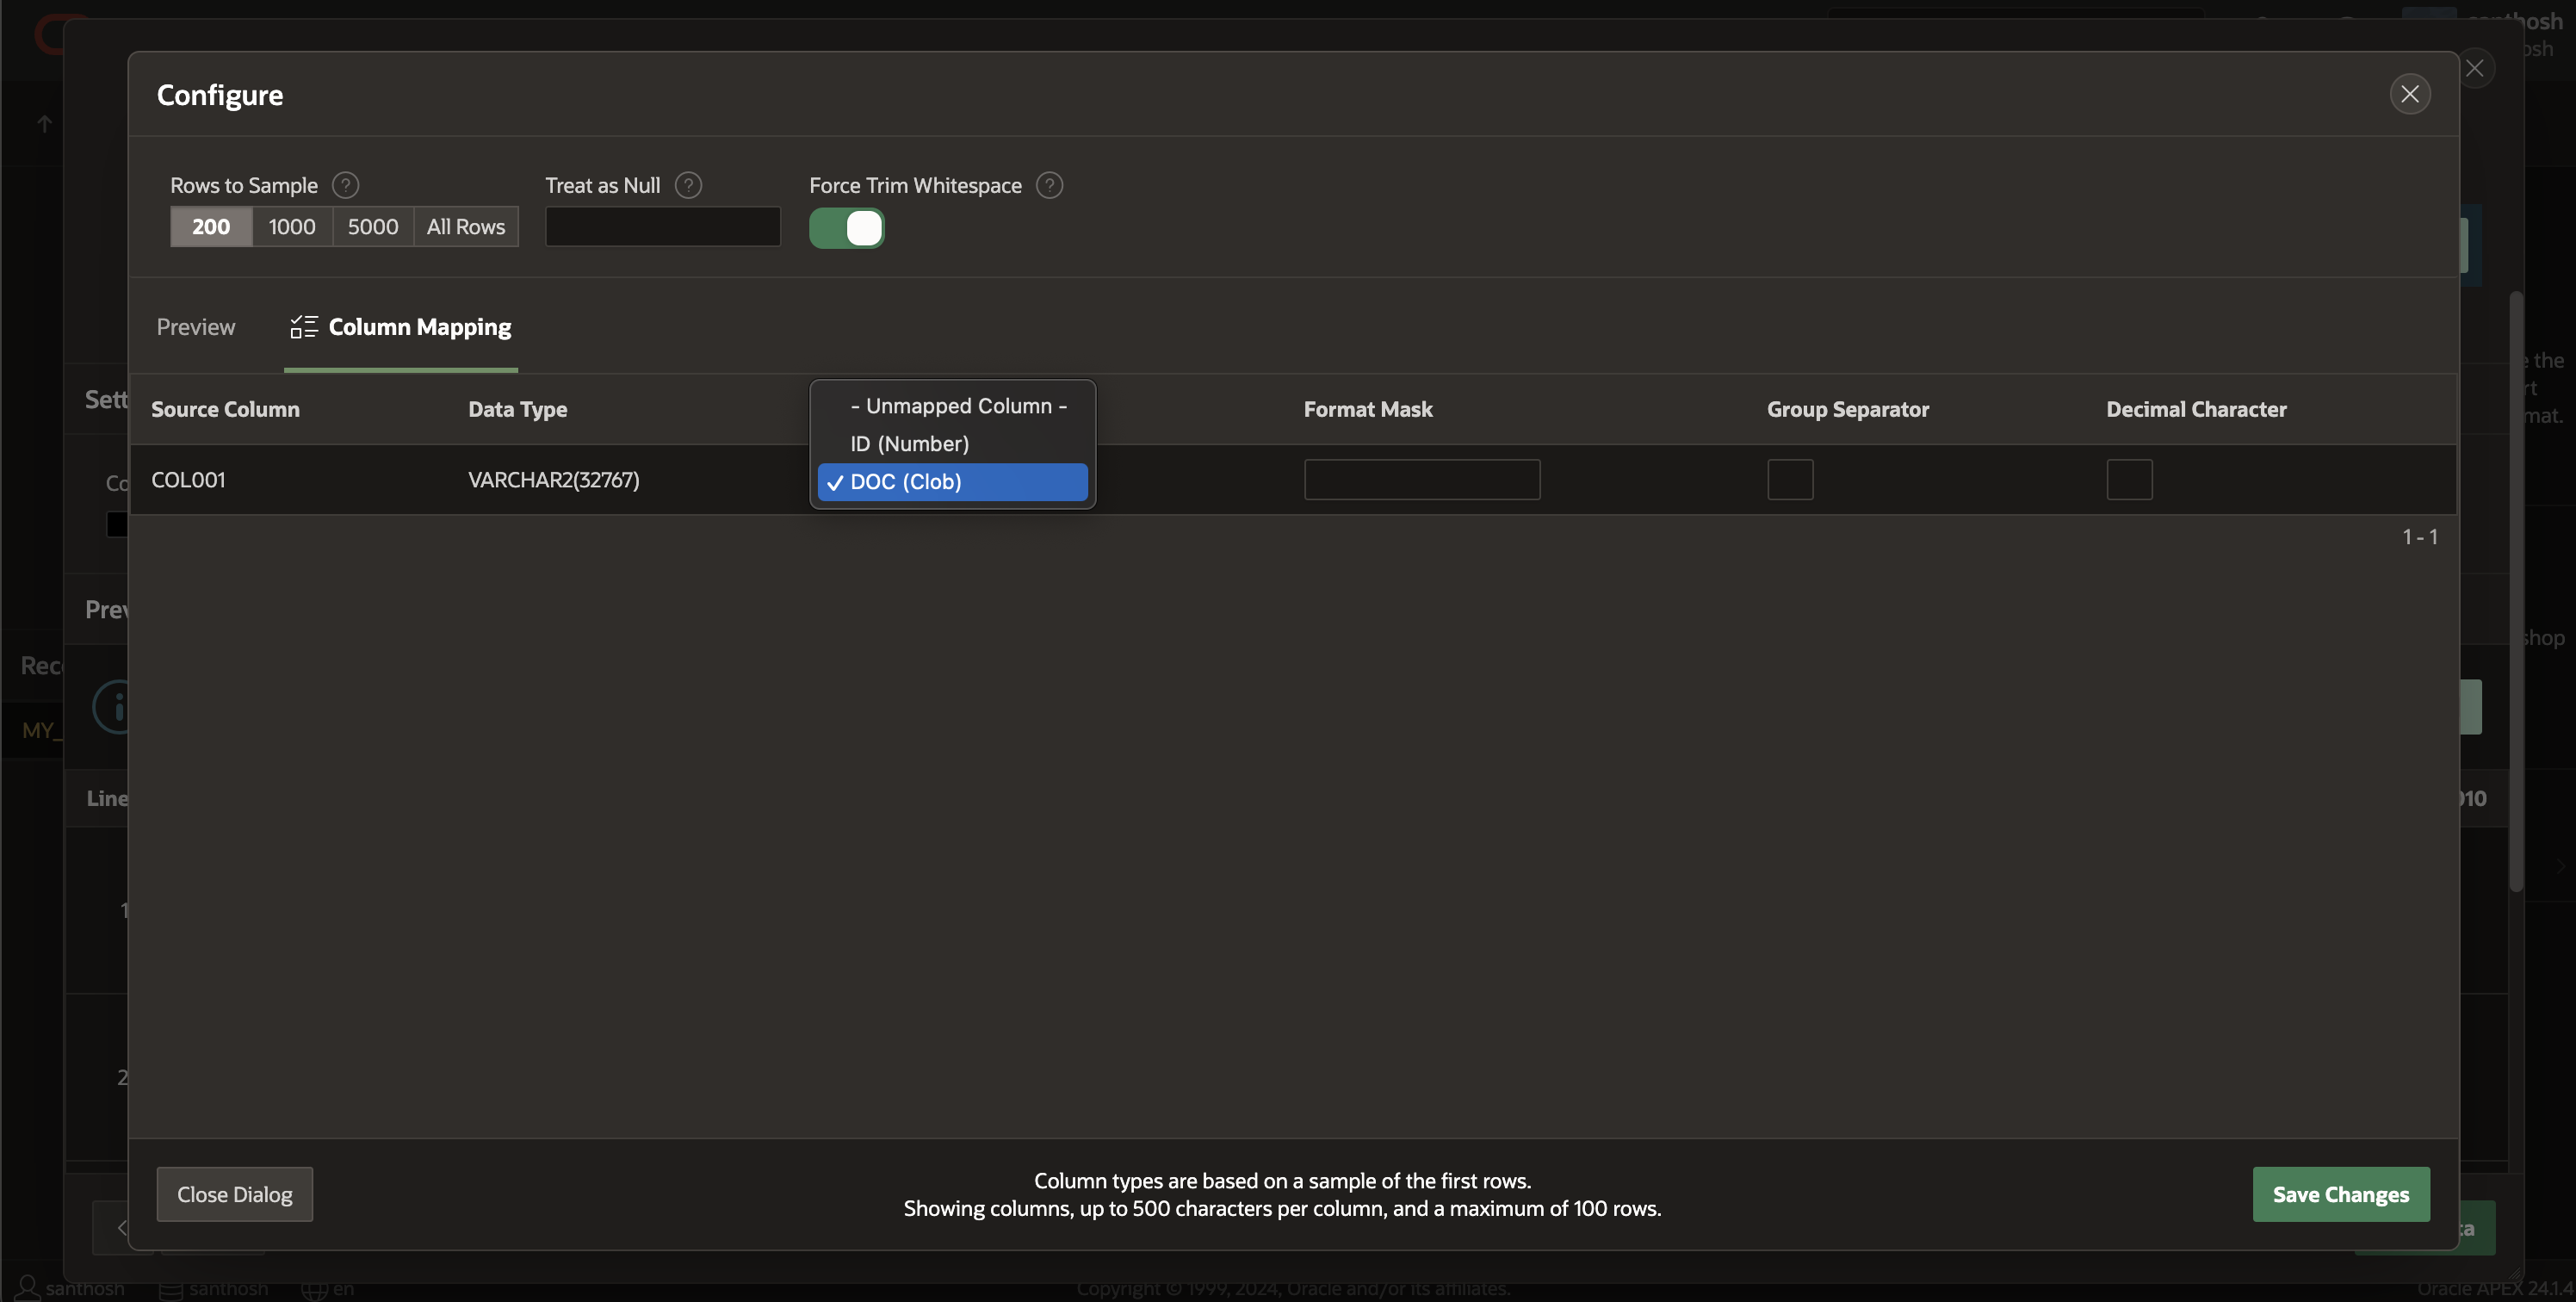
Now that the table is created I will proceed to import the attached data into the previously created table utilizing SQL Workshop Data Loading. It is essential to use the <tab> character as the column delimiter and to disable enquoting, ensuring that APEX effectively loads each line into the CLOB column of the table.
PurchaseOrders-json.txt contains the data used to load into MY_JSON_TABLE CLOB field (DOC).
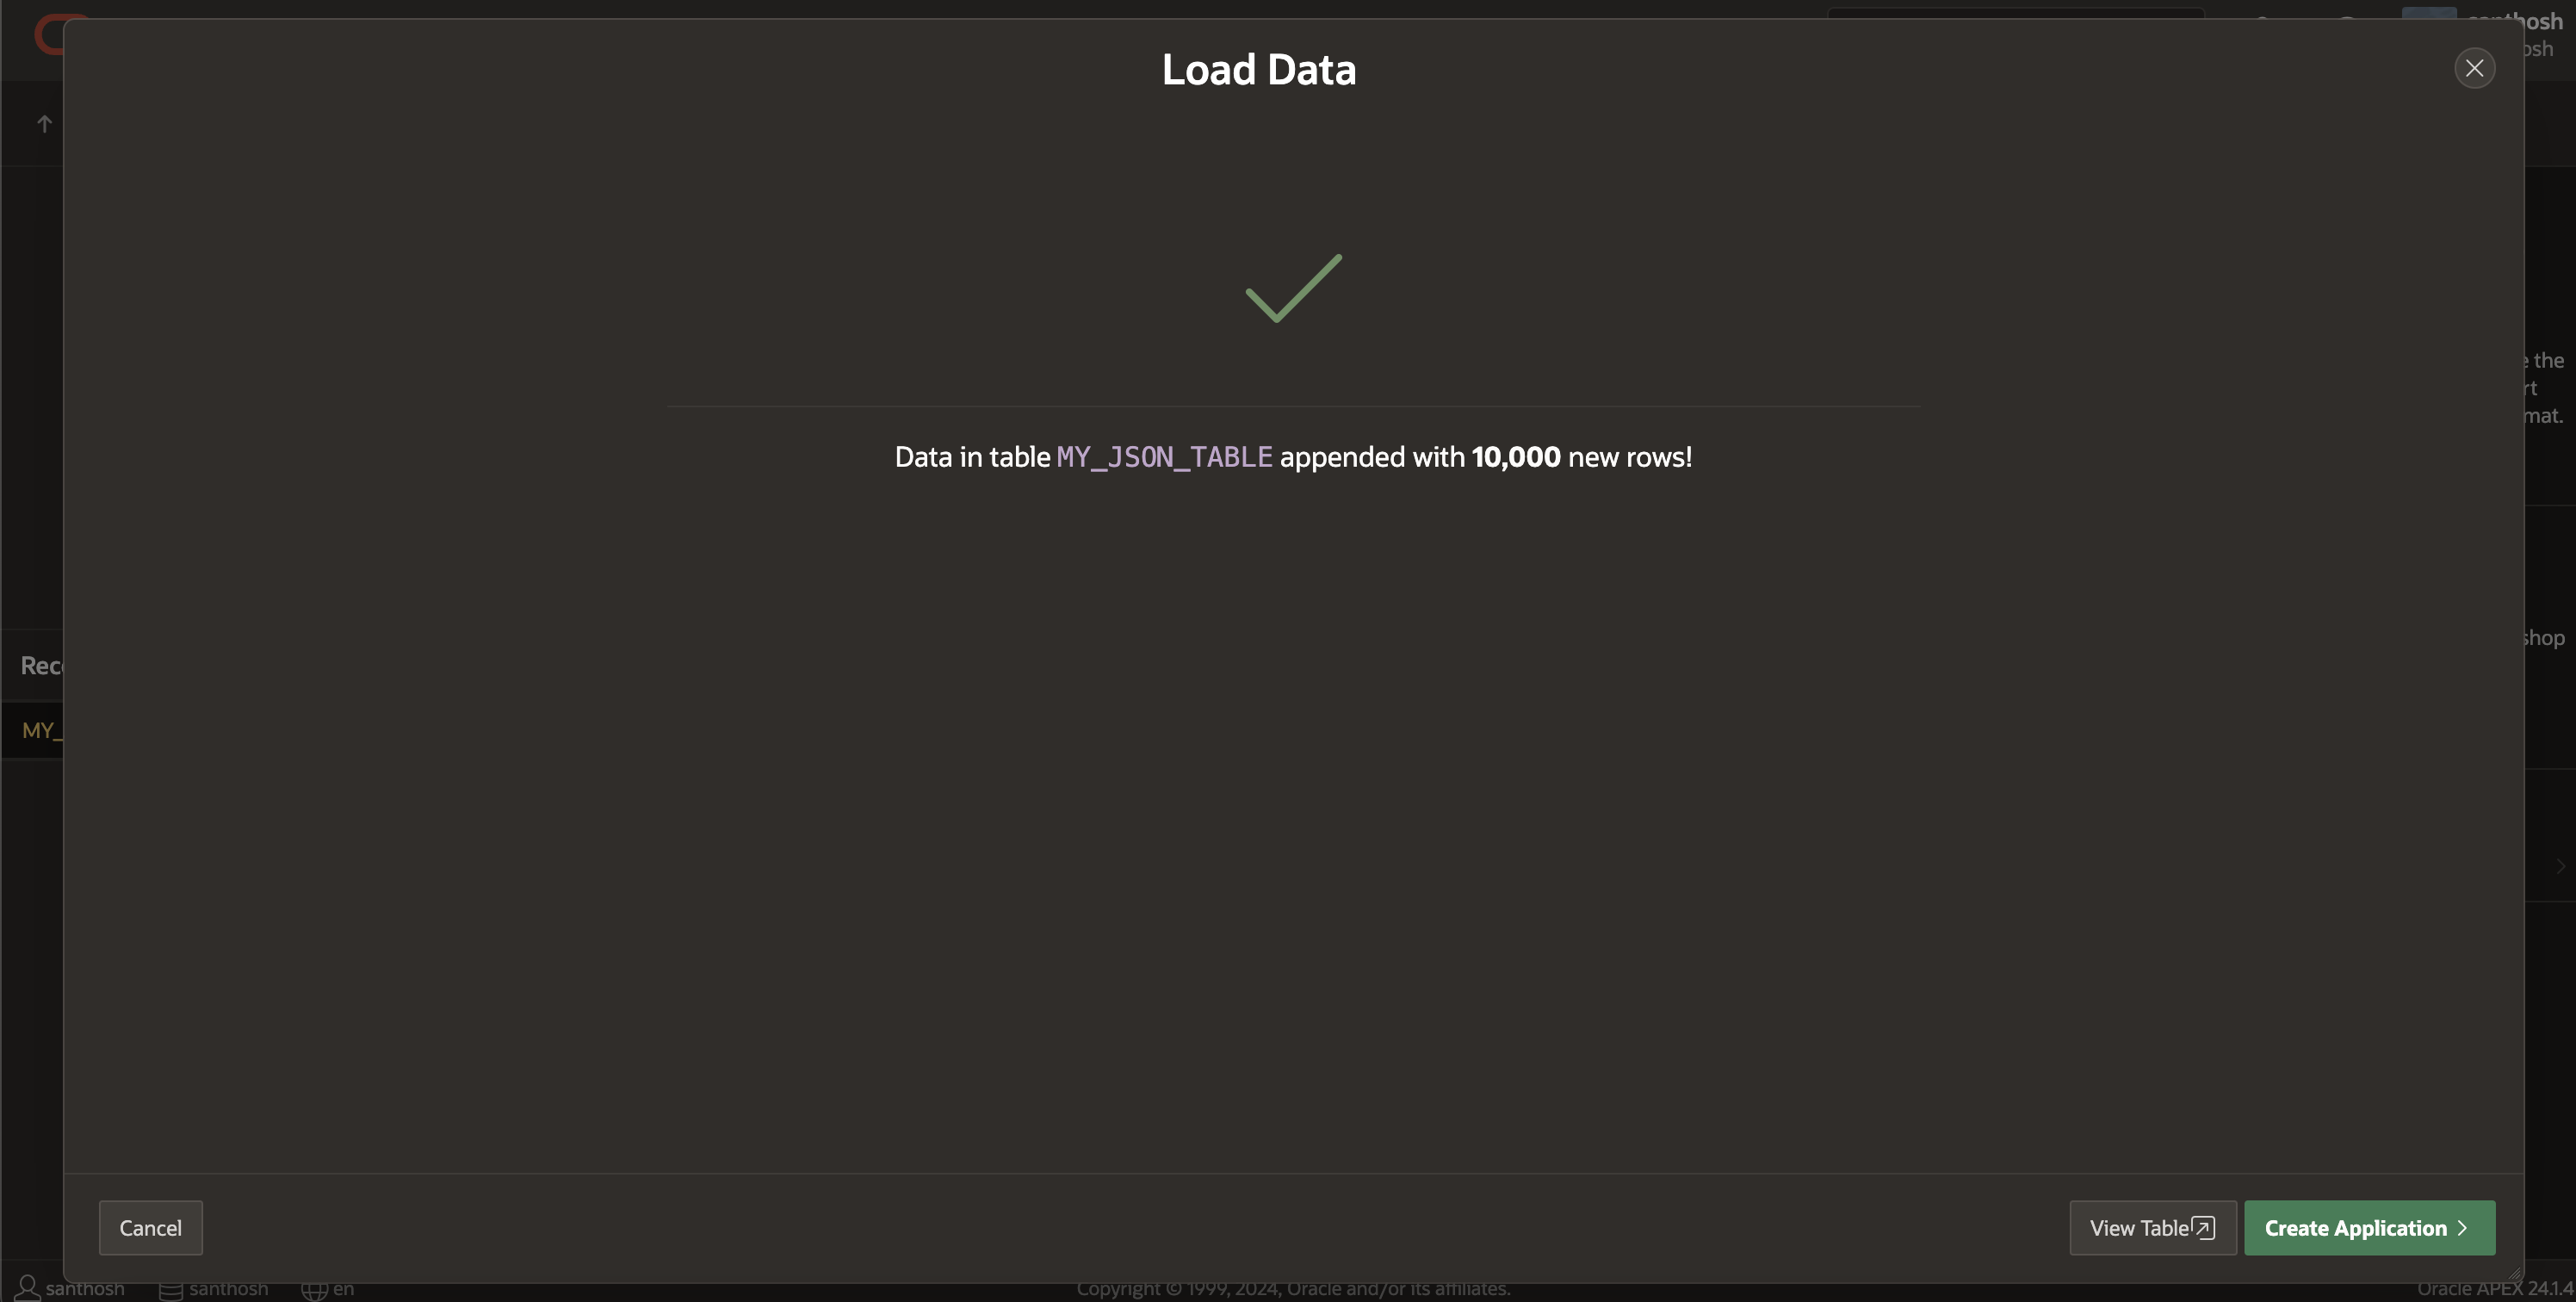
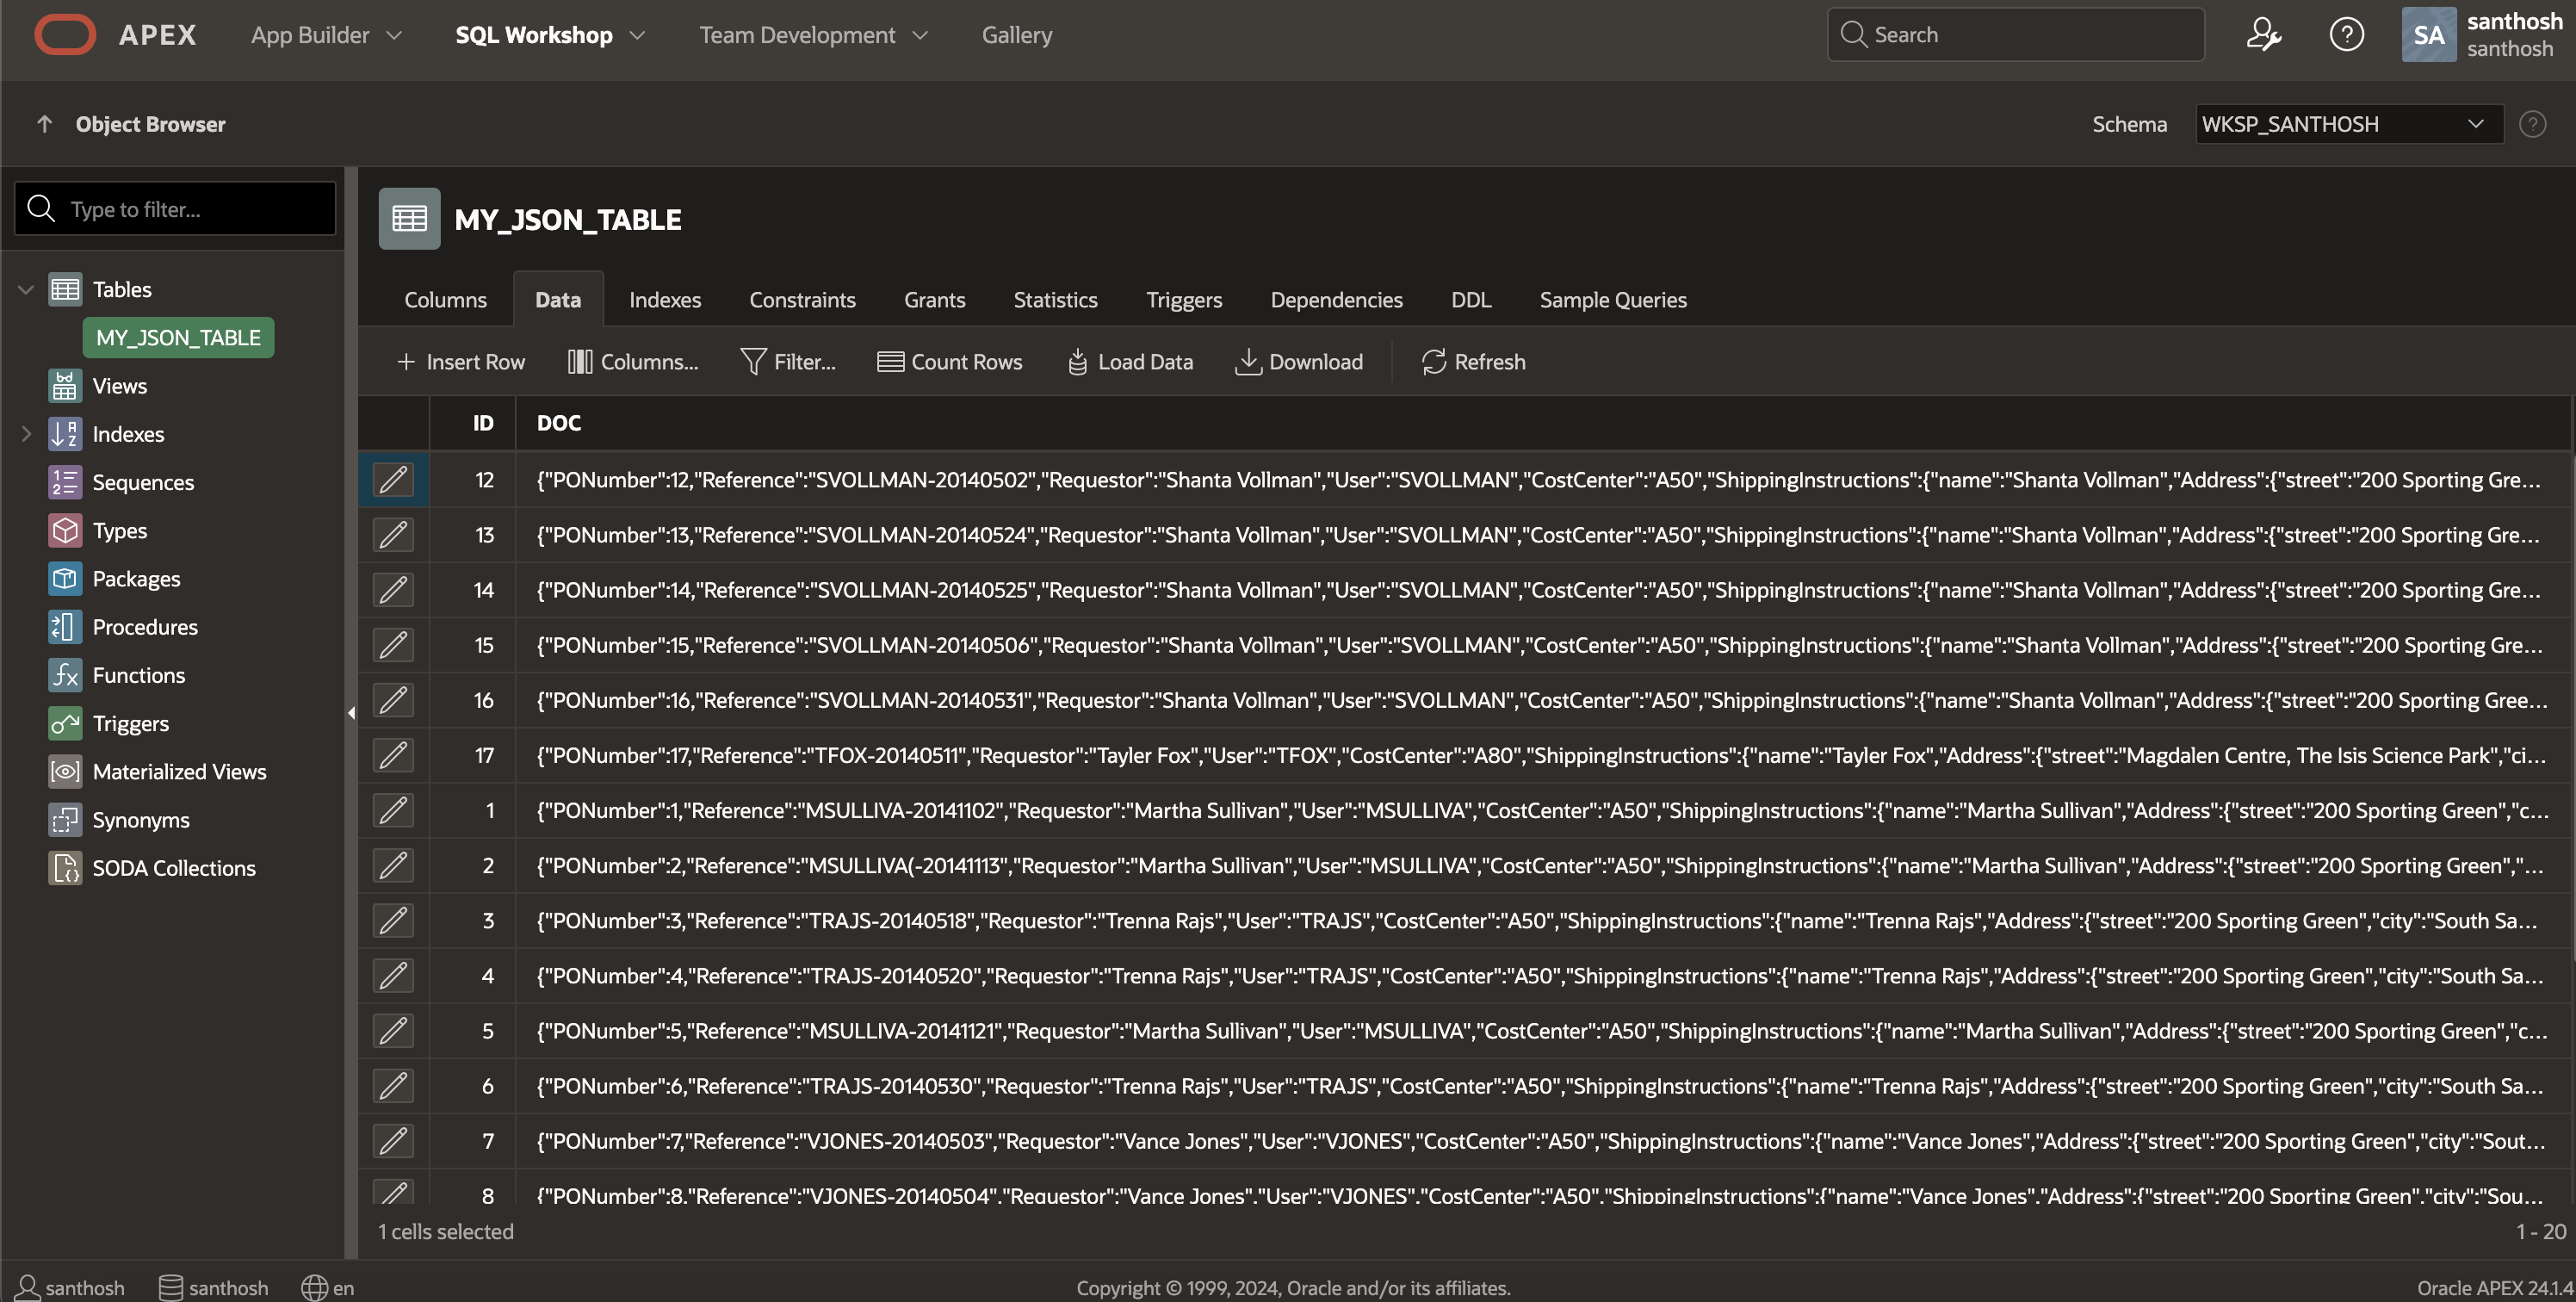
This completes the process of loading JSON data into the table. Next, we can swiftly examine the data in the table by selecting “View Table”.
Configuration
To configure JSON Sources, follow these steps:
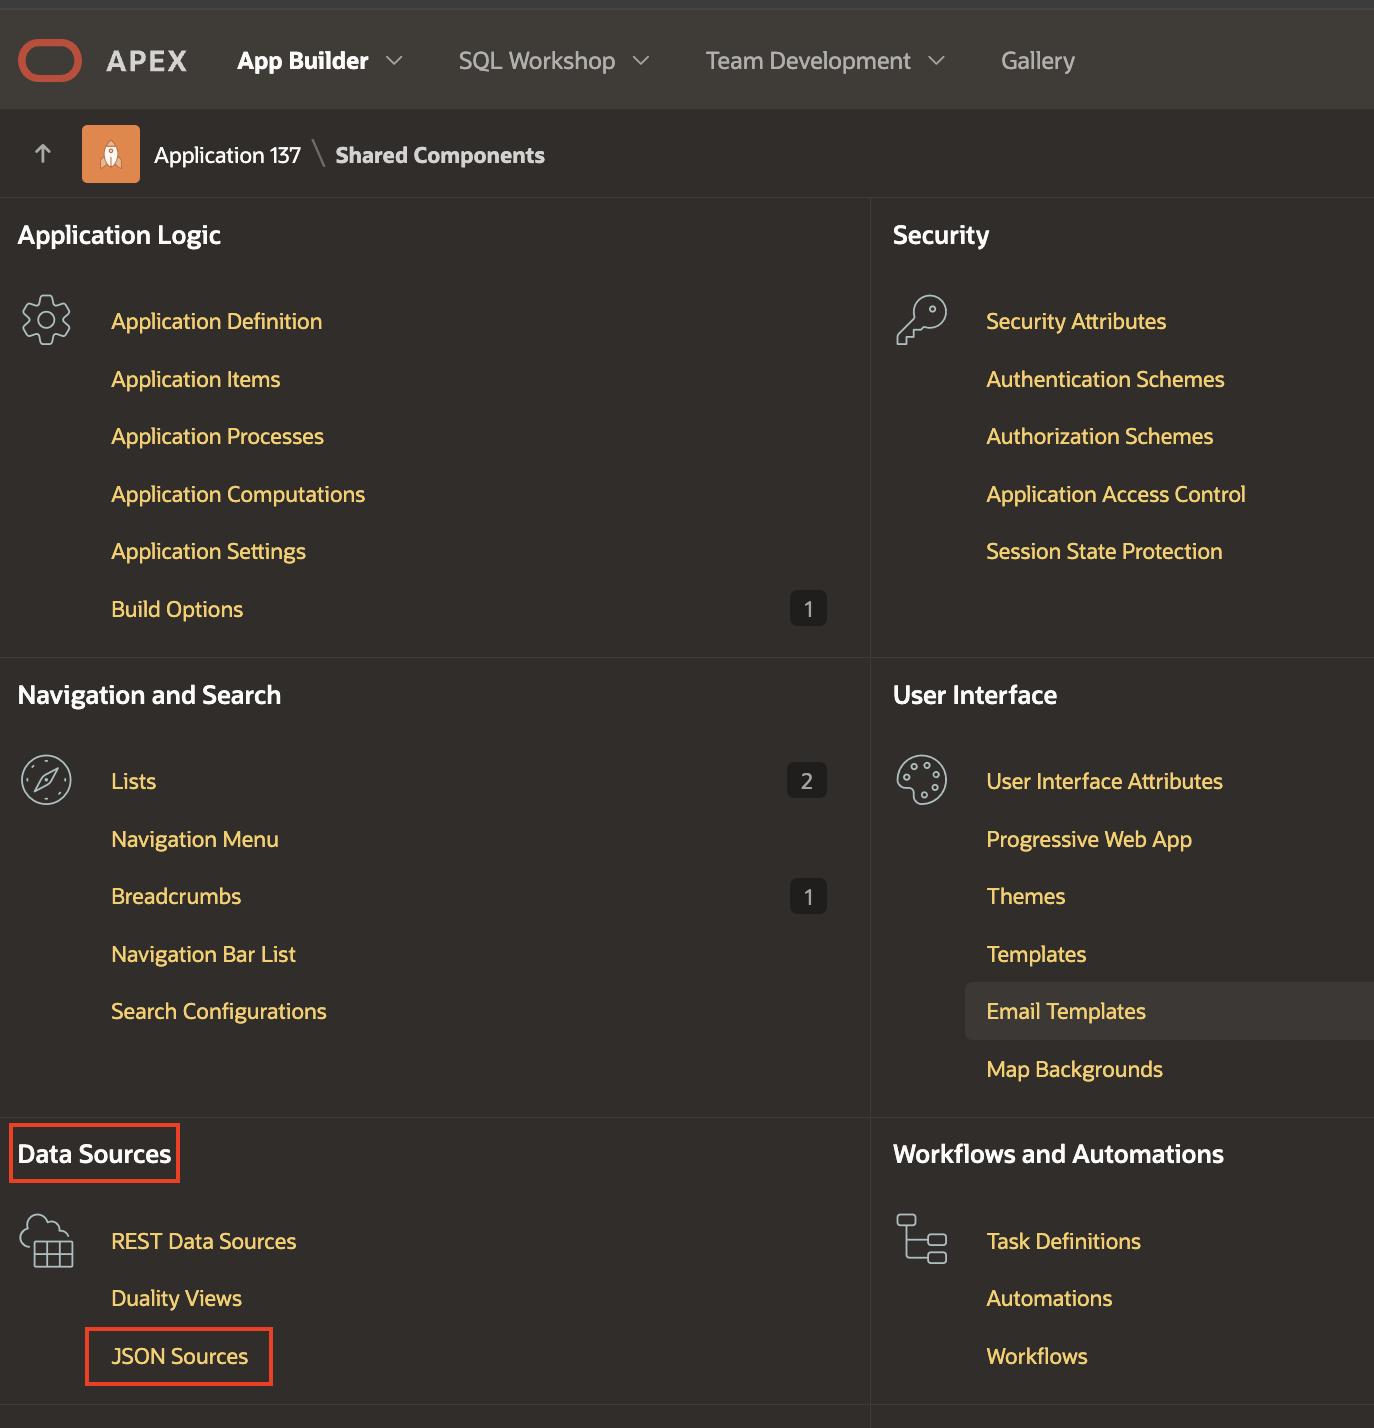
- In your Oracle APEX workspace, choose the application for which you wish to set up JSON Sources as a Data Source, then proceed to Shared Components and select Data Sources followed by JSON Sources (Shared Components → Data Sources → JSON Sources).
Create JSON Sources in Oracle APEX - Assign a name to your JSON Sources and choose the appropriate JSON Sources Type, which can be either a Table with JSON Columns or a JSON Collection Table. For the context of this blog, choose “Table with JSON Columns” and select the table created before.
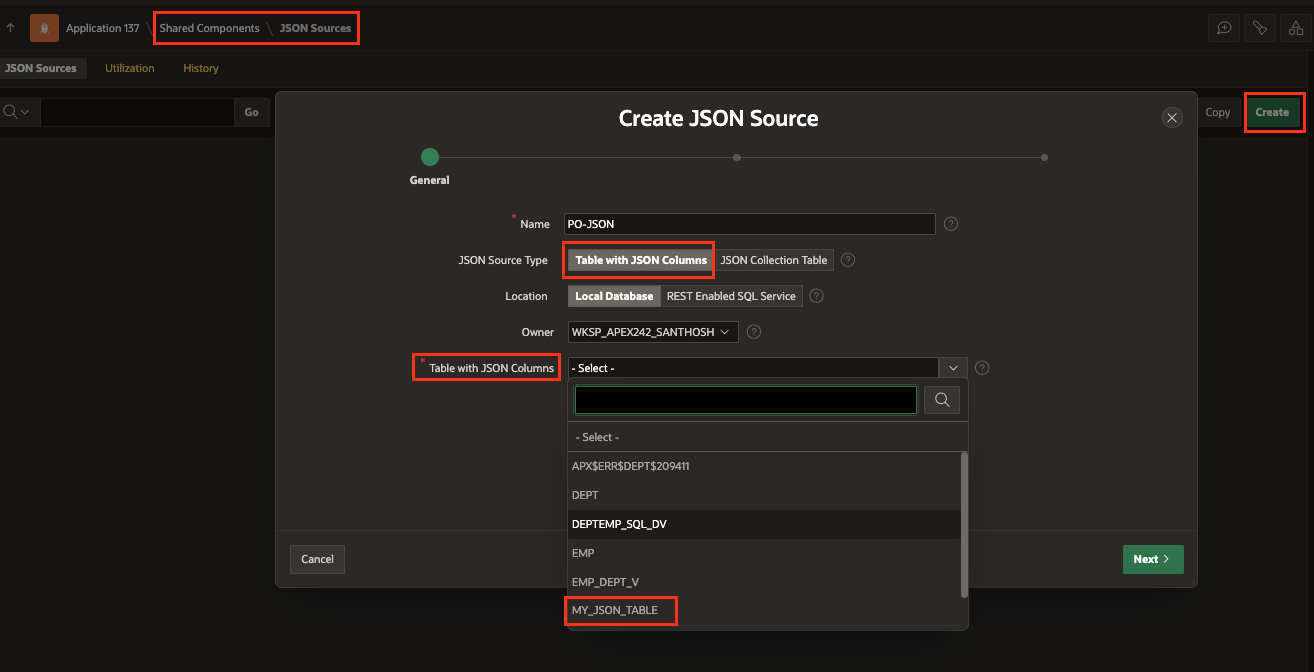
Table with JSON Columns - As the next step, select at least one column containing JSON documents. Optionally upload a JSON Schema file for APEX to infer the JSON structure from before clicking “Next.”
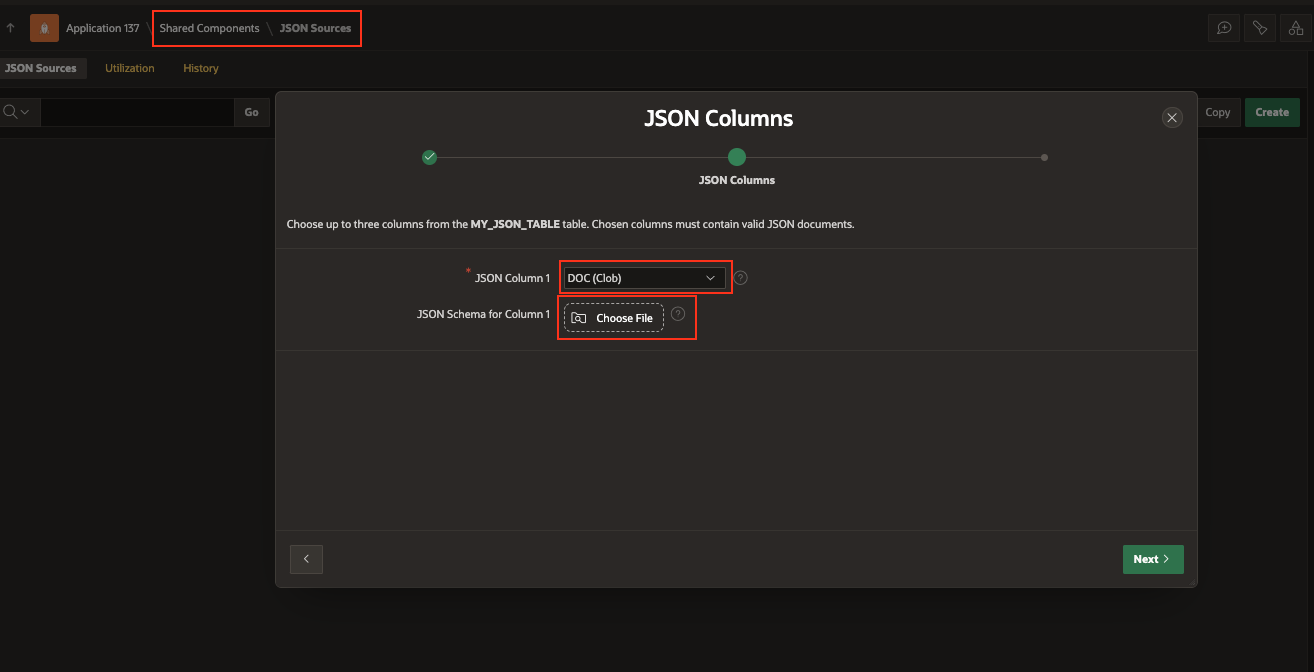
CLOB Column with JSON Data - For this blog, we will utilise the schema file mentioned below, which corresponds to the data I have uploaded to the table. PurchaseOrders JSON Schema
-
On the Data Profile page, choose the appropriate fields for the Primary Key corresponding to various Parent Columns, and then click “Create” to generate JSON Sources within your Oracle APEX Application. The snippet below illustrates how the array/parent columns have been identified from the CLOB column or from the uploaded JSON schema, resulting in the creation of the data profile.

JSON Document Data Profile
We have successfully created JSON Sources. Now let us explore what can we do with JSON Sources in Oracle APEX.
Demo
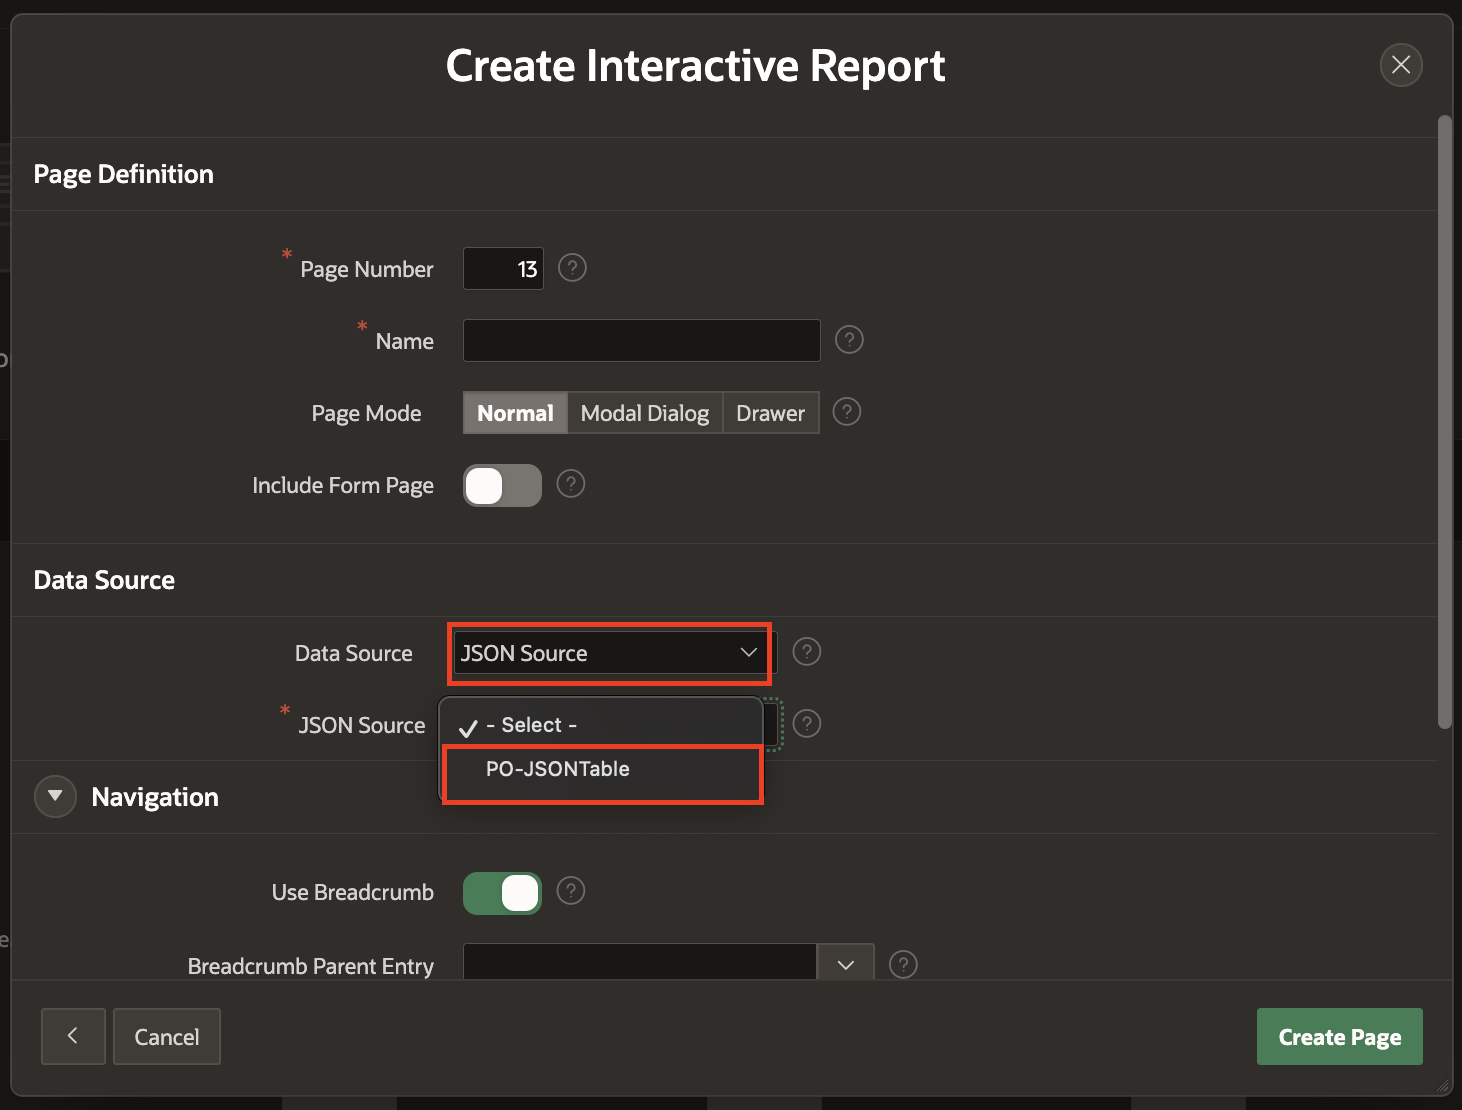
You can create different types of pages, List of Values and Search Configurations with JSON Sources as Data Source in your Oracle APEX application. The below snippet shows on how you can choose JSON Source as your Data Source for creating an Interactive Report.
Please follow the below GIF to understand, how developers can use JSON Sources in Oracle APEX for their low-code application development.
Duality Views
With the release of Oracle Database 23ai, support for JSON data has been enhanced through the introduction of Duality views. These views are constructed on top of standard relational tables, mirroring the structure of the JSON payloads for operations such as selection, insertion, updating, and deletion. Users can specify the desired operation—select, insert, delete, or update—using JSON data, and the corresponding actions will be executed on the underlying relational tables.
Pre-requisites
There are several prerequisites outlined below that must be met before configuring Duality View in Oracle APEX:
- The Duality View must be present in the Oracle Database. It can either reside in the same schema as your APEX application or be accessible through the REST Enabled SQL Service.
- The operations intended for execution, such as select, insert, update, or delete, should be defined within the Duality View itself, which should follow a JSON-like structure.
- Should any modifications to the JSON format be necessary in the future, these changes must be made at the database level, and the Data Profile in APEX will need to be updated accordingly.
Below is the syntax used for creating JSON relational Duality View on Emp & Dept tables to perform insert, update & delete operations.
create or replace json relational duality view deptemp_sql_dv as
select json{ '_id':      d.deptno,
             'dname':    d.dname,
             'loc':      d.loc,
             'employees':
             [ select json{ 'empno':        e.empno,
                            'ename':        e.ename,
                            'job':          e.job,
                            'hiredate':     e.hiredate,
                            'compensation': {
                                              'sal':  e.sal,
                                              'comm': e.comm
                                            }
                      }
                 from emp e
                 with insert update delete
                where e.deptno = d.deptno
             ]
       }
  from dept d
  with insert update delete nocheck
/
Configuration
To configure or create Duality Views in your Oracle APEX workspace, please follow these steps:
- Start by choosing the application in your Oracle APEX workspace where you want to establish Duality Views as a Data Source. Next, go to Shared Components → Data Sources → Duality Views.
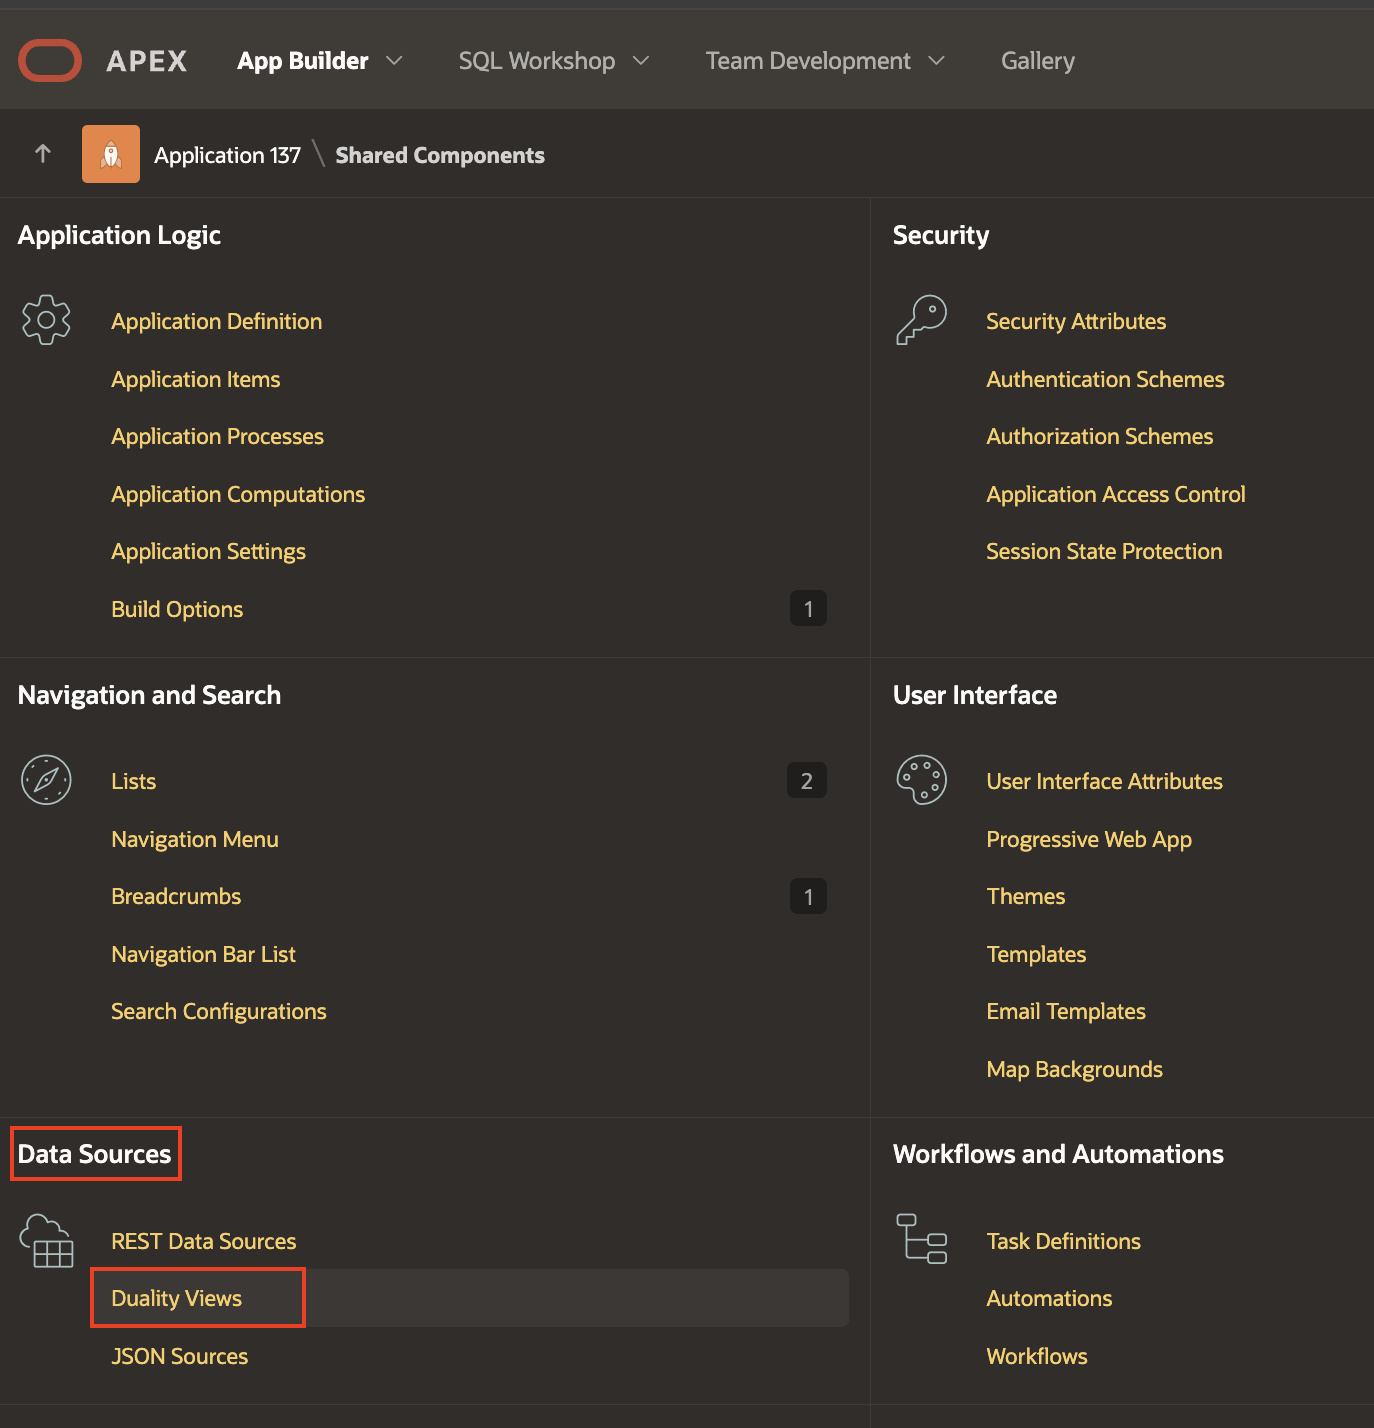
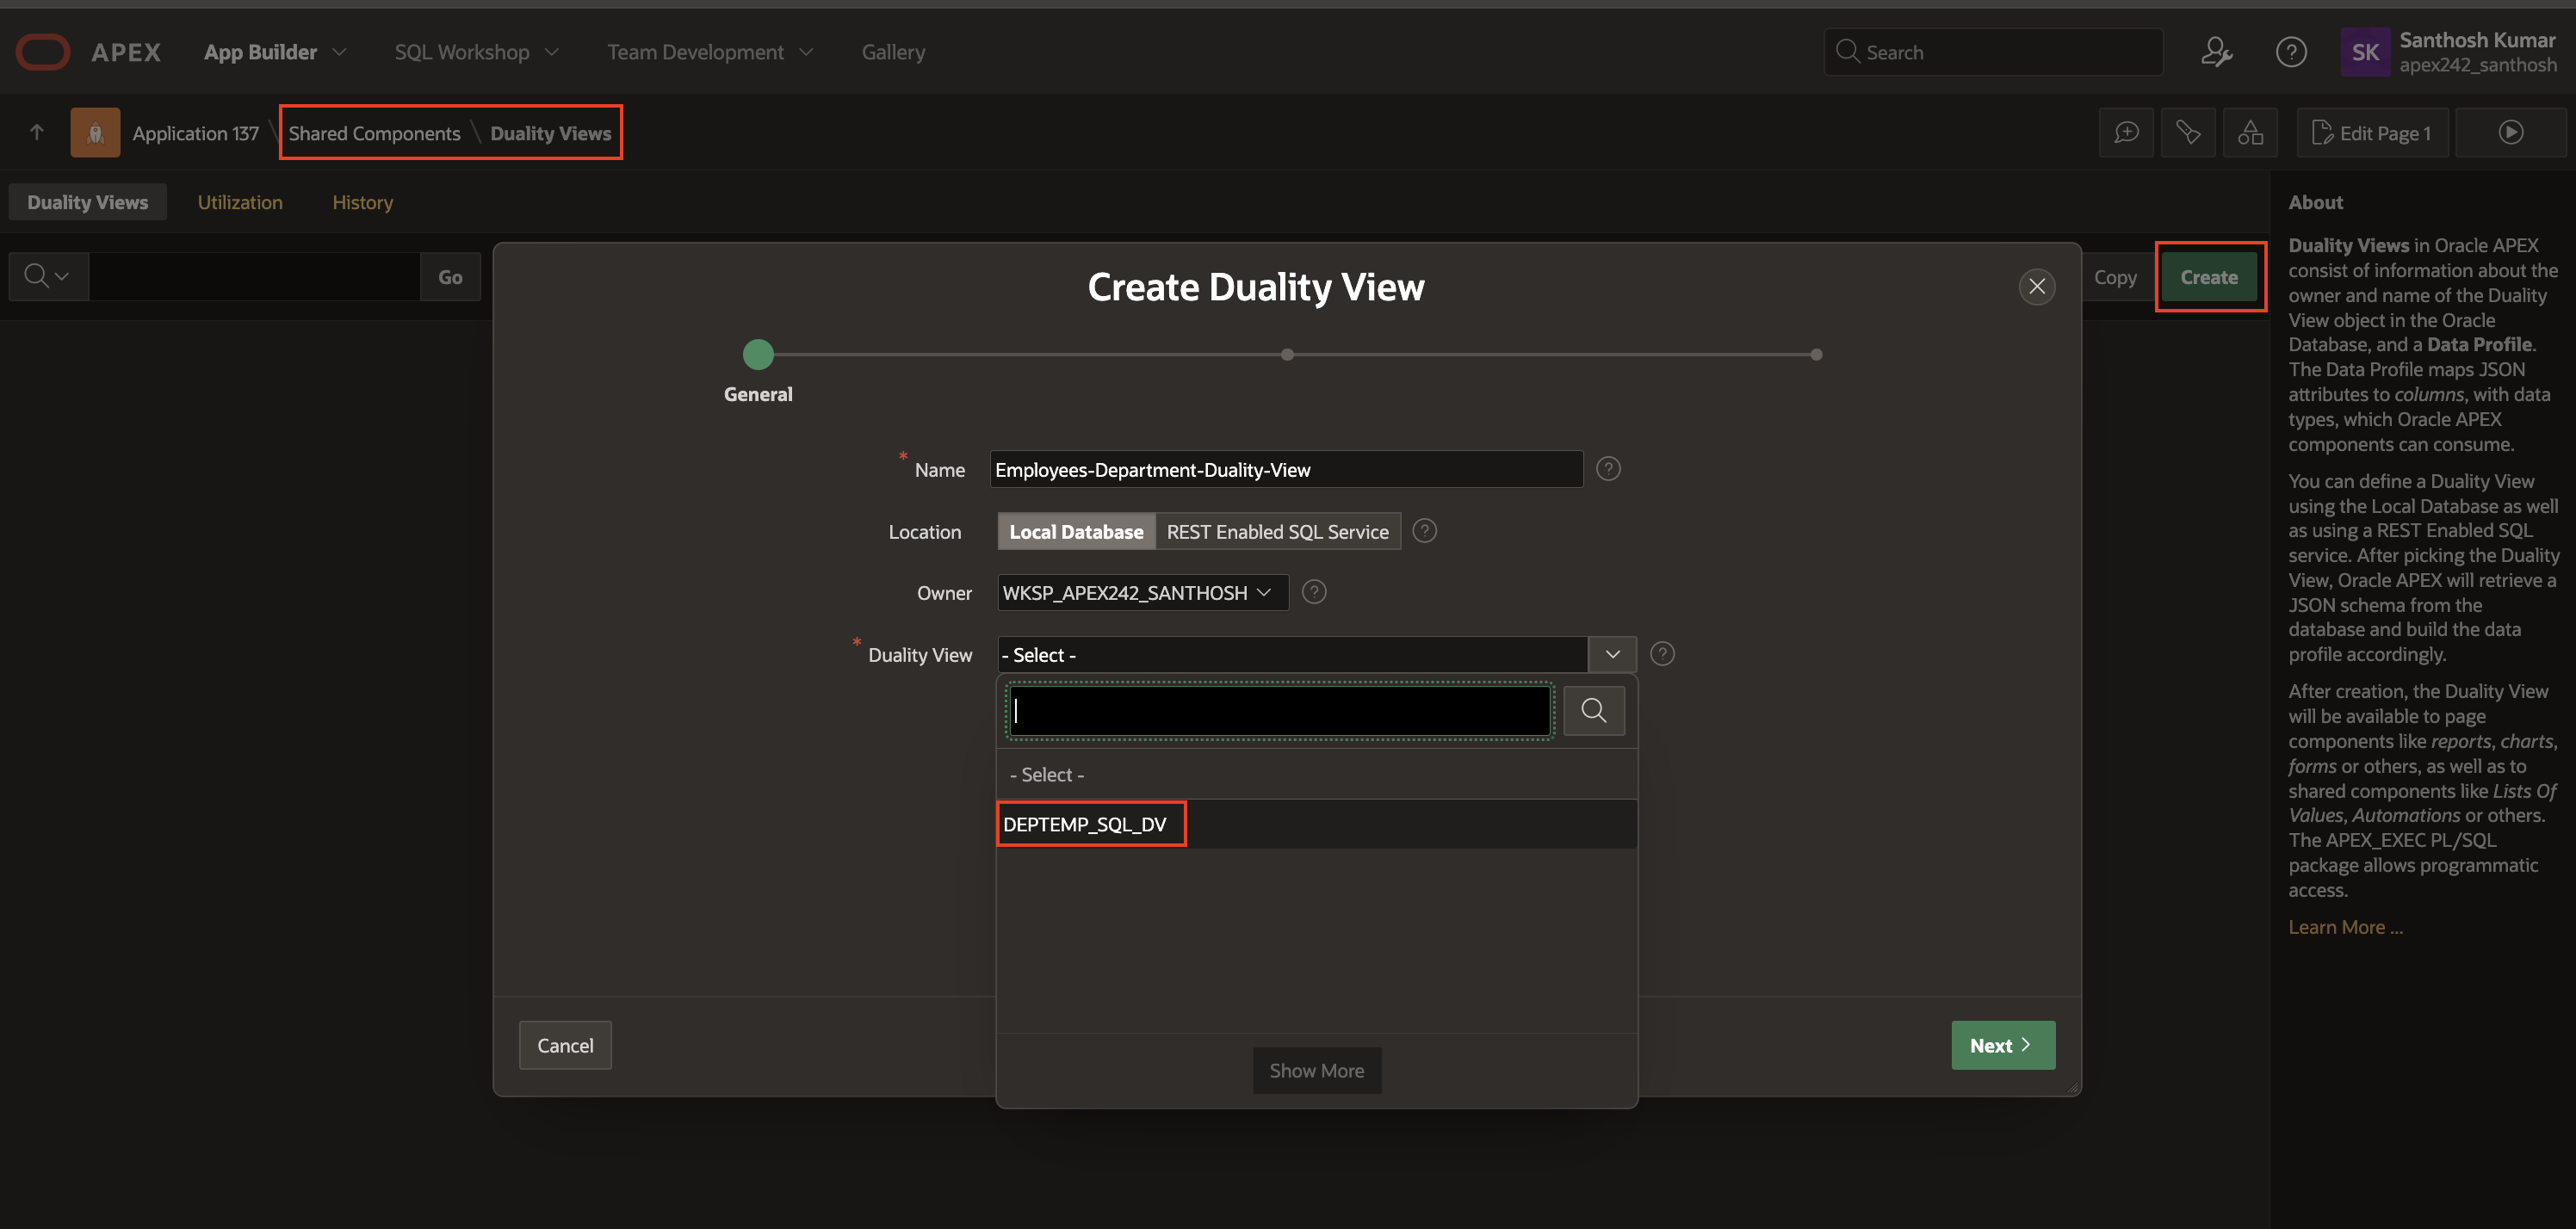
Shared Components > Duality Views - To start creating a new Duality View in your Oracle APEX workspace, click on “Create“. Give the Duality View a name and choose its location, either Local Database or REST Enabled SQL Service. Then, select the Duality View from the dropdown menu and continue by clicking “Next“.
NOTE: This is the Duality View which we created as part of Prerequisites in Oracle Database.
3. On the Data Profile page, choose the appropriate fields for the Primary Key corresponding to various Array Columns, and then click “Create” to create/configure Duality Views within your Oracle APEX Application.
Demo
You can create different types of pages, List of Values and Search Configurations with Duality View as Data Source in your Oracle APEX application. The below snippet shows on how you can choose Duality View as your Data Source for creating an Interactive Report.
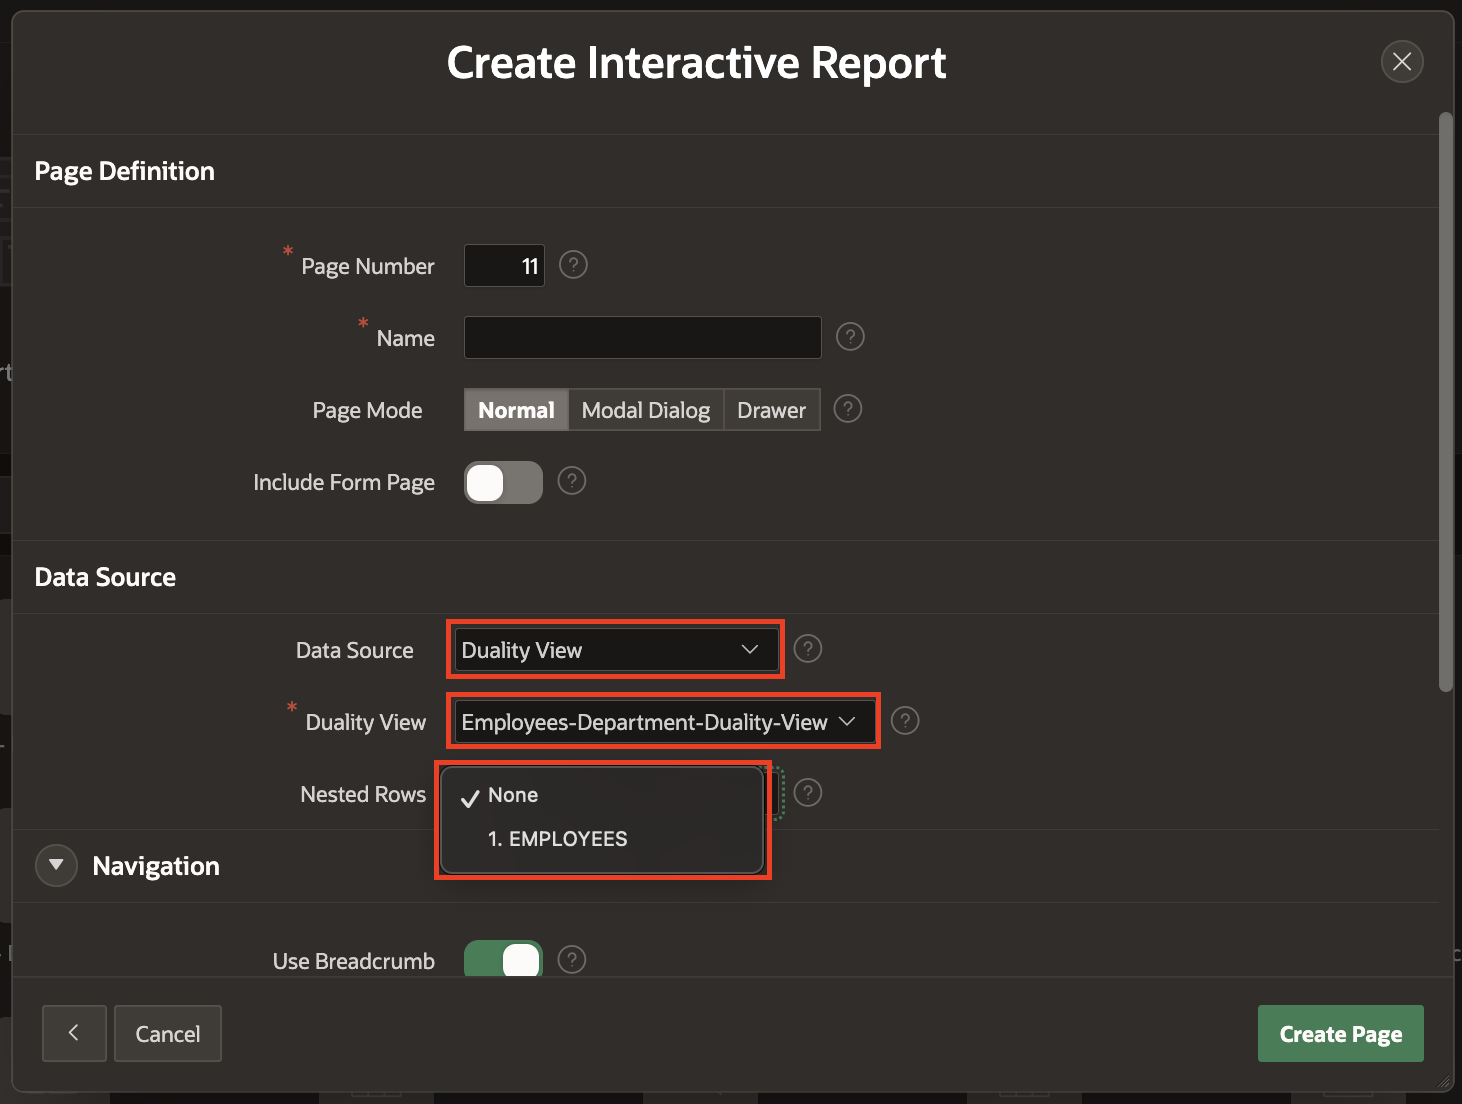
Follow the below GIF to understand, how can developers use Duality View in Oracle APEX for their low-code application development.
NOTE: You can learn more about Oracle Duality View which is part of Oracle Database 23ai from here.
To reiterate the components which developers can build using JSON Sources or Duality View are as below:
- Charts
- Calendars
- Cards
- Content-Row
- Interactive-Grid
- Interactive Report
- Classic Report
- Reflow Report
- Form
- Master-Detail
- Smart Filters
- Search Page
- Faceted Search
- List of Values
- Search Configurations
Usage
We have now explored the concepts of JSON Sources and Duality Views. Next, let us examine the scenarios in which these can be used.
JSON Sources
- JSON data sources are ideal for scenarios where direct interaction with JSON data is required, eliminating the need to locate and configure an API as a REST source.
- The JSON team aims to engage with MongoDB customers by utilizing a Mongo application. By exporting the data and loading it as JSON into Oracle, they can then create reports and dashboards using APEX.
- When your data consists solely of JSON documents and you wish to leverage the capabilities of APEX for rapid visualisations and straightforward forms, this approach is particularly beneficial.
Duality Views
- JSON Duality Views enable applications to directly access relational tables in JSON format.
Conclusion
Integrating JSON sources and Duality Views into Oracle APEX applications enables more flexible and dynamic component development. This approach enhances data handling and streamlines the creation of complex, interactive user interfaces. By leveraging these technologies, developers can create more powerful and responsive APEX applications with minimal effort.