In previous blogs, we have described how to run WebLogic Server on Kubernetes with the Operator using the Oracle Cloud Infrastructure Container Engine for Kubernetes (OKE). To create new Kubernetes clusters quickly, we suggest that you use the Terraform-based Kubernetes installation for the Oracle Cloud Infrastructure (OCI). It consists of Terraform modules and an example base configuration that is used to provision and configure the resources needed to run a highly available and configurable Kubernetes cluster on the Oracle Cloud Infrastructure (OCI).
In this blog, we provide sample Terraform scripts and describe the steps to create a basic OKE cluster. Note that this cluster can be used for testing and development purposes only. The provided samples of Terraform scripts should not be considered for creating production clusters, without more of a review in production clusters.
Using Terraform installation scripts makes the provisioning of the cloud infrastructure and any required local resources for the Kubernetes cluster fast and easy to perform. They enable you to run WebLogic Server on OKE and leverage WebLogic Server applications in a managed Kubernetes environment in no time.
The samples will create:
- A new Virtual Cloud Network (VCN) for the cluster
- Two load balancer subnets with security lists
- Three worker subnets with security lists
- A Kubernetes cluster with one Node Pool
- A kubeconfig file to allow access using kubectl
Nodes and network settings will be configured to allow SSH access, and the cluster networking policies will allow NodePort services to be exposed.
All OCI Container Engine masters are highly available (HA) and employ load balancers.
Prerequisites
To use these Terraform scripts, you will need to:
- Have an existing tenancy with sufficient compute and networking resources available for the desired cluster.
- Have an Identity and Access Management policy in place within that tenancy to allow the OKE service to manage tenancy resources.
- Have a user defined within that tenancy.
- Have an API key defined for use with the OCI API, as documented here.
- Have an SSH key pair for configuring SSH access to the nodes in the cluster.
Configuration Files
The following configuration files are part of this Terraform plan.
| File |
Description
|
| provider.tf |
Configures the OCI provider for a single region. |
| vcn.tf |
Configures the VCN for the cluster, including two load balancer subnets and three worker subnets. |
| cluster.tf |
Configures the cluster and worker node pool. |
| kube_config.tf |
Downloads the kubeconfig for the new cluster. |
| template.tfvars |
Example variable definition file for creating a cluster. |
Creating a Cluster
Without getting into the configuration details, getting a simple cluster running quickly entails the following:
- Create a new tfvars file based on the values from the provided oci.props file.
- Apply the configuration using Terraform.
In the sample, we have provided a script that performs all the steps. In addition, the script downloads and installs all the required binaries for Terraform, Terraform OCI Provider, based on OS system (macOS or Linux).
Create a Variables File
This step involves creating a variables file that provides values for the tenancy that will contain the VCN and cluster you’re creating. In the sample, the script oke.create.sh uses values from the property file oci.props. Copy the oci.props.template to the oci.props file and enter the values for all the properties in the oci.prop file:
1.user.ocid – Log in to the OCI console. Click the user icon in the upper-right corner and select user settings. It will display this page:
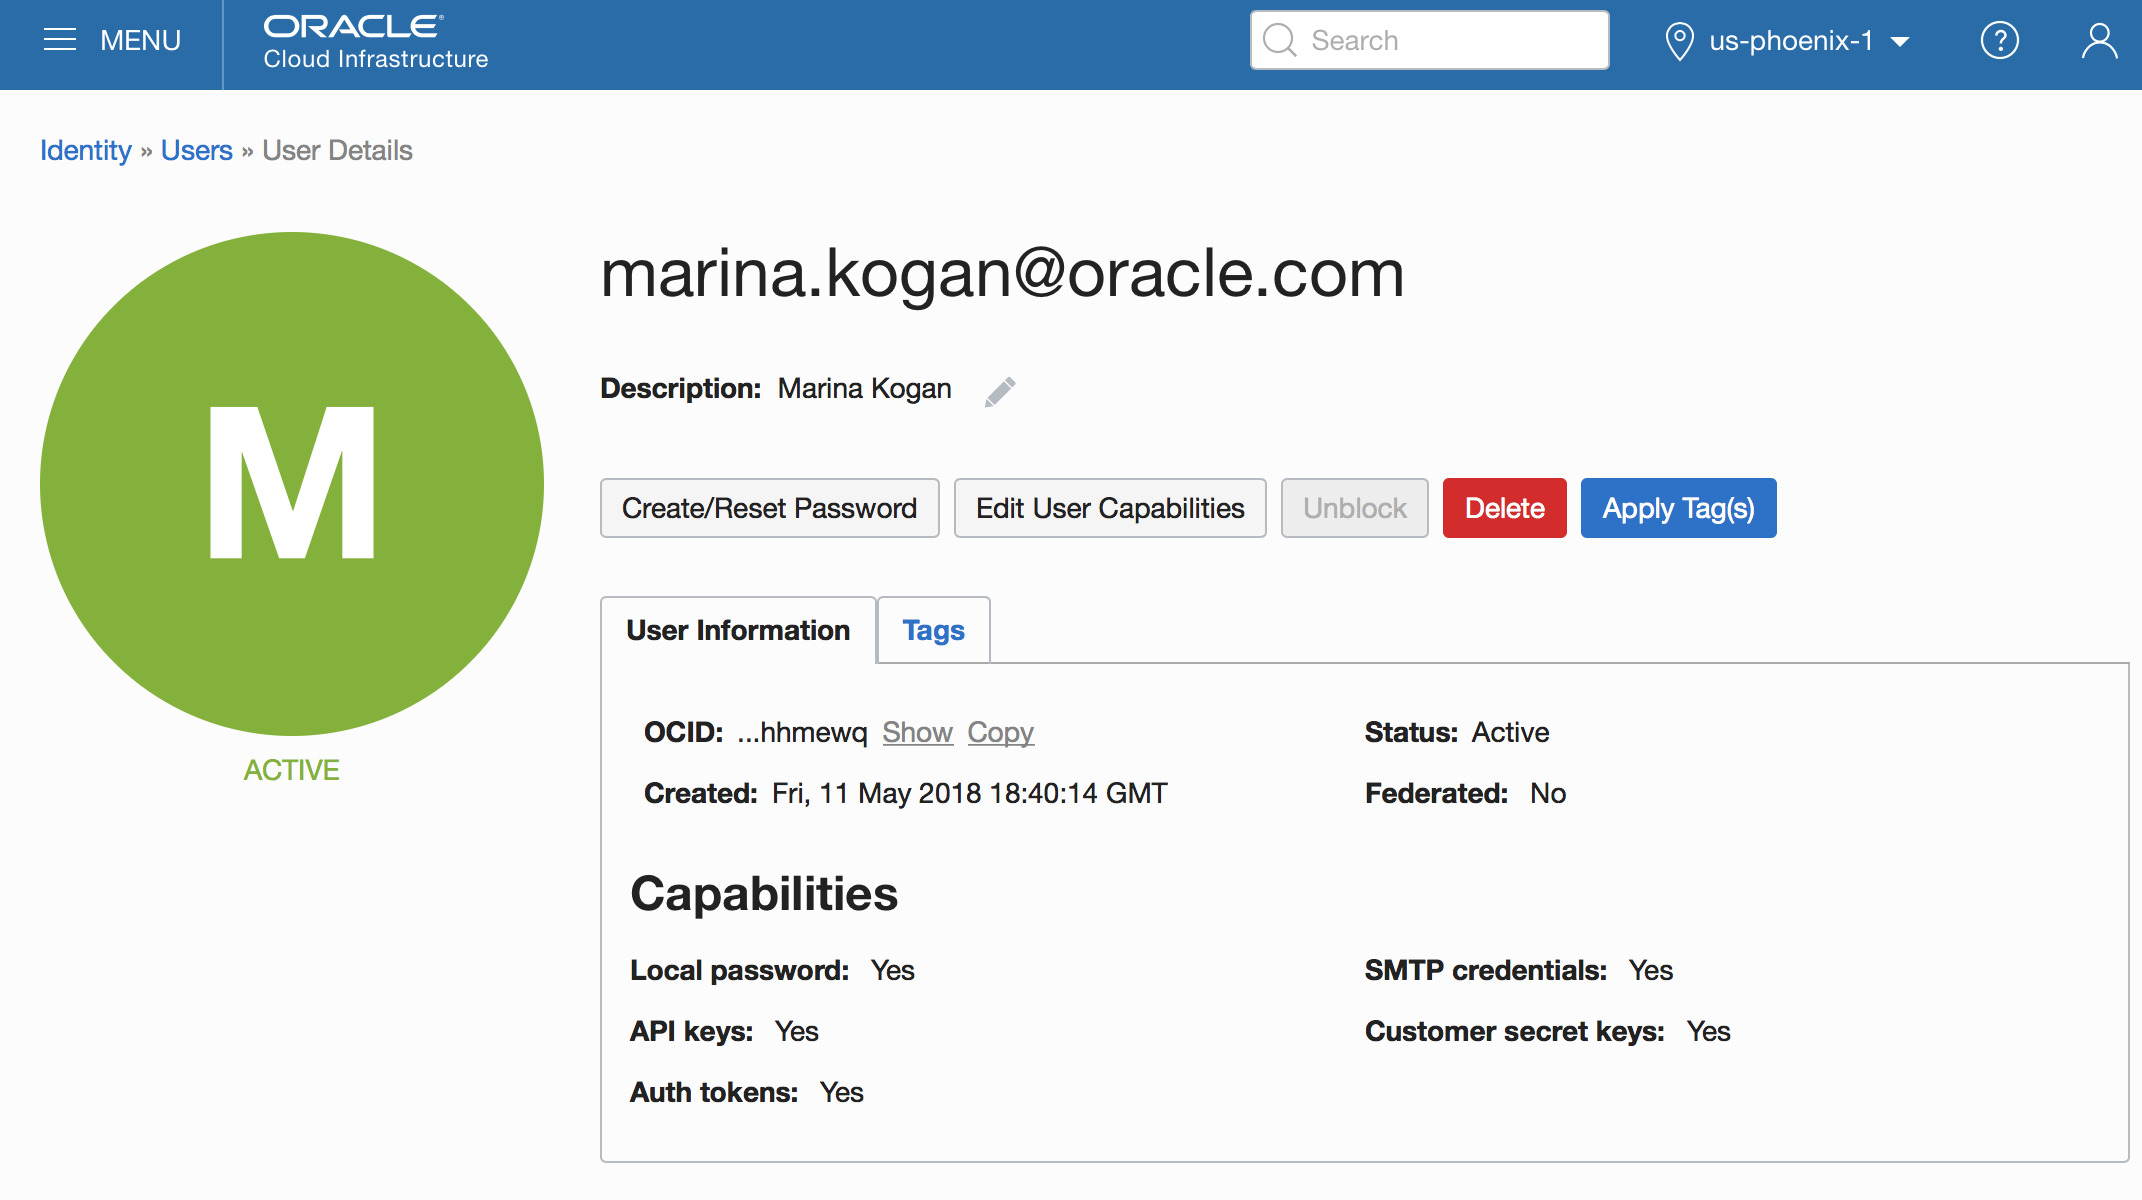
Copy the OCID information and enter it as a value of the user.ocid property.
- tfvars.filename – Name of the tfvar file that the script will generate for the Terraform configuration (no file extension )
- okeclustername – Name of the generated OCI Container Engine for Kubernetes cluster.
- tenancy.ocid–– In the OCI console, click the user icon in the upper-right corner and select tenancy.
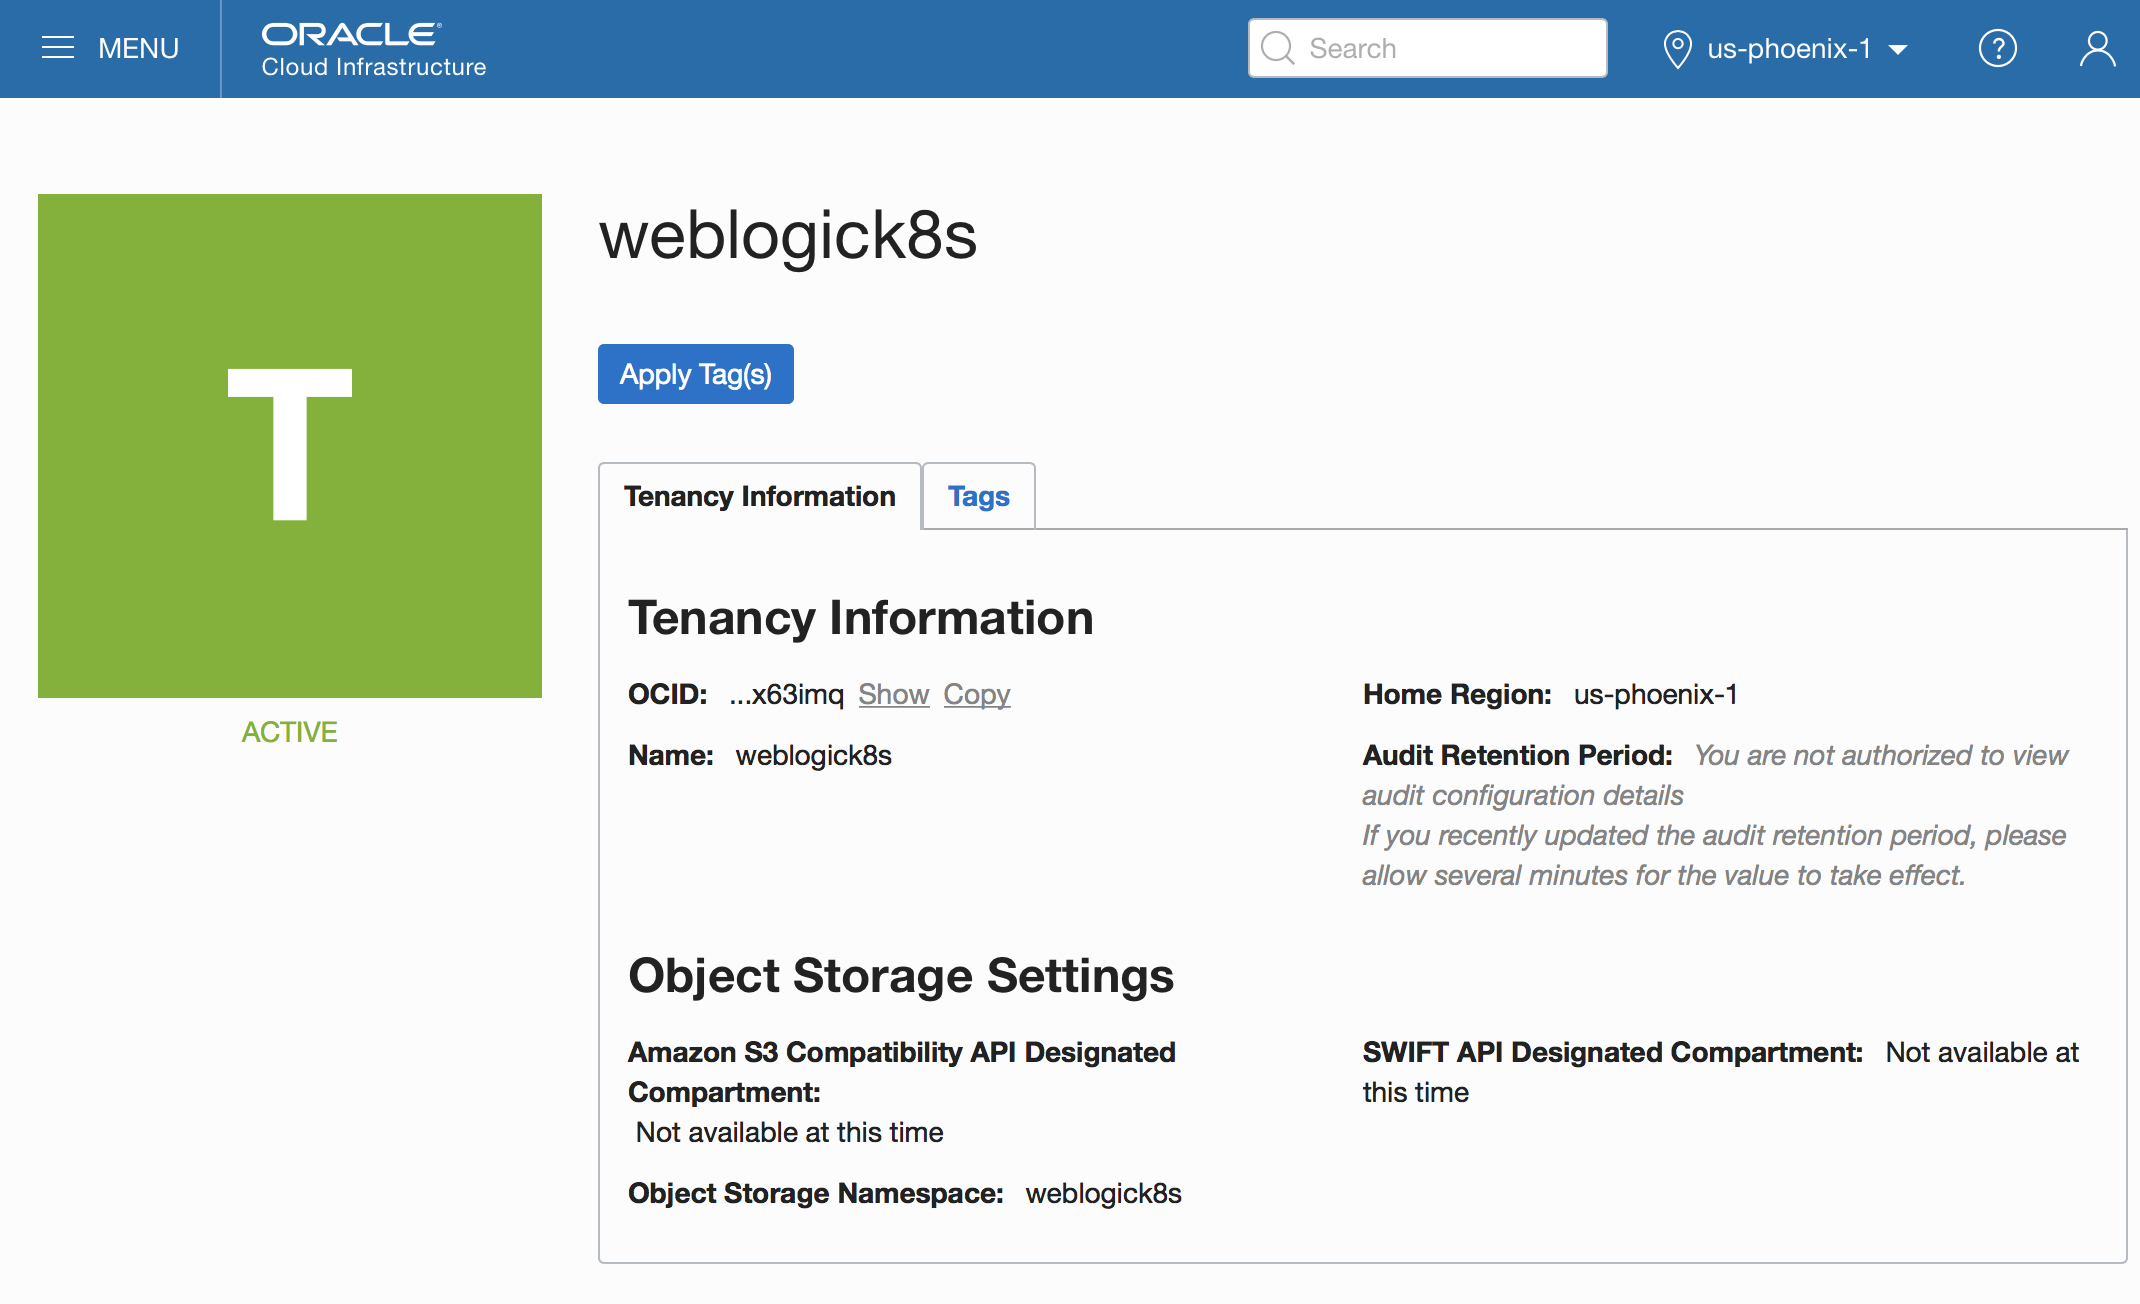
Copy the tenancy OCID information and enter it as a value of the tenancy.ocid property.
5. region – Name of the used home region for tenancy
6. compartment.ocid –– In the OCI console, in the upper-left corner, select ‘Menu’, then ‘Identity’, and then ‘Compartments’.
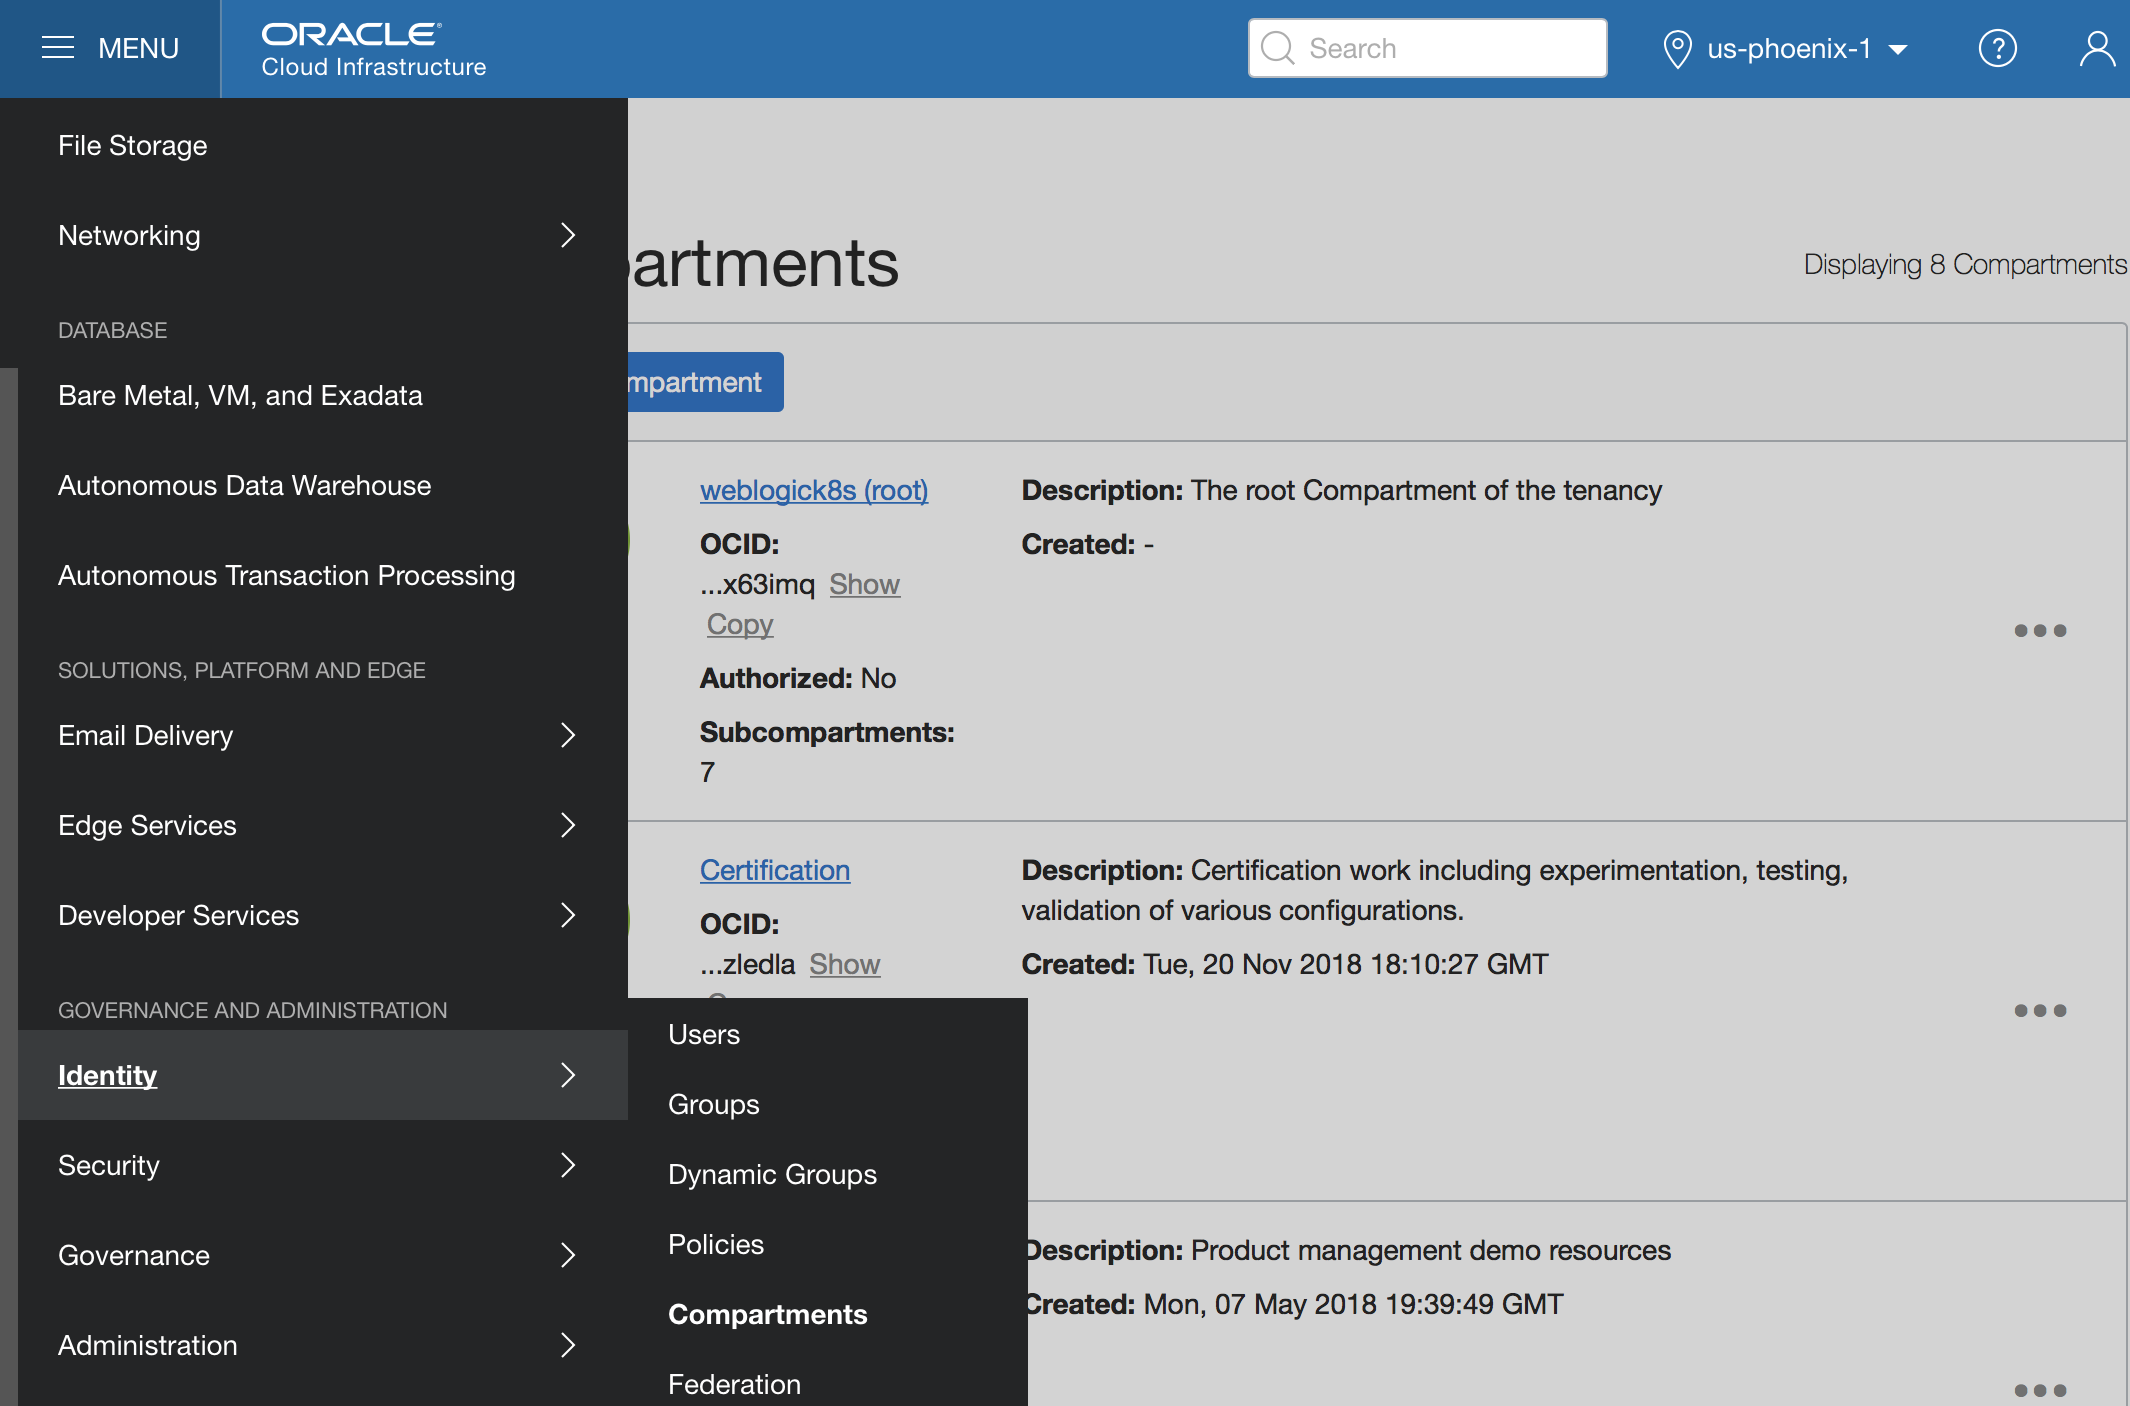
On the ‘Compartments’ page, select the desired compartment, copy the OCID information, and enter it as a value of the compartment.ocid property.
- compartment.name – Enter the name of the targeted compartment.
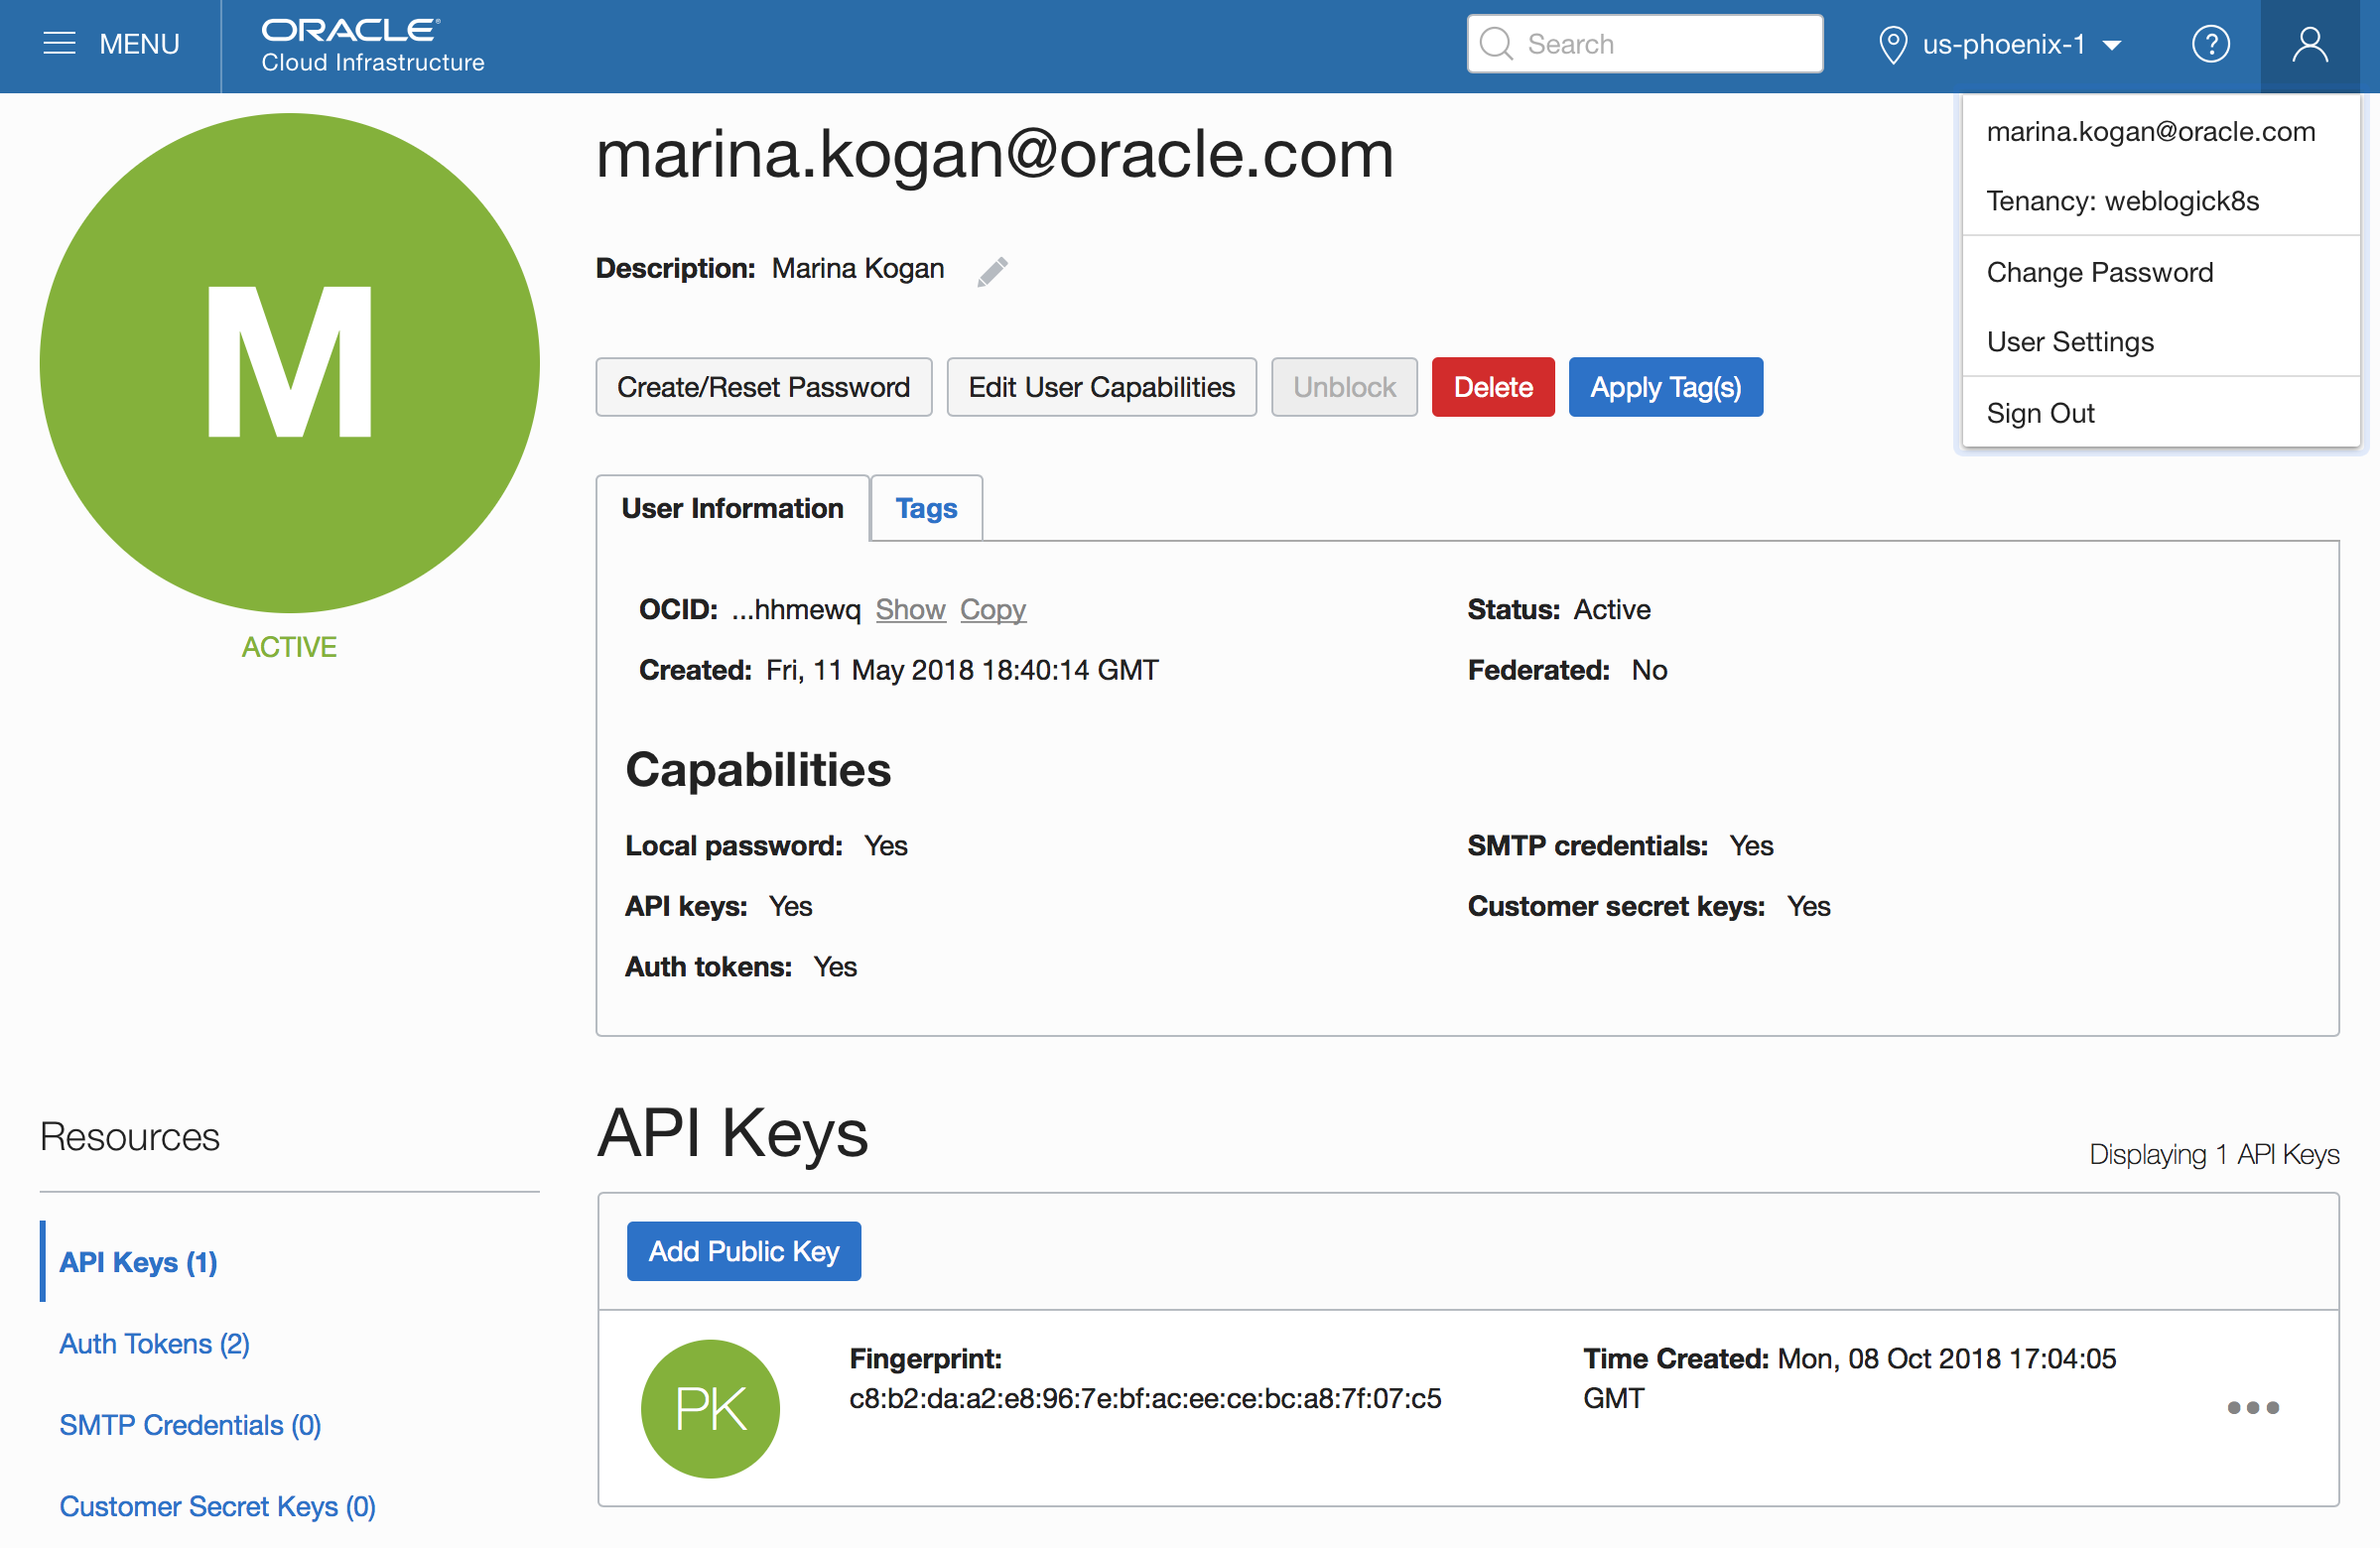
- ociapi.pubkey.fingerprint – During your access to OCI setup, you have generated OCI user public and private keys. Obtain it from the API Keys section of the User Settings page in the OCI Console. Add escape backslash ‘\’ for each colon sign. In our example: c8\:c2\:la\:a2\:e8\:96\:7e\:bf\:ac\:ee\:ce\:bc\:a8\:7f\:07\:c5
- ocipk.path – Full path to OCI API private key
- vcn.cidr.prefix – Check your compartment and use a unique number for the prefix.
- vcn.cidr – Full CIDR for the VCN, must be unique within the compartment.
- nodepool.shape – In the OCI console, select ‘Menu’, then ‘Governance’, and then ‘Service Limits’.
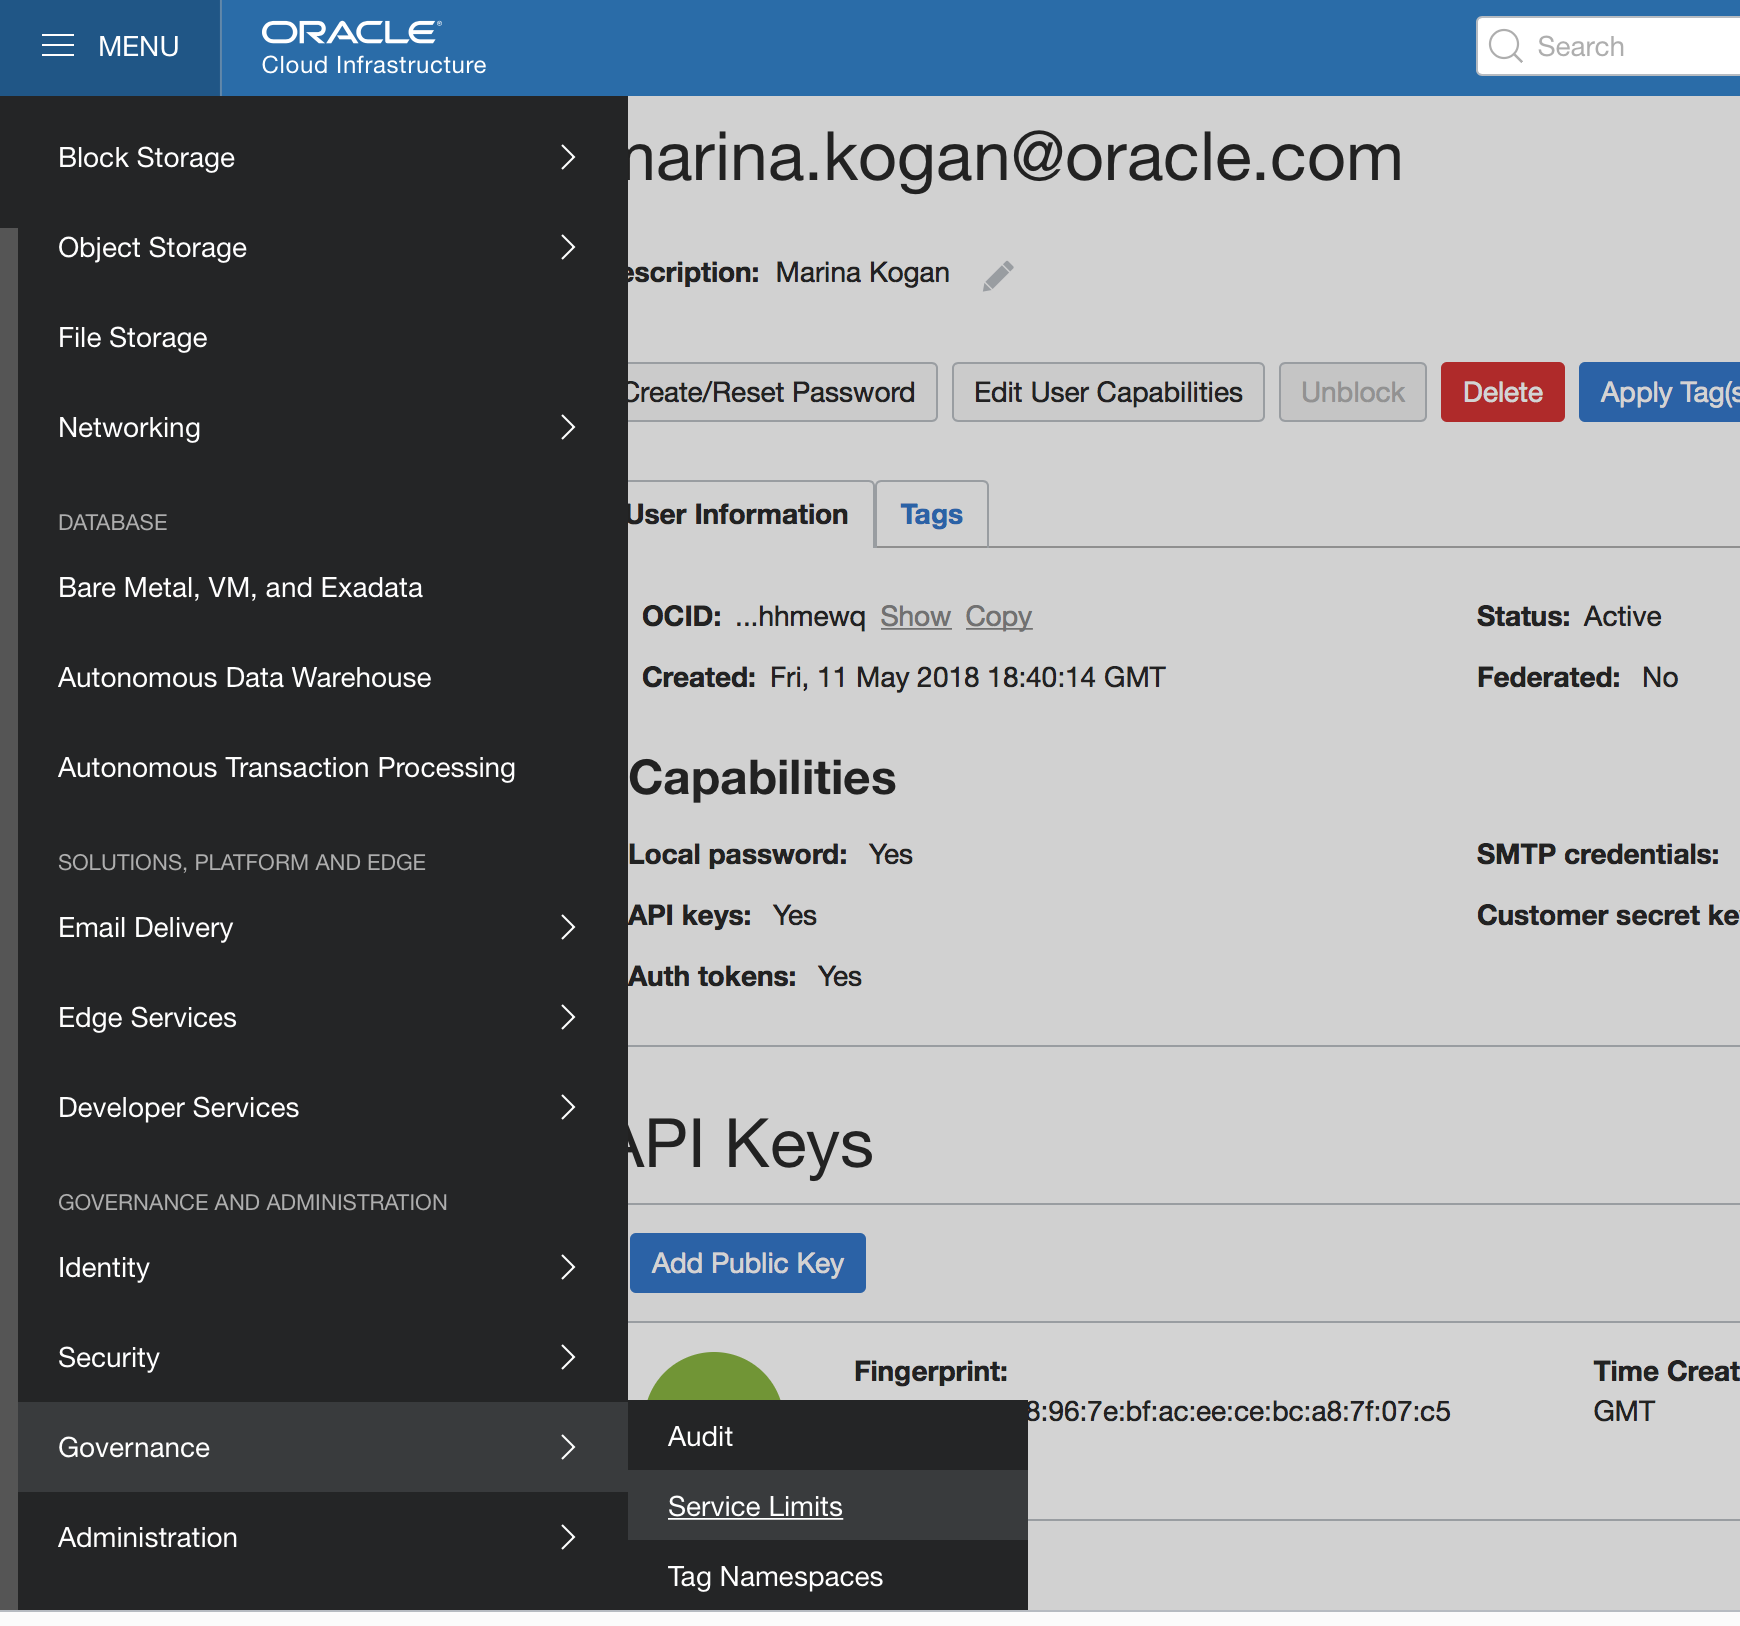
On the ‘Service Limits’ page, go to ‘Compute’ and select an available Node Pool shape:

- k8s.version – OCI Container Engine for Kubernetes supported version for Kubernetes. To check the supported values, select ‘Menu’, then ‘Developer Services’, and then ‘Container Clusters’. Select the Create Cluster button. Check the version:

- nodepool.imagename – Select supported Node Pool Image
- nodepool.ssh.pubkey – Copy and paste the content of your generated SSH public key. This is the key you would use to SSH into one of the nodes.
- terraform.installdir – Location to install Terraform binaries. The provided samples/terraform/oke.create.sh script will download all the needed artifacts.
The following table lists all the properties, descriptions, and examples of their values.
| Variable |
Description |
Example |
| user.ocid
|
OCID for the tenancy user – can be obtained from the user settings in the OCI console |
ocid1.user.oc1..aaaaaaaas5vt7s6jdho6mh2dqvyqcychofaiv5lhztkx7u5jlr5wwuhhm |
| tfvars.filename |
File name for generated tfvar file |
myokeclustertf |
| region |
The name of region for tenancy |
us-phoenix-1 |
| okeclustername |
The name for OCI Container Engine for Kubernetes cluster |
myokecluster |
| tenancy.ocid |
OCID for the target tenancy |
ocid1.tenancy.oc1..aaaaaaaahmcbb5mp2h6toh4vj7ax526xtmihrneoumyat557rvlolsx63i |
| compartment.ocid |
OCID for the target compartment |
ocid1.compartment.oc1..aaaaaaaaxzwkinzejhkncuvfy67pmb6wb46ifrixtuikkrgnnrp4wswsu |
| compartment.name |
Name for the target compartment |
QualityAssurance |
| ociapi.pubkey.fingerprint |
Fingerprint of the OCI user’s public key
|
c8\:c2\:da\:a2\:e8\:96\:7e\:bf\:ac\:ee\:ce\:bc\:a8\:7f\:07\:c5 |
| ocipk.path |
API Private Key — local path to the private key for the API key pair |
/scratch/mkogan/.oci/oci_api_key.pem |
| vcn.cidr.prefix |
Prefix for VCN CIDR, used when creating subnets — you should examine the target compartment find a CIDR that is available |
10.1 |
| vcn.cidr |
Full CIDR for the VCN, must be unique within the compartment (first 2 octets should match the vcn_cidr_prefix ) |
10.1.0.0/16 |
| nodepool.shape |
A valid OCI VM Shape for the cluster nodes |
VM.Standard2.1 |
| k8s.version |
OCI Container Engine for Kubernetes supported Kubernetes version string |
v1.11.5
|
| nodepool.imagename |
OCI Container Engine for Kubernetes supported Node Pool Image |
Oracle-Linux-7.4 |
| nodepool.ssh.pubkey |
SSH public key (key contents as a string) to use to SSH into one of the nodes. |
ssh-rsa AAAAB3NzaC1yc2EAAAADAQABAAABAQC9FSfGdjjL+EZre2p5yLTAgtLsnp49AUVX1yY9V8guaXHol6UkvJWnyFHhL7s0qvWj2M2BYo6WAROVc0/054UFtmbd9zb2oZtGVk82VbT6aS74cMlqlY91H/rt9/t51Om9Sp5AvbJEzN0mkI4ndeG/5p12AUyg9m5XOdkgI2n4J8KFnDAI33YSGjxXb7UrkWSGl6XZBGUdeaExo3t2Ow8Kpl9T0Tq19qI+IncOecsCFj1tbM5voD8IWE2l0SW7V6oIqFJDMecq4IZusXdO+bPc+TKak7g82RUZd8PARpvYB5/7EOfVadxsXGRirGAKPjlXDuhwJYVRj1+IjZ+5Suxz mkog@slc13kef |
| terraform.installdir |
Location to install Terraform binaries |
/scratch/mkogan/myterraform |
Save the oci.props file in the samples/scripts/terraform directory. See the provided template as an example.
Execute the oke.create.sh script in the [weblogic-kubernetes-operatorDir]/kubernetes/samples/scripts/terraform:
sh oke.create.sh
This command will:
- Generate the Terraform tfvar configuration file.
- Download Terraform, Terraform OCI Provider binaries.
- Execute Terraform ‘init’, ‘apply’ commands to create OCI Container Engine for Kubernetes cluster.
- Generate ${okeclustername}_kubeconfig file, in our example myokecluster_kubeconfig.
Wait about 5-10 mins for the OCI Container Engine for Kubernetes Cluster creation to complete.
Execute this command to switch to the created OCI Container Engine for Kubernetes cluster configuration:
export KUBECONFIG=[fullpath]/myokecluster_kubeconfig
Check the nodes IPs and status by executing this command:
kubectl get nodes
bash-4.2$ kubectl get nodes
NAME STATUS ROLES AGE VERSION
129.146.56.254 Ready node 25d v1.10.11
129.146.64.74 Ready node 25d v1.10.11
129.146.8.145 Ready node 25d v1.10.11
You can also check the status of the cluster in the OCI console. In the console, select ‘Menu’, then Developer Services’, then ’Container Clusters (OKE).

Your newly created OCI Container Engine for Kubernetes cluster (OKE) is ready to use!
Summary
In this blog, we demonstrated all the required steps to set up an OCI Container Engine for Kubernetes cluster quickly by using the provided samples of Terraform scripts. Now you can create and run WebLogic Server on Kubernetes in an OCI Container Engine for Kubernetes. See our Quick Start Guide to quickly get the operator up and running or refer to the User Guide for detailed information on how to run the operator, how to create one or more WebLogic domains in Kubernetes, how to scale up or down a WebLogic cluster manually or automatically using the WebLogic Diagnostics Framework (WLDF) or Prometheus, how the operator manages load balancing for web applications deployed in WebLogic clusters, and how to provide integration for managing operator logs through Elasticsearch, Logstash, and Kibana.