With the release of the October 2018 Solaris 10 Extended Support Recommended patch set, you can now run Solaris 10 in Oracle Cloud. I thought it would be good to document the main steps for getting an image you can run in OCI
High level steps are
- Create a Solaris 10 image using Virtualbox and get it patched with the October 2018 patch set
- Unconfigure it and shut it down
- Upload it to the Oracle Cloud object storage
- Create a custom image from that object you’ve just uploaded
- Create a compute instance of the custom image
- Boot it up and perform configuration tasks
Creating a Solaris 10 image
1) Download Solaris10. I chose to download the Oracle VM VirtualBox template, which is preconfigured and installed with Solaris 10 1/13, which is the last update release of Solaris 10, you could equally install from the ISO, just make sure you pick vmdk as the disk image format.
2) Install VirtualBox on any suitable x86 host and operating system, I’m using Oracle Linux 7 which is configured to kickstart in our lab, but you could download it from Oracle at https://www.oracle.com/linux. One reason I picked Oracle Linux 7 is to make it easier to run the OCI tools for uploading images to Oracl Cloud Infrastructure.
VirtualBox can be downloaded from http://virtualbox.org, or better it’s in the Oracle Linux 7 yum repositories, just make sure the addons and developer repos are enabled in the file /etc/yum.repos.d/public-yum-ol7.repo, then run
# yum install VirtualBox-5.2.x86_64
3) Import the VirtualBox template you downloaded above using the import appliance menu

On the import Virtual Appliance dialog I’ve increased the amount of memory and changed the location of the root disk
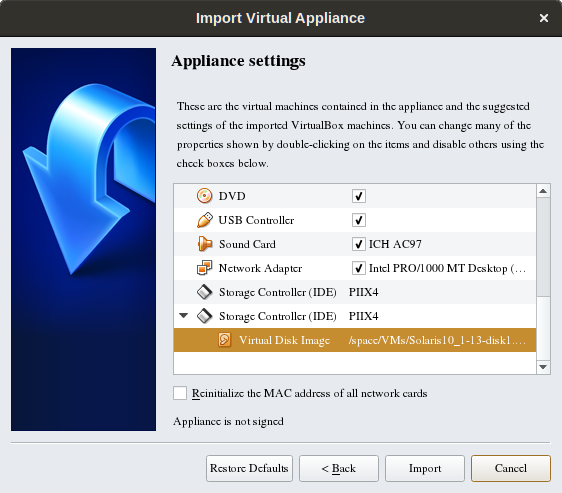
I also changed the imported appliance to run with USB 1.1 as I haven’t got the extension pack installed, but you probably should install that any way.
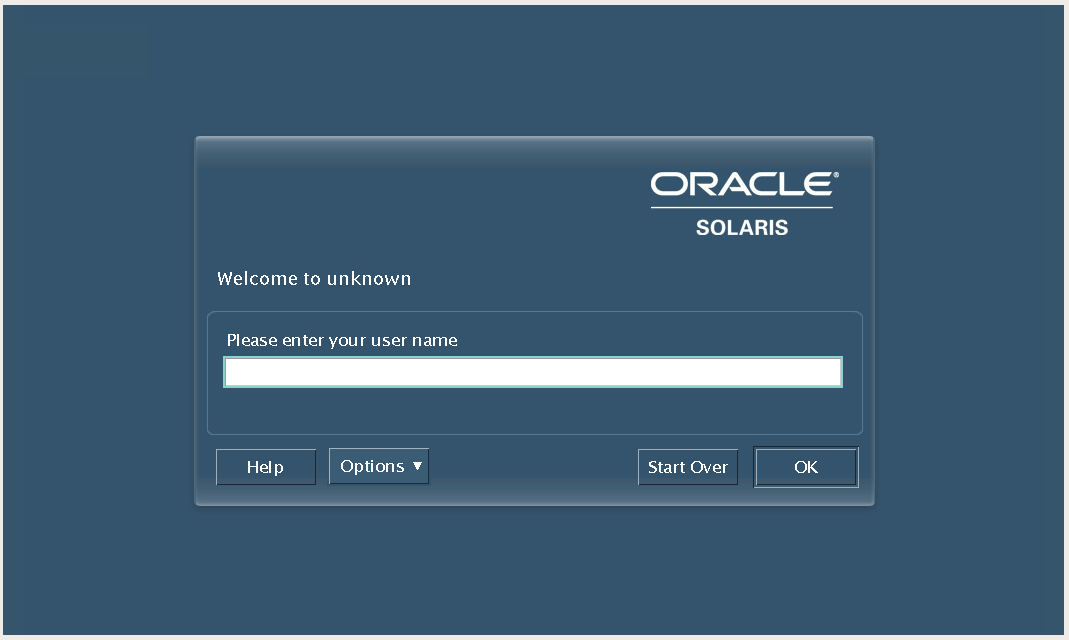
When it comes up it’ll be using dhcp, so you should be able to just select dhcp during the usual sysconfig phase, select timezone, and root password, and it’ll eventually come up with a desktop login.
Now you can see we’ve got Solaris 10 up and running. For good measure I updated the guest additions. They’re installed any way, but at an older version, so it works better with the new versions.
4) Next step is to download the recommended patch set. Specifically the October 2018 patch set. This contains some fixes needed to work in OCI
These are available from
https://updates.oracle.com/download/28797770.html
It is 2.1GB in size, so it’ll take some time.
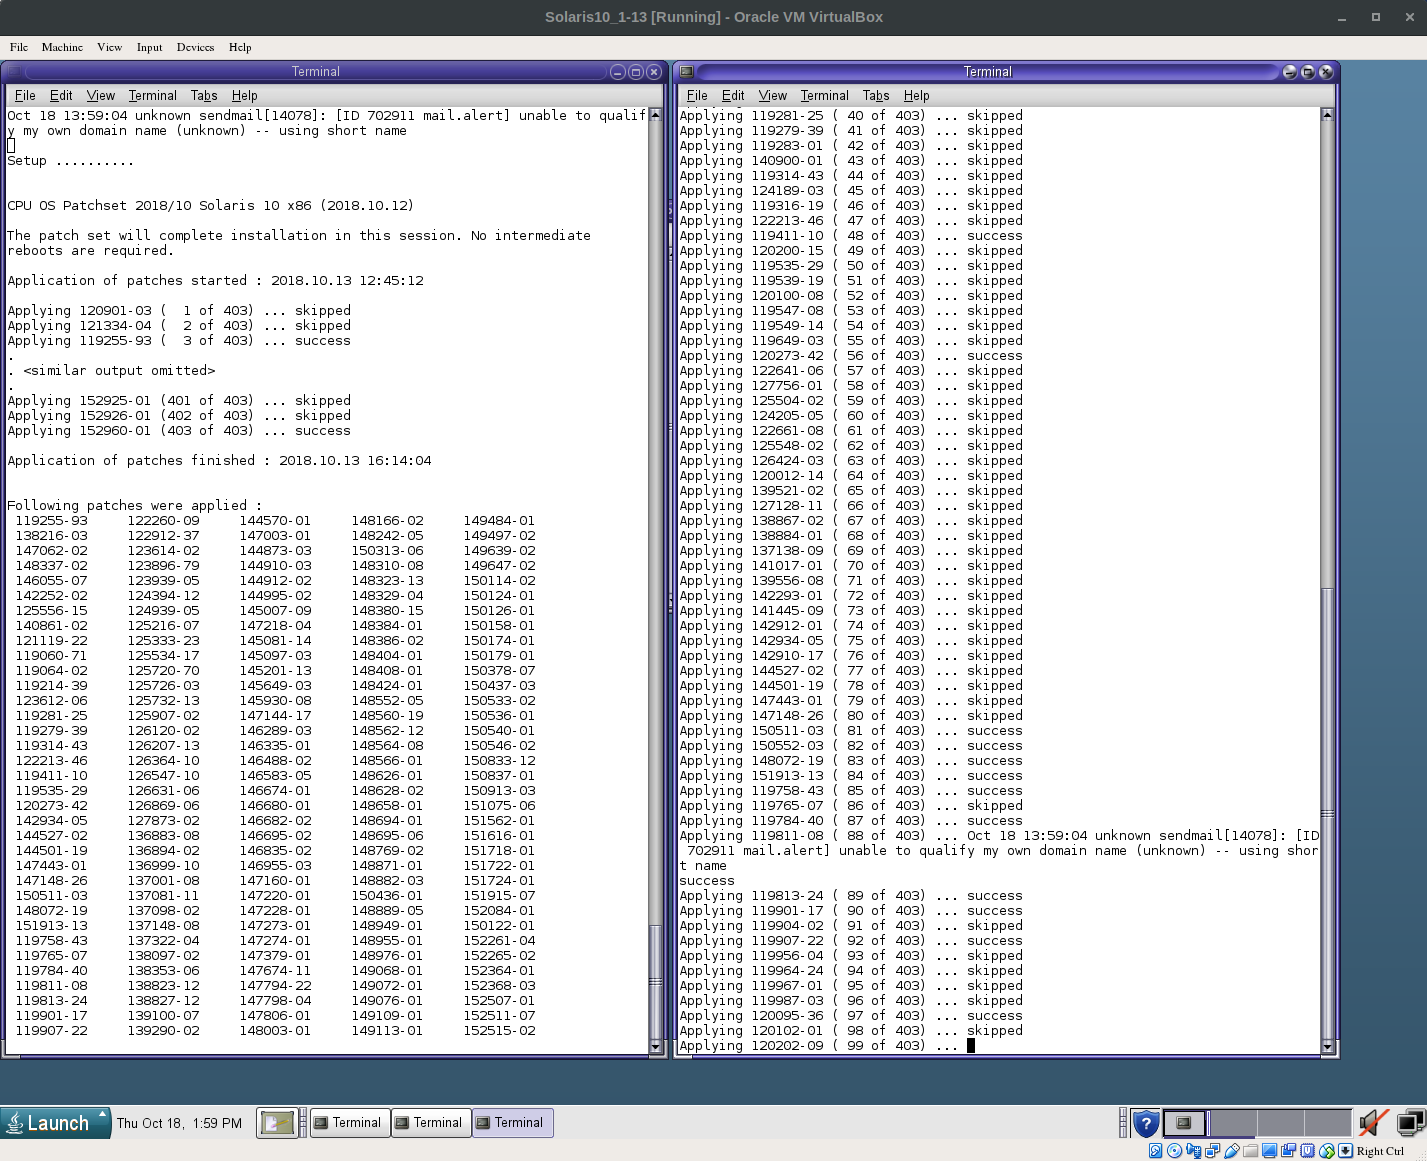
Then we simply extract the zip archive, change directory in to the directory you’ve just extracted it to and run
./installpatchset –s10patchset
(If I was doing this on a real machine I’d probably create a new liveupgrade boot environment and patch that, having scoured the README)
Currently 403 patches are analysed, that will change over time.
Shut it down and prepare it for use in OCI
When you reboot be sure to read the messages at the end of the patch install phase, and the README. Particularly this section
“If the “-B” Live Upgrade flag is used, then the luactivate command will need to be run, and either an init(1M) or a shutdown(1M) will be needed to complete activation of the boot environment. A reboot(1M) will not complete activation of a boot environment following an luactivate.”
Two more things to do before we shutdown though, first off remove the SUNWvboxguest package, second is to sys-unconfig the VM, so we get to configure it properly on reboot.
# pkgrm SUNWvboxguest
# sys-unconfig
Upload it to Oracle Cloud object storage
So we now have a suitably patched S10 image, ready to upload to Oracle Cloud. To do this you need to have the oci tools installed on your linux machine. Doing that will be the subject of another blog. But there’s pretty good documentation here too (which is all I followed to create the blog).
Assuming you now have ocitools working and in your path you upload the the disk image using this command
$ oci os object put –bucket-name images –file Solaris10_1-13-disk1.vmdk
It’ll use the keys you’ve configured and uploaded to the console, and is surprisingly quick to upload the image – given this disk file is ~20GB in size, it only took about 10minutes to upload.
[oci@ol7-1]]# oci os object put –bucket-name images –file Solaris10_1-13-disk1.vmdk
Upload ID: c94aaf0d-a0e2-d3d1-7fb6-5aed125c3921
Split file into 145 parts for upload.
Uploading object [###############################—–] 87% 0d 00:01:26
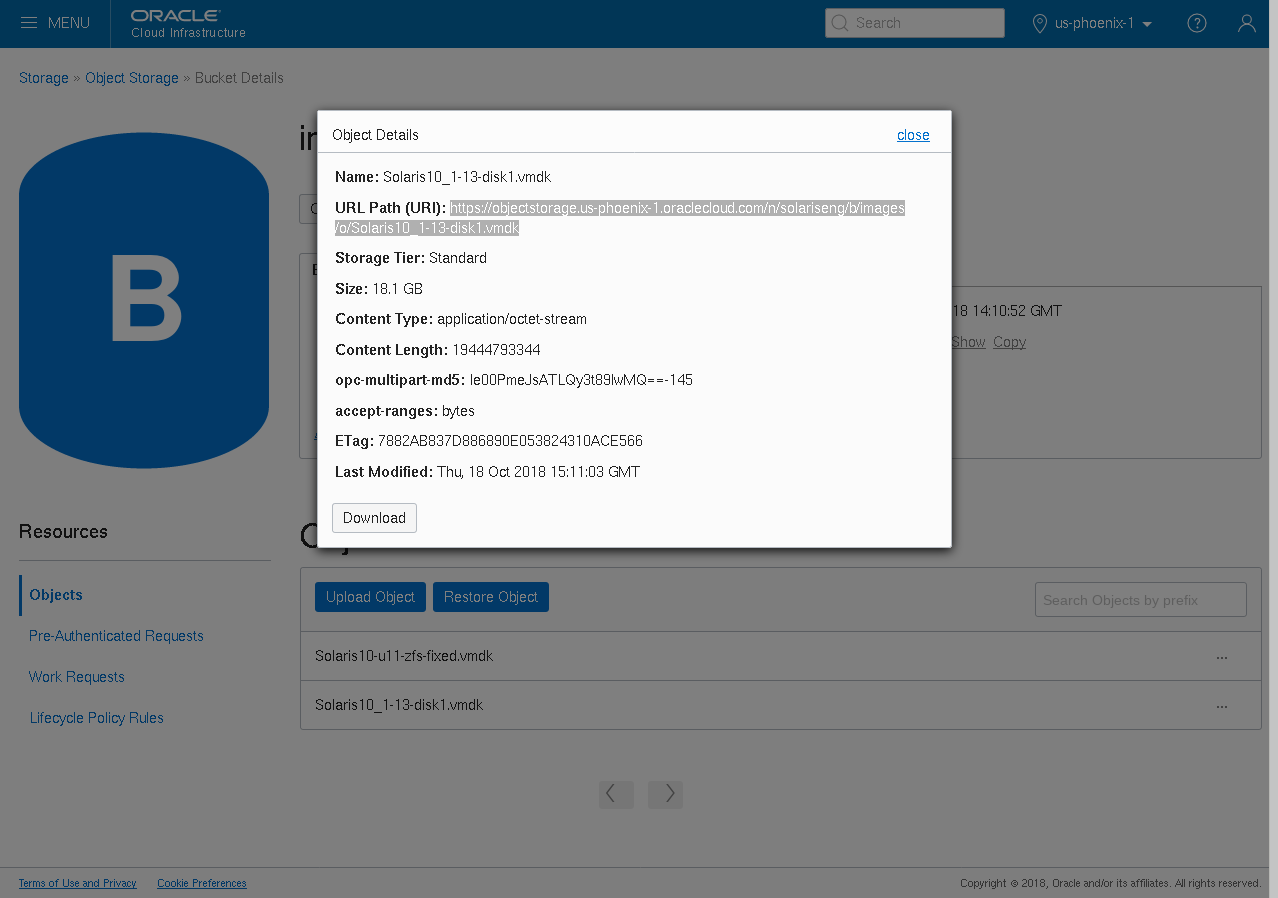
Once it’s there you can see it in the object storage pane of the OCI console
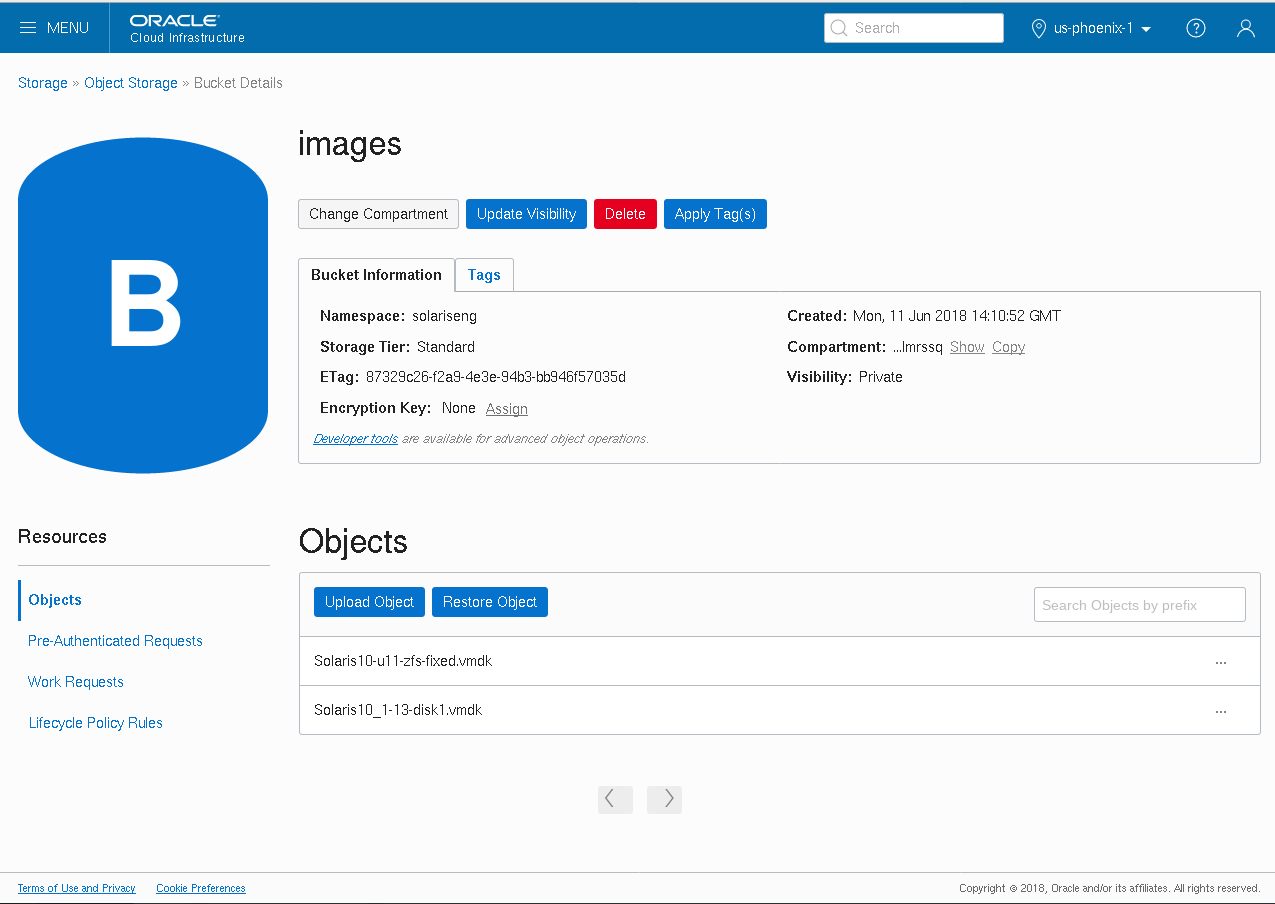
And critically you need to get the object storage URI to allow you to create a custom image of it
Create a custom image
Then go to the compute section and create a custom image. Selecting the “Emulated” mode, and giving it the object storage URI
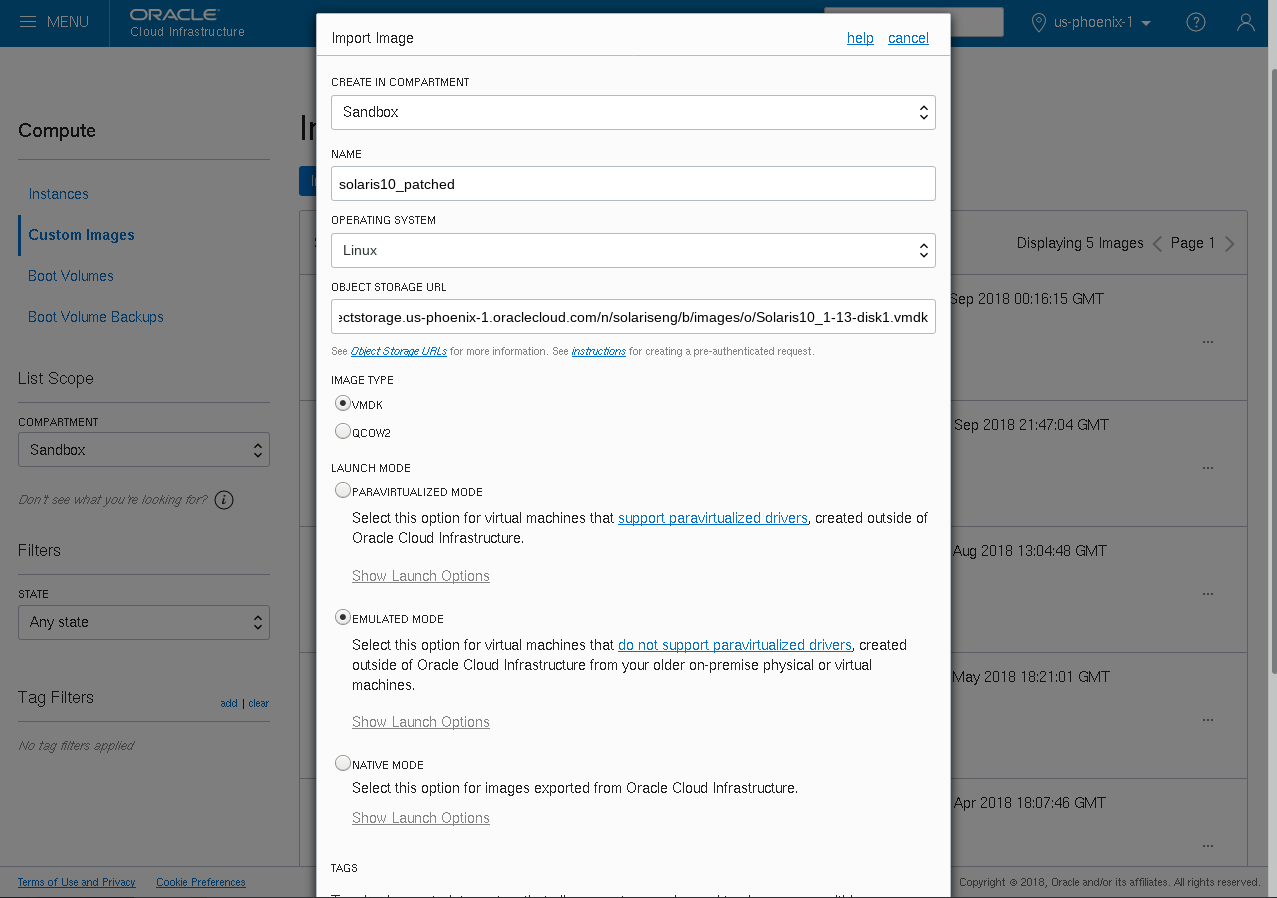
It takes a while for the image to be created, but once it is you can deploy it multiple times
Create a compute instance
Now go to the Compute menu and create an instance
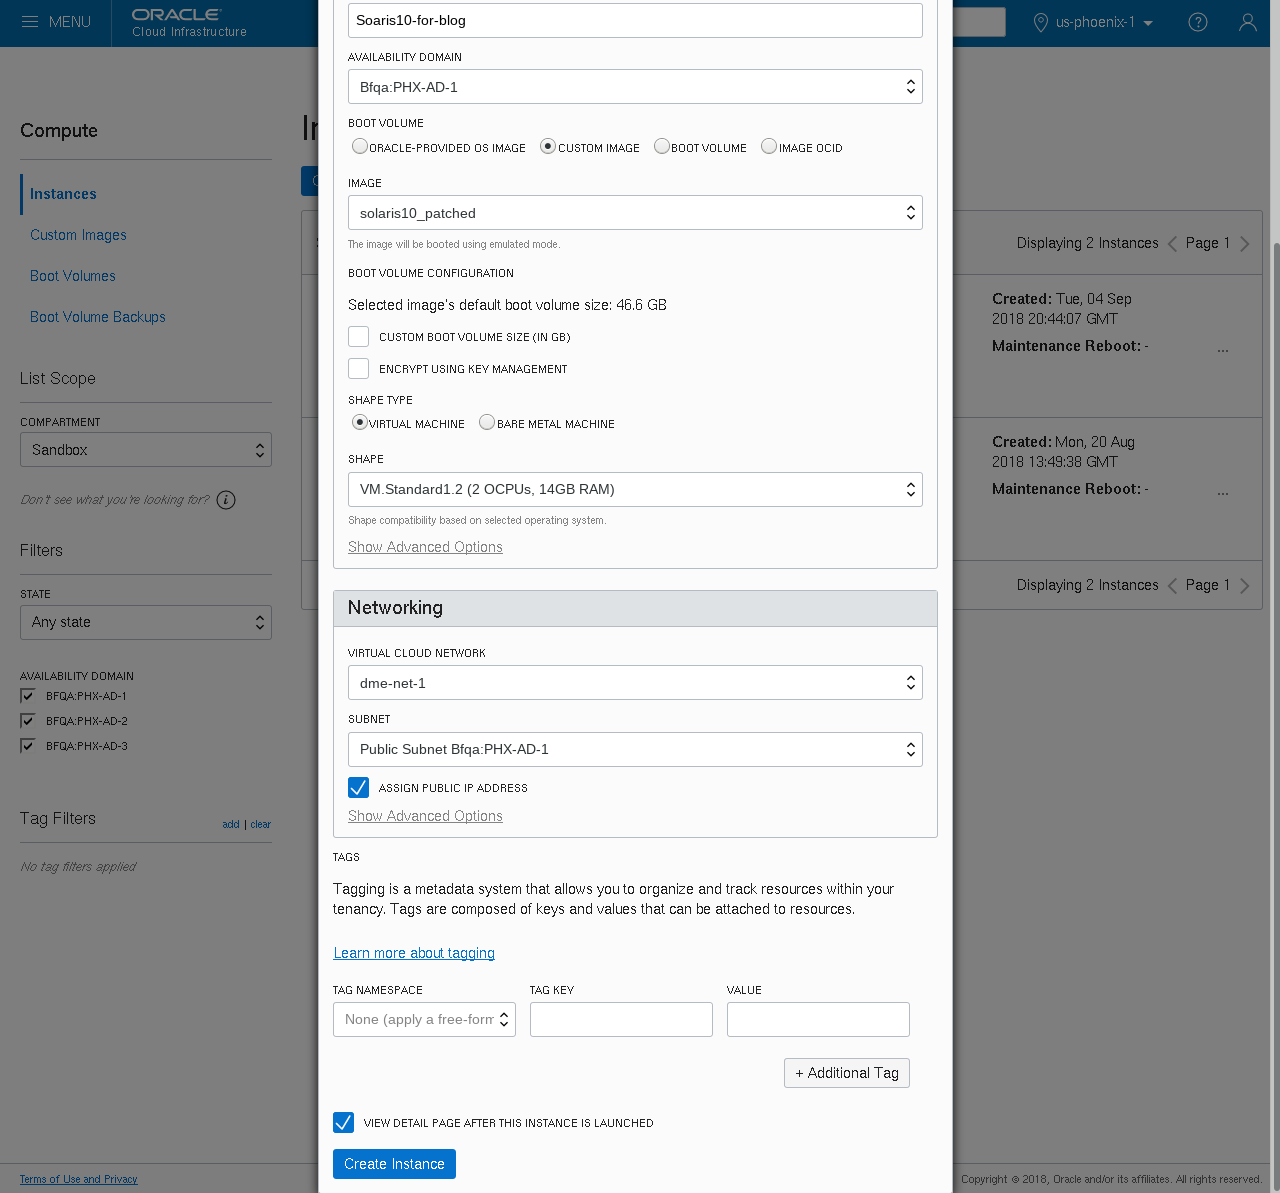
Key things about this stage are to select the Custom image you just created and an appropriate VM shape
You will then be shown a page like this one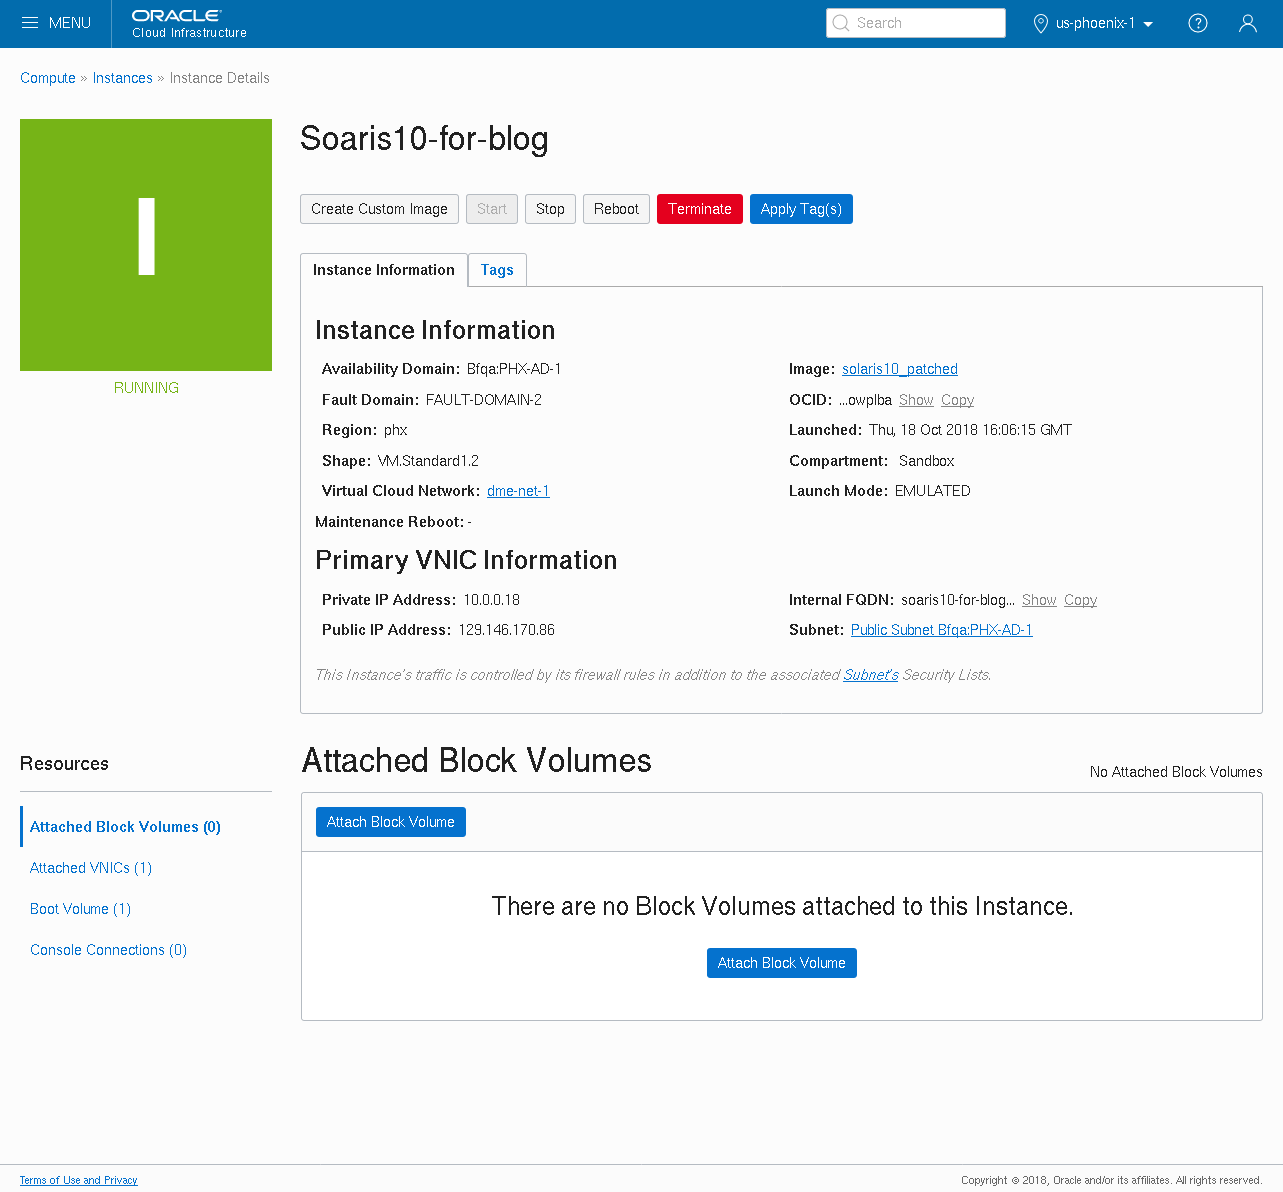
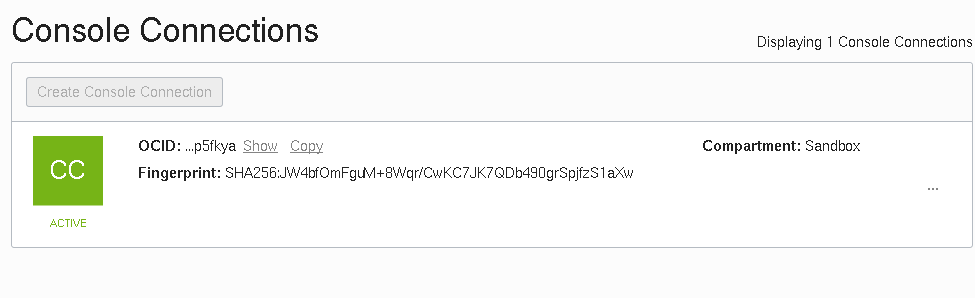
And finally you can use vnc to connect to the console by using your rsa public key and creating a console connection. If you select the connect with VNC option from the 3dots on the right of the console connection, it gives you the command to set up an ssh tunnel from your system to the console.
Boot it up and perform configuration tasks
You connect with vncviewer :5900 and you’ll see the VM has panicked. Solaris 10 uses an older version of grub, which can’t easily find the root disk if the device configuration changes. So we need to trick it in to finding the rpool.
To do this you can boot the failsafe archive and mount the rpool.

Then you touch /a/reconfigure and reboot, next time through the system should boot up correctly.

It does take a while after loading the ORACLE SOLARIS image for the system to actually boot, so don’t panic if you see a blue screen for a while before seeing the SunOS Release boot messages.
Of course we remembered to sys-unconfig before shutting the VM down, so we will have to run through the sysconfig setup. Just remember to set it up as DHCP and you do get asked for nameservice info, you will probably want to use the local DNS resolver at 169.254.169.254. Oracle Cloud also has lots of more specific options for managing your own DNS records and zones.

If you forget to remove the SUNWvboxguest package the X server will fail to start.
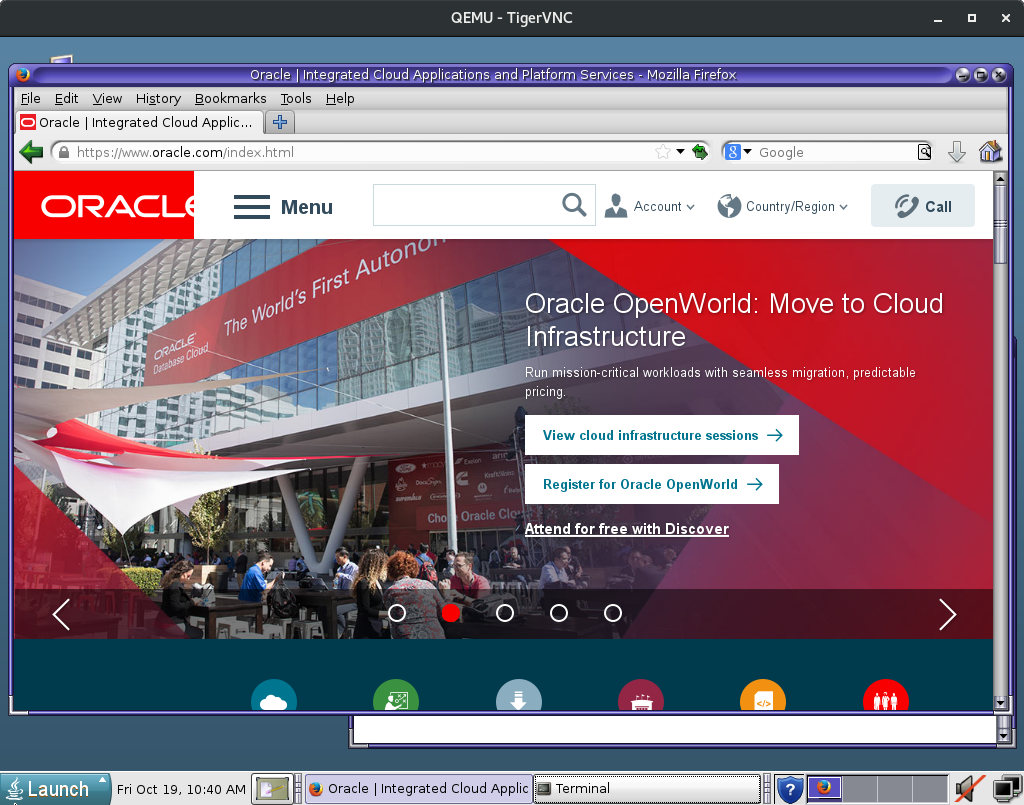
And there you have it, Oracle Solaris 10 running in OCI