This is a continuation of the series, Machine Learning With PeopleSoft. The first was an introduction, then I provided a post covering the first step in Machine Learning (ML): Data Acquisition. In this post, I will talk about the next and possibly the most important step in Machine Learning with PeopleTools 8.58: Data Modeling. Once the data is flattened and available in Elasticsearch, it can be used to train and build a Machine Learning Model.
Using the PeopleTools 8.58 Data Distribution framework, data was flattened and pushed to an Elasticsearch index. This data can be used to build and train an ML Model. We will use a new platform available on Oracle Cloud Infrastructure (OCI) called Data Science Service for this purpose. OCI Data Science service is a collaborative platform for building powerful and scalable ML Solutions. It is based on Python and other open-source ML libraries & provides a platform to build, train and manage ML Models. More information on the OCI Data Science Service can be found here.
These are the steps required to build and train an ML Model using OCI Data Science Service:
- Configure OCI tenancy to use Data Science
- Create a new Data Science Project
- Create and open a new Data Science Notebook Session
- Train, build & save the ML Model in Jupyter Notebook using the Elasticsearch data
1. Configure OCI tenancy to use Data Science
Oracle provides you with USD 300 cloud credits that are valid for up to 30 days. [link]
The first step is to configure the OCI tenancy to use Data Science. This involves –
- Creating users and groups for Data Science
- Creating Compartments to Own Network Resources and Data Science Resources in the Tenancy
- Creating the VCN and Subnets to Use with Data Science
- Creating Policies to Control Access to Network and Data Science Related Resources
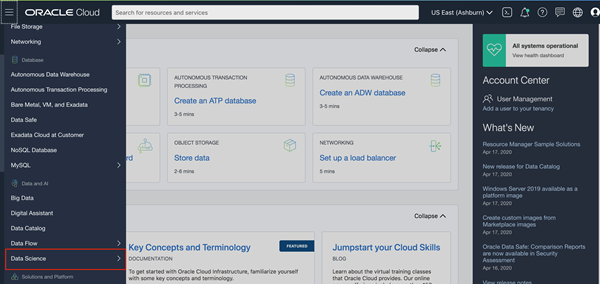
Details on these steps can be found in the Data Science Documentation. Once the tenancy has been configured, the Data Science platform can be accessed from – OCI Main menu -> Data and AI -> Data Science
2. Create a new Data Science Project
After configuring the tenancy, click on Data Science -> Projects to go to the Projects screen. This screen will list all the projects based on the selected compartment.
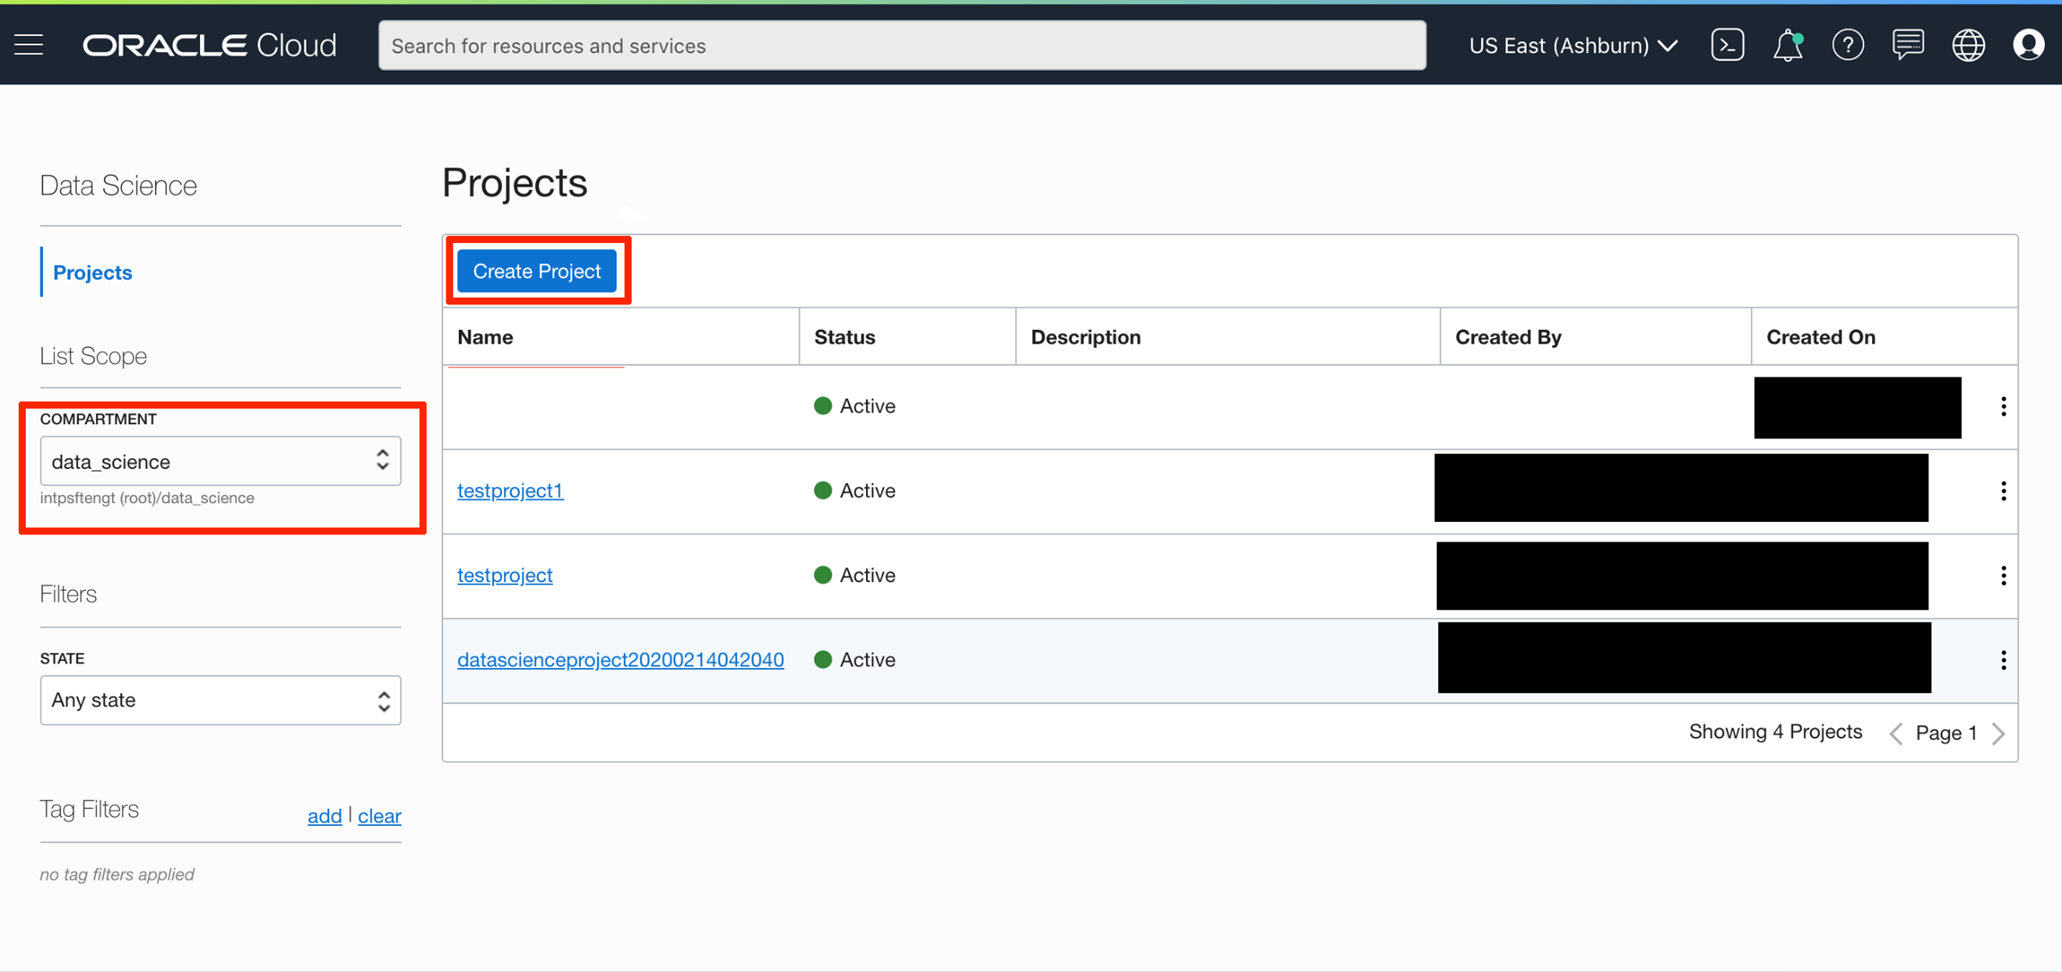
Clicking on the “Create Project” button brings up the below dialog:
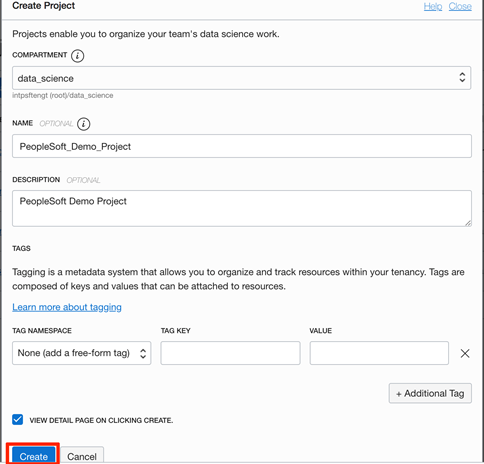
In this dialog, select the compartment in which the project should be added. Also, provide a unique name for the Project and a description (both these parameters are optional). We can also add a tag to easily tag & locate the project. Clicking on the “Create” button creates the project. Once the project is created, it will be listed on the “Projects” screen and its details can be viewed.
3. Create and open a new Data Science Notebook Session
After the project is created successfully, the Project detail screen will come up as shown below. We can now create notebook sessions and ML Models and associate them with the project.
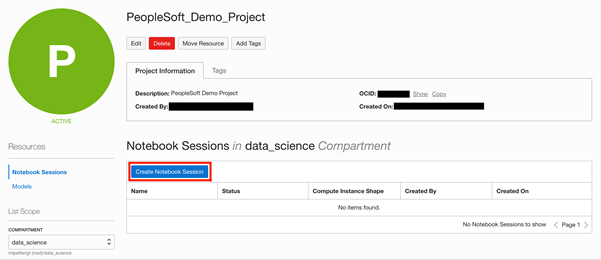
Clicking on the “Create Notebook Session” button brings up a dialog for creating the same –
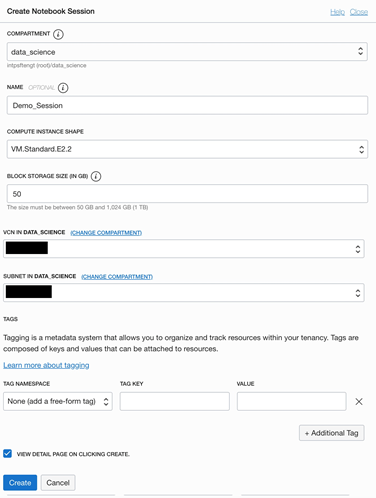
On this screen, we need to enter…
- The compartment name in which the notebook session will be created
- A unique name for the notebook session
- The compute instance shape is based on the use case. For details on OCI Compute shapes, please refer to the documentation.
- Block storage size from 50GB to 1024GB. This also depends on the use case and the volume of data that needs to be processed.
- VCN and Subnet name for the notebook session
- Optionally a tag can also be provided
Clicking on the “Create” button creates the new notebook session. It will take some time to create the session and the big icon will change to a green color (Active) when the session is created.
The session is ready when it turns active and the Data Science notebook session can now be opened. Clicking on the “Open” button on the screen below will open the session in a new window. It may be required to sign-in again to open the Notebook session.

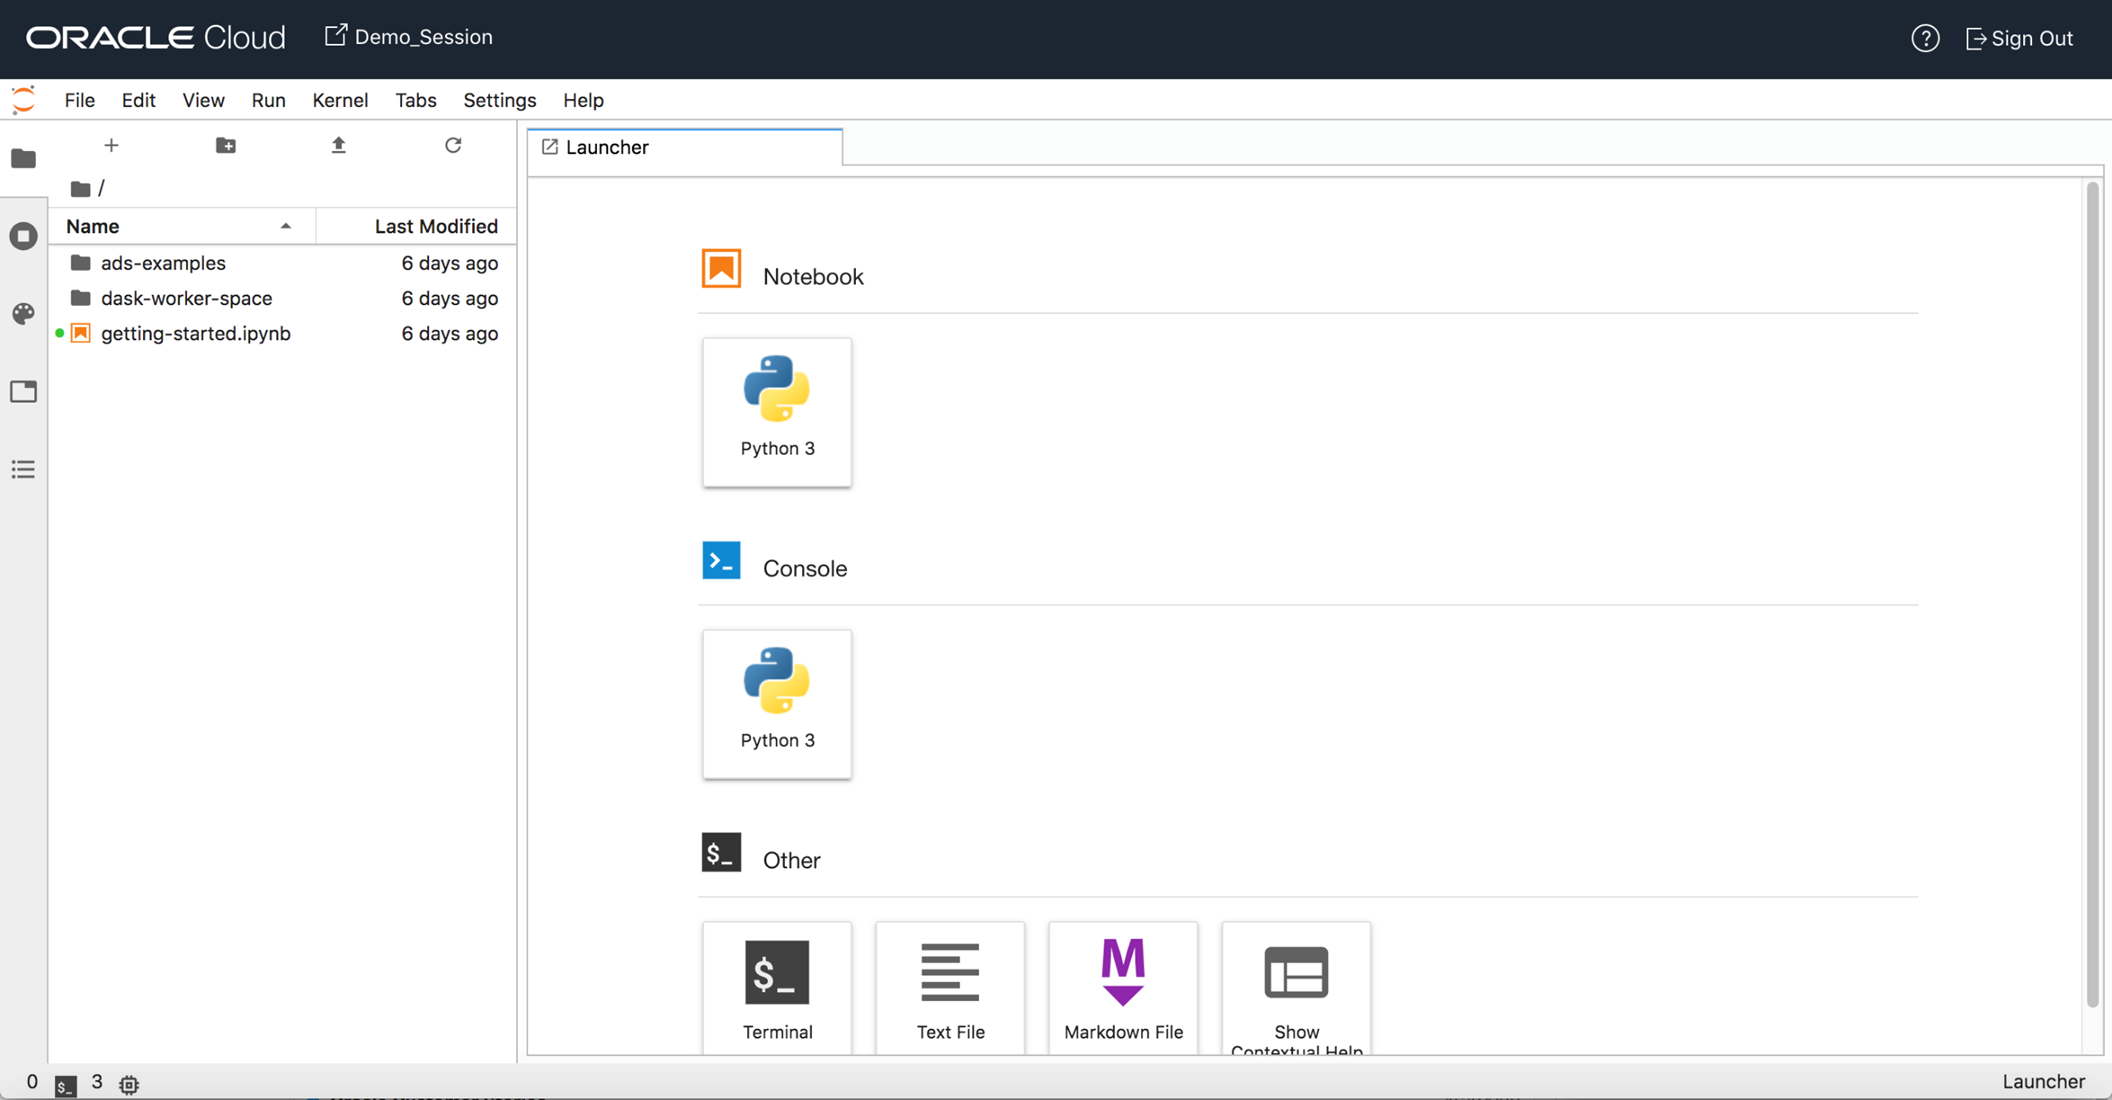
Once the session is opened, we can see the session screen:
4. Train, build and save the ML Model in Jupyter Notebook using the Elasticsearch data
In the Data Science Notebook session that has been opened, we can now create a new Jupyter Notebook. This Notebook can be used to build, train, and save the ML Model. Before we create a new notebook, the first step is to configure the Notebook session. For doing that, we open the “getting-started” notebook. This notebook needs to be executed for doing OCI configurations for the notebook session.

There are two things that need to be done when running this notebook:
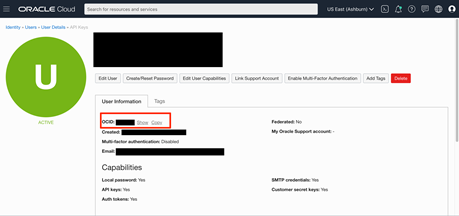
- If the user signs in to the session as a federated user, then the user’s OCID needs to be replaced. For getting the user OCID, on the OCI console page, click on the user avatar icon present on the top right corner of the page. This brings up a pop-up menu. Select the “User Settings” menu link.

On the “User Settings” page that comes up, the user OCID can be seen. Click on the “Copy” link to copy it to the clipboard.
On the “getting-started” notebook, go to the cell shown below. In this cell replace the “$USER_OCID” with the actual user OCID copied earlier. After replacing the value, execute the cell.

- The next thing to do is to generate an API key and copy it to the OCI console. For doing that, execute the cell below. This will generate an API key as shown.

This API key needs to be copied to the OCI console. For doing that, go to the “User Settings” (as described above) and click on the “Add Public Key button”. In the dialog that comes up, copy the API key from the previous step.

Execute the rest of the steps as described in the notebook and ensure that there are no errors.
After the configuration, the next step to do is to create a new Jupyter Notebook for building & training the model (You can upload an existing Jupyter notebook too). Select the “Upload” button (highlighted in red in the screen below) or create a new notebook by clicking the “Python 3” button (highlighted in green in the screen below).

We are creating a new notebook here. In the Notebook, we need to retrieve data from Elasticsearch. In my previous post on Data Acquisition, I had detailed out a sample HR Attrition use case and how the data for this use case is pushed to an Elasticsearch index. The data from the same index is used for training here. For data extraction, we can import the standard python Elasticsearch package and then pull the data from the index. A sample of this code is shown below –


In this code, replace –
- • – with the Elasticsearch server name e.g. abcd.server.es.com
- • – Elasticsearch user name having access to the index e.g. esadmin
- • – Elasticsearch user password
- • – http or https
- • – Elasticsearch port
- • – Elasticsearch index where the data was pushed e.g. in our sample use case the name of the index was “hr_empl_attr_data_h92vbpcc”
The ‘query’ and ‘size’ parameters can be manipulated appropriately based on the use case. By default, the size is set to 10. Depending on how much data needs to be retrieved, the “size” parameter can be changed. In our sample case, we have kept the value as 10,000. We have also set the “query” to do a “match all”. You can specify any query in Lucene appropriate string syntax. Once this code is executed, it will load the data onto a Python Data frame.
We can perform data transformations next if required. As an example, In the sample HR Attrition use case, one of the index columns was a person’s birthdate. This is being used as one of the attributes for building the model. We may need to transform it into the person’s age to make it more relevant. Such custom transformations can also be done before pushing the data to Elasticsearch to avoid doing the same in the Jupyter notebook. Other standard transformations like encoding categorical values can also be done in the Jupyter notebook.
For training the model, we can use the AutoML feature from the ADS (Accelerated Data Science) package provided by the OCI Data Science platform. ADS is a Python library included as a part of OCI Data Science and it provides objects & methods for all steps in the ML Development lifecycle. More details can be found in the ADS Documentation. Given an ML problem, the Oracle AutoML feature automatically creates a tuned ML Pipeline. It takes care of…
- Algorithm Selection
- Adaptive Sampling
- Feature Selection
- Hyperparameter tuning
All these are combined for automating many of the steps in the ML development lifecycle. Once the AutoML process runs, it selects the best ML model for the given dataset. It also provides a lot of visualizations that explain the different parts of the process. Instructions on using the AutoML package can be found in some of the sample Jupyter notebooks which are part of each of the notebook sessions. We can also look at the AutoML Feature Documentation on the different objects and methods that are provided.
Once we are satisfied with the accuracy of the generated ML Model, it can be saved. ADS library provides methods to save the ML Model. Sample code is shown below:


The saved model artifacts can be downloaded by selecting the “Models” link from the Project screen. Navigate to “Data Science” -> Projects -> “Select the current project”

The ML Model is now ready and this completes the Data Modeling phase. In the next post, I will talk about deploying this Model so that the runtime predictions can be consumed in PeopleSoft.
Note to customers: If you are interested in participating in a Proof of Concept/Early Adopter program on AI/ML with PeopleSoft, contact us at psoft-infodev_us@oracle.com
