Instance principals is a capability in Oracle Cloud Infrastructure Identity and Access Management (IAM) that lets you make service calls from an instance. With instance principals, you don’t need to configure user credentials on the services running on your compute instances or rotate the credentials. Instances themselves are now a principal type in IAM. Each compute instance has its own identity, and it authenticates by using certificates that are added to the instance. These certificates are automatically created, assigned to instances, and rotated.
You use instance principals to authorize an instance to make API or CLI calls in Oracle Cloud Infrastructure (OCI) services. After you set up the required resources and policies, an application running on an instance can call OCI public services. For more information, see Calling Services from an Instance.
Dynamic Groups and Matching Rules
Dynamic groups let you group OCI instances as principal actors, similar to group users into user groups. You can then create policies to permit instances in these groups to make API calls against OCI services.
Membership in the group is determined by a set of criteria that you define called matching rules. Resources that match the rule criteria are members of the dynamic group. Matching rules have a specific syntax.
Security Considerations
Any user who has access to the instance (who can use SSH to connect to the instance) automatically inherits the privileges granted to the instance. Before you grant permissions to an instance by using instance principals, ensure that you know who can access it and that they should be authorized with the permissions you are granting to the instance.
All compute instance principals are granted the compartment_inspect permission. You can’t revoke this permission.
Enable Instances to Call Services
Perform these tasks to enable an instance to call services:
Create an OCI instance on a public subnet
Create a dynamic group and matching rules
Write policies for dynamic groups
Install and configure the OCI CLI
Create an Object Storage bucket using the OCI CLI and instance principal authentication
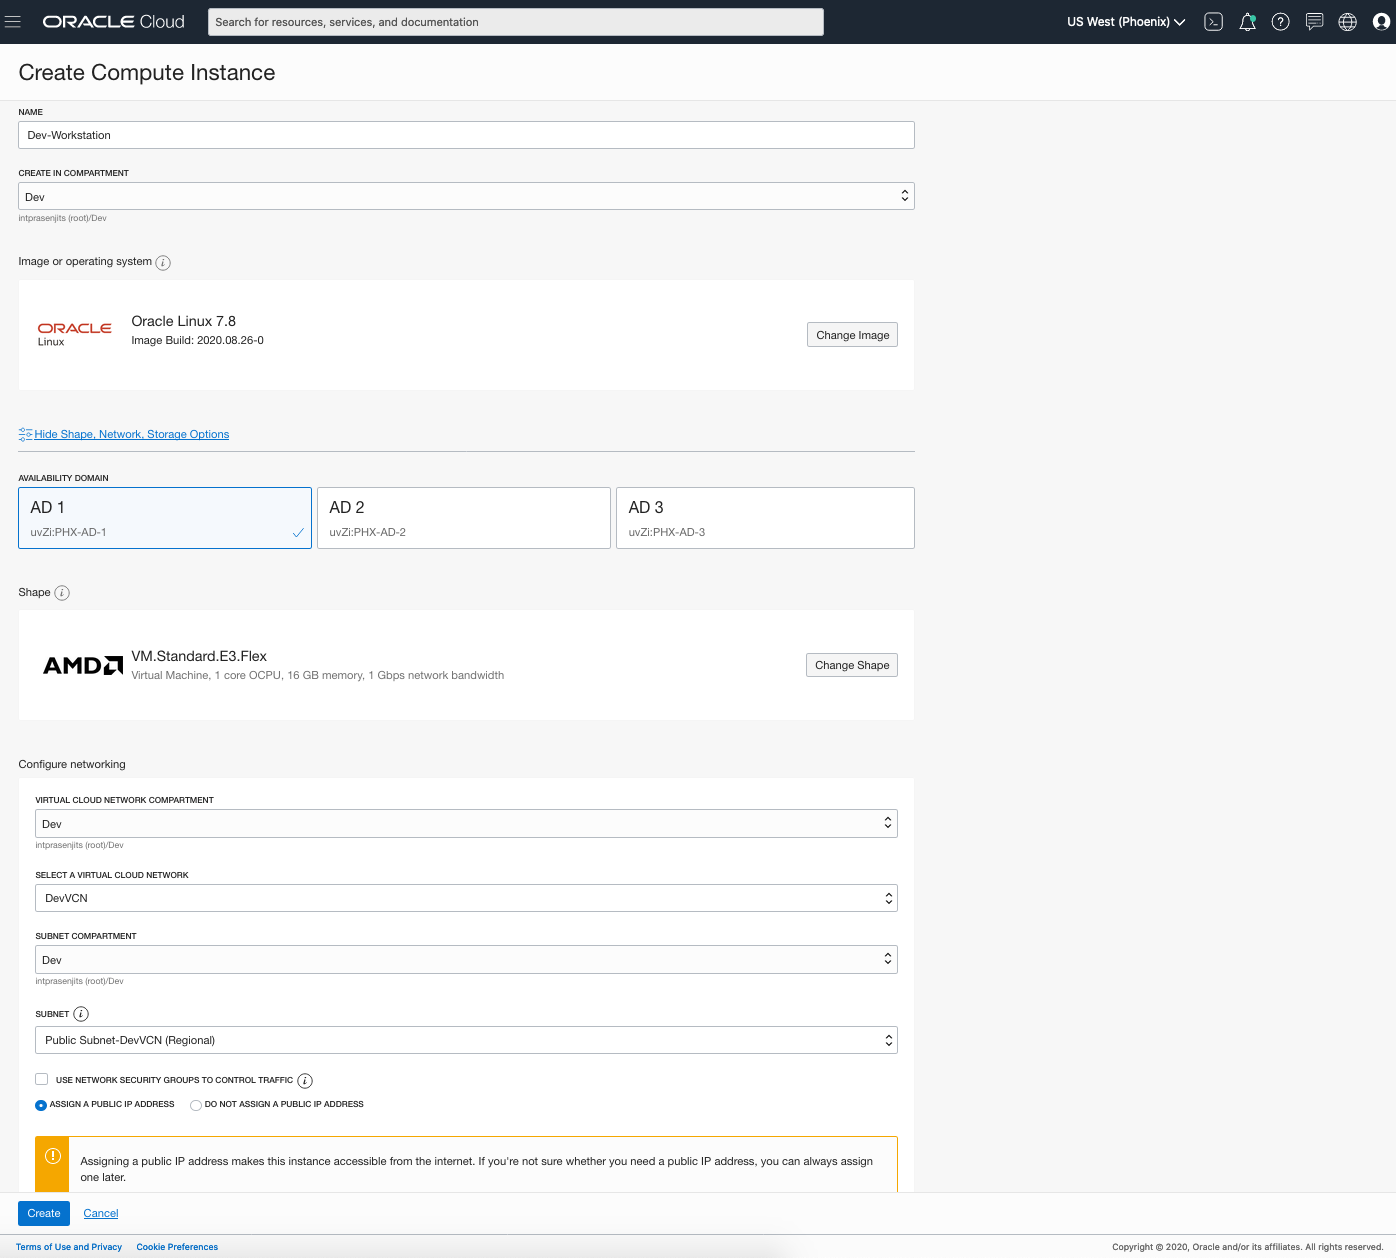
Select a shape for the virtual machine (VM), for example, VM.Standard.E2.1.Micro (which is eligible for an Always Free account).
In the Configure networking section, select the compartment in which your VCN resides. This is typically in the same compartment in which you’re deploying this VM.
Select the VCN.
Select the compartment in which the subnet resides.
Select the public subnet.
Figure 1: Create a Compute Instance
In the Add SSH keys section, select Generate SSH Key Pair and click Save Private Key and Save Public Key to save the keys on your computer.
Click Create.
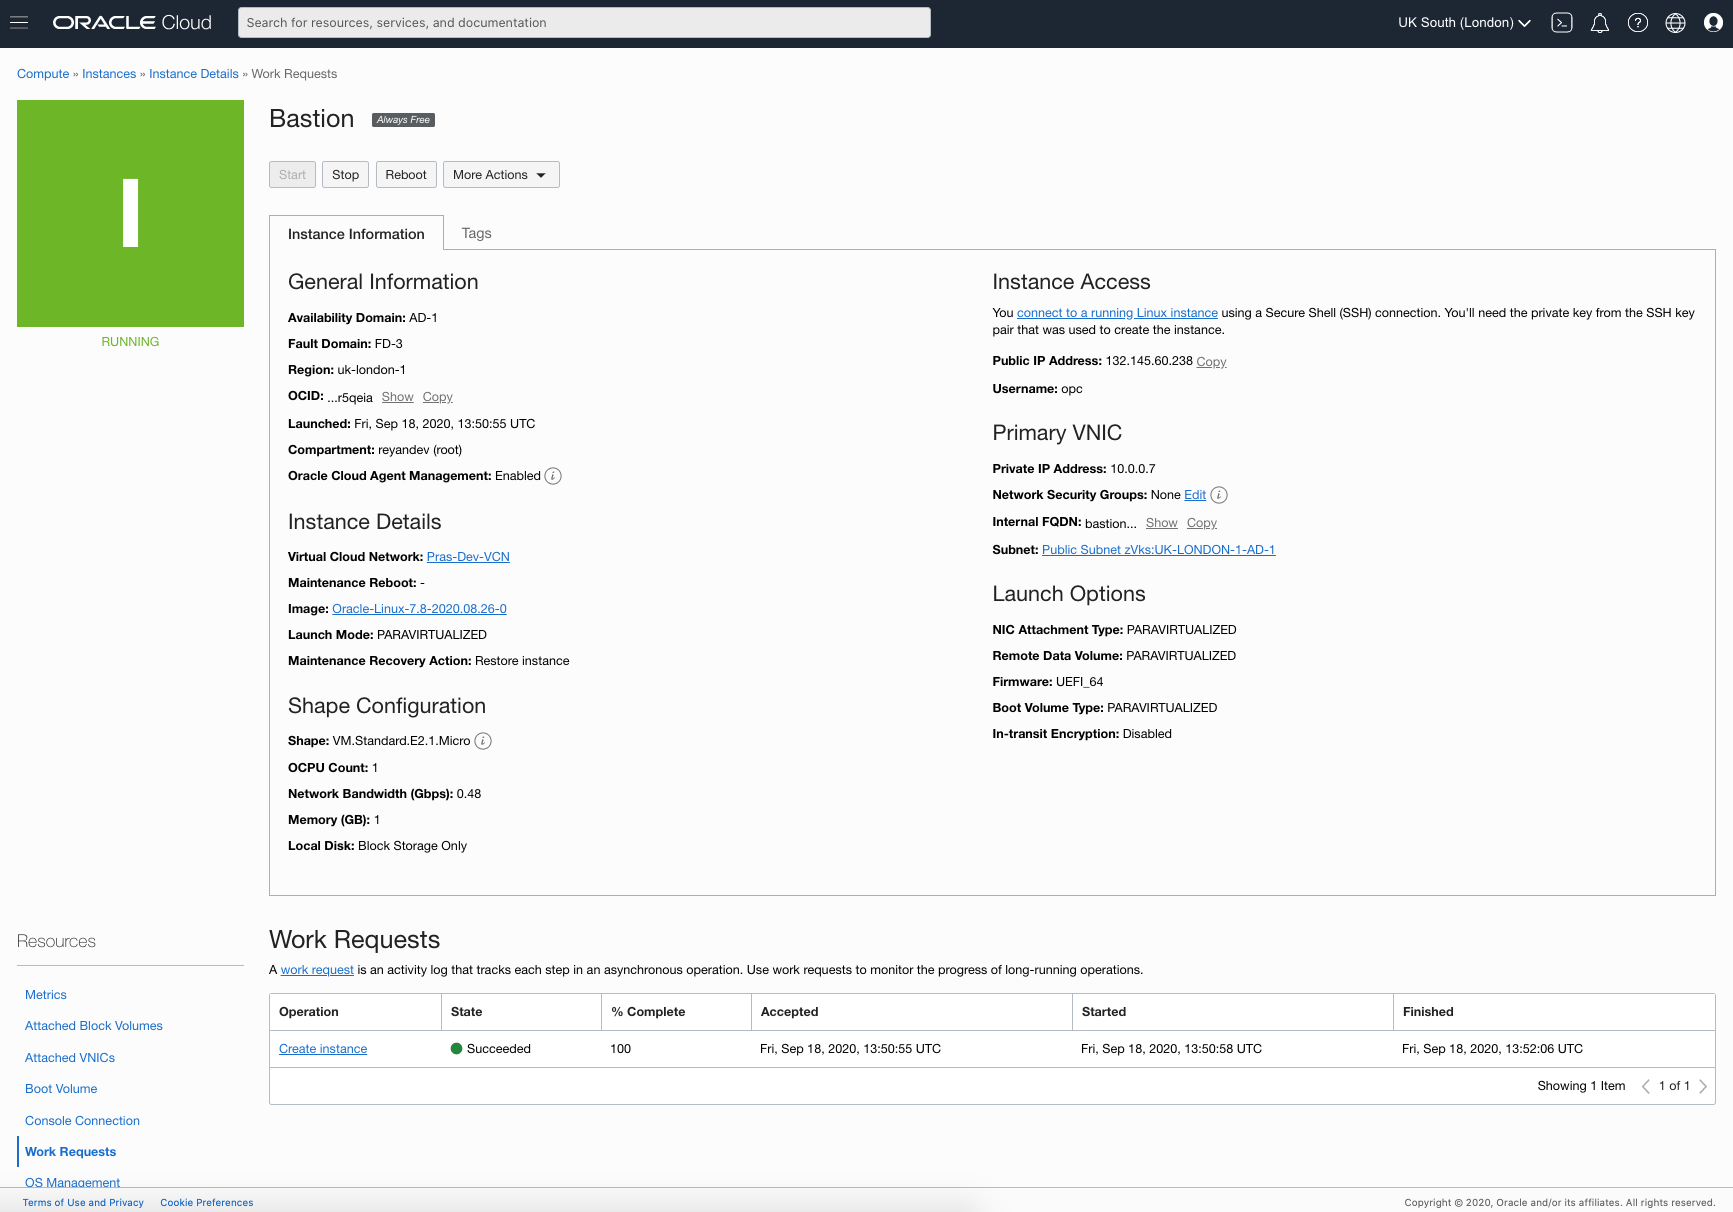
After the instance is created, the instance details page is displayed. Make a note of the OCID of this instance and also the public IP address.
Figure 2: Compute Instance Details Page
Create a Dynamic Group and Matching Rules
Dynamic groups allow you to group Oracle Cloud Infrastructure computer instances as “principal” actors (similar to user groups). You can then create policies to permit instances to make API calls against OCI services.
When you create a dynamic group, rather than adding members explicitly to the group, you instead define a set of matching rules to define the group members. For example, a rule could specify that all instances in a particular compartment are members of the dynamic group. The members can change dynamically as instances are created and deleted in that compartment.
To create a dynamic group and matching rules in the OCI Console, follow these steps.
Open the navigation menu, select Identity, and then select > Dynamic Groups.
Click Create Dynamic Group.
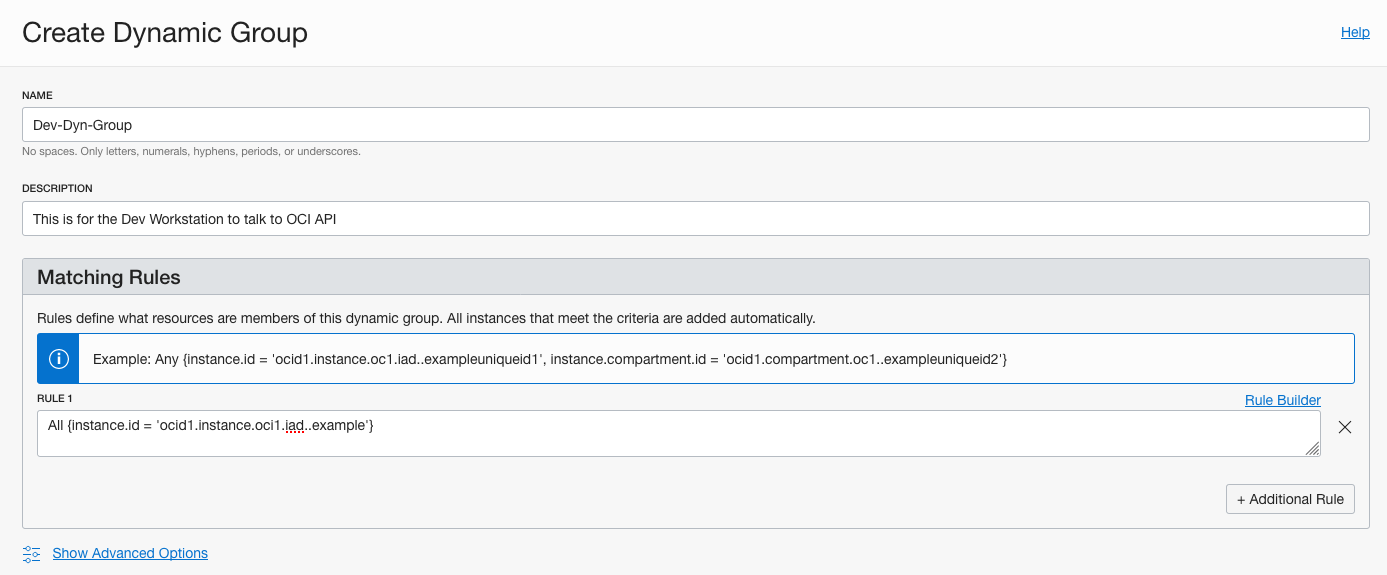
Provide a name and a short description.
In the Matching Rules section, write the following rule. Change > instance-OCID to the OCID of your instance.
All {instance.id = ‘instance-OCID’}
Figure 3: Create a Dynamic Group
Click Create.
Write Policies for Dynamic Groups
After you create a dynamic group, you need to create policies to permit the dynamic group to access OCI services.
Here’s an example policy that allows a dynamic group (OracleDev) to manage all resources in the tenancy:
Allow dynamic-group OracleDev to manage all-resources in tenancy
You can also choose to specify a particular resource access for this dynamic group, such as Object Storage in a given compartment:
Allow dynamic-group OracleDev to manage object-family in compartment Dev
Install and Configure the OCI CLI
The Oracle Cloud Infrastructure CLI is a tool that you can use on its own or with Cloud Shell to complete OCI tasks. The CLI provides the same core functionality as the Console, plus additional commands.
The CLI is built on the Oracle Cloud Infrastructure SDK for Python and runs on Mac, Windows, or Linux. The Python code makes calls to OCI APIs to provide the functionality implemented for the various services. These are REST APIs that use HTTPS requests and responses.
In this step, you install the CLI onto the instance that you created in the previous step. The installer script automatically installs the CLI and its dependencies, Python and virtualenv. Before running the installer, ensure that you meet the requirements.
Note: Oracle Autonomous Linux 7 and Cloud Shell have the CLI preinstalled.
To install the CLI on Linux and UNIX (including Oracle Linux 8), following these steps:
From your local development environment, fix the permission of the private key that you downloaded from the Console (it has wide-open permission) and then run SSH to connect to the OCI instance by using the private key and the IP address of the VM that you created earlier:
Note: opc is the user that is added to every Oracle Linux image that you deploy on OCI.
After the CLI is installed, run the following command to check the version.
oci -v
Create an Object Storage Bucket Using OCI CLI and Instance Principal Authentication
To enable instance principal authorization from the CLI, you can set the authorization option (–auth) for a command. For example:
oci os ns get --auth instance_principal
This command shows the Object Storage namespace, which is your tenancy name.
Alternatively, you can set the following environment variable:
export OCI_CLI_AUTH=instance_principal
To create an OCI Object Storage bucket, run the following command:
oci os bucket create --name ocidevbucket --compartment-id <compartment-OCID>
Change compartment-OCID to the compartment in which you deployed the instance.
Conclusion
This blog post gave you a short overview of how to use a dynamic group to create a group of instances and then give them permission to send authenticated calls to the OCI API or CLI without any configuration files. This post briefly discussed dynamic groups, matching rules, and IAM policies. To learn more, see this article.
Oracle Cloud Infrastructure provides Enterprise features for developers to build modern cloud applications. Try the Oracle Cloud Free Tier with 300$ credits for a 30 Day Free Trial. Free Tier also includes a number of “Always Free” services that are available for an unlimited period of time even after your free credits expire.
Authors
Prasenjit Sarkar
Senior Principal Product Manager
Prasenjit Sarkar is a Senior Principal Product Manager & Cloud Native App/Dev Lead at Oracle for their Cloud Native Services on Oracle Cloud Infrastructure with the primary focus on Cloud Native Applications and Micro Services. His primary focus is driving Oracle’s Cloud Computing business with Startups & Key Enterprise customers; helping to shape and deliver on a strategy to build broad use of Oracle’s Cloud Native Services. He is also responsible for developing public/private cloud integration strategies, customer’s Cloud Computing architecture vision, future state architectures, and implementable architecture roadmaps in the context of the Cloud Native Services that Oracle offers.
He has 12 Granted Patent in US PTO and authored numerous research articles.
He is also an author of Virtualization blog http://blog.kube-mesh.io and also authored six industry-leading books on Virtualization, SDN, Physical Compute etc.