The Oracle Cloud Infrastructure Toolkit version 1.1.0 is an Eclipse plugin that enables Java developers to access the Compute Instance, Object Store, and Autonomous Databases (ATP/ADW) created on the Oracle Cloud. Eclipse plugin can be used to perform most of the database related operations without having to log into your cloud console. You can create a ATP/ADW database, start/stop/terminate/clone/restore the database, scale up/down, choose compartments/regions, download the client credentials, create a connection, and browse the schema etc.,
One of the important use cases for Java developers is, through this plugin, they can easily download the client credentials zip (wallet_<dbname>
.zip
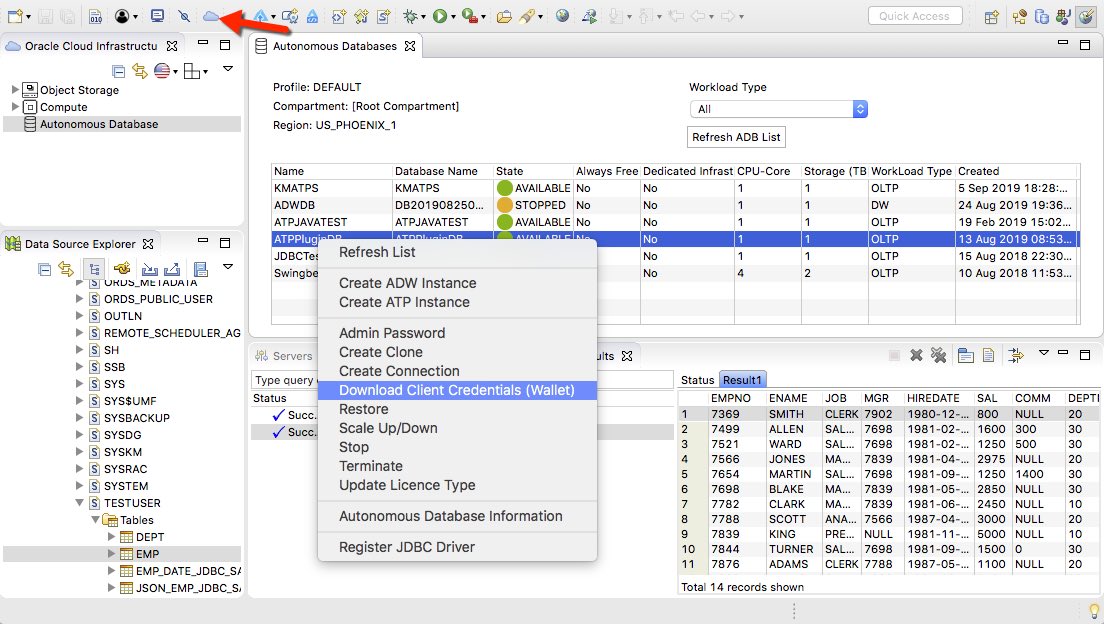
) that contains the necessary wallets and network related files and connect to the Autonomous Database from Eclipse. After establishing the connection to the database, the plugin allows you to browse the schema as well. Note that The screenshot below shows a glimpse of the capabilities of the plugin. The plugin (com.oracle.oci.eclipse-1.1.0.zip) is available to download from Github.
Fig 1: Screenshot of “Oracle Cloud Infrastructure Toolkit” plugin
Most of the functionalities of the plugin are self explanatory. However, in this blog, you will find instructions to establish a connection to Autonomous Database and browse the schema. Note that you need to have Eclipse JEE version installed to create a connection and browse the schema. Follow the steps below:
Step 1: Download “Oracle Cloud Infrastructure Toolkit v1.1.0” from Github. From Eclipse, go to Help –> Install New Software –> Add –> Archive –> Choose the downloaded “com.oracle.oci.eclipse-1.1.0.zip” –> Add and Follow the steps to install the plugin successfully. Once installed, you will see a small cloud icon ![]() on the top.
on the top.
Step 2: Follow the instructions to the create a config file based on your Oracle Cloud account. You can choose to enter this information directly as well. After successfully logging in, you can view the ATP/ADW databases.
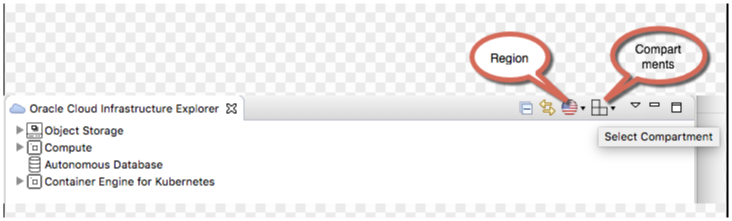
Step 3: Make sure the Region and the Compartments are chosen correctly.
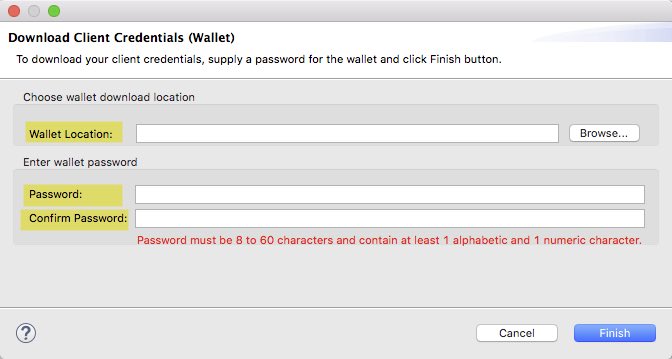
Step 4: Right click on the ATP/ADW that you want to connect and click on “Download Client Credentials (Wallet)” option (See Fig 1). Provide the path to save the wallet_<dbname>
.zip file. Oracle Wallets use auto-login and hence do not need this password.
Note: The password that you specify on this window is used only if you are using JKS to connect to the autonomous database.
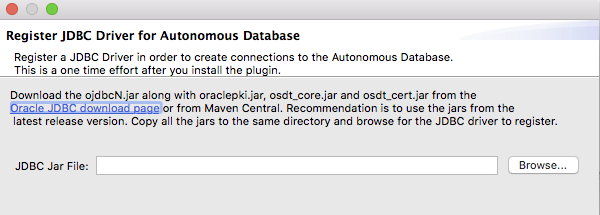
Step 5: Right click on ADW/ATP and choose “Register JDBC driver” (See Fig 1) option. Point to the location where you have downloaded the JDBC driver.
Note: You can download the latest 19.3 ojdbc10-full.tar.gz or ojdbc8-full.tar.gz based on your JDK version. Additional jars (oraclepki.jar, osdt_core.jar, and osdt_cert.jar) required for using Oracle Wallets are already included in the zip.
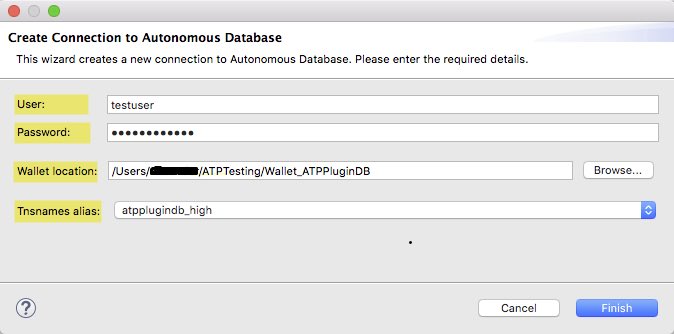
Step 6: Right click on the ATP/ADW database and click on “Create Connection” . Provide the database username and password along with the path for the client credentials (wallet_<dbname>
.zip) file. Choose any TNS alias name.
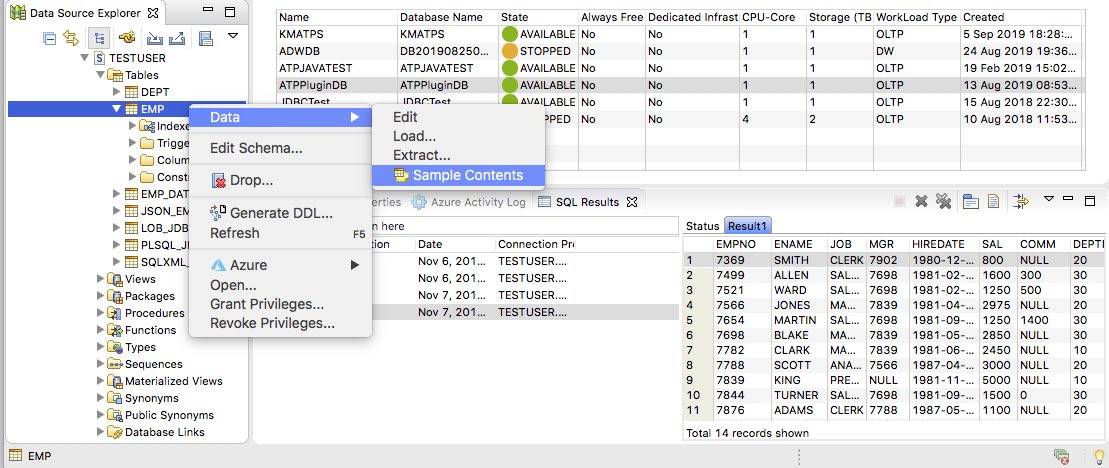
Step 7: After the connection is established successfully, you will be able to browse the schema, access the tables, and execute any SQL statements.
For non-database related capabilities of the plugin released as part of v1.0.0, refer to the blog “Announcing Oracle Cloud Infrastructure Toolkit for Eclipse”.